
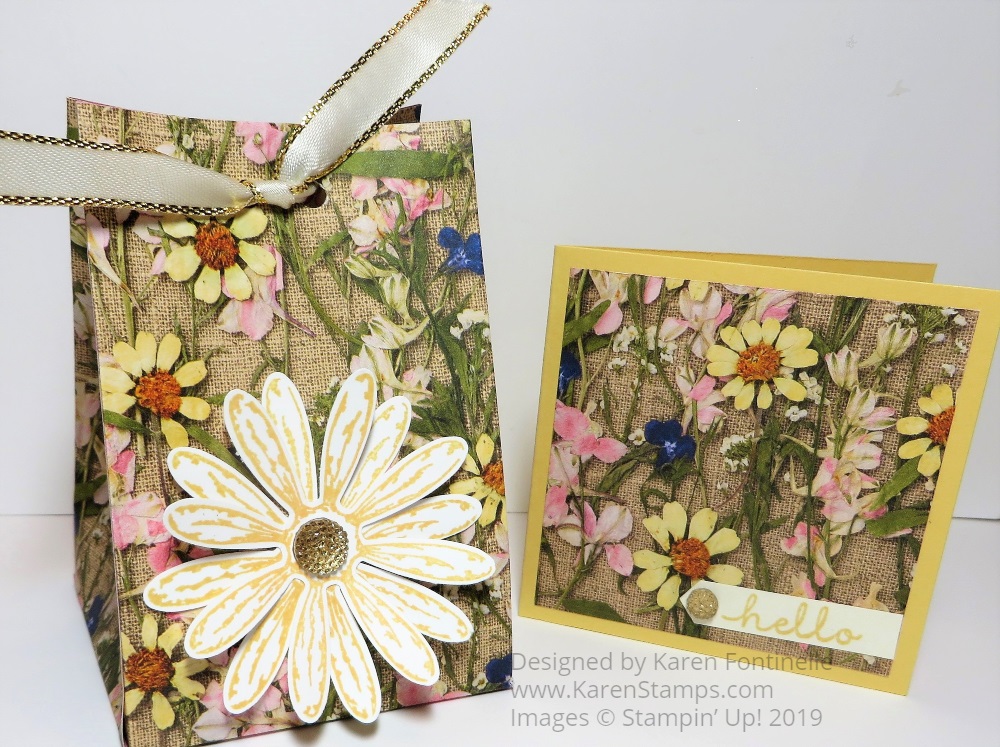
The Pressed Petals Specialty Designer Series Paper is so pretty and I thought I would make something other than a regular card with it. Here is my Pressed Petals Gift Bag and Gift Card that you could also make for just a small gift. The bag is just 6″ high and the paper is very lightweight so you could put some pieces of candy inside, a piece of jewelry, a gift card, or a diamond ring! (Might as well aim high!)
The Pressed Petals Paper is designed with photographic images of real pressed flower petals. One side of the paper has the flower images, the other side has subtle vintage designs like old sheet music, lines of script, wood grain, and vintage plant descriptions. One design has portions you can cut apart and use on cards, much like the Petal Promenade Paper we previously had.
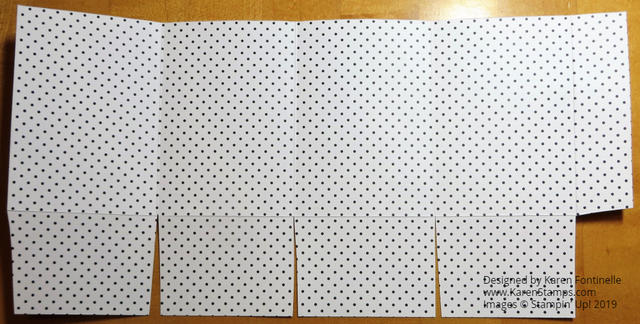
This bag is one of those easy things to make, as I have done many times before. Start with a 12″ x 6″ piece of designer paper (or cardstock). Score at 1″, 3 3/4″, 6 1/2″ and 9 1/4″. Then turn long ways and score at 2″ to make the bottom flaps. Cut off the smallest little section and cut up on the botton flap score lines to the horizontal score line. Then crease and fold to form the bag. Leave it open at the top or punch two holes and tie it closed with ribbon. Here’s a similar example.
You can see the little bag I made previously HERE with the Botanical Butterfly Paper.
I stamped two daisies with the Daisy Delight Stamp Set and punched out with the Daisy Punch. I like putting one of the Gold Faceted Gems in the daisy center. A new item we have now in the new Stampin’ Up! Catalog is the Perennial Essence Floral Centers, actual fuzzy embellishments to look like the center of real flowers, that you could use.
The ribbon I used is the Gold 3/8″ Metallic Edge Ribbon. Just push the sides of the bag in a little bit and pull the top edges of the bag together to close the top. If you don’t want to get punched holes on all four sides of the bag, punch the front and back holes first before you pull the bag together! You could also hold the top of the bag together with a Mini Library Clip or check the Clearance Rack for two other styles (and bargains!). Don’t forget! Some stamp sets were added to the Clearance Rack the other day you might want to check out!
And while I had the paper out, I decided to make just a cute little matching card, 3″ x 6″ folded in half with a 2 3/4″ x 2 3/4″ piece of designer paper on top. The little “hello” is found in the Bloom & Grown Stamp Set. I thought it was cute for that card and is punched out with the Classic Label Punch to make it easy. Just for a little something, I added the smallest size Gold Faceted Gem on to the greeting to match the bag. I wish it was even smaller but I think it is fine.
Use your Pressed Petals Specialty Designer Series Paper to make simple gift bags like this one plus a gift card to match!