Tag Archives: Rudolph the Red Nose Reindeer

Rudolph the Reindeer Gift Bag

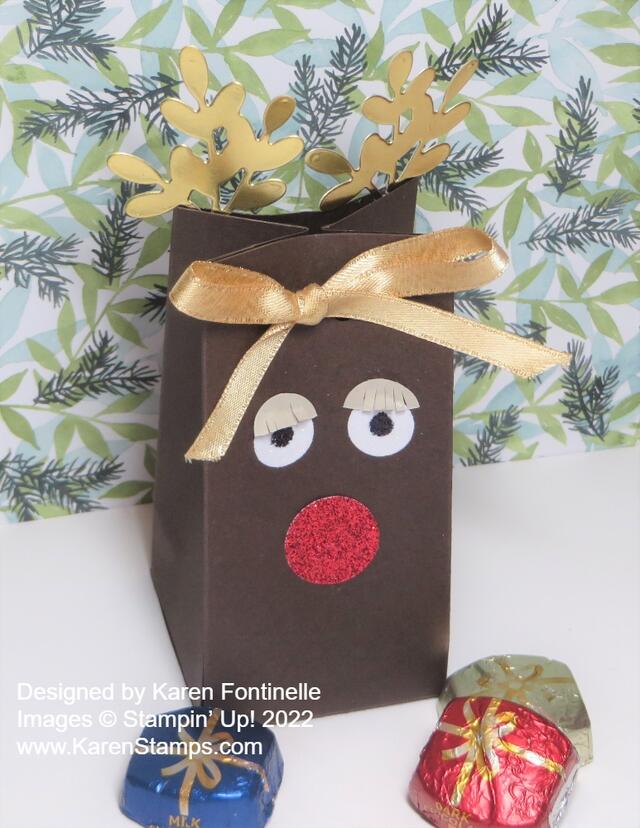
I think every year I make some kind of Rudolph Gift Bag so here is one for 2022. It’s so quick and easy to make, not to mention fun to see Rudolph develop right before your eyes!

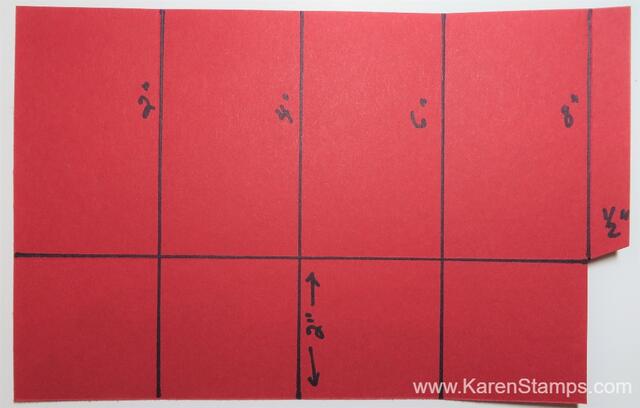
This is a typical 2-4-6-8 bag (or box, however you want it to end up!) that we all know how to make. I used a piece of Early Espresso Cardstock since in previous years I usually use Soft Suede. This reindeer has darker fur! Start with a piece of cardstock cut at 6″ x 8 1/2″. Score at 2″, 4″, 6″, and 8″, then turn the paper lengthwise and score at 2″. Cut on the score lines of those small squares which will be the bottom of the bag, up to the 2″ score line. Cut off the tiny 1/2″ piece in the bottom corner. See diagram below.

2-4-6-8 Treat Bag Diagram

Apply adhesive to that 1/2″ flap and fold over to adhere to opposite side. Fold in the bottom flaps and use adhesive to hold them closed. Pinch the sides and the top of the bag to close. Before closing the bag for good, adhere the gold foil diecut antlers to the inside of the bag . I used a leafy die in the Christmas Banners Dies. I thought this reindeer should be spiffy with golden antlers!

For the eyes, use any white paper, but since I had scraps of the Real Red & White Glimmer Paper handy, I thought Rudolph might look good with glimmery eyes! I colored in the center of the eye with a Sharpie. I used a retired 1/2″ Circle Punch to make the eyes but you could just cut them out by hand.

Rudolph’s red nose is the Red Glimmer Paper. If you don’t have red glimmer paper, color some other glimmer paper with a red marker or red ink. I used a retired 3/4″ Circle Punch for his nose.

I thought maybe Rudolph, for something different, should have some fancy eyelashes! To make them show up, I used Sahara Sand cardstock and punched half circles with the 1/2″ Circle Punch and cut the little lashes by hand. Not sure I think they look that great but maybe it’s ok! Gotta try new things!

If you want to close up the top of the box, just punch a couple of holes and thread some ribbon through to tie a bow. I used the Gold Shimmer Ribbon to match the gold antlers.

Use the gift bag for a small gift or candy or anything that will fit! Modify the measurements if you want it a little taller or shorter. It’s such an easy thing to make, but you might not know that until you make one!

Check out the Last Chance Sale in the Stampin’ Up! store plus the Clearance Rack! Some items went fast yesterday!

Easy Rudolph the Red-Nose Reindeer Gift Bag

Easy Rudolph the Red-Nose Reindeer Gift Bag

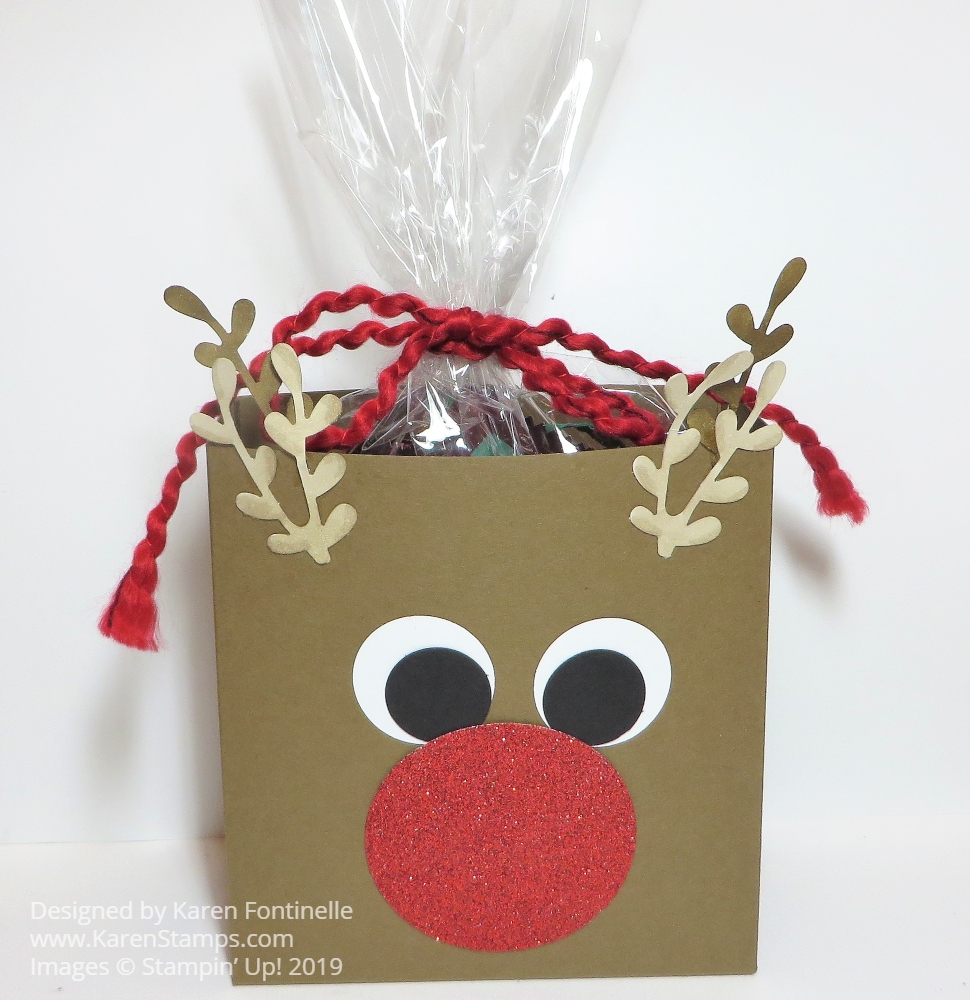
Almost every year I have been making one variation or another of a Rudolph gift bag so here is my Easy Rudolph the Red-Nose Reindeer Gift Bag! Usually, I have decorated a kraft shopping bag like in this popular post HERE. Another year I made a smaller 2-4-6-8 bag to look like Rudolph HERE.

This is a similar bag, but a little larger that you make with half a sheet of 12″ x 12″ paper. It’s good to have at least the assortments of each color family of 12″ x 12″ paper on hand because even if we don’t use this size paper real often, sometimes you need a large piece for a project.

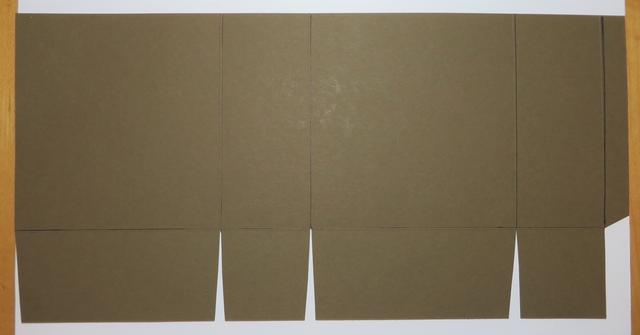
Start with a 6″ x 12″ piece of Soft Suede Cardstock or whatever color of brown that you like. Score at 4″, 5 3/4″, 9 3/4″, and 11 1/2″. Turn the paper so the short edge is at the top and score at 1 3/4″. This will make the bottom flaps of the bag. Cut those short bottom tabs up to the 1 3/4″ score line. Cut off the little 1/2″ tab on the bottom. Fold on all the score lines and crease well with the Bone Folder. Adhere the tab on the end to the other side to assemble the bag. Then adhere the flaps on the bottom. I used the Tear & Tape Adhesive. (There’s a piece of white cardstock underneath just for the photo.)

Gift Bag Diagram

Before you completely assemble the box, fold on all the score lines and SEE how it is going to go together. See which area will be the front. I found it was easier to glue on the pieces while the bag was still flat, but either way works since it is so simple!

I used a 2″ Circle Punch for the Red Glimmer Nose, a 1″ Circle Punch for the white part of the eyes and a 3/4″ Circle Punch (retired) for the black. You can use whatever punches or dies you have according to what sizes and look you want your Rudolph to have! Just glue them on to make your reindeer’s face.

For the antlers I used the Sprig Punch. I punched out 3 of the sprigs out of the Whisper White Thick Cardstock since I wanted them sticking up over the top of the bag and thought the Thick Cardstock would be a little stronger. One of the sprigs I cut apart and added one piece to each sprig. I colored all the sprigs with my Stampin’ Blends, two of them with the Light Crumb Cake and one with Soft Suede just to make it a little interesting and adhered the darker piece to the full sprig.

Just fill a cello bag with treats and tie with a ribbon! Put it inside the Easy Rudolph the Red-Nose Reindeer Gift Bag and you’ve got a fun gift for someone!