Category Archives: Christmas

Gold Mini Pizza Box With Christmas Poinsettia

Gold Mini Pizza Box With Christmas Poinsettia

It’s going to be time to wrap gifts sooner than we want to realize, so here is an idea – this Gold Mini Pizza Box With Christmas Poinsettia. Just put a treat inside or a small gift and decorate the box exactly how you want!

It’s a good idea to keep a package of these Gold Mini Pizza Boxes on hand. They are pretty already being gold so you can just add a little decoration and you’ll have a gorgeous gift box ready to go. These boxes are food safe so you can add a cookie or two inside, some Christmas fudge or candy, a set of 3″ x 3″ notecards or some other gift. You get 8 mini pizza boxes in a package!

I got the inspiration for this gift box after seeing a Christmas card online (not handmade) although I ended up changing it a little. The card had gold, dark blue, and red poinsettias with gold trim. It also had swirly things in the background in gold. So I thought I would try that red, blue, and gold color scheme as a gift box!

The blue I chose is Night of Navy although I started with Misty Moonlight. Really, either would be fine. I liked the slightly darker shade. The poinsettia is made with Real Red Cardstock and the Poinsettia Dies. I used two layers of the medium size flower and the smallest flower for the center. Just using the largest poinsettia flower in the center of this box would be pretty also, but I wanted room for gold trim of some kind. I ended up using Gold Foil for a few leaves and the sprigs in the die set. The flower is popped up with Stampin’ Dimensionals®. It’s a good idea to use your fingers to sort of fold up the petals and leaves a little bit to give them some dimension.

The greeting is stamped with the Itty Bitty Christmas Stamp Set and cut out with the Classic Label Punch. The greeting is popped up with Mini Stampin’ Dimensionals.

There are so many things you can do with these Gold Mini Pizza Boxes! They can be decorated for any occasion. You can use them for a birthday treat or gift or take a few cookies or candy to your neighbor. You could do some stamping on cardstock for the top and tie a ribbon around the box. Or add a belly band with a greeting.

Order some of these boxes or the plain white Mini Pizza Boxes to have on hand. You will have fun decorating them for many occasions, especially Christmas!

SHOP STAMPIN’ UP! ONLINE!

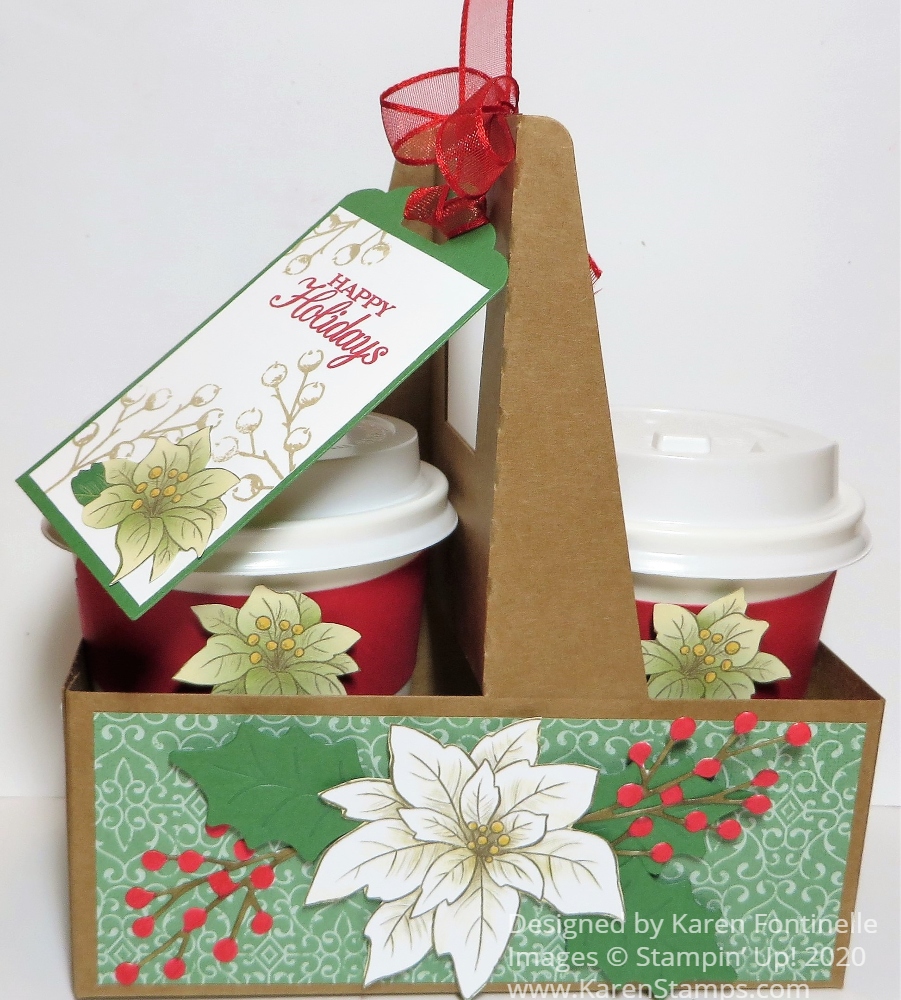
Poinsettia Decorated Mini Coffee Carrier

Poinsettia Decorated Mini Coffee Carrier

I’ve had these carriers for a while and kept forgetting to use them, but here is one for you today, my Poinsettia Decorated Mini Coffee Carrier! These will be fun to make for neighbor gifts or treats or extra presents for your family. You can use them in so many different ways for so many different treats!
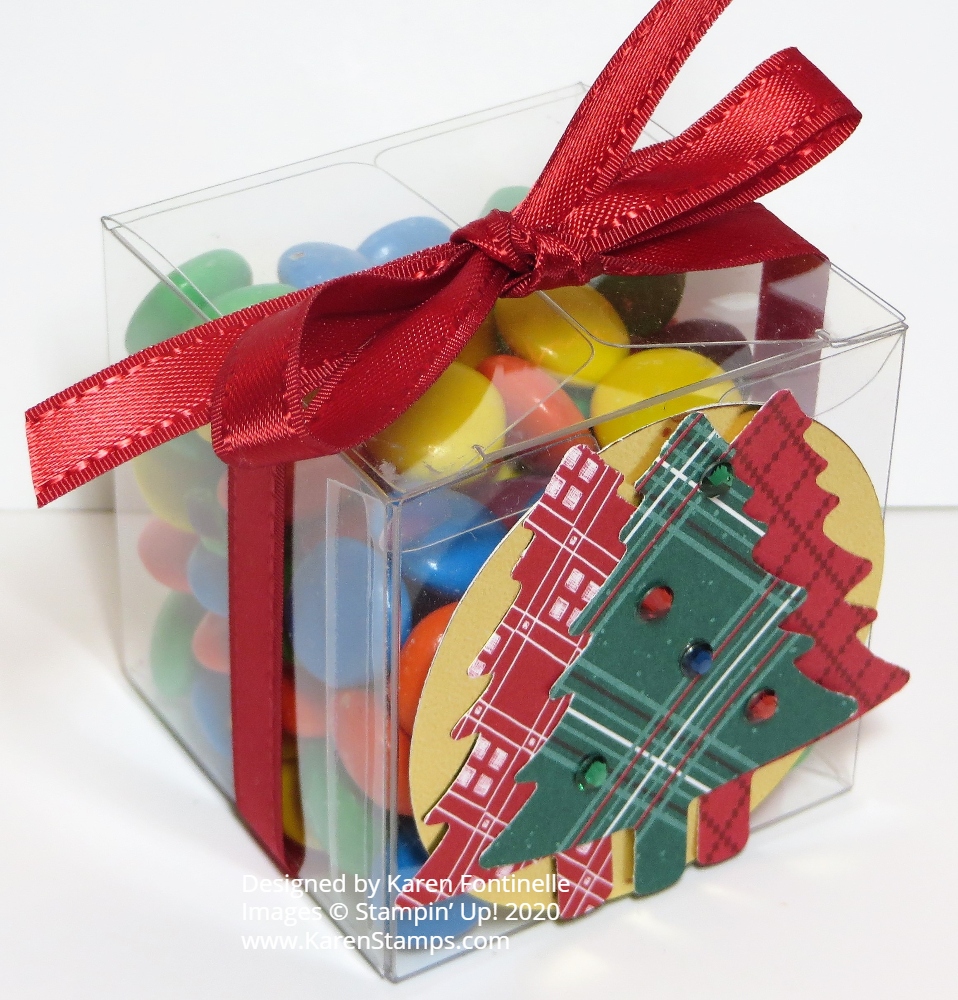
Fill the cups with cocoa mix, or maybe just one cup and then on the other side put cello bags of marshmallows and maybe a peppermint stirrer. Put any kind of candy or maybe small cookies inside the cups. Fill cello bags with a treat and insert those inside the cup but leave off the lid so the recipient will see the pretty treat bag tied with a ribbon and a tag. Decorate the Mini Coffee Carrier but put in gifts of small candles or bath products or some other kind of product or container. The ideas are endless!

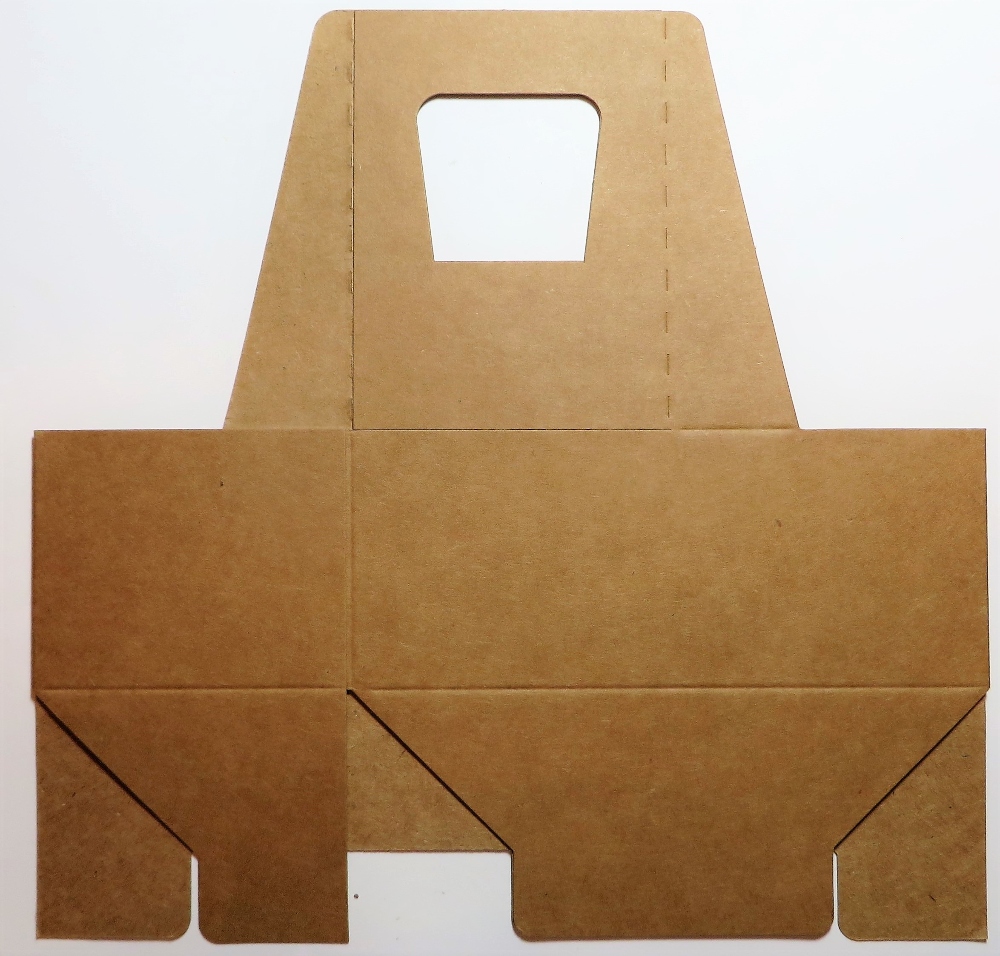
Mini Coffee Carrier Flat

This is what the Mini Coffee Carrier starts out like! It is folded flat so you don’t have to worry about storage space. Just start sticking your hands in there to open it up and then when it gets loosened up, crease and fold on all the score lines to make your carrier. Play around with those tabs on the bottom and make sure you have them assembled so they are strong to hold the contents of the carrier. You get 8 kraft carriers for only $5!

The coffee cups are separate if you would like those. Order the Mini Coffee Cups and get eight cups and lids and they are food safe and can hold a beverage up to 200 degrees F.

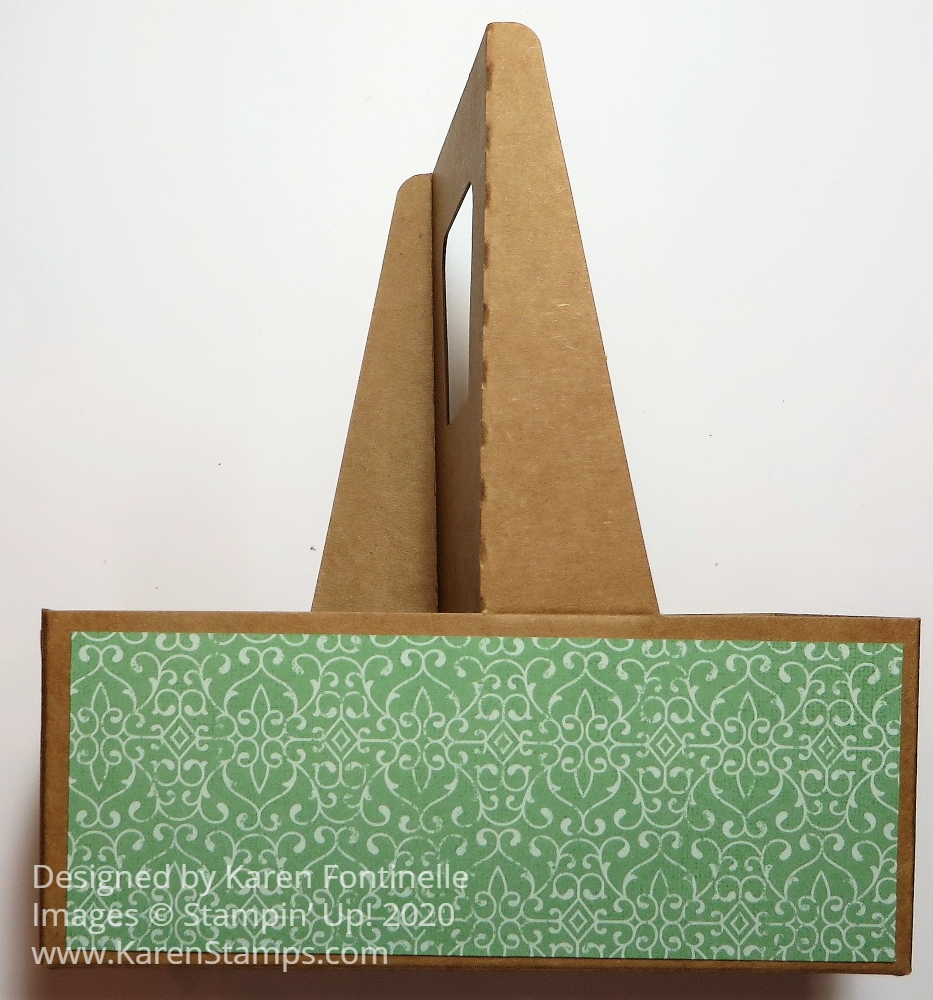
Mini Coffee Carrier Side Paper

Here I started decorating my carrier with paper in the Poinsettia Place Designer Series Paper. You can wrap a strip of paper around as far as it will go or you can do as I did, just cut paper to fit each side of the carrier. To leave a small margin of the carrier showing, I cut my designer paper at 2 1/8″ x 5 1/2″ for the front and back and 2 1/8″ x 2 5/8″ for each end. I tried to match the pattern but it wasn’t that important with this paper, but make sure you check your patterns so one isn’t upside down or completely doesn’t match and look good.

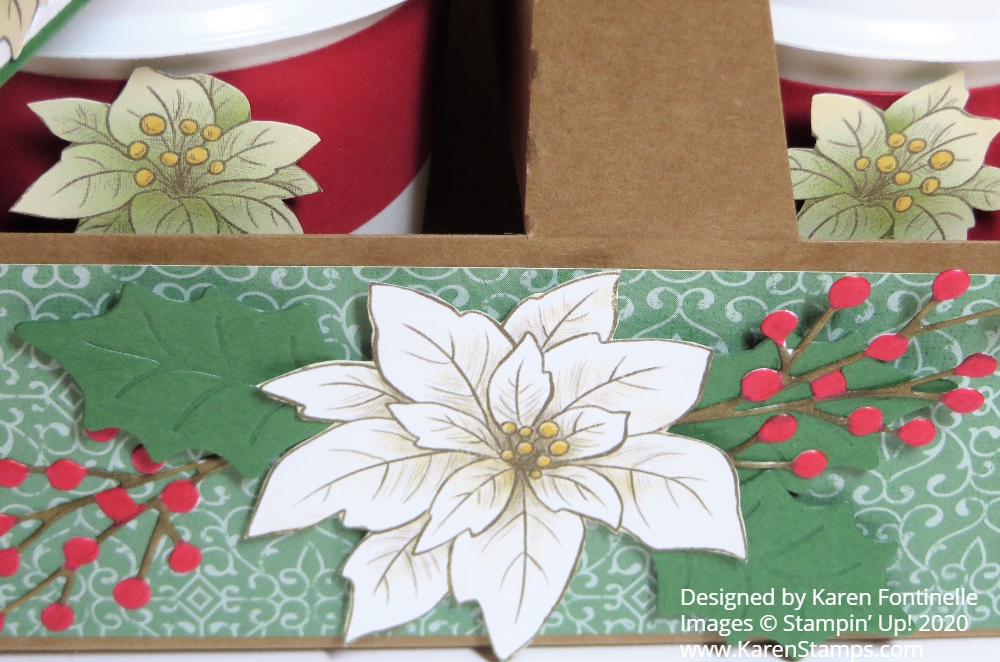
Poinsettia Decorated Mini Coffee Carrier Front Decoration

To decorate my carrier, I cut out a large poinsettia from one of the papers and die cut the leaves with the Poinsettia Dies. I used Garden Green Cardstock. For the berry sprigs, I die cut those from Whisper White Cardstock and then colored the berries with the Dark Real Red Stampin’ Blend and Dark Soft Suede for the stems. The flower and leaves are popped up on Stampin’ Dimensionals® and the sprigs adhered with tiny bits of Multipurpose Liquid Glue on the berries.

Poinsettia Decorated Mini Coffee Carrier Tag

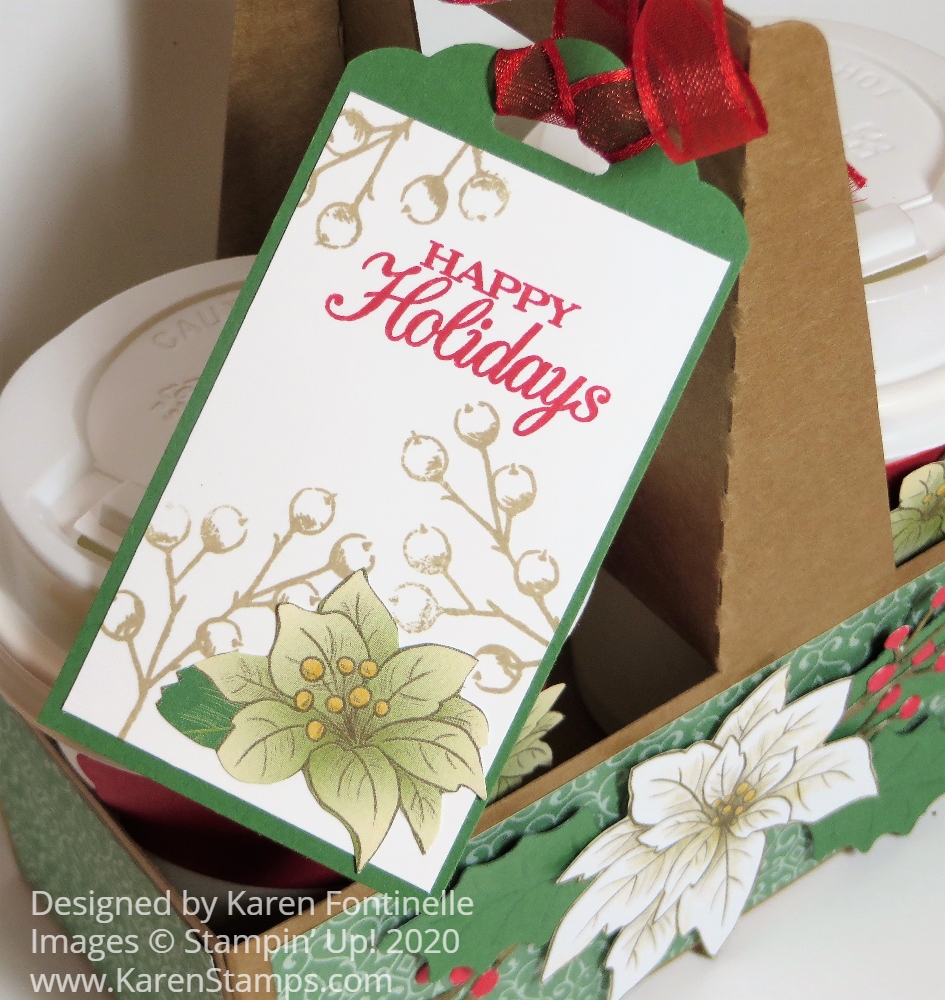
I actually love this tag that I came up with! The Garden Green tag is punched with the Scalloped Tag Topper Punch. The Whisper White layer is stamped with a Happy Holidays greeting in the Poinsettia Petals Stamp Set. Then I stamped the berry sprig in Crumb Cake ink to make a lighter interesting background. The poinsettia is hand-cut from the designer paper. The tag is tied on with the Real Red Sheer Ribbon.

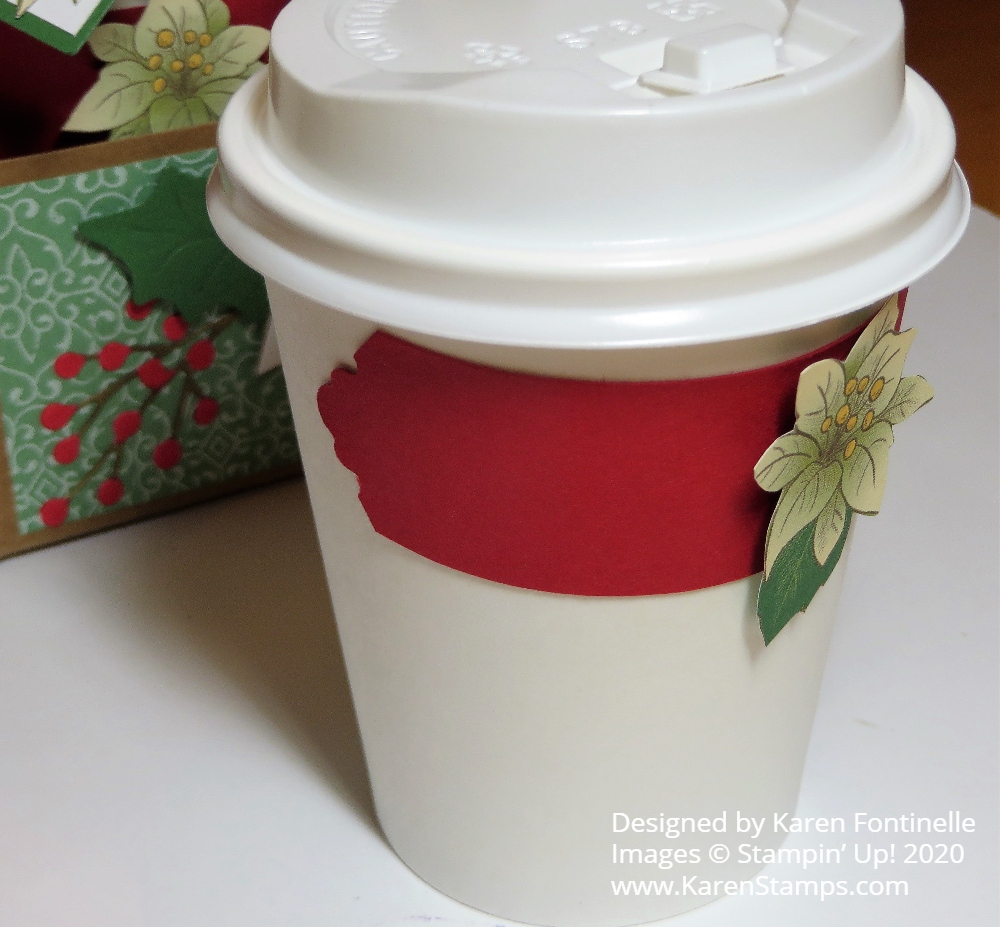
There are dies to order to make wrappers to go around the cups for decoration. If you don’t order these, you may have to cut up a cup for a template to make your paper fit around the cup. The dies are called Warm Wrap Dies and they will make your life easier! Since I don’t own them, I punched a strip of Real Red with the Lovely Labels Pick a Punch and adhered that to the cup, then added another hand-cut small poinsettia flower to each label.

It’s time to be thinking about making some holiday gifts! Really, you could use these any time of year! All you have to do is decorate for any occasion.

SHOP STAMPIN’ UP! ONLINE HERE!

Christmastime Is Here Designer Paper Gift Bag

Christmastime Is Here Designer Paper Gift Bag

It’s so easy to make a small gift bag for the holidays like this Christmastime Is Here Designer Paper Gift Bag. You would be surprised! I didn’t realize this designer paper was still available in the Stampin’ Up! Online Store from last year! It’s so beautiful with rich colors so you might want to see if you still have some that you purchased last year and stock up with some more or pick up some for the first time.

This gift bag is made with the Christmastime Is Here Specialty Designer Series Paper. Last year it was a special release or something and I used most of my paper but I had placed it in with my retired paper. Something told me to check, and I found it still in the Online Store! It certainly is beautiful paper to use for Christmas! I’m glad it is still around!

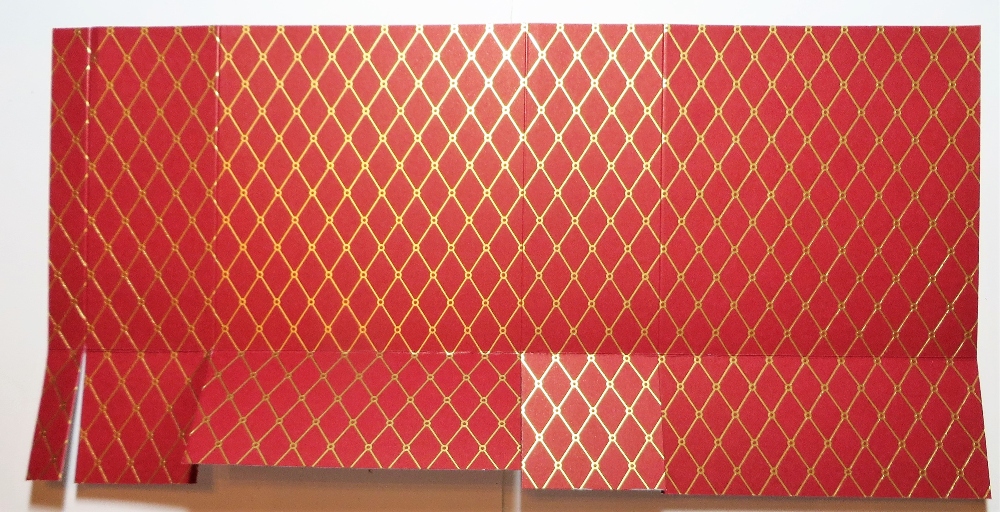
All you need to make a gift bag like this one is a 6″ x 12″ piece of designer paper or cardstock. Score at 4″, 5 3/4″, 9 3/4″, and 11 1/2″. Turn the paper so the short edge is at the top and score at 1 3/4″. This will make the bottom flaps of the bag. Cut those short bottom tabs up to the 1 3/4″ score line. Cut off the little 1/2″ tab on the bottom. Fold on all the score lines and crease well with the Bone Folder.

Christmastime Is Here Designer Paper Gift Bag Scoring

Adhere the tab on the end to the other side to assemble the bag. The adhere the flaps on the bottom. You can use whichever adhesive you like. I used Stampin’ Seal+, but you could also use Multipurpose Liquid Glue if you like a little “wiggle room” to get things lined up. You will be able to see how the bag goes together as you start to assemble it.

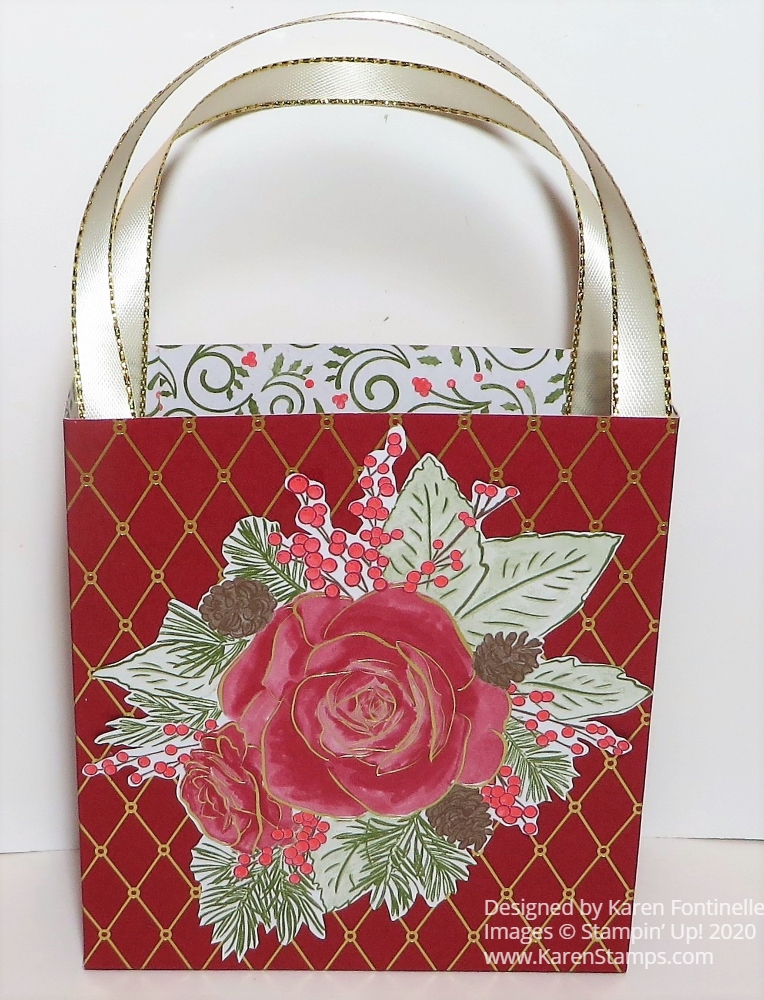
After you have the bag made, you can decorate it however you like. I chose to cut out by hand the pretty roses and leaves from another sheet of the designer paper. I was going to add a greeting but I liked just the flowers on the front of the gift bag.

I added handles made with two pieces of ribbon. The ribbon is the Gold 3/8″ Metallic Edge Ribbon, one of my favorites. I just attached them with a Mini Glue Dot on the ends and adhered inside the bag.

All you need to do is add a small gift or treat and your gift is ready to go!

Check out the Christmastime Is Here Designer Paper in the Online Store and add it to your Christmas papers to use!

Shop Stampin’ Up! Online HERE!

Coming Soon! Stampin’ Up! Online Extravaganza!

The Holidays are coming and so is the Stampin’ Up! Online Extravaganza on Tuesday, November 24! Start making your shopping list now!

If you haven’t started already, you are probably starting to think about your holiday papercrafting plans. Maybe you are planning to make an advent calendar, create home decor, or get some scrapbook pages ready, not to mention making Christmas cards to send for the holidays.

Nearly all 2020–2021 Annual Catalog items are eligible for the 10% discount, but there are some exclusions. Keep in mind shipping might be delayed due to increased shipping demands during the holidays.

More details and reminders as we get closer to the date! It’s NEXT WEEK!!

Did you know you can make a shopping list in the new Online Store? Sign in to your account, then click the little heart in the upper right. Then you can “Create a List” and name it whatever you want….Favorites, Holidays, Birthday. Go ahead and shop and when you see something you want, click on the product and then click on the little heart again and choose your list. Once you have all your products on your list, you can put them all in your Shopping Cart or you can share a link with someone! Handy for Christmas shopping for others! Try it! I think you will figure it out pretty easily.

Remember, circle next Tuesday, November 24 on your calendar and set a reminder on your phone calendar!

So Many Snowflakes Die-Cut Holiday Card

So Many Snowflakes Die-Cut Holiday Card

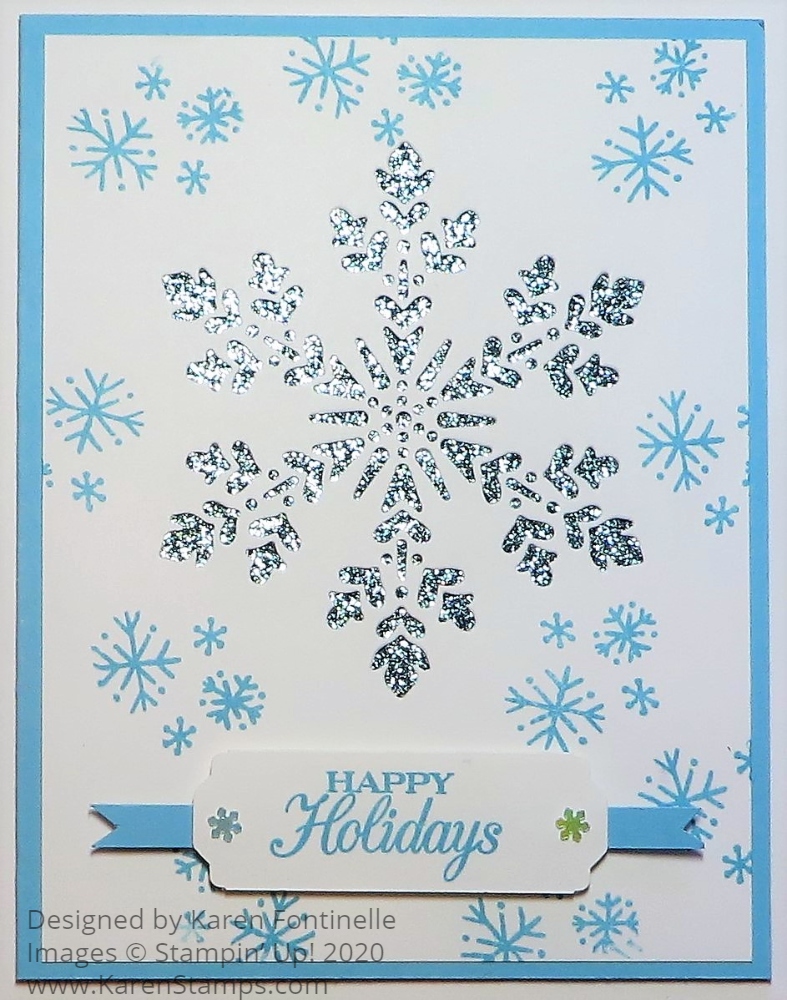
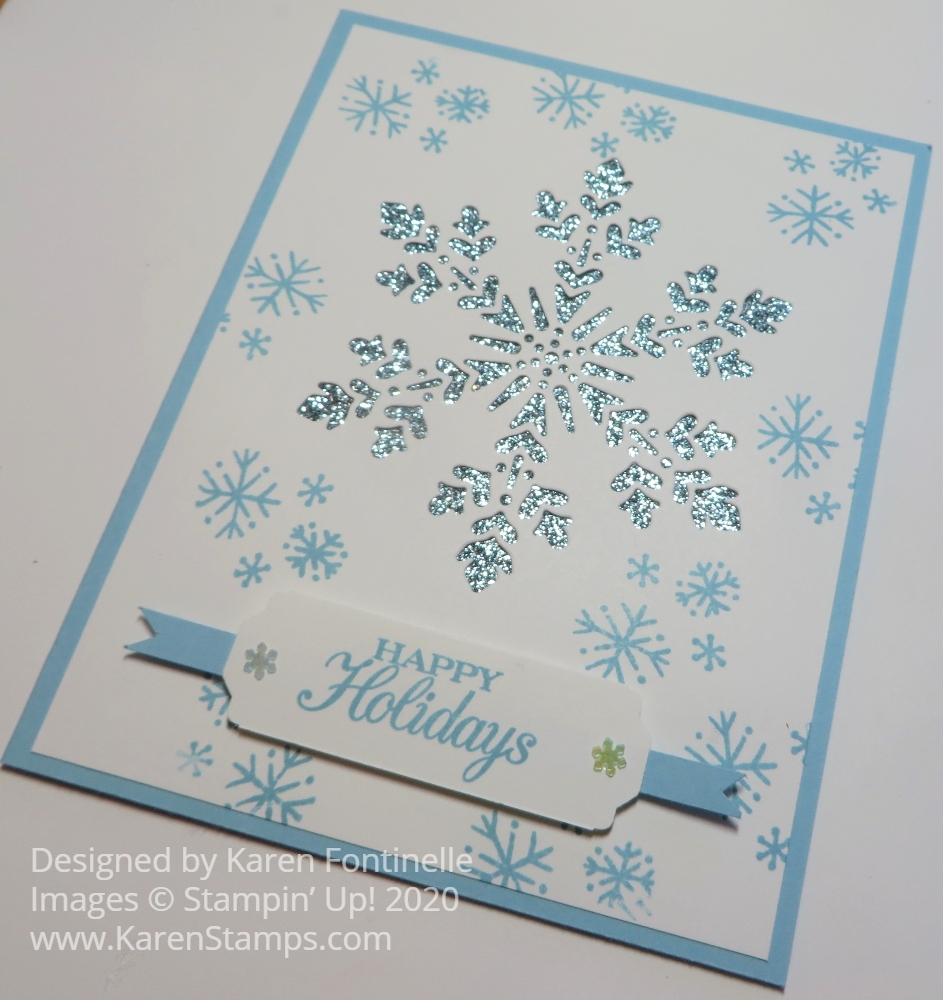
Use the So Many Snowflakes Die to make this So Many Snowflakes Die-Cut Holiday Card and let the sparkles show through the snowflake! I realized I hadn’t used my glimmer paper enough so I tried it out on this card with the see-through die-cut negative.

The card base is Balmy Blue with a layer of Whisper White. I die cut the largest snowflake from the So Many Snowflakes Dies in the Whisper White. Since I didn’t purchase the Snowflake Wishes Stamp Set (even Demonstrators can’t have everything!), I used some snowflakes in the Snowman Season Stamp Set to stamp some random snowflakes in Balmy Blue Ink on the front of the card.

For the sparkle under the die-cut, I adhered a piece of Balmy Blue Glimmer Paper. It’s always difficult to photograph sparkle and shine, but it looks very pretty under there! Then this Whisper White layer with the Balmy Blue Glimmer Paper underneath adhered to the Balmy Blue Cardstock card base.

The greeting is from the Poinsettia Petals Stamp Set. It is stamped in Balmy Blue Ink and punched with the Lovely Labels Pick A Punch. I simply cut a little strip of Balmy Blue Cardstock to layer underneath the greeting to help it stand out a little and popped it up with Stampin’ Dimensionals®. For a final touch, I added two Adhesive-Backed Snowflakes. These are so fun to play with and easy to use with the adhesive already on them!

I think this would actually be an easy Christmas card to duplicate if you wanted several to send. It involves the die-cutting and punching the greeting, but you could make a simpler greeting by cutting a rectangle or using another die rather than the punch. Do it assembly-line fashion like I described yesterday in my blog post!

So Many Snowflakes Die-Cut Holiday Card Closeup

Making Christmas Cards Assembly Line Style

Making Christmas Cards - Cut Paper

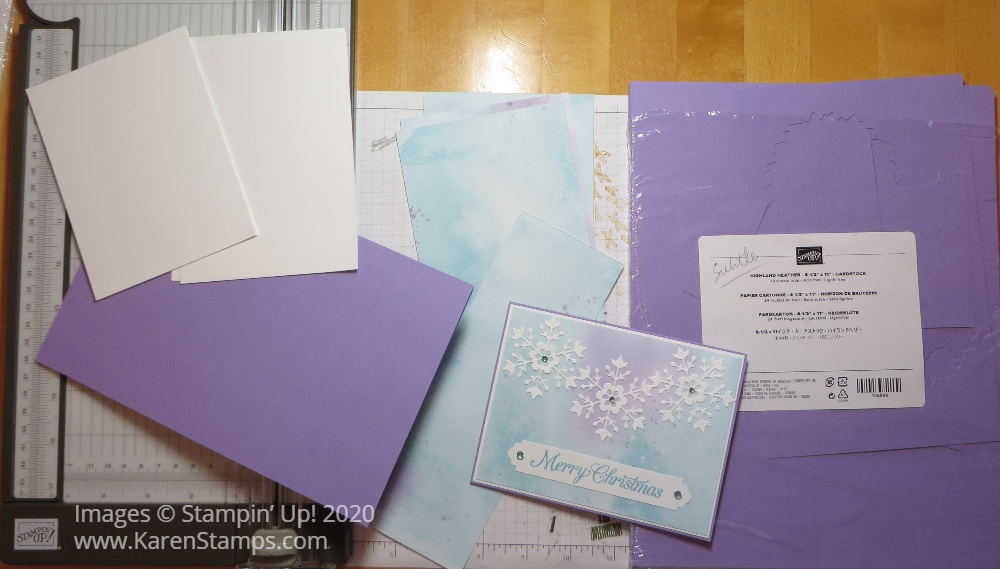
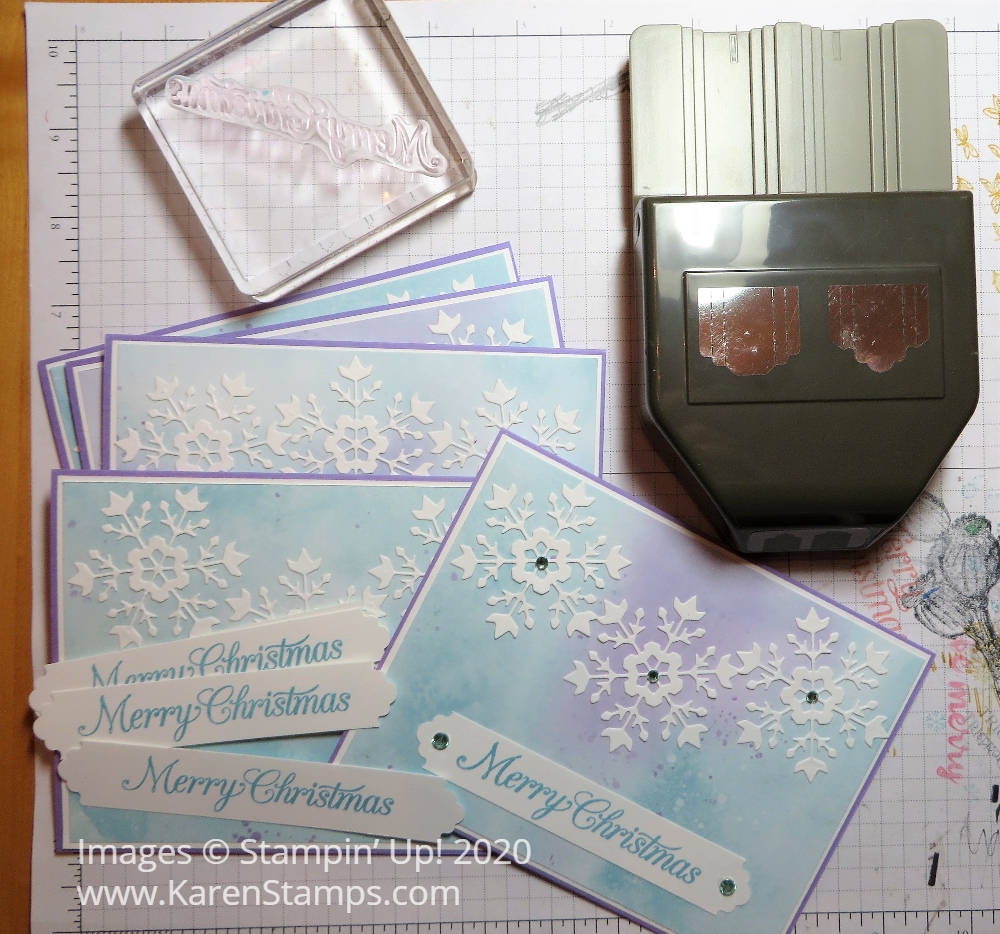
When you are going to make a batch of Christmas cards, whether it’s a few or a hundred, plan to make them “assembly-line style”. I learned early on not to make one whole card, then another whole card, and then another. Instead, gather all your supplies and do each step for ALL the cards. Whether you are cutting or stamping or adding embellishments, you will do it faster if you do it over and over again. And if you are making a whole pile of cards, you almost get “muscle memory” for doing each step and that makes it even easier!

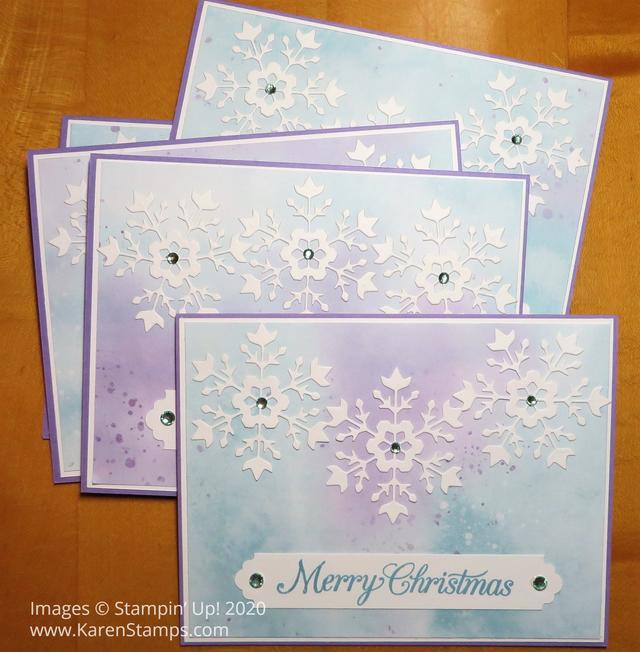
I am copying a card Snowflake Splendor Merry Christmas Card, I already made awhile back (in August!!) but liked it a lot. Since I like to make a lot of different cards from all the ideas I see in the catalogs and online, I’m making many different designs and maybe five copies of each one. The only problem is that when I go to send them, I have to choose which card to send to which person! You might choose one card design and make 50 cards the same. I’ve done that, also. Then everyone just gets the same card! And your muscle-memory gets really good at making the cards!

The first step, as you see in the top photo is to cut all your paper and score the card base as well. Cut the card base, layers, designer paper, scrap pieces….everything you need to make the card. Make little piles of the same pieces so you don’t get them mixed up.

Making Christmas Cards - Adhesive Sheets

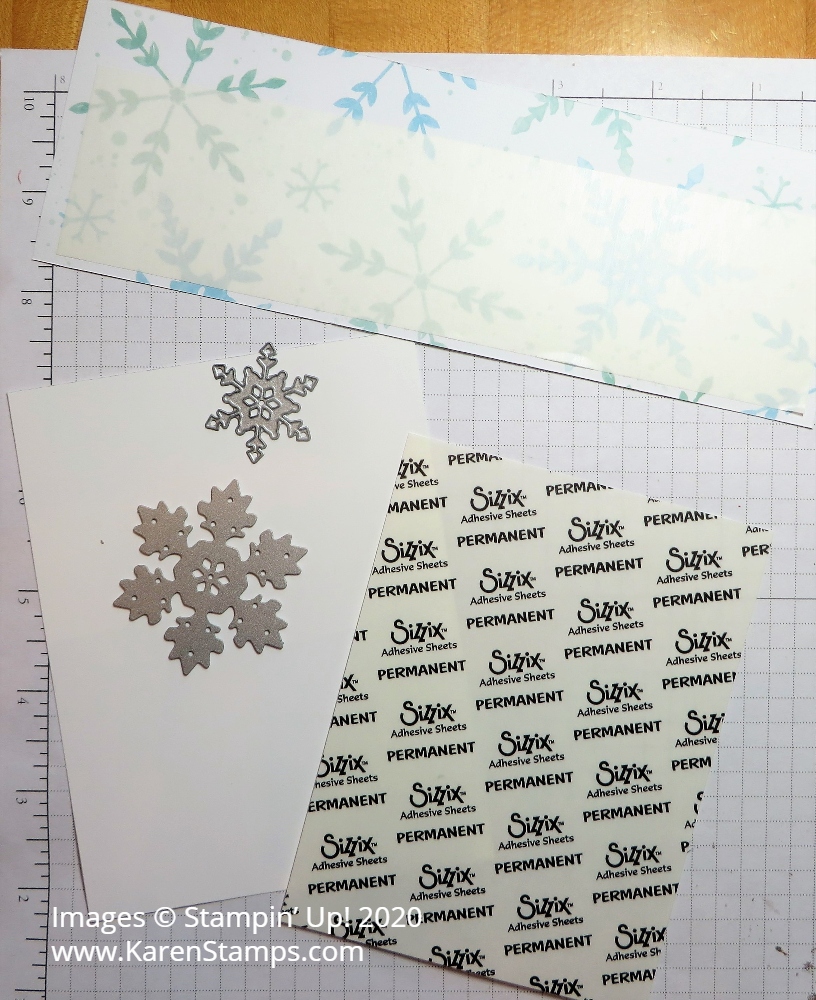
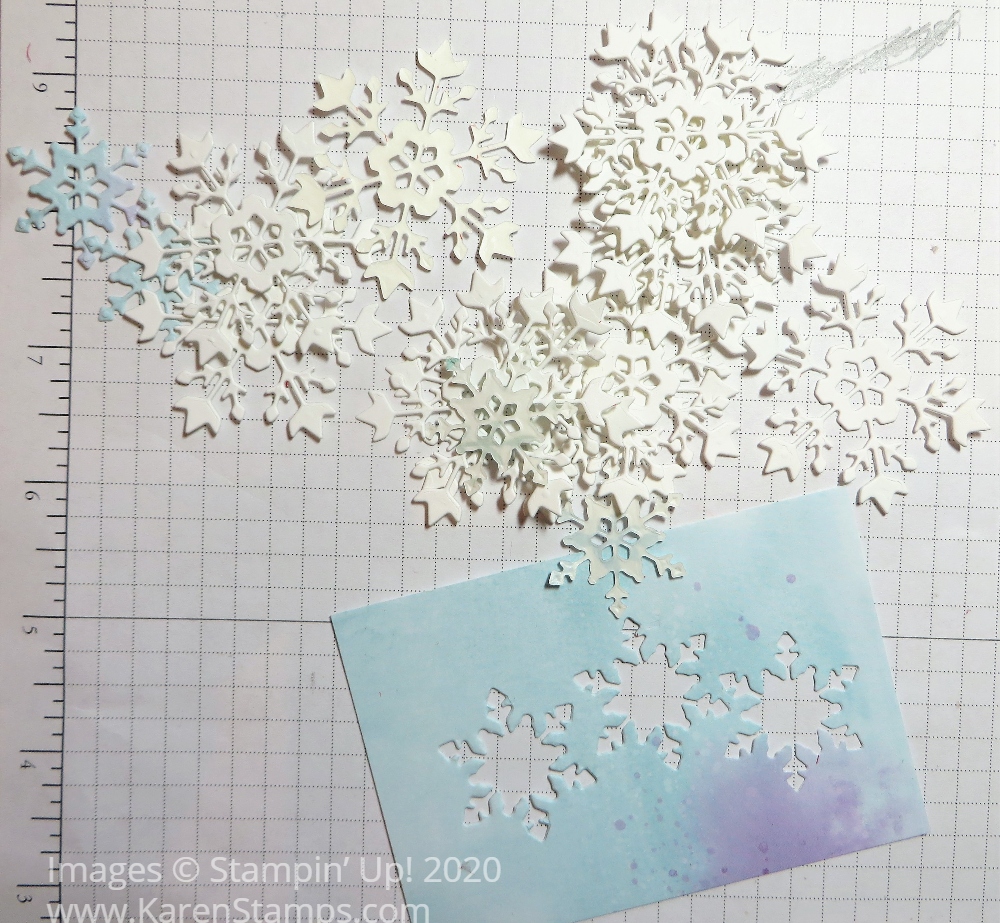
Now amazingly, this time I remembered to use the Adhesive Sheets before cutting out the snowflakes! This makes it easier to adhere them because they will already have adhesive on all the little areas from the Adhesive Sheets. No need to add tiny drops of glue! The snowflakes are made with the So Many Snowflakes Dies.

Making Christmas Cards - Die Cut Pieces

For this card, I diecut all the white snowflakes out of the Whisper White layer I was going to use under the designer paper. Shhh! Don’t tell anybody! They’ll never know!

Making Christmas Cards - Adhere Layers

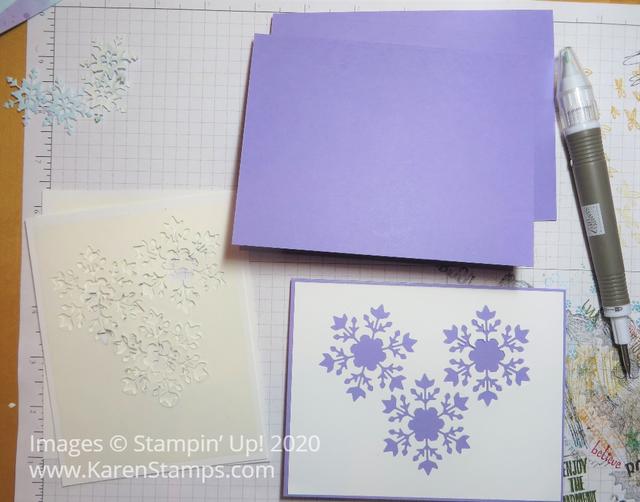
Adhere the Whisper White layer to the Highland Heather card base. And since I used the Adhesive Sheets on the back so I could diecut the snowflakes, I don’t even have to use glue, just adhere the Whisper White to the card. Do all the cards like this.

Making Christmas Cards - Adhere Diecuts

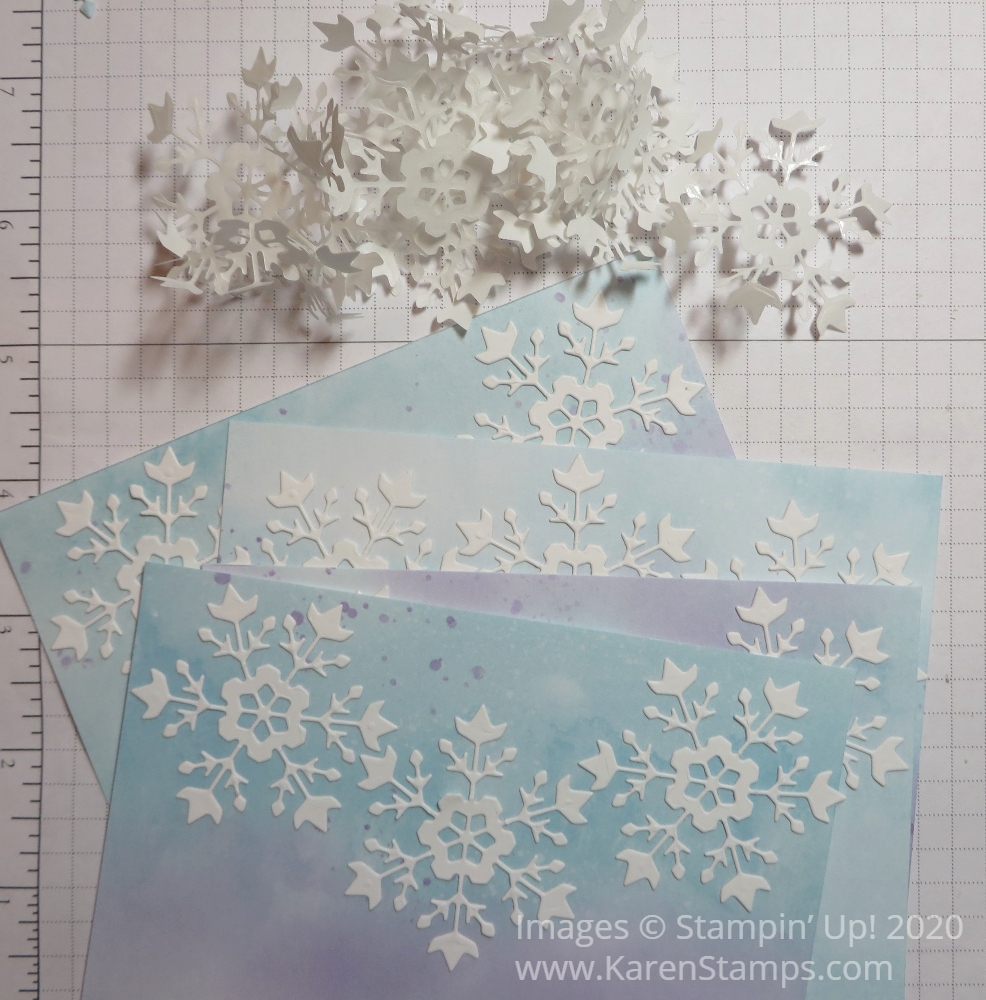
Adhere all the die-cut snowflakes to all the pieces of the watercolor pattern in the Snowflake Splendor Designer Series Paper. The Take Your Pick tool helps to separate the backing of the adhesive sheets from the snowflake.

Making Christmas Cards - Stamp

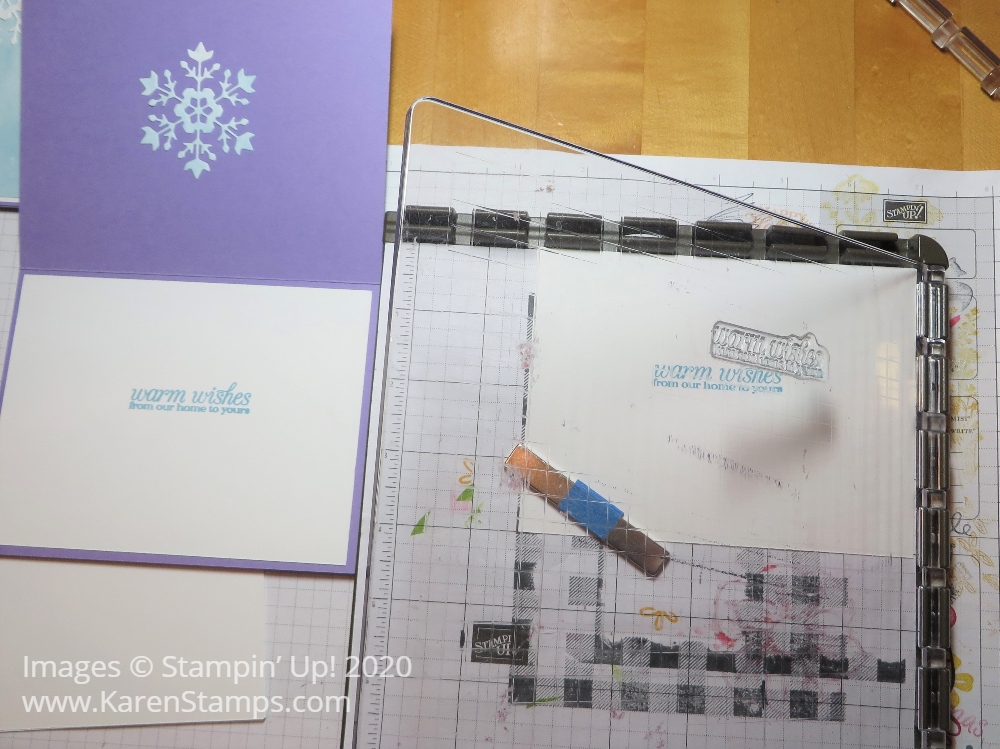
When you have stamping to do making Christmas cards, it’s really useful to have the Stamparatus! Get the words or whatever images lined up perfectly and then stamp with the Stamparatus! If the inked image is incomplete, you can just reink the stamp and stamp again as long as you don’t move the paper!

Making Christmas Cards - Add Greetings

Stamp and punch our all the greetings so they are ready to go on your cards. This greeting is from the Poinsettia Petals Stamp Set and is punched with the Lovely Labels Pick a Punch.

Making Christmas Cards - Add Embellishments

Finish assembling your cards by adding some Holiday Rhinestone Basic Jewels. Inside the card, adhere the smaller designer paper snowflakes you already cut out and stamp the greeting using the Stamparatus on another layer of Whisper White, also from the Poinsettia Petals Stamp Set. Then you have a stack of Christmas cards all finished!! Make them assembly-line style!

Curvy Christmas Sample Christmas Card

Curvy Christmas Card Sample SU
Image © Stampin’ Up! 2020

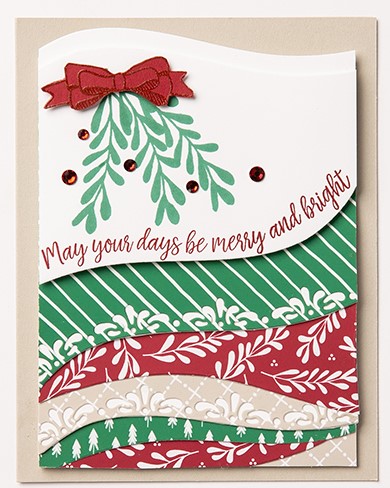
Have you checked out the Quite Curvy products yet that became available November 1st for customers? This card is a sample from Stampin’ Up! and shows the curves you can get with the new dies for some fun new looks on your cards and projects!

These new products are actually an early release from the upcoming Spring Mini Catalog coming out in January. However, if you want the Christmas portions of the whole selection, those must be ordered during this early promotion. The Curvy Christmas Stamp Set and the Classic Christmas 6″ x 6″ Designer Series Paper is only available through January 4, 2021.

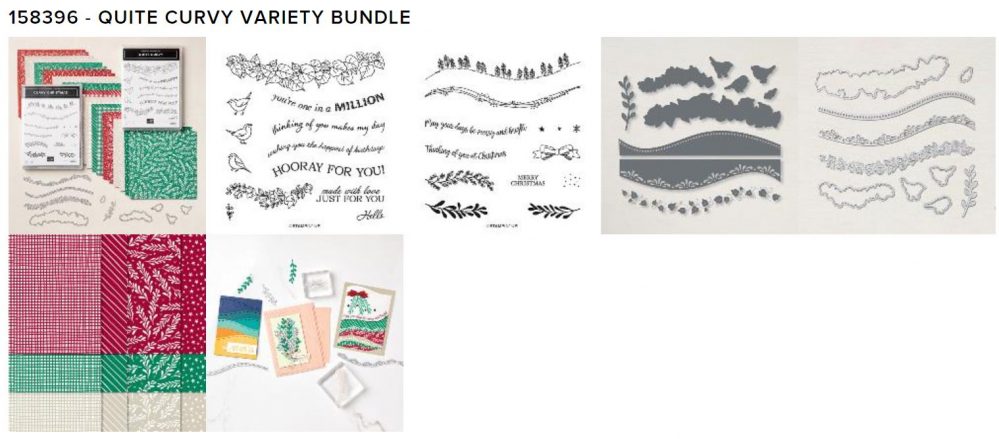
If you are interested in ALL the products, Stampin’ Up! has made it easy for you! Just order this number #158396 for the Quite Curvy Variety Bundle and you get it all! No need to add each individual product. However, if you want only certain products, just order them individually as you would normally do.

Quite Curvy Variety Bundle All Images
Image Copyright Stampin’ Up! 2020

If you look online you will find so many beautiful, different samples of cards and projects made with the Curvy Celebrations products! Go to the Online Store and check out these new products, and especially check if you want the Christmas products so that you get those soon to use for the holidays and so that you get them before they go away in January.

Trimming the Town Wreath Christmas Card

Trimming the Town Wreath Christmas Card

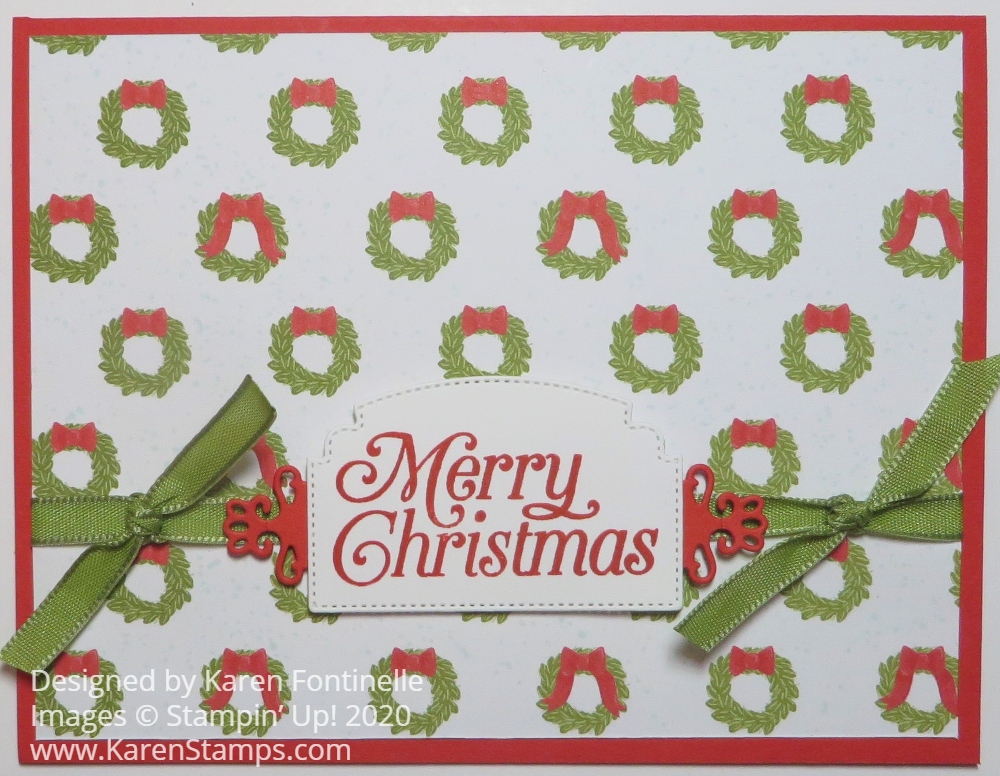
Make this Trimming the Town Wreath Christmas Card for a pretty quick and easy Christmas card. In fact, you can make it even easier than mine if you only use one die cut or no die cuts!

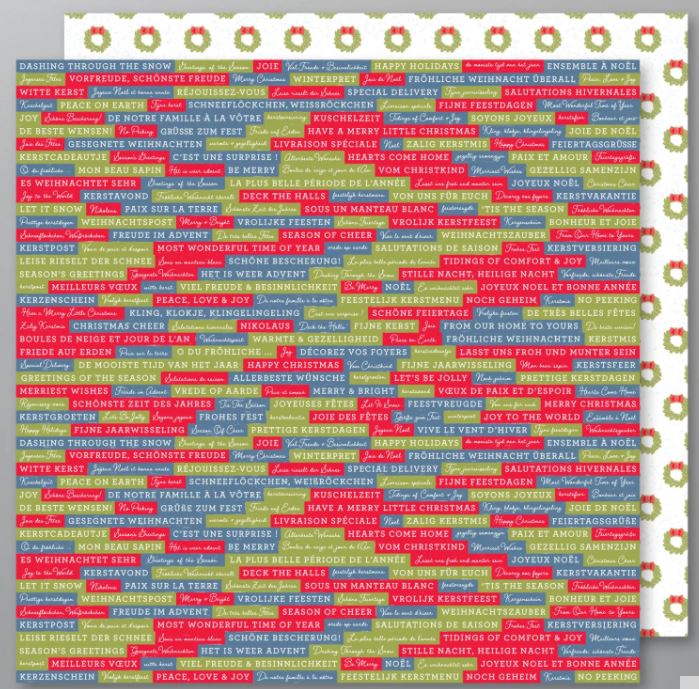
This is just a card with a piece of designer paper and a greeting plus a little ribbon. It’s a very simple design. The card base is Poppy Parade with a layer of designer paper from the Trimming the Town Designer Series Paper. You will find this cute wreath print on the back of the paper with all the holiday phrases. It’s often tough to know which side of the paper to use and tough to cut into it, especially when you like both sides!

Before adhering the designer paper to the card base, I adhered the strip of ribbon around the designer paper (just adhere the ends on the back, no need to go all the way around and waste a couple of inches of ribbon!). This ribbon is in the Ornate Garden Combo Pack.

The greeting is stamped in Poppy Parade Ink on Whisper White and die cut. The greeting is in the Perfectly Plaid Stamp Set. The die cut is part of the Ornate Frames Dies. To layer it on something, I cut out the narrow die with the fancy ends in the same set, but cut it in half so that I could place each piece at each end of the greeting. That die cut in Poppy Parade was adhered to the greeting and then popped up on Stampin’ Dimensionals. I also added two knots of ribbon on each side.

That’s all there is to this card. You could simply cut a rectangle out of Whisper White and a larger rectangle out of Poppy Parade with your Paper Trimmer and not do the die-cutting is you were making a lot of Christmas cards like this one.

Have fun trying out new card designs with different designer papers and greetings!

SHOP STAMPIN’ UP! ONLINE HERE!

Trimming the Town Scene Christmas Card

Trimming the Town Scene Christmas Card

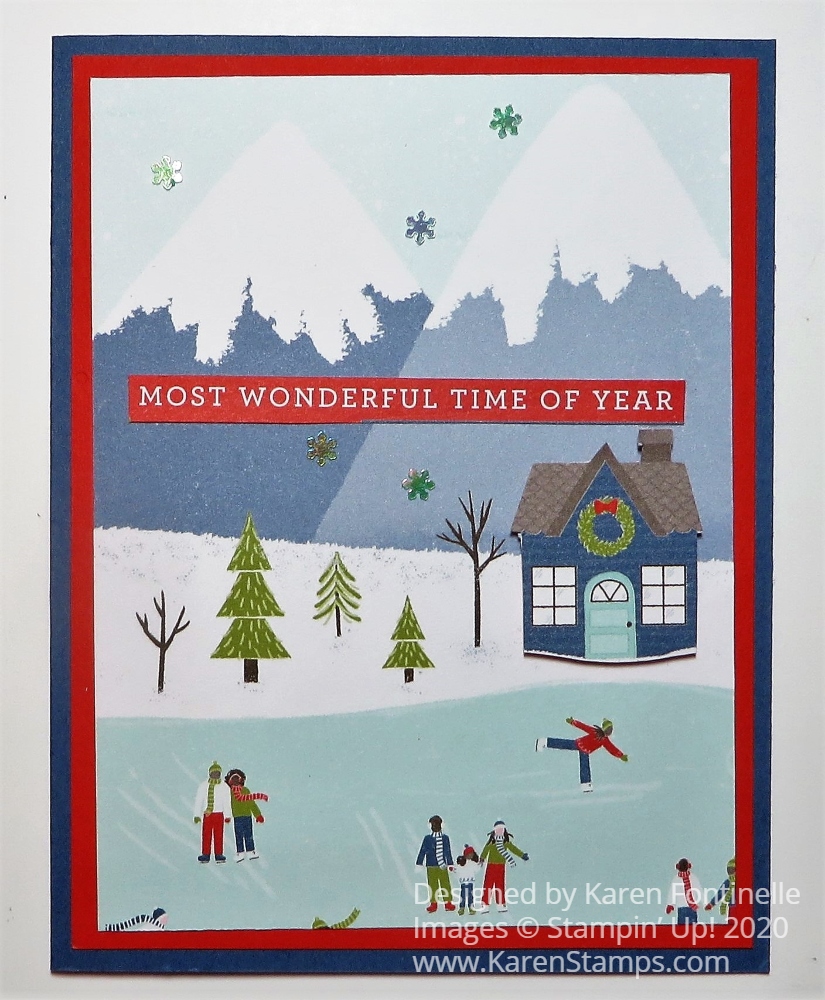
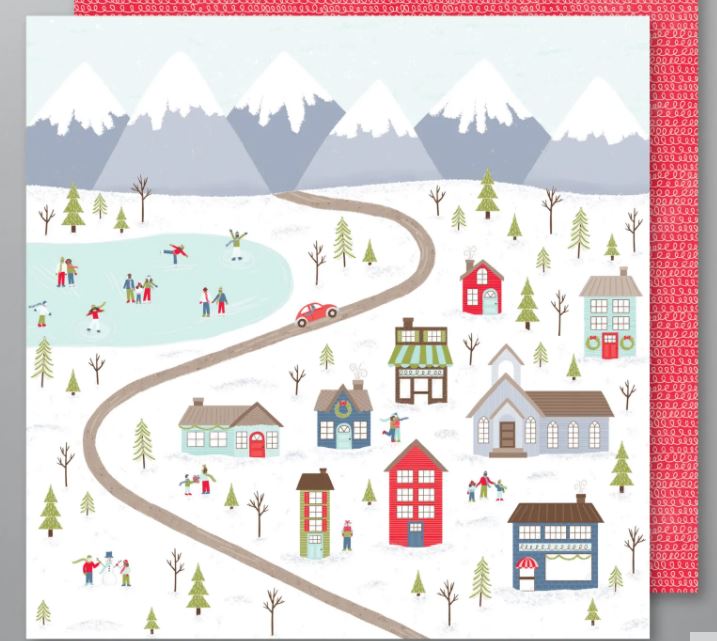
It might kill you to cut into this 12″ x 12″ paper with this snowy mountain scene, but if you do, you can make an easy Christmas card like this Trimming the Town Scene Christmas Card. The whole paper could also be used for a scrapbook page or even a framed piece that you could add some extra pieces to.

For this card, I cut out a top portion of the Trimming the Town Designer Series Paper so I could get the mountains in the scenery. I could have stopped there, really, but I also cut out a house on another piece of designer paper and popped that up on Dimensionals on the front of the card.

Trimming the Town DSP Scene

For a greeting, I cut out the words on another sheet of the Trimming the Town Designer Paper that has Christmas greetings of all sorts in many languages! That’s an easy way to put a greeting on your card!

For the card base, used Misty Moonlight Cardstock with a layer of Poppy Parade. Poppy Parade is the coordinating color with this Trimming The Town Designer Series Paper. I have also used Real Red, though, also. On the inside of the card I would put a layer of Whisper White on which to stamp or write my greeting since the Misty Moonlight is a dark color.

If you want to make some quick and easy Christmas or winter cards and you don’t have any other use for this large paper, you can certainly cut it up and use it for cards. Maybe add some houses or images from other pages to embellish your scene. It’s really fun to play with! Plus I added some Adhesive-backed Snowflake Sequins to the card.

Stampin’ Up! recommends ordering anything you want by Christmas by December 10th. We are already being warned on the news that shipping this holiday season may be delayed so I suggest ordering anything you want for your Christmas card assembly soon!

Here’s another card I made earlier using the Trimming The Town Designer Paper on which I made my own little scene!

If you have this designer paper, see if you can bring yourself to cut into this paper and make some cards like my Trimming the Town Scene Christmas Card.

SHOP STAMPIN’ UP! ONLINE!

Get The Last Half of My 12 Weeks of Christmas Holiday Emails!

Reindeer

The “12 Weeks of Christmas” is my special Thank You gift to my Stamping With Karen Mailing List subscribers. Each Wednesday for 12 weeks leading up to Christmas I send out an email with an exclusive holiday project to give you an idea complete with supply list and instructions. You can use it exactly or use it as inspiration to come up with your own creative project.

This is absolutely FREE and I’m excited to share these project ideas with you! This is my annual gift to my mailing list subscribers, and I love sending out these weekly emails!

The 12 Weeks of Christmas is ONLY for members of my mailing list, however, and I have already sent out five weeks.  But you don’t have to miss any more weeks if you sign up for my Mailing List TODAY by 1:00 pm CT to receive Week 6! We have already done 5 weeks of Christmas card ideas and starting today it will be Gift Ideas, then on to Gift Wrap, Bags, and Tags.

Just sign up in the box below or in the box in the upper-right corner of my blog.  You will get a free gift just for signing up!  We’d love to have you!

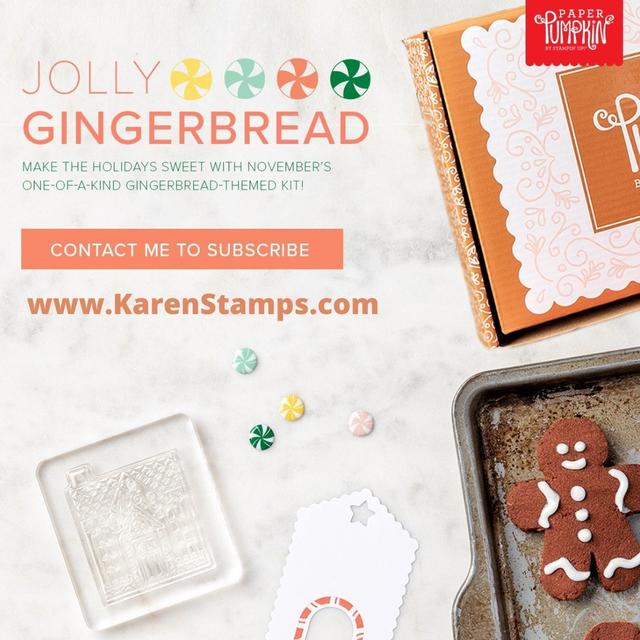
Last Day To Get the Jolly Gingerbread Paper Pumpkin Kit!

Today is the 10th of the month, November, and that means it is the last day you can sign up or join Paper Pumpkin in order to get this November Kit called Jolly Gingerbread! Maybe it’s just me, but at the first glimpse of this kit I was dying to have it! I don’t want you to miss out!

Here is the link to sign up RIGHT NOW!! You can’t miss this cuteness!!

JOIN PAPER PUMPKIN!

But if you want to know what you are buying….! Here is the information!

Paper Pumpkin is our monthly subscription service that offers unique papercrafting projects for crafters of any skill level! In these all-inclusive kits, subscribers receive pre-cut paper pieces, embellishments, ink, and an exclusive stamp set designed to encourage them to explore their creativity. As their subscription continues, subscribers will have a collection of cards—and other creations—for a variety of occasions, in addition to a stockpile of supplies!

Paper Pumpkin provides a fun and easy crafting opportunity for you and it’s an excellent way to introduce new crafters to their papercrafting potential. So it’s really for everyone and all supplies are included!

November’s cute, gingerbread-themed kit contains enough supplies to create one-of-a-kind Christmas crafts! Whether it’s a gift card carrier, traditional card, or tasty-looking tag, this sweet and seasonal kit is the key to heartfelt holiday gifting. With curly cutouts, sugary stickers, and delicious die-cut designs in a special-edition box, a jolly holiday will be on its way with this kit!

That’s enough to convince me! What about you? And look at what someone did with the box on the Paper Pumpkin Facebook Page, shown at the top of this post! Remember last year when someone came up with the idea of turning the Paper Pumpkin box into a haunted house? I loved that!

Paper Pumpkin Haunted House Front

But even if you aren’t going to cut up the Paper Pumpkin box to make a gingerbread house, this is what you CAN make with the supplies. CAN means you can follow the design and directions or you can make something else you prefer.

Paper Pumpkin Jolly Gingerbread Kit Nov 2020

You can also buy Prepaid Subscriptions to Paper Pumpkin in the Stampin’ Up! Online Store just like you would order anything. In fact, if you are trying to reach Stampin’ Rewards with your regular order, a Paper Pumpkin Prepaid subscription might help you reach it! You can buy a 1-month, 3-month, 6-month, or 12-month subscription. You can also purchase kits for gifts! If you buy a prepaid subscription, you will receive an email right away from Stampin’ Up! telling you how to set up your Paper Pumpkin account. Be sure to do this TODAY so that your account will be set up to get the November Kit. They start shipping out right after the 10th of the month!

And you can always skip a month if you want to or need to at any time, or even cancel your subscription, so there is no risk. Stampin’ Up! guarantees every kit.

Sign up now so you don’t get busy and forget and then regret you didn’t get this cute kit in a week or so and see all the cute creations subscribers are making and posting online!

SIGN UP FOR PAPER PUMPKIN TODAY! LAST DAY!

(If you have a Demonstrator you are working with and want to sign up with them, just go to www.stampinup.com and choose their name.)

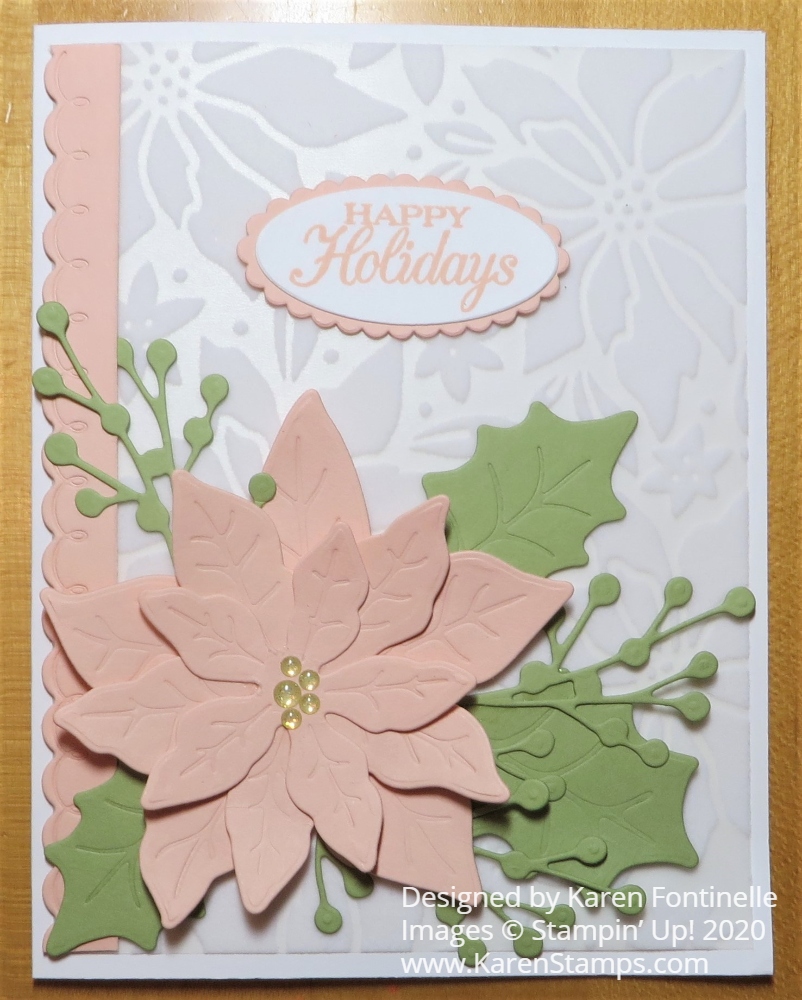
Pink Poinsettia Petals Happy Holidays Card

Pink Poinsettia Petals Happy Holidays Card

I was really happy with the way this Pink Poinsettia Petals Happy Holidays Card turned out. The colors turned out to look pretty nice together with the Plush Poinsettia Specialty Paper in the background.

The card base is just Whisper White with a layer of the Plush Poinsettia Specialty Paper. This paper is beautiful with the flocked poinsettias on white vellum.

The poinsettia petals are all die-cut with the Poinsettia Dies. I used Petal Pink Cardstock and the die-cut leaves are Pear Pizzazz. Each poinsettia and leaf has two pieces – the outline that cuts it out and a separate inside piece that does the embossing of the veins in the leaves and petals. If you have trouble lining them up, just keep turning the inside piece until it fits in the outline die. You might even want to mark one of the lined up points with a Sharpie on both pieces. Those little green sprigs are also a die in the set. I think they add a lot.

The Petal Pink strip along the side was just in my bag of cardstock! It is from the Peony Dies. I think it is accidentally perfect! It adds a little something along the side of the card without taking away from the poinsettia and doesn’t take up any extra space like a ribbon with a bow would.

The greeting is in the Poinsettia Petals Stamp Set as well as a very nice “Merry Christmas” greeting. I stamped it in Petal Pink Ink on Whisper White and die cut with the Layering Ovals die along with a Petal Pink scalloped oval die for the layer. I think it is small enough to not take away from the poinsettia and fits just fine in the space.

For the poinsettia center, I just added some Gold Glitter Enamel Dots. I adhered three of the smallest ones and one the next size up and that looked perfect. As I was cleaning up, I had a Dot stuck on my finger from the package so I stuck that on the flower center too! I thought about using the Gilded Gems but for this card, I liked the Gold Glitter Dots better and they are better for mailing.

This card is a little fussier to make so I don’t know that I would want to make many multiples of it with all the die-cutting, yet now that I have the card design maybe it wouldn’t be too bad – or too bad for you to copy. Click HERE to see another poinsettia Christmas card I made, this time with the traditional red poinsettia.

This Poinsettia Place Suite of products is all so beautiful it’s worth a little extra effort so try your hand at a card something like this Pink Poinsettia Petals Happy Holidays Card.

Shop Stampin’ Up! Online HERE!

Freezin’ Fun Penguin Merry Christmas Card

Freezin' Fun Penguin Merry Christmas Card

You can’t help but be happy when you stamp with the Freezin’ Fun Stamp Set like on this Freezin’ Fun Penguin Merry Christmas Card! It is the cutest stamp set and so much fun to stamp with. Whether you use one or more of the whimsical characters and accessory stamps in the set, you can’t make anything except a “happy” card, as my friend would say.

The card base is Balmy Blue with a layer of the Snowflake Splendor Designer Series Paper. Sometimes it’s not what you plan to use, it’s what piece of paper you spy when you get out your package of designer paper. In this case, I saw this piece with the various purples and wanted to use it on my card. To help the designer paper stand out a bit, I put a layer of Whisper White behind it.

I found the scalloped circle die cut piece already in my package of Balmy Blue so I tried to just use that. I stamped the little penguin on Whisper White and die cut with the Layering Circles Die. Since the penguin looks like he is jumping (or there is a snowboard in the stamp set you can use with him) I decided to stamp a pile of snowballs he is jumping over! Then I also stamped and die cut with the Freezin’ Fun Stamp Set and the Freezin’ Friends Dies. If you want both, get the Freezin’ Fun Bundle and save 10%.

The images are all colored in with Stampin’ Blends alcohol markers, but you can use ink, Watercolor Pencils, or whatever you like. On the die cut circle with the penguin I also stamped some snowflakes in Balmy Blue, stamped off once.

After adhering the scalloped circle with the stamped image to the card front, I adhered one small tree flat on the Whisper White circle but popped up the other two trees with Stampin’ Dimensionals®. I meant to put the image pretty far into the lower right corner of the card, but leave room for aa tree or two, so I think I could have moved it over to the right a little bit more.

The greeting is stamped in Balmy Blue from the Arrange A Wreath Stamp Set and die cut from one of the Ornate Frames Dies. And for a little bling, I added the Blue Adhesive-Backed Gems.

You could make this same card design with any of the characters in the Freezin’ Fun Stamp Set. If you like fun and whimsical Christmas cards, then this is the set for you!

SHOP STAMPIN’ UP! ONLINE HERE!

It’s Time For “Curvy Celebrations”!

Quite Curvy Variety Bundle Banner

Not only is today Election Day but you can purchase an early-release group of products called Curvy Celebrations! Celebrate with curvy stamps, dies, and more! Designed for a variety of special occasions, so you can get a lot of use out of it.

This set will be in the upcoming January-June 2021 Mini Catalog but you can purchase it now! If you purchase the entire group, the Quite Curvy Variety Bundle (158396), you will save 10%! The Christmas items in this Bundle are only available until January 4, 2021. The rest will be in the Mini Catalog in January. The last “safe” day to order before Christmas is December 10th, according to Stampin’ Up! but I’d order as soon as possible. Click on the images below.

Curvy Celebrations Pt 2
Curvy Celebrations Pt4

The best value is the Quite Curvy Variety Bundle. You get these items:

  • Quite Curvy Stamp Set
  • Curvy Dies
  • Curvy Christmas Stamp Set
  • Classic Christmas 6″ x 6″ Designer Series Paper
Quite Curvy Variety Bundle Image
https://su-media.s3.amazonaws.com/media/Promotions/2020/Q4_OOP/flyer/10.27.20_DEMO_FLYER2_Q4_OOP_NA.pdf

Check it all out in the Stampin’ Up! Online Store TODAY!

If you click on the three horizontal bars on the top left of the Home Page of the Store and click on the “What’s New” category, you will see the Quite Curvy Variety Bundle listed. Or use the link above to directly to my page.

Have fun looking over this new group of products designed to give you additional options for your holiday projects and cards!

Shop Stampin’ Up! Online HERE!

Plaid Tidings Christmas Wreath Card

Plaid Tidings Christmas Wreath

Fresh off making a Thanksgiving card with plaid designer paper, I wondered if I could do one with a wreath and I came up with this Plaid Tidings Christmas Wreath Card.

The card base is Real Red (although I could have used Cherry Cobbler also). Then I chose this red and green plaid pattern in the Plaid Tidings Designer Series Paper. I die cut a wreath with the Wreath Builder Dies. I was going to leave it as is, but I ended up cutting out another partial wreath out of Granny Apple Green for contrast and cut off little sprigs to add on to the main wreath.

I die cut several flowers of different sizes out of Real Red Cardstock with dies in the Wreath Builder Dies. Since the die punches out out a tiny center circle from the flowers, I decided to cut very small pieces of Bumblebee Cardstock to adhere to the back of every flower to give it a yellow center. I wouldn’t have had to since I planned to add a jewel to the center, but I did it. A little tedious, though! After placing and adhering the flowers around the wreath, I added Gold Glimmer Enamel Dots to some of the flowers.

The greeting is stamped in Real Red ink on Whisper White Cardstock from the Banner Year Stamp Set and die cut from the Tasteful Labels Dies. Then this greeting was layered on a Real Red die cut from the Ornate Frames Dies. I also added Gold Glimmer Enamel Dots to each end of that piece.

After I got the wreath adhered to the card front, I added a small bow to the top of the wreath. The ribbon is the All The Trimmings Ribbon Combo Pack. The red color is actually Poppy Parade trimmed in gold but it looks fine on my wreath. The other color in the ribbon combo is Old Olive.

The Arrange A Wreath Bundle is a great one to own and use well past Christmas. You know you can make a wreath for any occasion on any card or project so don’t think it is just for the holidays. Here is a Thanksgiving card I made with the Bundle. Change up the colors for a birthday or whatever occasion you need.

If you start making Christmas cards now, you will be ahead of the game and not so rushed right in the midst of the holidays. It’s already November! So get a head start, maybe make a version of this Plaid Tidings Christmas Wreath Card that is a little bit simpler. But now that you have the design it won’t be so hard to duplicate! Have fun stamping!

SHOP STAMPIN’ UP! ONLINE HERE!