
When you are going to make a batch of Christmas cards, whether it’s a few or a hundred, plan to make them “assembly-line style”. I learned early on not to make one whole card, then another whole card, and then another. Instead, gather all your supplies and do each step for ALL the cards. Whether you are cutting or stamping or adding embellishments, you will do it faster if you do it over and over again. And if you are making a whole pile of cards, you almost get “muscle memory” for doing each step and that makes it even easier!
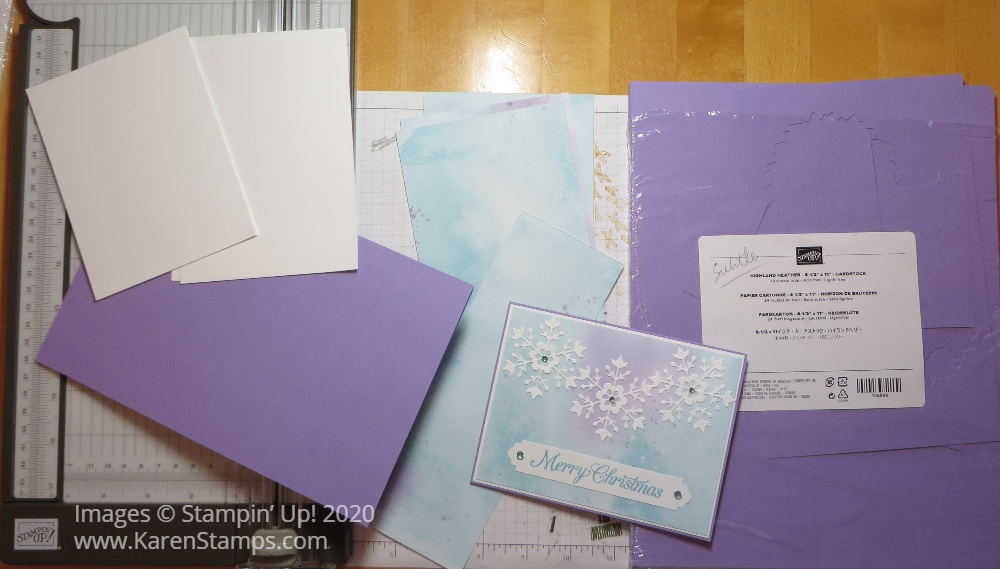
I am copying a card Snowflake Splendor Merry Christmas Card, I already made awhile back (in August!!) but liked it a lot. Since I like to make a lot of different cards from all the ideas I see in the catalogs and online, I’m making many different designs and maybe five copies of each one. The only problem is that when I go to send them, I have to choose which card to send to which person! You might choose one card design and make 50 cards the same. I’ve done that, also. Then everyone just gets the same card! And your muscle-memory gets really good at making the cards!
The first step, as you see in the top photo is to cut all your paper and score the card base as well. Cut the card base, layers, designer paper, scrap pieces….everything you need to make the card. Make little piles of the same pieces so you don’t get them mixed up.
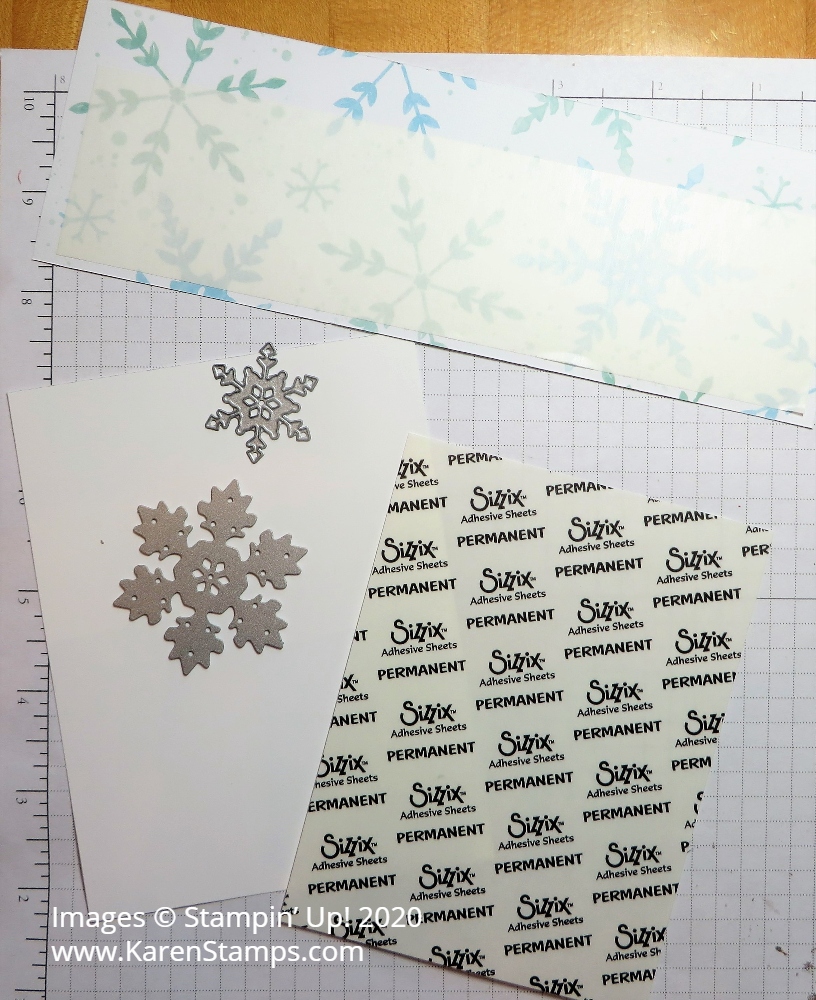
Now amazingly, this time I remembered to use the Adhesive Sheets before cutting out the snowflakes! This makes it easier to adhere them because they will already have adhesive on all the little areas from the Adhesive Sheets. No need to add tiny drops of glue! The snowflakes are made with the So Many Snowflakes Dies.
For this card, I diecut all the white snowflakes out of the Whisper White layer I was going to use under the designer paper. Shhh! Don’t tell anybody! They’ll never know!
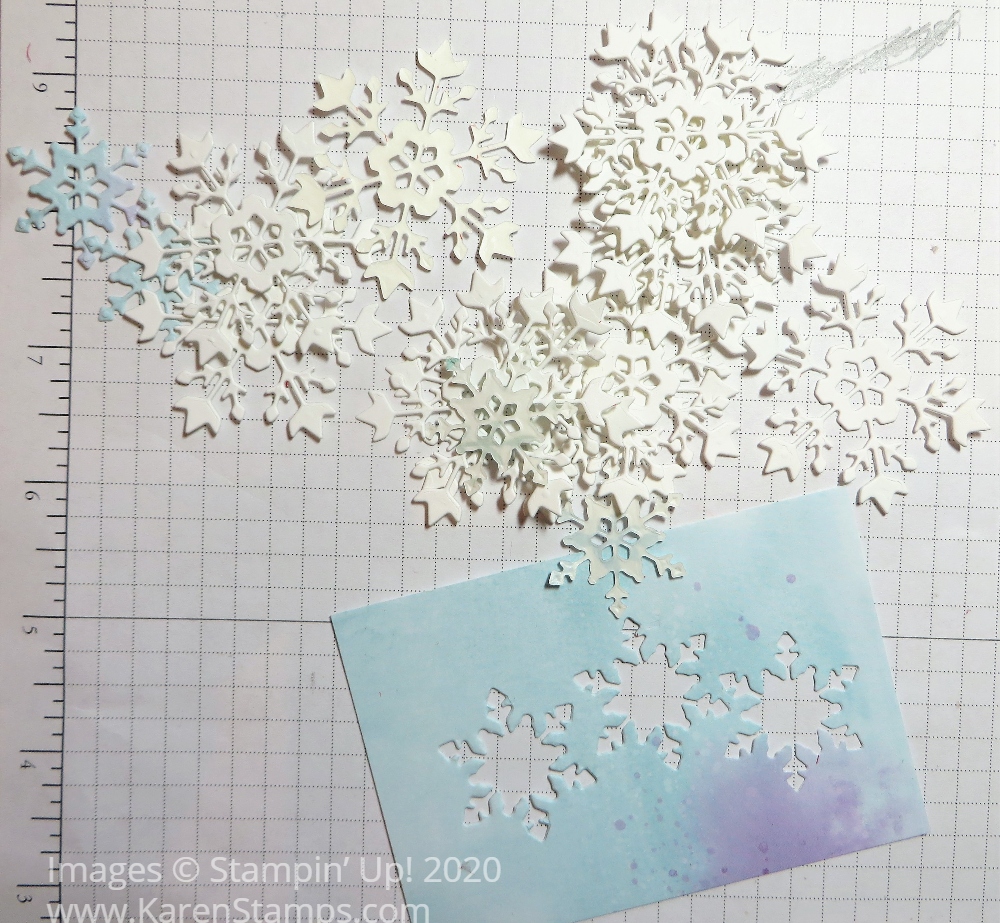
Adhere the Whisper White layer to the Highland Heather card base. And since I used the Adhesive Sheets on the back so I could diecut the snowflakes, I don’t even have to use glue, just adhere the Whisper White to the card. Do all the cards like this.
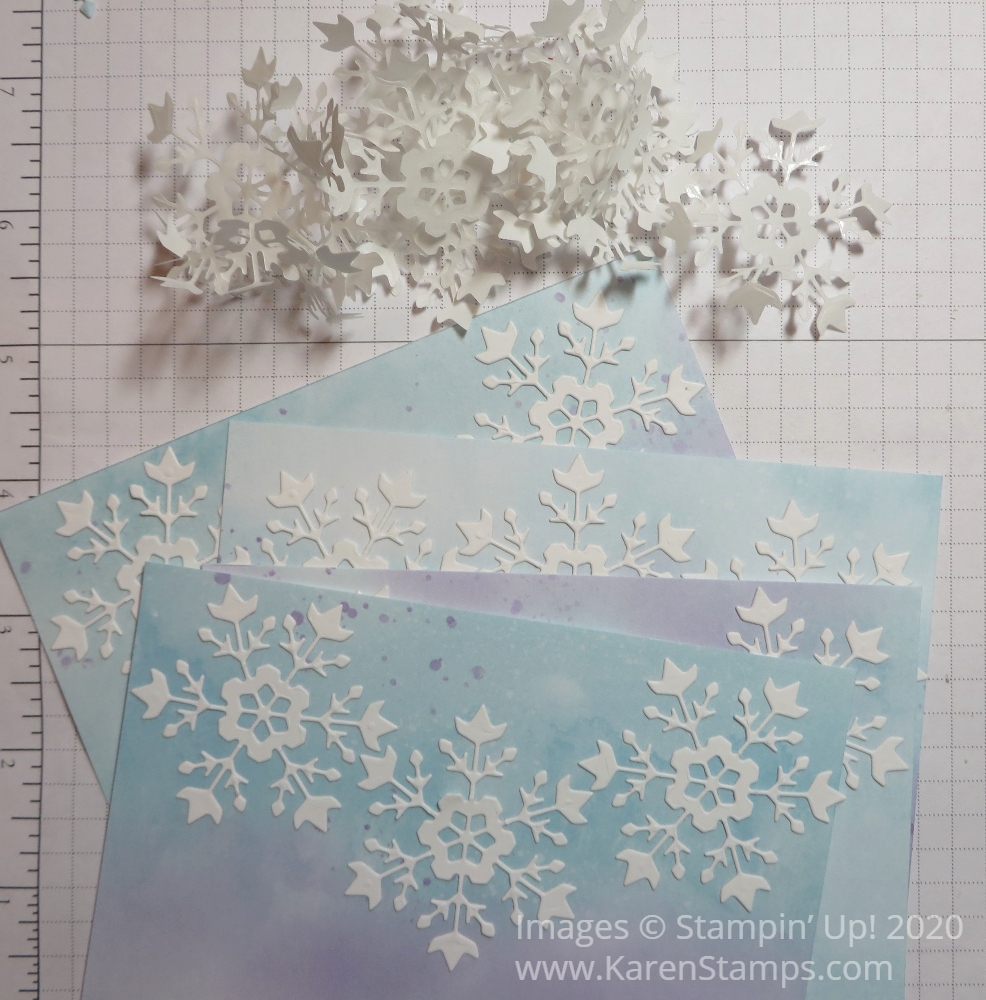
Adhere all the die-cut snowflakes to all the pieces of the watercolor pattern in the Snowflake Splendor Designer Series Paper. The Take Your Pick tool helps to separate the backing of the adhesive sheets from the snowflake.
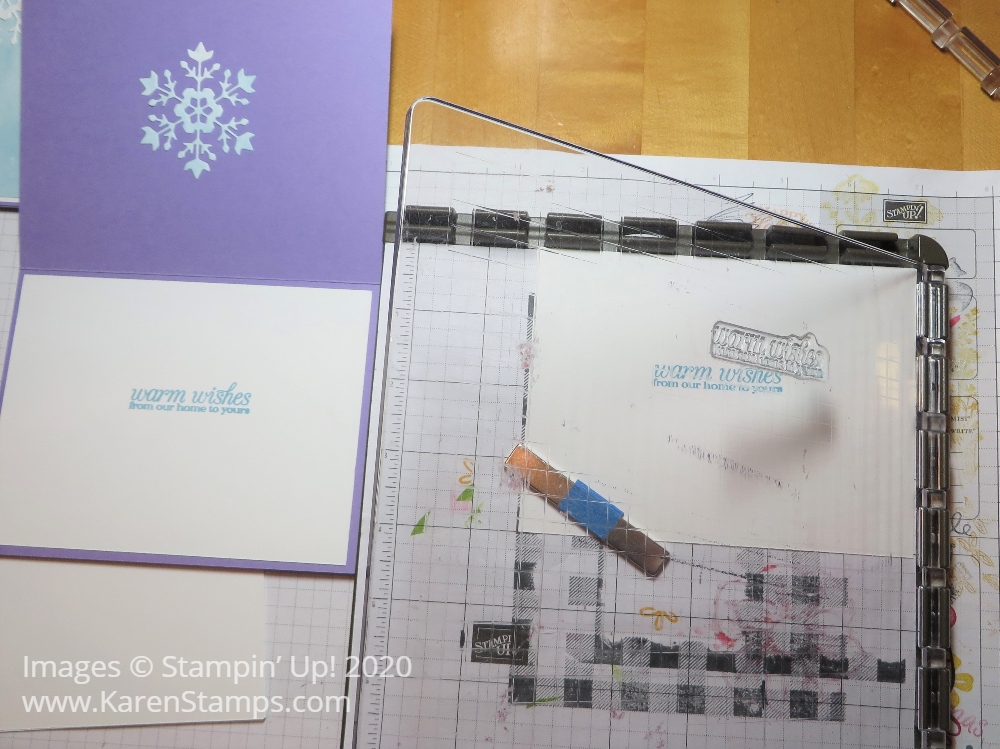
When you have stamping to do making Christmas cards, it’s really useful to have the Stamparatus! Get the words or whatever images lined up perfectly and then stamp with the Stamparatus! If the inked image is incomplete, you can just reink the stamp and stamp again as long as you don’t move the paper!
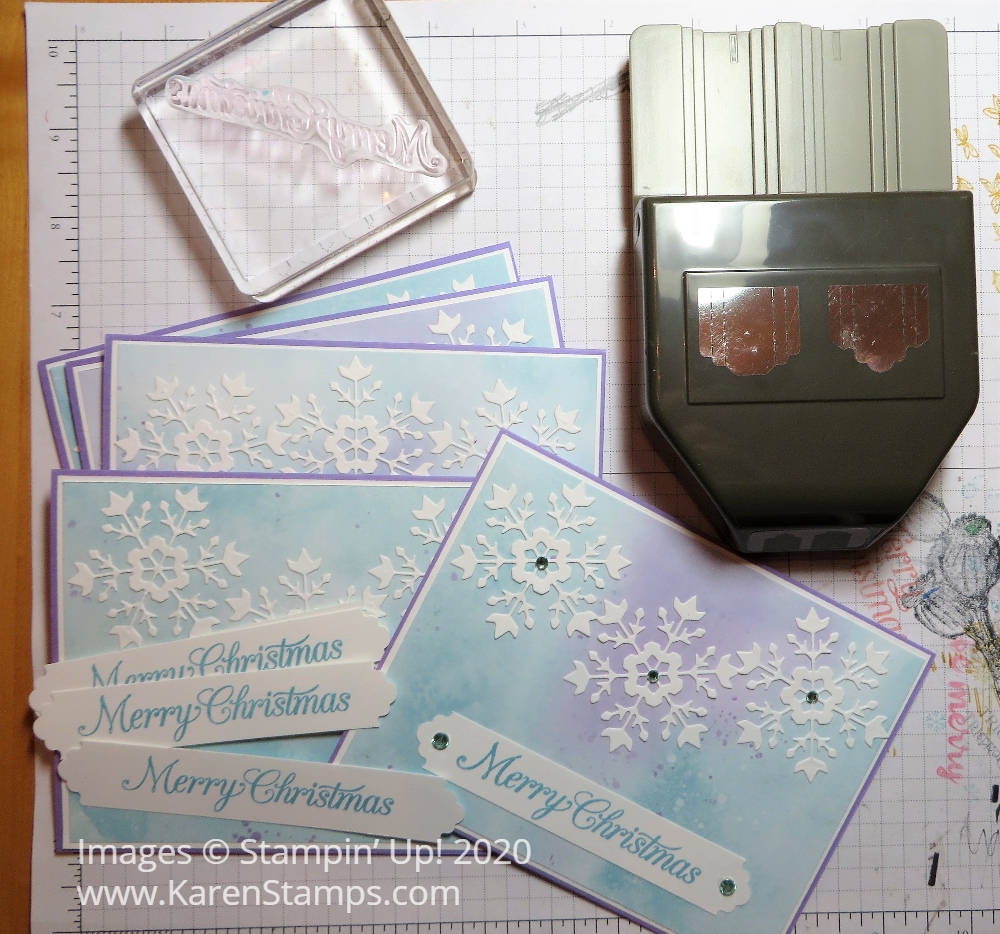
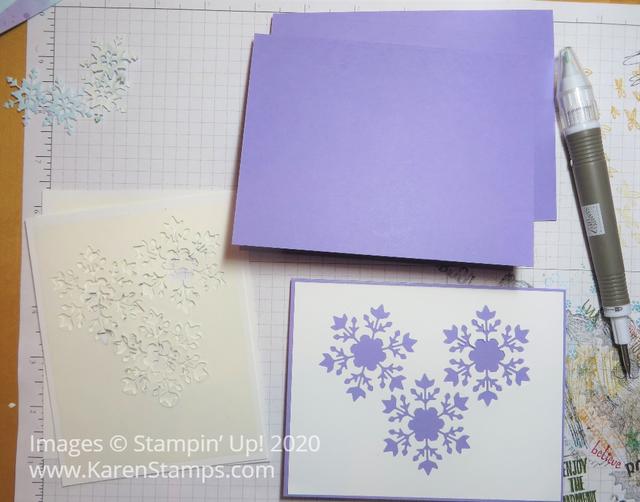
Stamp and punch our all the greetings so they are ready to go on your cards. This greeting is from the Poinsettia Petals Stamp Set and is punched with the Lovely Labels Pick a Punch.
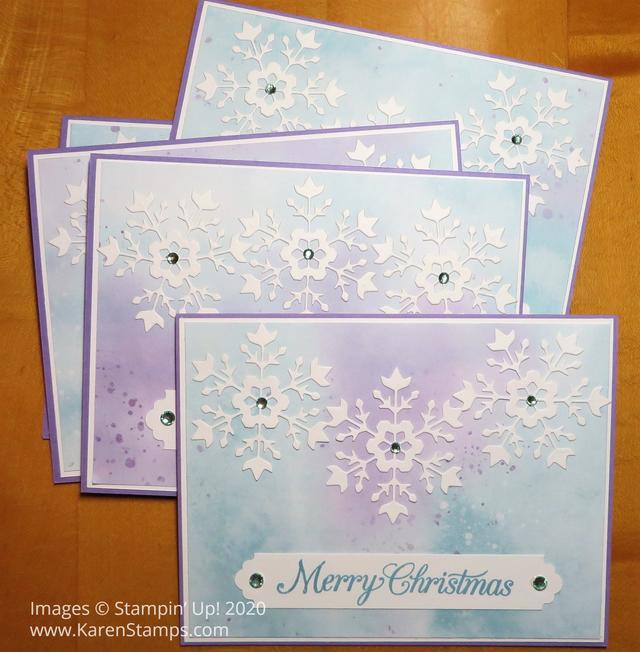
Finish assembling your cards by adding some Holiday Rhinestone Basic Jewels. Inside the card, adhere the smaller designer paper snowflakes you already cut out and stamp the greeting using the Stamparatus on another layer of Whisper White, also from the Poinsettia Petals Stamp Set. Then you have a stack of Christmas cards all finished!! Make them assembly-line style!