It’s time to subscribe to Paper Pumpkin in order to start the New Year off right and receive the January 2020 Kit in the mail very soon!
Paper Pumpkin’s first kit of 2020 is all about L-O-V-E. Whether you want handmade favors for Valentine’s Day, a bridal shower, or a remarkably romantic wedding, this month’s kit has everything you need to help you celebrate your favorite friendships and love stories. So make it a “LOVE”-ly year with Paper Pumpkin!
About the January Kit
Makes 20 treat bags + 10 mini cards and envelopes
Card size: 3″ x 3″ (7.5 x 7.5 cm)
Envelope size: 3-1/8″ x 3-1/8″ (7.8 x 7.8 cm)
Bag size: 3-1/4″ x 4″ (8.2 x 10 cm)
Coordinating Stampin’ Up! colors: Crushed Curry, Highland Heather, Mint Macaron, and Rococo Rose
You can subscribe to Paper Pumpkin on a monthly basis by clicking the link right below. You can always skip a month or cancel any time.
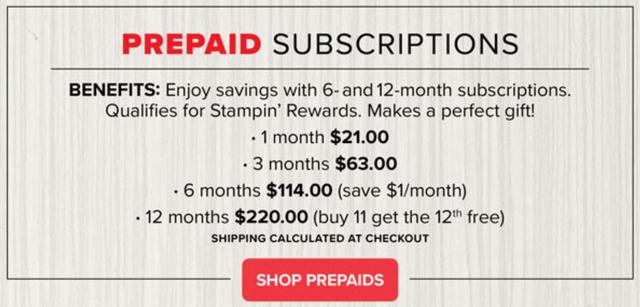
Add a Prepaid subscription to your Stampin’ Up! order, perhaps getting Sale-A-Bration benefits or even Host Rewards! Choose the 3 months and get one SAB item FREE (although you will pay shipping on it, if by itself) or 6 months for two SAB items (or one $100 choice).
You can get more from the I’ll Bee Yours kit when you buy the Heart Punch Pack (item 151292) from the 2020 January–June Occasions Mini Catalog. Both punches coordinate with the heart stamp in the kit so you can craft for love-filled occasions now . . . and later!
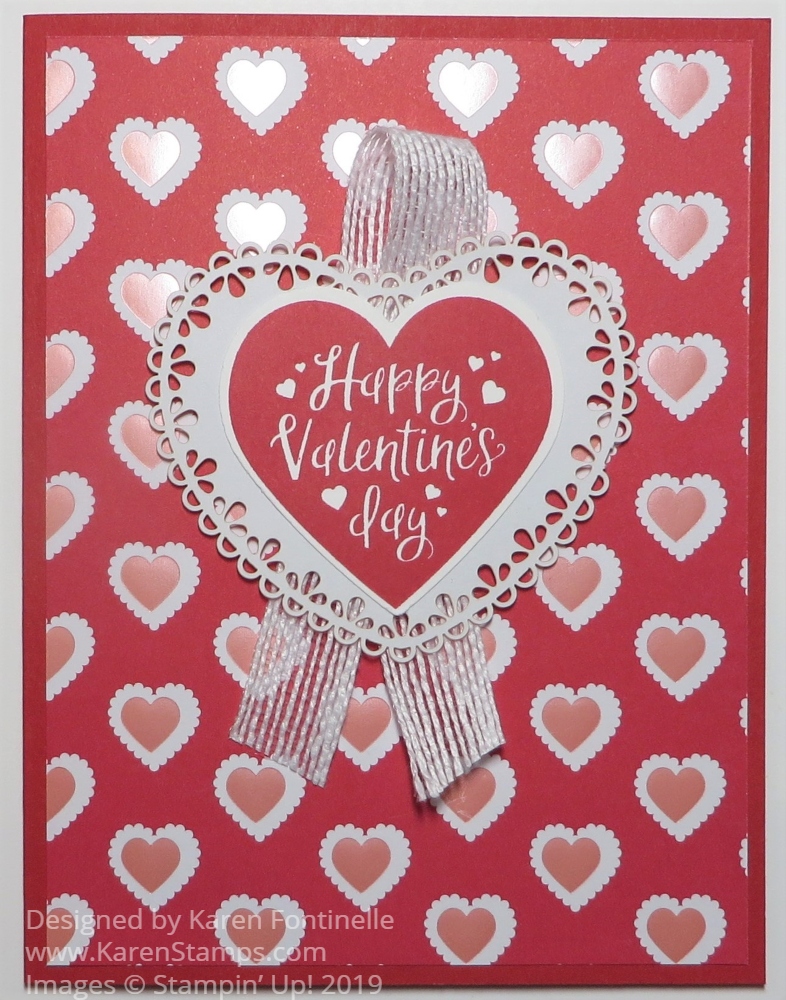
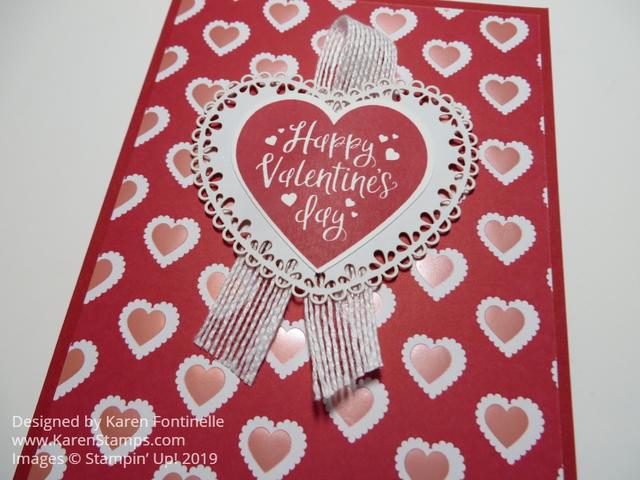
You “might” be able to tell on this From My Heart Valentine’s Day Card that the designer paper has a few pink foil accents. Can you see the shine on the little pink hearts in this photo? There was something about this particular design in the package that really caught my eye!
The doily comes in the package of Heart Doilies. The doilies are Real Red and Flirty Flamingo, but if you flip them over to the back, they are white, which you can also use! So you really get three colors of doilies.
I flipped my doily over to the white side and added the “Happy Valentine’s Day” greeting. That is a stamp in the Heartfelt Stamp Set. It is punched out with one of the heart punches in the Heart Punch Pack. You can buy both the Heart Punch Pack and the Heartfelt Stamp Set in the Heartfelt Bundle and save 10%! The punched heart doesn’t really fit inside the Heart Doily but it looks okay I think.
For an added embellishment, I took a piece of Whisper White 5/8″ Flax Ribbon and just adhered it underneath the doily with a little twist at the top and the tails hanging below the doily. Then I popped up the whole thing with Stampin’ Dimensionals.
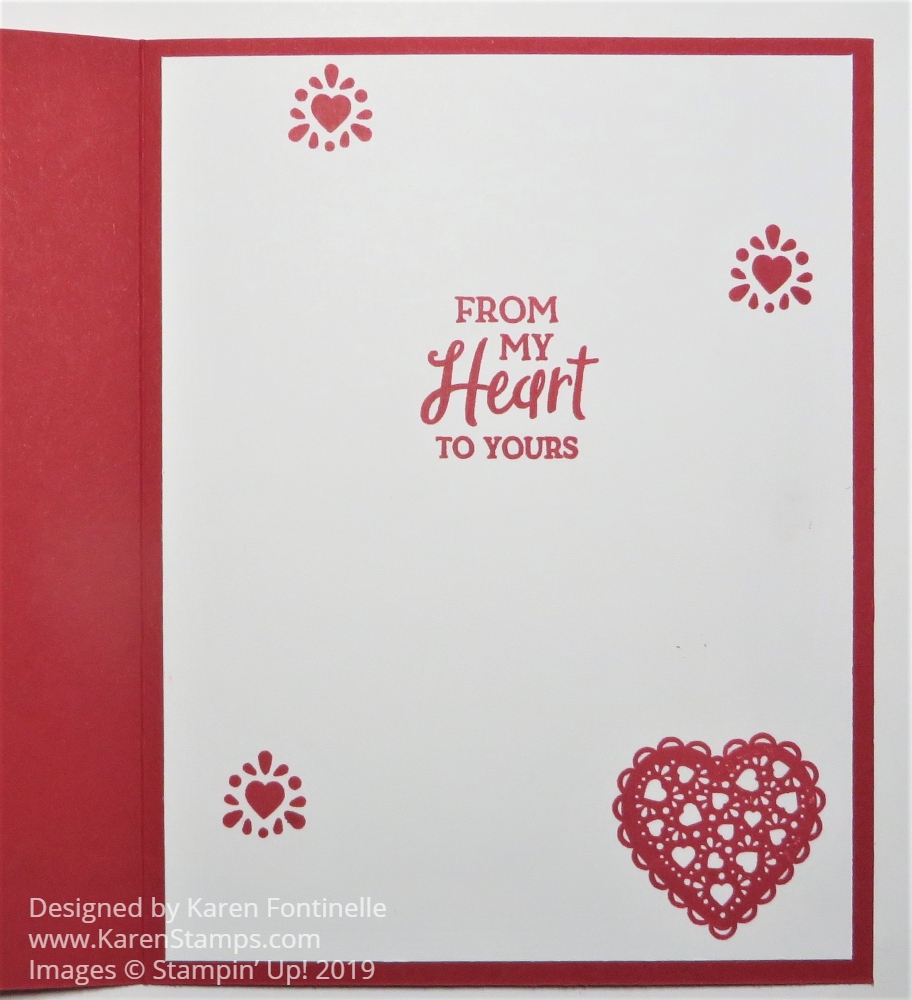
I needed a layer inside the card since the Real Red is rather dark. I stamped a greeting from the same stamp set on a piece of Whisper White and added a heart in the bottom corner. Somewhere along the line, I got a tiny ink smudge on the other side of the card, so I stamped another little heart over it to cover the smudge. But to balance that out, I had to stamp a few more little hearts so you can see the hearts are maybe a bit overdone!
This was really an easy valentine card to make! It’s going to be fun to play with all the hearts and other products in the Suite to make all kinds of valentines! Of course, hearts aren’t just for valentines, so you can use the hearts for other occasions throughout the year!
I think this Peaceful Poppies Suite is one of the most beautiful and has so much creative possibility! While I don’t have the whole suite yet, I have one Bundle and can tell you there are lots of ways to use just that bundle to make wonderful cards and things.
Watch this Stampin’ Up! video and you’ll find out all kinds of things about the Suite, like how they named everything! I watched it twice because there was so much information in it!
You’ll find out how the beautiful Peaceful Poppies Designer Series Paper was designed and that will make you want it even more. Although I have a sample, I can’t wait to get the whole package.
Check out this quick video as they show each paper in the collection:
Check out this post and this post about two cards I have put on my blog if you would like to see a couple of easy cards to make with these poppies!
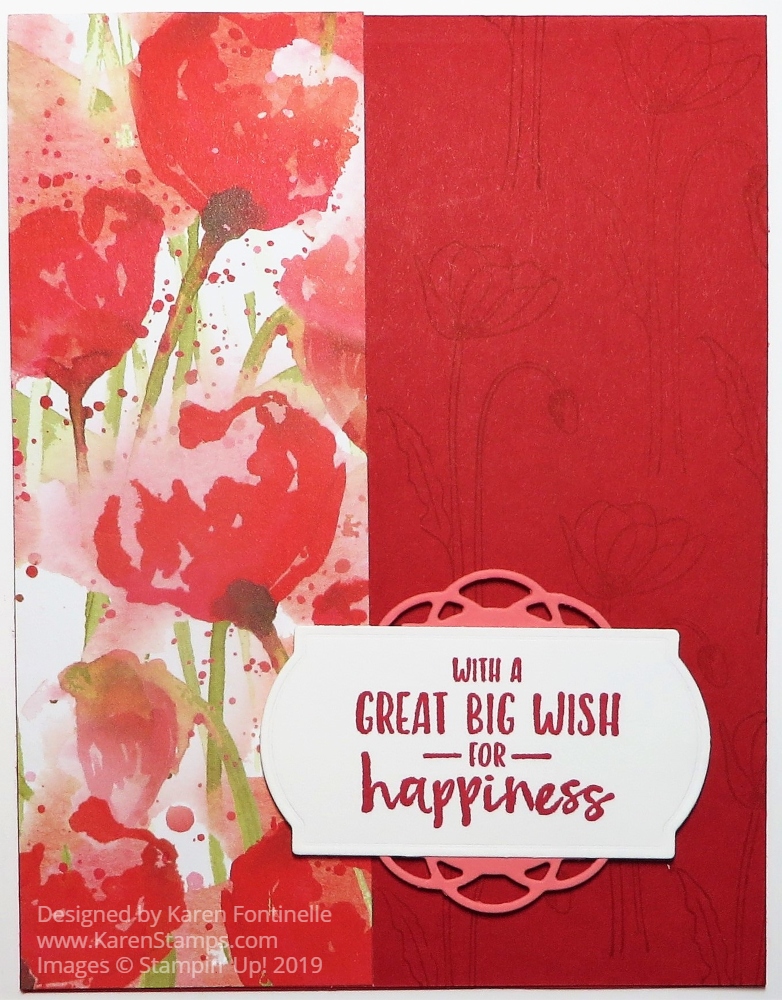
This Peaceful Poppies Happiness Card is another fairly simple card to make! This card opens at the top instead of the side just for something different. It uses a strip of the beautiful Peaceful Poppies Designer Series Paper. Just wait until you get your hands on this beautiful designer paper!
To make this card, the card base is 11 1/2″ x 4 1/2″, folded in half with the fold at the top. I chose Real Red Cardstockalthough I don’t think that’s actually a coordinating color with the designer paper, but I think it looks fine together.
For a little extra interest, I stamped a poppy and stem from the Painted Poppies Stamp Set on the Real Red cardstock that isn’t covered by the designer paper. I inked it up and stamped off before stamping on the card. I could also have used Versamark Ink for that watermark look. If you had ribbon, you could wrap some ribbon around the designer paper before adhering it to the front of the card.
The greeting is from the Sending You Thoughts Stamp Set, one you can get FREE during Sale-A-Bration with a $50 purchase. I stamped it on Whisper White with Real Red ink and then die cut it with a label die in the Painted Labels Dies. Then I used Flirty Flamingo Cardstock and die cut another label in the same set, cut it in half and used it under the top and bottom of the greeting. It just adds a little something although just the greeting die cut with that label die with a little embossed border around the edge was just fine by itself.
You will probably want to get the Painted Poppies Stamp Set and the Painted Labels Dies together in the Painted Poppies Bundle and save 10%!
Check out the whole Peaceful Poppies Suite and see what you’ve GOT to put on your next Stampin’ Up! order! Remember about Sale-A-Bration and getting a free SAB item with every $50 you spend!
Today is the day we’ve been waiting for! Sale-A-Bration begins and with every $50 Stampin’ Up! purchase, you can choose a Sale-A-Bration product in the brochure! And to help you, the Occasions Mini Catalog is LIVE today with all new spring and summer products!
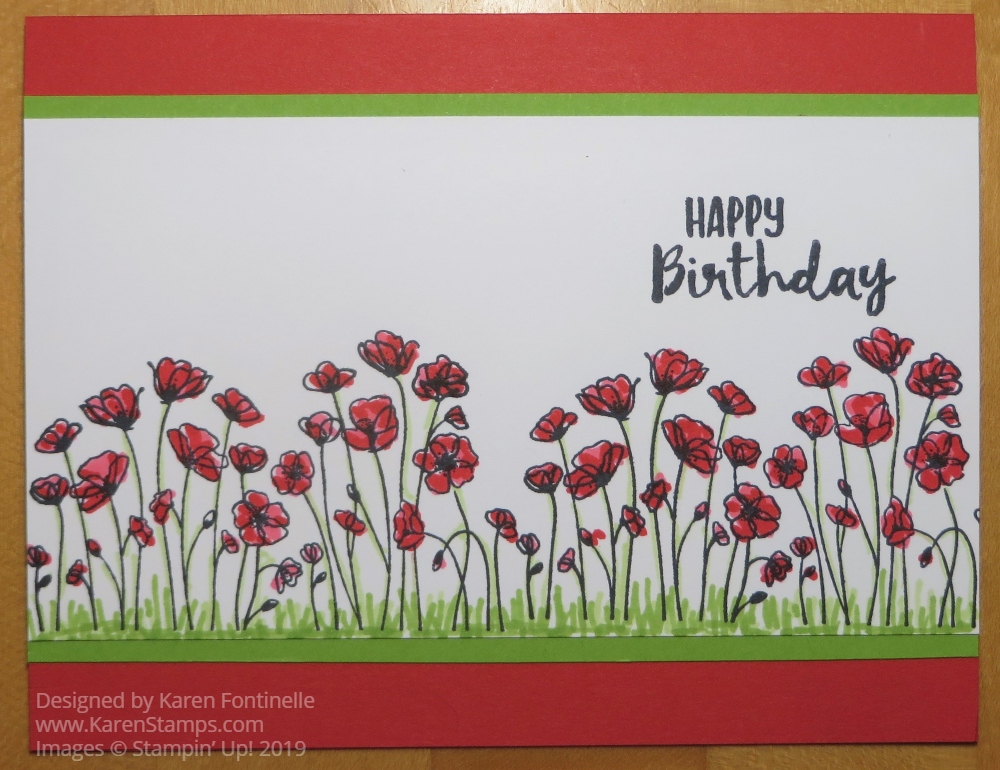
One of the products that I think will be the most popular is the Painted Poppies Stamp Set. I made this easy card with just some basic stamping and coloring by stamping the group of poppies twice and then quickly coloring in the flowers and grass with the Stampin’ Blends markers. I didn’t color “carefully”, I just dabbed some Light Poppy Parade marker on all the flowers and then went back and dabbed on a little bit of Dark Poppy Parade. I used Granny Apple Green Blends on the stems and drew in some grass.
The greeting on this card is from the Sending Thoughts Stamp Set, FREE with a $50 purchase during Sale-A-Bration! You will find it under the Sale-A-Bration category in the Online Store and in the SAB brochure. I simply stamped it in Memento Black Ink right on the card front to keep things simple! Sometimes we forget “simple”! The card base is Poppy Parade with a bit of Granny Apple Green Cardstock showing under the stamped image.
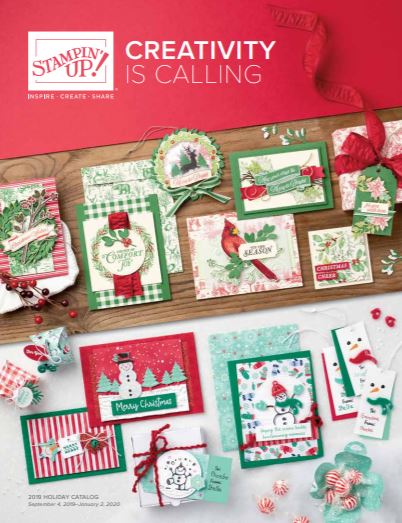
Today, January 2, 2020, is the LAST DAY for the HOLIDAY CATALOG! Where did the time go?! It seems like such a short time ago that we were SO excited to have the Holiday Catalog coming out! All the excitement of the holidays and the creative thrill of all the many holiday cards and projects we would be making were ahead of us. And now it’s all over except for the clean-up! (At least at my house!)
Today is the last day to order anything from the Holiday Catalog, what is still available anyway! Many products were so popular that Stampin’ Up! couldn’t get more in stock in time to be used for the holidays. We have to keep that lesson in mind with every catalog – anything you really love and want, be sure to order it as soon as you can to perhaps save you from a backorder situation.
Stampin’ Up! is doing a different Holiday Catalog Carryover process this year!
Some products will carry over to the next Annual Catalog in June.
Some products will carry over from this Holiday Catalog to the NEXT Holiday Catalog but will not be available in the meantime. If you want any of these now, be sure to order them today! Here is the list:
Holiday-to-Holiday Catalog Carryover Products
Most Wonderful Time Product Medley (item 150705)
Christmas Countdown Project Kit (item 150703)
Please note: The coordinating Christmas Countdown Stamp Set (item 151833) will not carry over.
Jingle Bells Embellishments (item 149598)
Snowflake Sequins Embellishments (item 150443)
Feels Like Frost Specialty Designer Series Paper (item 150444)
Toile Tidings Designer Series Paper (item 150432)
Brightly Gleaming Specialty Designer Series Paper (item 150429)
Christmas Gleaming Stamp Set (item 150464)
Gleaming Ornament Punch Pack (item 150647)
Merry Moose Stamp Set (item 150494)
Moose Punch (item 150652)
Gather Together Stamp Set (item 150589)
Gathered Leaves Dies (item 150662)
Here is the full Carryover Listalthough it includes the products available above (you will see an asterisk on the chart) that won’t be available until the next Holiday Catalog. Anything without an asterisk will be available after today even though it’s not shown in the catalog.
Whenever you are interested in a product and aren’t sure about it, just type in the item number and if you can order it at that moment, it will come up!
And beginning tomorrow, Friday, January 3, 2020, you can begin ordering from the Occasions Mini Catalog (but it’s not very “mini”) and enjoy the benefits of Sale-A-Bration! The catalog PDF’s will be online tomorrow if you don’t have a hard copy of the catalog and of course, you can see the products in the Online Store.
ORDERING DOWNTIME: Ordering will be unavailable from midnight to 3:00 am (MT) while we transition our systems to the new catalog and brochure. Ordering will be restored no later than 3:00 am (MT).
But TODAY…..the HOLIDAY CATALOG! Get what you want!
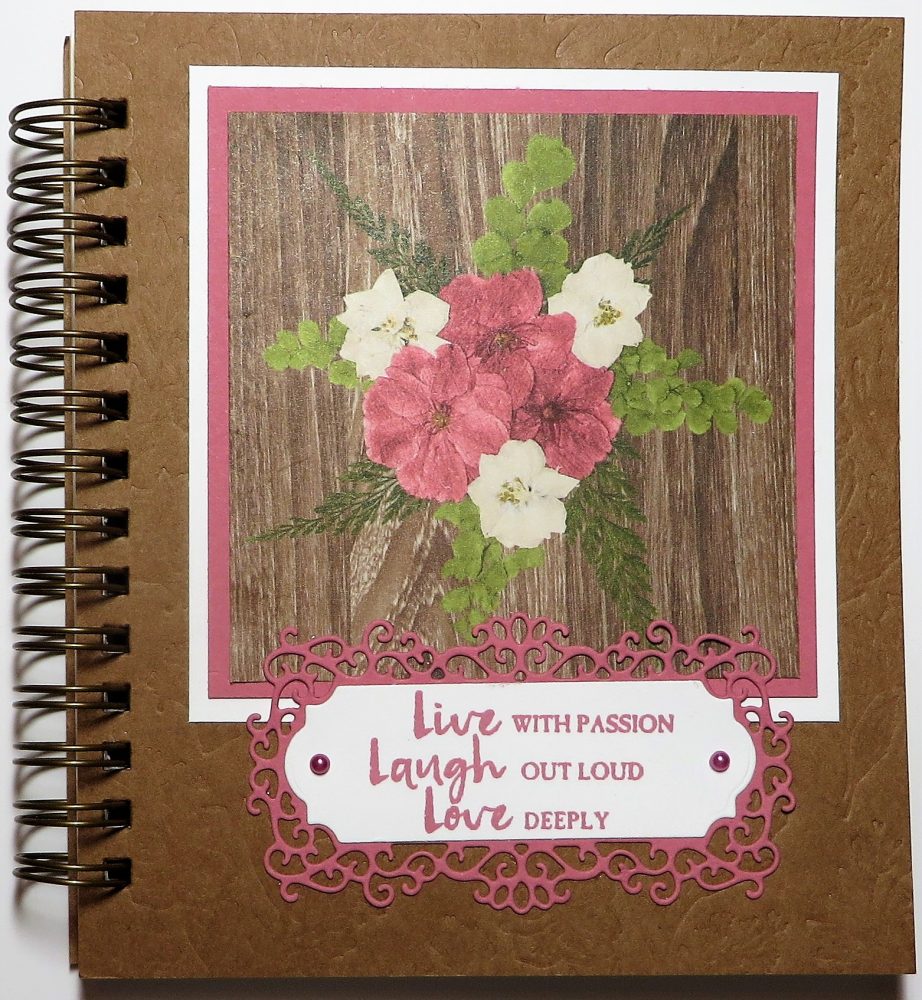
I made this Pressed Petals Journal for a gift for someone, but haven’t mailed it yet! However, it made me think, with the 2020 New Year approaching, if you were looking for just a little journal to begin the New Year, this could be perfect for you!
The Pressed Petals Journal is pretty nice just the way it comes from Stampin’ Up!. The cover is already embossed (or “debossed”) with kind of a floral design and comes spiral bound. The pages inside have some designs already printed and prompts (just several used over and over again). But then you can decorate it however you like! I tried to leave at least some of the cover showing a bit since I like that design.
I changed my mind a few times but ultimately settled on just using the Pressed Petals Specialty Designer Series Paper because it would match the inside of the journal. I just chose one of the printed panels in the paper selection that would be small, especially after I cut it down close to the flowers. I layered it on the coordinating color of Rococo Rose Cardstock. I thought it needed a little brightening up so I added a layer of Whisper White.
The greeting is from the wonderful stamp set Beautiful You. I have always loved this saying and thought it would be a good thought to go on a journal for 2020! It is stamped in Rococo Rose Ink and die cut with a die from the Ornate Frames Dies,then layered the greeting on the frilly Ornate Frame die in Rococo Rose Cardstock. (I told you those dies weren’t just for Halloween!) And I also added a couple of little pearls that may be retired. Inside I even added a few embellishments, like a punched daisy, sequins, and other Flower Faceted Gems.
You’ll find this Pressed Petals Journal in the Memories & More section of the catalog or Online Store. One special thing about the pages in the journal is that they can be torn out and used on card fronts or memory-keeping pages, whatever you like!
At the beginning of each new year, we often feel we want to start something new or resolve to have better habits of all kinds. If you feel like to want to do some journaling in the new year, get this Pressed Petals Journal because it’s not intimidating with expectations at all. It’s small, so you barely have to write anything at all, but if you jot down some memories or thoughts, you might be very happy you did in future years to look back on!
Paper Pumpkin’s first kit of 2020 is all about L-O-V-E. Whether you want handmade favors for Valentine’s Day, a bridal shower, or a remarkably romantic wedding, this month’s kit has everything you need to help you celebrate your favorite friendships and love stories. So make it a “LOVE”-ly year with Paper Pumpkin!
Kit details:
Makes 20 treat bags + 10 mini cards and envelopes
Card size: 3″ x 3″ (7.5 x 7.5 cm)
Envelope size: 3-1/8″ x 3-1/8″ (7.8 x 7.8 cm)
Bag size: 3-1/4″ x 4″ (8.2 x 10 cm)
Coordinating Stampin’ Up! colors: Crushed Curry, Highland Heather, Mint Macaron, and Rococo Rose
Get more from the I’ll Bee Yours Kit when you buy the Heart Punch Pack (item 151292) from the 2020 January–June Mini Catalog. Both punches coordinate with the heart stamp in the kit so you can craft for love-filled occasions now . . . and later! Think: weddings, showers, birthdays, and more! Check out the flyer advertising this super-versatile punch pack in your January kit!
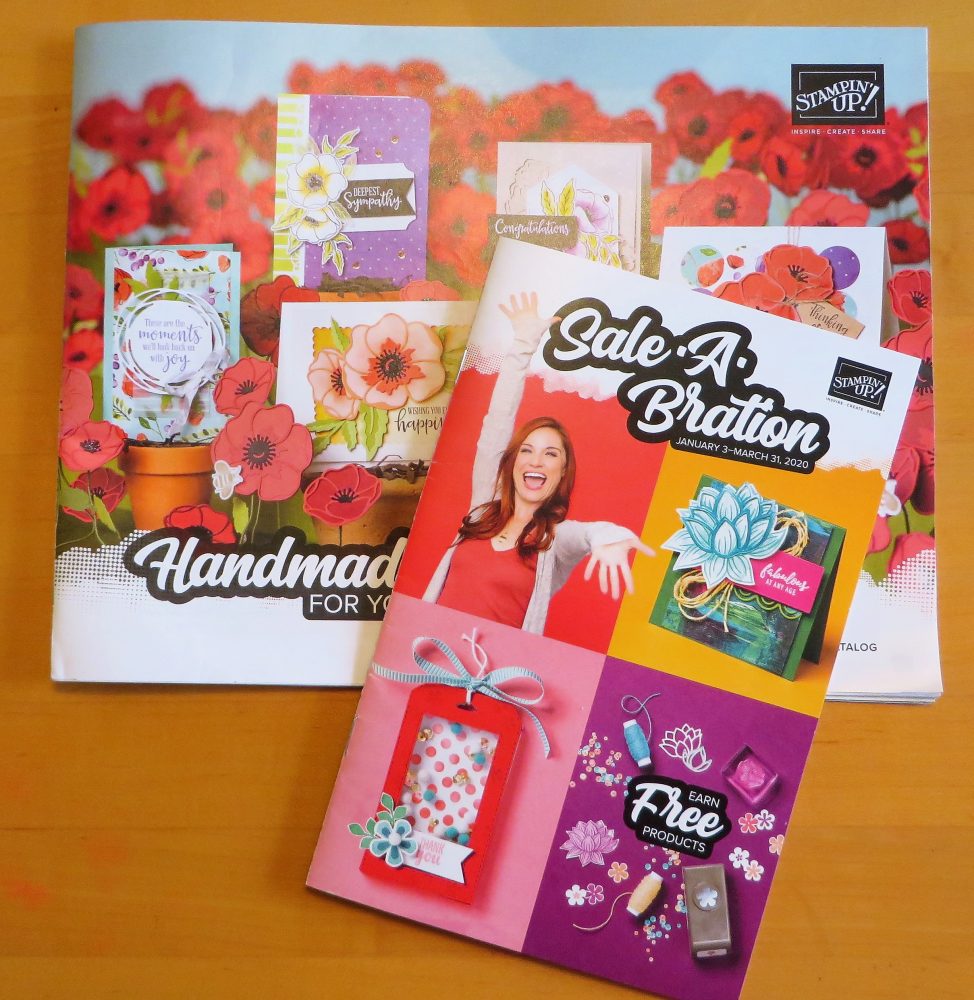
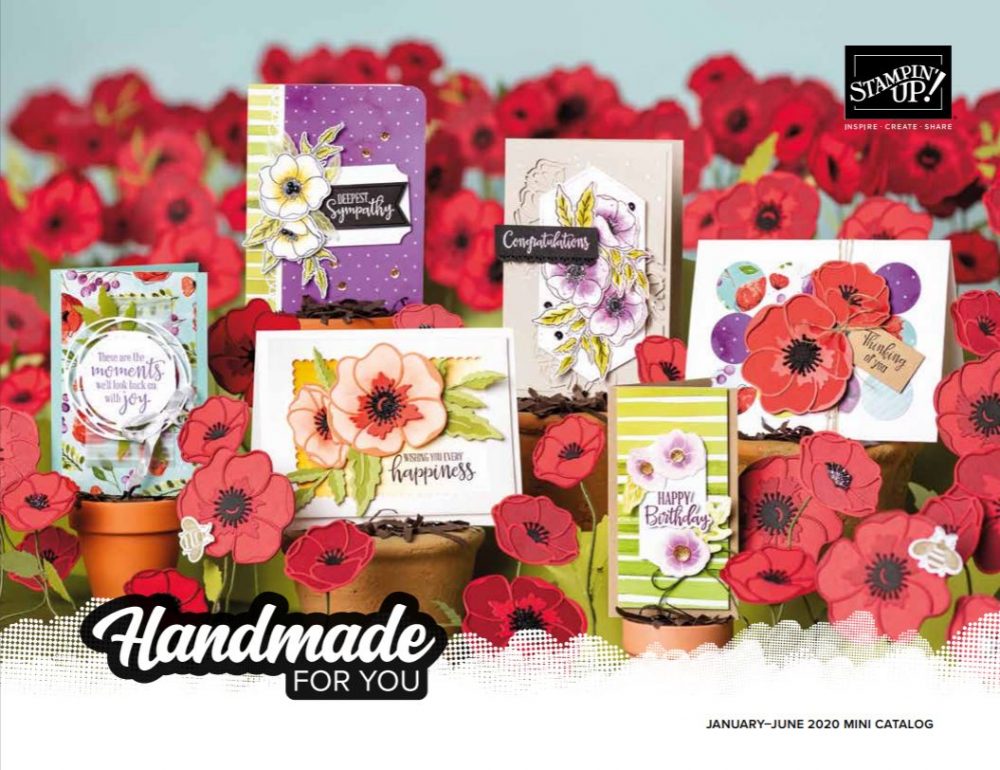
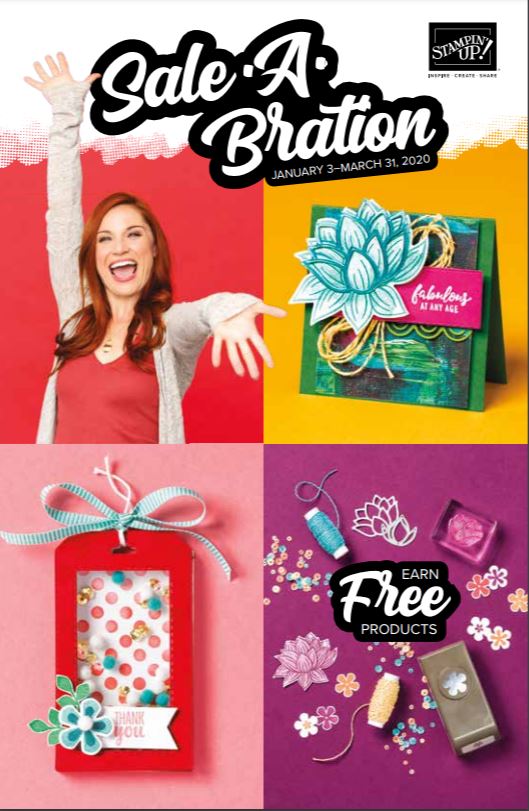
Check your mail for these new Stampin’ Up! mini catalogs, for the spring Occasions Catalog and the new Sale-A-Bration Brochure! I hope you got lots of Christmas cards and sales brochures for bargains, but don’t miss these two new catalogs from Stampin’ Up!
There is something different about the Occasions Catalog, which might even cause you to not notice it is Stampin’ Up! Did you catch it? It is “landscape” position so the pages open from the side longways! It might take some getting used to but it allowed Stampin’ Up! to present the products better in the catalog. So we will try it and see how everyone likes it (or not!).
Sale-A-Bration and the Occasions Catalog both begin on Friday, January 3rd so circle that date on your calendar! It’s a big one for us stampers! If you are new to Stampin’ Up!, Sale-A-Bration is the time period during which for every $50 you spend on Stampin’ Up! products, you get to choose one free product from the Sale-A-Bration brochure! There are some special offerings for $100 purchases, too.
Note that the Holiday Catalog ends on Thursday, January 2nd so get whatever you want from that. Remember, the Year-End Close-out ends on December 31….a few discounted items. And the Clearance Rack had items added to it before Christmas and you might have been too busy to check it out, but there are still a lot of choices left, so check that out as well!
I ordered both catalogs for my regular customers, as I always do. They will arrive separately, perhaps at way different times! My Sale-A-Bration came way after my Occasions Catalog. Give it a little more time and keep checking your mail and catalogs and holiday junk mail you have gotten and see if you received them. If they never come, I’ll have Stampin’ Up! send out another one.
If you are new and interested in Stampin’ Up! products and would like me to be your Demonstrator to help you with any orders, just send me a note with your contact information so I can send you the catalogs. They WILL be available online on January 3rd if you just prefer seeing them online. Also, let me know if you want/need the annual Stampin’ Up! catalog as well.
Ask your mailman/maillady if they are reading your Stampin’ Up! catalogs at the post office and if so, to please deliver them to you promptly! It’s always a good feeling to change over to some brand new products after all the holiday projects (as much as we loved the Holiday Catalog!).
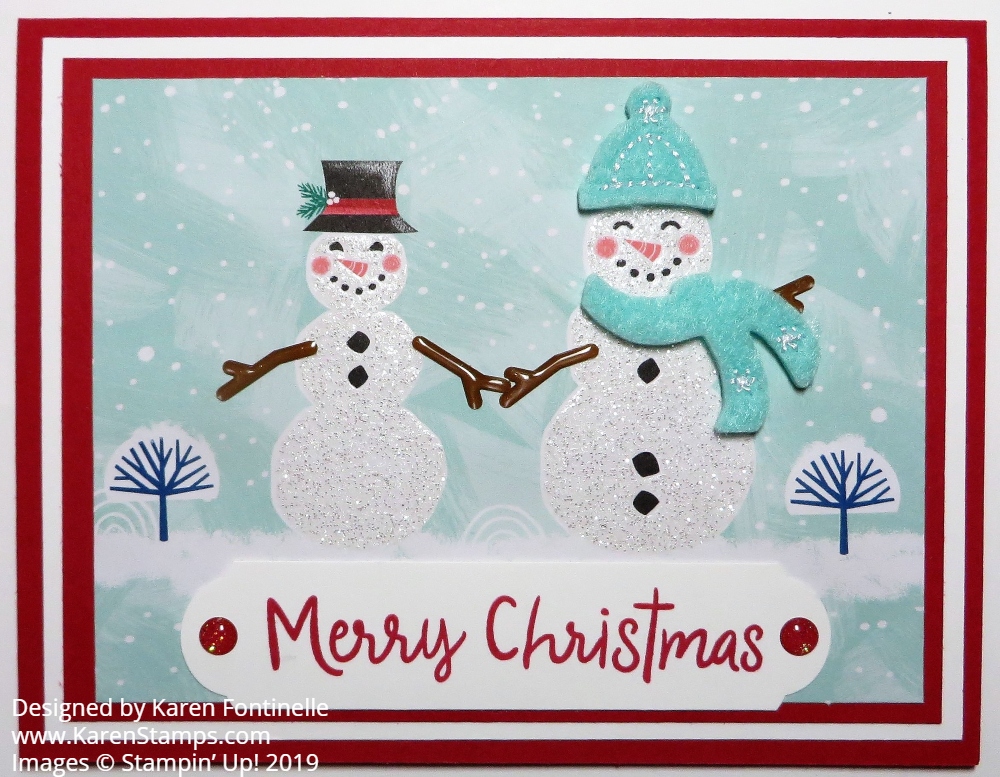
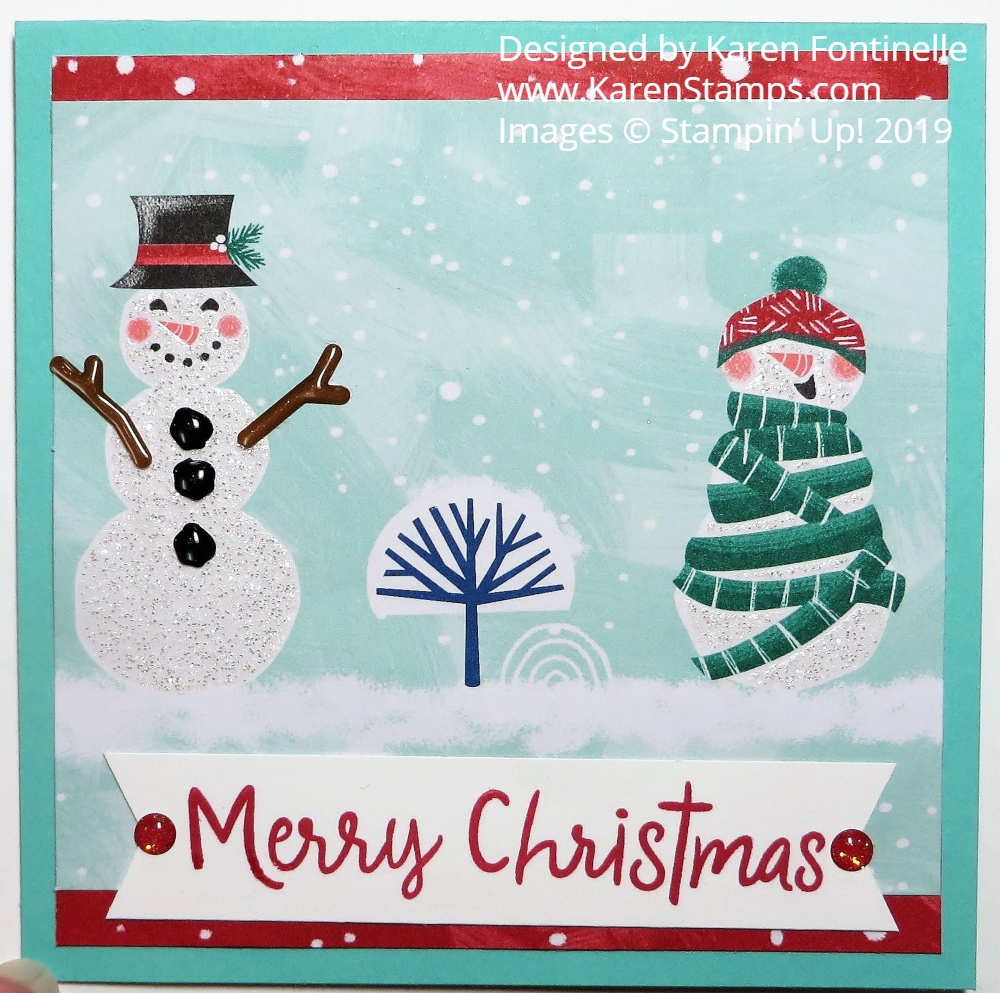
By now you have probably used up most of your fun Let It Snow Specialty Designer Series Paper unless you are a paper hoarder! And we all want to hoard this fun paper with the glittery snowmen on it. However, if you did actually cut up the sheets with the snowmen, you know it required drastic steps, perhaps destroying parts of the snowmen design. I know you didn’t throw away a bit of the scraps, so look through them now and see what you can make! You might still be able to salvage some snowmen!
On this first card, I had a smallish piece of designer paper with the two snowpeople on it. I just added extra layers so it would make a full card. And I jazzed up the snowmen by adding some stick arms and a scarf and hat. These pieces were from the Let It Snow Embellishment Kit. Don’t forget to use the cardstock cheat trick by punching out or die-cutting some pieces from the center of the cardstock that is going to be covered up anyway. No one will ever know!
On this card, I was able to save these two snowpeople and just made a smaller card! Make a 4 1/4′ x 4 1/4″ card or 4″ x 4″ size, whatever the piece of designer paper will fit best. On this one, just a little designer paper at the top and bottom of the snowman paper was enough to set off the focal point snowmen. Once you add a greeting and embellish the card a little bit you will have a great card even with a smaller piece of designer paper than you might have used.
Remember, sometimes the opposite side of the paper can be used long after the holidays. Often, we aren’t as familiar with the other side of the paper as we are of the well-known image.
If you have really small pieces of this Let It Snow Designer Paper, remember, you can make tags for gifts! Usually we run out before all the packages are wrapped, so it’s a good idea to make extra tags! Especially if you haven’t started wrapping packages yet1
Have fun making your last minute holiday cards, tags, and treats!
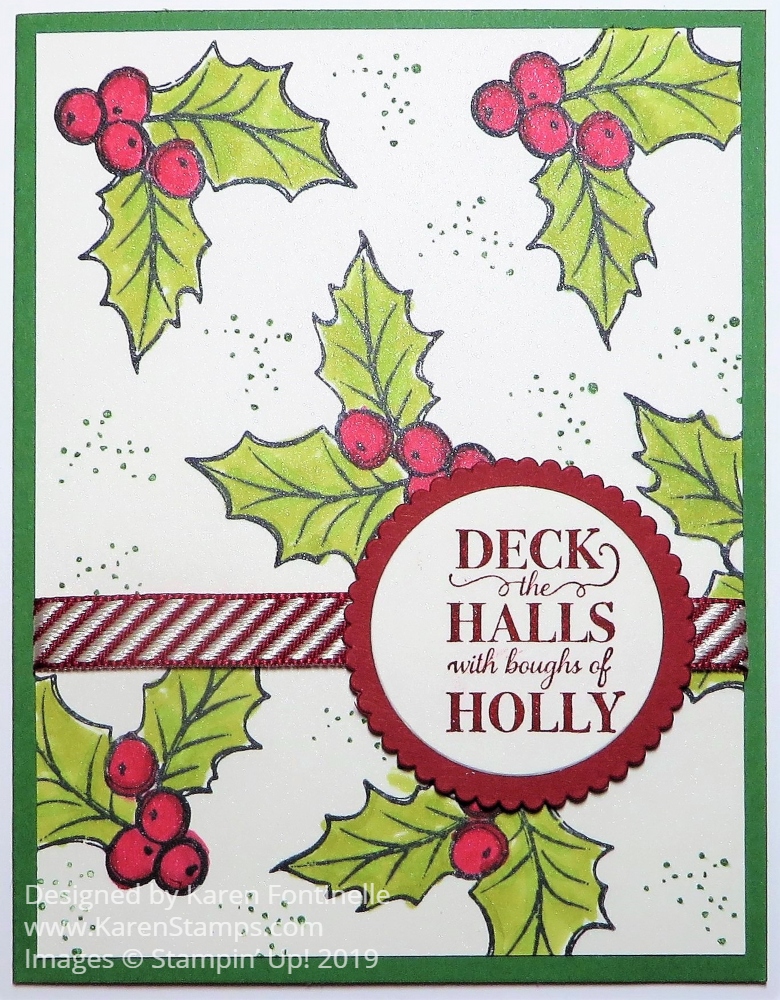
Here is a card I mostly copied from one I found online except I think she die-cut all the holly leaves and adhered them to the card. I simply stamped them randomly on the card front and colored them in on my Christmas Gleaming Holly Leaves Christmas Card.
The card base is Garden Green although you could also use Cherry Cobbler as the sample I saw did. I used Shimmery White Cardstock, one of my favorite papers. I think you can kind of see the shimmer in the photo a little bit on the colored areas. Even in person, you can barely see it, but it is there! It’s also the next best paper on which to watercolor if you don’t have real watercolor paper.
I stamped the holly leaves and berries in Memento Ink and colored in with Stampin’ Blends. It takes a little time to color even only using green and red. I used two shades of green to give a subtle bit of variation in the leaves.
There is a stamp in the Christmas Gleaming Stamp Set that makes those little dots. I stamped some of those around in Garden Green just to fill in the space a little bit around the leaves. I didn’t want to stamp too many holly leaves because then I’d have to color them in!
The greeting from the same stamp set is stamped in Cherry Cobbler Ink and die cut with a Layering Circle Die and Scalloped Circle Die in the same set.
The ribbon is the Cherry Cobbler Diagonal Stripe Ribbon (no longer available). The greeting is then popped up over the ribbon using Stampin’ Dimensionals.
This is a relatively easy card to make except for the coloring taking a little bit of time. But coloring is relaxing and therapeutic!
Have fun finishing up your Christmas cards, if you are still working on them!
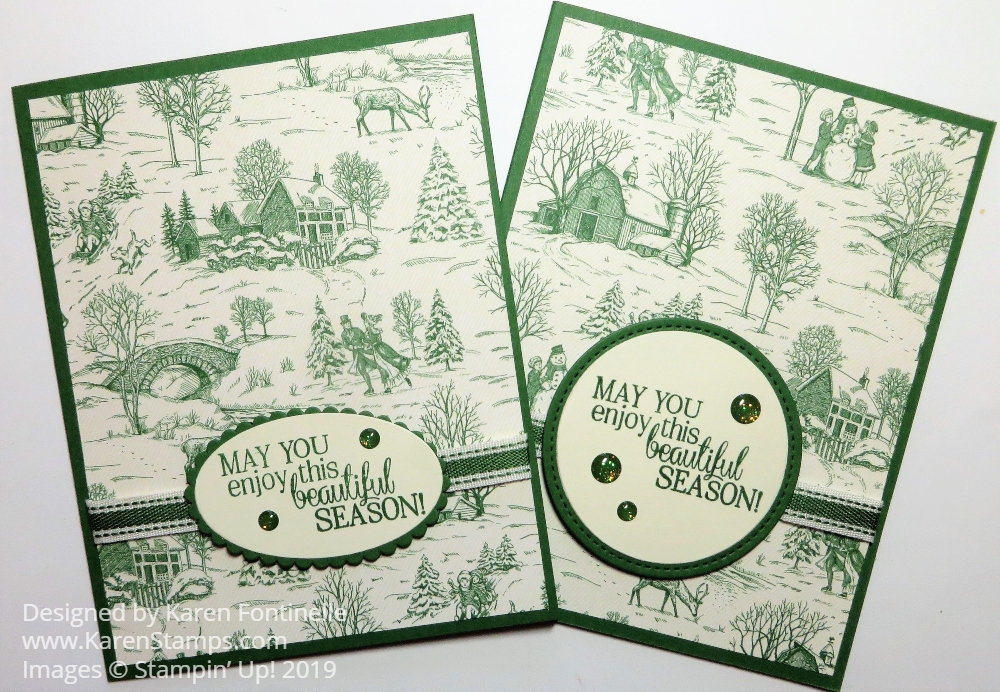
I wanted some quick and easy cards the other day (because who has any time with Christmas racing to get here?!) so I made these Quick and Easy Toile Tidings Christmas Cards. I love this toile paper, probably because I have some toile fabric covering the seats of a couple of chairs.
Then the card just needed a greeting so I chose this one from theSo Many Stars Stamp Set. It is stamped in Garden Green Ink on Very Vanilla Cardstock, which was die cut and then layered on a piece of Garden Green. I made the circle one first but then I changed to the oval die cuts. The greeting is kind of large. The greeting seemed to beg for another little something so I added a couple of Toile Tidings Glitter Enamel Dots.
That’s all there was to it, so if you need some easy cards, just use this Toile Tidings Paper. I love all the little scenes on it! In fact, you could use this paper after Christmas, during the winter for cards or to write thank you notes after the holidays.
(Did you know you can expedite your Stampin’ Up! order? There is a drop down box when you check out for shipping. It IS extra ($20 for 2nd Day Air and $35 for Next Day Air, on top of regular SU shipping) but if you need it, you need it! Warning: 2nd Day Air CAN be addicting for large orders! (What’s another $20 if I’ll get it in two days?!) You have to place your order by 11:00 am MT (that’s noon Central Time) for it to go out that day.
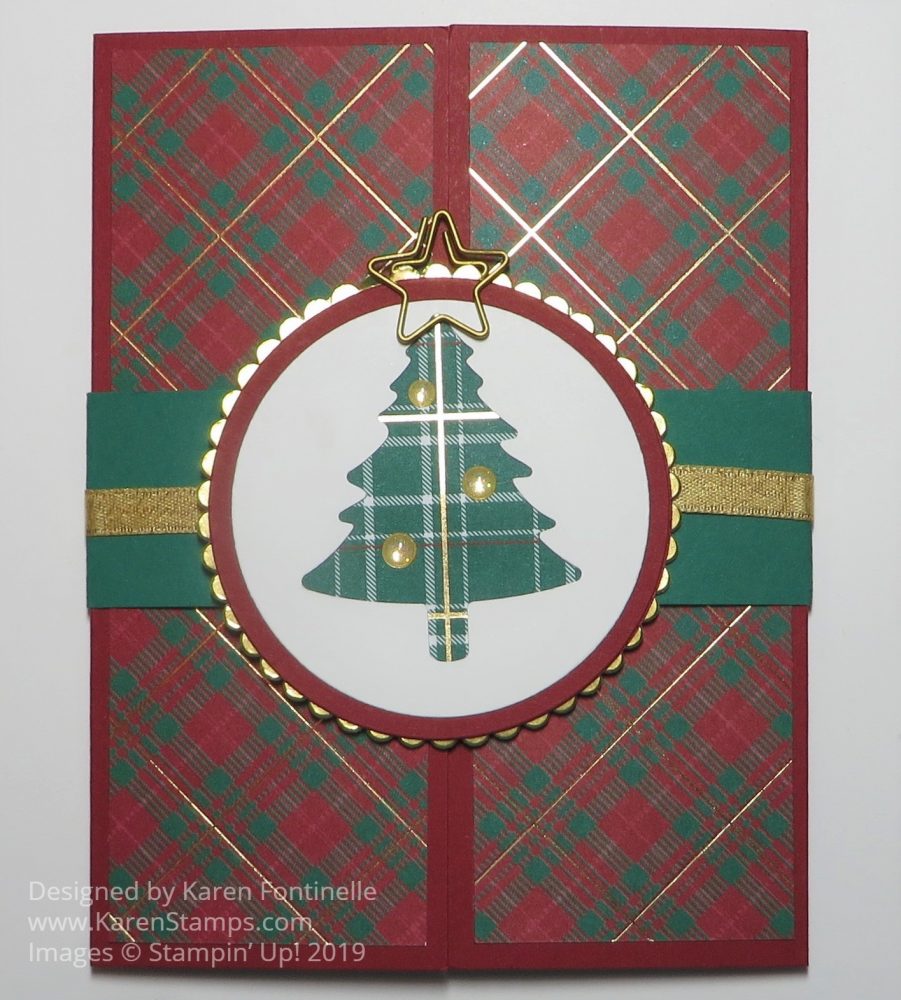
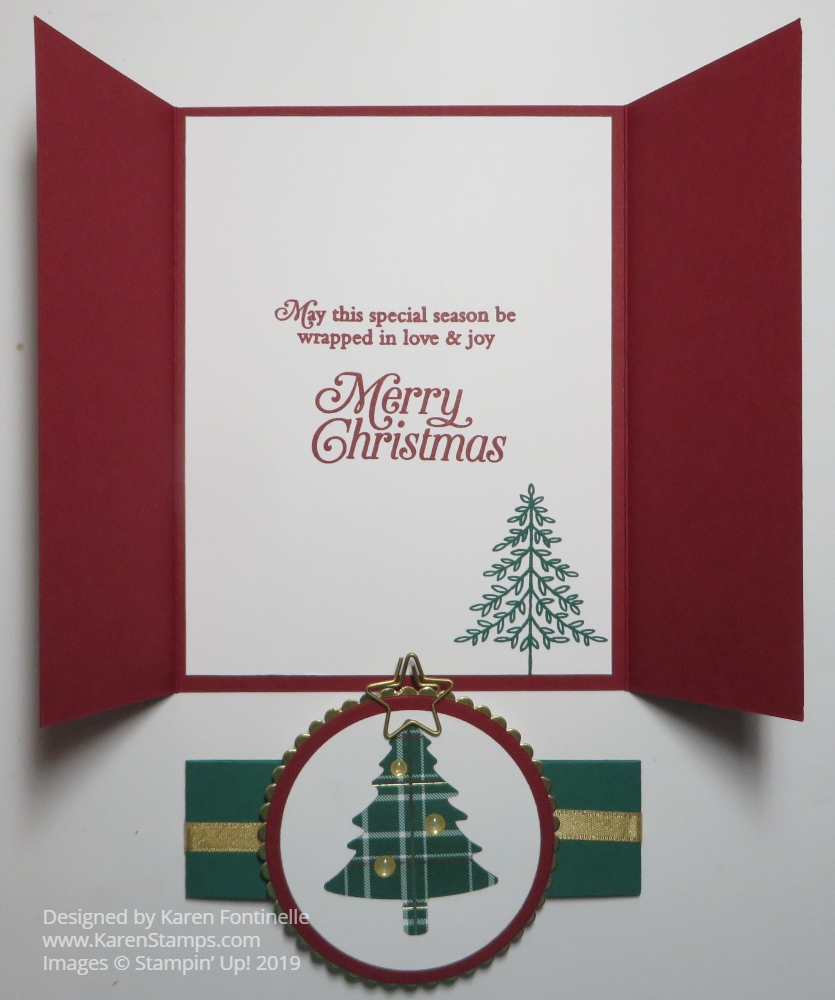
This Wrapped in Plaid Gatefold Christmas Card is fairly easy to make especially if you just copy my design! Gatefold cards are easy enough and yet look impressive to the recipient, especially knowing that you made it! It is still the size of a regular card and you can decorate the card base any way you like.
The card base is 8 1/2″ x 5 1/2″ as per usual. Instead of scoring and folding in half, score from each end to fold over the center of the card. Score at 2 1/8″ from each end of the Cherry Cobbler Cardstock. Crease and fold with the two ends meeting in the center.
For the inside of the card, cut a piece of Whisper White and stamp whatever greetings you like. I added a tree from the Perfectly Plaid Stamp Set. You could also stamp right on the inside of the Cherry Cobbler Cardstock, but since it is a little dark, you might prefer the Whisper White layer for your personal greeting and signature.
For the belly band cut a strip of Shaded Spruce 11″ x 1 1/4″ or whatever width you would like. Fold around the card, crease the folds, cut off the excess length and have the overlapping ends meet at the front center of the card. You might think you would want the belly band to meet at the back, but if it meets at the front, the tree piece that you add will cover up the ends. I added a piece of Gold Shimmer Ribbon around the belly band and held in place with Mini Glue Dots.
You can add whatever you like for the center of the belly band. I used the Pine Tree Punch to punch a tree out of a piece of Whisper White and then die cut this piece with the Layering Circles Die. Behind that, I die cut a slightly smaller piece of Wrapped in Plaid DSP that I wanted to show through and adhered to the back of the punched tree. This was layered on a Cherry Cobbler die-cut circle, which is then layered on a die-cut scalloped circle of Gold Foil.
As I was looking in my drawer for embellishments, I came up this clip-on star that had been on the Clearance Rack. Perhaps you already own these clip shapes. If not, just punch out a gold star from whatever you have. And for a little extra bling, besides the gold accents in the Wrapped in Plaid DSP, I adhered a few Gold Glitter Enamel Dots. These dots, along with the Gold Shimmer Ribbon are items that are in the Christmastime Is Here Suite.
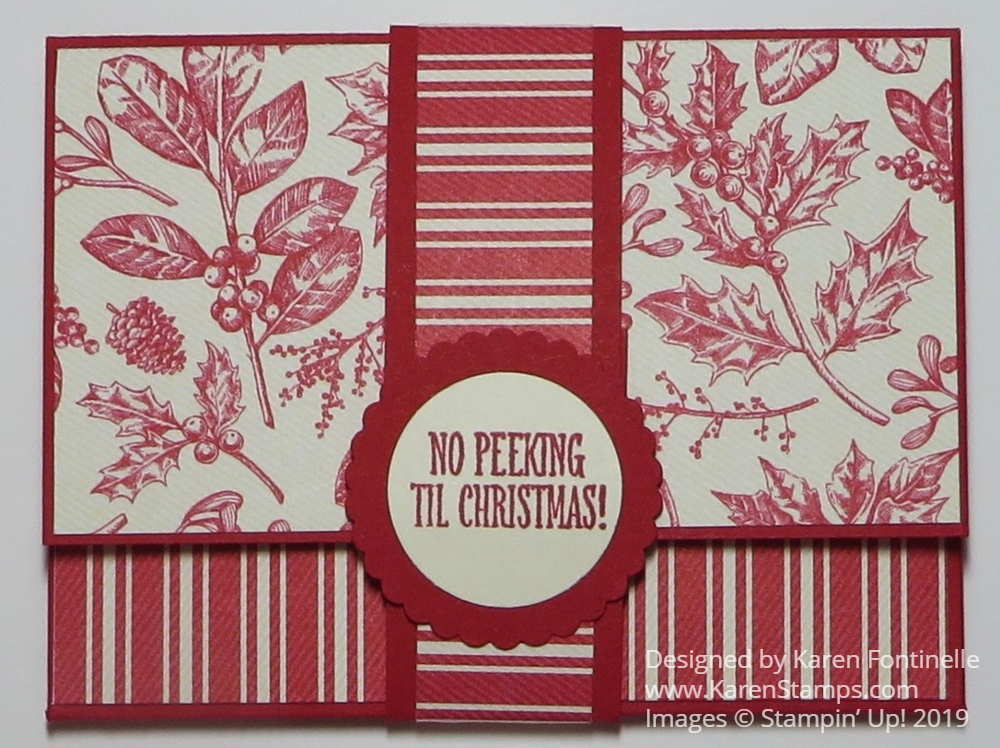
It’s time to make some gift card holders that you can use at Christmastime for those people that you plan to give a gift card to and for those for whom you buy last-minute gift cards to finish off your shopping! It’s a great way to make the gift card itself something extra-special with your cardmaking touch!
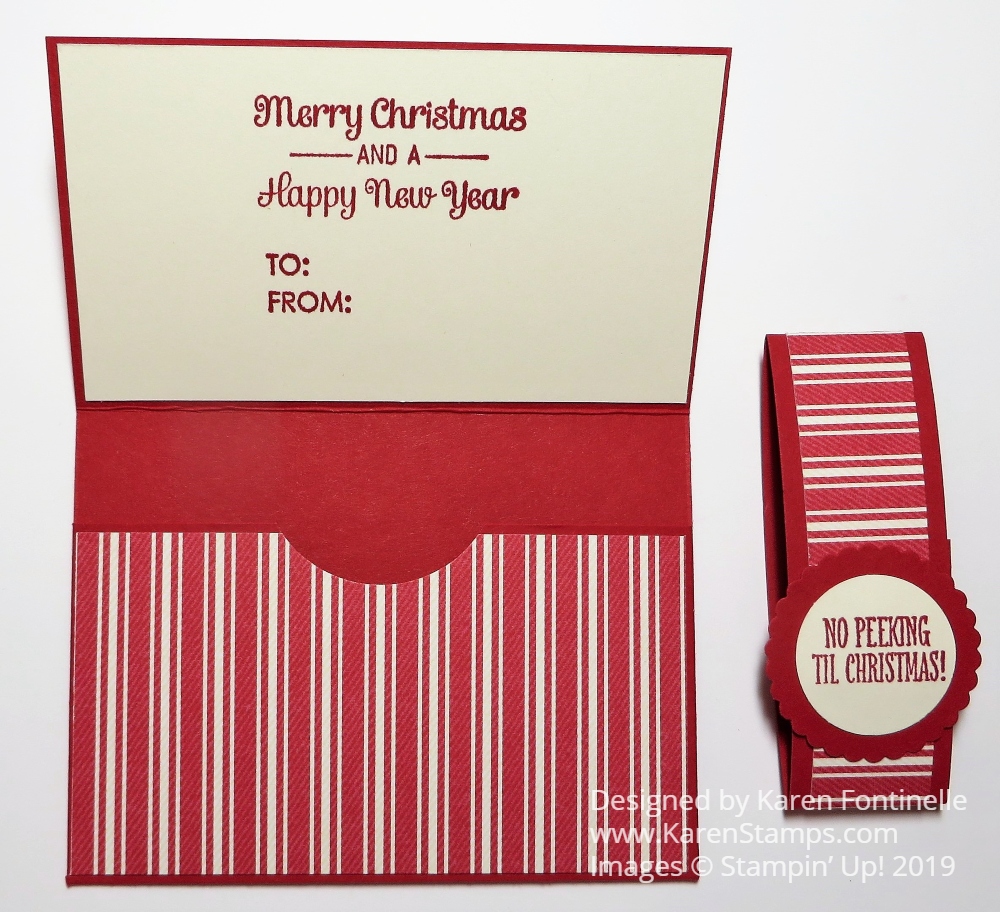
There are all sorts of gift card holders you can make. Basically, you just need a card with a little pocket inside! This one I made is pretty easy. It has a belly band to hold it closed and inside is a pocket to hold the gift card and also a place for a greeting and/or a personal message. You can put it right under the treat or mail it in an envelope.
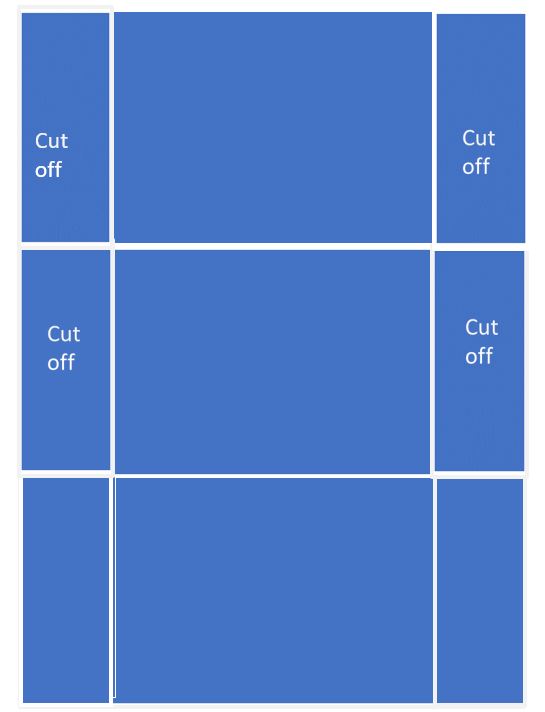
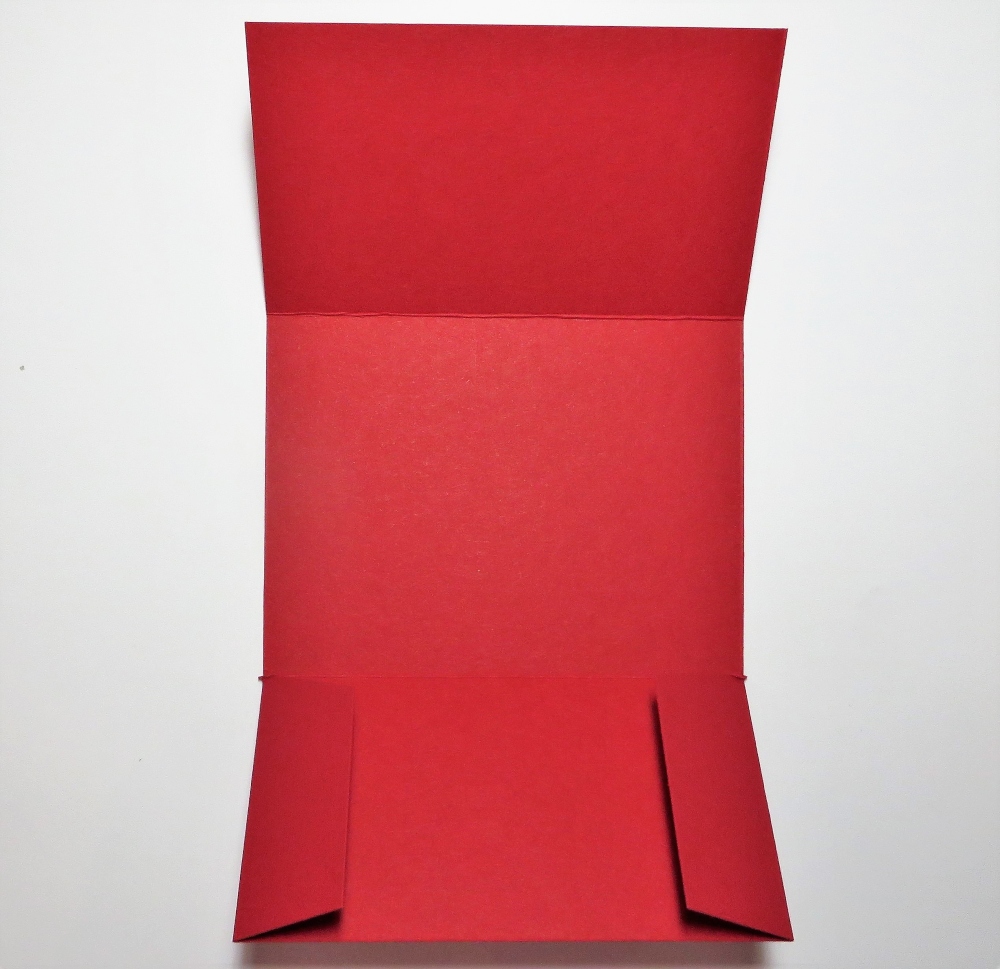
To begin, start with a piece of cardstock 7 1/2″ x 6″. On the 7 1/2″ side, score the paper at 2 1/4″ and 5 1/4″. Turn and score the 6″ side at 1″ and 5″. Then cut away both 1″ sides down to the last score line as you see in the diagram below. You can cut those bottom tabs at an angle just to fold them in easier. That bottom portion folds up to make the pocket to hold the gift card and then the top folds down. Easy peasy!
To decorate the holder, cut the Toile Tidings Designer Paper or whatever you want to use. Cut two pieces at 3 7/8″ x 2 1/8″ and one piece at 3 7/8″ x 2 7/8″. One piece goes on the inside pocket. Adhere and then use some circle punch partially inserted into the pocket to punch out a half-circle at the top, if you wish, just to make it easier to grab the gift card. You can also cut out a plain piece of cardstock on which to stamp a greeting or write a personal message for inside the top of the gift card holder as you see in my sample.
To make the belly band, if you want one, cut cardtock 7″ x 1″ and designer paper 7″ x 3/4″. Stamp a greeting, punch out, and layer however you like. I used the Itty Bitty Christmas Stamp Set. It’s so handy!
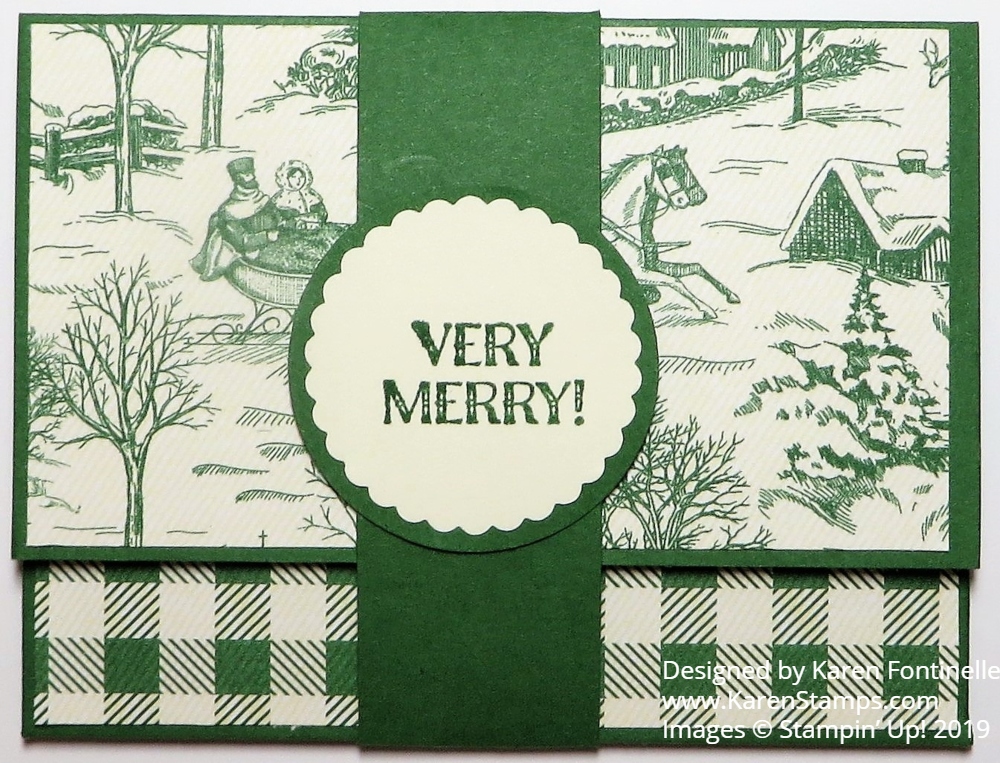
And here’s an example of the same pattern using the Garden Green designer paper, perhaps better for a man than the red and a little plainer.
Remember, tomorrow, December 11th is FREE SHIPPING for orders $50 or more!! It’s one day only.
Don’t start inputting your order until Dec. 11 or it might not take the free shipping. Just get your list ready today! You can use it on regular orders, Year-End Closeout, Clearance Rack, Paper Pumpkin Prepaid Subscriptions! What fun!
Today is the last day to sign up for Paper Pumpkin and get the December Kit!