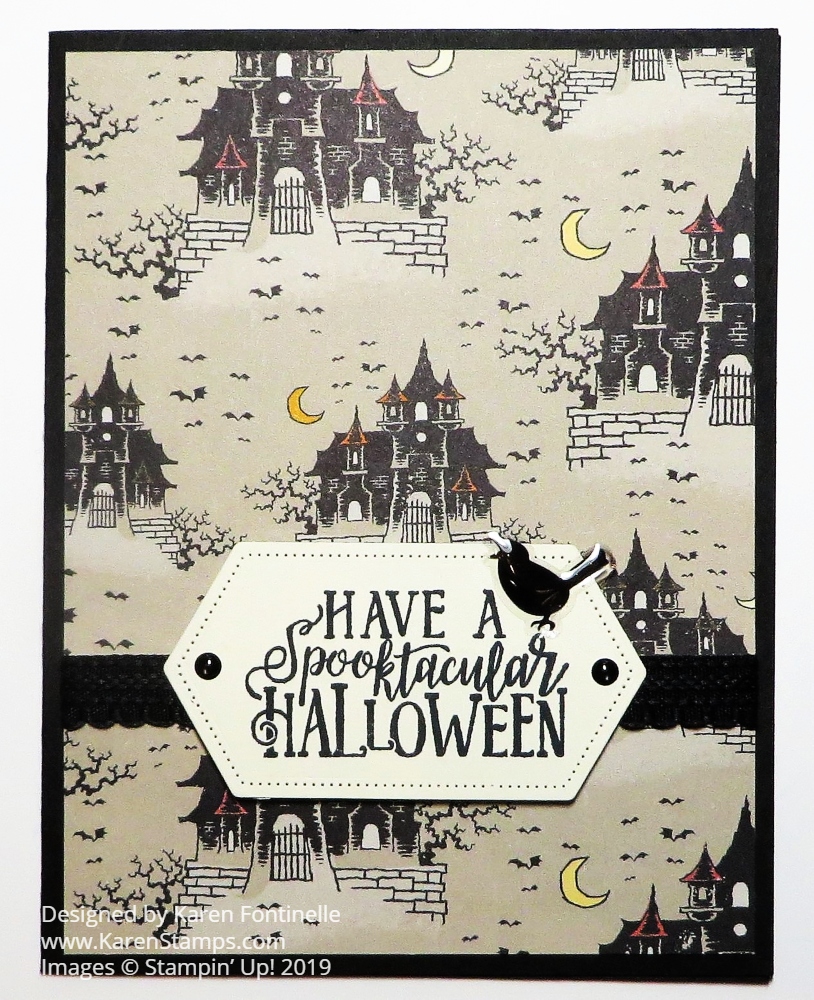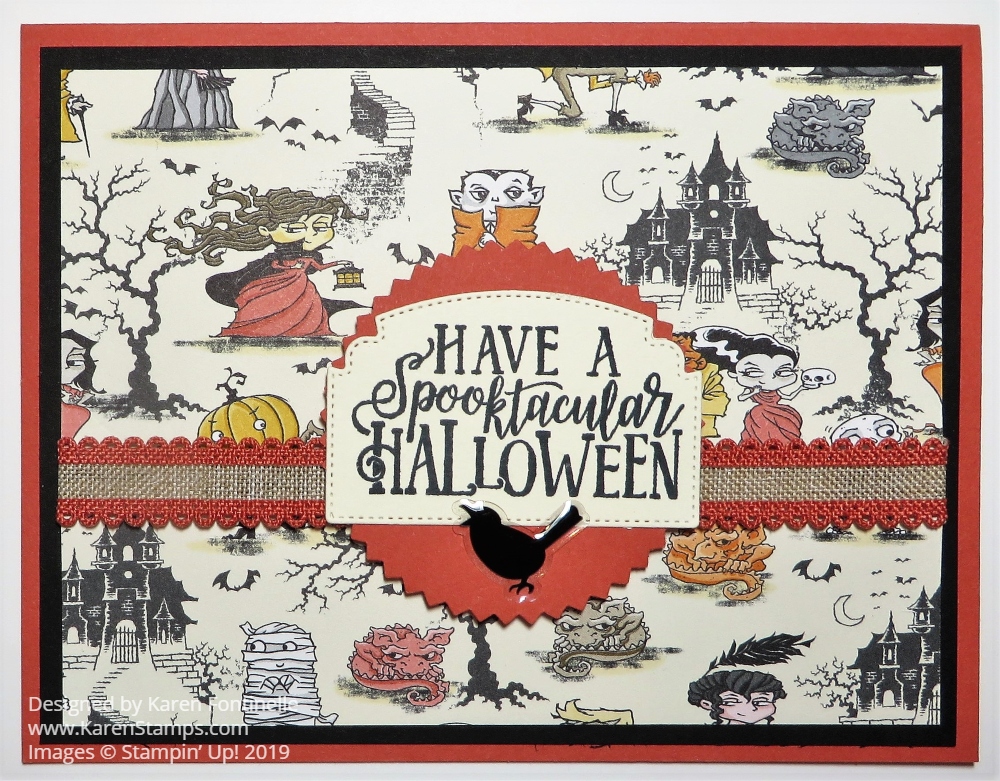
In between watching several baseball games and one Texans football game, I’ve spent some time making Halloween cards with the Monster Bash paper like this Spooktacular Bash Terracotta Tile Halloween Card. The Houston Astros have made their way to the American League Championship Series as have the St. Louis Cardinals (our hometown team) so we have been watching a LOT of baseball including the division games they got these two teams here. So it was fun to have some breaks stamping and making Halloween cards!
One of the coordinating colors for the Monster Bash Designer Series Paper is Terracotta Tile, one of the current In Colors. Since I haven’t used this color very much and the matching ribbon, I chose this color for the card base. The designer paper pattern is a cute one with little haunted houses and Halloween characters! I layered it on a piece of Basic Black to help it stand out.
The ribbon is wrapped around the designer paper and adhered on the back. It is the very nice Terracotta Tile 1/2″ Scalloped Linen Ribbon. You can use it to dress up a fun card like this one or use it on a fancier card. I’ve even cut it down the middle to use just the scalloped edge to decorate a card.
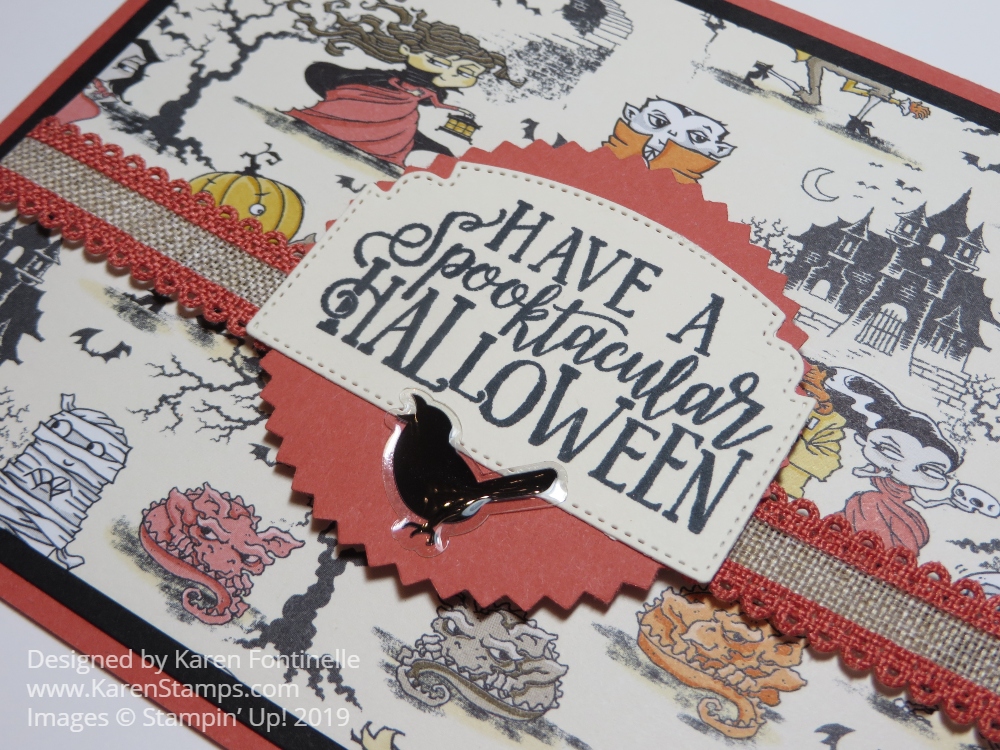
The greeting is stamped with the Spooktacular Bash Stamp Set. I really like this greeting and used it on a lot of cards! It is stamped on Very Vanilla cardstock which I think goes better with this card than Whisper White. Then it is die-cut with one of the Ornate Frames Dies. I love this particular shape that goes with this greeting so well!
Then I took a long time to decide how to layer the die-cut greeting on something! I just couldn’t find the right thing. Finally, I looked at my punches and chose the Starburst Punch. The greeting seemed to fit fine over the Starburst shape with a little room left for one of the blackbirds in the Monster Bash Enamel Shapes. I think the bird gives an appropriately spooky look to the card, right?! It’s fun to stick it on, anyway! A cute embellishment for a Halloween card!
All you have to do is change the designer paper pattern and the greeting if you want for another design for a Halloween card. It is fun making cards and treats with this Halloween paper and all the spooky, whimsical characters! The backside of some of the papers will also make very nice non-Halloween cards!
Make some Halloween cards this week and give them to your family or send them to friends who enjoy Halloween!