
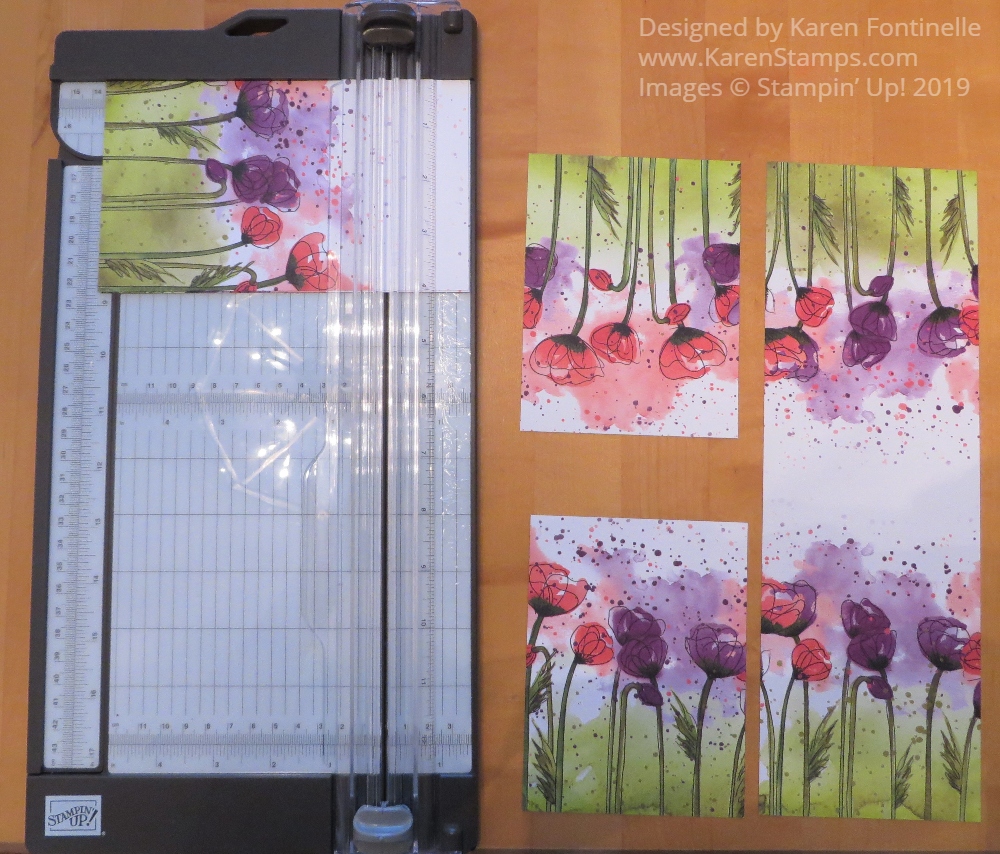
I’ve seen posts by other Demonstrators showing ways to use your designer paper to make lots of cards at one time so I thought I would try to make six cards out of one sheet of designer paper. I decided to use just this one design in the Peaceful Poppies Designer Series Paper. It is the sheet that has poppies on each side with a rather plain area running through the center of the paper.
With this, or any, 12″ x 12″ paper, you can cut three 4″ wide strips out of the paper. Then turn each strip and cut at 5 1/4″, the perfect size for a layer on a card. If you do the math, that will use up 10 1/2″ of the paper and you will have pieces left that are 1 1/2″ wide. If you plan ahead, you could cut off a strip 12″ x 1 1/2″ wide and then cut the strips. It probably all depends on the pattern of your paper and how you intend to use it, whether you want longer or shorter scraps of paper leftover.
This particular sheet of paper is different, with the plainer area in the middle. If you cut it as I show in the photos, you can basically cut out the plain area and just get maximum use out of the poppies! Then you can either use the center area for the colored side on the opposite side of the paper or the white side.
I might say that if you are not happy with your paper trimmer, the new Stampin’ Up! Paper Trimmer is really nice! I believe it makes much closer to perfect cuts than the previous one did. I am enjoying mine and do recommend it!
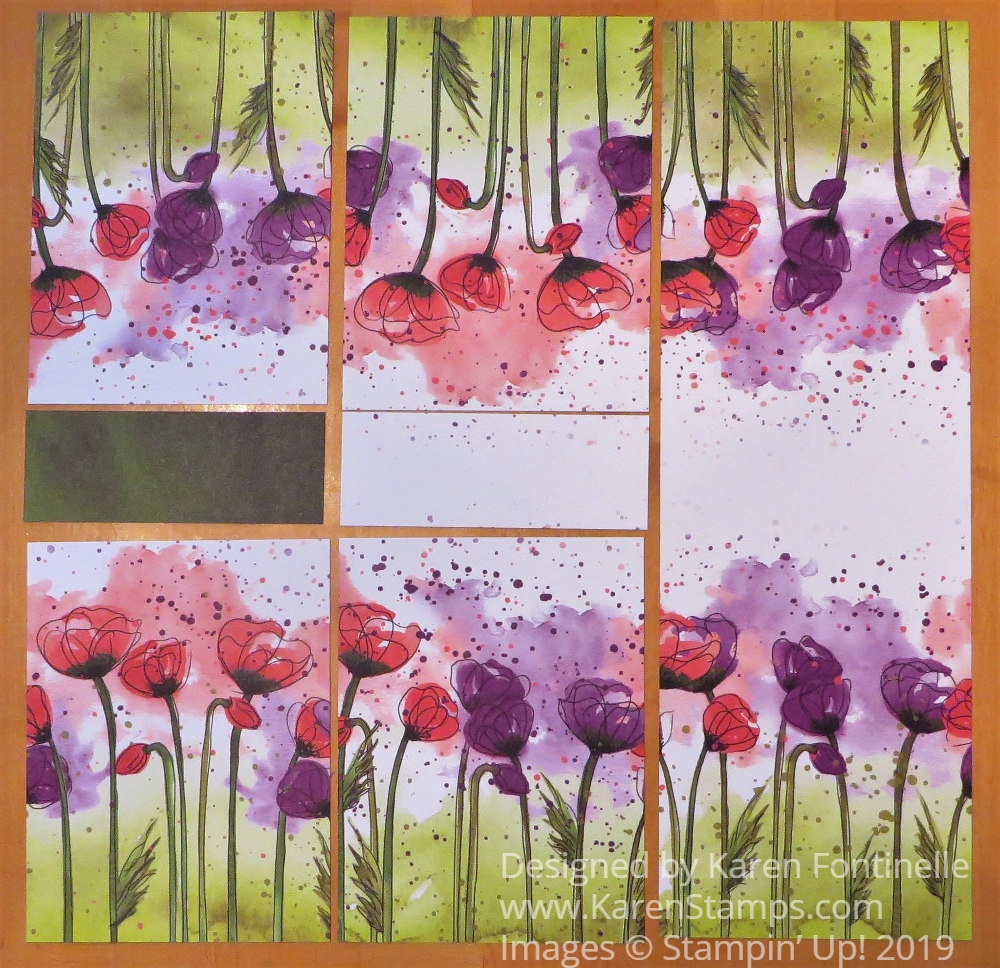
Another alternative would be to cut some or all strips at 3″ wide and get 4 strips out of the designer paper. In this way, you will not completely cover the card base, which is fine, too. I did some cards like this and added a little accent strip of cardstock along the side of the designer paper. This Peaceful Poppies paper is so pretty, no matter what you do with it, you will make a beautiful card!
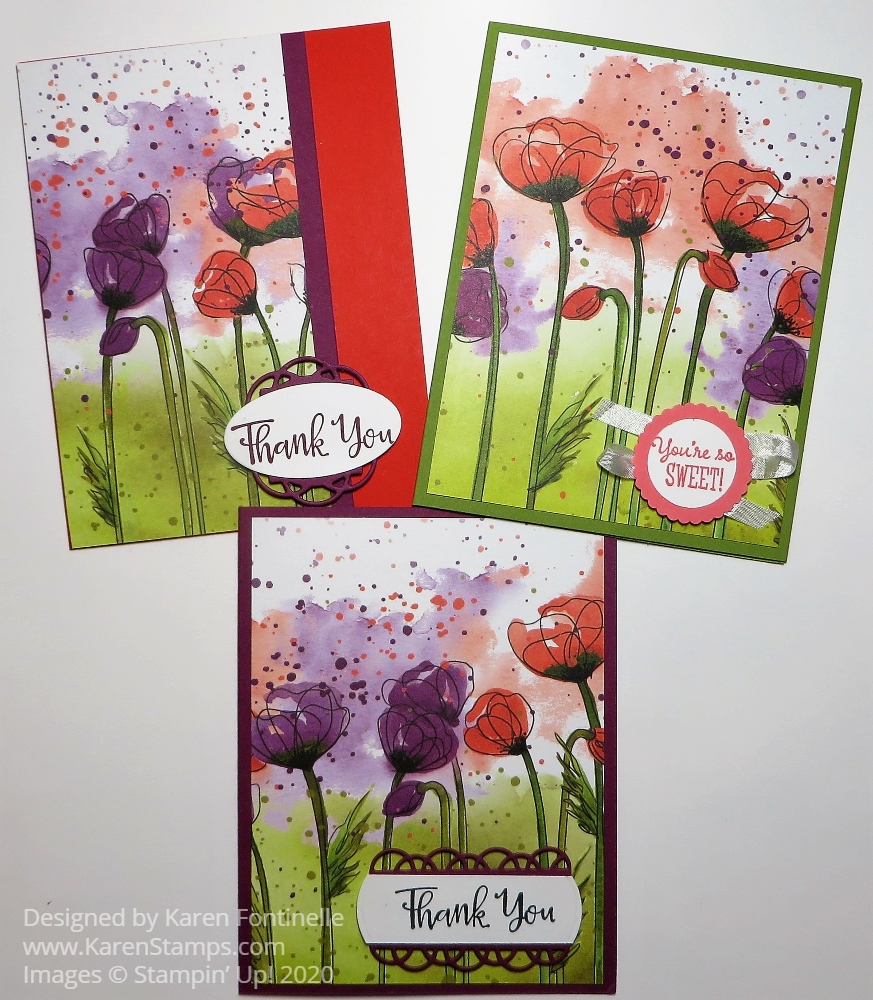
I used several different colors of cardstock that coordinate with the designer paper – Rich Razzleberry, Flirty Flamingo, Old Olive, Calypso Coral, and Poppy Parade. Then just add a greeting, maybe layered on something else and maybe with some embellishments. You can make the card as fancy or as simple as you like at this point.
On the cards above, I used the “Thank You” from the Peaceful Moments Stamp Set and the other greeting from the Little Ladybug Host Stamp Set. On the thank you cards I used die-cuts from the Painted Labels Dies. (I love that little scallop die-cut!) On the other card, I used the 1 3/8″ Scallop Circle Punch for the layer.
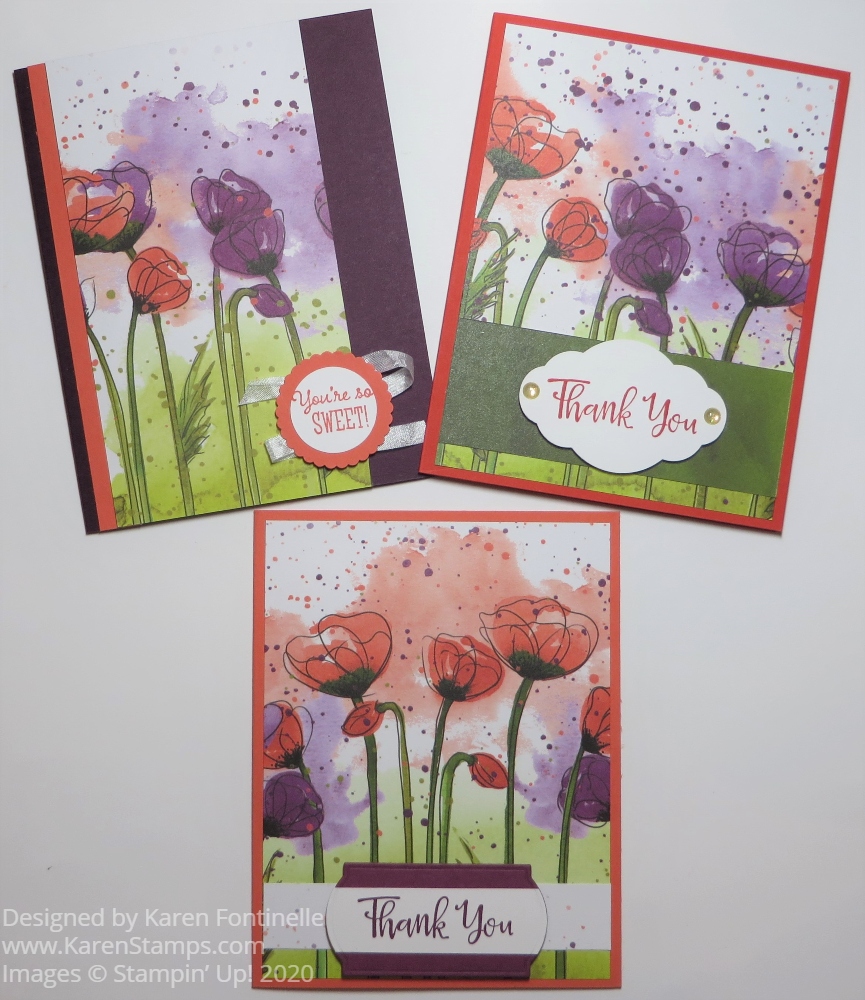
On these cards, I used another die in the Painted Labels Dies and the Pretty Label Punch. You can see I used two of the excess strips, one green and one the white side behind the greetings, plus some embellishments. You will notice two of the cards in the two photos have the narrower strip of designer paper, cut at 3″x 5 1/2″ with a narrow accent strip of cardstock.
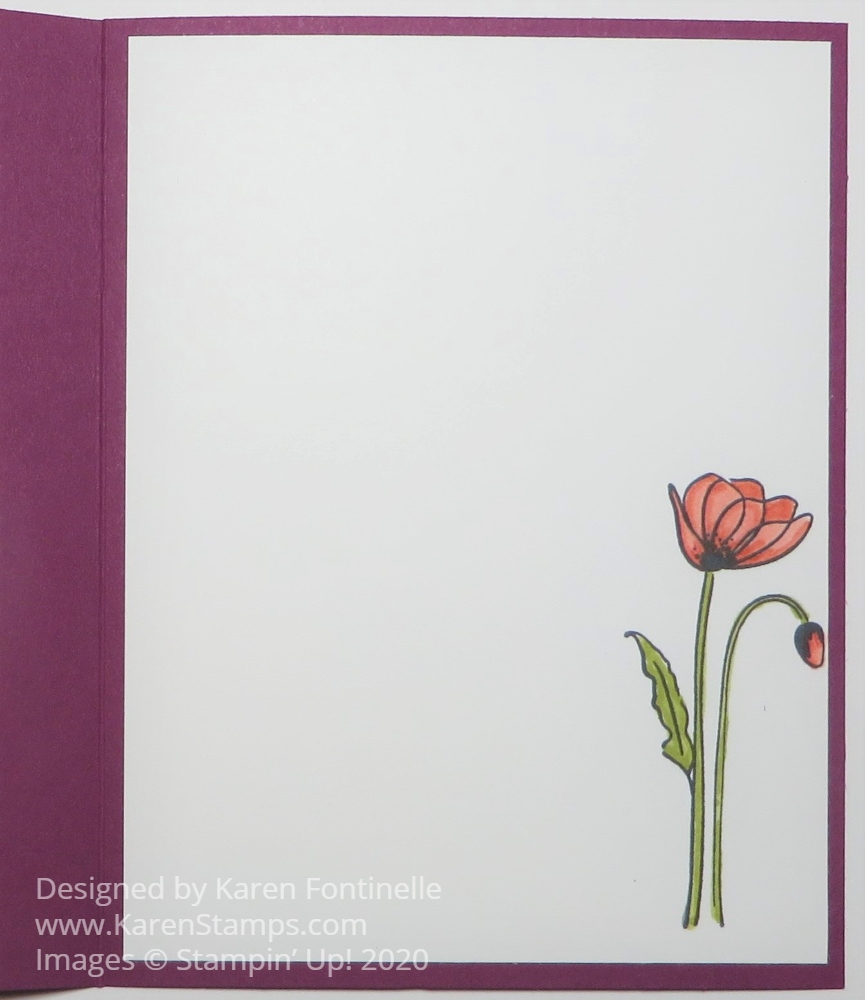
If you want to see what you can do with the inside of the card, I added Whisper White layers to all and stamped a flower from the Painted Poppies Stamp Set in Memento Black Ink. Then I colored in the flower with some Stampin’ Blends markers.
And there you have it! Ideas for six cards from one sheet of the Peaceful Poppies Designer Series Paper!
SHOP STAMPIN’ UP! DURING SALE-A-BRATION AND EARN FREE PRODUCTS WITH EVERY $50 PURCHASE!