Tag Archives: Peaceful Poppies Suite

Poppy Moments Altered Birthday Gift Bag

Poppy Moments Altered Birthday Gift Bag

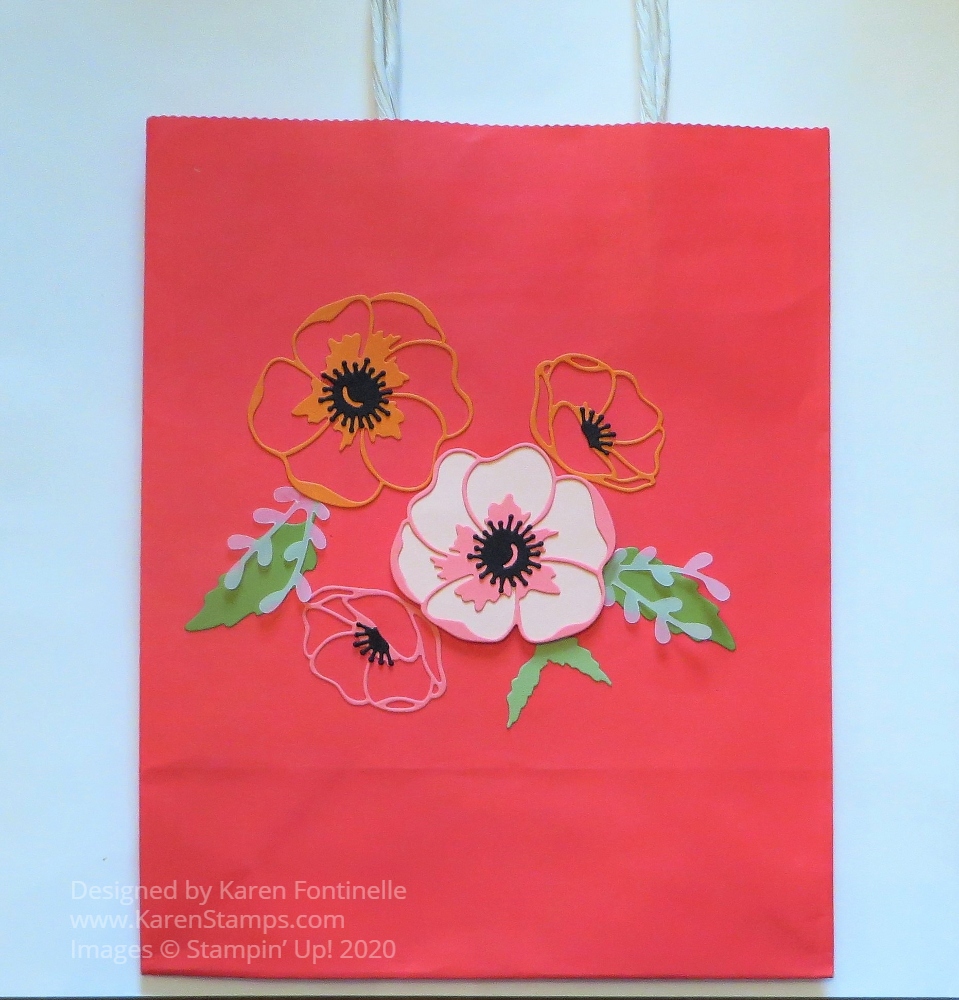
One of my favorite projects to make is to decorate a gift bag like this Poppy Moments Altered Birthday Gift Bag that I made for a friend’s birthday. Sometimes I use a bag I got out shopping and even if it has the store name on the side, I can cover the name with paper and decorate. It’s almost like making a card on the side of a bag! And if you don’t already have a cute shopping bag, you can buy a bunch at the craft store.

To decorate this shopping bag, I used the Poppy Moments Dies and just cut out a few flowers and leaves! I also used the Sprig Punch to punch a few leafy sprigs out of Vellum Cardstock. I made this bag pretty simple because there was no store printing that I had to cover up. After putting a gift inside the bag with tissue paper, you could also tie a ribbon around the bag handles. You could also attach a gift tag that you made. So many possibilities!

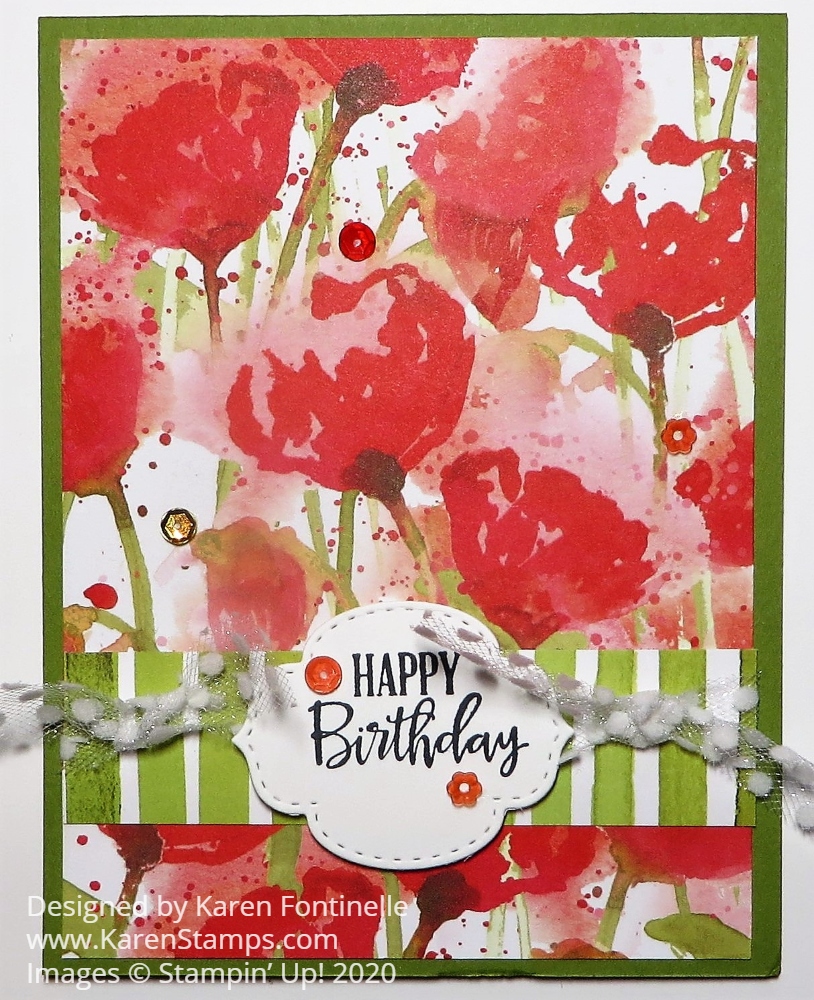
Here’s a birthday gift bag I decorated several years ago. The bag itself is pretty with a swirly leaf print on it, but I did need to cover the store name but that’s usually easy to do, sometimes on the front and back of the bag.

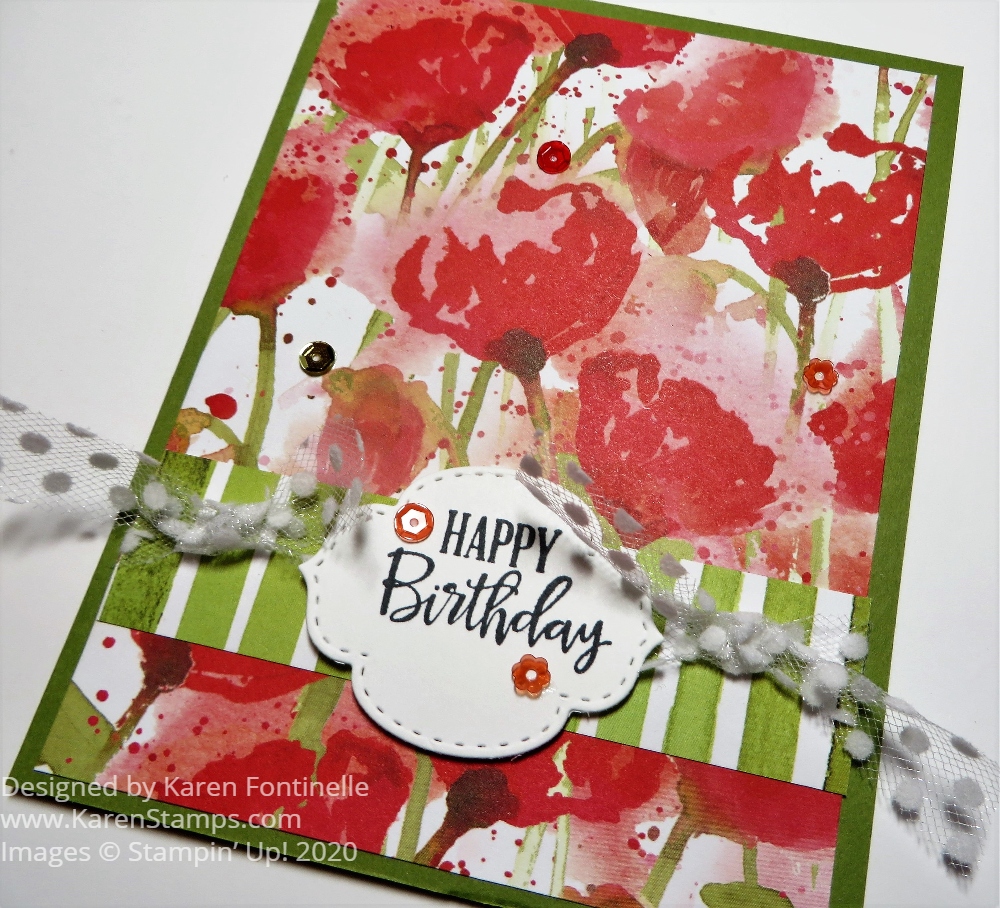
This gift bag turned out really pretty I think! I don’t remember if the bag was plain on the front or if it had printing on it, but it was easy to cover almost the whole front of the bag almost like if I had been making a card! You can see how you could make the same design for a card just by making it smaller!

If you are cleaning up closets and cabinets during the pandemic, save those small shopping bags and do something creative with them! Decorate for birthdays or Christmas or something generic and then you will have some personalized gift bags ready to go! Or maybe you can make a bag that matches your gift.

Altering or decorating bags you have around the house is something fun you can easily do and a great way to recycle! And it just might save you a trip to the store for a gift bag!

Peaceful Poppies Watercolor-Look Birthday Card

Peaceful Poppies Watercolor-Look Birthday Card

This Peaceful Poppies Watercolor-Look Birthday Card is just so bright and happy, I think it would brighten anyone’s day even if it was already that person’s birthday! This card is an example of how the beautiful designer paper does all the work of making a card!

The Peaceful Poppies Designer Series Paper was designed from actual watercolored images. One side of the paper has the floral images and the other side has watercolor washes in stripes, polka dots, and solids. Don’t think your designer paper is printed badly, the watercolor washes have different shadings in them like a watercolor painting would have than just a regular solid color.

Sometimes when you page through a package of designer paper, no matter what you were planning to use, one design jumps out at you. This time it was this particular poppy design! Then I also chose this little piece of green stripe design from another page with a gorgeous floral design on the other side that I hated to cut into!

The card base is Old Olive with the fold at the top. Just cut your cardstock in half lengthwise and score in half at 5 1/2″. The green stripe piece is adhered to the poppy paper and then the Whisper White Polka Dot Tulle Ribbon (one of my favorites!) is wrapped around the two layers of designer paper and adhered on the back. Next, the designer paper layer is adhered to the card base. I also tied on a knot on with the ribbon on each side of the greeting.

For the greeting, I stamped “Happy Birthday” from the Peaceful Moments Stamp Set and die cut with a die from the Stitched So Sweetly Dies.

For a final embellishment, I added a few Peaceful Poppies Sequins to the card front.

Peaceful Poppies Watercolor-Look Birthday Card Closeup

Here is another card I made with just a strip of this same pattern in the Peaceful Poppies Designer Series Paper! Be sure to check out the whole Peaceful Poppies Suite in the Occasions Mini Catalog! Earn FREE products, too, during Sale-A-Bration with every $50 purchase!

SHOP STAMPIN’ UP!

Make Six Cards Out of One Sheet of Designer Paper

Poppy Designer Paper Cutting

I’ve seen posts by other Demonstrators showing ways to use your designer paper to make lots of cards at one time so I thought I would try to make six cards out of one sheet of designer paper. I decided to use just this one design in the Peaceful Poppies Designer Series Paper. It is the sheet that has poppies on each side with a rather plain area running through the center of the paper.

With this, or any, 12″ x 12″ paper, you can cut three 4″ wide strips out of the paper. Then turn each strip and cut at 5 1/4″, the perfect size for a layer on a card. If you do the math, that will use up 10 1/2″ of the paper and you will have pieces left that are 1 1/2″ wide. If you plan ahead, you could cut off a strip 12″ x 1 1/2″ wide and then cut the strips. It probably all depends on the pattern of your paper and how you intend to use it, whether you want longer or shorter scraps of paper leftover.

This particular sheet of paper is different, with the plainer area in the middle. If you cut it as I show in the photos, you can basically cut out the plain area and just get maximum use out of the poppies! Then you can either use the center area for the colored side on the opposite side of the paper or the white side.

I might say that if you are not happy with your paper trimmer, the new Stampin’ Up! Paper Trimmer is really nice! I believe it makes much closer to perfect cuts than the previous one did. I am enjoying mine and do recommend it!

Poppy Designer Paper Cut Up

Another alternative would be to cut some or all strips at 3″ wide and get 4 strips out of the designer paper. In this way, you will not completely cover the card base, which is fine, too. I did some cards like this and added a little accent strip of cardstock along the side of the designer paper. This Peaceful Poppies paper is so pretty, no matter what you do with it, you will make a beautiful card!

Peaceful Poppies Designer Paper Easy Cards

I used several different colors of cardstock that coordinate with the designer paper – Rich Razzleberry, Flirty Flamingo, Old Olive, Calypso Coral, and Poppy Parade. Then just add a greeting, maybe layered on something else and maybe with some embellishments. You can make the card as fancy or as simple as you like at this point.

On the cards above, I used the “Thank You” from the Peaceful Moments Stamp Set and the other greeting from the Little Ladybug Host Stamp Set. On the thank you cards I used die-cuts from the Painted Labels Dies. (I love that little scallop die-cut!) On the other card, I used the 1 3/8″ Scallop Circle Punch for the layer.

Peaceful Poppies Designer More Easy Cards

On these cards, I used another die in the Painted Labels Dies and the Pretty Label Punch. You can see I used two of the excess strips, one green and one the white side behind the greetings, plus some embellishments. You will notice two of the cards in the two photos have the narrower strip of designer paper, cut at 3″x 5 1/2″ with a narrow accent strip of cardstock.

If you want to see what you can do with the inside of the card, I added Whisper White layers to all and stamped a flower from the Painted Poppies Stamp Set in Memento Black Ink. Then I colored in the flower with some Stampin’ Blends markers.

Peaceful Poppies Designer Easy Cards Inside

And there you have it! Ideas for six cards from one sheet of the Peaceful Poppies Designer Series Paper!

SHOP STAMPIN’ UP! DURING SALE-A-BRATION AND EARN FREE PRODUCTS WITH EVERY $50 PURCHASE!

All About the Peaceful Poppies Suite

I think this Peaceful Poppies Suite is one of the most beautiful and has so much creative possibility! While I don’t have the whole suite yet, I have one Bundle and can tell you there are lots of ways to use just that bundle to make wonderful cards and things.

Watch this Stampin’ Up! video and you’ll find out all kinds of things about the Suite, like how they named everything! I watched it twice because there was so much information in it!

You’ll find out how the beautiful Peaceful Poppies Designer Series Paper was designed and that will make you want it even more. Although I have a sample, I can’t wait to get the whole package.

Check out this quick video as they show each paper in the collection:

Check out this post and this post about two cards I have put on my blog if you would like to see a couple of easy cards to make with these poppies!

Shop Stampin’ Up! Online During Sale-A-Bration!