Category Archives: Cards

Fun Halloween Projects From the Past!

Halloween Night Candy Bars

Halloween Decorated Candy Bars

I think one fun treat project is to cover candy bars with designer paper or cardstock and then decorate. It doesn’t matter if you have Halloween paper or not, you probably have something that will work. If not, stamp some cardstock.

Mini Curvy Keepsake Halloween Boxes

Mini Curvy Keepsake Halloween Character Boxes

It’s so fun to use the Mini Curvy Keepsakes Box Die to make all kinds of treat box characters, like this Jack-o-Lantern and Frankenstein. You’ll find all kinds of examples on the internet for ideas!

Monster Bash Halloween Clear Tiny Treat Box

Monster Bash Halloween Clear Tiny Treat Box

I continue to say having these Clear Tiny Treat Boxes on hand makes it so easy when you want to make a little treat, gift box, or party favor. Just decorate in any number of ways, with designer paper, ribbon, stamping, whatever you like for the occasion.

Easy Halloween Trick or Tweet Candy Treats

Easy Halloween Trick or Tweet Candy Treats

If you want to make a special, but easy, treat wrapper for Halloween, just cut a strip of cardstock and score for the bottom to fit the candy and decorate the front with a funny Halloween character or design!

Black Cat Halloween Cards

Black Cat Halloween Cards

If you want to make Halloween cards but don’t have Halloween paper, make your own “designer paper” by stamping all over. Start with the largest stamp as you stamp randomly around on your paper, then progress through the smaller stamps you are using to fill in the space. It’s really fun! The Cat Punch makes this card so easy!

Triangle Treat Box For Halloween

Triangle Treat Box For Halloween

I’ve always thought these Triangle Treat Boxes were so easy to make and turn into a great treat box. You can vary the size easily. Just follow the directions in this post, linked in the title. Once you make one, you will have it down!

Halloween Card With Ghosts

A Quick and Easy Halloween Card With Ghosts

One of my favorite things of all in stamping is making ghosts out of hearts cut in half! You’ve got to try it!! Here’s an easy card with ghosts and some fun Halloween paper in the background. But you could also just use Basic Black maybe with a few “Boos” written in the background or embossed.

I hope these past Halloween ideas have gotten your creativity going if you are making some last-minute Halloween projects! I hate to see Halloween come to an end because it’s so much fun to make Halloween projects and cards!

Happy Halloween!

Paper Pumpkin Alternate Halloween Cards

Paper Pumpkin Alternate Halloween Cards

It’s not too late to make Halloween cards and certainly not too late to make Paper Pumpkin Alternate Halloween Cards if you got a September 2020 Paper Pumpkin Kit! The kit was designed to make a whole slew of treat holders, which are cute, but if you don’t need or like a Paper Pumpkin projects you can always just use the materials to make whatever you want! No Paper Pumpkin Police will show up at your door asking why you didn’t make the intended project!

This particular Paper Pumpkin kit has a BUNCH of extra pieces in it. I made several of the treat holders as seen in this post. I usually like to make at least some of the kit as designed, so in this case, I made several of the treat holders and then went to work making some Halloween cards, as many subscribers did. After I made some cards, I wanted even more! And it was so fun to play with all the extra pieces of die cuts and cute stamps in the exclusive stamp set that came in the kit!

Here are some more cards I made with extra pieces in the kit.

Paper Pumpkin Alternate Halloween Cards 2

Sometimes I start out looking on Pinterest or online somewhere for ideas (there are always plenty of alternate ideas for every Paper Pumpkin Kit) and often change up the design or make up my own design as my creativity starts flowing after getting some ideas to get started!

In some cases here, I used my own Stampin’ Up! dies to make focal points so you can do whatever you like. It was a fun time making a bunch of cards with so many materials to choose from!

It’s not too late to make some Halloween cards to send or give to friends or family or make some treats for the trick-or-treaters. Even if you don’t have the September Paper Pumpkin Kit, you can get ideas and use whatever stamps and products you already have.

And if you aren’t already a Paper Pumpkin subscriber, you might want to try out the upcoming November Kit by subscribing by November 10th. Kits ship out a couple days after day so it won’t be long! No risk, no obligation if you don’t care to continue your subscription at any time. Or you can skip a month by just going into your account before the 10th of any month.

JOIN PAPER PUMPKIN HERE!

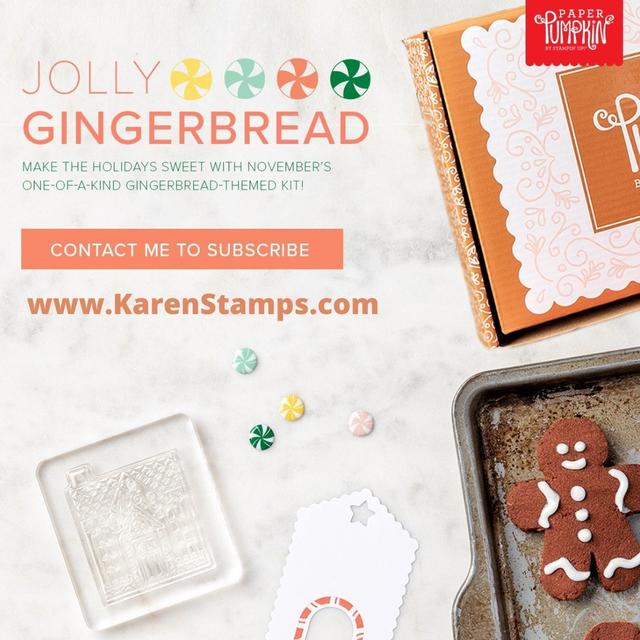
Paper Pumpkin Jolly Gingerbread Kit Nov 2020

Looks so cute, doesn’t it?! We always need something extra for the holidays, so subscribe to Paper Pumpkin for November and try it out. Or if you used to be a subscriber, just reactivate your account to get this kit!

Now go make some last-minute Halloween cards!

Which Designer Paper on Sale Is Your Favorite?

Designer Paper Sale 2020 Banner

LAST WEEK! Ends Sat. Oct. 31!

This is the last week for the Stampin’ Up! Designer Series Paper Sale so don’t miss out! Which of the selected papers is your favorite?!

As the holiday season approaches, you might want to save some money where you can in your cardmaking. Fortunately, the Designer Series Paper Sale this October will you do just that.

During this promotion (ending October 31), you can enjoy a 15% discount on select papers from the 2020–2021 Annual Catalog and August–December 2020 Mini Catalog! It’s the perfect opportunity to stock up and save on gorgeous Designer Series Paper that you can use in all of your holiday projects …. and others!

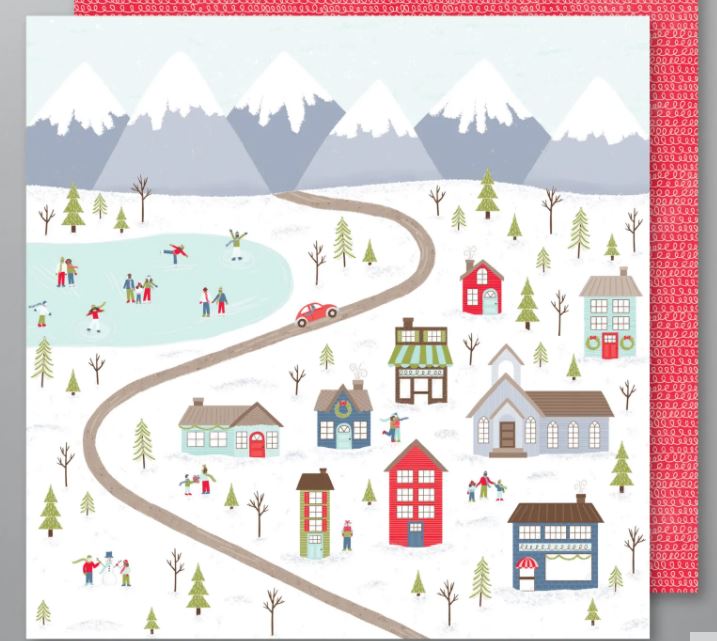
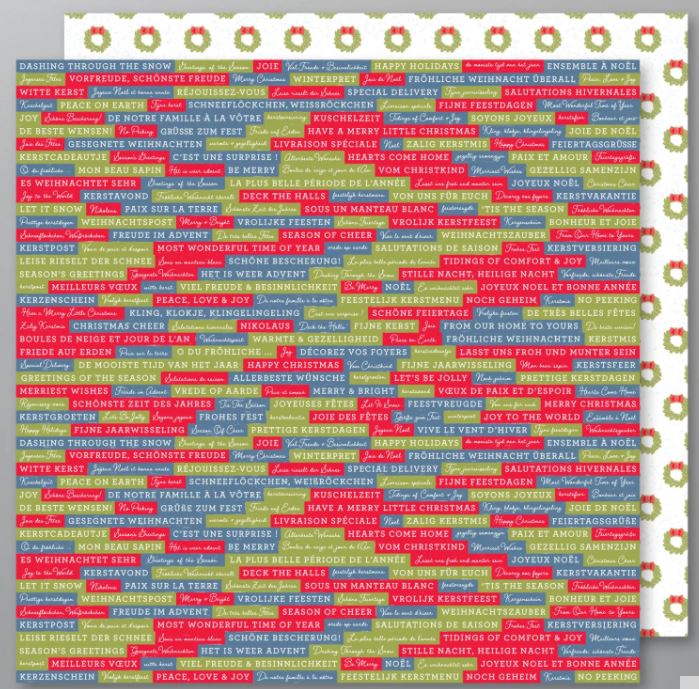
Designer Paper Sale Papers
Designer Paper Sale 2020 List

My personal favorite papers:

  • Forever Greenery (for sure!)
  • Poinsettia Place
  • Heartwarming Hugs
  • Plaid Tidings

I could list a few others, maybe most, but these are a few!

Whether you want to purchase papers you haven’t bought yet or you want to stock up on your favorites or stock up for making Christmas cards and holiday projects, this is the week to do it!

SHOP THE STAMPIN’ UP DESIGNER SERIES PAPER SALE!

Paper Pumpkin Halloween Card & Tag

Paper Pumpkin Halloween Card & Tag

I still have pieces from my September Paper Pumpkin Kit so I used stamps and pieces to make this Paper Pumpkin Halloween Card & Tag. I actually started with the tag because I have this Halloween sweater tree I bought from someone on Instagram and I thought it would be fun to hang a tag on it for Halloween.

And after I made the tag, I thought I should copy myself and make a Halloween card as long as I had extra pieces I had die cut and everything still out on the table!

I used a lot of varied things! To start with, I used the Stitched So Sweetly Dies for the Pumpkin Pie and Basic Black pieces to make the tag and then the focal point on the card. The pumpkin on the tag is stamped with the stamp set in the Paper Pumpkin Kit and then colored with Stampin’ Blends. The greeting is from the Paper Pumpkin stamp set also and stamped on Granny Apple Green, then die cut with a die in the Tasteful Labels Dies. For some tiny little stems of leaves in various colors, I used the dies in the Forever Flourishing Dies. And I found some tiny little flowers in the Budding Blooms Dies. Sometimes you should just look through all your dies and see what you can use! It doesn’t always have to be in a coordinating set. I added a Gilded Gem on top of each flower on the tag. The ribbon on the tag is the beautiful Black 3/8″ Glittered Organdy Ribbon.

The Halloween card is very similar. The card base is Cajun Craze with a layer of Pumpkin Pie. To get the wood background, I used a pattern in the In Good Taste Designer Series Paper. This large pack of designer paper is on sale in the Stampin’ Up! Designer Series Paper Sale until October 31 so don’t miss it! Instead of the stamped pumpkin, I used one of the pumpkin diecuts in the September Paper Pumpkin Kit, as well as a couple swirly vines plus some colored stems I already die-cut like on the tag. For a couple of embellishments I used two of the Gold Glitter Enamel Dots and tied a bow with the Black Glittered Ribbon.

Here is a photo of what I did with the tag! I bought this sweater tree from @thelittlegreenbean on Instagram, also the two little embroidered mushrooms on the right. After Halloween, I could make a fall or Thanksgiving tag to hang on the tree. (If you recognize the Witches Candy Shoppe sign in the background, that was some designer paper from several years ago that was perfect for framing for home decor!

Halloween Tree With Tag

Hope you have fun stamping during the last week before Halloween and the last week of the Stampin’ Up! Designer Series Paper Sale!

Snowman Z-Fold Merry Christmas Card

Snowman Z-Fold Merry Christmas Card Open

I was in a snowman mood when I made this Snowman Z-Fold Merry Christmas Card. I started off looking at the Trimming The Town Designer Series Paper and when I saw this snowflake print, I thought it would go well with one of the snowmen in the Snowman Season Stamp Set! Sometimes you get inspired with a card idea just by looking through your designer paper.

I decided to make a Z-Fold card. It’s something VERY easy and looks extra special. All you have to do is make a card base the usual way, then fold the front back on itself in half. So cut the cardstock like usual at 8 1/2″ x 5 1/2″. Score at 2 1/8″ and 4 1/4″. If the front of the card is 4 1/4″ wide, then you want to score that in half which would be 2 1/8″ to fold half of the front back to make that z-fold. It’s easy!

The card base is Misty Moonlight cardstock with a snowflake piece of Trimming the Town DSP. I cut it at 2″ x 5 3/8″. I could also have made it 1 7/8″ x 5 1/4″ for a slightly wider margin that would have matched the Whisper White inside layer.

The snowman is stamped in Black Memento Ink on Whisper White with the greeting, in the same stamp set, stamped in Real Red Ink. That piece is cut 3″ x 3 1/2″. It is layered on a piece of Real Red Cardstock die cut with a special technique using the Rectangle Stitched Dies. I cut out the rectangle, then moved the die so that it would make the rectangle shorter.

The snowman is colored the little bit it needs with Stampin’ Blends in Real Red, Misty Moonlight, and Pumpkin Pie with a tiny bit of Pool Party as shading on the snow. Then I adhered a few Snowflake Sequins around the snowman. The Take Your Pick tool is really handy for picking up and placing sequins on teeny tiny drops of Multipurpose Liquid Glue.

When adhering the snowman panel to the front of the z-fold, but sure to only put adhesive on the portion of the back of the snowman that will be adhered to the z-fold. You want to make sure that the panel you add to a z-fold card will cover any message inside so sometimes you have to play with positioning a little bit. The message I stamped inside this card is from the Tag Buffet Stamp Set.

Click HERE to see another z-fold card I made recently!

This really was an easy card and if you follow my design and directions, it will be even easier and faster for you to make a card like this Snowman Z-Fold Merry Christmas Card!

Snowman Z-Fold Merry Christmas Card

Many Layered Blossoms Birthday Card

Many Layered Blossoms Birthday Card

This die-cut piece was already laying on my table and I was in a “red” mood so I was pleased how this Many Layered Blossoms Birthday Card came together. Real Red is one of my favorite Stampin’ Up! colors!

You won’t believe how simple this card is to make and yet it will look like you make an elegant, fancy card! That’s what die-cuts can do for you!

The card base is Shimmery White Cardstock, one of my favorite papers! It just barely has a glimmer to it, very subtle, but it is there and makes the paper look rich. It’s a must-have in your stash in my opinion! Then I added a layer of Real Red underneath another piece of Shimmery White.

I had previously used the Many Layered Blossoms Die to cut out this piece or Real Red. I think I was trying out my new Stampin’ Cut & Emboss Machine to see how it would handle a large and intricate die. So I had this stack of die cuts on my table! I just used the teeniest dots of Multipurpose Liquid Glue on the back of the blossoms and adhered it to the front of the card.

The greeting is from the Blossoms in Bloom Stamp Set. You can buy both the stamp set and the Many Layered Blossoms Dies. Then you will have it all!

I stamped the greeting in Real Red Ink on a strip of Shimmery White and snipped the banner in with the pointy part of the Tailored Tag Punch. Then I layered this on a piece of Real Red.

That’s all there is to this card! If you want a change from Halloween or holiday cards, go back to this popular stamp set and die and make a card like this Many Layered Blossoms Birthday Card.

Easy Trimming the Town Christmas Card

Easy Trimming the Town Christmas Card

Don’t forget about the Designer Paper Sale going on this month (which is just about over) at Stampin’ Up! and the paper on this Easy Trimming the Town Christmas Card is one that is on sale, just in time for the holidays! This particular card is one that is about as simple as they get yet is colorful and festive and will spread holiday cheer!

The card base is Misty Moonlight, one of our In Colors, with a layer of Poppy Parade. I originally thought the red color on this paper was Real Red, but it is actually Poppy Parade. Not that you can’t use Real Red because I did on this other card I made!

I just cut a layer of the Trimming the Town Designer Series Paper with the smaller buildings on it. It is bright and colorful and makes a “happy” holiday card! Then all I had to do was add a greeting!

The greeting is from the Banner Year Stamp Set. This is a set that you might overlook but I have gotten a lot of use out of it with its many greetings and cute little images. I stamped it in Misty Moonlight Ink on Whisper White Cardstock and layered on a piece of Misty Moonlight Cardstock. I used the Banners Pick a Punch to punch the banner ends. If you don’t have the punch, just eyeball it and cut with Paper Snips. To help the greeting stand out, I layered a piece of Poppy Parade underneath and popped it all up on Stampin’ Dimensionals®.

The designer paper already had snowflakes printed on it, but you could add some Adhesive-Backed Snowflakes or some other sequins or gems if you wanted to jazz up the card a little bit more.

Just add a layer of Whisper White inside the card since the Misty Moonlight card base is a dark color. Maybe cut out one of the little buildings or add a strip of the designer paper or stamp a Christmas greeting inside if you like.

Be sure to check out the Designer Series Paper Sale, going on now in the Stampin’ Up! Online Store, only until October 31!

Designer Paper Sale 2020 Banner

Tag Buffet Stocking Christmas Card

Tag Buffet Stocking Christmas Card

If you need to make a lot of Christmas cards, you might want to consider a simpler card design, like this Tag Buffet Stocking Christmas Card, because not every card has to be elaborate to be beautiful. This card was not the result of a lot of planning and thinking. I had in mind making a simple Christmas card, pulled out the designer paper and then thought of using this stamp set. An already diecut Whisper White piece in my cardstock package inspired me to use it for the focal point. One thing just followed another.

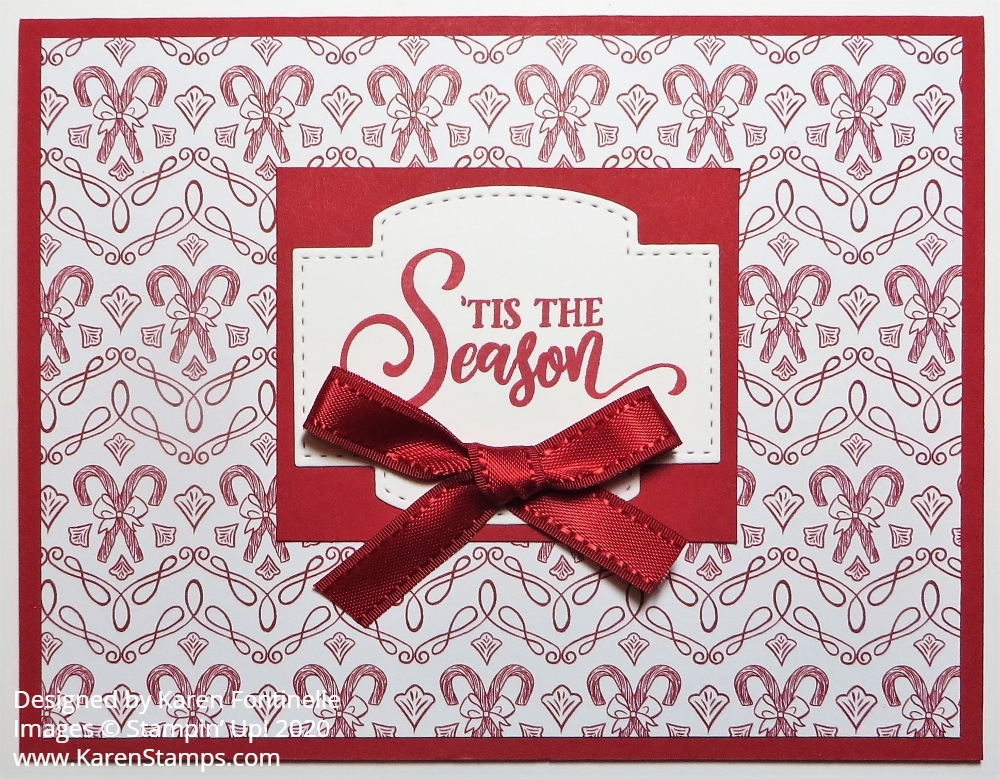
The card base is Real Red and the designer paper I used is ‘Tis the Season 6″ x 6″ Designer Series Paper, which I just purchased. Originally I wasn’t too crazy about the paper designs and I was already buying other holiday papers so I didn’t think I needed it. But of course, eventually, I wanted it! The 6″ x 6″ size is very handy for cardmaking and you don’t feel so bad cutting up a 12″ x 12″ piece of DSP!

I also decided to use the Tag Buffet Stamp Set, which goes with the Tag Buffet Project Kit to make tags. I already made the tags in the kit, but the stamp set is very Christmas-y and good to use making cards or other projects for the holidays.

I found a die-cut Whisper White piece in my bag of cardstock and that gave me the idea to use the big “Merry Christmas” greeting stamped on it with the stamped and cut out Christmas stocking off to the side. The piece was die cut with the Rectangle Stitched Die. It has a really pretty edge on it which is why I like those dies so much. But when I stamped the Merry Christmas greeting across the rectangle, there really was no space for the stocking! I thought my original idea was ruined, but no fear! It occurred to me to cut the two words of the stamp apart! I know it is like heresy to cut stamps apart, but in this case, I could see no downside. I could still stamp the words side by side easily, but if I separated them I could stamp one on top of another in smaller areas. All it took was one snip of the scissors! Then there was room for the stocking!

I stamped the stocking on Whisper White in Memento Ink because I knew I would color with my Stampin’ Blends alcohol markers. I used the Light and Dark Real Red markers. I also could have used Cherry Cobbler since that is a coordinating color with the designer paper. I found the Real Red markers a little light but I just added some more coloring to the stocking.

After stamping and coloring the stocking, I cut it out by hand with my Paper Snips. Before adhering it to the greeting, I couldn’t resist stamping some greenery and holly on the cardstock. It was all in the stamp set and I wanted to play with more stamps! Then I popped up the stocking with Stampin’ Dimensionals®. For some bling, I added some Red Rhinestone Basic Jewels. And for just a little bit of glimmer, I used Clear Wink of Stella on the white areas of the stocking with the glitter brush.

On the inside of the card, I added a layer of Whisper White on top of the Real Red and stamped the long sentiment that is in the stamp set in Real Red Ink. The I also added two stamped pieces of the same greenery I used on the front of the card.

If you are interested in the Tag Buffet Stamp Set, you might enjoy the Tag Buffet Project Kit for making some tags (or even using the tags to make cards!). I loved working on these tags! The only stamping was the greeting, everything else was supplied and I just had to assemble. They are very pretty. Check out my post about the tags HERE.

I like to make a variety of Christmas cards to send out. Some I might make easy and some fancier. This Tag Buffet Stocking Christmas Card is a simpler one that you might enjoy and still would impress the recipient!

Shop Stampin’ Up! Online HERE!

Arrange a Wreath Floral Wreath Give Thanks Card

Arrange a Wreath Floral Wreath Give Thanks Card

After seeing a lot of cute samples of wreath cards and receiving a birthday card from my friend using the wreath die cut, I decided I had to have this set! Finally, I got around to trying it out, and here is my fallish Arrange a Wreath Floral Wreath Give Thanks Card.

I didn’t even realize how much is included in both the Arrange a Wreath Stamp Set and Wreath Builder Dies. Of course, you can get the Arrange a Wreath Bundle and save 10% off the price of both. There are two different dies for wreaths, giving you two different looks or just two different wreaths to use separately. You get all kinds of different little items for decorating the wreaths to cover several occasions or just any occasion. The stamp set has five different greetings to use. So you are covered for just about anything with this Bundle!

For my card I chose Terracotta Tile for the card base. I seldom use these In Colors from last year but I thought Terracotta Tile might be a nice color for a fall card.

The Whisper White embossed layer I found on the table that I had made a while back just testing my new Stampin’ Cut & Emboss Machine with embossing folders! I thought it would work just fine as a background behind my wreath. The background is made with the Ornate Floral 3D Embossing Folder. It just adds a little bit of subtle prettiness I think!

I die cut both wreaths using two different greens – Granny Apple Green and Old Olive. I played around with which one looked better on top and finally settled on this combination. Then I stamped some flowers from the stamp set and cut them out with the dies. I chose Terracotta Tile, Pumpkin Pie, and Crushed Curry ink for the flowers. There is a die to cut a ribbon for the wreath but I decided to use a real ribbon, the Terracotta ribbon in the Ornate Garden Ribbon Combo Pack. For a little bit more embellishment I used some Holiday Rhinestones for each flower center.

The greeting is in the Arrange a Wreath Stamp Set and I stamped it in Terra Cotta Ink on Whisper White. It was die cut with a small Stitched So Sweetly Die and layered on a die-cut piece of Terracotta Cardstock in the Tasteful Labels Dies.

That’s all there is to this card! Take a peek again at the card my friend sent to me for my birthday. It’s really pretty easy and simple, but lots to play with in this stamp set and dies as I said! You will get a lot of use out of this Bundle because you can use a card with a wreath for lots of occasions.

SHOP STAMPIN’ UP! ONLINE!

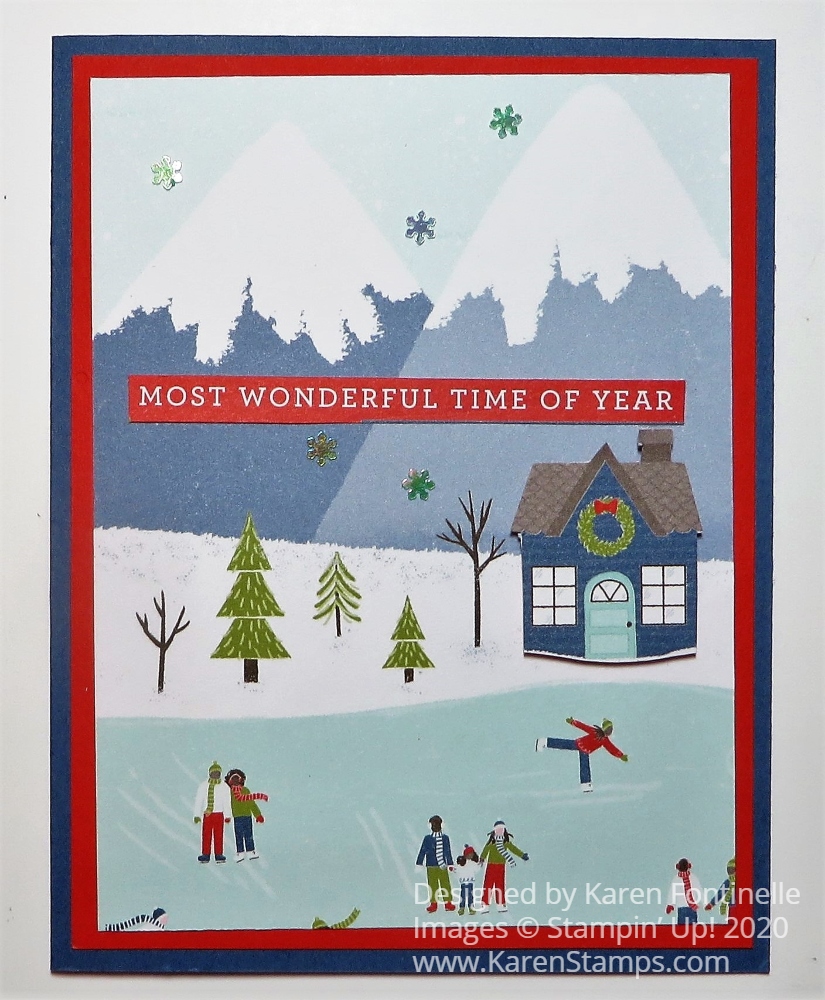
Trimming the Town Christmas Wishes Card

Trimming the Town Christmas Wishes Card

If you would like to have some fun with designer paper and card design like this Trimming the Town Christmas Wishes Card, this designer paper is for you! If you like, you can feel like a kid playing with paper and scissors and building a little town or landscape!

During the Stampin’ Up! Designer Series Paper Sale this month, I couldn’t resist purchasing this Trimming the Town Designer Series Paper. I also purchased the stamp set, but for this card, I only used the paper except for the greeting. I simply took one of the papers that had the larger houses and buildings printed on it and cut out some of the images with Paper Snips.

The large house on the front of my card I actually “remodeled”! The basic house was printed on the paper but as I tried to conserve as much of the paper as I could while cutting into it, I noticed that at the very bottom of the paper was a partial building and it was this roof piece with the round window, so I cut that roof piece out and adhered it to the top of my large house! The other little building on my card was also at the bottom of the page so I cut that out and stuck it behind the snow as it looked like the lower part of the image could have been cut off being placed at the bottom edge of the paper.

The card base is Real Red. The actual coordinating color with the paper is Poppy Parade, but I think the Real Red worked just fine on this card. Besides, I love Real Red! I put a layer of Whisper White underneath the Trimming the Town DSP with the snowy sky pattern. What a perfect paper to use as a background on a card or project! I covered the bottom portion of this designer paper with a piece of Whisper White to look like snow. I cut this the size I wanted to fit and then just added a little curviness to the top, just freehand although there are some dies that could do the same for you.

I just placed the two buildings and trees where I wanted them on the card and popped up the larger house with Stampin’ Dimensionals® as well as the large tree. If I had cut out some smaller buildings, I could have played a little more with the landscape. There is so much design potential with this designer paper as well as if you used the Coming Home Bundle (stamp set and dies).

One of the papers in the Trimming the Town package, is a full sheet of a winter scene that you could actually frame as is for a home decor piece, or use as a scrapbook page background or cut out various sections. It’s really a fun package of designer paper for the holidays!

The greeting I used on this card is from the Banner Year Stamp Set. I stamped it in Real Red ink and die cut with one of the Rectangle Stitched Dies. I think it is a perfect fit on this card.

Don’t miss out on the Designer Series Paper Sale going on until October 31 in the Stampin’ Up! Store! There is a good choice of select papers and Trimming the Town is one of them 15% off! I think you will enjoy using this paper as I did on this Trimming the Town Christmas Wishes Card.

SHOP STAMPIN’ UP! ONLINE HERE!

Can’t Miss THIS November Paper Pumpkin!

Paper Pumpkin is our monthly subscription service that offers unique papercrafting projects for crafters of any skill level! In these all-inclusive kits, subscribers receive pre-cut paper pieces, embellishments, ink, and an exclusive stamp set designed to encourage them to explore their creativity. As their subscription continues, subscribers will have a collection of cards—and other creations—for a variety of occasions, in addition to a stockpile of supplies!

So, what’s in store for this month’s Paper Pumpkin kit? November’s cute, gingerbread-themed kit contains enough supplies to create one-of-a-kind Christmas crafts! Whether it’s a gift card carrier, traditional card, or tasty-looking tag, this sweet and seasonal kit is the key to heartfelt holiday gifting. With curly cutouts, sugary stickers, and delicious die-cut designs in a special-edition box, a jolly holiday will be on its way with this kit!

ABOUT THE NOVEMBER KIT

Name: Jolly Gingerbread

  • Kit contains enough supplies to create 15 gift card carriers and coordinating envelopes.
  • Kit contents can also be used to design traditional holiday cards, gift tags, and other paper projects.
  • Contents arrive in a collectible, special-edition box!
  • Project size: 2-1/4″ x 4″
  • Envelope size: 2-3/4″ x 4-3/8″
  • Coordinating colors: Cinnamon Cider, Daffodil Delight, Calypso Coral, Mint Macaron, Shaded Spruce, Blushing Bride, and Whisper White
Paper Pumpkin Jolly Gingerbread Kit Nov 2020

Join Paper Pumpkin Today Here!

Deadline to get this November Paper Pumpkin Kit is November 10th

(while supplies last).

Halloween Spooky Ghosts Card

Halloween Spooky Ghosts Card

A Halloween card that I saw years ago much like this Halloween Spooky Ghosts Card is one of the things that inspired me to become a Stampin’ Up Demonstrator! I was visiting my friend who first introduced me to Stampin’ Up! and we went to what was a team meeting, I guess, or some kind of gathering. I was so taken with a creative Halloween card made like this one with a ghost on it that I fell in love with stamping and eventually signed up to be a Demonstrator.

Can you guess how I made these ghosts?? They are die-cut hearts, cut in half! Sometimes it doesn’t take too much to thrill me! That card from years ago will always be one of my favorites, maybe because I like Halloween so much, too!

In addition, I decided to make this one of those new-fangled Slim-Line cards everyone is talking about. I have made others HERE and HERE. They can be made in various sizes, so you can make one longer and/or wider than mine. Just make sure it is going to fit in an envelope!

To make this card, I started with a card base of Gorgeous Grape cut at 6″ x 6″. When you fold that square piece of cardstock in half, you have a card that is 3″ x 6″. It will fit into one of those regular, but small, envelopes you likely have at home. If you make it longer and wider, then it has to fit into one of those regular longer envelopes.

I made the layer Basic Black so the ghosts would show up really well in Whisper White! I die cut several small, medium and large heart shapes with the Be Mine Stitched Dies. You could use heart punches if you don’t have the dies or even just cut out hearts by hand. Then just cut each heart you are going to use in half with scissors, from the point at the bottom right up through the middle of the heart. Then just add some eyes with a black marker. Place the heart halves along the edge of the card as if they are peeking in.

As I was looking for a greeting, I wanted to use this one from the Ghoulish Goodies Stamp Set and decided to emboss it right on the black cardstock with white embossing powder. I also noticed the tiny little “Boo” in the stamp set and thought that would be perfect also embossed on the card. I used my retired Embossing Buddy to remove some of the static on the card before stamping with Versamark Ink. Then I dumped on White Stampin’ Embossing Powder, dumped it back off, and heated the powder with my Heat Tool. I did all the embossing before I adhered the ghosts to the edges of the card. Then I adhered the black layer on to the Gorgeous Grape card base.

So there you have one of my favorite cards for Halloween! It’s so easy and fun, even if you don’t do the heat embossing. You can stamp and adhere a greeting the regular way if you like.

Have fun making a card like this Halloween Spooky Ghosts Card!

Forever Fern Fall Leaves Thank You Card

Forever Fern Fall Leaves Thank You Card

While we mostly think about “green” when we think about the Forever Fern Bundle, I wondered if I could use fall colors instead, and I ended up with this Forever Fern Fall Leaves Thank You Card. I really like it!

The card base is Garden Green with what was going to be a full Whisper White stamped layer. There is nothing difficult about the technique I used, but placing the stamps resulted in too much of a hodgepodge at the bottom of the Whisper White that I did not like. Luckily I thought of just cutting off that bottom portion and using a piece of Forever Greenery Designer Series Paper instead. I wanted a rather plain piece of designer paper so it wouldn’t look distracting and busy against my stamped leaves.

After I cut off the bottom mess of leaves, there were a few sticking up, but there seemed to be too much white space in the middle, even with the greeting stamped in Cajun Craze. The greeting didn’t look right stamped lower. So, what to do? I chose one of the long tamps in the Forever Fern Stamp Set and stamped it so it went up into the center of the card a little bit. I got lucky and really liked how it turned out!

After adhering the two papers, I wrapped the Whisper White Faux Linen Ribbon in the Flowers For Every Season Combo Pack (you get 3 ribbons!) around the seam. I tied the bow separately and adhered it with Mini Glue Dots. One tip I could have done would have been to tie a piece of white twine around the ribbon where I would place the bow to cinch that ribbon going across the card just to make it look more like I tied the bow on that ribbon going across!

Let’s talk about the stamping technique! I just used my Stampin’ Write Markers (not Stampin’ Blends) to color directly on the stamp. I pulled out various green markers, yellow, orange, darker yellow, even Cherry Cobbler for a dark reddish. It’s best if you start with the lightest colors, but even if you don’t, just scribble the darker color off your marker on scrap paper. You don’t have to be precise, just use the side of the brush tip of the marker to randomly color on the leaves all around, then use another color and another, whatever look you are going for. Don’t forget to “huff” (breathe) on the stamp to moisten the ink that might be drying, and then stamp. Each time you stamp it’s a surprise!

You can see on my card that the top bunch of leaves have a little more Cherry Cobbler ink on them, which I loved. The other ones have more green with a little yellow and orange. Each time you use this technique and stamp it will be different because while you can see the wet marker ink on the stamp, you can’t really see the colors until you stamp! In the end, I loved how this card turned out!

If you haven’t done this technique before, you can practice a few times, but it is plenty easy and I’m sure you will be happy with your efforts! Remember that the Forever Greenery Designer Series Paper is on the Stampin’ Up! Designer Series Paper Sale during the month of October.

SHOP STAMPIN’ UP! ONLINE HERE!

Paper Pumpkin Halloween Cards

Paper Pumpkin Halloween Cards

The September 2020 Paper Pumpkin Kit may have been designed to make a bunch of Halloween or fall treat holders, but I don’t need that many this year so I used some of the supplies to make Paper Pumpkin Halloween Cards!

This kit really has a ton of pieces to use on the treat holders or however you like so it was really easy and fun to make these three cards. And I plan to go back and make some more cards and use up more of the pieces in various card designs.

The top card has a Basic Black card base with a layer of Cajun Craze. I used the Dainty Diamonds Embossing Folder to give the Cajun Craze paper a little texture. The little diamond shapes on the side are the scrap pieces from the treat holders! I stamped the faces on the pumpkins from the exclusive stamp set that came in the kit. The black cat and flowers are all die cuts in the kit as well as the two lacy yellow pieces. The greeting is stamped from a stamp in the kit on a die-cut piece in the kit. It’s just that easy!

The second card uses a piece of the Plaid Tidings Designer Paper for a layer on the Cajun Craze cardstock, layered on the Black card base. The pumpkins are stamped with faces and popped up on Stampin’ Dimensionals with a die-cut witch’s hat in the kit and some flowers and a swirly piece that looks like a vine with the pumpkins. I had a scrap strip of Cajun Craze so I slid that underneath the black lacy piece. Another fun, easy card!

The third card has a Basic Black card base with a Cajun Craze layer on which I stamped a few of the tiny leaves in the kit stamp set using Cajun Craze Ink. I could also have used Versamark Ink but I already had the Cajun Craze out and it gives almost the same look. I just cut up one of the treat holders to get the orange diagonally striped pieces underneath all the pumpkins and leaves. All of these die-cut pumpkin pieces and leaves come in the Paper Pumpkin Kit.

These Halloween cards were fun to make and I’m looking forward to making some more! In yesterday’s post I showed you the treat holders I had already made from the kit. A lot of times I like to make some of the cards or projects in the Paper Pumpkin Kit exactly as designed. But then I might like to use the rest of the supplies to make some alternate ideas. You will always find alternative ideas for any of the Paper Pumpkin kits online after people receive theirs and start making them!

You can’t get this fall pumpkin kit any longer but the next one comes out in just a few days! It’s a holiday kit called Joy To the World with international greetings if you’d like to send cards to other countries! You can even join a special Facebook group to connect with other Paper Pumpkin subscribers about this kit! Today, October 10th, is the last day to sign up to get this holiday kit so don’t delay!

Here is my personalized link for you to sign up to subscribe to Paper Pumpkin so you won’t have to add my name:

JOIN PAPER PUMPKIN!

Gilded Autumn Fall Acorn Card

Gilded Autumn Fall Acorn Card

I absolutely love the Gilded Autumn Designer Paper for fall cards and I noticed there was one pretty, but kind of odd patterned paper that I hadn’t used. It is actually the opposite side of this acorn and leaf paper and I had planned to use both sides on this card. But then I didn’t! I liked just the acorn and leaf print on this paper so I only used this one side on my Gilded Autumn Fall Acorn Card.

This card is just a simple, basic design we can all make very easily. You can keep it very simple or add some embellishments. It’s just a layer of designer paper on top of the card base and a greeting. That’s really all you would have to do.

The card base is Mint Macaron, one of the coordinating colors with the Gilded Autumn Specialty Designer Series Paper. This paper with its fall colors also has some papers with Gold Foil or Copper Foil accents. That’s what makes it so beautiful. It’s one of my favorites this season!

The greeting is stamped on Very Vanilla from the Gather Together Stamp Set. Then it was die cut with a circle in the Stitched Shapes Dies and layered on a Mint Macaron scalloped circle that I already had in my package of paper! I popped up the greeting on Stampin’ Dimensionals.

Running underneath the greeting is a Just Jade ribbon in the Flowers For Every Season Ribbon Combo Pack. It’s not a perfect match but I think it is close enough and I like the gingham ribbon.

I couldn’t finish the card without doing a little more embellishing! I had a piece of the Forever Gold Laser-Cut Specialty Paper laying out on my desk and thought I’d see if some gold leaves would look okay behind the greeting. Then on the bottom of the greeting, I added three of the smallest Gilded Gems.

So if you are looking for an easy card to make for fall, just follow this simple design!

SHOP STAMPIN’ UP! ONLINE!