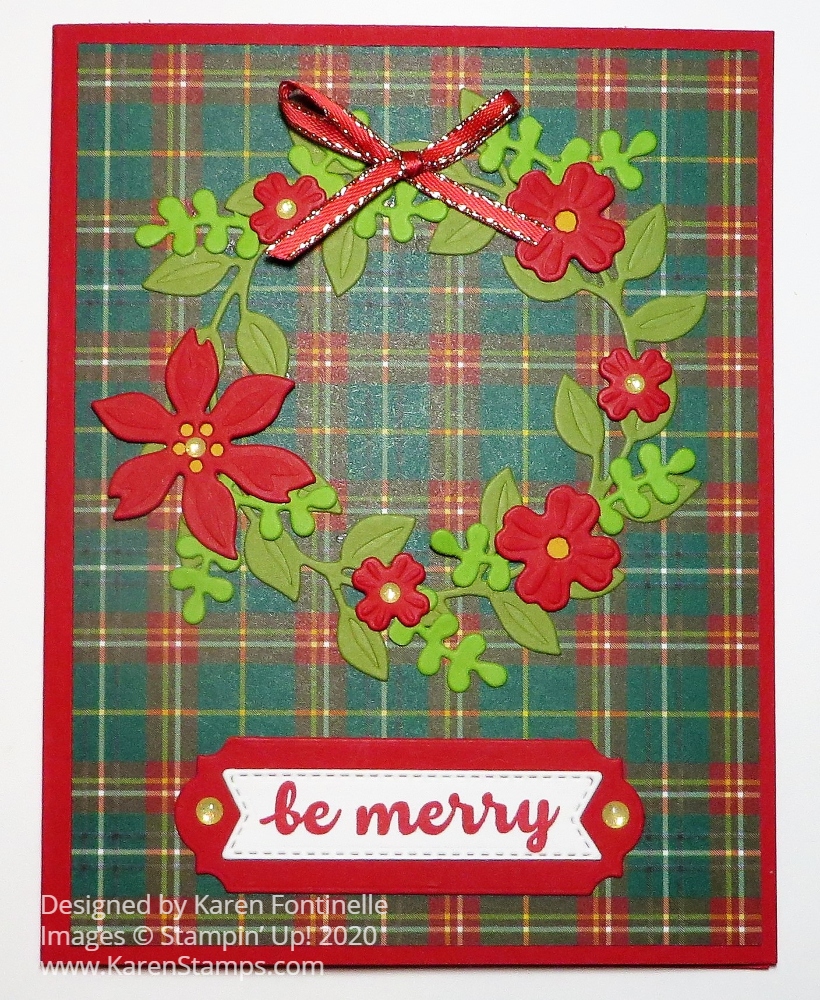
Make this Trimming the Town Wreath Christmas Card for a pretty quick and easy Christmas card. In fact, you can make it even easier than mine if you only use one die cut or no die cuts!
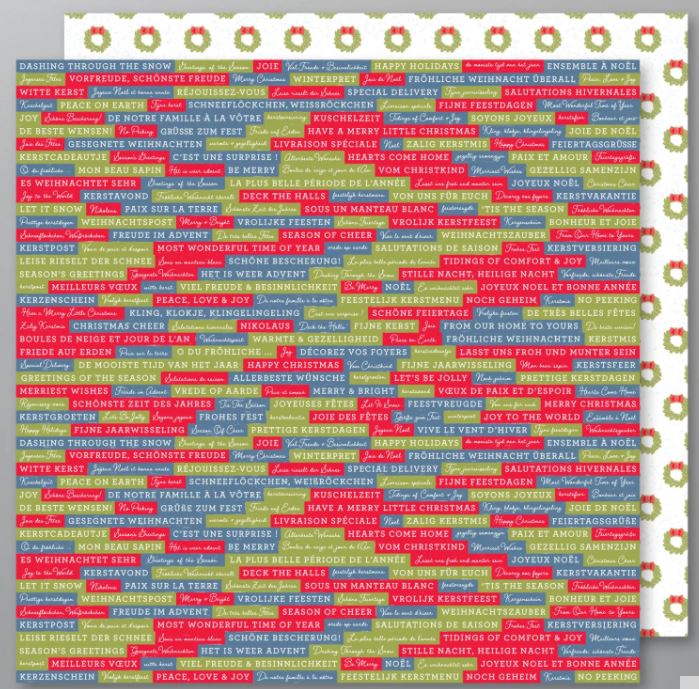
This is just a card with a piece of designer paper and a greeting plus a little ribbon. It’s a very simple design. The card base is Poppy Parade with a layer of designer paper from the Trimming the Town Designer Series Paper. You will find this cute wreath print on the back of the paper with all the holiday phrases. It’s often tough to know which side of the paper to use and tough to cut into it, especially when you like both sides!
Before adhering the designer paper to the card base, I adhered the strip of ribbon around the designer paper (just adhere the ends on the back, no need to go all the way around and waste a couple of inches of ribbon!). This ribbon is in the Ornate Garden Combo Pack.
The greeting is stamped in Poppy Parade Ink on Whisper White and die cut. The greeting is in the Perfectly Plaid Stamp Set. The die cut is part of the Ornate Frames Dies. To layer it on something, I cut out the narrow die with the fancy ends in the same set, but cut it in half so that I could place each piece at each end of the greeting. That die cut in Poppy Parade was adhered to the greeting and then popped up on Stampin’ Dimensionals. I also added two knots of ribbon on each side.
That’s all there is to this card. You could simply cut a rectangle out of Whisper White and a larger rectangle out of Poppy Parade with your Paper Trimmer and not do the die-cutting is you were making a lot of Christmas cards like this one.
Have fun trying out new card designs with different designer papers and greetings!