Category Archives: Big Shot

Ornate Garden Sponged Happy Card

Ornate Garden Sponged Happy Card

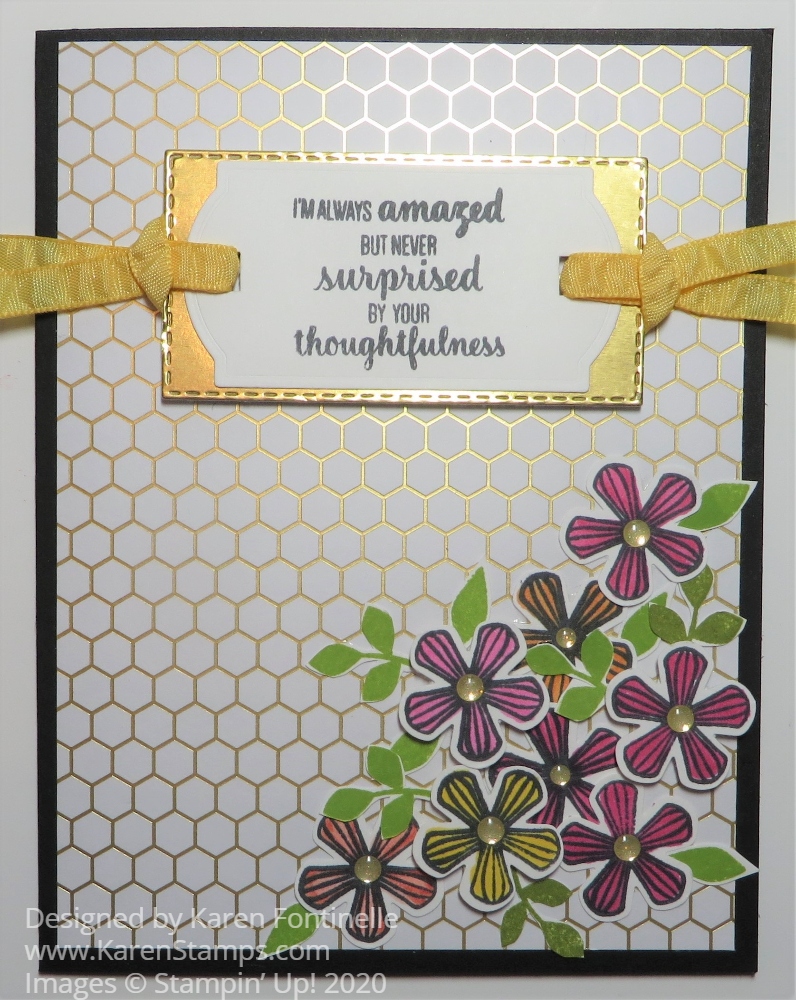
This Ornate Garden Sponged Happy Card came about it two ways today. First, I felt like I was either having an anxiety attack or coming down with “the virus” when one second before I was fine AND I saw a sample of a card online that was embossed but reminded me of this Ornate Garden Specialty Designer Series Paper with the gold foil accents on some sheets that made me think of sponging different colors of ink on the paper.

Here’s your anxiety tip of the day: Start looking online at cards and stamping videos and maybe better yet, force yourself to get up and start stamping! Get your mind off the news or whatever is going on in your mind that is not good for you!

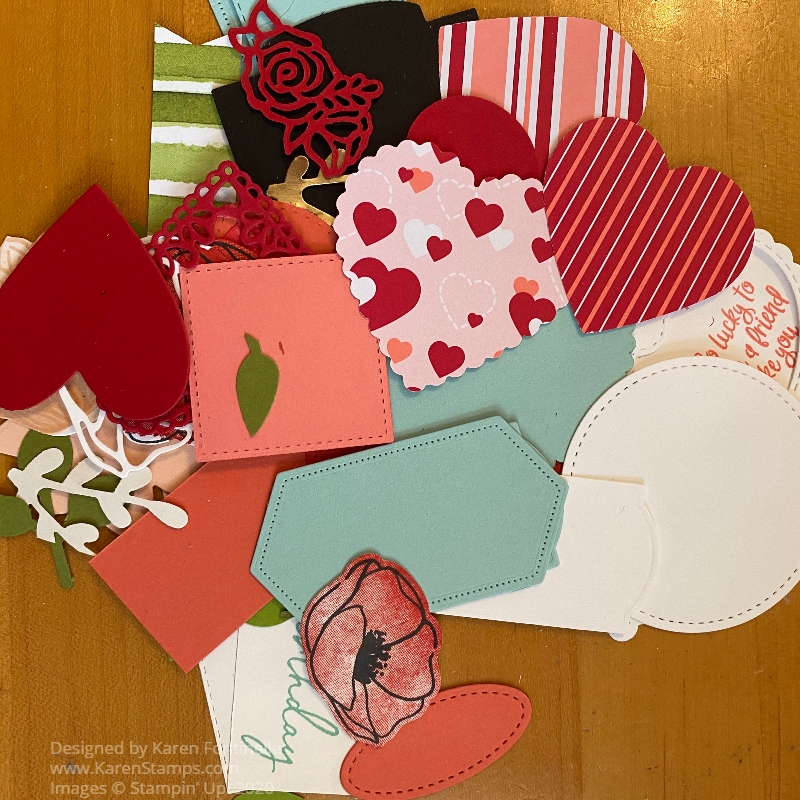
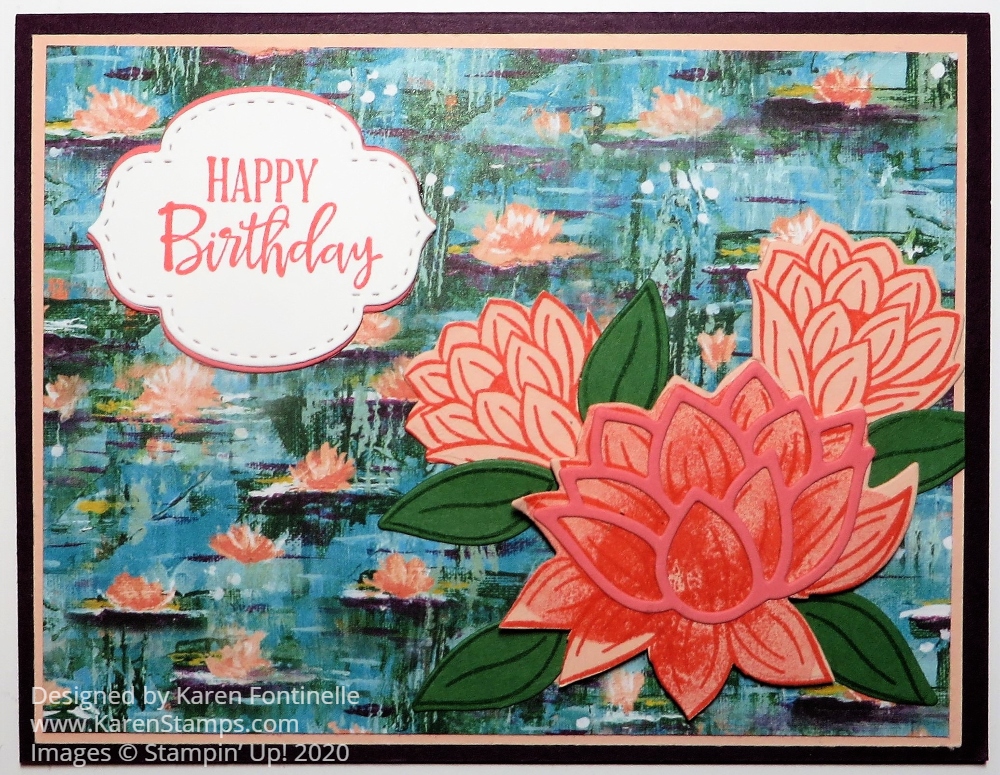
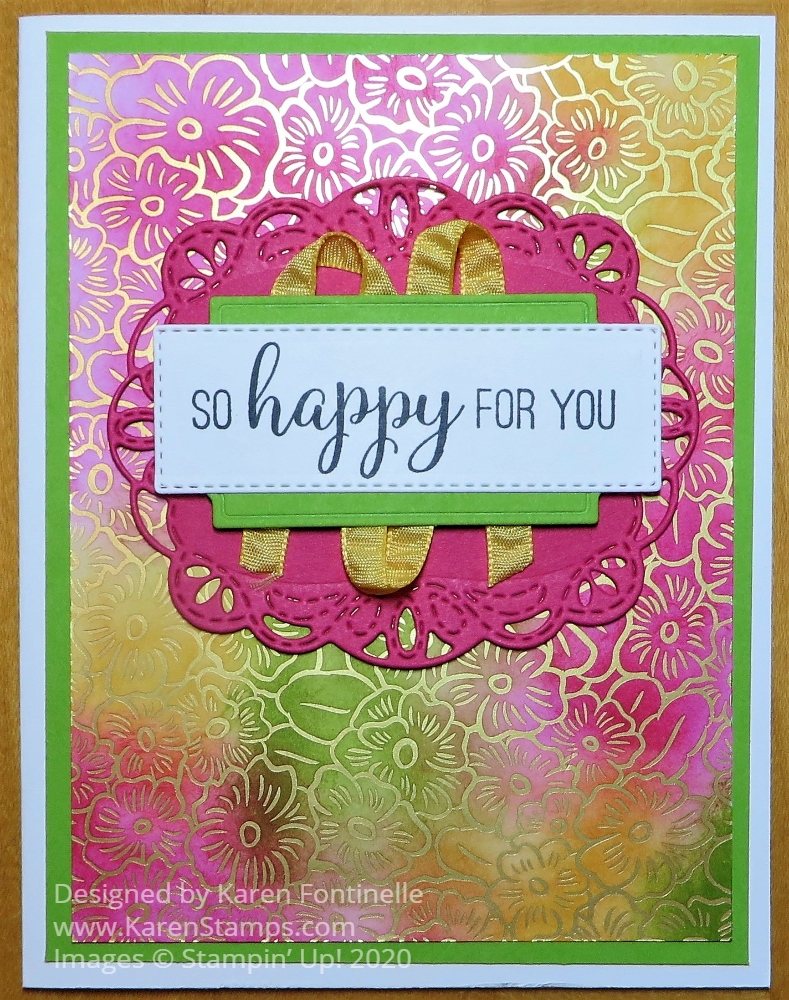
Obviously I need a “Happy” card today so I chose three colors of ink from the Brights family (my favorite!)…..Melon Mambo, Daffodil Delight, and Granny Apple Green. I could have used Sponge Daubers, but I grabbed a small piece of sponge and just used a different side of it for each color of ink. Yes, you will get ink on your fingers but that’s okay. It will keep you happy all day! I just sponged around on the Ornate Garden Paper and then wiped off a bit with a tissue. Next, I just played around with those three colors of cardstock plus Whisper White to see what combination would look best, or at least that I liked, to actually assemble the card.

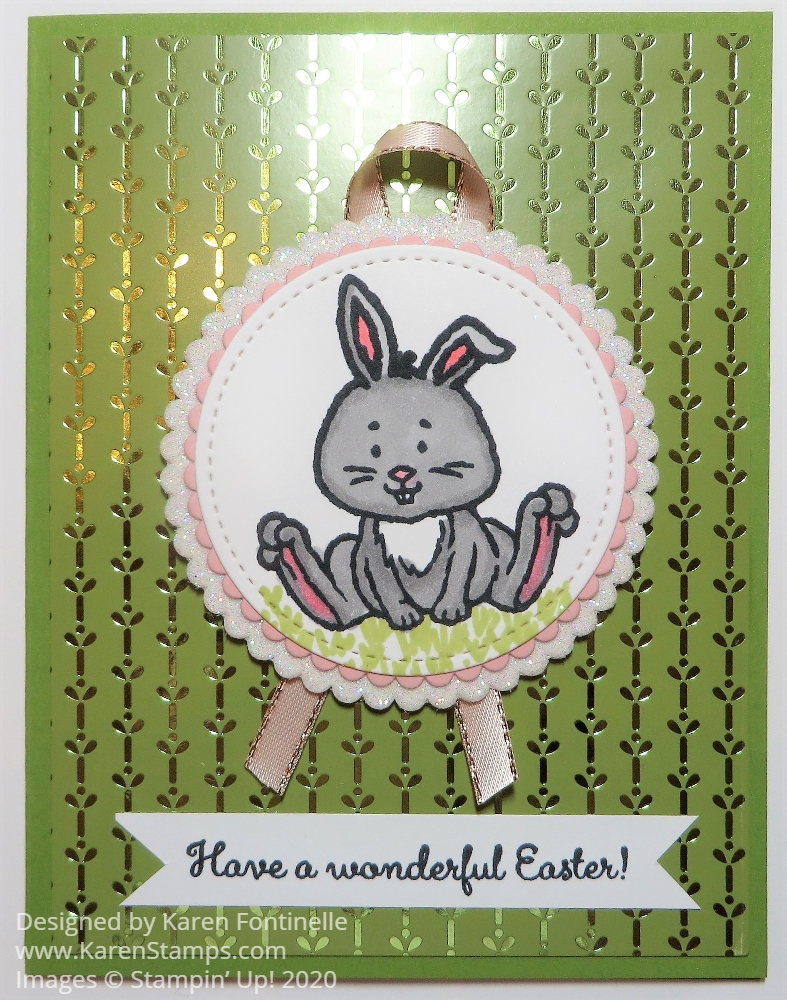
I finally decided on a Whisper White card base with a layer of Granny Apple Green. I found the Melon Mambo die cut from the Stitched Labels Dies in with my Melon Mambo paper but at first decided not to use it. I found the greeting I liked in the Modern Heart Stamp Set. I used a rectangular die in the Ornate Layers Dies but I used the technique of cutting it and then replacing the die over the same stitched lines to shorten the greeting piece.

I looked through my dies again to see what to layer the greeting on and found a die in the Stitched So Sweetly Dies that seemed to work. I cut that out of Granny Apple Green. As I thought about how that looked, I saw that Melon Mambo die-cut piece laying on the table and tried that behind it. I think it works! But I still felt like I wanted something else and finally adhered some Daffodil Delight 1/4″ Ruched Ribbon behind the Granny Apple Green and also popped that piece up on Stampin’ Dimensionals. I think the whole thing brings in all the colors of the ink and works out well with the sponged paper behind it and with the original intent of the card…. a Happy card!

Maybe today is the day for you to try some new technique or one like this. Remember to check the Last-Chance Products and the Clearance Rack in the Online Store! You will find some good bargains! Be sure to get what you need before it sells out!

SHOP STAMPIN’ UP! ONLINE!

Bird Ballad Laser-Cut Mother’s Day Card

Bird Ballad Laser-Cut Mother's Day Card

Mother’s Day is coming on Sunday so if you need to make a card, you might take some inspiration from this Bird Ballad Laser-Cut Mother’s Day Card. Part of the beauty of this card is the fancy laser-cut design but all you have to do is open the pretty tin that the cards and envelopes come in! Then decorate a little bit without taking away from the beauty of the laser-cut design.

The Bird Ballad Laser-Cut Cards and Tin are on the retiring list and you will find it in the Last-Chance category of the Stampin’ Up! Online Store. It is even discounted so a great deal! Not only will you have the pretty cards ready to use plus the envelopes with a fancy flap, but you will have the tin to save for yourself or give as a gift, maybe with some laser-cut cards inside!

If you want to add color to the laser design, you can do it one of two ways. On this card, I adhered the Petal Pink cardstock to the inside of the card front. This piece is cut just a bit smaller than the card front so that I could use the Multipurpose Liquid Glue to adhere inside the narrow outer frame of the laser-cut front and a few tiny dots in the center of the card. The other easier way is to adhere the Petal Pink cardstock to the inside of the card and let the laser-cut front be completely open.

To decorate the card, I wanted to use the pretty Bird Ballad Designer Series Paper before it retires. I think this paper is so pretty, sometimes both sides of it! I used the 2 1/4″ Circle Punch to punch the little bird and branch. Then I went to my Big Shot and used the Stitched Shapes Dies to die-cut a Petal Pink layer. I think I should have just used a regular circle die-cut because the punched image didn’t fit perfectly in between the stitching, as it turned out. But that’s okay! No one will notice except you and me! For the Mint Macaron layer, I used a scalloped Layering Circles Die. I think it is just enough without covering too much of the laser-cut design.

Then choose a greeting. If you are making a Mother’s Day card, you will find this greeting in the Dressed To Impress Stamp Set. You can make this same card for a birthday, congratulations, sympathy, or thinking of you. Just change the greeting or even leave off a greeting if you just want to write a personal note inside. Not every single card has to have a greeting or sentiment on the front!

Here is an example of another card I made last summer using the laser-cut cards.

The Bird Ballad Designer Paper is on the Last-Chance List and is discounted, so get some while you can or restock your stash! While supplies last, of course! I used to hear of people who would keep three packages of the same favorite designer paper on hand…..one package to use now, one to use later, and one to hang on to so they would always have some! The more supplies I accumulate, the more I think it is better to use up what you have because there will always be MORE new things! And we always want the new things! However, I do really think this Bird Ballad Paper is very pretty, one of my favorites!

A bonus is that not only do you get the tin to save and use, but you get pretty envelopes for your laser-cut cards. One thing you can do to make an envelope even prettier is to cover the flap with designer paper! I just took a scrap that would cover the whole flap, spread the Multipurpose Liquid Glue on the outside of the flap and placed the paper on the flap, lined up with the top edge. Then I just cut off the excess from the underside of the flap.

SHOP THE LAST-CHANCE PRODUCTS BEFORE JUNE 2ND!

Dinoroar Dinosaur Birthday Card

Dinoroar Dinosaur Birthday Card

It certainly is fun to make cards with this designer paper as you can see on this Dinoroar Dinosaur Birthday Card! Perhaps you already ordered this paper from the catalog or maybe you choose it during the last part of Sale-A-Bration. If you don’t own it yet, you can purchase it as a Last-Chance product even at a discount!

The Dinoroar Designer Series Paper is a fun paper to have in your stash for children’s and baby cards…..or even for anyone else! Why not?! Some adults might enjoy getting a dinosaur card for their birthday!

This card has a card base of Pool Party and then a layer of Mango Melody underneath the designer paper. I wanted to use a pattern that had leaves and foliage to look like the dinosaur was roaming the forest! The dinosaur is even cut out from one of the patterns of designer paper!

The greeting is stamped from the Peaceful Moments Stamp Set. The greeting and the layer are cut with the Stitched Nested Label Dies. I wanted to just keep the front of the card simple since the background paper is pretty busy with rather large images and I wanted the dinosaur to stand out.

Here is another dinosaur card I made recently. Now that card you could send to almost anybody just to say “Hello” or put a smile on their face when they open the envelope!

You can still purchase the Dino Days Bundle, consisting of the Dino Days Stamp Set and the Dino Dies for 10% off. The stamp set and dies will be in the new catalog but not bundled for the 10% off price. So if you like it and want to save 10%, get it now. The little Dinoroar Enamel Shapes are on sale also right now in the Last-Chance Products at more than 50% off!

These Last-Chance retiring products are available through June 2, while supplies last, until the new Stampin’ Up! catalog comes out June 3rd! Get some bargains while you can and don’t forget to check the Clearance Rack, too!

SHOP STAMPIN’ UP! ONLINE HERE!

Peaceful Poppies Gift Bag With Poppies

Peaceful Poppies Gift Bag With Poppies

As I was looking through what is left of my Peaceful Poppies Designer Series Paper, I had a full sheet of this poppy floral pattern and thought it looked so pretty and that it would make a lovely Peaceful Poppies Gift Bag With Poppies. You could use this gift bag for a small gift for Mother’s Day or a birthday or any special occasion. There will be graduations coming up even, perhaps, without graduation ceremonies this year. Making your own gift bag out of pretty Stampin’ Up! designer paper would make a very special gift presentation!

You can make this gift bag with just half a sheet of designer paper, whichever one you choose to use. I used the Peaceful Poppies Designer Series Paper to make the bag. Start with the paper cut to 6″ x 11 3/4″. Using the Paper Trimmer or the Simply Scored scoring tool, score along the long side at 1 1/4″, 5 1/4″ 6 1/2″ and 10 1/2″. Turn the paper so the short end is at the top of the board and score at 1/4″ on one side, then at 1 1/4″ on the other side. Pay attention to the pattern on the designer paper so the bag will have the design going the correct way. The narrow 1/4″ scored area will be the part you will fold over to make a smooth top edge. The other long scored 1 1/4″ area will be the flaps at the bottom of the bag.

Peaceful Poppies Gift Bag Diagram

Crease all the score lines and fold over the narrow 1/4″ piece at the top of the bag. If you prefer you could fold it to the outside if you’d like that side to show as a contrast. OR don’t score that 1/4″ line and have your bag be 1/4″ taller. Use some adhesive of choice to adhere that to the inside of the bag.

Use the Classic Label Punch to punch a handle at the top of the bag. You can squish the front and back sides together and try to center the punch to make the handle opening or you can do one side at a time.

Assemble the bag folding on all the scored lines and flaps. Then decorate for the occasion.

Peaceful Poppies Gift Bag Top View

To decorate my gift bag, I die cut two large poppies using Poppy Parade for the body of the flower and Flirty Flamingo for the outline, plus Basic Black for the center. The leaves are Old Olive and Pear Pizzazz. I tied a bow of Poppy Parade 1/2″ Textured Weave Ribbon separately (after trying to tie it onto the handle unsuccessfully!) and adhered it to the handle with Mini Glue Dots.

In this photo you can see the actual designer paper better from the back of the bag and how pretty it is:

Peaceful Poppies Gift Bag Back View

While the Peaceful Poppies Designer Series Paper is going away (get it while it lasts in the Last-Chance List!), the two sets of dies that go with the Suite, the Poppy Moments Dies and Painted Labels Dies, will carry over to the new catalog!

Add some tissue paper and a gift inside, maybe make a matching gift card and you’ll have a charming gift to give someone special! Here’s a matching card idea you could even use to go with the bag! Just cut half a sheet of designer paper and make a gift bag with the basics of this Peaceful Poppies Gift Bag With Poppies.

Dinoroar All-Occasion Dinosaur Card

Dinoroar All-Occasion Dinosaur Card

This Dinoroar All-Occasion Dinosaur Card is a fun card to make with this dinosaur paper! Just imagine the kids who would love to get this dinosaur card from you! Maybe even some adults because it’s a fun card regardless!

I got this paper free at the end of Sale-A-Bration last month when Stampin’ Up! offered a few catalog items as rewards for spending $50. I hadn’t bought it earlier because I didn’t think I had any use for dinosaur paper, but it’s really cute and I’ll be able to make some fun cards and projects with it. It would even be good for baby cards!

The card base is Mango Melody, one of the coordinating colors for the paper. I also added a layer of Old Olive and then a pattern of the Dinoroar Designer Series Paper.

The greeting is from the Itty Bitty Birthdays Stamp Set, a great stamp set to own. While this particular greeting likely implies “birthday”, I think you could interpret is as an all-occasion type greeting. You could put it on a card just for any day or to encourage someone or for many reasons, maybe a celebration. It doesn’t have to be for a birthday.

The greeting is stamped in Old Olive Ink and die cut with a small Layering Circles die, then layered on another die-cut circle of Mango Melody. These are then layered on a scalloped circle of Old Olive in the same die set. Surprisingly, I used a piece of ribbon from the Ornate Garden Suite. It’s in the Ornate Garden Ribbon Combo Pack.

This was a very easy card to make! Just a card base, some cardstock layers and designer paper on top with a greeting and some ribbon for embellishment. I think this Dinoroar Paper will be fun to use as on this Dinoroar All-Occasion Dinosaur Card.

Shop Stampin’ Up! Online and don’t forget the Clearance Rack!

Garden Lane Easter Bunny Card

Garden Lane Easter Bunny Card

Today I needed to make an Easter card for my son that was a little less frilly than the ones I already made and I had something in mind, but not this Garden Lane Easter Bunny Card. But once I started looking at my designer papers for the one I was going to use, I saw this Garden Lane Designer Series Paper and I thought that leafy pattern would go well with a bunny!

The card base is Garden Green but there are other greens that go with the paper. For the scalloped Layering Circle Die underneath the bunny, I chose Pool Party because it looked like it matched the bluish leaves a little bit.

The bunny from the Welcome Easter Stamp Set is stamped in Memento Ink and die cut with the Stitched Shapes Die. Then I had fun coloring him in with Crumb Cake Stampin’ Blends.

The Easter greeting is from the same Welcome Easter Stamp Set and is just stamped on a strip of Whisper White. The bunny and the greeting are both popped up on Stampin’ Dimensionals.

That’s all there is to this card! The Garden Lane Easter Bunny Card is an easy and fun card to make!

Easter Diorama Card With Welcome Easter

Easter Diorama Card With Welcome Easter

It’s been a long time since I have made a diorama card but it was fun to make this Easter Diorama Card With Welcome Easter. Diorama cards can be made in different ways, even fancier than this one. A diorama card is a 3D card with an opening on the front layer that lets you see a scene of any kind on the inside. Sometimes there is even a middle layer. But let’s start with this one!

You just need two pieces of cardstock, each piece 4 1/4″ x 5 1/2″. I chose Pool Party for my front piece and Whisper White for the back. On each piece, score 1/2″ and 1″ from each end.

Diorama Easter card diagram

Then you will crease those score lines so that your card front pushes out and the back piece pushes back. You can see which way these score lines go from this top view of the diorama card.

Diorama Card Top View

Now you will stamp or decorate that back piece before you assemble the card. But when you are ready to adhere the two pieces of the card together, use something like Tear & Tape Adhesive or Multipurpose Liquid Glue. All you have to do is adhere that end 1/2″ on the front and the back piece together.

For my Easter diorama card, I used the Welcome Easter Stamp Set. I stamped the three little characters, colored them with Stampin’ Blends, and cut them out with my Paper Snips. I also used the Happy Easter greeting stamped in Pool Party from the Welcome Easter Stamp Set.

On the front of the card in the center area, I die cut with a Layering Ovals die. You could use a circle die, punch, square, whatever you like. I played around with the placement of the bunny, chick, and lamb before adhering the two pieces together. You want to make sure that you can see what you want to see well enough.

You want to think about the background. I stamped a few leafy boughs from the Path of Petals Stamp Set. I didn’t want the rest of the background to just be white so I colored in lightly, just with kind of a scribble motion with a Pool Party Stampin’ Blend marker. And I drew in some sprigs of grass at the bottom.

The lamb and the chick are popped up on Stampin’ Dimensionals to give a little dimension inside the card. The bunny is also popped up on a dimensional on the front corner. I still thought the card needed a little something so I used some Iridescent Sequins on the inside and even the outside. Once I added the sequins, I was happy with the card!

Now the amazing part of this card is that you can fold it flat and it is the size of a normal card! It will fit in an envelope and can be mailed!

As I’ve said before, you can use the Welcome Easter Stamp Set to make baby cards with these cute images! You could change the greeting on this Easter card and make it one for a baby, like one that comes in the stamp set.

Here is another example of a diorama card that I made years ago, an oldie but goodie!

Easter is coming soon so try your hand at this Easter Diorama Card With Welcome Easter because it is easy enough to make and will the recipient feel like someone special!

Welcome Easter Bunny on Peacock Foil Paper

Welcome Easter Bunny on Peacock Foil

This Welcome Easter Bunny on Peacock Foil Paper is one of those cards for which I didn’t really have a design in mind until I made it but I knew what kind of paper I wanted to use. After it all came together I really loved it! I think I will make some more cards just like this one to send for Easter. And Easter isn’t far off!

I was seeing the Noble Peacock Specialty Designer Series Paper being used on some cards and it jogged my memory about having that paper! I have barely used it even though it is beautiful paper! I think products in the Annual Catalog get forgotten sometimes when we are mostly looking at the Mini Catalogs!

One of the coordinating colors with the Noble Peacock paper is Old Olive so I chose that for my card base. Then I just adhered the designer paper on the card base.

The bunny is from the Welcome Easter Stamp Set and is stamped in Memento Ink. Then I colored him with my Smoky Slate Stampin’ Blends and a little bit of Flirty Flamingo for his ears, nose, and bottom of his feet. I even drew in some sprigs of grass with Old Olive.

The bunny was die cut with one of my favorite dies of all time, the Stitched Shapes Dies. Then in deciding what color and size scalloped circle to use as a layer under the bunny, I die cut one in Petal Pink Cardstock and one in White Glimmer Paper. As I layered them to see what size I wanted, I saw that both layers looked good together! I love the little bit of pink around the edge and the pretty glimmer paper bringing another texture.

Since I had just received some back-ordered ribbon, the Petal Pink 1/4″Metallic Edge Ribbon, I used that underneath the bunny and popped it all up on Stampin’ Dimensionals. The greeting was stamped on a narrow scrap I had of Whisper White and I just cut the flagged ends.

Such a simple card, fun to make, and beautiful! Here is a similar card but with a monochromatic design for Easter. Try your hand at either one of these cards and send them out for Easter or just for spring or to say hello. If you have it, dig in your stash for the fancy-looking Noble Foil Paper to make this Welcome Easter Bunny on Peacock Foil Paper.

Welcome Easter Lamb Card For a Sweet Friend

Welcome Easter Lamb Card For a Sweet Friend

I’ve seen many people coloring this Flowering Foils Specialty Designer Series Paper various ways so I finally tried it on this Welcome Easter Lamb Card For a Sweet Friend. The Flowering Foils paper is one that you can earn FREE during Sale-A-Bration with a $50 Stampin’ Up! purchase until March 31. You can tell from the glare on the photo that this paper has foil accents in Rose Gold and Silver Foil. It’s beautiful but difficult to photograph very well!

I decided to color in the background around all the flowers. You might think (and I thought!) that it would be extremely tedious and ridiculous to color around all those little flowers! Somehow it was not! I got out my Stampin’ Blends, chose Granny Apple Green, and started coloring! It really went pretty fast and I think the Blends marker made it easy. I didn’t feel I had to be absolutely exact and yet it came out just fine! After coloring the background, I decided to color the silver flowers, too! I used Dark Flirty Flamingo.

After the designer paper was colored, I layered it on a card base of Flirty Flamingo Cardstock. I tied around a piece of Whisper White 5/8″ Flax Ribbon with a knot on the side of the card. Then I stamped the lamb from the Welcome Easter Stamp Set and colored him with Stampin’ Blends, particularly with Light Gray Granite. The lamb was die cut with a Stitched Shapes Die and then layered on a scalloped Layering Circles Die in Flirty Flamingo. The greeting is in the same stamp set and is stamped in Flirty Flamingo Ink. It is punched out with the Classic Label Punch.

If you like coloring, just sit down and relax and enjoy coloring this Flowering Foils Paper. And we all need activities that help us relax right now! Here’s a card I made the other day with the Flowering Foils paper without coloring. I even used three different papers on that card! So you can do it either way! The paper is pretty as is, or you can do lots of coloring like I did on my Welcome Easter Lamb Card For a Sweet Friend, but don’t miss out on Sale-A-Bration!

Project: Use Your Scraps!

Paper Scraps

The other day I was taking everything off our kitchen table where I stamp so that I could completely clean it and sanitize it and I had this little pile of scraps! I have more scraps in a ziploc bag and more scraps in the cardstock packages. So I thought why not sit down and try to make cards out of what I have ready to go!

I didn’t get very far before I had to stop and help my husband figure out his teleconferencing with work (who knew you had to “set up” a microphone, not just plug it in?!) and figure out how it works. So I only got two cards made!

Cards From Scraps

On the poppies card, I already had a Poppy Parade card base cut and folded in my bag of cardstock. I cut it down to 4 1/4″ x 4 1/4″ just for something different. The stamped Painted Poppies were already colored and cut out. Sometimes I stamp or die cut something and then think it doesn’t work or I change my mind. Hence, ready to go scraps! I adhered one flower flat on the card front and popped up the other two on Stampin’ Dimensionals. I even had some leaves already cut out. I tied around a Poppy Parade 1/2″ Textured Weave Ribbon (not a scrap!) and tied on a knot. Finally I used some Clear Wink of Stella to add some glitter to the poppies. On the inside of the card I added a Whisper White layer and another little floral die cut I found.

The second card has a layer embossed with the Country Floral Embossing Folder that I found in my Whisper White package. I added the die cut white heart from the Be Mine Stitched Dies. I don’t remember if the center die cut was already stamped or if I did that, but either way, I think it works! Then I added a bit of Lovely Lipstick 1/8″ Grosgrain Ribbon to the heart.

I plan to make more cards with my scraps as soon as I get some time! I don’t seem to have found all this “free time” that some people have to do all kinds of projects that they never have time to do otherwise. I suppose since I am home every day anyway, my routine isn’t changed during this time.

I hope you are staying on top of the news, only because recommendations and things change so quickly. But you also have to turn off the TV or radio or internet news sites and get some fresh air outside and do something relaxing. It’s a good time to lose yourself in stamping! If you don’t have many supplies, it might be a good time to subscribe to Paper Pumpkin and know you will get a kit in the mail mid-April and mid-May, etc. to give yourself a treat during this difficult time.

Do take care, stay healthy, stay home as much as you can, and STAMP! Use your scraps and see what you can come up with!

Peaceful Poppies Pizza Box 3 x 3 Notecards

Peaceful Poppies 3 x 3 Notecards

The other day I posted about decorating one of the Stampin’ Up! Mini Pizza Boxes and today I am showing you the Peaceful Poppies Pizza Box 3″ x 3″ Notecards I made to go with the box! There were really so many choices of how I could have decorated the notecards, but using a Whisper White poppy die-cut was what I ended up with.

You can make your own 3″ x 3″ cards (or you may have some old ones in your stash!) by cutting 6″ x 3″ cardstock, folded in half. You can purchase envelopes at Stampin’ Up! in the Online Store.

To make these little cards, I just cut different patterns of the Peaceful Poppies Designer Series Paper into layering pieces of 2 3/4″ x 2 3/4″. I wanted that pretty paper to show through, so I cut the large poppy die from the Poppy Moments Dies, plus the small black center die-cut for the flower. I just used tiny dots of Liquid Multipurpose Glue (I mean TINY!) to adhere the white poppies. You could even add some Peaceful Poppies Sequins if you wanted to.

For fun, I also stamped the inside of the little notecards with a stamp in the Painted Poppies Stamp Set.

Peaceful Poppies Pizza Box Notecards Inside

And of course the envelopes!

You could even make up a few sets of these Mini Pizza Boxes and notecards and have them on hand for gifts. Who wouldn’t love to receive this little gift?!

Peaceful Poppies Pizza Box and Notecard Set

If you want details on how I decorated the Mini Pizza Box, check out my blog post HERE from the other day. You can also purchase Gold Mini Pizza Boxes. Both kinds of boxes are food safe so you can even put a cookie or brownie or candy inside! These boxes are great to have on hand. They store flat so they don’t take up any space. All you have to do it pull one out and decorate it for whatever occasion and put something inside. Use this Peaceful Poppies Pizza Box 3 x 3 Notecards idea and use it for your inspiration!

Peaceful Poppies Pizza Box

Peaceful Poppies Pizza Box

Peaceful Poppies Pizza Box! Say that ten times fast! If you are looking for a little gift idea, look no further than the Stampin’ Up! Mini Pizza Boxes! These boxes will be so cute for you to decorate, whether you are putting a set of 3″ x 3″ notecards inside, a small gift, or a cookie! They are even food safe so no worries there!

These boxes come to you flat, 8 in a package, so you don’t have to worry about a pile of boxes to store! Just take one out when you need one and fold on the scored lines and assemble it into a pizza box shape. Then the fun begins! Decorate for whatever occasion you have or personalize for the recipient of your gift.

For this pizza box, I decided to use the beautiful Peaceful Poppies Designer Paper. I absolutely love the pattern that I chose on top with the poppies against that Pool Party blue color. As a layer underneath this designer paper, I used another piece of designer paper, the solid watercolor Poppy Parade color. I cut a piece 3 3/8″ square to fit the top of the box and then 3 1/8″ square of the layering designer paper.

For all four sides of the box, I used strips of the Peaceful Poppies DSP, cut 7/8″ wide and just under 3 1/2″ long. You may need to trim your papers slightly differently than mine depending on your box. You could also wrap a ribbon around the box or use a solid color of cardstock. Whatever you like!

I tried several ideas for the top of the box before settling on what you see that I came up with! I used dies from the Painted Labels Dies, the Poppy Parade Cardstock bottom layer and the Pool Party circular diecut. The Whisper White circle I felt was needed to help everything stand out. It is die cut with one of the Stitched Shapes Dies. The greeting is from the Butterfly Gala Stamp Set. It’s a small box and I didn’t want to cover up too much of the lid because I wanted the designer paper to show as much as possible. Since I am putting small notecards inside the box, I thought the greeting was perfect! You wouldn’t have to have it though or you could change it for a birthday or congratulations. The greeting is popped up on Stampin’ Dimensionals and little Basic Rhinestone Jewels added for some bling!

Here is another example using one of the Gold Mini Pizza Boxes from the Holiday Catalog with the Christmastime Is Here Designer Paper. And here is one I decorated for Valentine’s Day two years ago.

Peaceful Poppies Pizza Box Side

Put some Mini Pizza Boxes on your next order so you have them handy for a last-minute or just an extra little gift that you can quickly decorate for someone, like this Peaceful Poppies Pizza Box!

A Margarita Card For National Margarita Day 2020

A Margarita Card For National Margarita Day 2020

“They say” today is National Margarita Day so we may as well celebrate by making A Margarita Card For National Margarita Day 2020. My grandma used to always say “They say…” about fashion, the news, what was popular, etc. and then my dad would tease her and say “Who’s ‘They’?” “They” were very powerful and knew everything! So if “They” and Google say it is National Margarita Day, then we should believe them!

A margarita card is actually very easy to make! Just cut a large circle out of vellum and then cut in half for the glass. I used the Layering Circles Dies and used the largest one. Or you could use two smaller ones and make two glasses clinking together! Sponge some Granny Apple Green ink on the backside of the vellum and let it dry before adhering. I used Sponge Daubers. For the glass stem, just cut a strip of vellum. For the base, just punch an oval or use the Layering Ovals Dies. Use Vellum Cardstock because it is a little bit stronger and sturdier than regular vellum. You can adhere it easily by sponging on some Multipurpose Liquid Glue. That way the glue won’t show through the vellum.

The greeting at the bottom of the card is from the Honey Bee Stamp Set in the Occasions Mini Catalog. I stamped it in Granny Apple Green Ink. The little “splatters” around the card are from the Still Scenes Stamp Set, still available under Holiday Favorites in the Online Store. If you look through your stamp sets, you will find many stamps that you could use for those little sprinkles or splatters! I used three Stampin’ Write Markers to color right on the stamp to get three colors on the sprinkles.

If you like salt on your margarita, just put a strip of Tear & Tape along the rim and dump on some Dazzling Diamonds Glitter (or Ice Glitter from the Holiday Catalog 2019 if you have some). If you want to be fancy, color the glitter first with green reinker and let it dry. I didn’t really need green salt, though!

The card base is Coastal Cabana Cardstock with a layer of Granny Apple Green Cardstock. I thought the colors should be festive for National Margarita Day!

And I hadn’t even had a margarita yet today when my fingers got tangled up and my whole post disappeared! If you can’t celebrate today, here is another card idea for Cinco de Mayo, coming up soon on May 5th! I hope you have a good Mexican restaurant nearby where you can go celebrate National Margarita Day, but if not, just make A Margarita Card For National Margarita Day 2020!

Thoughtful Blooms Card With Gold Accents

Thoughtful Blooms Card With Gold Accents

This Thoughtful Blooms Card With Gold Accents took me a little longer than I expected to get it exactly right. Not that there is ever an “exactly right” in stamping and cardmaking, but I always know when I finally hit something that pleases me. Just keep going if you aren’t happy with your creation because you may just be one step away.

For this card, I had the idea of using a cluster of flowers in the bottom corner, maybe three flowers. What took some time for me was finding the right layer for the sentiment at the top. Some dies were too big, some too little, a plain rectangle too plain. I kept working and came up with the combination you see. Adding the bits of ribbon, I think, jazzed it up just enough to make me happy.

The card base is Basic Black, so plan on putting a Whisper White layer inside the card for your greeting or personal message. I added two extra flowers I already had punched out plus some stamped leaves to the inside layer down in the right-hand corner.

The designer paper layer on the front of the card is the Golden Honey Specialty Designer Series Paper. This is the paper with the bees and coordinates with the Honey Bee Bundle in the Occasions Mini Catalog. You can earn this Golden Honey DSP FREE during Sale-A-Bration with a $50 purchase of Stampin’ Up! products! Besides the bees and beehives and honeycombs on some sides of the paper, there are also plainer designs like on my card today, so even if you’re not into bees, you can still use this paper!

Since my Thoughtful Blooms Stamp Set was still out on my table, I decided to just use those flowers again. I made a card yesterday with those flowers. Today I wanted to stamp the outline image of the stamp and color them in with my Stampin’ Blends alcohol markers. I wanted some bright colors so I used Lovely Lipstick, Daffodil Delight, Calypso Coral, and Pumpkin Pie.

There is a punch for these Thoughtful Blooms flowers that you can earn during Sale-A-Bration with a $100 purchase called the Small Bloom Punch. I wish there had been a little leaf punch, too, but there isn’t so I just cut out some leaves and the sprig of leaves by hand. A little tedious and I left some white margin so I didn’t have to be perfect, but since they are small it took a few minutes! But I like the look of having them! I just played around with grouping the flowers down in the lower-left corner, gluing two of them flat on the card and the rest are popped up on Stampin’ Dimensionals. These are the first six flowers I used in this grouping. When I was all finished with the card, I added the Gold Glitter Dots to the flower centers, which I loved, and also added one more flower at the “top” of the grouping and at the bottom left. This, to me, was the finishing touch!

The greeting is from the Thoughtful Blooms Stamp Set. It is die-cut with a die in the Painted Poppies Bundle. I tried to find a Gold Foil layer that I was happy with. Finally, one in the Stitched Rectangle Dies seemed to fit about right! I also punched a hole in each side and threaded some Daffodil Delight 1/4″ Ruched Ribbon through.

If you like this Thoughtful Blooms Card With Gold Accents, add the Golden Honey Paper and Thoughtful Blooms Stamp Set to your Stampin’ Up! order(s) during Sale-A-Bration in the Stampin’ Up! Online Store!

Lily Impressions Birthday Card

 103 Kingsley Farms Road in Gouldsboro, ME

It took me a little longer to come up with this Lily Impressions Birthday Card, I have to admit. This was my first try with all the “Lily” products in the Stampin’ Up! Sale-A-Bration Brochure and I found it a little difficult at first to use everything together. Not everything fits together perfectly, which is fine, but you just have to play with it and not expect everything to line up!

Once I really looked through the Lily Impressions Designer Series Paper, I thought it was beautiful and I couldn’t wait to make something with it. I chose the pattern that you see on the card, layered on Petal Pink (not a coordinating color but I liked it) and Blackberry Bliss for the card base. This designer paper does have a LONG list of coordinating colors!

The three flowers are all stamped with the Lovely Lily Pad Stamp Set. They are stamped on Petal Pink with Flirty Flamingo Ink. There is a stamp that you can use to “color in” the large flower but it doesn’t fit the shape exactly. But that’s okay! It just gives a different look! You could also stamp the flower and color it in yourself if you want it to be exact. The Lily Pad Dies don’t fit everything exactly either! AND some of the stamps are reversible so you can stamp the solid shape, clean the stamp, then turn it over on the block and stamp with the detailed image. To earn the Lily Pad Dies, you must spend $100, but just $50 for each of the stamp set and paper.

Watch the Stampin’ Up! video below to get an idea of how everything works from Shannon at the Home Office!

On this card, I popped up the large lily and glued down the smaller flowers flat. Then I die cut and added some Garden Green leaves. For a greeting, I chose “Happy Birthday” from the Peaceful Moments Stamp Set in the Occasions Mini Catalog. I stamped this in Flirty Flamingo and die cut with a shape in the Stitched So Sweetly Dies also in the Occasions Catalog. I wanted a bit of a layer but there isn’t a die for layering, so I just die cut a second one out of Flirty Flamingo Cardstock, cut it in half horizontally, and very carefully layered it under the greeting with just a tiny margin showing.

Lily Impressions Birthday Card Closeup

For the inside, since the Blackberry Bliss is so dark, you can add a Whisper White layer for stamping a greeting or writing a personal message, but I just grabbed a layer of Petal Pink and put that inside. And since I had an outline die cut leftover from my trials, I glued that to the inside corner for a little decoration.

Lily Impressions Birthday Card Inside

If you feel like working with some really artistic paper, stamps and dies, I recommend all these Lily products available during Sale-A-Bration. You will make some beautiful cards with even just the Lily Impressions Designer Series Paper! But if you get all of the products, just play and experiment and see what you come up with!

SHOP STAMPIN’ UP! ONLINE TODAY!