Make these easy Golden Honey Bees 2-4-6-8 Gift Boxes using the Golden Honey Specialty Designer Series Paper available during Stampin’ Up! Sale-A-Bration 2020! You never know when you might need a little gift bag or box at the last minute so make up a few of these or learn how to make them quickly and easily so you can personalize your gift!
Although I am not a fan of bees and bugs and insects because heaven knows, we have way too many of everything down here in the tropics of Houston, Texas in the summertime! But I liked this designer paper with its gold foil accents and it’s black, white, and gold stripes and prints. You can make lots of pretty things with this paper even if you are not into bees!
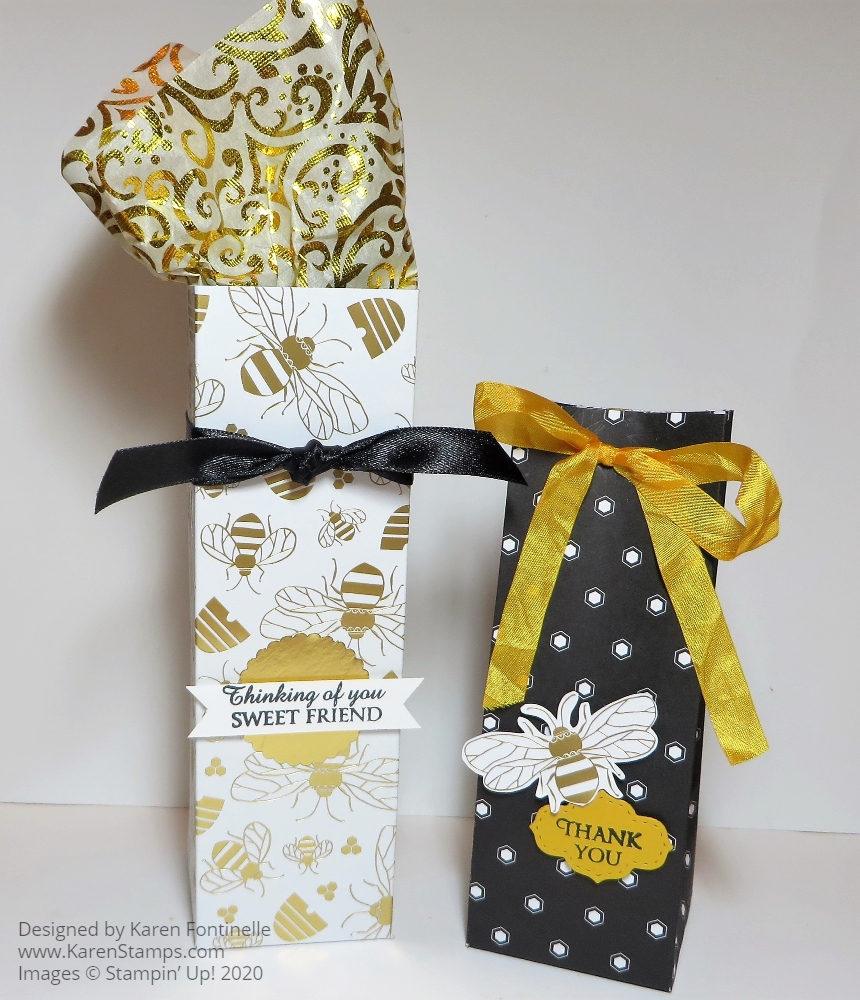
I first chose the paper pattern with the gold foil bees on it to make a box. The opposite side of the paper was a black and white dotted pattern so I decided to make a box with each side of the paper. They are both the 2-4-6-8 box but one is shorter.
Here are the basic instructions on how to make the 2-4-6-8 box: It’s very easy and has been around a long time. No pattern required!
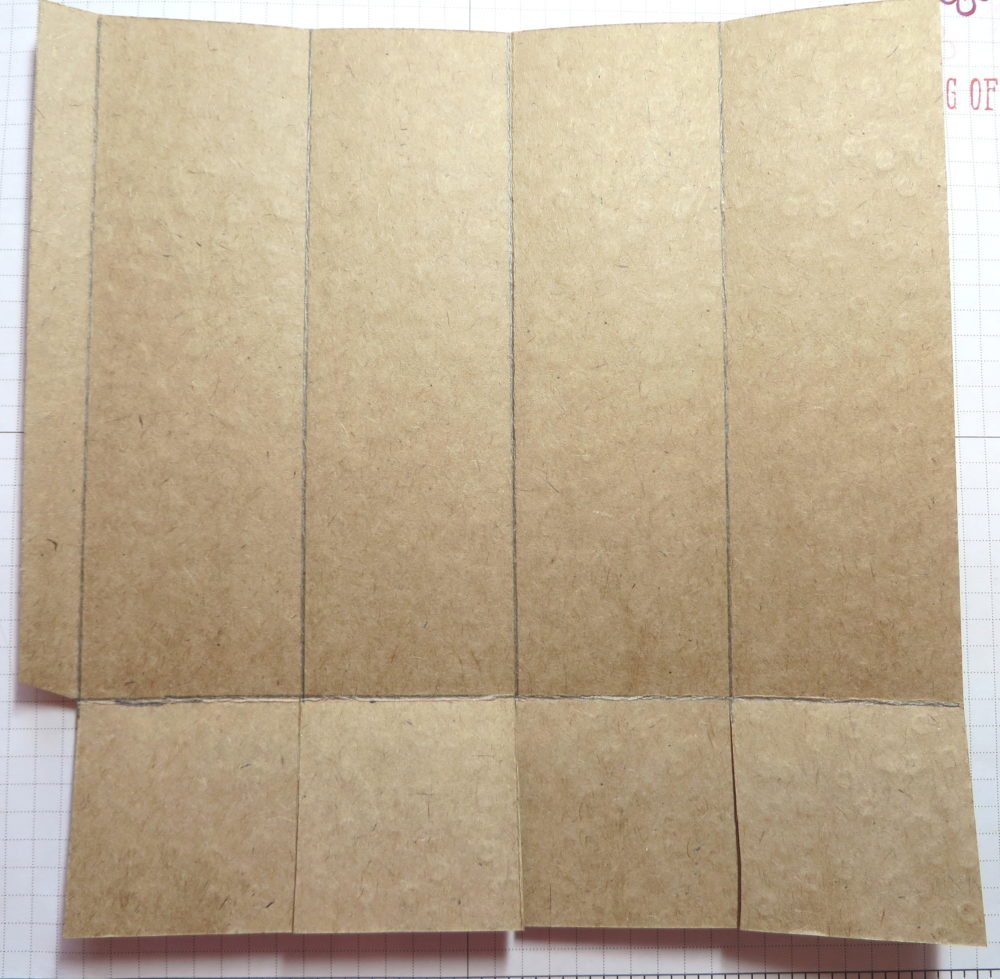
- The first box on the left with the gold foil bees and hives is made with an 8 1/2″ x 8 1/2″ piece of paper. You can vary the measurements depending on the size you want your box. If your paper has a pattern, decide where the bottom of the box is. Score at 2″ on one side which will become the bottom tabs.
- Turn the paper the other way and score at 2″, 4″, 6″ and 8″……hence, the 2-4-6-8 box! That will leave a 1/2″ edge on one side of the paper. This is where you will put a strong adhesive later on.
- Now that the box is scored, hold the paper with the bottom portion at the bottom and cut up to the horizontal score line on each score line to make the bottom tabs. That little 1/2″ piece on the bottom should just be cut off.
- Crease all the score lines and see how the box will go together.
- Apply a strong adhesive along that 1/2″ edge, preferably Tear & Tape or Multipurpose Liquid Glue. If you lay the box flat on the table, you can just fold the other side over to adhere.
- Figure out where the backside of the box will be so the seam doesn’t show from the front. Fold the back tab at the bottom in and fold the other tabs in as well. If they don’t line up perfectly, just trim with scissors. Use a little bit of glue to hold the tabs in place for the bottom of the box.
- Put your gift inside, punch holes in the top for ribbon to tie shut or leave open, add a handle, whatever you like. Embellish the box if you like.
- You can vary the measurements, making the box shorter or taller. The bottom tabs need to be the same width as the side panels of the box. Then you need that little 1/2″ strip at the edge of the paper so you have to consider that math as you figure out the sizes.
Here is a diagram of the scored and cut paper:
For the second box, I decided to make it a little shorter. The paper is still 8 1/2″ wide but I cut it down a little to 7 1/2″. The bottom is still scored at 2″ and then you turn the paper and score at 2″, 4″, 6″, and 8″. So the box is the same, just shorter.
You can close up the top of the box by punching holes in the top and tying closed with ribbon. I used the Crushed Curry 3/8″ Crinkled Seam Binding Ribbon. For the greeting, I stamped “Thank You” on Crushed Curry Cardstock from the Honey Bee Stamp Set and die cut it with the smallest die in the Stitched So Sweetly Dies. In keeping with the bee theme, I simply cut out a gold foil bee from the designer paper. If you like the Honey Bee Stamp Set and the Detailed Bee Dies, you can order the Honey Bee Bundle and save 10%! Spend $50 on your order and get the Golden Honey Specialty Designer Series Paper FREE during Sale-A-Bration.
For the taller box with the gold foil bee pattern, I left it open and happened to find some pretty gold foil tissue paper to put inside! I simply tied a Black Satin Ribbon around the top portion and tied a knot, but you could do a bow. The greeting is stamped from the Honey Bee Stamp Set on a narrow strip of Whisper White and layered over a Gold Foil circle punched with the 1 3/8″ Scallop Circle Punch.
Have fun trying your hand at making these Golden Honey Bees 2-4-6-8 Gift Boxes and other variations!