Tag Archives: Ornate Garden Suite Collection

Ornate Garden So Grateful Card

Ornate Garden So Grateful Card

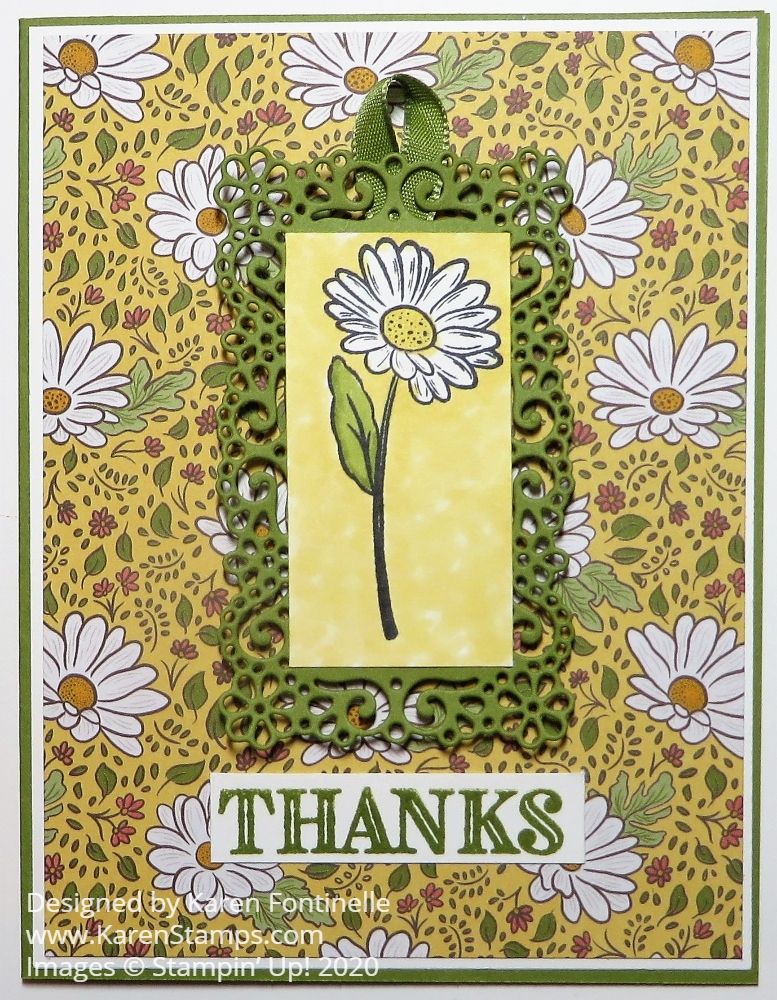
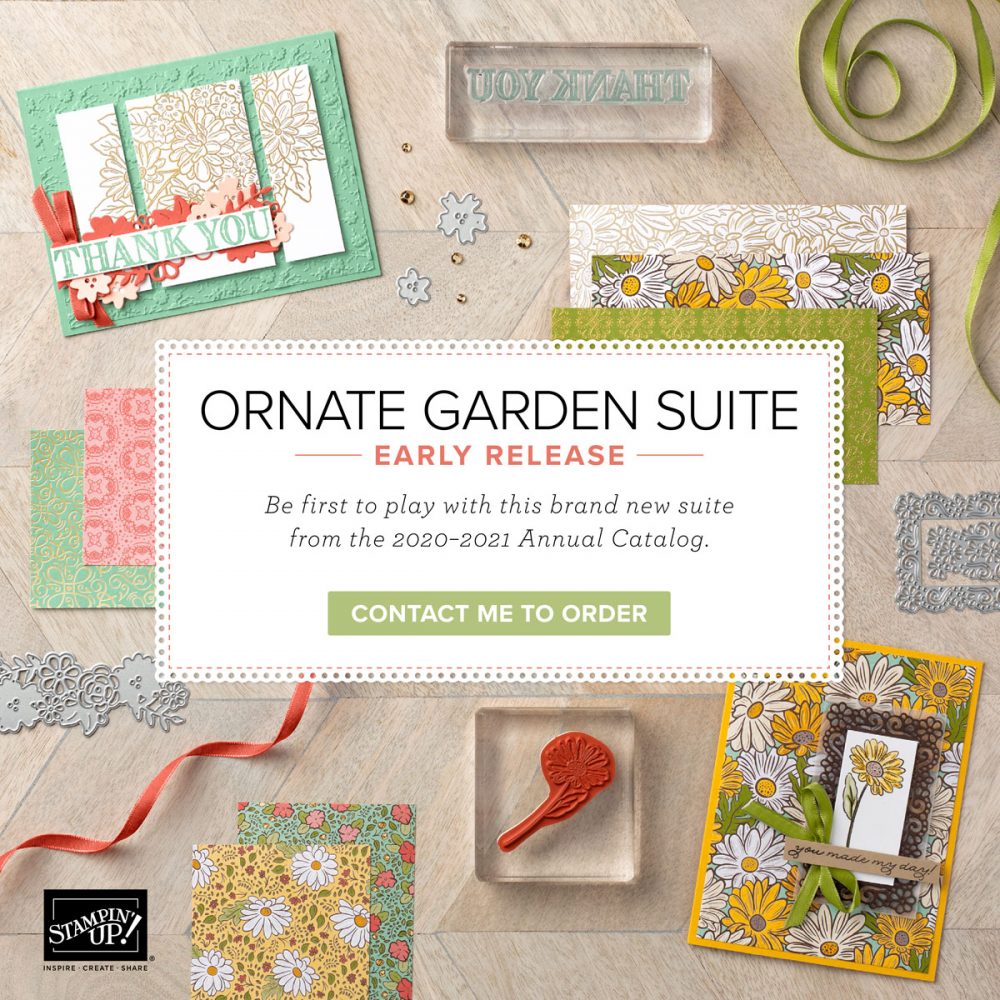
For this card, I was in the mood to use the paper in the Ornate Garden Suite and this Ornate Garden So Grateful Card is what turned out! This is a great all-occasion card that has a little different style than maybe you normally make. It’s also a great way to use up some smaller pieces of designer paper! Just change the greeting for a birthday or congratulations or even sympathy.

The card base is Mint Macaron, one of the coordinating colors for the Ornate Garden Specialty Designer Series Paper. Some of these sheets in this collection have gold foil accents.

At first I was going to just adhere the floral strips directly to the card base, but it’s a little easier to adhere to another piece of cardstock first, whether it shows or not. I started with a Whisper White piece under the floral strips with a narrow margin showing but I wasn’t crazy about that. Then I realized Terracotta Tile, another coordinating color, very evident in these floral strips, might be perfect!

You might want to make your card pieces slightly different sizes, but here are the sizes I used:

Floral Strips 1 1/4″ x 4″, Terracotta Tile layer under strips 3 7/8″ x 4 1/8″.

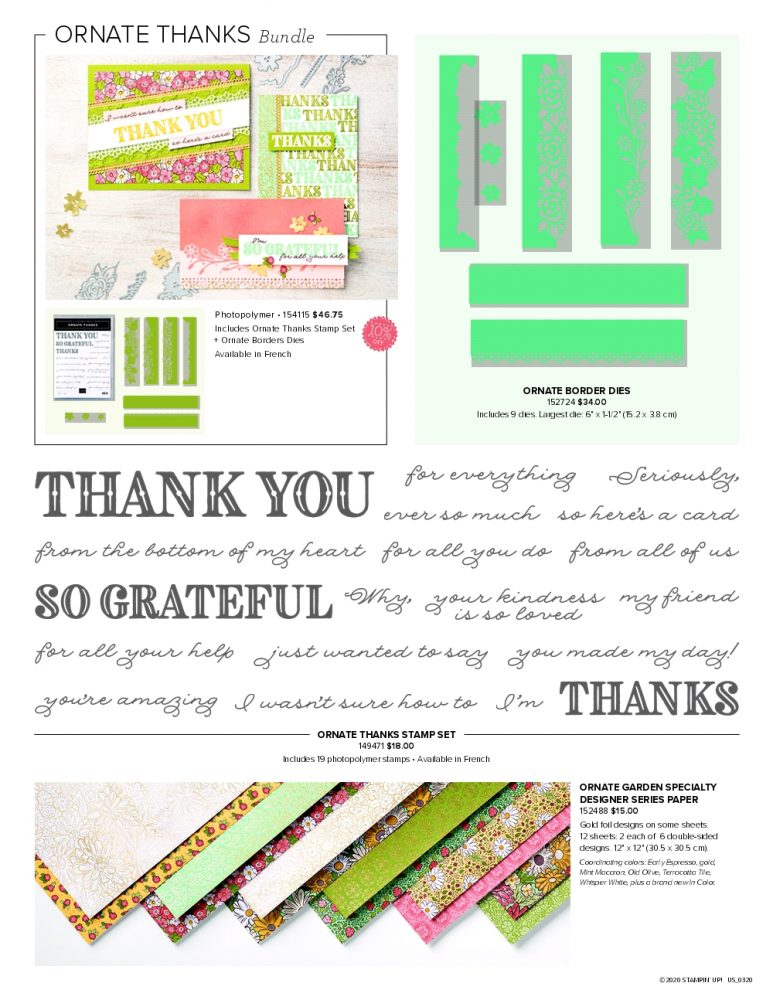
For the greeting, since I was using the Ornate Garden paper, I decided to use a greeting in the Ornate Thanks Stamp Set. First I stamped it in Terracotta Tile on Whisper White but I didn’t like it. I thought it looked too bold. I changed it to Mint Macaron and I could have changed the layer to Mint Macaron but I just used the Terracotta layer.

Before adhering the layer with the paper strips, I adhered a piece of ribbon around to the back on both sides and then added a separate bow. Just use a Mini Glue Dot or two to hold the bow on the card. Often this works easier than trying to tie the bow with the ribbon on the card. This white ribbon is in the Flowers For Every Season Ribbon Combo Pack. It looks like a linen ribbon and is very pretty with this paper.

I forgot to mention, I cut the sheet of Mint Macaron Cardstock in half lengthwise, rather than horizontally, so it is 4 1/4″ x 11″, scored at 5 1/2″. This produces a top of the card fold rather than the usual side fold. You can do it either way, it’s just something a little different!

Here’s another card I made using the Ornate Garden Suite, using one of the papers with larger flowers. You can use whichever floral pattern you are in the mood for!

Get out whatever designer paper you like or scraps you have and see if you can make a card similar to this one. Once you get started you may change the idea completely! It’s up to you! Start with my Ornate Garden So Grateful Card to possibly give you an idea and then let your own creativity take you wherever it wants to go!

SHOP STAMPIN’ UP! ONLINE!

Ornate Garden Sponged Happy Card

Ornate Garden Sponged Happy Card

This Ornate Garden Sponged Happy Card came about it two ways today. First, I felt like I was either having an anxiety attack or coming down with “the virus” when one second before I was fine AND I saw a sample of a card online that was embossed but reminded me of this Ornate Garden Specialty Designer Series Paper with the gold foil accents on some sheets that made me think of sponging different colors of ink on the paper.

Here’s your anxiety tip of the day: Start looking online at cards and stamping videos and maybe better yet, force yourself to get up and start stamping! Get your mind off the news or whatever is going on in your mind that is not good for you!

Obviously I need a “Happy” card today so I chose three colors of ink from the Brights family (my favorite!)…..Melon Mambo, Daffodil Delight, and Granny Apple Green. I could have used Sponge Daubers, but I grabbed a small piece of sponge and just used a different side of it for each color of ink. Yes, you will get ink on your fingers but that’s okay. It will keep you happy all day! I just sponged around on the Ornate Garden Paper and then wiped off a bit with a tissue. Next, I just played around with those three colors of cardstock plus Whisper White to see what combination would look best, or at least that I liked, to actually assemble the card.

I finally decided on a Whisper White card base with a layer of Granny Apple Green. I found the Melon Mambo die cut from the Stitched Labels Dies in with my Melon Mambo paper but at first decided not to use it. I found the greeting I liked in the Modern Heart Stamp Set. I used a rectangular die in the Ornate Layers Dies but I used the technique of cutting it and then replacing the die over the same stitched lines to shorten the greeting piece.

I looked through my dies again to see what to layer the greeting on and found a die in the Stitched So Sweetly Dies that seemed to work. I cut that out of Granny Apple Green. As I thought about how that looked, I saw that Melon Mambo die-cut piece laying on the table and tried that behind it. I think it works! But I still felt like I wanted something else and finally adhered some Daffodil Delight 1/4″ Ruched Ribbon behind the Granny Apple Green and also popped that piece up on Stampin’ Dimensionals. I think the whole thing brings in all the colors of the ink and works out well with the sponged paper behind it and with the original intent of the card…. a Happy card!

Maybe today is the day for you to try some new technique or one like this. Remember to check the Last-Chance Products and the Clearance Rack in the Online Store! You will find some good bargains! Be sure to get what you need before it sells out!

SHOP STAMPIN’ UP! ONLINE!

Ornate Garden Gold Sympathy Card

Ornate Garden Gold Sympathy Card

We saw a story on the news the other night showing card racks at the store being sold out of sympathy cards which is so sad that people need those kind of cards, but the fact is, we all need to send them throughout the year, pandemic or not. It’s the most difficult card to make so it’s probably a good idea to make several at a time and hope that you don’t need them, but if you do, you will already have one ready to mail.

My original idea was not even to make a sympathy card but I planned to do something with the Ornate Garden Suite if only to use the dies. But when I looked through the Ornate Garden Specialty Designer Series Paper, I decided to use this floral sheet with foil accents and then use Gold Foil for the die-cut somehow. And even then, I wasn’t planning on a sympathy card. I was sort of thinking of a wedding card. When I looked through some stamp sets with sentiments, I settled on the Peaceful Moments Stamp Set. Somehow I couldn’t get past the sympathy sentiment so I went with that. Here’s another example of a sympathy card, simple but elegant with the designer paper and a nice ribbon.

To match the other gold, I felt like the greeting needed to be embossed with Gold Emboss Powder and the Heat Tool. The greeting is stamped in Versamark Ink, a clear ink that can be used for embossing or for the watermarked look in your stamping. Heat embossing is one of those things that is like magic when a new stamper sees it done for the first time. You stamp with Versamark Ink, sprinkle/dump on the embossing powder, shake off the excess, then heat with the Heat Tool and watch the magic happen! The powder melts and you watch it happen right in front of your eyes as the Heat Tool moves over it.

The very fancy die is one in the Ornate Layers Dies. Be sure to run it through your die-cutting machine three times to get the best cut. After cutting that, I measure the solid inside so I would know what size to cut my Whisper White Cardstock for the greeting.

If you would like to get your hands on brand-new product coming in the next Stampin’ Up! Catalog June 3, you can purchase any or all of the products in the Ornate Garden Suite. And if you want even more choices early, you can sign up to be a Stampin’ Up! Demonstrator and choose some of the preorder products to be in your Starter Kit or order them separately after you sign up!

I certainly hope you do not need to send a sympathy card any time soon, but they are an important part of what we do. When you make a card for someone, especially a sympathy card, you are putting your heart and soul into it with your creativity and that will mean something to the recipient. You might even consider making some cards that could be for different occasions but don’t put greetings on them yet. Then if you need one to be for sympathy, you will have a nice card ready to go when you add a greeting.

Ornate Garden Floral Stamp With Sequins

Ornate Garden Floral Stamp With Sequins

The Ornate Garden Suite offers so many beautiful ways to make cards whether you stamp and color in the image or use the beautiful designer papers! There are two sets of die cuts you can use too, but on this card, I was going for something simpler.

A few days ago I made another card with this same floral stamp in the Ornate Style Stamp Set from the Ornate Garden Suite, but I cut it out by hand. This one is just stamped and colored in on the card front. I love coloring all the flowers with my Stampin’ Blends markers, but you can use other techniques.

The greeting on this card is from the Ornate Thanks Stamp Set. This stamp set has large greetings to pair with the smaller script greetings but you can also just use some of the script greetings alone. That’s what I did on this card.

The Whisper White cardstock front layer is adhered to an Old Olive card base with the fold at the top for something different. For a little pizzazz, I added a few sequins that kind of matched the flowers and leaves.

If you want EVERYTHING that goes together in this Ornate Garden Suite Collection, just order the whole collection with one number on your order, #154153. Or you can pick and choose exactly which products you want on this order and get more on another order! This Suite will be in the upcoming Stampin’ Up! Annual Catalog so there is no rush unless you’d like to get your hands on something brand-new while you are staying home these days!

Ornate Garden Elegant Gold Foil Birthday Card

Ornate Garden Elegant Gold Foil Birthday Card

This Ornate Garden Elegant Gold Foil Birthday Card is actually elegant because of the gold foil accents on the specialty designer paper and also the gold foil die underneath the greeting. It’s not elegant because it is a fancy card to make as far as design. There are no real bells and whistles on this card, just pretty designer paper, the gold accent layer and some ribbon behind the birthday greeting.

The Ornate Garden Specialty Designer Series Paper is so pretty it will be hard to select which paper you want to use! I actually started out thinking I wanted to use one of the small floral prints, like on the backside of this paper. But I can do that another time!

I wanted to use one of the Ornate Layers Dies so after I chose a greeting for this card I selected this one you see on the card. I didn’t want it to be too large and layered on this card and take away from the designer paper. The card base is Old Olive, one of the coordinating colors of the papers. It would also be pretty to put a layer of Gold Foil underneath the designer paper to enhance the gold accents, but I didn’t think of that early enough!

The “Happy Birthday” greeting is from the Peaceful Moments Stamp Set, one of those really good sentiment stamp sets to have on hand. This is one of the stamp sets that is a part of the Peaceful Poppies Suite in the Occasions Mini Catalog. In fact, you can buy it as a Bundle with a set of dies.

For a minute I didn’t quite know what I wanted to do with the greeting which I die cut with one of the Stitched So Sweetly Dies. I thought maybe I should stamp it again and die cut with another shape. But then, the lightbulb came on, and I thought to just place some of the Old Olive Ornate Garden Ribbon in the Combo Pack back and forth in loops on the back and pop it up on Stampin’ Dimensionals®. That took up some of the empty space, made the greeting stand out, and made the whole card look elegant!

Remember to check your Inbox this afternoon for my “Best of the Blog” newsletter with info about the new catalog. If you are not on my Mailing List, sign up in the red box or the Pop-up box today!

SHOP THE ORNATE GARDEN SUITE COLLECTION!

Ornate Garden Floral Bouquet Card in Mint Macaron

Ornate Garden Floral Bouquet Card in Mint Macaron

This Ornate Garden Floral Bouquet Card in Mint Macaron is one that turned out a little differently than I expected. Somehow I thought there was a die to cut out the bouquet and that was my plan as I designed the card. Who knew? There is no die in the Ornate Garden Suite that cuts out the bouquet! I must have made it up in my mind! But no problem! I just grabbed my Paper Snips and cut it out by hand.

Otherwise, this is a pretty simple card. The card base is Mint Macaron, not necessarily one of my favorite colors, but I like it on this card. The floral bouquet in the Ornate Style Stamp Set is stamped on Shimmery White Cardstock in Memento Black Ink so that I could color in with Stampin’ Blends. Coloring is so relaxing during this time and Shimmery White is a great cardstock to color on! If you looked closely in person you could see just a little bit of shimmer on the paper. It’s really nice! I was trying to keep these colors a little on the softer side. I usually use different greens on the leaves and usually a touch of yellow. On the small flowers, I used a blue and a bit of purple. You can use whatever colors you like.

As I said, I assumed that there was a die for this whole bunch of flowers, but there is not! But I continued on with my idea of cutting out the flowers and then popping them up on the card with Stampin’ Dimensionals.

The beautiful layer behind the flowers is die cut with one of the Ornate Layers Dies. This die has seemed pretty easy to use to me. I usually have a few little pieces to poke out but mostly it cuts pretty well. I ran it through my die-cutting machine three times to get a good cut.

I chose not to put a greeting on the card yet or I might just leave it without one. I think the card is fancy enough to stand on its own without a greeting and then I can use it to just write a note or for any occasion.

Be sure to look at the Ornate Garden Suite and check out all the products that you can get in the whole Collection! The good thing is you can pick and choose if you do not want all the products or not all of them at once! But if you do “want it all” you can just put in the one order number for the Ornate Garden Suite Collection #154153.

SHOP STAMPIN’ UP! ONLINE!

Ornate Garden Monochromatic Floral Card

Ornate Garden Monochromatic Floral Card

If you want to stamp an EASY card, make this Ornate Garden Monochromatic Floral Card! The front of the card only uses two stamps and then a little bit of ribbon and a bow. You can’t get much easier than that! And with the beauty of just the one large floral stamp, you really don’t need much more!

The card base is Lovely Lipstick, one of the outgoing In Colors when Stampin’ Up! releases the annual retirement list. Lovely Lipstick was one of my favorite In Colors so I hate to see it go. If you want any of those colors in paper, ink or accessories, you should probably order before the retirement list comes out.

I started to stamp the floral image with the largest acrylic block, but then I thought this would be the perfect time to use my Stamparatus. If I didn’t get every area on the large stamp inked up just right or didn’t press well enough in the right place, I wouldn’t have to worry with the Stamparatus because I could just stamp again over the exact same position!

This large floral image is in the Ornate Garden Suite in the Ornate Style Stamp Set and the greeting is in the Ornate Thanks Stamp Set. You really should look at all the greetings and combinations you can make with that stamp set! You don’t always have to use the large words either. And even on the inside of the card, I stamped two of the corners with the smaller corner stamp.

If you stamp a monochromatic card, you just use and stamp one color so that makes it easy! Here’s another monochromatic Easter card I made recently.

Check out the Ornate Garden Suite and also the Clearance Rack which was just refreshed yesterday! Then try your hand at stamping a monochromatic card with whatever stamps you choose!

Ornate Garden Daisy Thank You Card

Ornate Garden Daisy Thank You Card

This Ornate Garden Daisy Thank You Card was made with the new Ornate Garden Suite of products. This suite will be in the new Stampin’ Up! Annual Catalog in June so this is an early release! One set of products coming in the next catalog that you can get your hands on now! And who among us does not need a box arriving from Stampin’ Up! right about now!!

I resisted pre-ordering it as I can do as a Demonstrator, at least not until the end of March. And I did have a short trip in there and stocking up for the coronavirus, which I’m glad I did as early as possible. So finally I realized how beautiful the suite was and that I had to have it, right away!

This card just came from thumbing through the Ornate Garden Specialty Designer Series Paper. It is called “Specialty” because some of the papers have gold foil accents on them. I liked this small daisy print today!

I started off thinking I would use the Daisy Punch to add a 3D daisy to the front of the card but I decided to stick with using stamping from the suite. I stamped the single daisy in the Ornate Style Stamp Set in Memento Ink and colored it in with So Saffron and Old Olive Stampin’ Blends. You might notice that one of the coordinating colors for the designer paper is called Bumblebee! Must be a new In Color! So my yellow doesn’t really match the paper but I wanted to color in around the daisy rather than leave it stark white. The photo I think actually makes the color a little brighter than it is in person so it really is okay.

You may see that I layered the daisy designer paper on Whisper White to help it stand out a little more against the Old Olive card base. Sometimes I do this and sometimes I don’t. The layers, then, have 1/8″ margins instead of 1/4″ or I could have cut them smaller with a bigger margin.

The ornate layer behind the daisy is in the Ornate Garden Suite, of course! It is in the Ornate Layers Dies and I cut the daisy paper down to fit on it just perfectly. Be sure to run your die through your die-cutting machine two or three times and put it in the narrow end first. I just used my old die brush to get out the few pieces that stuck in the design so mine cut out well.

I popped up the ornate frame with Stampin’ Dimensionals. Behind it just at the top is the Old Olive Ribbon that comes in the Ornate Garden Ribbon Combo Pack, along with Terracotta Tile. The greeting is stamped in Old Olive Ink using the stamp in the Ornate Thanks Stamp Set. This is basically a pretty easy card to make!

Take some time to look over all the products in the Ornate Garden Suite. There are two stamp sets and two sets of dies. These are matched up in Bundles and you will save 10%. There is also an Embossing Folder, the ribbon combo, the designer paper and some Gilded Gems for embellishment. If you want the WHOLE THING, just use this one number #154153 to order the Ornate Garden Suite Collection. That saves the effort of entering each number of each product into your order. But if you like, you can order the products separately and get just the ones you want now.

This is a beautiful collection of Stampin’ Up! products so go check them out in the Stampin’ Up! Online Store!

Early Release of the Ornate Garden Suite

Ornate Garden Suite Early Release Ad

Today is the first day you get a chance to order something from the upcoming Stampin’ Up! Annual Catalog! No need to wait until June! Beginning today, you can order some or all of the products in the Ornate Garden Suite # 154153. If you want it ALL, you can just put in that product number and get everything in the Collection! If you want just certain items, you can order each product that you want.

Click on the photos below or view the individual pieces of this collection.

Click HERE to view the Flyer – Be sure to scroll down through the 3 pages!

Ornate Garden Products 2
Ornate Garden Products 3
Ornate Garden Suite Prices

Find out more about the Ornate Garden Suite Collection in the Stampin’ Up! Online Store!