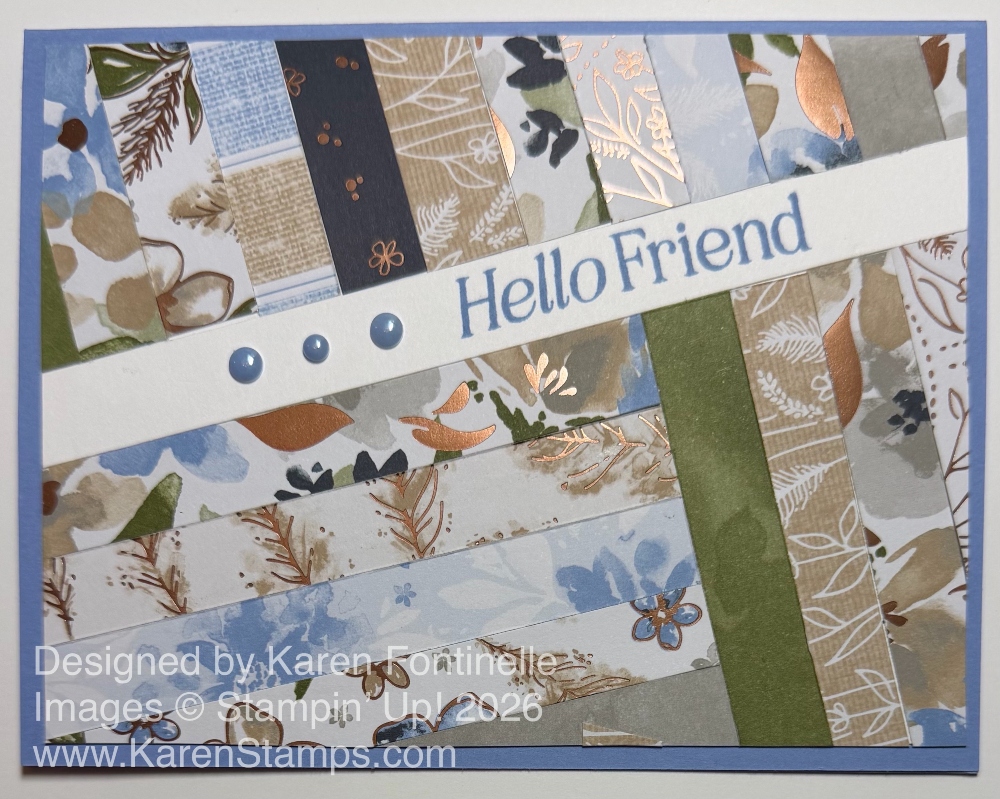
I’m calling this Delicate Dreams Scrap Friend Card a scrap card because you can make it using the scraps you have been hoarding from designer series paper or even cardstock. How can these little pieces of paper end up making a beautiful and interesting card? It’s a fun card to make because you won’t exactly know what it will look like until it is almost all finished!
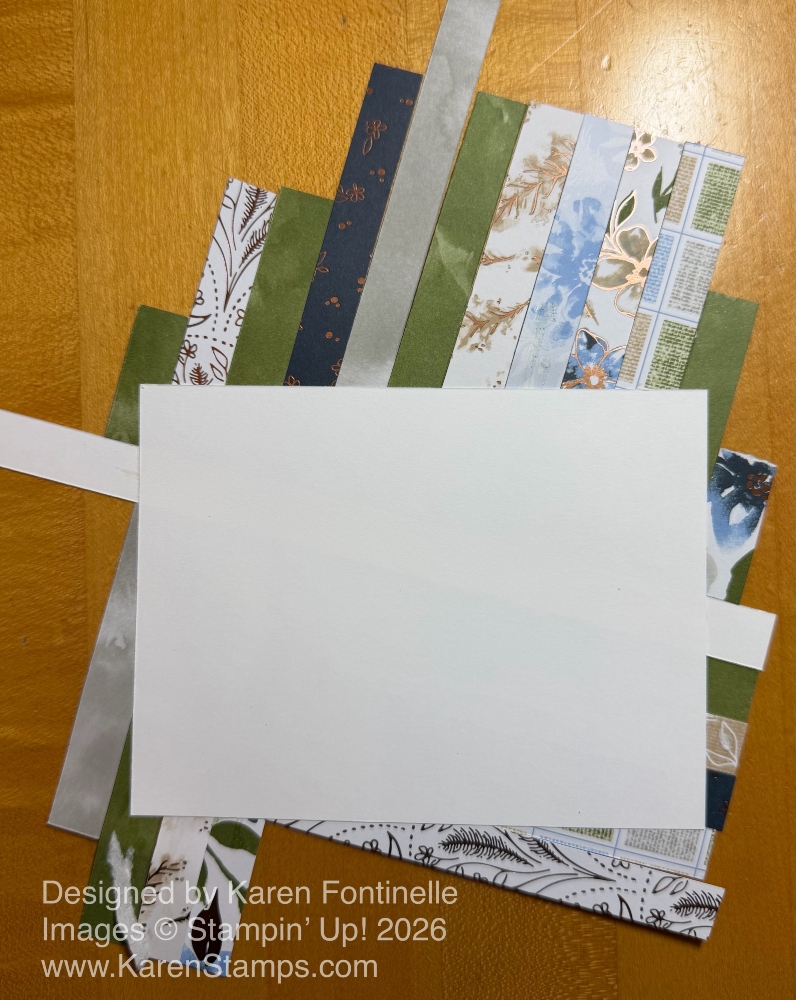
This card has a card base of Hydrangea Hue, one of the newest In Colors. There are other colors of cardstock I could have used. Secret Sea might have been nice but I need to order more! To make this scrap card, start with a piece of Basic White cardstock (or any color). This is what all your scraps will adhere to in making the front of the card. Pull out all the little scraps in one or more pack of designer series paper and see what you have. I cut mine 1/2″ wide, but you can do another measurement if you like. I used the beautiful Delicate Dreams Specialty Designer Series Paper with its bronze foil accents.
First, I adhered the white strip at an angle across the Basic White piece. Maybe you want to stamp a greeting on it first before glueing to your card, just in case! I got lucky and stamped it after completing the card. Adhere vertical strips coming off that white strip, above and below, to serve as the guide for the other strips. You can lay out your strips first and see how they look next to each other or see if you want to move any around. Or just take a chance and glue them down randomly. Even if the strips are too long, that’s okay for now.
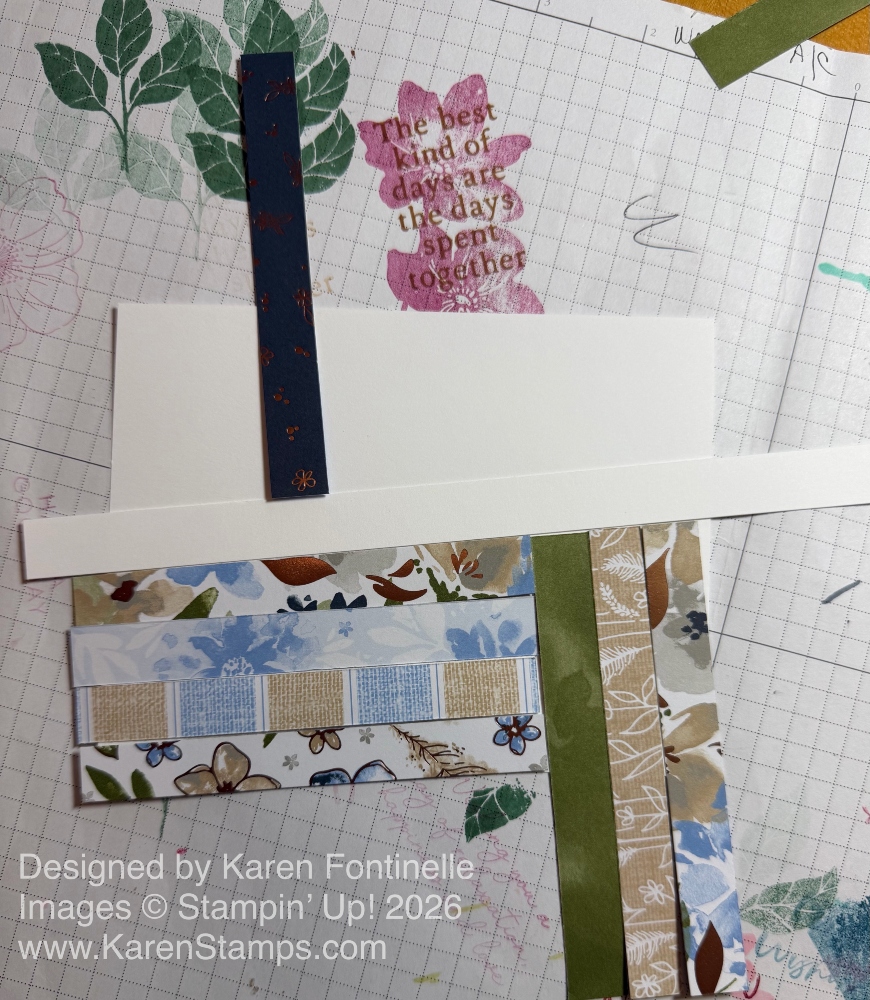
Just keep going until you fill in all the space, even any tiny spaces. It will look like a mess on the front.
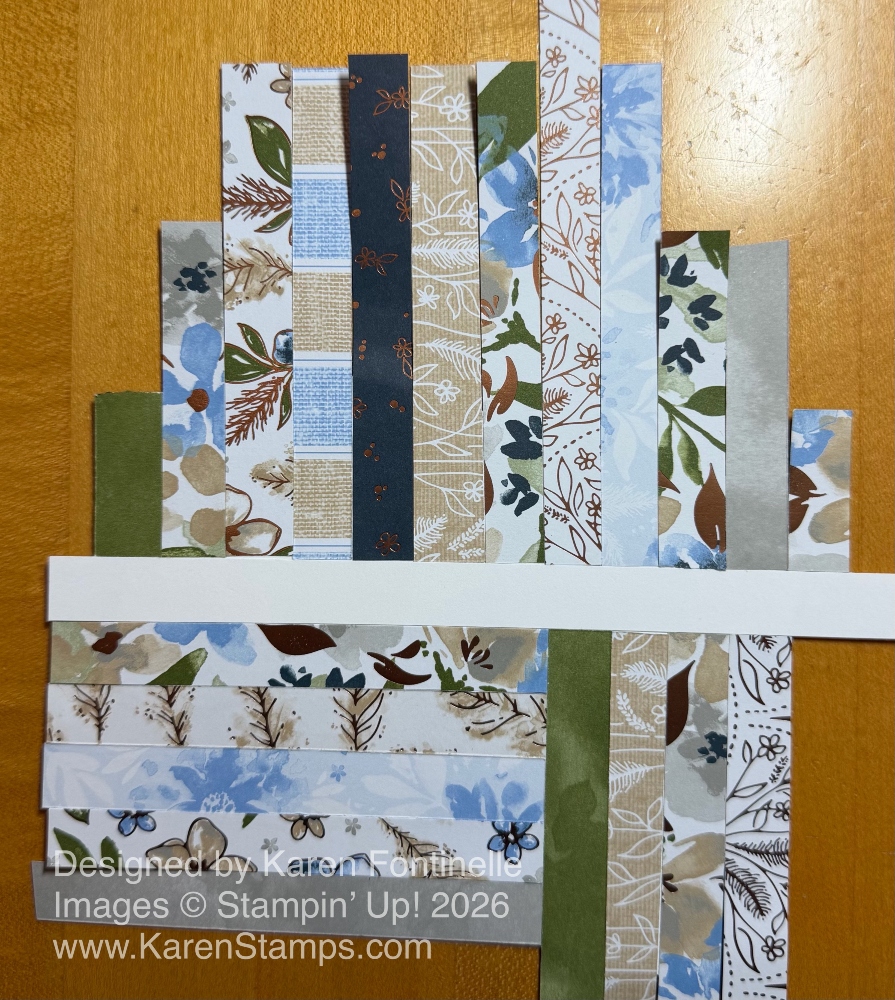
When you turn the piece over, you will see the strips extending beyond the Basic White cardstock. You can trim off the excess paper strips using a large scissors or your Paper Trimmer. Keep in mind you might have glue on those extended pieces so your scissors or Trimmer may be some glue. Therefore, I would recommend scissors since you can clean those off easier.
As you are assembling the card, you can cut a few strips that are really long to use in smaller areas when you get near the end of making the card. Once you turn over the trimmed piece of Basic White, you will have a neat piece to add to the front of the card! Adhere to the card base.
Stamp the greeting, if you haven’t already. I used Hydrangea Hue ink and a greeting from the Lovely Arrangements Stamp Set. For some embellishment and to take up empty space on the long white strip, I added three Hydrangea Hue In Color Dots or any other embellishments you have. These dots are out of stock right now as I write this, but you can fill out the notification form with your email to be notified when they are back in stock.
Try this technique with any paper that you have. Orient the strips in different ways. Just play around with it!