
It’s been a long time since I have made a diorama card but it was fun to make this Easter Diorama Card With Welcome Easter. Diorama cards can be made in different ways, even fancier than this one. A diorama card is a 3D card with an opening on the front layer that lets you see a scene of any kind on the inside. Sometimes there is even a middle layer. But let’s start with this one!
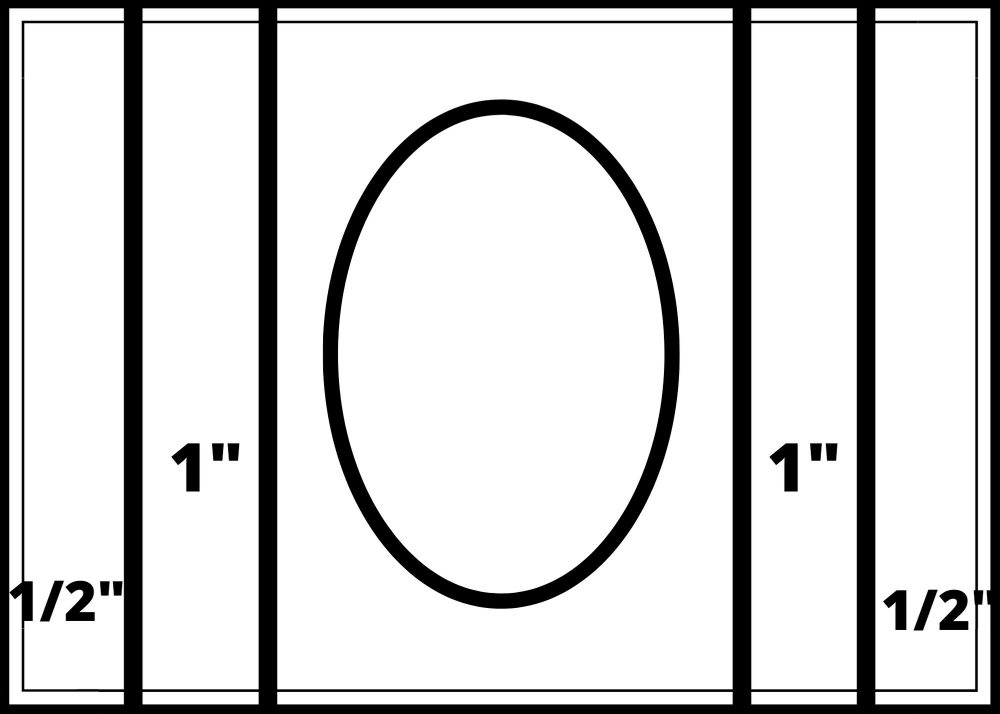
You just need two pieces of cardstock, each piece 4 1/4″ x 5 1/2″. I chose Pool Party for my front piece and Whisper White for the back. On each piece, score 1/2″ and 1″ from each end.
Then you will crease those score lines so that your card front pushes out and the back piece pushes back. You can see which way these score lines go from this top view of the diorama card.
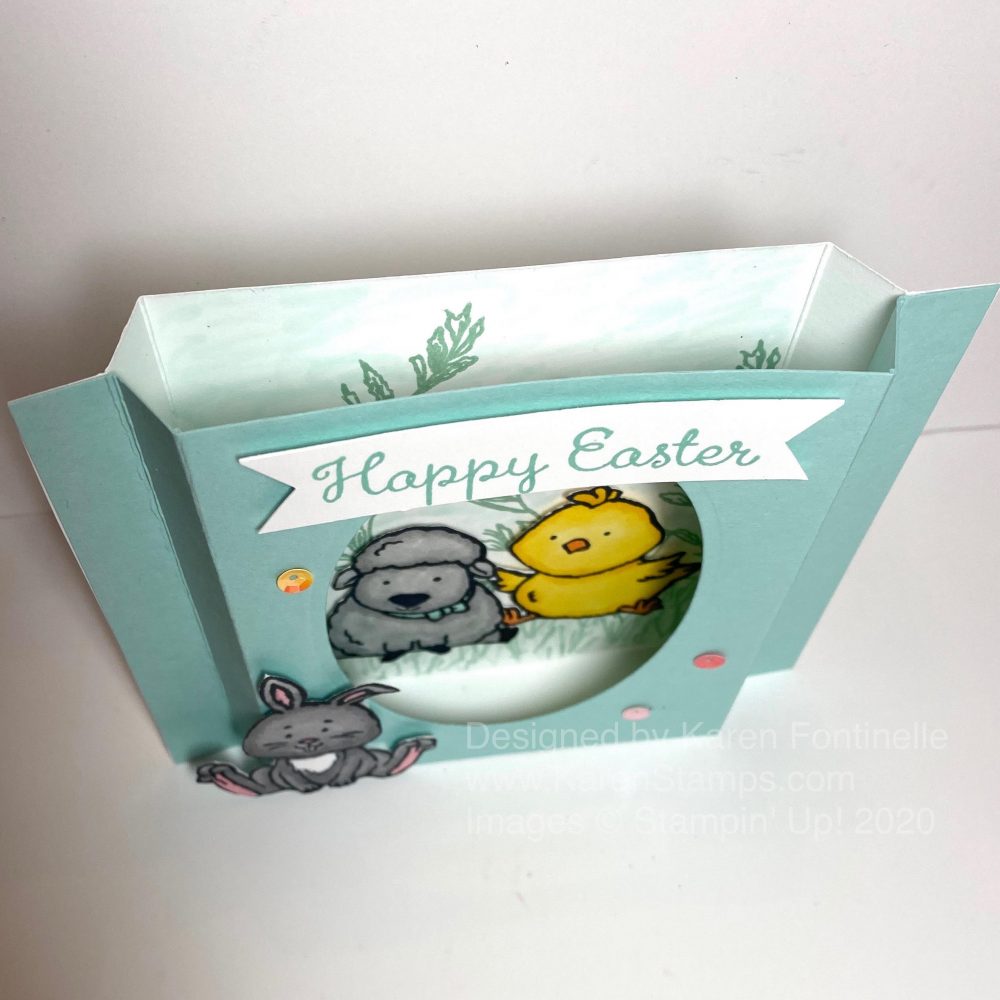
Now you will stamp or decorate that back piece before you assemble the card. But when you are ready to adhere the two pieces of the card together, use something like Tear & Tape Adhesive or Multipurpose Liquid Glue. All you have to do is adhere that end 1/2″ on the front and the back piece together.
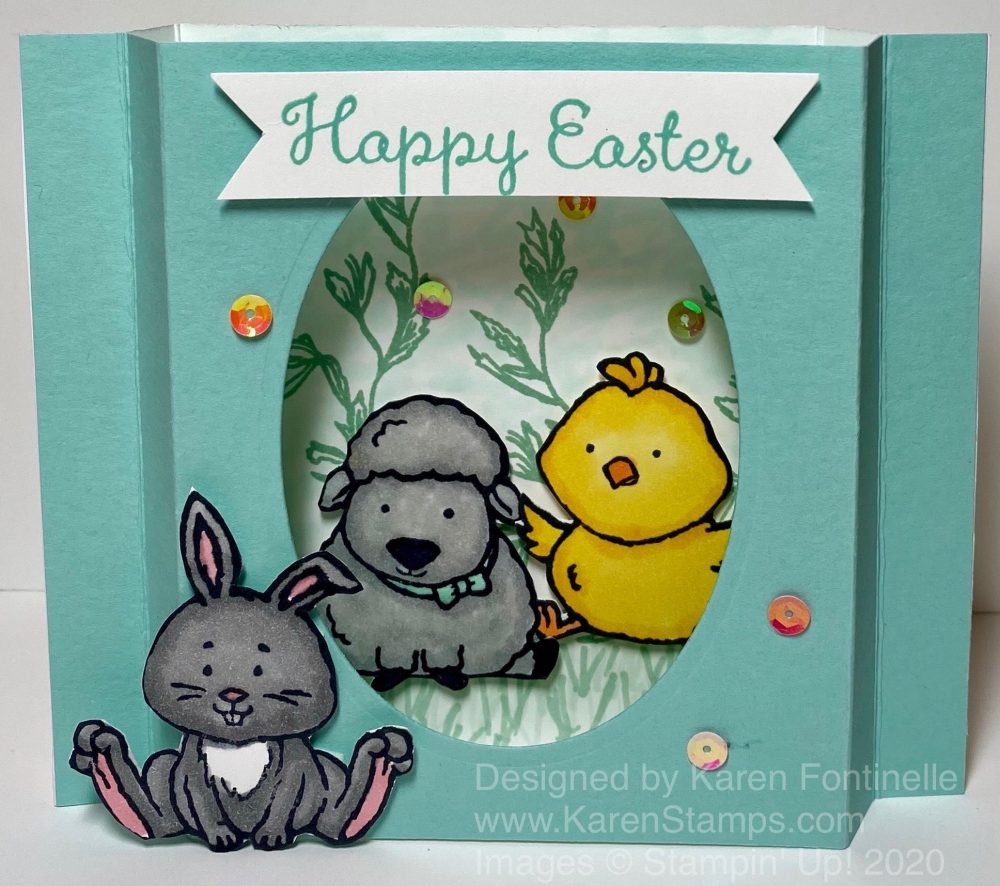
For my Easter diorama card, I used the Welcome Easter Stamp Set. I stamped the three little characters, colored them with Stampin’ Blends, and cut them out with my Paper Snips. I also used the Happy Easter greeting stamped in Pool Party from the Welcome Easter Stamp Set.
On the front of the card in the center area, I die cut with a Layering Ovals die. You could use a circle die, punch, square, whatever you like. I played around with the placement of the bunny, chick, and lamb before adhering the two pieces together. You want to make sure that you can see what you want to see well enough.
You want to think about the background. I stamped a few leafy boughs from the Path of Petals Stamp Set. I didn’t want the rest of the background to just be white so I colored in lightly, just with kind of a scribble motion with a Pool Party Stampin’ Blend marker. And I drew in some sprigs of grass at the bottom.
The lamb and the chick are popped up on Stampin’ Dimensionals to give a little dimension inside the card. The bunny is also popped up on a dimensional on the front corner. I still thought the card needed a little something so I used some Iridescent Sequins on the inside and even the outside. Once I added the sequins, I was happy with the card!
Now the amazing part of this card is that you can fold it flat and it is the size of a normal card! It will fit in an envelope and can be mailed!
As I’ve said before, you can use the Welcome Easter Stamp Set to make baby cards with these cute images! You could change the greeting on this Easter card and make it one for a baby, like one that comes in the stamp set.
Here is another example of a diorama card that I made years ago, an oldie but goodie!
Easter is coming soon so try your hand at this Easter Diorama Card With Welcome Easter because it is easy enough to make and will the recipient feel like someone special!