This die-cut piece was already laying on my table and I was in a “red” mood so I was pleased how this Many Layered Blossoms Birthday Card came together. Real Red is one of my favorite Stampin’ Up! colors!
You won’t believe how simple this card is to make and yet it will look like you make an elegant, fancy card! That’s what die-cuts can do for you!
The card base is Shimmery White Cardstock, one of my favorite papers! It just barely has a glimmer to it, very subtle, but it is there and makes the paper look rich. It’s a must-have in your stash in my opinion! Then I added a layer of Real Red underneath another piece of Shimmery White.
I had previously used the Many Layered Blossoms Die to cut out this piece or Real Red. I think I was trying out my new Stampin’ Cut & Emboss Machine to see how it would handle a large and intricate die. So I had this stack of die cuts on my table! I just used the teeniest dots of Multipurpose Liquid Glue on the back of the blossoms and adhered it to the front of the card.
I stamped the greeting in Real Red Ink on a strip of Shimmery White and snipped the banner in with the pointy part of the Tailored Tag Punch. Then I layered this on a piece of Real Red.
That’s all there is to this card! If you want a change from Halloween or holiday cards, go back to this popular stamp set and die and make a card like this Many Layered Blossoms Birthday Card.
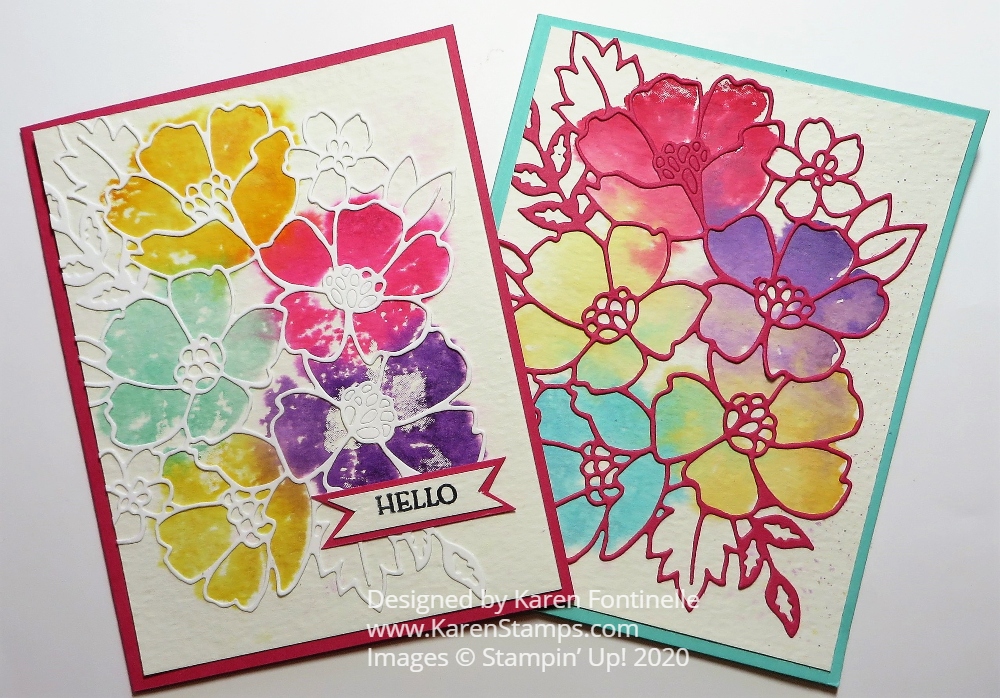
I thought I would try some watercoloring with this stamp set and dies and ended up with these Blossoms In Bloom Watercolor Stamping Cards. I’m calling it watercoloring stamping. I used watercolor paper, moistened it and also spritzed water on the stamp before stamping.
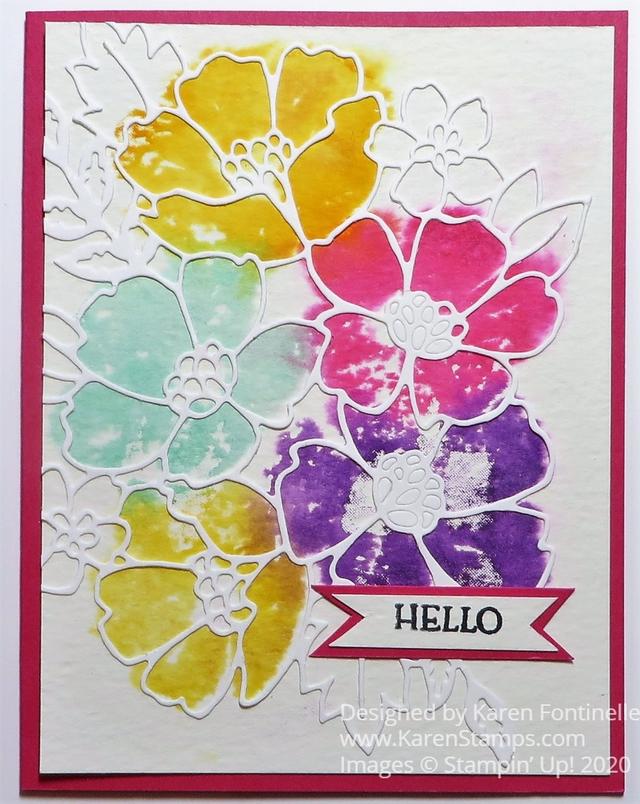
I used my Stamparatus to stamp since the Blossoms in Bloom stamp is so large. I used my Aqua Painter (now Water Painters in the new catalog) to moisten the Fluid 100 Watercolor Paper and I also spritzed the stamp with water after coloring with Stampin’ Write Markers. On the other card, I applied the ink to each flower with Sponge Daubers. When I stamped with the Stamparatus on the wet watercolor paper with the wet stamp, it looked like a mess! But all I had to do was dab with a paper towel to pick up the excess water and it was fine! I really just wanted a bit of color underneath the die cut I would later put on.
After letting the watercolor paper dry, I adhered the thin Whisper White die cut of the Many Layered Blossoms Dies with teeny tiny drops of Multipurpose Liquid Glue. Then this piece was layered on the card front of Melon Mambo Cardstock.
The die cut didn’t quite cut all of the flower centers but I don’t think anyone will mind. I could have even colored them perhaps with yellow to make them look like they were supposed to be there. I like how I didn’t have to place the die cut perfectly, if the color extended beyond, it looked fine because it was watercolor.
And then I did another one to see if I could get it less watery, but I didn’t, although using a Melon Mambo die cut on Coastal Cabana Cardstock gives this card a different look anyway.
I like the way some of the colors bled into each other which gives it a good watercolor look. I even accidentally got some splatters on the watercolor paper.
If you’d like to watercolor, but don’t know “how”, just use this stamping method on watercolor paper, spritzing before or after. Just experiment! There are lots of ways to do this. If you don’t have official watercolor paper, Shimmery White Cardstock is the next best thing.
Try your hand at some watercoloring with whatever you have! And you can get some other ideas of how to use the Many Layered Dies on these cards in THIS POST.
I think you will find these Blossoms In Bloom Watercolor Stamping Cards fun to make!
These Blossoms In Bloom sample cards are ones I made just playing around with some new Stampin’ Up! products. They are all coming soon in the new Stampin’ Up! Catalog, going live on Wednesday, June 3rd!
With these cards, I wasn’t really trying to make anything special. I just wanted to play with the stamp set and mainly the dies to see how things worked together. But I think they turned out pretty well!
The stamp set is called Blossoms In Bloom and is one of the Distinktive stamp sets. This is what Stampin’ Up! says about Distinktive Stamps:
“Get photo-realistic style images with Distinktive stamps, available only from Stampin’ Up!. Distinktive stamps have a special texture that gives added depth and dimension in a single step. They’re available in red rubber and photopolymer; look for the Distinktive icon. Distinktive patent pending.”
It may look like you didn’t ink up the stamp properly, but just stamp and try it out! If you have too much ink, you won’t see all the detail that this kind of stamp is designed to give. It should look like there were several steps involved in stamping that image but in reality you only had to stamp once!
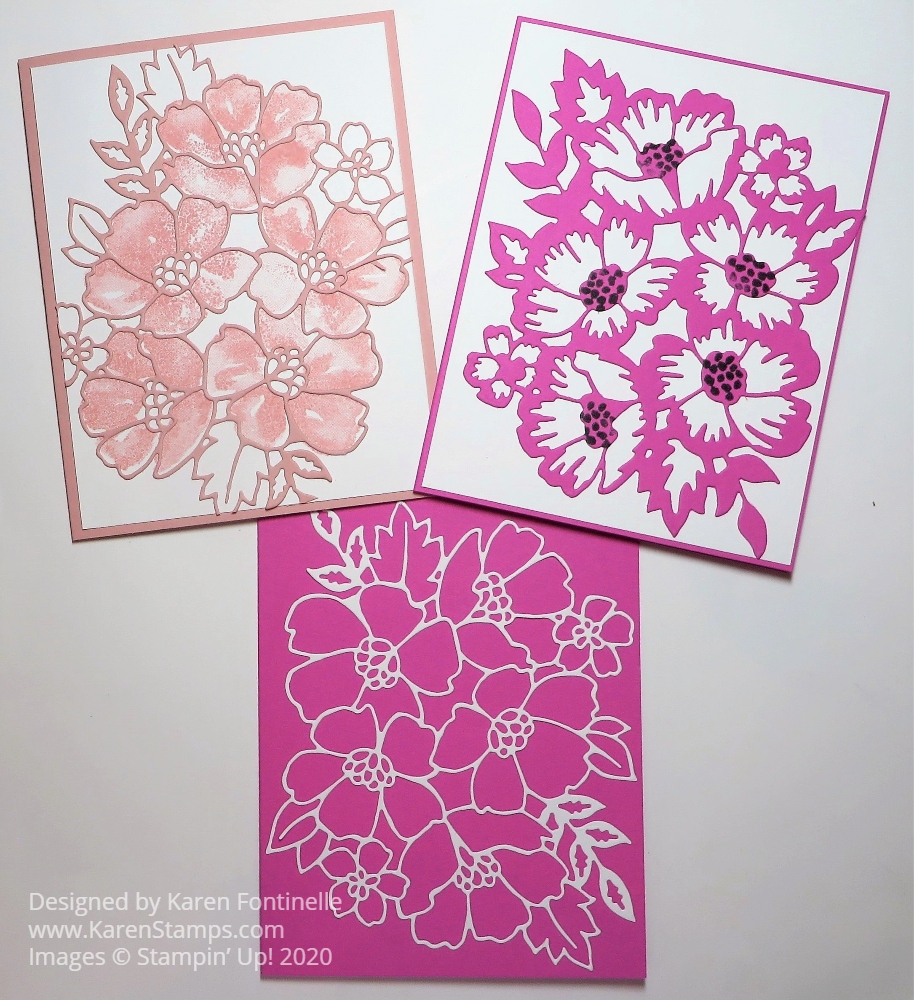
All that being said, I first stamped the one large image of about five flowers in a bunch. I used Blushing Bride Ink on Whisper White Cardstock. Then I die cut the blossoms image out of Blushing Bride Cardstock with the thinner outline die. These dies are called the Many Layered Blossoms Dies. You will be able to purchase the Blossoms In Bloom Stamp Set and the Many Layered Blossoms Dies in a Bundle and save 10% buying them together. It might take a second to line up the die-cut over the stamped image. You just have to get all areas lined up since the die-cut is so thin and flexible. I used the teeniest dots of Multipurpose Liquid Glue to adhere the die-cut over the stamped image and I didn’t make a mess! Or you can sponge on the glue over a Silicone Craft Sheet or scrap paper. I just got lucky!
Another purpose of mine in making these cards was to try out the new In Color 2020-2022 Magenta Madness. It’s quite a color, and I kind of wanted to see what would go with it. Since this die-cut image is very large I opted to just go with Magenta Madness as the card base and no other layers. I die cut Whisper White with the thin blossom outline and adhered that to the Magenta Madness card base. I think it is rather striking and elegant looking with the white against the bold color.
On my third card, I die-cut Magenta Madness with the thicker outline die from the Many Layered Blossoms Dies. It also makes a great looking card just on it’s own with no stamping underneath. I did stamp some black dots in the center of the flowers before adhering to the card with the stamp in the set. The card base is Magenta Madness with a Whisper White layer and then the Magenta Madness blossom die cut.
I haven’t put greetings on these cards yet as my main purpose was trying out Magenta Madness as a color and trying the new dies along with the stamp set.
There are lots of creative possibilities with these stamps and dies so be sure to check it out when it is time to order from the new Stampin’ Up! Catalog June 3rd!