Tag Archives: watercoloring

Biggest Wish Watercolor Birthday Card

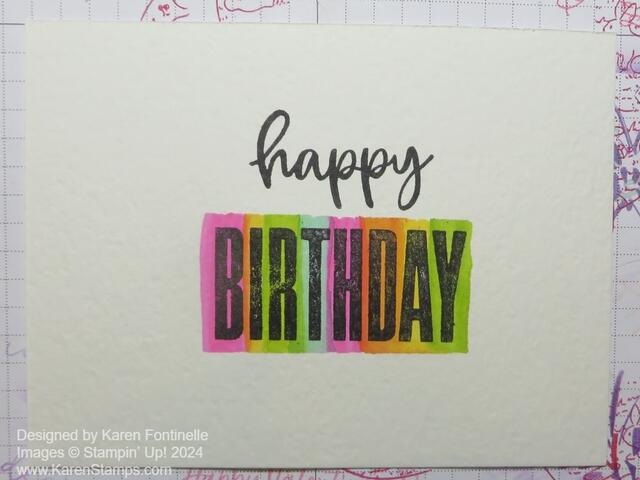
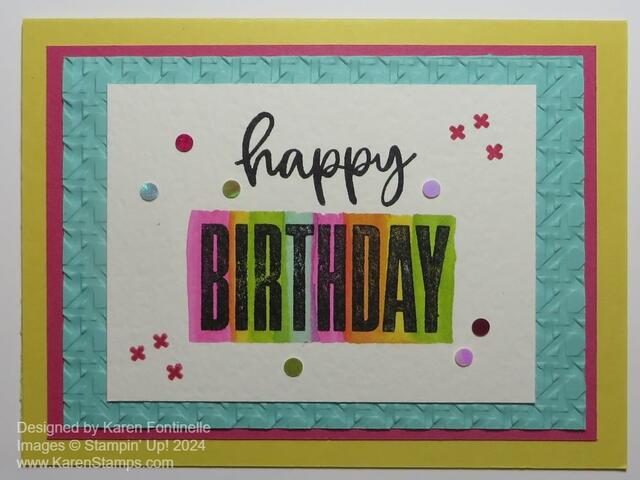
Biggest Wish Watercolor Birthday Card Complete

I’ve recently been captivated by a lot of watercolor videos on Instagram, nothing complicated, just some super-easy ideas that I could try with my Stampin’ Up! products! Here is one idea I saw online somewhere made into this Biggest Wish Watercolor Birthday Card.

Here is how I did the watercoloring on this card with my Stampin’ Up! ink pads and Water Painters. I started by stamping the two words in the Biggest Wish Stamp Set with Stazon ink (which is waterproof) on the Fluid 100 Watercolor Paper. The watercolor paper started out larger than you see on the finished card. Make sure the Stazon ink pad is well-inked before stamping on this textured watercolor paper.

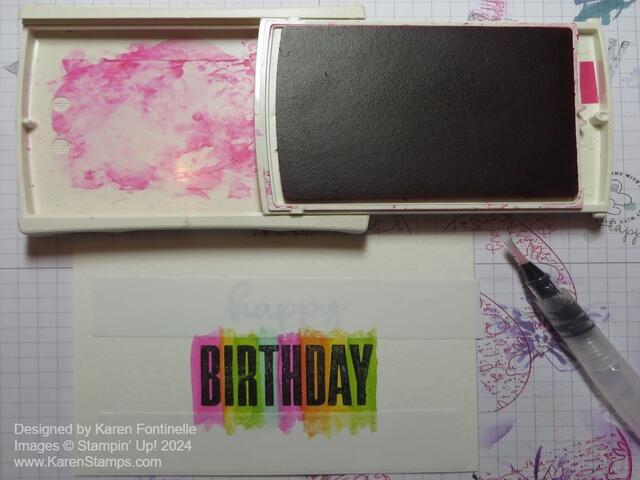
After stamping the words I covered “Happy” with a piece of 1″ wide cover up tape. There are probably different brands you can use or washi tape might work if it is wide enough and not so sticky that it tears the paper when you remove it. This tape worked well for me. I placed it with a space above the word “Birthday” so the color had space to go above the word. Then I placed another strip of tape below the word leaving a space for the color.

I used several colors of ink in the Brights family and my Water Painter to pick up some ink in the ink pad lid and painted over the word “Birthday”. The tape kept the ink from going anywhere else except in that open space. When you finish with the watercoloring in the lid of the ink pad, be sure to use a paper towel to clean up the excess water in the lid so it doesn’t get into the ink pad. You can also use reinkers in the lid if you need more color. See the photo below.

Biggest Wish Watercolor Birthday Card Painting

The colors I used were Melon Mambo, Daffodil Delight, Granny Apple Green, Pumpkin Pie, and Coastal Cabana. You can use whatever colors you like!

When I removed the tape, you can see that I had straight lines of watercoloring across the top and bottom of the word “Birthday”. You wouldn’t have to do it this way if you wanted the color to be free-flowing. See the photo below.

Biggest Wish Watercolor Birthday Card Painted

I might even try making a similar card, but using a different watercoloring technique with my inks and Water Painters. It’s just something fun and different. You could also use Watercolor Pencils! Or use Stampin’ Blends markers for the same effect. Don’t you love all the creative possibilities with stamps, ink, and paper?!

To make the card, I played around with the colors before deciding on this design. The card base is Daffodil Delight with a layer of Melon Mambo cut at 5″ x 3 3/4″. The next layer is Coastal Cabana, 4 3/4″ x 3 1/2″, but I felt it needed a little “something”. I decided to use the Cane Weave Embossing Folder. However, I didn’t exactly like the “cane weave” look with this particular card so I turned it over to the other side and I think it gave a textured look without looking like a cane weave so obviously. I also trimmed down the watercolor paper to 3 7/8″ x 3″ so some of the embossed texture of the Coastal Cabana would show around the margin.

Since it is a birthday card I wanted it to look festive so I added quite a few Iridescent Adhesive-Backed Discs in three different colors. That didn’t seem like quite enough, so I stamped the little group of “plus marks” in the Biggest Wish Stamp Set in the corners.

Once you have the design idea for this card, it’s pretty easy to make. Get out some ink pads or reinkers and an acrylic block plus a small paintbrush or Water Painter and have some fun with watercoloring!

SHOP STAMPIN’ UP! ONLINE HERE!

Valentine Stamping and Watercoloring

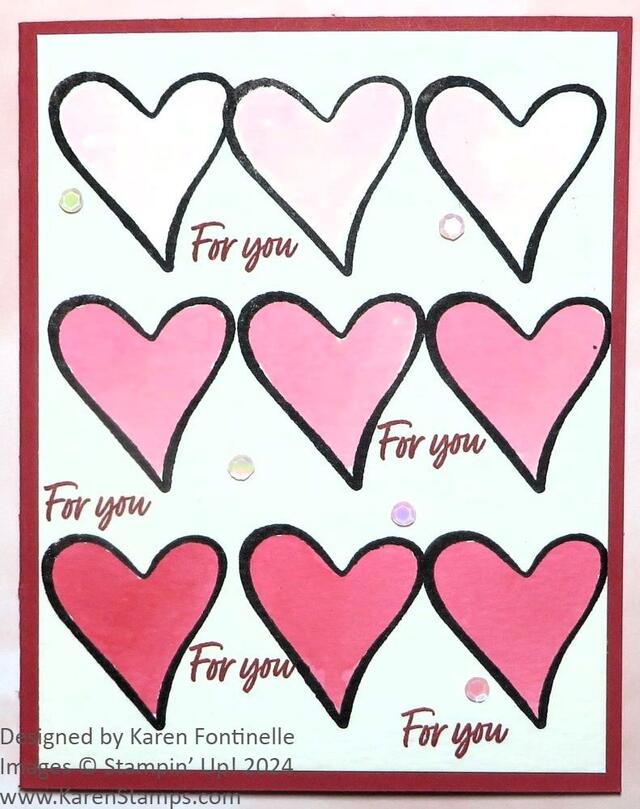
Country Bouquet Watercolored Valentine

I seem to be getting a lot of watercoloring accounts popping up on my social media and some of them look so fun and simple! I don’t own a set of watercolor paints, but I knew I could use our Stampin’ Up! ink and the Stampin’ Up! Water Painters. I saw a card design a little bit like this card but made with cardstock hearts in kind of an ombre effect. I got the idea to use the Country Bouquet Stamp Set in the Annual Catalog for stamping hearts and then I watercolored them!

This Valentine only uses Real Red ink! The card base is Real Red. The hearts are stamped with Stazon black ink on Stampin’ Up! watercolor paper, Fluid 100 Watercolor Paper (149612). You need to use Stazon ink since it is waterproof. You don’t want any ink to smear when you apply the watercolor. Basic White cardstock doesn’t stand up well to water so watercolor paper is a lot better. If you still have some Shimmery White cardstock that unfortunately is retired now, it works fairly well with water.

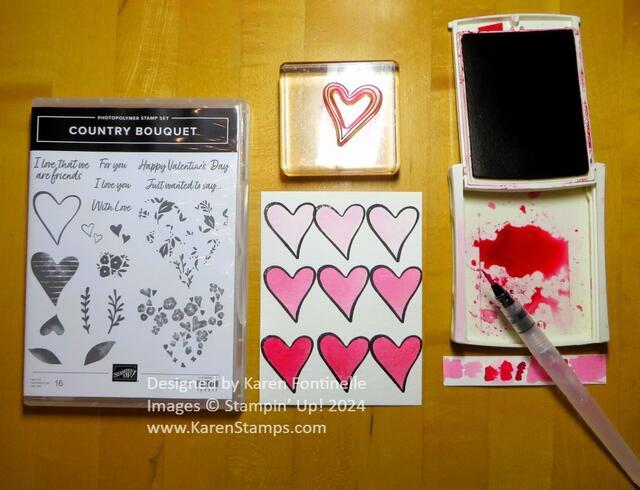
To make this card, stamp hearts on the watercolor paper. If you already have some ink in the lid of the Real Red ink pad, you can start with that. Squeeze water out of the Water Painter to make a very light color with the ink. I had a scrap piece of watercolor paper that I tested my colors on. When you feel you have the shade you want, color in the top three hearts. Then add a little bit more reinker to the lid (don’t let all the water get onto your ink pad!), stir it up with the Water Painter, perhaps adding more water. When you get a medium shade with the ink and water, fill in the next row of hearts. For the last row of hearts, add more reinker and see what shade you have or add more water if it is way too dark. You want three different shades of colored hearts just using Real Red reinkers and water. See my photo below of what I was using.

Valentine Watercoloring

Either let the watercolor paper dry or hit it with your Heat Tool for a short time. It doesn’t take very long at all to dry with the Heat Tool. Then you can adhere it to the card base of Real Red. I used a LOT of Stampin’ Seal+ since the watercolor paper is heavier and possibly warped a little bit. I wanted to be sure it was going to hold on the card.

I tried to figure out what to do for a greeting and in the end stamped “For You” randomly in the empty spaces on the card. Not one to leave well enough alone, I also added some Pastel Adhesive-Backed Sequins in Petal Pink scattered on the front of the card.

On the inside of the card, I added a Basic White layer and stamped both greetings “Just wanted to say” and “Happy Valentine’s Day in Real Red ink.

IMPORTANT: Before you just close up that ink pad, take a paper towel and dab out all that water. You don’t want that all soaking into your ink pad and it would probably make a mess anyway just closing the lid!

This was a fun way to do something a little different but still use Stampin’ Up! products. Sometimes we may forget how versatile many of our products are, the reinkers being one of them. Try a little watercoloring with your reinkers and Water Painters or whatever small brush you have. If you don’t have the Stazon ink, I’d suggest just paint the hearts and omit the stamping. Make all the hearts different colors if you like. Just play!

February is here so this is the last month for Sale-A-Bration. It’s a good time to pick up a few things at Stampin’ Up!, thinking of reaching that $50 level or $100 level or more to choose a FREE product in the Sale-A-Bration Brochure and the newly released products on this flyer.

SHOP STAMPIN’ UP! ONLINE HERE!

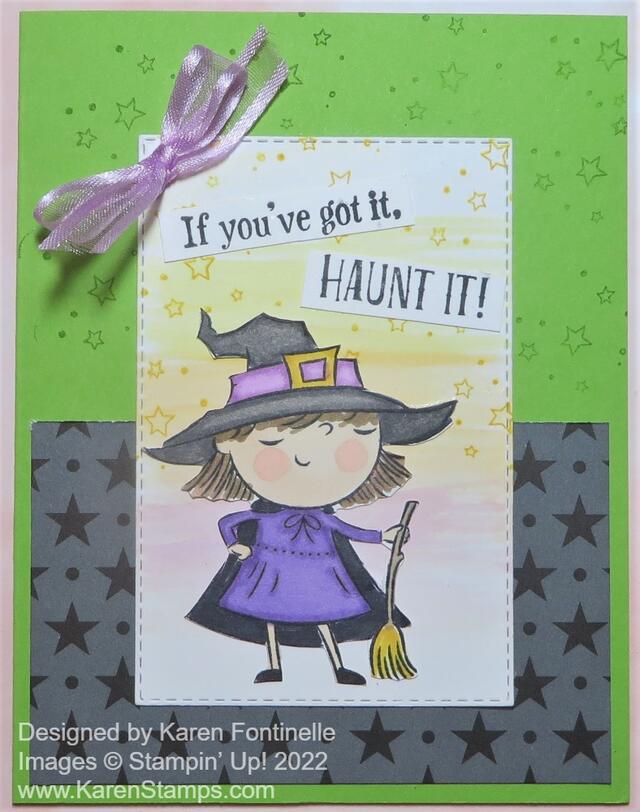
Best Witches Haunt It Halloween Card

Best Witches Haunt It Halloween Card

This Best Witches Haunt It Halloween Card is the first Halloween card of the season! It’s a little early, considering it is over 100 degrees these days here in Houston! I have to say some Halloweens here haven’t been all that much cooler either by October 31st! But weather aside, I wanted to try in my new Halloween stamp set, Best Witches and I was in the mood to color!

You’ll find the Best Witches Stamp Set in the July-December 2022 Mini Catalog or Holiday Catalog, as I like to call it (and type it!) on page 55. The stamp set has two cute witches, a toad, some stars, and some cute sayings! It’s just my kind of Halloween set!

To make this card, I used Granny Apple Green cardstock for the card base. Then I added a piece of Black & White Designs Designer Series Paper to the bottom half of the card. These will be fun papers to use for Halloween or any time. You can leave them black and white or you could color the white parts of the papers.

I stamped the witch in Memento Black and colored her in with Stampin’ Blends. I just chose whatever colors I wanted with no planning so just play and choose whatever colors you are in the mood for. I think I used Smoky Slate and Gray Granite on the witch’s hat, Daffodil Delight for the gold buckle, Fresh Freesia for the hat band, but Highland Heather for her dress. Her face is Ivory with a little pink blush on her cheeks, Petal Pink. Then I cut out the witch by hand with Paper Snips You wouldn’t have to but that was my original idea when I wasn’t quite sure what the background was going to be.

Stampin’ Up! says July is Watercolor Month so I thought I would do a little watercolor background on which to layer the witch. Since I was using Basic White which can’t handle very much water at all, I watercolored VERY lightly. I used the wide Water Painter to pick up just a little bit of ink in the lid of the ink pad with minimal water and just brushed across the paper very lightly. I used Daffodil Delight, Pumpkin Pie, and Gorgeous Grape. You can barely see it but, as I said, I didn’t want much water on the paper which could make the paper pill and look messy. Then I stamped with the small stars stamp in the Best Witches Stamp Set, in Daffodil Delight, on the background. I had also stamped at the top half of the Granny Apple Green with Granny Apple Green ink so that it would just be very light in the background to add a little interest and match the stars on the designer paper.

The Basic White paper was die cut with one of the Stitched Rectangle Dies. The witch is adhered flat on the paper although you could use Stampin’ Dimensionals to pop her up if you wanted to. The greeting is stamped in Memento Black and then cut apart just for fun. I think this would be a fun card to send to a girlfriend for Halloween! I love it! And for a finishing touch, I couldn’t resist adding a bow of Fresh Freesia ribbon in the corner. My other thought was to use Iridescent Rhinestone Jewels for a little sparkle but I did the ribbon for something different.

I love Halloween and I had so much fun making this card! It may barely be the middle of summer but you know time flies so if you enjoy Halloween, don’t hesitate to get an early start on fall. If you are having summer heat like we are, maybe making a fall or holiday card will cool you off! Certainly staying inside in the air-conditioning and stamping will keep you cool! I hope this Best Witches Haunt It Halloween Card will inspire you to think ahead a little bit to the fun days coming up!

SHOP THE HOLIDAY CATALOG ONLINE HERE!

A Floral Card For Spring With Brusho

A Floral Card For Spring With Brusho

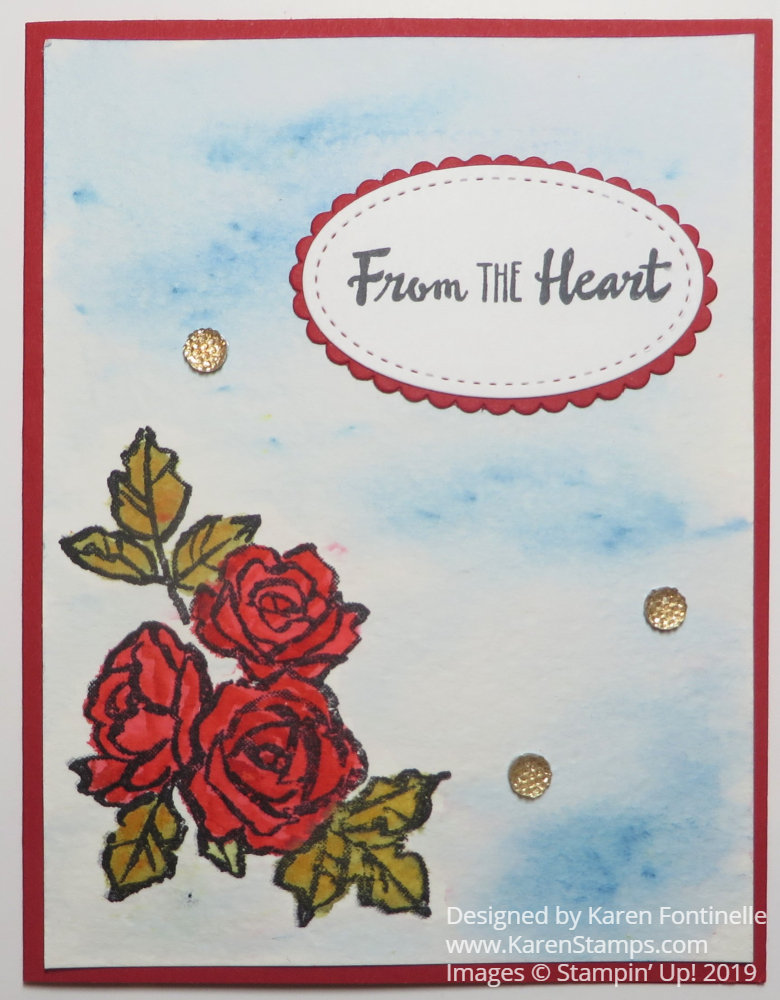
Late yesterday spring arrived, finally, and here is a Floral Card For Spring With Brusho to celebrate! My daughter has been visiting for a week (not long enough!) and she wanted to stamp and learn some new techniques! We played around with several things including the Brusho Crystal Colour (yes, that’s how it is spelled!). I haven’t used it much, even though it was something I wanted right away when it came out! There are different ways you can use Brusho. Mostly you just need to play with it!

We used real Watercolor Paper by Stampin’ Up! because that works the best, along with the Aqua Painter. You can apply water to the paper with the Aqua Painter or move the ink crystals around with it. You can also just pick up with crystals mixed with water and use as a watercolor paint to color in an image. The Watercolor Paper is a high-quality cotton paper that absorbs the water and doesn’t pill like Whisper White Cardstock does when you use water on it and try to move color around. Even if you don’t use watercolor paper often, you might like to keep a package or two on hand in case you come across a project you want to try with watercoloring.

The Brusho is fun to use because you get five little pots of color – Brilliant Red, Gamboge (orange), Moss Green, Prussian Blue, Yellow. You can use them individually or combine them or do whatever you want! It is recommended you do not even OPEN the pots as the powder is so fine and you’ll have tiny crystals all over. Just poke a hole or several holes in the lid with a Paper Piercing Tool or push pins or something so you can shake out minute amounts of color when you want them.

For my card, I stamped the flowers from the Petal Palette Stamp Set with Stazon Ink since it is waterproof. Then I just shook out a tiny amount of Brusho onto a clear block and picked it up with my Aqua Painter to color in the flowers and leaves. If the shade isn’t exactly what you wanted, you can go back and add more color for a deeper color or shading or blending.

I just wanted kind of a light blue, sky background for the card so I sprinkled just a very few crystals on the wet watercolor paper (I applied water around the flowers with my Aqua Painter) and kind of let it move on its own and helped it with the Aqua Painter so it went where I wanted it. Very easy and simple, not to mention fun!

The card base is Real Red to match the flowers and the greeting is from the Petal Palette Stamp Set. I had to add a little bit of bling with the Gold Faceted Gems.

My daughter and I also made some backgrounds while we played with the Brusho so we will have to make those into cards or something.

Take some inspiration from this Floral Card For Spring With Brusho and make your own card for spring to send to someone who just might really need a card that day!

SHOP STAMPIN’ UP! SALE-A-BRATION!