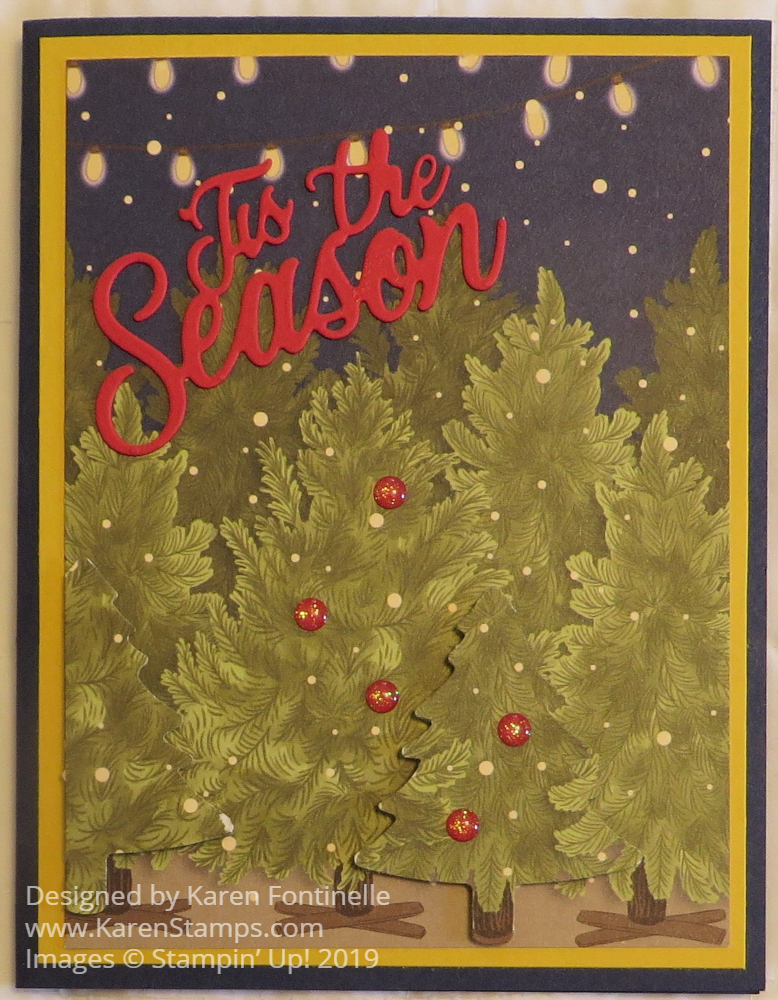
I named this card Night Before Christmas At the Christmas Tree Lot because that is what it looks like to me! Well, I guess it’s not just what it looks like to me, I think that’s what it is! I first thought it looked like all the trees were die-cut, so that’s how I got the idea for this card, but then I realized it’s just how good the paper is designed that they look that way! However, I did sacrifice some other paper to punch out a couple of trees to give it a 3D effect!
This card is made with the Night Before Christmas 6″ x 6″ Designer Series Paper. I just fell in love with this whole package of paper when I first saw it in the Holiday Catalog for its vintage look! The card base is Night of Navy, one of the coordinating colors with a layer of Crushed Curry. I thought it brought out the strings of lights over the Christmas trees. For the 3D trees, I was going to cut some out by hand but I decided to use the Pine Tree Punch, just to punch out some greenery from the larger trees in the paper. I popped those up on Stampin’ Dimensionals®.
I couldn’t find a good place for a stamped greeting, so I thought of using the die cut one from the Jolly Season Dies, part of the Holly Jolly Christmas Bundle. I used Real Red Cardstock and just adhered it with tiny drops of Multipurpose Liquid Glue. Of course, I had to have a little more bling, so I adhered some Toile Tidings Glitter Enamel Dots to the fronts of two of the trees like little red ornaments!
If you like this paper, you will also probably like the card I made in THIS POST using a different pattern of paper and the Santa in the Holly Jolly Christmas Stamp Set. All of these holiday products you will find in the Night Before Christmas Suite in the Holiday Catalog!
Grab some popcorn and a soda or some chocolate and enjoy!
Honestly, it will take you a while to really absorb all the products in the Holiday Catalog! Everyone seems to miss seeing something…..EVEN Shelli Gardner in a video hadn’t noticed the Coffin Treat Boxes! (If you like Halloween you should get those, even if you like more whimsical Halloween themes, but these are cute and easy to put together. Then you can decorate however you like!)
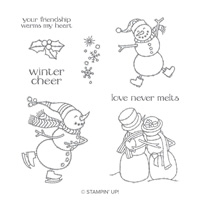
You will find this darling snowman stamp set and really fun designer paper in the Holiday Catalog plus the teeny tiny snowflakes in theSnowflake Sequins package. They are really for theSnow Globe Shaker Domes, but I couldn’t resist using a few with my Happy Snowman Christmas Card! I used the teeny tiniest dot of Multipurpose Liquid Glue and used the Take Your Pick Tool to place the sequins. They are really tiny!
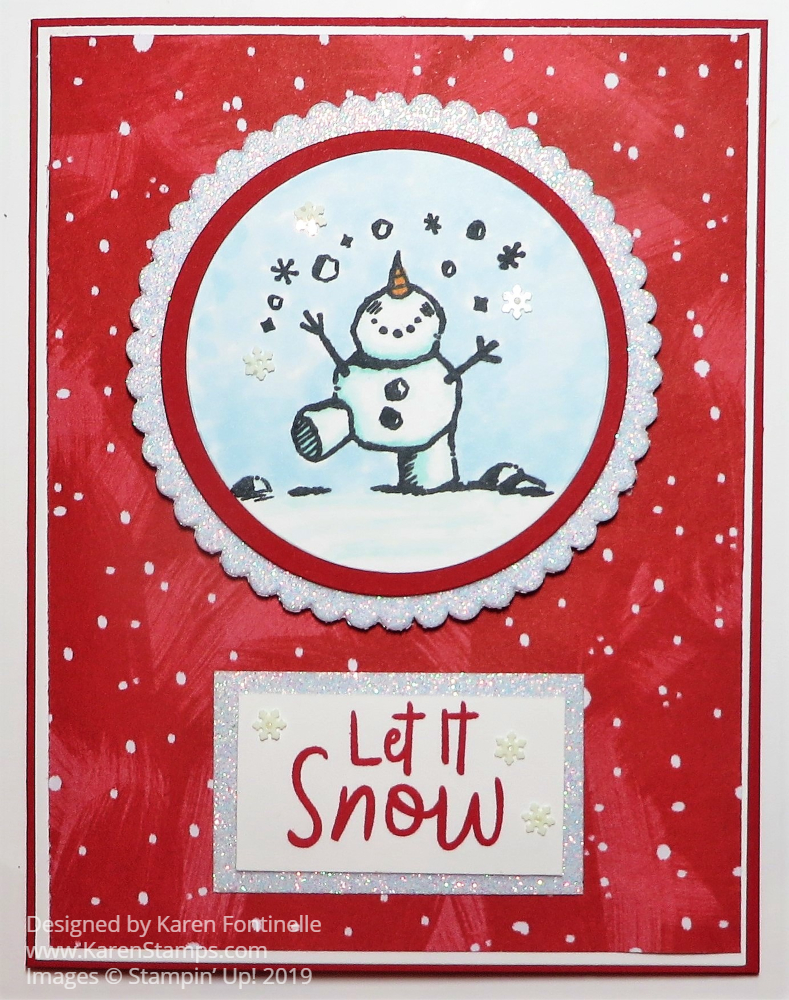
The card base is Real Red (which I am super happy to be using with these cards and the Let It Snow Paper) and has a layer of this red pattern of Let It Snow Designer Series Paper. I hate to tell you that on the other side are glimmery snowmen that I hated to cut through and put glue on!!! Oh my!! But it had to be done if I wanted to use this red paper with white snowflakes. Of course, you could use this pattern at any time because the white dots don’t have to be snowflakes! Just to help this red stand out, I put a layer of Whisper White underneath it. Now if you don’t tell anybody, you can die cut the circle that the snowman is stamped on out of the Whisper White before you assemble the card. No one will ever see it or know!
After I die cut that circle out of the Whisper White layer, I stamped a snowman from the Snowman Season Stamp Set on it in Memento Ink. Then I could add just a tiny bit of icy shadows on the snowman and snow with my Stampin’ Blends and lightly color in the winter sky. This circle is layered on a Real Red larger circle, die-cut with the Layering Circle Dies and that is layered on a scalloped circle from the same set out of Sparkle Glimmer Paper.
The greeting is in the snowman set and stamped in Real Red Ink. I also layered this on a piece of the Sparkle Glimmer Paper. Just for fun, I added three tiny snowflake sequins to the greeting, too.
That’s it. Pretty easy card to make once you have the idea and the Sparkle Glimmer Paper adds a little pizzazz! The inside of the card has another one of the greetings stamped in red, plus “Merry Christmas” as well as some snowflakes stamped at the top, all on a layer of Whisper White since the red card base would be a little difficult on which to stamp a sentiment or write a note. It’s easy to decorate a layer inside your card with some stamping or a piece or strip of designer paper! And don’t forget the outside of the envelope!
Just as this snowman is excited, I’m sure you are excited to start shopping with the Holiday Catalog! You can combine your Holiday Catalog order with the Designer Series Paper Sale! And don’t forget about the Clearance Rack if you want to pick up some bargains!
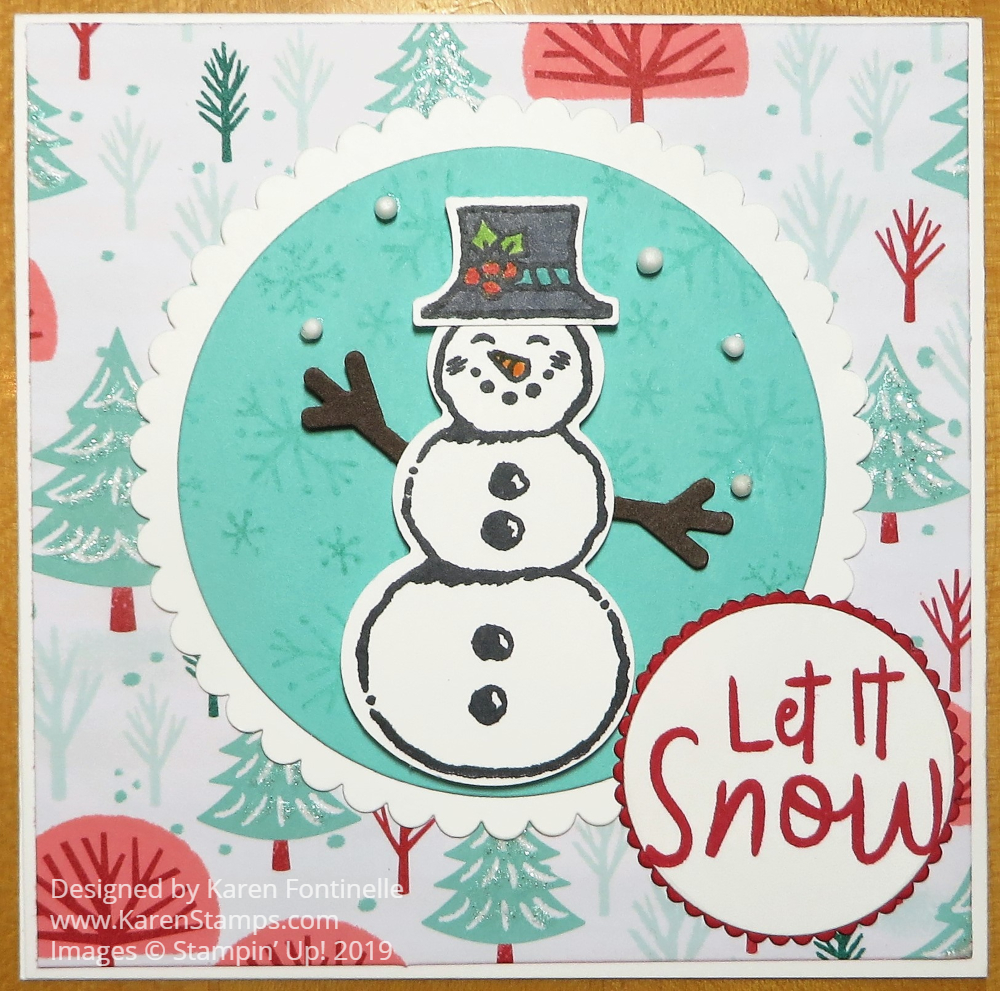
This Snowman Season Punched Snowman Square Christmas Card was made out of a 4″ x 4″ Whisper White card base that I already had. Sometimes it is fun to make a different size card and that’s how this card came about! The main thing was trying out the new Snowman Builder Punch in the Holiday Catalog along with the Snowman Season Stamp Set.
For the background layer on this card, I chose this pattern with trees in the Let It Snow Specialty Designer Series Paper. Some of the colors in this designer paper are Coastal Cabana and Real Red. Real Red has always been one of my favorite colors, probably THE favorite color, but after the recent color rearrangement with Real Red moving to the Regals family instead of Brights, it seemed that it didn’t get much use. So I am very happy to be using Real Red again when using this Let It Snow Paper!
The cute snowman is stamped on Whisper White from the Snowman Season Stamp Set and then punched out with the Snowman Builder Punch. You can use the Whisper White punched out arms and color them brown or black with a marker or you can use scrap cardstock in whatever color you like. I used Early Espresso. The hat was stamped and then punched out. I colored in the hatband, holly leaves, and berries with a marker. I also colored in the snowman nose with Pumpkin Pie. I glued on the hat and arms.
The snowman is adhered to a die-cut circle of Coastal Cabana with Stampin’ Dimensionals® which was first stamped with the snowflakes in the Snowman Season Stamp Set. I inked up the snowflakes, then stamped off once before stamping on the Coastal Cabana so they would be a light background. The Coastal Cabana circle was layered on a Whisper White scalloped circle. All circles are die-cut with the Layering Circles Dies.
There wasn’t much room for a greeting so I did it a little differently by placing it kind of in the corner, layered a little bit over the focal point with the snowman. I think it works okay!
Then for a little fun, I got into the Let It Snow Embellishment Kit, which I discussed in my blog post yesterday. It’s a really cute kit in an adorable box you can reuse that comes with lots of pieces you can use to dress up your snowmen! You’ll find it on page 19 in the Holiday Catalog. I took out five of the teeny tiny snowballs and adhered them to the card with teeny tiny drops of Multipurpose Liquid Glue. So far they are still stuck on! The Take Your Pick Tool is pretty handy to use with these tiny things! the snowman is having fun juggling some snowballs!
Even though this card is sized at 4″ x 4″, I will still mail it in a regular size envelope. Square envelopes cost extra postage and I don’t know if you would find the correct size envelope anyway. It will be fine in one of our beautiful Whisper White Medium Envelopes. These are the best envelopes! You can actually identify a Stampin’ Up! envelope in a batch of mail by feel if someone sends you a card in a Stampin’ Up! envelope!
There are lots of things to make with the Let It Snow Suite, Snowman Season Stamp Set, and Let It Snow Specialty DSP! It’s time to start thinking about Christmas cards like making something like this Snowman Season Punched Snowman Square Christmas Card.
If you like cute things, you have to put the Let It Snow Embellishment Kit on your Holiday Catalog order! The catalog goes live September 4, 2019 which is right around the corner!
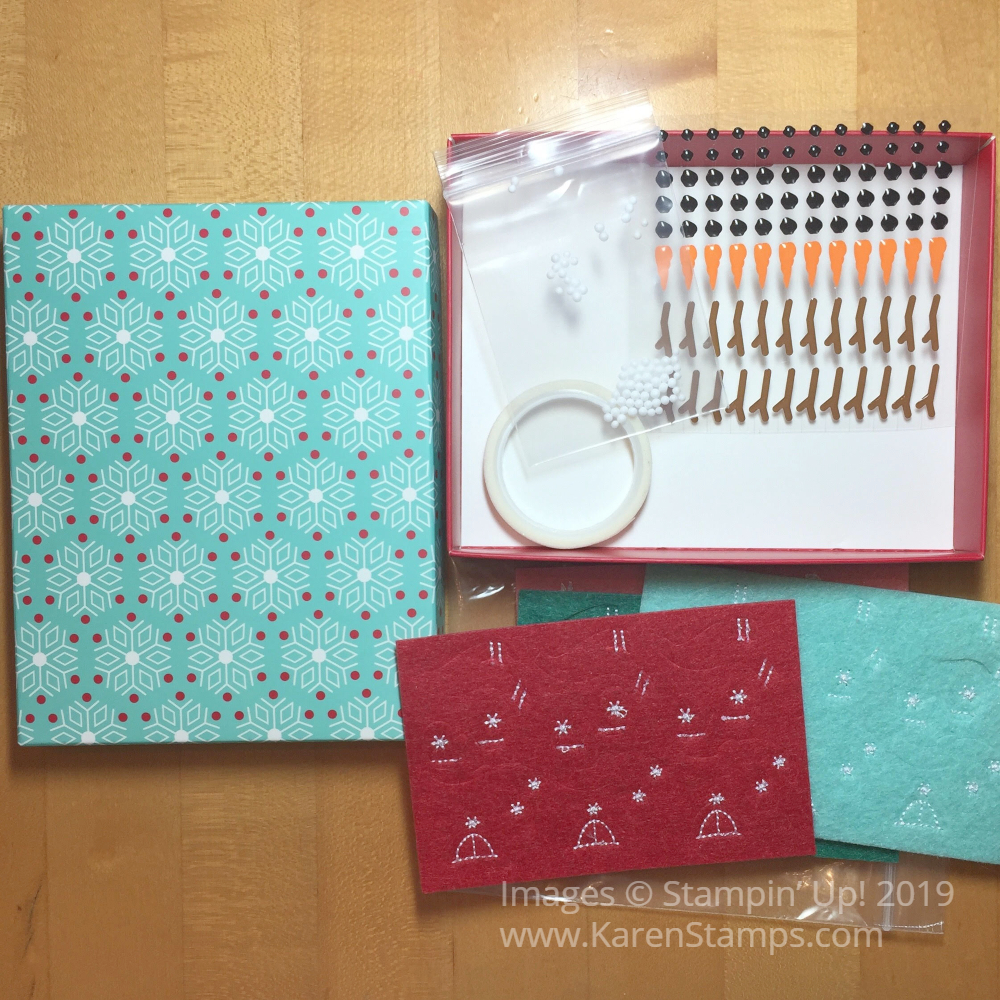
The box itself is cute, in Coastal Cabana, Real Red, and Whisper White colors. Presentation is everything, as they say! You can reuse the box after you use the contents!
And inside the box, you will ooh and aah when you open the lid!
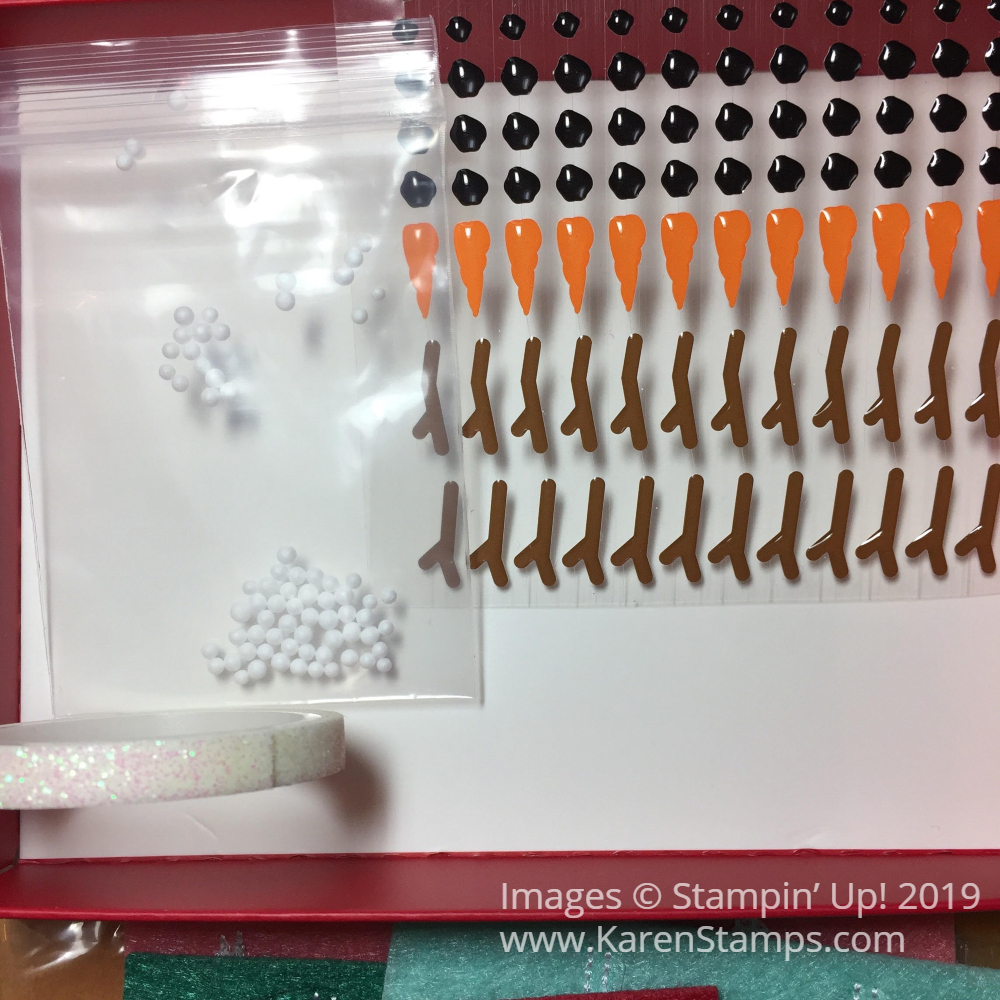
Just look!!! Darling little enamel pieces every snowman needs – stick arms, a carrot nose, and pieces of coal for buttons and eyes! Just your typical snowman!
Along with the enamel pieces are teeny tiny snowballs!! They are really tiny! I made a card with the snowballs and I used the tiniest drop of Multipurpose Liquid Glue (or if you aren’t sure you are going to get a tiny drop out of the bottle, put a drop or two on scrap paper and then pick up a tiny drop with a toothpick or something to place the glue on your paper where you want the snowball to stick) and then used my Take Your Pick Tool with the sticky putty end to pick up and place the snowball. I will say that they are so tiny they are a little difficult to handle.
There is also a roll of 1/4″ glimmery washi tape. You can use this in many ways. Washi tape is so much fun!
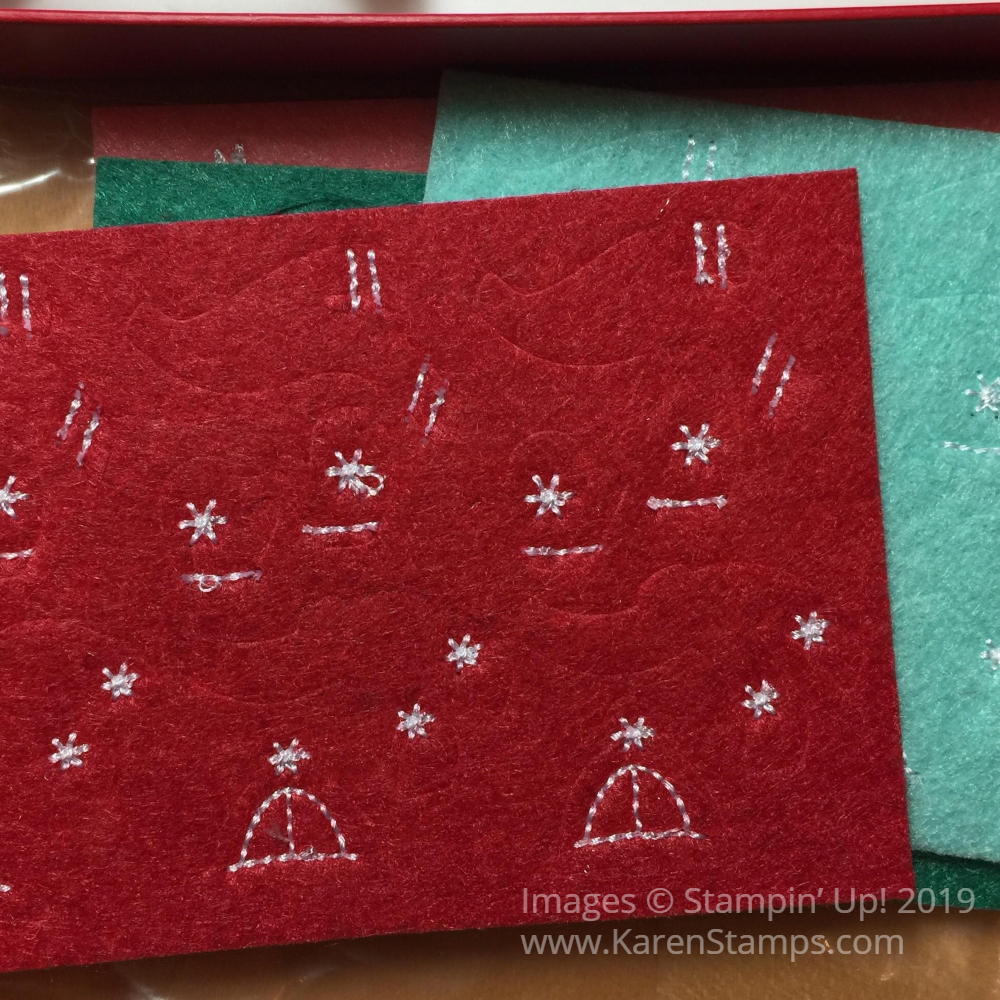
Then there are these die-cut stitched felt pieces that you can use for snowman caps, scarves, and mittens! Use these pieces on your snowmen just by pressing out of the felt piece and using a bit of glue on the back to adhere to your snowmen!
Stamp a snowman with the Snowman Season Stamp Set and add these pieces to dress him up or make your own snowman and decorate with these pieces. No matter what it will be fun to use these pieces in the Let It Snow Embellishment Kit!
It’s only four months until Christmas Day (yikes!) so jump on the Holiday Catalog when it goes live! Check out the Let It Snow Embellishment Kit and see if it is something you want to put on your Wish List so you don’t miss out!
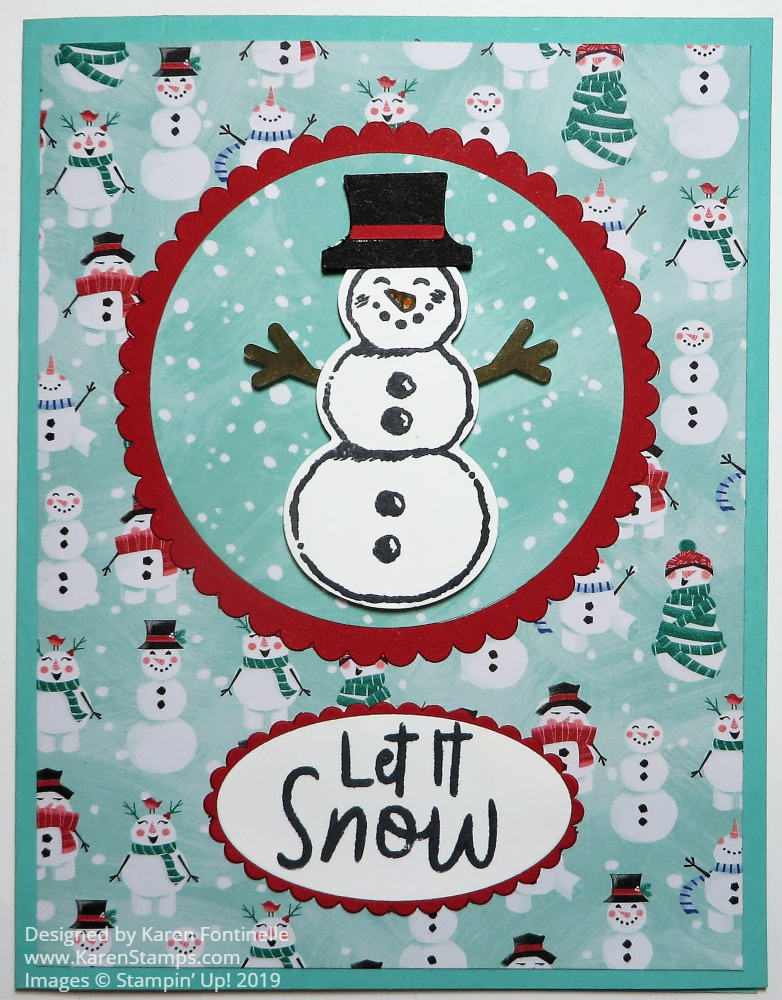
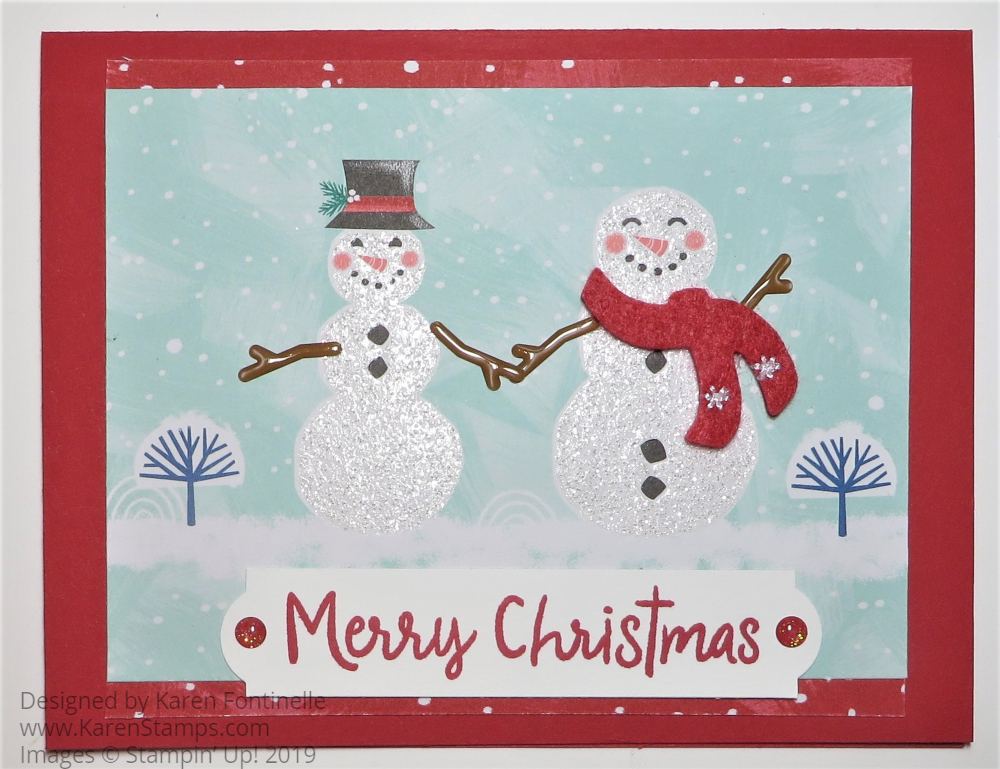
There are so many ways to play with the Let It Snow Suite in the Holiday Catalog that it was pretty easy to come up with this Let It Snow Snowman Christmas Card.
Let’s start with the Let It Snow Specialty Designer Series Paper! On my first preorder, I took it off my order because I had too much. As soon as I saw a sample of the paper in a card online, I was just sick that I hadn’t ordered it! I originally hadn’t realized that the paper has glittery images on it. Once I saw it in that card sample I had to have it as soon as I could order again! Remember, any time the paper name has the word “Specialty” in it, it means there is something special about that paper, like foil accents or in this case, glitter! The other side of the paper has generic designs you can use any time, so even if you don’t use up all the snow-themed paper, you can turn it over and still have occasions to use the paper!
I decided to choose the paper with the snowmen in rows, so I cut out just this pair. From the scrap, I turned the paper over and there was this cute red design with white dots. It can look like snow or just dotted paper. I cut just two strips from it to add to the top and bottom of the snowmen paper.
An interesting product in the Let It Snow Suite is the Let It Snow Embellishment Kit. If you want to stamp snowmen, you can use pieces in this kit (and cute box!) to finish off your snowman with stick arms and other facial features, plus felt scarves, caps, and mittens to add, plus tiny snowballs and washi tape. I added arms to my two snowmen and a scarf to the lady snowman.
The greeting is stamped in Real Red Ink from the Snowman Season Stamp Set. To get the fancy ends on the strip of Whisper White cardstock, I stuck each end of the strip into the side of the Everyday Label Punch. And for a little bling, I added two red Toile Tidings Glitter Enamel Dots (from the Toile Tidings Suite).
Be sure to add a layer inside any cards that have a dark card base or where you would like to stamp a greeting or write a personal note.
This was a pretty easy card because the Specialty Designer Series Paper does most of the work on this Let It Snow Snowman Christmas Card. Check out the whole suite when the catalog goes live September 4th!
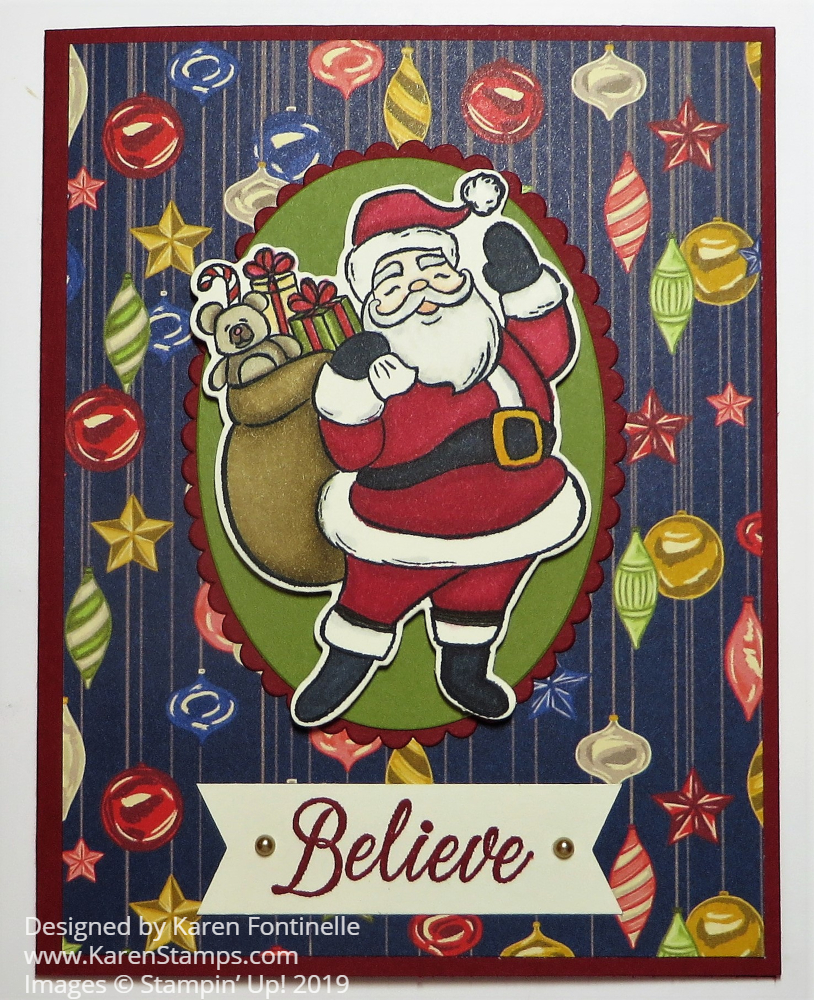
If I do say so myself, I am very happy with how this Holly Jolly Christmas Santa Card turned out! As I flipped through the package of Night Before Christmas paper, I saw this vintage ornament sheet and it jumped right out at me, reminding me of old-fashioned Christmas ornaments. I just had to use it on my first Christmas card with this Night Before Christmas Suite in the upcoming Stampin’ Up! Holiday Catalog! The Holiday Catalog goes live September 4, 2019.
Sometimes it is hard to know where to begin when you have so many new products you are dying to try! As I said, with that particular ornament design paper catching my eye in the Night Before Christmas 6″ x 6″ Designer Series Paper, that was the place to start. I also was inspired by another sample card in the catalog that used the Santa stamp in the Holly Jolly Stamp Set. I thought it would be fun to stamp the Santa, color him in and then die cut to use on the card.
I chose coordinating colors as listed on the designer paper to know what to use for my card. The card base is Cherry Cobbler Cardstock with a layer of Night Before Christmas designer paper. You could probably pick another design and make the same card and it would also turn out great!
After coloring the Santa with various Stampin’ Blends markers on Very Vanilla Cardstock, I die cut him with the Jolly Season Dies. With these new dies, just line them up along the stamped edge of the image and the die-cutting will leave a tiny margin around the image. This makes it easier to line up correctly.
To help Santa stamp out a little better, I played around with various colors of oval die-cuts to see what I liked best. Finally, I settled on an Old Olive oval with a Cherry Cobbler scalloped oval layer, using the Layering Ovals Dies. I popped the Santa up on Stampin’ Dimensionals®.
For the greeting I simply chose the “Believe” stamp in the Holly Jolly Stamp Set, stamped on Very Vanilla with Cherry Cobbler Ink. I used the Tailored Tag Punch to punch the banner ends. If you stick a strip in just the top of that punch, you can punch that banner end. Then turn the strip around and stick the other end in from the side. Do not stick the whole strip into the punch like you normally would or it won’t turn out right! For a final touch, I had to add two Gold Metallic Pearls. That’s it for the card front!
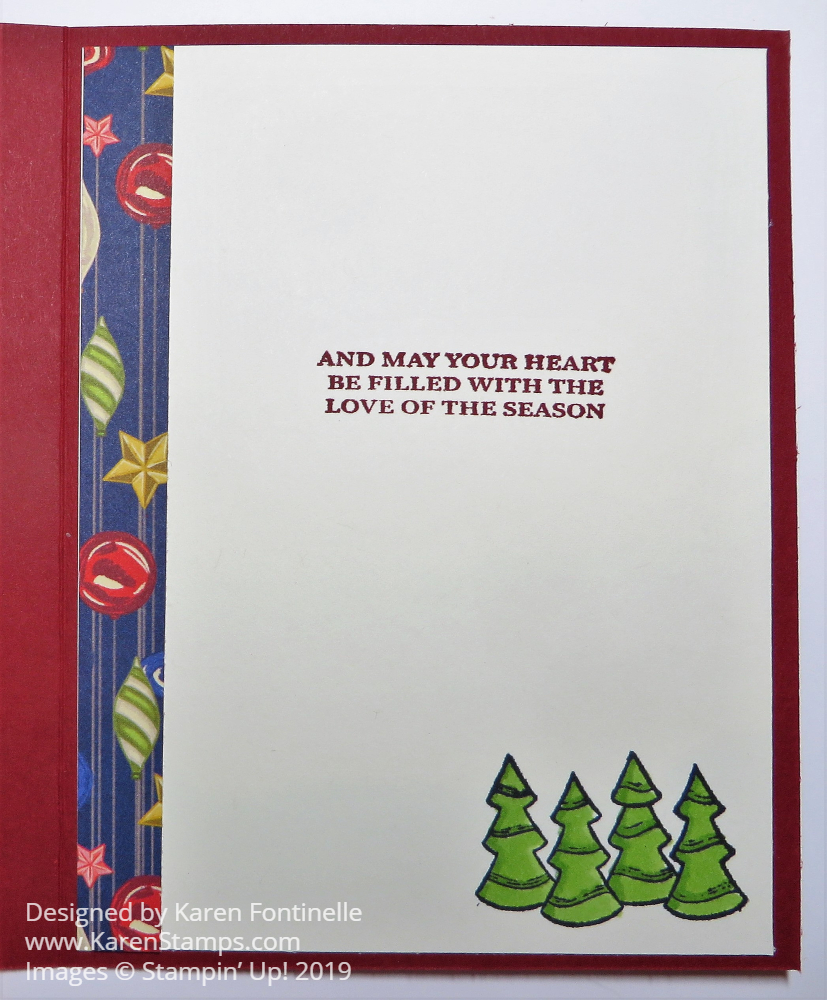
Since the Cherry Cobbler is a dark color, I added a Very Vanilla layer inside the card, stamped with a greeting from the same stamp set. Since I had a strip of designer paper laying on the table, I cut it narrower and used it along the inside Very Vanilla paper. I could have stopped there but decided to stamp the Christmas trees in the Holly Jolly Stamp Set and color those with Stampin’ Blends.
It would also be nice to stamp something like these little trees on the outside of the envelope to give the recipient a hint about the card inside! Keep in mind Stampin’ Blends might bleed through so maybe stick a piece of scrap paper inside the envelope while you color, then remove. It is time to be collecting ideas for Christmas cards that you like! I think I will make a few more cards like this Holly Jolly Christmas Santa Card!
You are invited to join my Stamping With Karen Mailing List so you will keep up with any news or special offers from Stampin’ Up! in a weekly email, get ideas for cards and projects, learn new techniques and stamping tips, and…..coming sooner than you can imagine……receive my annual “12 Weeks of Christmas” emails with a new holiday project each week leading up to Christmas!
Every Tuesday Stampin’ Up! Demonstrators get updates from Stampin’ Up! about any news or special offers and then I pass anything of interest on to my customers and email subscribers in my weekly email. I feel like this is a personal note to each subscriber to keep in touch and hopefully help them with their stamping and papercrafting.
In October I will begin sending out my annual 12 Weeks of Christmas emails each week with one exclusive holiday project so you can get ideas for cards, gifts, and then bags, tags, and wraps as we get close to the holiday. It’s really fun and people seem to enjoy getting these bonus emails, available only to my email subscribers.
Don’t miss another week! Join my Stamping With Karen Mailing List TODAY plus get a FREE GIFT, creative ideas for gift wrapping to save you a last-minute trip to the store! Click the link below OR find the red sign-up box on the top right side of my blog!
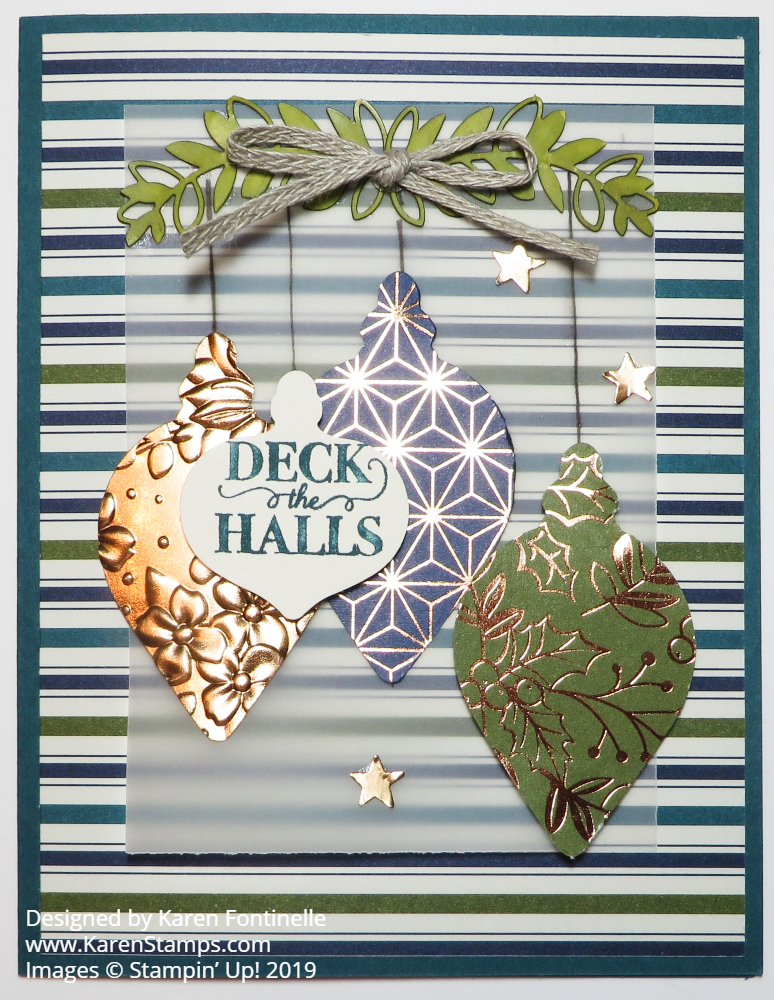
My second Christmas card, the Brightly Gleaming Ornament Christmas Card, is also one that I pretty much copied from the upcoming Stampin’ Up! Holiday Catalog. It was my favorite sample in the catalog for the Brightly Gleaming Suite! Mine has a few variations based on what I had or didn’t have or what effort I wanted to go to!
This Suite certainly has some beautiful designer series paper! It has copper foil accents on one side and beautiful generic designs on the other side. Except for the ornaments and the pattern with holly leaves, you can use most of this paper for other occasions. It doesn’t all have to do with Christmas! You will want to put this Brightly Gleaming Specialty Designer Series Paper on your Holiday Catalog order.
The card base is one of the In Colors, Pretty Peacock. The designer paper layer from Brightly Gleaming DSP is next with a smaller piece of Vellum Cardstock over it. I think the sample used one of the Stitched Rectangle Dies so it is probably either the vellum or the DSP but I couldn’t tell from the sample in the catalog. You can do it or not.
The greenery at the top really had me fooled! Finally, I figured out that it came from the Brightly Gleaming Foil Elements in the Suite on page 31. You can use the foil side but you can also flip them over and color the white side on the back! I used a Dark Old Olive Stampin’ Blend Marker to color the two greenery pieces. They may have used one more piece in the catalog because both sides of their greenery are turned up on the ends. I just used two pieces which I think are fine. They use Linen Thread to tie the bow and attach to the greenery. I am out of Linen Thread (although it is one of my staples to have on hand!) so I used the 3/16″ Braided Linen Trim.
The blue and green ornaments are punched with the large ornament in the Gleaming Ornament Punch Pack out of the Brightly Gleaming DSP. The sample stamps the green ornament and punches it out. I just used the pretty paper! The copper one is punched out of Copper Foil and then embossed using the Country Floral Embossing Folder! There is a new embossing folder in the suite that is used in the sample, the Hammered Metal 3D Embossing Folder.
The smallest ornament is stamped on Very Vanilla Cardstock using part of the wording on a stamp in the Christmas Gleaming Stamp Set. Just color in the words you want to use with a Pretty Peacock Stampin’ Write Marker and stamp. Then I punched it out with the smaller ornament in the ornament pack. Very handy to sell two sizes in one pack!
After arranging the ornaments, I just drew the strings to the greenery with the small tip of the Basic Black Stampin’ Write Marker. I popped up the green ornament and the ornament with the greeting with a Stampin’ Dimensional®.
The sample also has stars from the Stars Designer Elements package. I don’t have those so I found a retired punch, the Confetti Punch, which had tiny stars in it and used those from Copper Foil.
The good thing is you have lots of covered space behind the greenery and ornaments on the backside of the vellum where you can apply glue and it won’t show through to the front!
I think this card would be fairly easy to make if you wanted to make multiples once you know exactly how it is made. While you play around with your new products from the Holiday Catalog, go ahead and make multiples, maybe 5, or each design you try. Before you know it, you will have a stack of Christmas cards ready to send!
Catalogs are arriving in mailboxes for my customers so keep an eye on your mail! If you think you should be getting a catalog from me and don’t, either they are reading it at the post office or it has gotten lost. I can have Stampin’ Up! send out another one to you. If you are new and would like a catalog, please email me at Karen@Karenstamps.com with your contact information and I’d be happy to send one to you so you can order some of these beautiful new goodies as soon as the catalog goes live!
Don’t forget to use your July Bonus Coupons and if you got the August Paper Pumpkin Kit and you want to make cards, order the Add-On Kit in the Online Store on your next order! While Supplies Last!
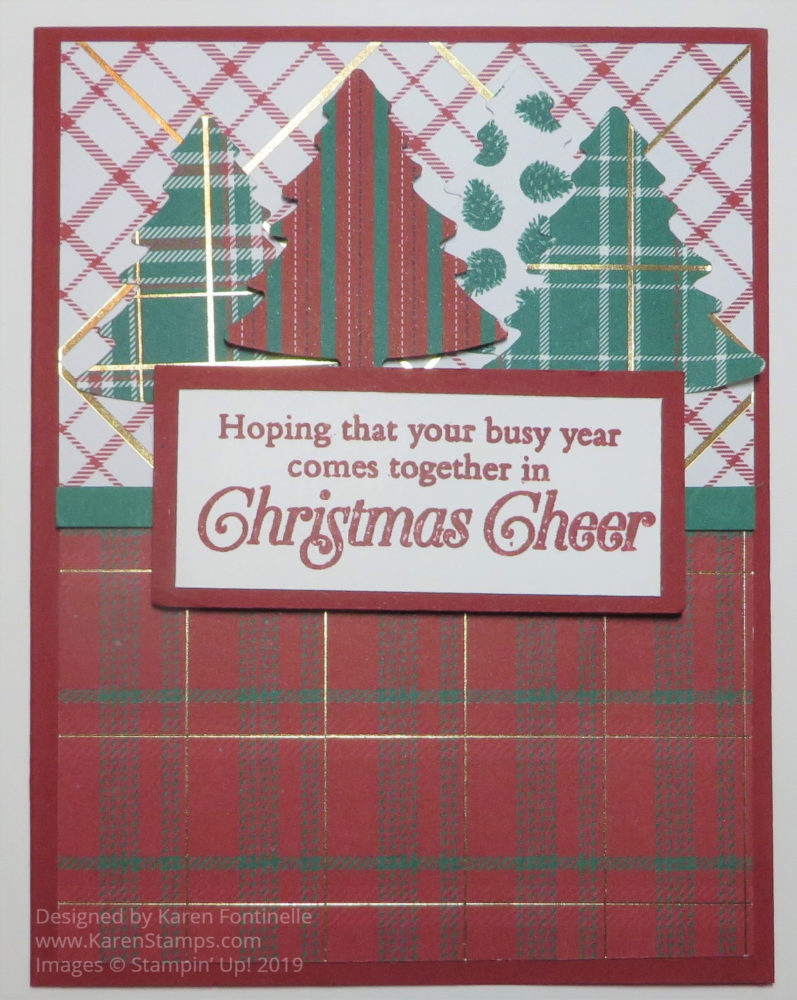
It’s the first Christmas card of the season, the Wrapped in Plaid Christmas Trees Christmas Card! This is a peek at some of the new products in the Stampin’ Up! Holiday Catalog! And just to get myself going, I decided to just “CASE” (Copy And Share Everything”) one of the samples in the catalog! This is the card that made me want to buy some of the products in this Wrapped in Plaid Suite. Ok, all of the products except the jingle bells!
And wait until you see this Wrapped in Plaid Specialty Designer Series Paper! I guess the word “Specialty” should have tipped me off, but I didn’t catch on until I got the paper. I was flipping through the papers, looking for the ones that matched the trees in the catalog. Finally, I flipped one over to see the other side, and WOW! It had gold foil accent lines on all the plaid pieces! You get 12 designs, 4 each in the package of 6″ x 6″ paper. Although the trees don’t show it off well, those gold accents on the plaid designs are really pretty!
You can purchase the Pine Tree Punch in the Suite and even combine it with the Perfectly Plaid Stamp Set to save 10% in a Bundle. I know we have had other tree punches in prior catalogs but this is a nice one, different from the others. Very nice for punching out the stamped trees or just out of paper. You’ll be able to use it with some of the other suites, too.
The card base is Mint Macaron with a layer die-cut with the largest Stitched Rectangle Die. The trees are punched out and adhered to that die cut layer. They are larger than the rectangle so it is okay for them to hang over the top edge of the layer and over the bottom edge. Just don’t let them hang over the edge of the card base. I glued mine down with Multipurpose Liquid Glue but you could also pop them up with Dimensionals.
The greeting is stamped from one in the Perfectly Plaid Stamp Set in Shaded Spruce Ink on Whisper White. The catalog sample shows a Jingle Bell attached to the end of the greeting banner, but since I didn’t have the bells (yet) I found these All Is Bright Paper Clips that I already purchased. They are on the Clearance Rack! I clipped it onto the greeting and tied on a piece of Linen Thread. I actually think this will be better for mailing. I don’t think you can mail the Jingle Bells in a regular envelope, but they are cute for other projects or cards you will hand out.
I look forward to making many other cards with this cute designer paper and Pine Tree Punch! It’s not too early to start working on Christmas cards! Holiday Catalogs are probably in the mail, although they take longer than regular mail, but hopefully my customers will be receiving them soon!
If you are interested in purchasing Stampin’ Up! products and especially holiday and fall items and would like a Demonstrator to assist you, I would be happy to be yours! Send me your contact information and I can mail the catalogs to you.
In the meantime, keep checking out the new Annual Stampin’ Up! Catalog because once the Holiday Catalog comes out, the annual catalog doesn’t get much attention! Time will fly! We all need to get early starts on our holiday cards and projects!
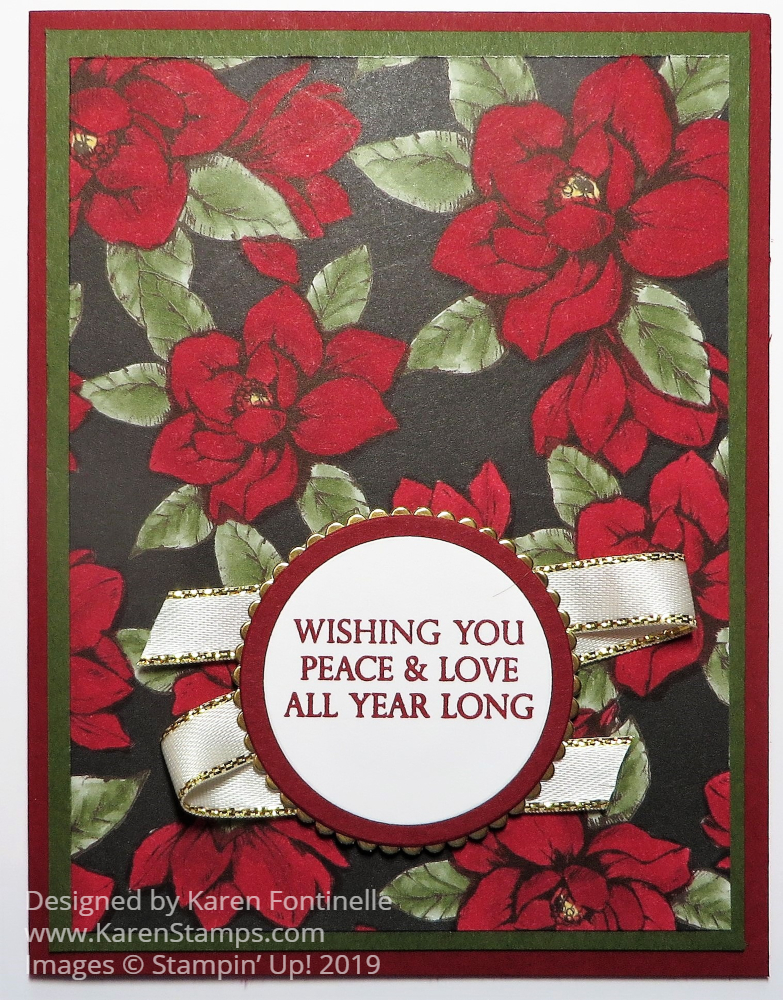
This is one of those creative ideas I never would have thought of myself, but I’ve seen samples that other Demonstrators did like this, coloring in the flowers on the Magnolia Lane Designer Series Paper! A few I saw colored the flowers red with Stampin’ Blends to look like a Christmas card! How cool is that?!
My Magnolia Lane Christmas Card has lots of coloring if you like coloring! This paper pattern has pinkish flowers and green leaves with a black background. Then I used my Cherry Cobbler Stampin’ Blends to color in the flowers. I did use both but if you wanted to make it quicker, just use one of the shades and don’t do any blending and shading. You almost don’t need it. The leaves are already green so you don’t need to color those! If you want to make more than one of these cards, you might want to use a smaller piece of designer paper so you can do less coloring!
The card base is Cherry Cobbler Cardstock with a layer of Mossy Meadow. The greeting is stamped in Cherry Cobbler Ink from the Merry Christmas To All Stamp Set. I die-cut a Cherry Cobbler layer underneath and then a back layer of Gold Foil with one of the scalloped circle dies. For some embellishment, I adhered a piece of Gold 3/8″ Metallic-Edge Ribbon back and forth behind the greeting and then popped up the whole thing with Stampin’ Dimensionals.
I could maybe have added some little embellishment to the greeting but this time I decided to stop while I was ahead! At least I have one Christmas card done! Do you realize Christmas is less than five months away?! Good thing the Holiday Catalog is coming out soon!
Here is a sneak peek of the cover, if you haven’t seen it online already! Demonstrators who earned the free cruise to the Greek Isles already have their copy and the rest of us will get them soon in August. The Holiday Catalog goes live September 4th, just two days after Labor Day!
If you want to get an early start on your Christmas cards, you can color in some of your Magnolia Lane Paper. But it doesn’t have to be for Christmas! Color the flowers some other color if you like! Maybe now we will look at some of our other papers and see if we can use them like this somehow!
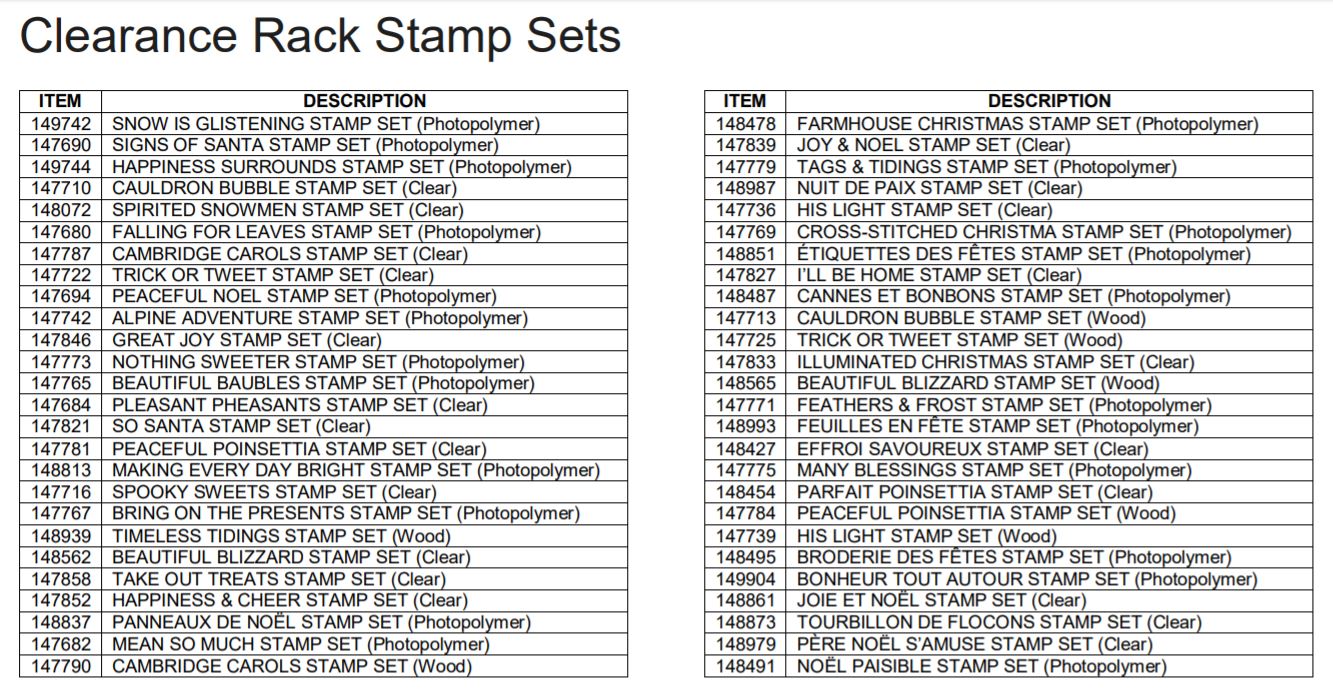
For the first time ever, Stampin’ Up! is putting stamps on the Clearance Rack and they might not ever do it again! But while they ARE doing it, go enjoy finding some bargains! Stamps available while supplies last, of course!
Check out the other items on the Clearance Rack already. You might find things that pair up! You can add any products to your order!
And tomorrow……….the Stampin’ Trimmer Cutting Blades have arrived! Beginning at 10:00 AM (MT) on Thursday, June 27 you can order cutting blades with a limit of 3 packages. That’s 11:00 AM Central Time.
The Stampin’ Up! Clearance Rack has been updated so don’t delay, race right over there and see what you want! Some items could go fast! Right now one of my favorite dies is on there…the Mini Treat Bag Thinlits Dies! Make cute little treat bags with the Big Shot and decorate for any occasion.
There are all kinds of punches, dies, trinkets, designer paper, Watercolor Pencils 2, even a little bit of cardstock. There are some kits if you want to get an early start on Christmas cards. Just check it out!
Now that we have all received our gifts, it’s time to make some easy Thank You cards to send, especially to those people who maybe mailed a gift to us or we didn’t get to see. I suppose email is better than nothing, but it’s not nearly as acceptable, in my mind, as a handwritten thank you note! I think we are losing these “old-fashioned” niceties with the ease of computers, email, and text messages. What is nicer, to open an email on your computer or find a handmade card in the mailbox?!
You don’t have to make an elaborate card. In fact, the Stampin’ Up! Note Cards & Envelopeswould be very handy to have on hand. Simply stamp a “Thank You” on the front or a pretty image and write your note inside.
This card I made for this post, is simply a leftover generic piece of Christmas designer paper that looks seasonal but doesn’t say “Christmas”. You could use any pretty designer paper. I stamped a Thank You greeting and layered it on a scalloped oval. There is a strip of Copper Foil along the side to match the copper accents in the paper. You could use ribbon or leave it plain.
Even if it is a simple card, make and send at least one written thank you card and message to someone after the holidays. It will be much appreciated.