Category Archives: Christmas

Paper Pumpkin Oct 2019 Christmas Card

Paper Pumpkin Oct 2019 Christmas Card

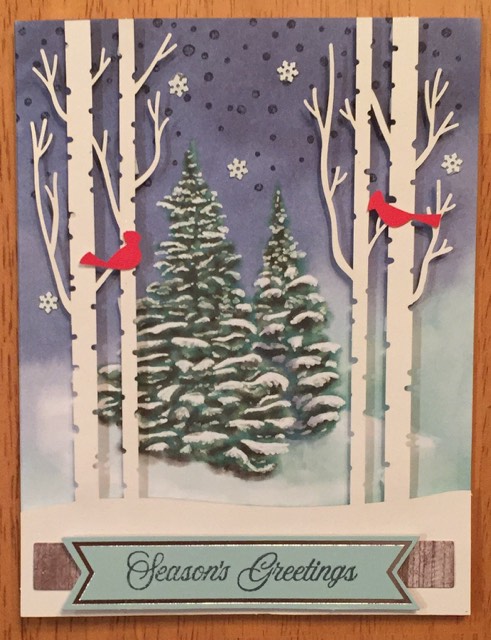
I hate to tell you that you can’t get this Paper Pumpkin Kit any more because it makes a beautiful Christmas card. I just made this one card exactly like the kit directions but I wanted to try out some other alternate ideas that I will find online or maybe think of myself! The Paper Pumpkin holiday season kits are always extra special!

This photo really doesn’t do this card justice. The evergreen trees you see are on the base card front. Then the snowflakes at the top of that part of the card are stamped with the Night of Navy ink from the snowflake stamp included in the Paper Pumpkin Kit.

Next, the white trees are punched out of the die-cut. They are on white glimmery paper to look like snow. This piece includes the snow base for the bottom with a tree on each side. This piece is adhered using Stampin’ Dimensionals to pop it up. This gives a 3D effect to the front of the card. It is a little tedious to stick on the little dimensionals, some cut in half for the tree branches.

The cute little redbirds are die cuts so all I had to do was punch them out and stick them on with glue dots (included in the kit) onto the tree branches! They really “pop” on this card!

For a little more bling, there are snowflake sequins included to stick on the card background with the mini glue dots. If you have the Take Your Pick Tool it would be handy for picking up the tiny snowflake sequins, but if not, use your Paper Snips.

The greeting is included in the stamp set of the kit and is stamped on the die-cut banner piece. This is popped up and layered on the woodgrain die-cut piece and that is all adhered to the bottom front of the card.

Inside I will stamp another greeting and the card will be ready to go. It also came with silver foil trimmed envelopes! That makes it all look luxurious!

In spite of the fact that no extra kits are available after the October Kits were sent out (that’s how popular it was!), it might give you a glimpse into the November Paper Pumpkin Kit. That kit “coordinates” with this October Kit. I don’t know what that means, exactly, but I’m sure it will be a good kit.

Kit details: Makes 24 holiday-themed gift tags of 4 various sizes and designs.

Coordinating colors: Early Espresso, Pool Party, Poppy Parade, and Shaded Spruce

The October and November kits coordinate; however, each kit is all-inclusive and can stand alone.

  • Supplies may be limited toward the end of each subscription period so don’t delay!

So if you find it enticing to get a cute winter-themed box in your mail in just over a week with a fun project inside making gift tags (if for some reason you don’t need handmade gift tags to make your gifts extra special, just put them on the front of a card instead!). Get an extra kit and have fun stamping with a friend! The deadline to sign up is November 10! Don’t delay!

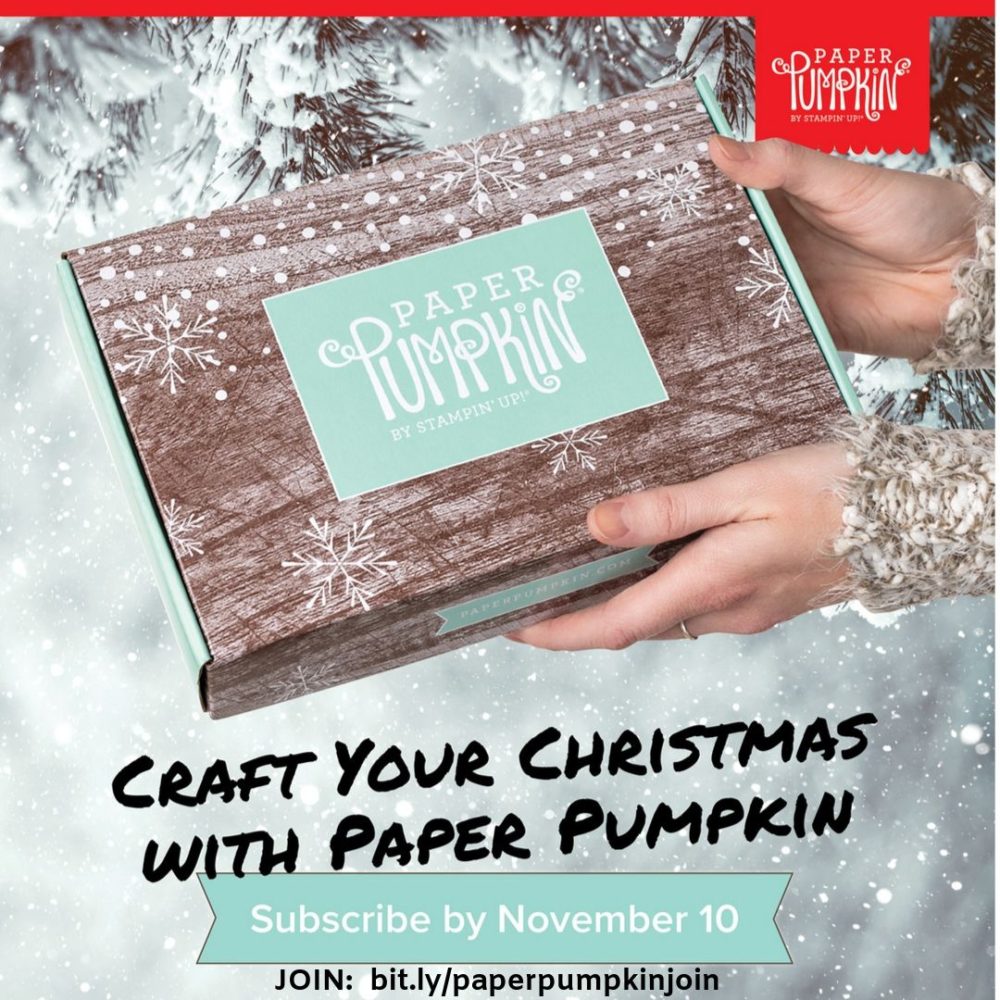
JOIN PAPER PUMPKIN TODAY!

Christmastime Is Here Specialty Designer Series Paper Florals and Gold Card

Christmastime Is Here Specialty Designer Series Paper Florals and Gold Card

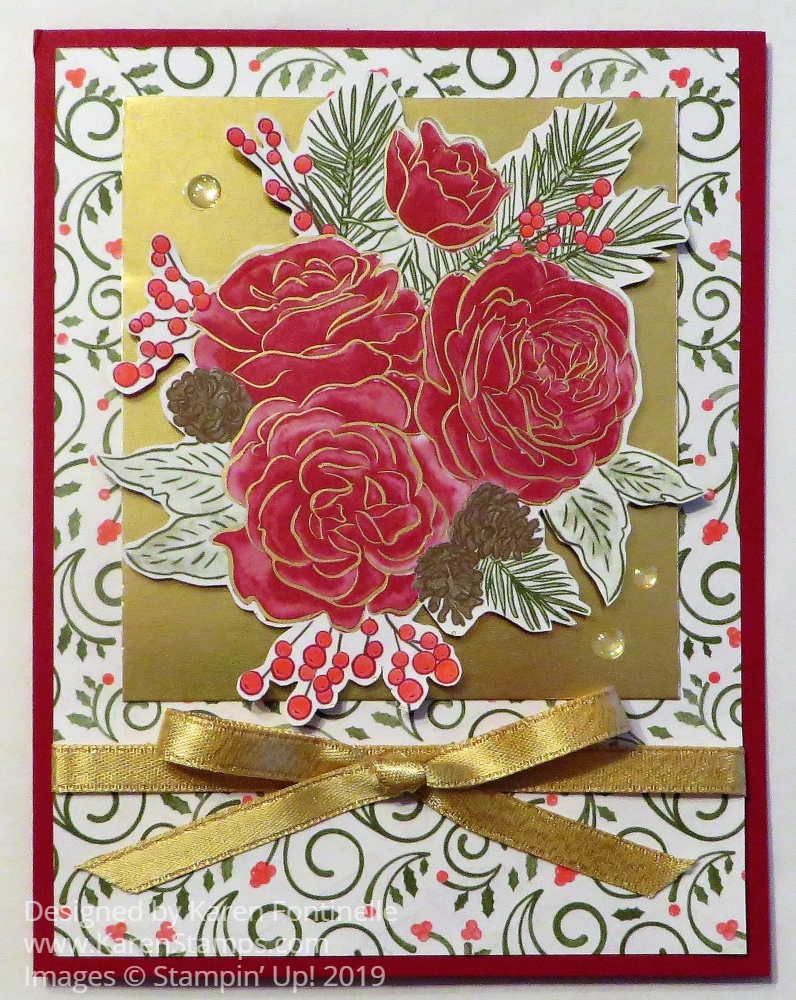
You will fall in love with the beautiful paper in the Christmastime Is Here Specialty Paper (specialty always means there are gold accents or some special texture or design to the designer paper) but until you have your own paper, you’ll have to get the idea from my Christmastime Is Here Specialty Designer Series Paper Florals and Gold Card. Even the sides of the paper that do not have the gold foil accents are still pretty, like the one I used on this card.

The base of my card is Cherry Cobbler Cardstock with a layer of the Christmastime Is Here Paper. The floral centerpiece is hand-cut from another sheet of the paper and layered on top of a piece of Gold Foil. Instead of a greeting, I wrapped around a piece of the Elegant Gold Shimmer Ribbon. To make it easier than tying a bow and hoping it doesn’t come out crooked, I just tied a separate bow and adhered it to the ribbon with a couple of Mini Glue Dots.

The cut out floral piece is popped up on Stampin’ Dimensionals. For a little extra bling, I added three of the Gold Glitter Enamel Dots. I hadn’t used these yet and I couldn’t put it off any longer!

This card was difficult to photograph because of the glare of the Gold Foil and the gold foil accents on the flowers. If I want to, I can still add a greeting underneath the bow, but really, I think it looks pretty as it is.

Remember, this Christmastime Is Here Suite has the stamp set, dies, paper, ribbon, and dots and they can ALL be purchased at one time or you can get whichever pieces you want. I would just suggest not to delay because these products are only available while supplies last! And the stamp set and paper are really pretty! It will all be beautiful for holiday cards or even after-holiday notes, birthdays and other occasions.

If you aren’t sure, I would for sure suggest getting the designer paper because you will love how beautiful it is! Then if you want the stamp set or accessories after that you can make even more projects!

SHOP STAMPIN’ UP! ONLINE!

Christmastime Is Here Rose Card

Christmastime Is Here Rose Card

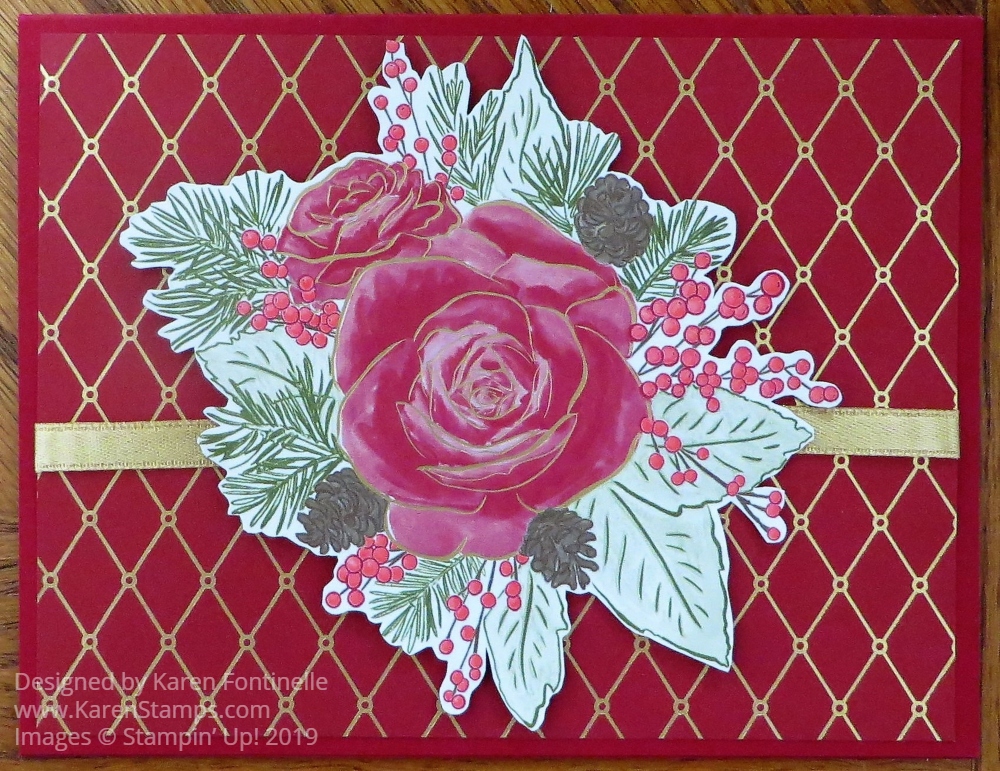
If you purchase the Christmastime Is Here Suite or at least some of the products, you will see how easy it is to make pretty cards like this Christmastime Is Here Rose Card. I wanted to post this yesterday but something was wrong with my blog and I couldn’t post any photos. SO frustrating when something goes wrong with our technology, right?! Today I finally got on a Live Chat and the guy fixed it! I am so relieved!

I confess I haven’t purchased the entire suite (not yet, anyway) but that is the great thing that you can pick and choose and don’t have to buy it all to have some of what you want! I chose to get the designer paper, ribbon, and glitter dots. However, the stamp set is beautiful and the die cuts make cutting out this big rose pattern in the designer paper and the stamped image a lot easier. But even Demonstrators can’t have EVERYTHING!

The Christmastime Is Here Specialty Designer Series Paper I have to say is gorgeous! The floral prints are beautiful and CAN be cut out by hand if you don’t hate cutting with Paper Snips. You don’t have to follow every single image accurately, just cut somewhat around them leaving a slight margin. This method makes it so you don’t have to be perfect and makes it look die-cut!

The floral images have gold foil accents which you can figure out in my photo but the shine doesn’t come through. The gold foil really makes the paper look festive and rich for your cards.

This card uses a base of Cherry Cobbler, one of the coordinating colors. I love this Cherry Cobbler cross-hatched designer pattern with the gold foil for a background. I wrapped a piece of the Elegant Gold Shimmer Craft Ribbon around it. After cutting out the floral piece, I popped that up with Stampin’ Dimensionals®. I did not add a greeting since I don’t have that Christmas Rose Stamp Set although I will use another greeting later on.

You will find that the Christmas Rose Stamp Set comes with one Cling stamp (the large floral image) and then the rest are Photopolymer stamps to add depth and richness. Those stamps are the Distinktive stamps that Stampin’ Up! developed to make stamping look photorealistic. I do love the sentiments in the stamp set and the font style. If you purchase the stamp set and dies together in the Christmas Rose Bundle, you will save 10%.

If you are really interested in some or all of the products in this Suite, I would not delay in purchasing. You know how some popular items go like hotcakes at Stampin’ Up! There are many holiday stamp sets and accessories to choose from, but if this slightly different look appeals to you, go for it because it is really beautiful!

SHOP STAMPIN’ UP! ONLINE HERE!

The Christmastime Is Here Suite…Is Here! And the New Paper Trimmer!

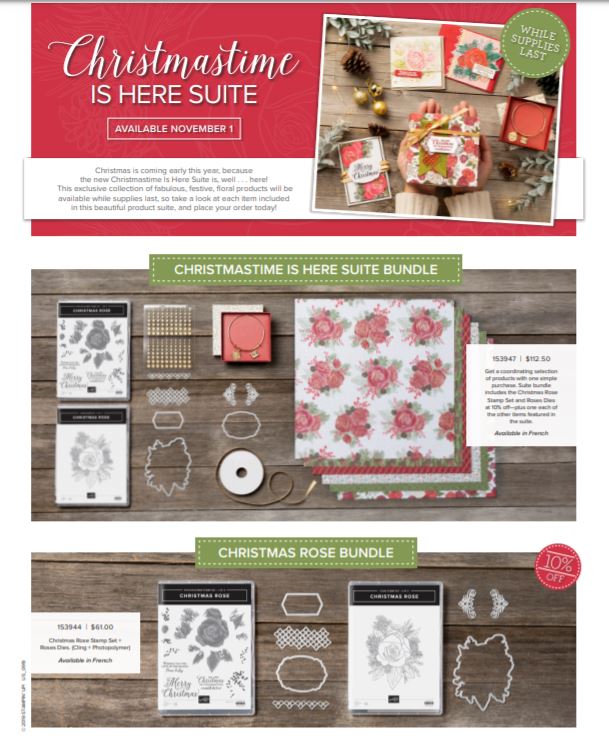
Christmastime Is Here Suite Ad

Today, November 1st is the day you can finally purchase this beautiful suite of new Stampin’ Up! products, the Christmastime Is Here Suite! If you are looking for something a little different for Christmas but still lovely, these roses with gold accents will be perfect for you! I can tell you the designer paper is gorgeous! No doubt you will make beautiful cards and projects with these new products.

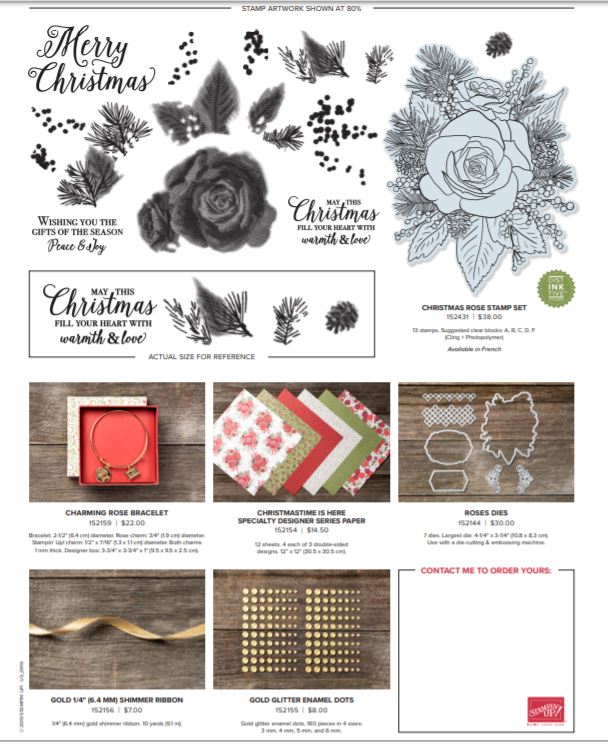
You can purchase the WHOLE suite or if that is too much for you at one time, you can actually purchase products individually! It’s great! There is even a bracelet in the mix with a rose and a Stampin’ Up! charm.

Christmastime Is Here Suite Flyer
Click for full version.
Christmastime Is Here Suite Flyer2
Click for full version.
Christmastime Is Here Suite Price List

Watch the Stampin’ Up! video below for more information!

These products are only WHILE SUPPLIES LAST! To avoid disappointment, I would order whatever you really really want as early as you can! I have no idea how things will sell, but this Suite may be pretty popular. It is SO pretty!

SHOP THE CHRISTMASTIME IS HERE SUITE IN THE ONLINE STORE HERE!

ALSO!!!

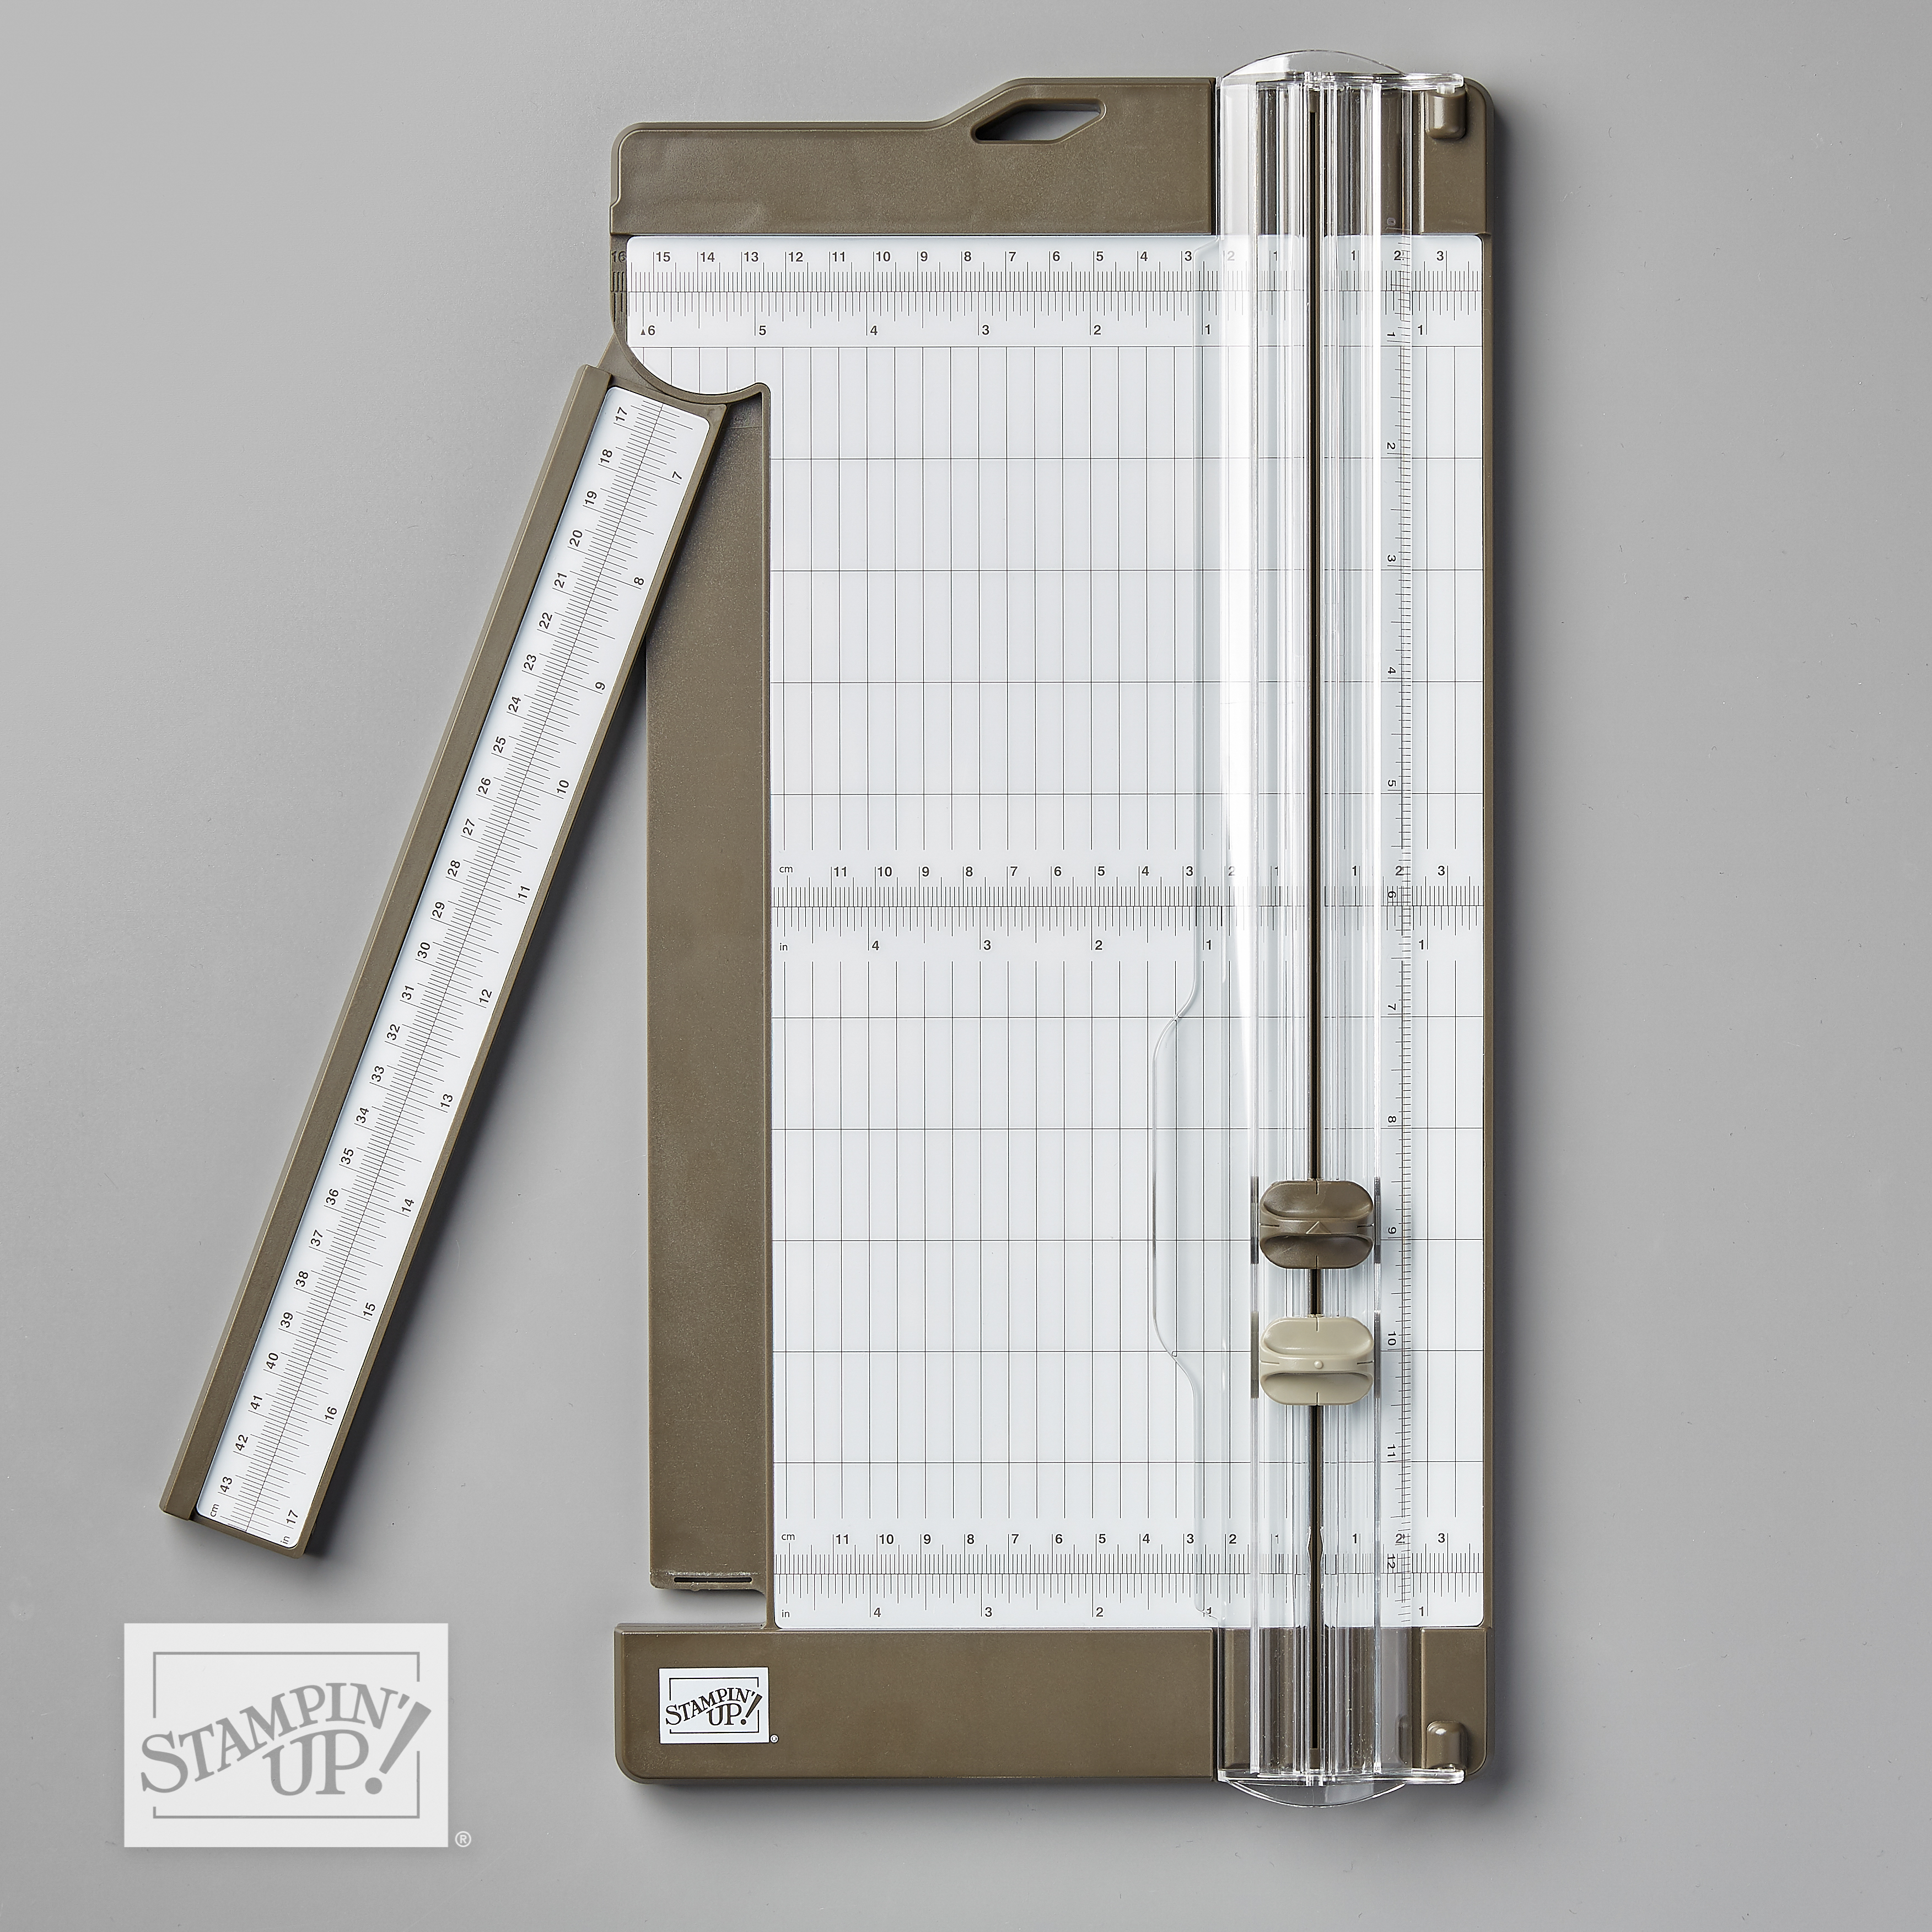
The new Paper Trimmer is also here!

New Paper Trimmer Photo arm out

You’ll find it under “Tools” in the list of categories! Check it out! It cuts great! I like mine!!

Buy the Stampin’ Up! Paper Trimmer!

Are You Getting My “12 Weeks of Christmas” Holiday Emails?

12 Weeks of Christmas Banner 2019

Every week for the past four weeks I have been sending my mailing list subscribers a free holiday project that you can use to make your holiday preparations easier! This is a thank you for my mailing list subscribers that I like to do every year. Just like in my regular weekly email, I send a photo of a project, a list of supplies needed, and all the directions to make it.

In the first 4-5 weeks, I send card ideas since it’s likely that is the first thing most of us will work on at this point. Next, come a few weeks of gift ideas and finally, as we are doing Christmas shopping, some ideas for gift wrap, bags, and gift tags.

These are exclusive projects that I won’t be posting on my blog or anywhere else. You may copy directly, take inspiration from the idea and come up with your own project, or simply enjoy seeing another stamping idea! I know I am all about seeing as many ideas as possible.

However, the only way you can get these special 12 Week of Christmas emails is to be on my Stamping With Karen Mailing List! You have already missed the first 4 weeks, but you can get the rest, beginning Wednesday! All you have to do is sign up in the red box in the upper right of my blog or in the form below.

Subscribe to My Mailing List! 

Exclusive Projects

Stampin’ Up! News & Updates

FREE Welcome Gift!

Name: 

Continue reading

Snowman Stamped Christmas Card

Snowman Stamped Christmas Card

On this Snowman Stamped Christmas Card, I made my own snowman designer paper! This stamp set is so fun to play with and will make many wonderful Christmas cards for you to send to family and friends.

I love that I am finally using Real Red again on Christmas cards after Real Red got demoted to the Regals color family! I liked it better in the Brights family where it had always been. LOL! But nobody asked me! Anyway, the card base is Real Red Cardstock and instead of designer paper layered on the card, I made my own designer paper! I simply stamped the snowman throwing snowballs up in the air from the Snowman Season Stamp Set in black ink randomly on a layer of Whisper White Cardstock. I think it gives the card a subtle fun feeling!

Next, another snowman is stamped with Memento Ink and then die-cut with one of the Layering Circles Dies and layered on a larger scalloped circle die in the same set. That snowman piece I colored in with Stampin’ Blends Markers. For some embellishment, I used the Multipurpose Liquid Glue and sprinkled on some Ice Stampin’ Glitter. You could also use the Dazzling Diamonds Glitter. This snowman centerpiece is popped up on Stampin’ Dimensionals.

The greeting is stamped on a Real Red banner with a “Merry Christmas” from the Snowman Season Stamp Set also. This card is one that just makes me happy! Sometimes you make a card that gives you that feeling. And, I have to say, it is always a good feeling to repeatedly stamp an image randomly on cardstock. There is something about holding that block and stamp in your hand and stamping over and over! I always like it when I do it!

You CAN stamp a greeting on the inside of the card in black ink and have it show up on the Real Red, but you might want to consider adding a Whisper White inside layer with a greeting stamped and maybe another little coordinating image. For this card, I stamped the other greeting in the Snowman Season set, “Hoping this season builds heartwarming memories” and then stamped the same snowman tossing snowballs in the air down in the corner. I just colored in the orange carrot nose and added a tiny bit of blue as shading on the snowman. The inside of the card looks almost as creative as the outside of the card! You can also stamp the envelope before you send the card with one of the snowmen. How cute would that be?!

Remember to try this technique of stamping an image randomly on a piece of cardstock to make your own designer paper as I did on this Snowman Stamped Christmas Card.

SHOP STAMPIN’ UP! ONLINE!

Need Christmas Tags For Gifts? Make Them With Paper Pumpkin!

Paper Pumpkin Nov 2019 Ad my info

If you would like to do at least “a little” crafting for the holidays, the Paper Pumpkin Kit for November is your answer! Maybe you are new to crafting and stamping or maybe you only like to stamp and make things occasionally. Paper Pumpkin is for you! And for those of us who have oodles of stamps, paper, and craft supplies Paper Pumpkin is fun to have an already designed project with all supplies included that we can just sit down and make!

This November Paper Pumpkin Kit from Stampin’ Up! makes 24 holiday-themed gift tags of 4 various sizes and designs. The coordinating colors are Early Espresso, Pool Party, Poppy Parade, and Shaded Spruce.

JOIN PAPER PUMPKIN TODAY TO GET YOUR NOVEMBER KIT!

I would hazard a guess that even if you didn’t want or need that many tags, you could make cards with the tag on the front as the focal point. Every month creative people make alternate projects with the supplies in the kit and post them on the internet so you will be able to find other ideas if that is what you want. Sometimes I do a little of both…..make the project as designed and also save some pieces to make other cards or projects.

Our family likes to have LOTS of packages under the tree and I have often found myself running out to the store to buy more tags, especially after the kids arrive and want to wrap their gifts. These are usually cheap tags to slap on in a hurry on the gift. Wouldn’t a handmade, pretty tag look a lot better on your gift?

Everything you need for the project comes in the kit! If you are a new subscriber, you will also get a clear acrylic block on which to mount your stamps. That’s why these Paper Pumpkin Kits are so good for new stampers and crafters or those who do not have many supplies….or don’t WANT many supplies!

In each Paper Pumpkin Kit you will receive an exclusive stamp set, an ink spot (1″ x 1″) (great to use on the Stamparatus to ink up stamps!), and a package of materials to make the project! And the presentation is everything of course!

Treat yourself to a present in the mail once a month! And if some months you are too busy or traveling or don’t care for that upcoming kit, just skip a month! If Paper Pumpkin really is not for you, there is no obligation to continue. Simply go into your account and cancel or ask me to take care of it for you.

Now if you missed the coordinating October Kit that had to be signed up for by Oct. 10th, if you subscribe NOW to Paper Pumpkin, there is a chance in a few days that Stampin’ Up! will have extra kits that they will put in the Online Store, only available to Paper Pumpkin subscribers. You can order whatever is in the Paper Pumpkin Past Kits category with your regular Stampin’ Up! order.

In fact, if you want to add a Paper Pumpkin subscription to your Stampin’ Up! order (maybe to reach Hostess Rewards??), just choose which length of time is good for you and add it to your order. Stampin’ Up! will send you an email with directions on how to set up your Paper Pumpkin account and put in the special code showing that you ordered a series of kits in the Online Store. Even if you already have a monthly subscription to Paper Pumpkin, you can purchase a Paper Pumpkin subscription in the Online Store and your account will use those first and then go back to your monthly subscription. Just ask if you have any questions.

The deadline for signing up for the November kit with materials for making holiday tags is November 10, 2019. Supplies may be limited near the end of the subscription period. You may think you will remember, but it’s easier to just do it today and then look forward to mid-November when those kits go out!

JOIN PAPER PUMPKIN TODAY!

(This is my personal link so you don’t have to put in my name as your Demonstrator. You can also sign up at www.paperpumpkin.com and choose me, Karen Fontinelle, as your Demonstrator.)

Holiday Catalog Let It Snow Snowman Christmas Card

Holiday Catalog Let It Snow Snowman Christmas Card

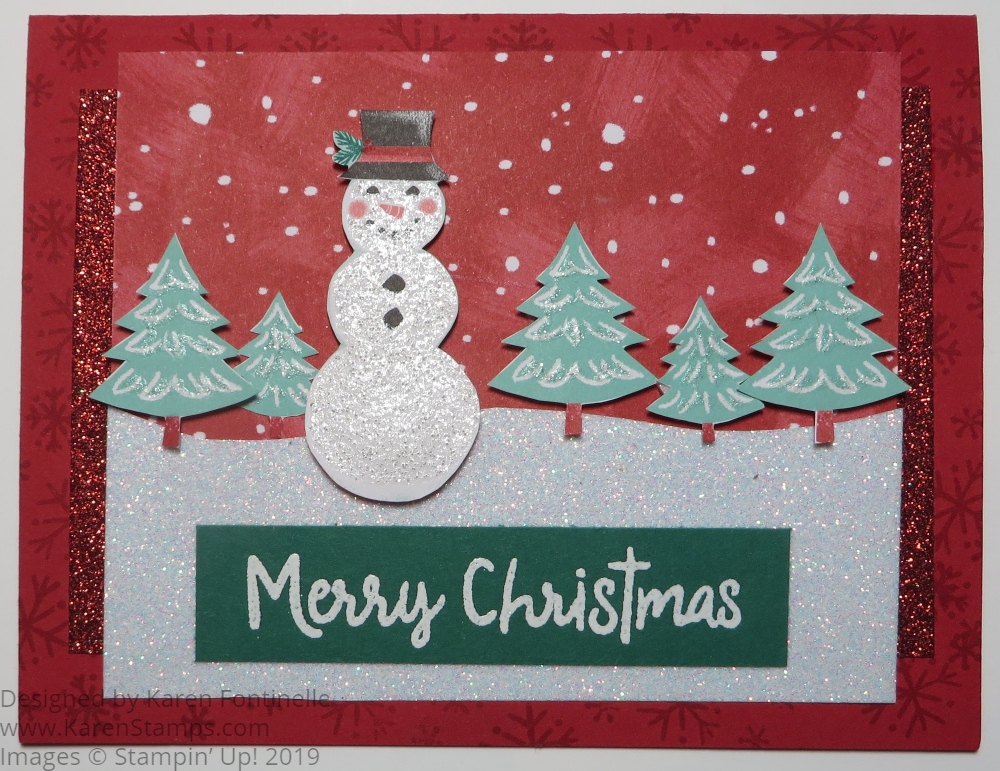
We always say if you need some inspiration, use the Stampin’ Up! catalogs, so that is what I have done with this Holiday Catalog Let It Snow Snowman Christmas Card. You will find a card on the cover of the Holiday catalog that I mostly copied except for the snow.

The Let It Snow Specialty Designer Series Paper is beautiful to use for Christmas cards and projects. This paper is 12″ x 12″ so you have plenty to use. One side has images with bits of glimmer and the other side has more generic images that you can use for non-Christmas projects or after Christmas (if you have any left after using the glimmery sides!).

This card has a Real Red base and is stamped with some Real Red snowflakes with the Snowman Season Stamp Set. Next, there is a piece of the non-glimmer side of the designer paper with the snowmen that I used for the background to look like snowflakes. On the bottom, instead of the way Stampin’ Up! did their card on the catalog cover, I cut a piece of Sparkle Glimmer Paper for the snow. Stampin’ Up! used the new Snowfall Accents Puff Paint on their card but I didn’t own that yet. (As I write this, the Puff Paint had been unorderable but it is back in stock right now so go order it while you can!) On the sides of this layer are strips of the Real Red Glimmer Paper to set off the layer.

The snowman is punched with the Snowman Builder Punch and the trees are all cut by hand with Paper Snips from the Let It Snow DSP. This is the kind of paper that you hate to cut into for any reason, even for making a great card! But it is made to be used so don’t hoard it! Except for one tree adhered directly to the layer, the rest and the snowman are all popped up with Stampin’ Dimensionals and Mini Stampin’ Dimensionals. The Minis save you from cutting the regular size Dimensionals into smaller pieces! (Did you know there are also Black Stampin’ Dimensionals Combo Packs which have both regular size and mini dimensionals in black, which for some projects “hides” them a little more on your project!)

The greeting is stamped with Versamark Ink and then heat embossed with White Stampin’ Embossing Powder. The greeting is also from the Snowman Season Stamp Set. The cardstock is Shaded Spruce. The Stampin’ Up! samples on the catalog cover also used some Red Rhinestones on the hat.

When you use dark cardstock for the card base, you may need to put a layer of Whisper White or Very Vanilla or some coordinating lighter color inside the card so that you can stamp a greeting or write a personal note. In addition, you can also add some decorative stamping. See the inside of this card below.

Holiday Catalog Let It Snow Snowman Christmas Card Inside

It’s time to get an early start making Christmas cards so we won’t be rushed when it gets down to the wire! If you need Christmas card ideas, be sure you are signed up for my Mailing List because I will be sending out Week 3 of my 12 Weeks of Christmas holiday emails. You still have time to get another few weeks of card ideas, then we move on to gift ideas and finally gift-wrapping ideas with tags, bags, etc. Of course, I will also have Christmas card ideas on my blog and Facebook page.

As I said, one of the many places you can get ideas and inspiration for holiday cards is to look in the Stampin’ Up! Catalogs. You can copy or you can just take part of the idea and add your own elements. Lots of times, just having some idea in front of you gives you your own idea as you begin working! Be sure to order your supplies early so something you want is not out of stock.

SHOP STAMPIN’ UP! ONLINE!

How To Take a Feels Like Frost Plain Christmas Card To an Embellished Card

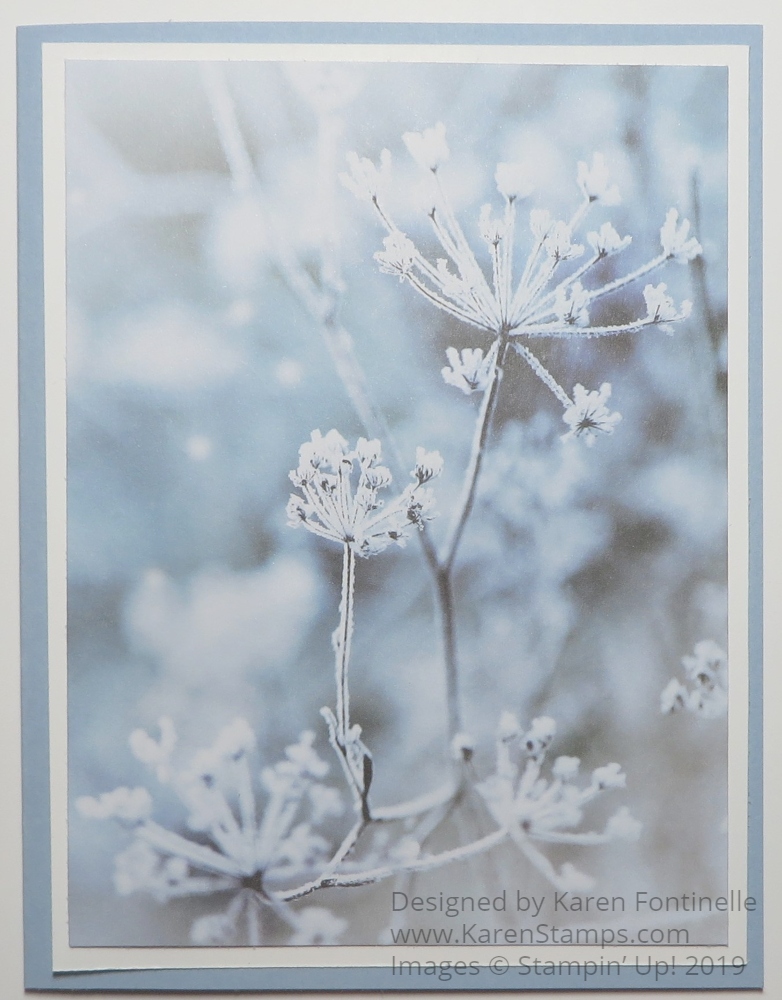
Feels Like Frost Plain Christmas Card

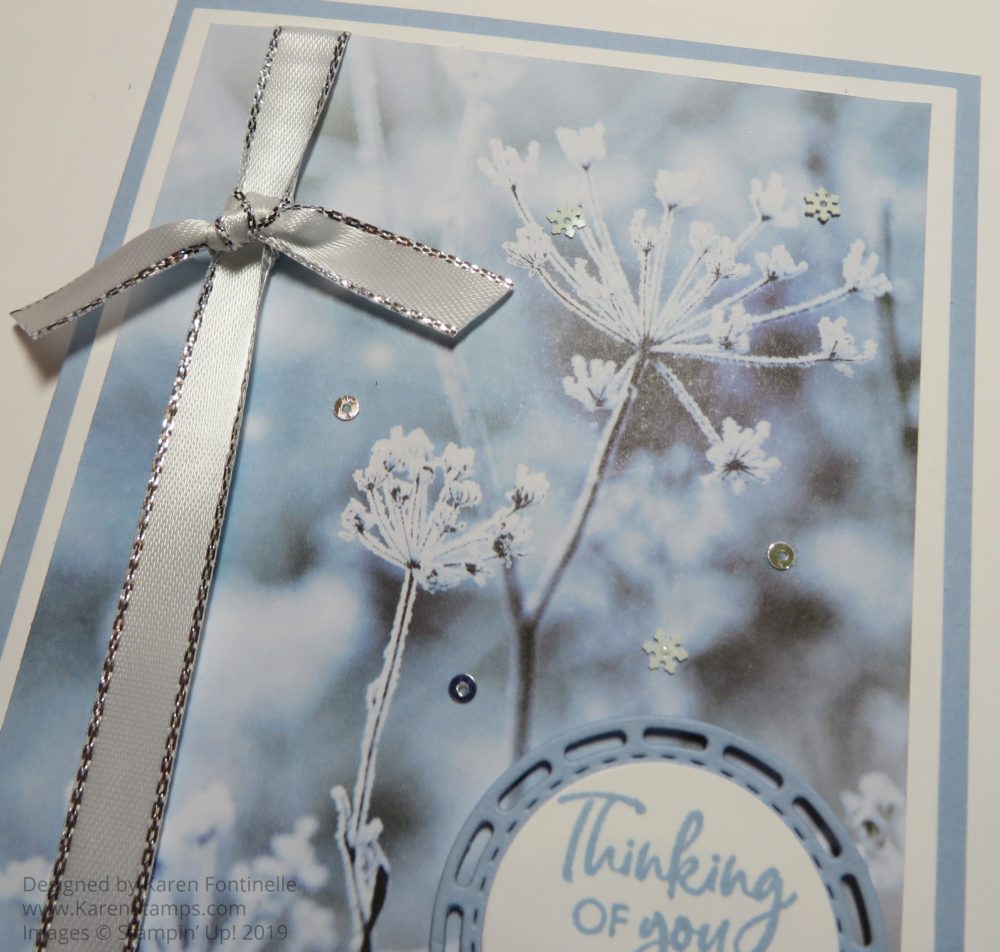
While I thought I could do without this beautiful wintery designer paper, I found that I could not and started working on a card. Just layering the designer paper I chose on the card base I thought looked simple and beautiful enough, especially if you were just sending a personal note. Since the card was so pretty as is, I thought about taking it step by step from a plain Christmas card to an embellished Christmas card and showing you the steps.

As you can see, the first card was just a card base of Seaside Spray Cardstock with a layer of Whisper White under the Feels Like Frost Specialty 6″ x 6″ Designer Series Paper. I think the white helps the designer paper stand out even better. I just thought the card looked so elegant enough with just the designer paper that it barely needed anything else! I could see this paper being used to make a series of note cards or regular size cards for Christmas cards, holiday cards, or just cards for winter. Often when we have someone of a different religion who is not celebrating Christmas, we like to have a more generic card to send them during our holiday.

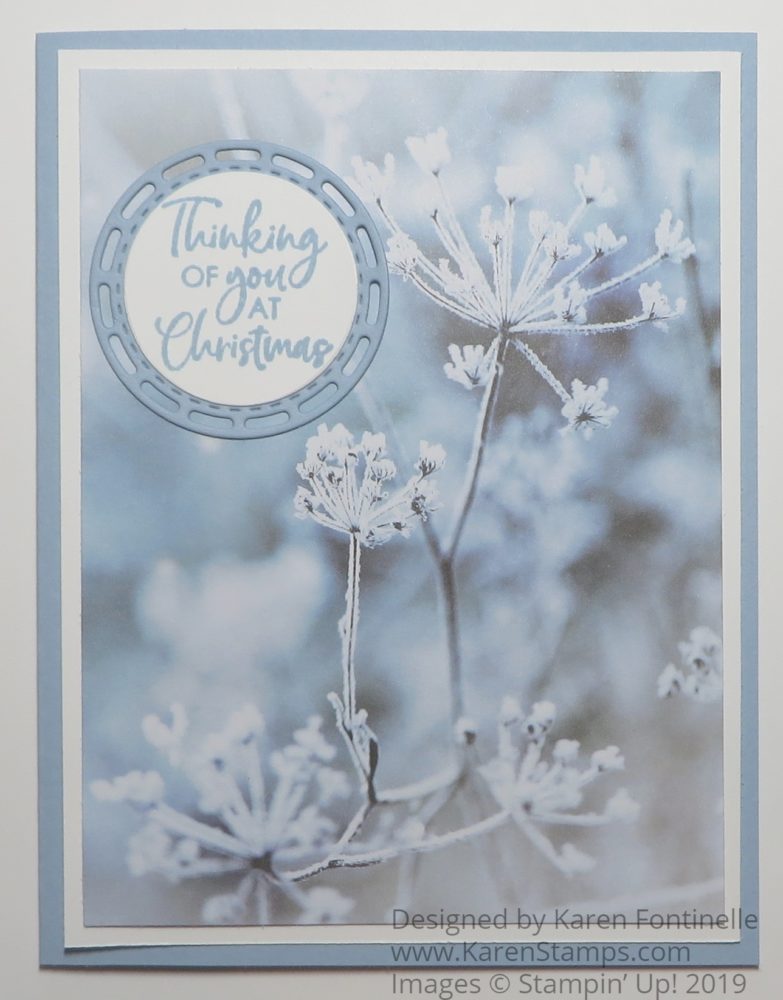
Feels Like Frost Christmas Card With Greeting

To step up the first card, I added a holiday greeting to this plain card. Since there was kind of an open area on the designer paper, I put the greeting in the upper corner. The greeting is in the Itty Bitty Christmas Stamp Set and is stamped with Seaside Spray Ink, one of the newest In Colors. I die cut it with one of the small circle dies in the Layering Circles Dies. I looked through my dies a little bit and decided to use this cute circle layer in the Stitched Labels Dies.

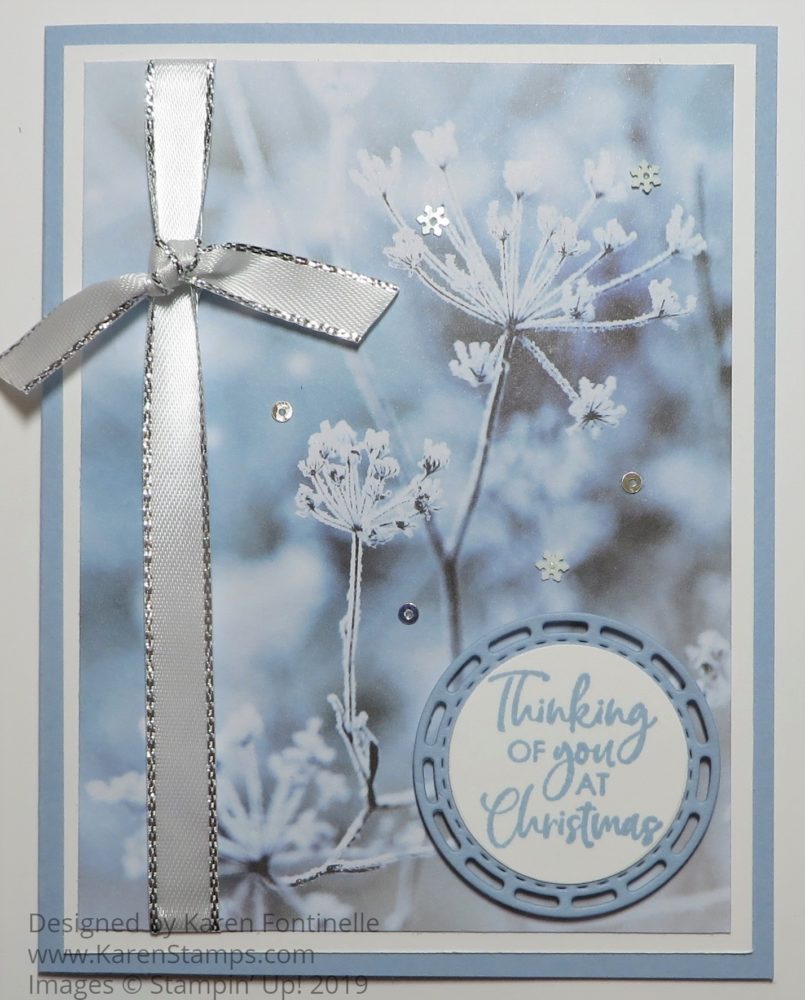
Feels Like Frost Embellished Christmas Card

Next, to step up the card, even more, I added the Silver 3/8″ Metallic-Edge Ribbon. I moved the greeting down to the lower corner of the card And for a little bling, I added the teeny tiny Snowflake Sequins to the card, three of the tiny silver ones and three of the snowflake ones. I just used the tiniest dot of Multipurpose Liquid Glue to adhere the sequins with the help (and I do mean HELP) of the Take Your Pick Tool. This is a great tool, no matter which end of the tool you use. I have used the pokey end and also the spatula for scooping up jewels off the sheet and applying to the project and today the sticky end for picking up and placing the sequins. Otherwise, you would go crazy without it, so put one on your next order!

Feels Like Frost Embellished Card Closeup

Check out this beautiful paper in the Stampin’ Up! Holiday Catalog and in the Online Store. Even though the photographic wintery images are beautiful, wait until you flip the paper over to the other side with the silver foil images! (As I write this, I see this paper and matching ribbon are backordered. The Feels Like Frost will be back in stock next week and the ribbon at the end of October.) (I must have gotten the last ones!)

If you are unsure about making a card, just start with something very simple like I did with just the designer paper. Then see what greeting you might want to add. Next see if you have some ribbon or jewels you want to add or a layer for the greeting, whatever it is. Sometimes it is good to stop before you overdo it! And sometimes it is good to jazz it up a bit! Anyway, check out the steps I took to take this plain Christmas card to an embellished Christmas card.

The “12 Weeks of Christmas” Holiday Emails Are Coming!

12 Weeks of Christmas Banner 2019

Believe it or not, we are just over twelve weeks until Christmas so it is time for my 12 Weeks of Christmas Holiday Emails to begin! Tomorrow, October 2 is the date!

Every week for 12 weeks I will send my mailing list subscribers a free holiday project that you can use to make your holiday preparations easier! This is a thank you for my mailing list subscribers that I like to do every year. Just like in my regular weekly email, I will send a photo of a project, a list of supplies needed, and all the directions to make it.

In the first few weeks, I will send card ideas since it’s likely that is the first thing most of us will work on at this point. Next, come a few weeks of gift ideas and finally, as we are doing Christmas shopping, some ideas for gift wrap, bags, and gift tags.

These are exclusive projects that I won’t be posting on my blog or anywhere else. You may copy directly, take inspiration from the idea and come up with your own project, or simply enjoy seeing another stamping idea! I know I am all about seeing as many ideas as possible.

However, the only way you can get these special 12 Week of Christmas emails is to be on my Stamping With Karen Mailing List! All you have to do is sign up in the red box in the upper right of my blog or in the form below.

Subscribe to My Mailing List! 

Exclusive Projects

Stampin’ Up! News & Updates

FREE Welcome Gift!

Name: 

Continue reading

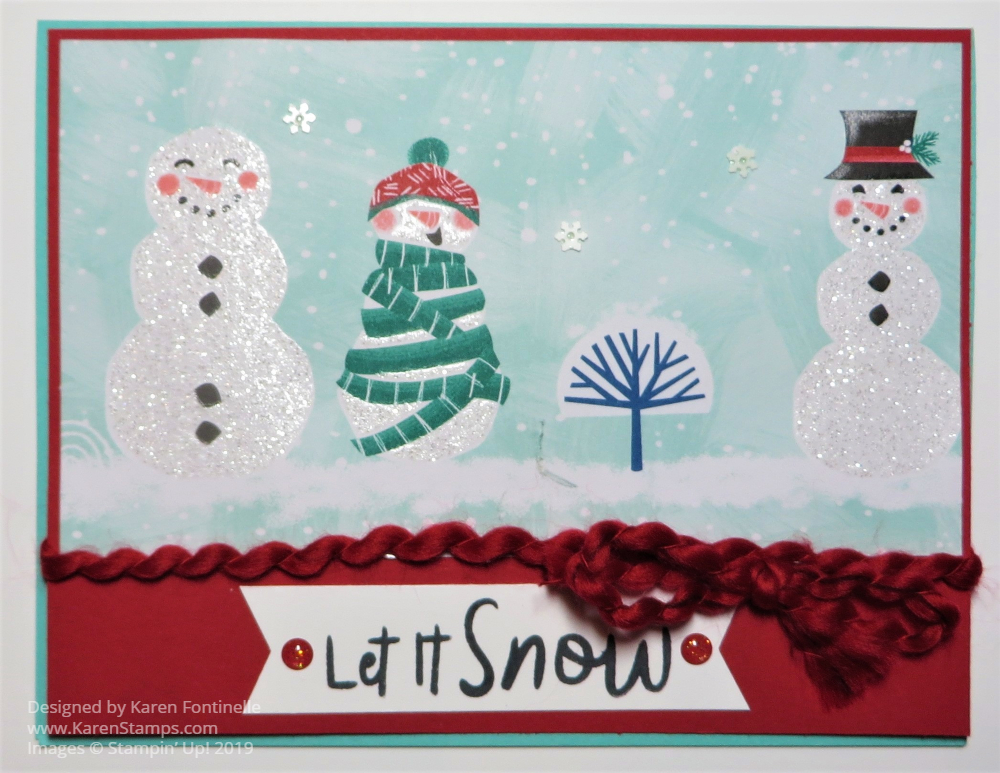
Let It Snow Designer Paper Christmas Card

Let It Snow Designer Paper Christmas Card

Someone said three months from today it will be Christmas so you might want to start thinking about what Christmas cards you want to make, like maybe this Let It Snow Designer Paper Christmas Card. I would add, besides being three months until Christmas Day, I would add that in three months from today, it will all be over with! The cards made and mailed (hopefully!), the presents bought, wrapped and possibly given, church services attended, Christmas cookies baked (usually not until after at my house!), parties attended, Christmas meals planned and eaten, except for Christmas Day dinner. SO….we have way less than 3 months to work on all our craft projects and cards to send and give!

To help you out a little bit, beginning next Wednesday, one week from today, we are going to start the “12 Weeks of Christmas” email campaign! Every week for 12 weeks I am going to be sending you a FREE holiday project that you can use to make your holidays easier and more festive! Please note, however, the only people who are going to receive these FREE projects are the people who are on my Mailing List. If you are NOT on my mailing list, you will not receive these special holiday emails.

To get on my email list, just fill in the red box in the upper right corner of my blog or you can sign up below:

Subscribe to My Mailing List! 

Exclusive Projects

Stampin’ Up! News & Updates

FREE Welcome Gift!

Name: 

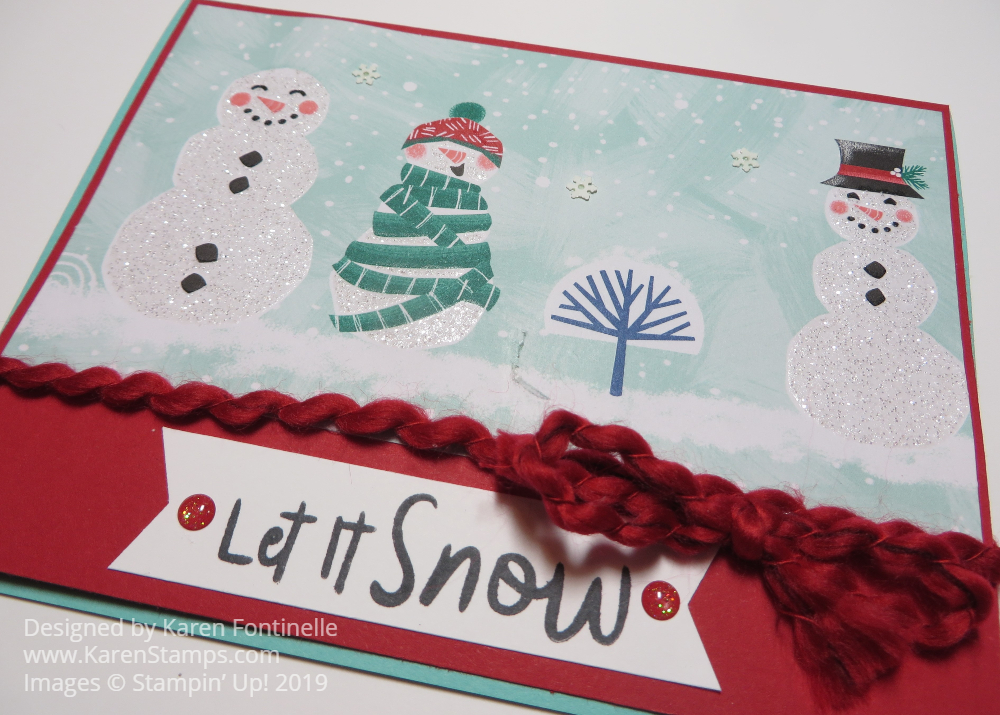
For this card, I used a card base of Pool Party with a layer of Real Red Cardstock. Laid over the top of the Real Red Cardstock, is a piece of the Let It Snow Specialty Designer Series Paper. It will almost kill you, but you can cut the designer paper sheet with the glittery snowman appropriately so that you get the snowmen that you choose on the paper. If this does kill you to whack your beautiful paper up this way, you might want to order extra!

The ribbon wrapped around the card (to hide the seam of the designer paper on the Real Red is the Real Red 1/8″ Curly Ribbon. It is fun to use on cards, of course, but you might like to order extra to use as real wrapping ribbon on your Christmas packages!

The greeting is one from the Snowman Season Stamp Set. It is stamped in Memento Black. The banner ends are punched with the Tag Punch. And finally, I added some red stick-on dots from the Toile Tidings Glitter Enamel Dots. And finally, I added only about three snowflake sequins from the Snowflake Sequins. When you get right down to it, this Let It Snow Designer Paper Christmas Card is pretty easy to make!

Remember to sign up for my regular mailing list in the top right of this blog, if you are not already on my mailing list, in order to receive these fun holiday emails starting next week! The holidays are coming fast!

Fun Stampin’ Up! Videos After the Houston Floods!

Yesterday was a very wet day in Houston – actually, the third wet day in a row in Houston, which you probably heard about on the news. On Tuesday there was a tropical depression in the Gulf of Mexico which got named Imelda pretty quickly, which I did not take as a good sign that they named a storm! That means it reached certain criteria and that usually isn’t good!

We knew we would get rain, but we needed rain, so at least for the first day it would be good. It all would depend on where you lived and where this storm went how much rain anyone would get. Unfortunately, even the first day coastal towns and towns east of Houston got a lot of rain and flooding. The second day Houston thought the storm had moved on and we dodged a bullet….but then we got big storms late in the day from the heat. Then yesterday, or even the night before for lots of people, the city of Houston itself got plenty of rain, flooding highways and roads and houses. You saw all the pictures on TV. It’s a terrible situation but one we have seen often in all the years we have lived here. We’ve just been lucky, so far, that we haven’t been stranded somewhere on the road or had water get in the house. When Houston gets too much rain, this happens, and often it is difficult to predict or these storms have a mind of their own, no matter how hard the weather people work to get it right.

So for today, let’s just relax and watch some Stampin’ Up! videos for Holiday Catalog products!

You saw the fall birthday box I made for my husband for his birthday instead of a card yesterday in THIS POST.  There are SO MANY ideas for these Mini Curvy Treat Dies Boxes, you won’t believe the cute ideas creative people come up with! I made one Halloween pumpkin one with my daughter but have to make some more here at home.

A great addition to our stamping supplies, I think, are these So Many Stars stamps and dies in the Holiday Catalog.  You can purchase the So Many Stars Bundle and save 10%, which includes the So Many Stars Stamp Set and the Stitched Stars Dies.  Stars are not at all just for Christmas!  You can use them for any celebratory occasion like birthdays, graduations, and many more.  The stars I have had in the past I have used a lot.

Be sure to notice the Mercury Glass Designer Acetate in the Holiday Catalog on page 33 at the bottom.  You could easily overlook it. See in this video how they die cut the acetate and then layer it on a white background. I think this Mercury Glass is very interesting to use for lots of projects!  Certainly something very different that we haven’t had before!

Enjoy your day and set aside some Holiday Catalog reading and browsing time for your pleasure and inspiration!

Paper Pumpkin Winter Wonders 2019 Holiday Kits

Paper Pumpkin Winter Wonders 2019

If you enjoy holiday craft projects, especially ones that come in a special edition box in perfect packaging, delivered straight to your mailbox for you to open up and begin crafting immediately, then you probably will love to get these October and November Paper Pumpkin Winter Wonders 2019 Holiday Kits.

The October and November Paper Pumpkin Kits are coordinating, back-to-back kits to help you with your holiday giving. Everyone loves the holiday kits and they are useful as well as fun!

October Kit

Kit details: Makes 10 cards and envelopes
Card size: 4 1/4″ x 5-1/2″ (10.8 x 14 cm)
Envelope size: 4-1/2″ x 5-3/4″ (11.4 x 14.6 cm)
Coordinating colors: Early Espresso, Pool Party, Poppy Parade, and Shaded Spruce

November Kit

Kit details: Makes 24 holiday-themed gift tags of 4 various sizes and designs.
Coordinating colors: Early Espresso, Pool Party, Poppy Parade, and Shaded Spruce

The October and November kits coordinate; however, each kit is all-inclusive and can stand alone.

How great would that be to know you will have a pre-planned kit to make 10 Christmas cards to send, even if you are a regular cardmaker and have some other card designs you want to make for Christmas. I like to make many different designs of cards that I send out for Christmas!

This also means that by the end of October, you surely will have at least ten cards made for the holidays so that is ten less that you will have to rush to make at the last minute!

Then in November, you will get the second kit with designs and supplies to make tags for gifts. If you don’t need tags, use them to make more cards if you like! But usually, we always need more tags! I know I have run out to the store at the last minute in past years for MORE tags for presents!

To get one or both of these kits (with no obligation to continue your subscription, but you probably will want to!), just sign up HERE at my Paper Pumpkin website! Just remember the deadline is October 10th to get the October kit, and if you don’t subscribe then, the deadline for the November kit will be November 10th. Save yourself the effort of remembering and just subscribe NOW!

Another option is to purchase a subscription on your Stampin’ Up! order in the Online Store! This may help you reach $150 or more on your order and thus get Stampin’ Rewards! You will get an email from Stampin’ Up! telling you how to set up your Paper Pumpkin account and a code to use to register your prepaid kits. It’s easy. Decide which method works best for you. Even if you have a subscription to Paper Pumpkin, you can add a subscription to your Stampin’ Up! order, use those prepaid kits in your account, and then it will revert back to your monthly subscription. Choose whichever option is better for you!

JOIN PAPER PUMPKIN TODAY!

Wrapped In Plaid Christmas Trees Card

Wrapped In Plaid Christmas Trees Card

Here is an easy Christmas card I made during a short stamping session with my daughter while visiting her in California, the Wrapped In Plaid Christmas Trees Card. I brought some projects along in the hopes that a couple of her friends could join us, but it ended up being just us! Of course, when you are on vacation, there is never enough time so we didn’t get to make everything we wanted to.

While she was working on another card using this plaid paper and the tree punch, I somewhat copied this card from a sample in the Holiday Catalog on page 12. The card base is Cherry Cobbler. The greeting is stamped from the Perfectly Plaid Stamp Set in Cherry Cobbler Ink and then layered on a piece of Cherry Cobbler Cardstock.

For the background of the card, I chose two designs from the Perfectly Plaid 6″ x 6″ Specialty Designer Series Paper. They overlap just a bit and I put a thin strip of Shaded Spruce Cardstock across the line where the two papers overlap.

The four Christmas trees are punched out easily with the Pine Tree Punch, new in the Holiday Catalog. I just chose patterns from the designer paper that I thought would stand out from the background. I could have also added a few embellishments, like the Holiday Rhinestone Basic Jewels on page 58.

If you use this dark cardstock for your card base, you probably want to put a piece of Whisper White Cardstock inside the card, perhaps stamping first, or writing a personal note later. Stamp a greeting or stamp just a small image somewhere on the inside of the card.

Really, with the Pine Tree Punch and the Perfectly Plaid Paper, this is a pretty easy card to make. You could change it up by only putting the designer paper on the bottom half of the card, allowing the punched trees to stand out more against a solid color background. Just play with the elements and see what you come up with! Use a ribbon around the seam between the two patterns of plaid paper.

Have fun thinking up creative ideas using the new products in the Holiday Catalog!

SHOP ONLINE FOR STAMPIN’ UP! PRODUCTS!

Let It Snow Punched Snowman Christmas Card

Let It Snow Punched Snowman Christmas Card

This Let It Snow Die-Cut Snowman Christmas Card will be a fun card to send at Christmas time! It uses fun designer paper plus a cute snowman stamp set. There are so many possibilities with the Let It Snow Suite for making cards and projects for winter and Christmas! You will find it all, of course, in the Stampin’ Up! Holiday Catalog!

This card starts with a Coastal Cabana card base. The designer paper is the Let It Snow Specialty Designer Series Paper. This package of paper has glittery snowmen on some of the patterns. The paper used on this card doesn’t have the glitter, but it is a design of an assortment of mini snowmen! It makes a great background for a snowman card without taking away attention from the main snowman.

The main snowman is stamped with the Snowman Season Stamp Set and then punched with the Snowman Builder Punch. With this punch, you can make the snowman body, the arms, the hat, and the carrot nose! You can even purchase the Snowman Season Stamp Set and the Snowman Builder Punch together in the Snowman Season Bundle and save 10%! After building this snowman with the punch, I popped him up with Stampin’ Dimensionals. He is then layered on a flip side of designer paper and layered on a large scalloped circle die cut.

The greeting is stamped from the Snowman Season Stamp Set and layered on a scalloped oval die cut. You can see another card HERE that also uses the punched snowman.

That’s all there is to this card! Stamp a holiday greeting inside or write a personal note and the card is ready to go!

Also, don’t forget about the Designer Series Paper Sale going on now at Stampin’ Up!. Select papers – Buy 3, Get the 4th package FREE!

Shop the Holiday Catalog and the Let It Snow Suite Online HERE!