Tag Archives: Wrapped in Plaid Designer Paper

Wrapped in Plaid Gatefold Christmas Card

Wrapped in Plaid Gatefold Christmas Card

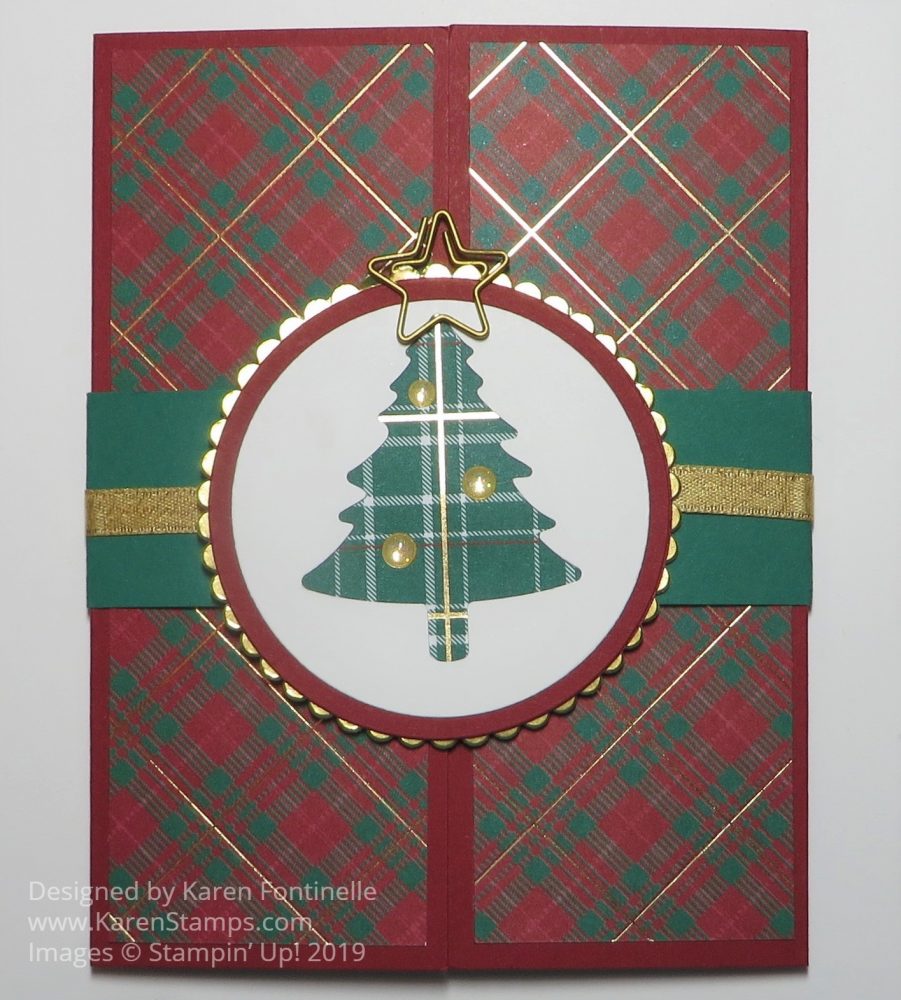
This Wrapped in Plaid Gatefold Christmas Card is fairly easy to make especially if you just copy my design! Gatefold cards are easy enough and yet look impressive to the recipient, especially knowing that you made it! It is still the size of a regular card and you can decorate the card base any way you like.

The card base is 8 1/2″ x 5 1/2″ as per usual. Instead of scoring and folding in half, score from each end to fold over the center of the card. Score at 2 1/8″ from each end of the Cherry Cobbler Cardstock. Crease and fold with the two ends meeting in the center.

If you want to use designer paper as I did with the Wrapped in Plaid 6″ x 6″ Specialty Designer Series Paper, cut two pieces at 1 7/8″ x 5 1/4″. Adhere these to the two front panels.

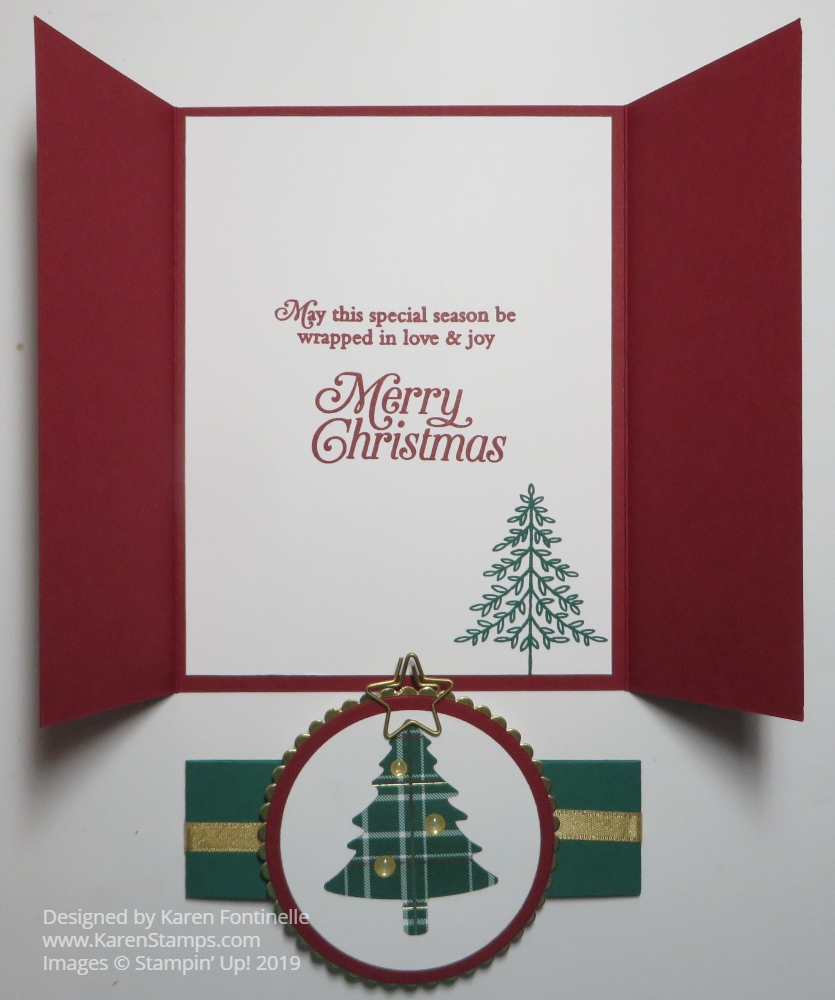
For the inside of the card, cut a piece of Whisper White and stamp whatever greetings you like. I added a tree from the Perfectly Plaid Stamp Set. You could also stamp right on the inside of the Cherry Cobbler Cardstock, but since it is a little dark, you might prefer the Whisper White layer for your personal greeting and signature.

Wrapped in Plaid Gatefold Christmas Card Inside

For the belly band cut a strip of Shaded Spruce 11″ x 1 1/4″ or whatever width you would like. Fold around the card, crease the folds, cut off the excess length and have the overlapping ends meet at the front center of the card. You might think you would want the belly band to meet at the back, but if it meets at the front, the tree piece that you add will cover up the ends. I added a piece of Gold Shimmer Ribbon around the belly band and held in place with Mini Glue Dots.

You can add whatever you like for the center of the belly band. I used the Pine Tree Punch to punch a tree out of a piece of Whisper White and then die cut this piece with the Layering Circles Die. Behind that, I die cut a slightly smaller piece of Wrapped in Plaid DSP that I wanted to show through and adhered to the back of the punched tree. This was layered on a Cherry Cobbler die-cut circle, which is then layered on a die-cut scalloped circle of Gold Foil.

As I was looking in my drawer for embellishments, I came up this clip-on star that had been on the Clearance Rack. Perhaps you already own these clip shapes. If not, just punch out a gold star from whatever you have. And for a little extra bling, besides the gold accents in the Wrapped in Plaid DSP, I adhered a few Gold Glitter Enamel Dots. These dots, along with the Gold Shimmer Ribbon are items that are in the Christmastime Is Here Suite.

SHOP STAMPIN’ UP! ONLINE HERE!

Wrapped in Plaid Christmas Trees Christmas Card

Wrapped in Plaid Christmas Trees Christmas Card

It’s the first Christmas card of the season, the Wrapped in Plaid Christmas Trees Christmas Card! This is a peek at some of the new products in the Stampin’ Up! Holiday Catalog! And just to get myself going, I decided to just “CASE” (Copy And Share Everything”) one of the samples in the catalog! This is the card that made me want to buy some of the products in this Wrapped in Plaid Suite. Ok, all of the products except the jingle bells!

And wait until you see this Wrapped in Plaid Specialty Designer Series Paper! I guess the word “Specialty” should have tipped me off, but I didn’t catch on until I got the paper. I was flipping through the papers, looking for the ones that matched the trees in the catalog. Finally, I flipped one over to see the other side, and WOW! It had gold foil accent lines on all the plaid pieces! You get 12 designs, 4 each in the package of 6″ x 6″ paper. Although the trees don’t show it off well, those gold accents on the plaid designs are really pretty!

Wrapped in Plaid DSP Plain Side
Wrapped In Plaid DSP Foil Accents

You can purchase the Pine Tree Punch in the Suite and even combine it with the Perfectly Plaid Stamp Set to save 10% in a Bundle. I know we have had other tree punches in prior catalogs but this is a nice one, different from the others. Very nice for punching out the stamped trees or just out of paper. You’ll be able to use it with some of the other suites, too.

The card base is Mint Macaron with a layer die-cut with the largest Stitched Rectangle Die. The trees are punched out and adhered to that die cut layer. They are larger than the rectangle so it is okay for them to hang over the top edge of the layer and over the bottom edge. Just don’t let them hang over the edge of the card base. I glued mine down with Multipurpose Liquid Glue but you could also pop them up with Dimensionals.

The greeting is stamped from one in the Perfectly Plaid Stamp Set in Shaded Spruce Ink on Whisper White. The catalog sample shows a Jingle Bell attached to the end of the greeting banner, but since I didn’t have the bells (yet) I found these All Is Bright Paper Clips that I already purchased. They are on the Clearance Rack! I clipped it onto the greeting and tied on a piece of Linen Thread. I actually think this will be better for mailing. I don’t think you can mail the Jingle Bells in a regular envelope, but they are cute for other projects or cards you will hand out.

I look forward to making many other cards with this cute designer paper and Pine Tree Punch! It’s not too early to start working on Christmas cards! Holiday Catalogs are probably in the mail, although they take longer than regular mail, but hopefully my customers will be receiving them soon!

If you are interested in purchasing Stampin’ Up! products and especially holiday and fall items and would like a Demonstrator to assist you, I would be happy to be yours! Send me your contact information and I can mail the catalogs to you.

In the meantime, keep checking out the new Annual Stampin’ Up! Catalog because once the Holiday Catalog comes out, the annual catalog doesn’t get much attention! Time will fly! We all need to get early starts on our holiday cards and projects!