Category Archives: Christmas

Christmas Cards 2018

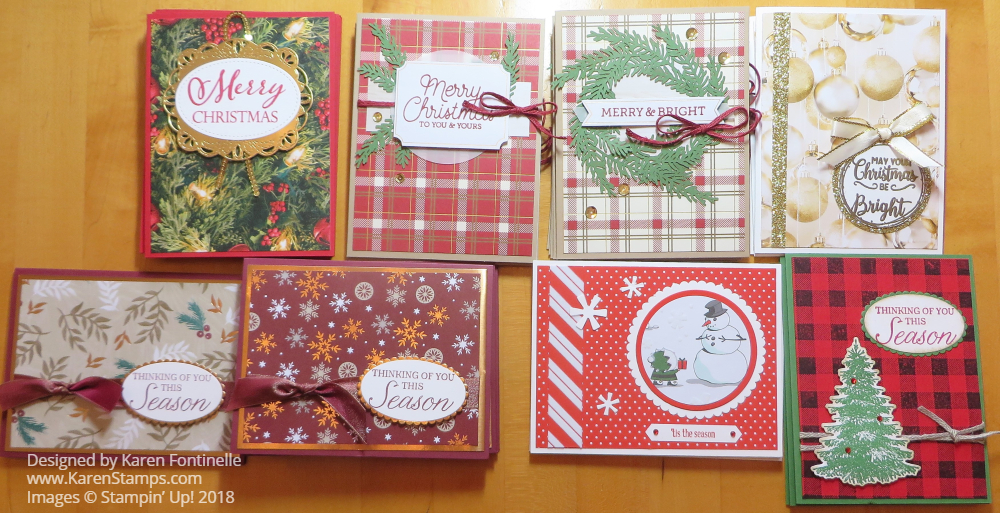
Christmas Cards 2018These are a selection of the designs of Christmas cards I made this year and mailed out!  I wish I had another month to make even more designs and cards because I didn’t get to use everything I wanted to!  So many ideas, so many stamps!

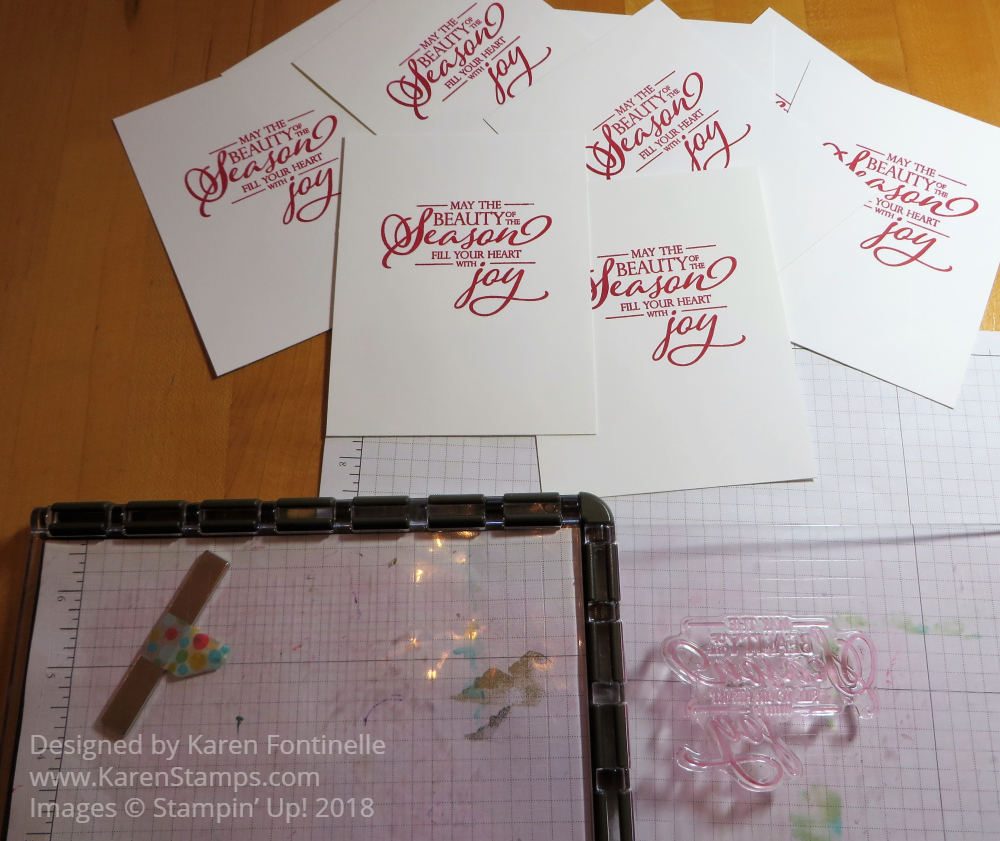
I sure used my Stamparatus a lot this Christmas, as I anticipated last year when it was on order! It is perfect for making multiples or just making sure you don’t mess up. The worst is when you have a card all made and then stamp the inside greeting and it doesn’t stamp properly or it’s crooked up upside down or something!  With the Stamparatus, you get perfect placement (I usually stamp on a window sheet first for a greeting to make sure it is straight and placed where I want it) and if you didn’t get part of the stamp inked up properly, you can stamp it again right in the same spot.  Just be careful with those magnets!!  It’s hard to remember they are so strong and REALLY want to be together, no matter where you place them!

My children all arrived last night so all is well with the world!  Today we are looking forward to a special lunch, my son’s gift of corned beef and pastrami from Katz’s Deli from New York City, where he just visited last weekend.  Tonight after dinner I guess everyone will frantically finish wrapping presents after Amazon makes its last delivery!!!  Life will be boring after this week with no packages arriving on the porch and in the mailbox every single day!

I hope you have a wonderful Christmas Eve!  Growing up, Christmas Eve was my favorite because that’s when we opened presents at our house with our grandparents and maybe other out-of-town relatives visiting. Afterwards, we would eat chocolate chip cookies that my mother baked and any that my grandma brought over that she made. On Christmas Day Santa would have come and set out presents and filled our stockings. I remember getting a blackboard one year, one of my favorite things ever, and one year my brother and I each got Etch-A-Sketches that Santa even drew pictures on when he left them!!  Then we would go to my grandma’s house for Christmas Day dinner and krullers that she made (a German deep-fried in a knot pastry-type dessert topped with powdered sugar) and open the presents from her so she wouldn’t have to bring them over to our house.  Nothing compares to those Christmases when my brother and I were kids! Of course, once you have your own children, then it’s a different type of Christmas as parents!

And what to do when you are putting out Christmas decorations and find that the pumpkin from Halloween is still sitting on the fireplace??  Put a Santa hat on him, give him some eyes, and set him out as a Christmas decoration!

Merry Christmas Eve!

Santa Pumpkin

Santa Treats

Santa Treats

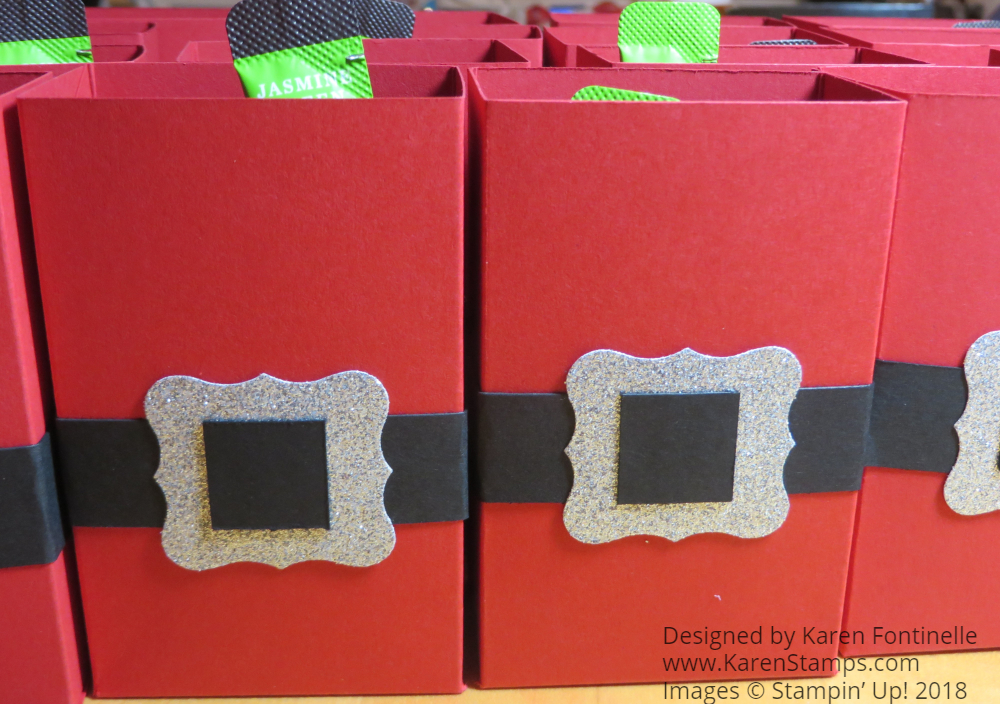
If you need one more Christmas treat idea that is easy to make, try these Santa Treats.  These boxes are easy to make, much like the 2-4-6-8 box.  Then just wrap the “belt” around and put a belt buckle.  Fill with candy.  Done and cute!

To make this Santa Treat Box, cut a sheet of Real Red Cardstock in half, at 5 1/2″ x 8 1/2″.  Score at 1 1/2″, 4″, 5 1/2″ and 8″ along the long side.  Turn and score at 1 1/2″ for the bottom flaps.  Then, like the 2-4-6-8 box, cut up on those flaps to the horizontal score line and cut off the tiny little piece.  Fold and crease all the lines and assemble the box.

The belt is a 3/4″ strip of Basic Black Cardstock.  I find it easiest to wrap a long strip around the box by hand, creasing at each corner and then cutting off the excess.  Make the strip meet on the front of the box because this will be covered by the belt buckle.

The belt buckle can be the retired punch that I used, the Curvy Label Punch, or just cut a square of Silver Glimmer Paper or Silver Foil.  The trick is to then just cut a small square of black to glue in the center of the buckle to make it look like the belt goes through the buckle.

I found this idea on Pinterest made by Julie Davison.

Then just put candy directly into the Santa box or put in a cello bag and put that inside.  Mine has various chocolate candies and after the photo, a candy cane, plus a little packet of tea for something healthy!

These are very easy to make and everyone will think you made something special!

Need Last Minute Christmas Gift Bags? Make These Easy Ones!

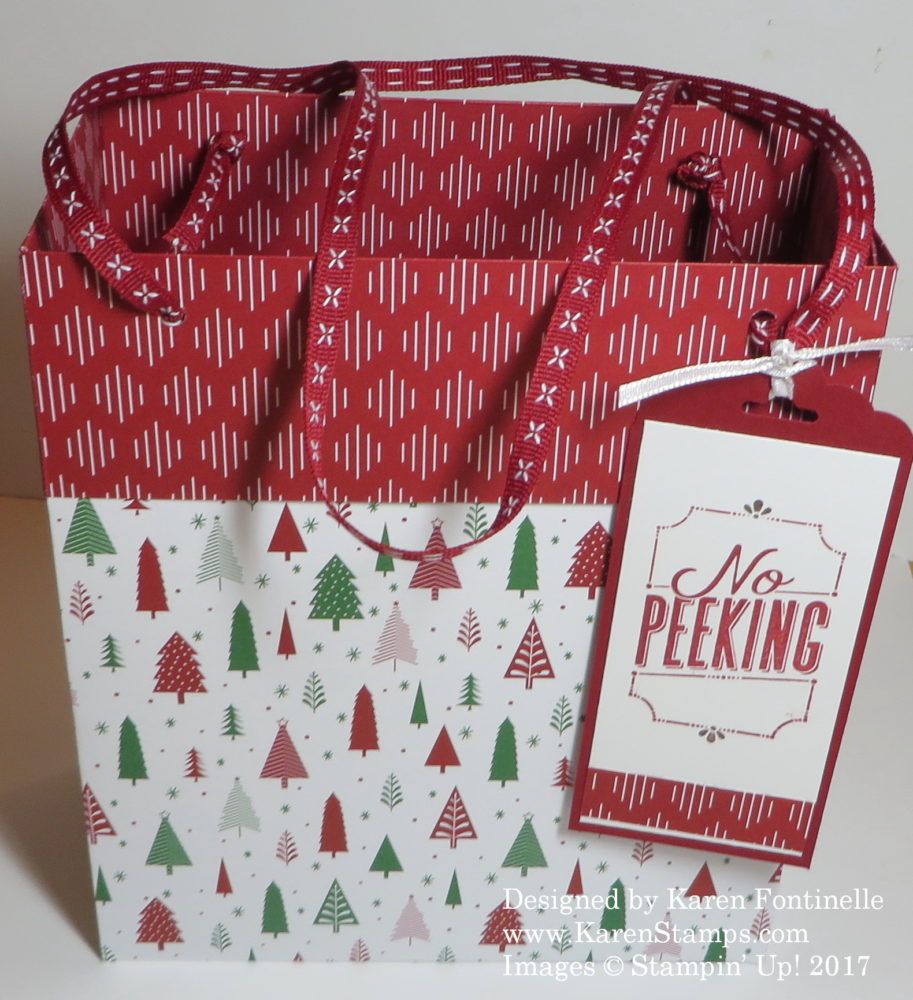
Suite Seasons Christmas Gift Bag

Suite Seasons Gift Bag

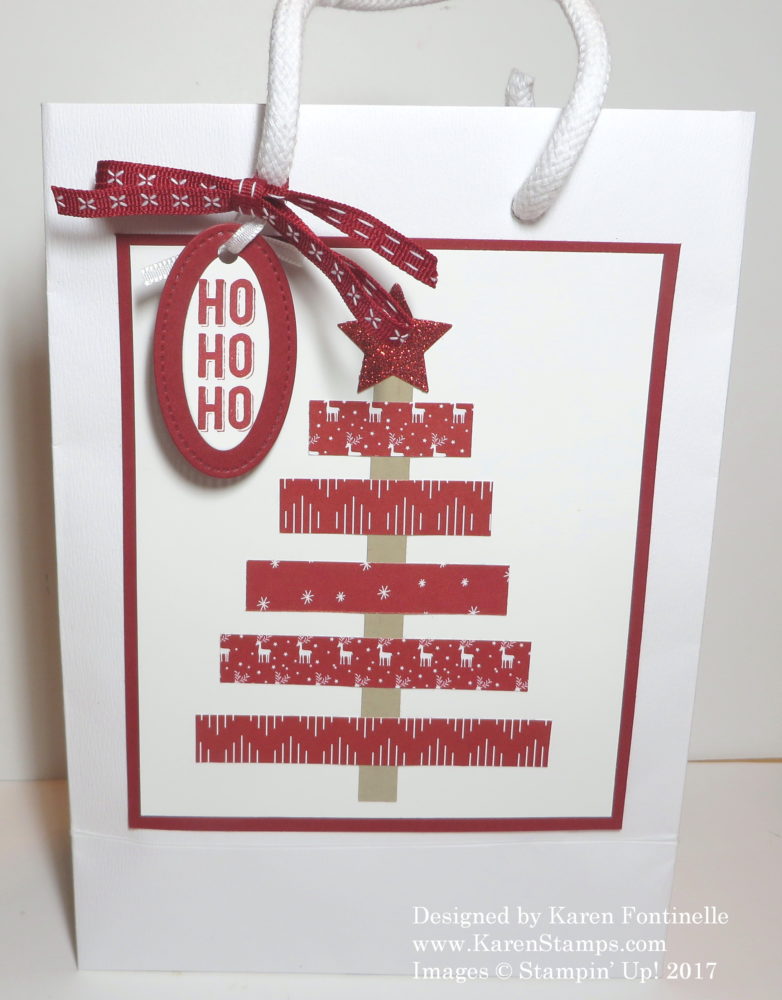
It’s time to wrap those Christmas gifts (I said to myself!)!  You probably are all finished but if you find another gift or two and have run out of wrapping paper, don’t fret and don’t run out to the store!  Find a bag in your house and decorate it!  Just get out your cardstock, designer paper, and adhesive and go to town!  You’ll be glad you saved yourself the trip!  Here are some ideas from years past.  Just click on the link to go to the post if you need more information!

Be Merry Christmas Gift Bag

Be Merry Gift Bag made out of designer paper.

Easy Christmas Gift Bag With Paper Scraps

Easy Christmas Gift Bag With Paper Scraps

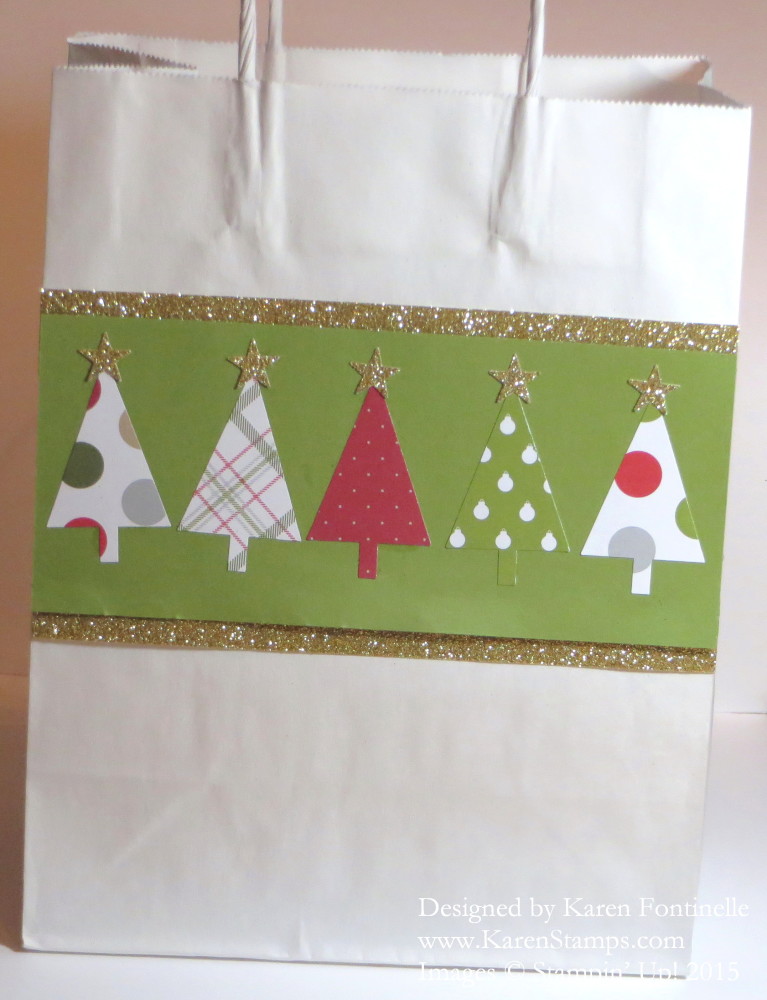
Easy Christmas Tree Punch Gift Bag

Decorate An Easy Christmas Gift Bag

Decorate a Christmas Gift Bag

Decorate a Christmas Gift Bag

There you have several ideas!  Even a brown lunch sack will work!  Or find a small gift box laying around in your closet somewhere.  Add some designer paper on the sides and tie a ribbon around! You have a fancy gift box!

And now I better go wrap some gifts myself!


Homemade Fudge Gift For Christmas – The Stamper’s Way!

Christmas Fudge Poem

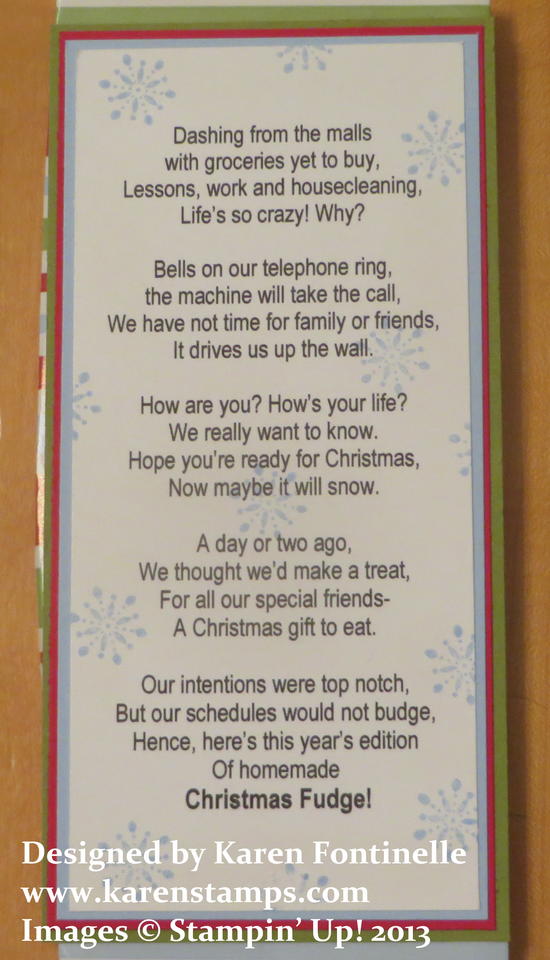
Time is getting short for shopping for Christmas gifts, but you do have time to make fudge for Christmas, don’t you?!  You will LOVE this fudge recipe!  All you need is a printer, stamps and paper!  Or even just a pen!  Maybe you have one of those impossible to buy for people on your list, but here is a solution! Print out this poem and buy one of those gigantic candy bars (or any size candy bar) and put this poem on it!  Maybe you want to update the words a little if you are creative with poetry!

Type up this poem and print out on your computer.  Likely you can put a sheet of Whisper White cardstock in your printer and print it on that. Wrap the candy bar with designer paper or cardstock.  If you want, do a little stamping on the poem, like these little snowflakes, then adhere to the top of the candy bar.  Wrap a ribbon around or put in a cello bag and you have a fun little gift or stocking stuffer!

It’s an oldie but goodie, around as long as I can remember, but it’s still a good, creative idea!  Time is of the essence right now!  You will probably think of other creative things you can do with food at the grocery store to make it into a lovely gift!  In the meantime, go make some “fudge” to give your neighbors or put in someone’s Christmas stocking!


Last Minute Easy Christmas Card Ideas From a Year Past

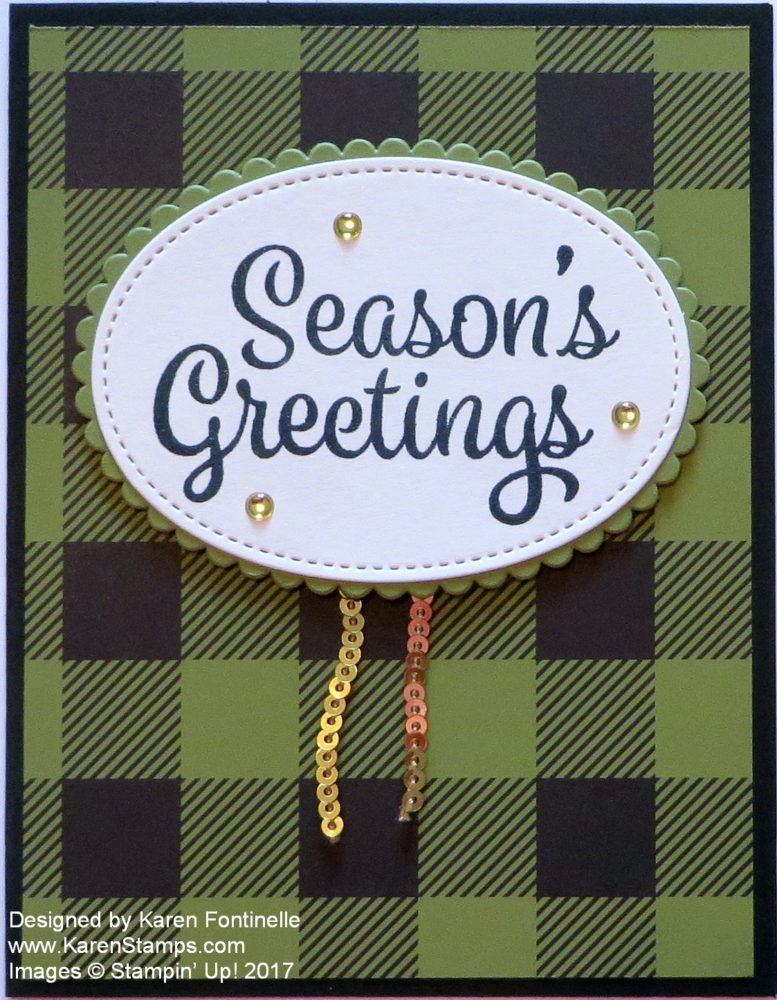
Need a few last minute Christmas card ideas? Here are some from 2017, just to refresh your memory.  Maybe you have these stamps or paper, or you can use the current supplies you have, just copy the layout.Quick and Easy Christmas Card in Green and Black

You could make this card with the Buffalo Check background stamp from this year.  Just add a greeting and a little bling with the sequin trim or some ribbon! Click the photo or HERE to see the details on my blog post.

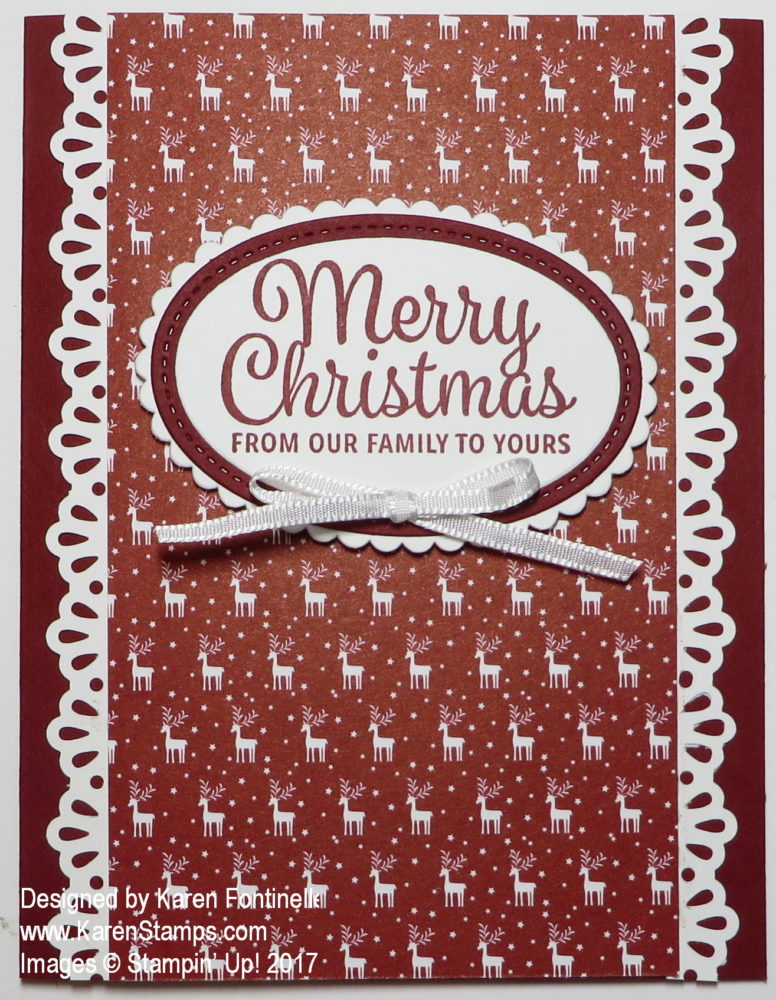
Be Merry Christmas Card with Decorative Ribbon Border Punch

Here’s an easy card, much like the first one, but with the punched Decorative Ribbon Border as an added feature.  Click HERE  or on the photo to see my blog post.

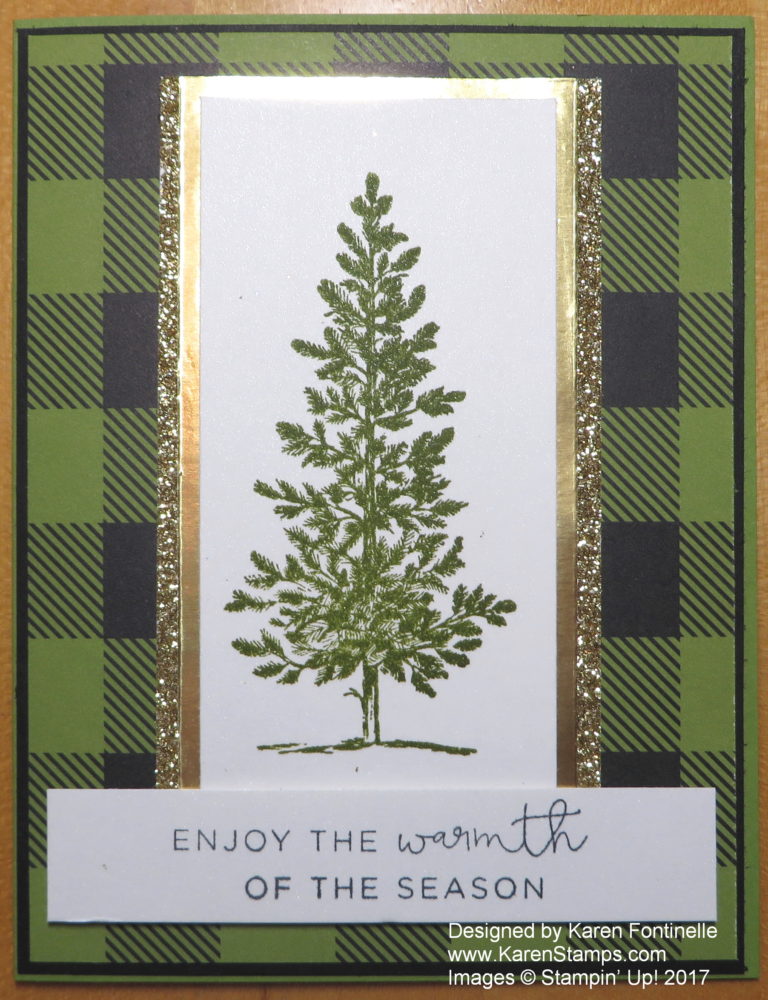
Lovely As a Tree Christmas Card

Here’s that designer paper from last year with the check, but you can make your own this year with the Buffalo Check Stamp. Everyone loves it and it gives such warmth to your card! Click HERE or on the photo to see my blog post. This card uses the classic Lovely As a Tree Stamp Set, but we have trees in this year’s stamps. Or substitute another image.  Just use the basic design!

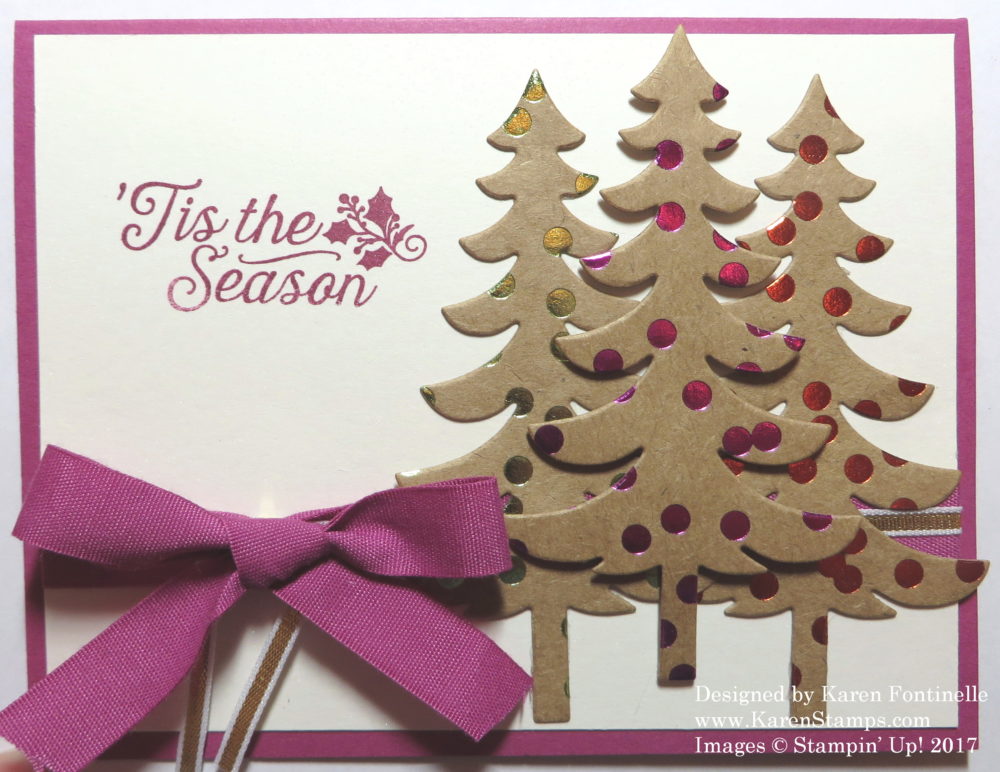
Christmas Card with Foil Frenzy Christmas Trees

Whether you use last year’s trees and die cuts or the new ones we have this year, put a few trees on one side and a greeting on the other.  Maybe add a little ribbon or some sequins for some bling!  Try out an unusual color or cardstock for a Christmas card that stands out!  Click on the photo or HERE to read this blog post.

Clearance Rack Updated with new products the other day!

Stampin’ Up! Year-End Closeout Sale Going On!


Loving the Stamparatus® To Make Christmas Cards

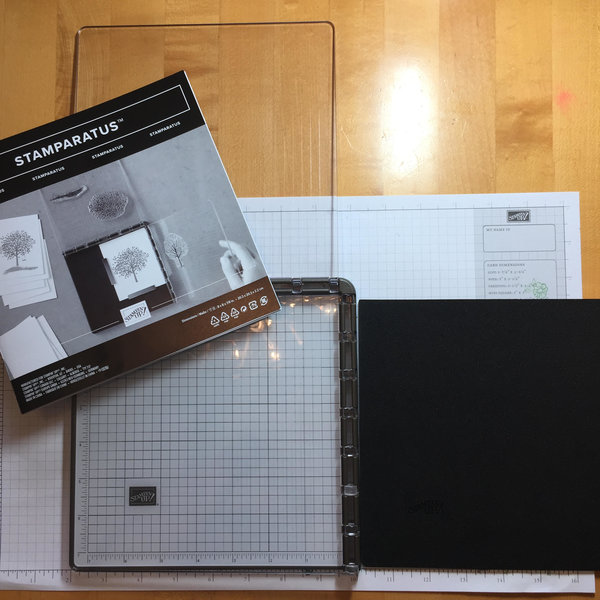
Stamparatus

Last year at this time the Stamparatus® was only a new tool on a reserved order!  Remember that system when it first came out?  We had to wait until the New Year to receive it and I remember thinking last year what a help it would be in making Christmas cards, especially when you are doing multiples.

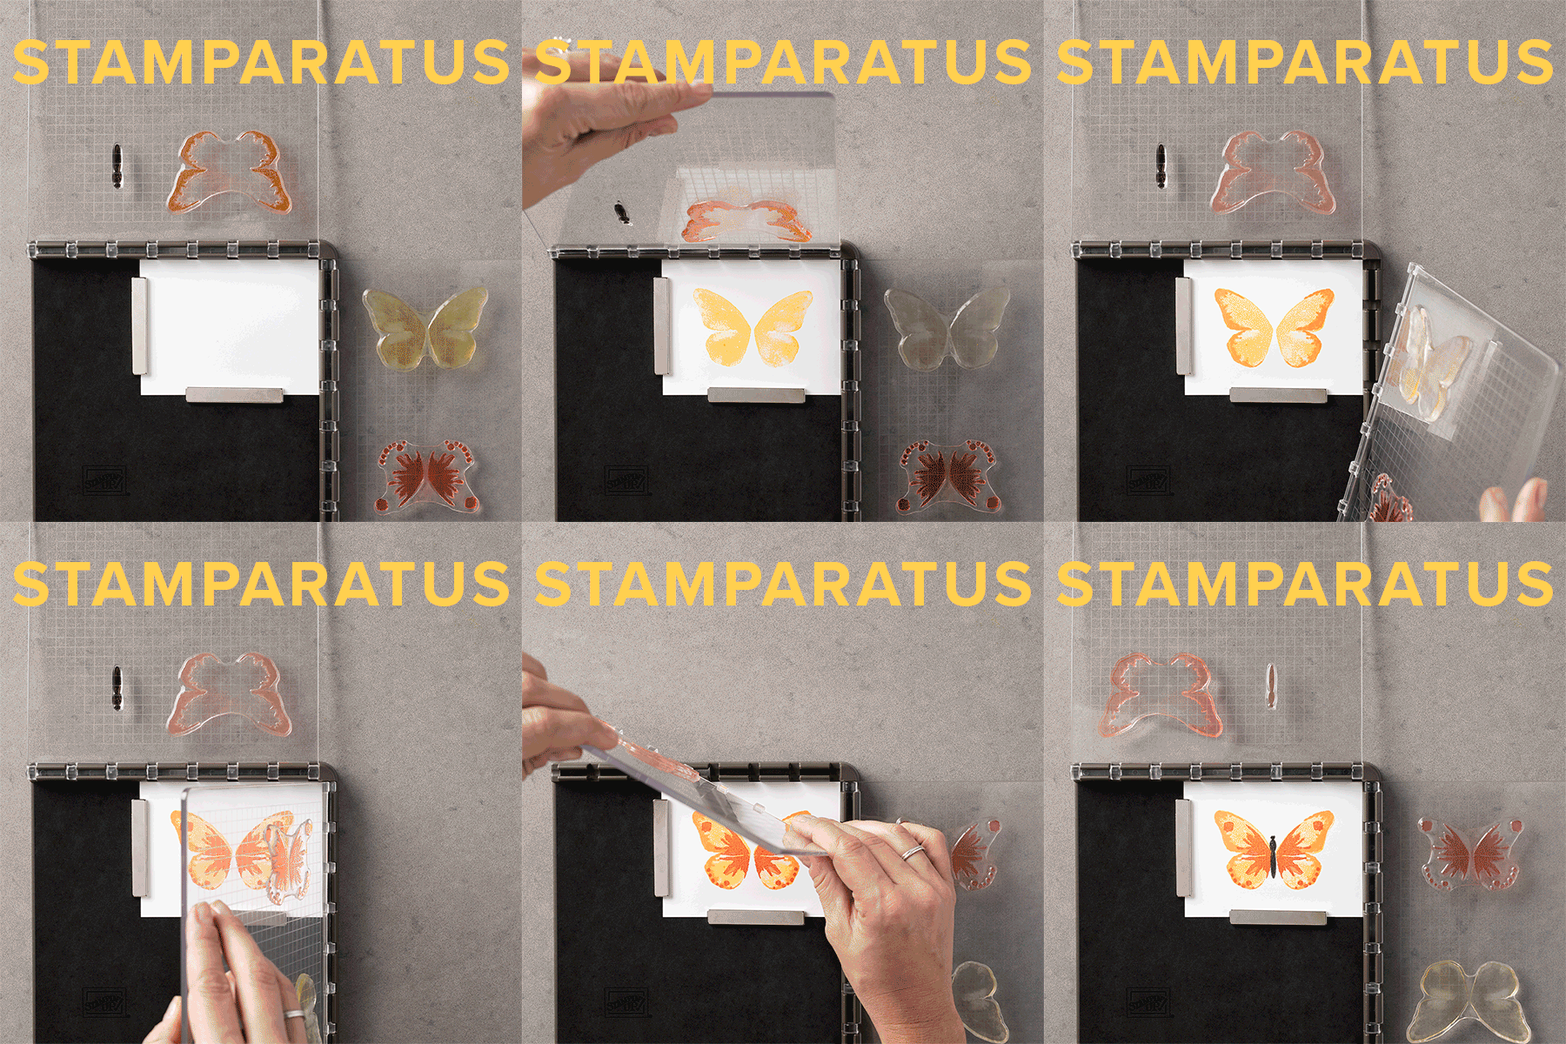
This year I have it and am using it with almost every card!  I’m making several different designs and maybe ten cards of each design. So many fun cards out there to make! I can stamp the inside message over and over again and have it perfect every time once the stamp is centered and lined up just right.  If the image doesn’t stamp perfectly, as long as I don’t move anything, I can ink up the stamp again and re-stamp. This has come in handy over and over.

Stamparatus Inside Greeting

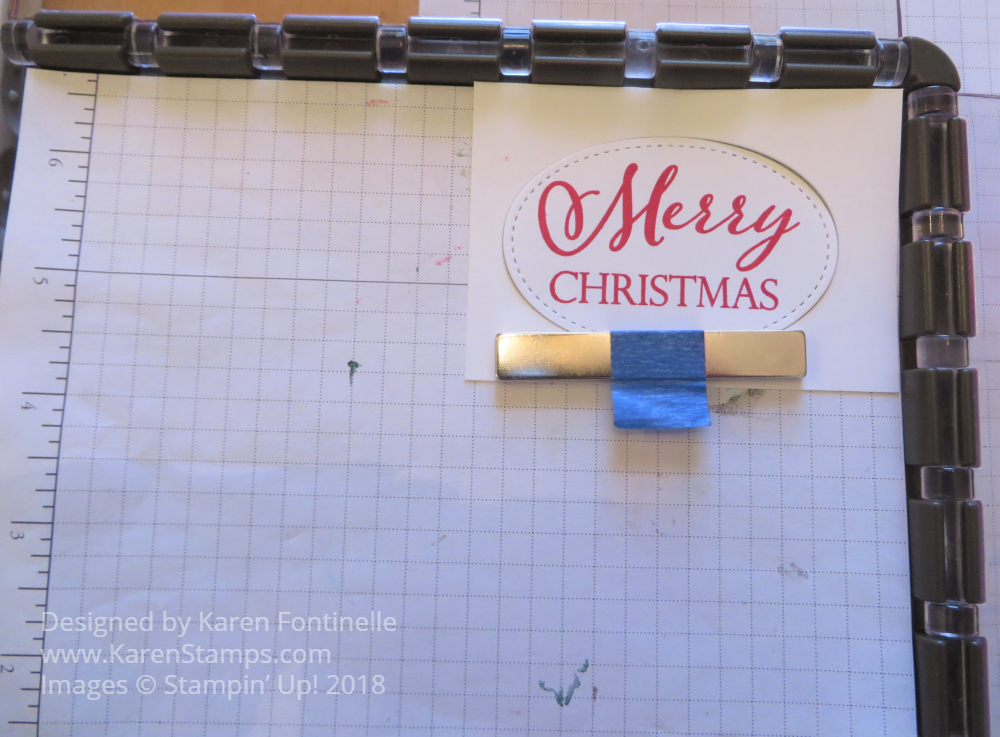
The Stamparatus also came in handy stamping die cuts. Make the die cuts you want with the Big Shot, then make one extra to have a template for the Stamparatus.  Place the template in the Stamparatus and then place the die cut in the template and stamp over and over.  No worries you won’t fit the greeting perfectly on the die cut.

Stamparatus Die Cuts

You might not have time to receive the Stamparatus® in time for this Christmas (although there is Expedited Shipping!), but be sure to put it on your order in January during Sale-A-Bration so you can use it all year and especially next Christmas!

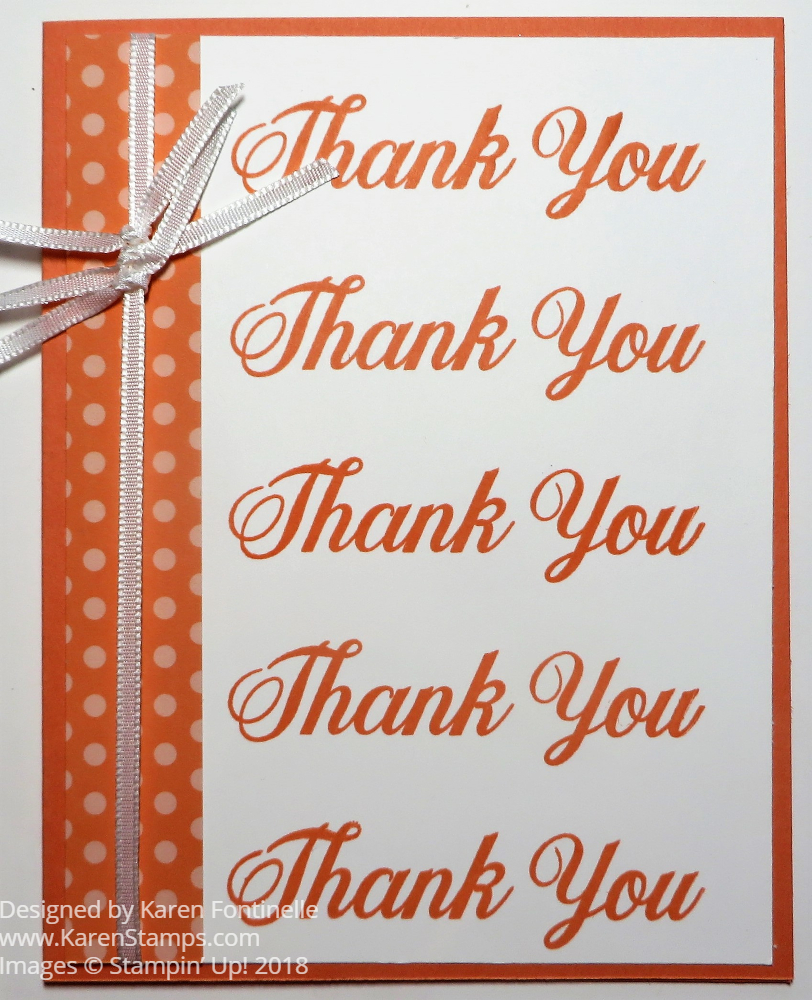
With the two double-sided plates and the hinges, you can have several stamps all set up on the Stamparatus to stamp multiple images on your cards and projects!  Here is a post where I moved the plate down a notch each time and stamped to make a Thank You card.

Stamparatus Thank You Card

Stamparatus GIF

Check out the Clearance Rack!  New items were added yesterday!  Lots of great bargains!

SHOP STAMPIN’ UP!


Snowman Christmas Card

Snowman Christmas Card

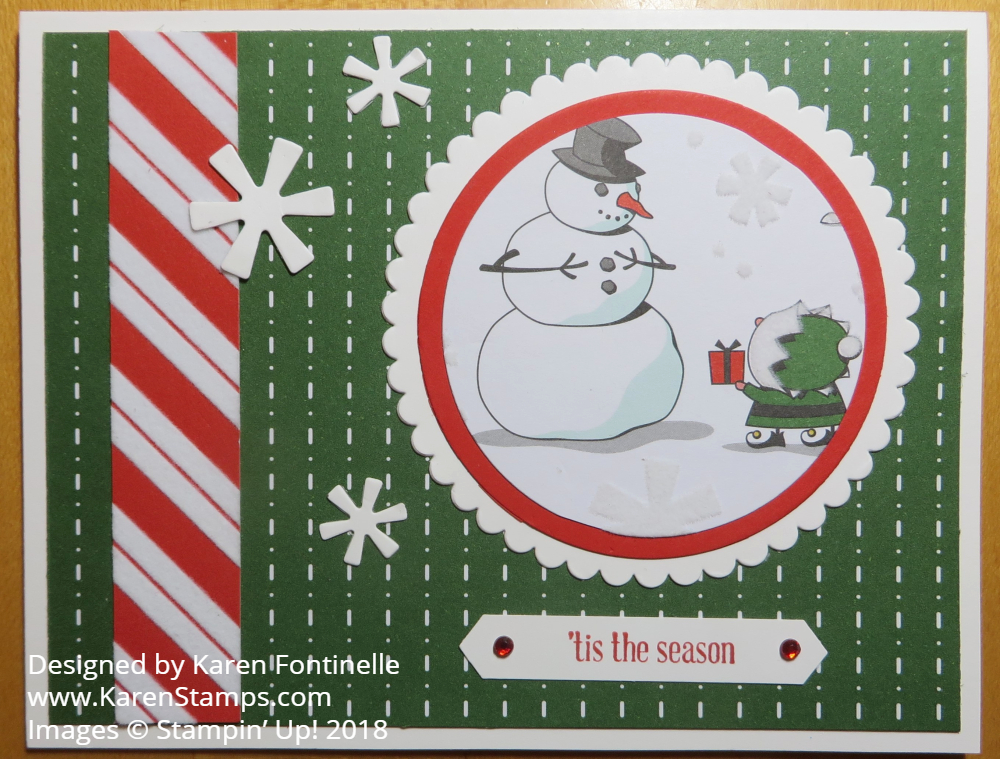
It’s a Christmas card factory at my house this weekend and this Snowman Christmas card is a slight variation of one of my favorite Christmas cards I am making.   Much earlier, I made this card.  The snowman image is die cut from the Santa’s Workshop Specialty Designer Series Paper.  Some of the sheets in this package have flocking on them which you might be able to see in this photograph of the snowflake on the snowman image.  The red and white striped paper strip on the side of the card also has the flocking.  The snowflakes are punched from the Santa’s Signpost Framelits Dies. Unfortunately, these products are no longer available due to their popularity, but maybe you already purchased them or you can use the idea with something else you have!  The greeting is from Itty Bitty Greetings, a must-have stamp set if you ask me.

I’m making 10 cards of each design I choose because there are so many fun ideas!  Actually, I could probably make cards from now until next Christmas from all the ideas I’d love to make! I posted this card because I only had enough of the background paper to make 9 cards!  So instead, I chose this green paper, but I like it pretty well!  Also, the snowman and elf are facing a different direction.

I have to say, I am LOVING having my Stamparatus® this year to make Christmas cards!!  I can set up the stamp on the Stamparatus and stamp a bunch of images one right after the other without any concern of getting the image crooked or not stamped well, etc.  If you don’t own a Stamparatus, put one on your Christmas list and order it in January during Sale-A-Bration!  Then you will all set for next Christmas!

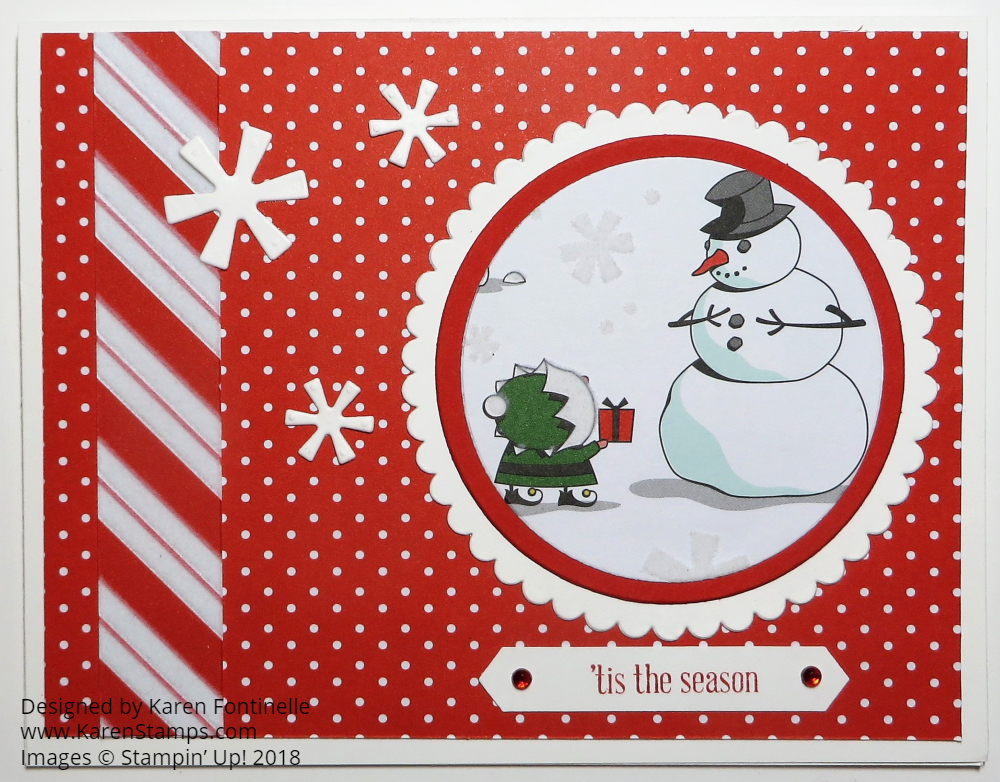
Here is my original card on which I just changed the designer paper.  You can easily make variations of your cards even if you don’t run out of paper!

Santa's Workshop Snowman Christmas Card

Which card do you like best?

Don’t forget about the Stampin’ Up! Year-End Closeout Sale going on now through January 2, 2019.

SHOP STAMPIN’ UP!

Rudolph The Reindeer 2-4-6-8 Gift Bag

Rudolph Reindeer 2-4-6-8 Gift Bag

You must make this Rudolph The Reindeer 2-4-6-8 Gift Bag just for fun!  It wouldn’t take you long to make several of these for favors at everyone’s place setting at Christmas dinner! You could put a few pieces of candy inside or a little gift.

Just use whatever brown cardstock you have. I used Soft Suede, but Crumb Cake would be good too! Cut the paper at 6″ x 8 1/2″.  Then score at 2″, 4″, 6″ and 8″ along the long side.  Turn the paper and score at 2″. Cut each of the flaps and crease on all the score lines.

Your paper will look something like this, although the measurements will be different.  Same idea.

Designer Paper Gift Bag Cut

Before assembling the box, figure out which panel will be the face of the reindeer and decorate with his eyes and shiny nose.  Use the Sprig Punch to punch two antlers for the reindeer.  Just put a tiny bit of glue on the bottom of each sprig and glue inside the bag. The eyes are punched with the 1/2″ Circle Punch in Whisper White Cardstock.  The tiny black pupils are punched with the little oval on the Detailed Trio Punch.  You could also just color in the eyes with a black marker!  The nose is punched with the 3/4″ Circle Punch.  I had some retired Red Glimmer Paper scraps that I used.

Assemble the box using some strong adhesive, like Tear & Tape or Multipurpose Liquid Glue.  If you want the bag to be closed at the top, punch two holes in the top and thread some ribbon through and tie.  I used the Gold 3/8″ Metallic-Edge Ribbon but some red ribbon would be perfect, too!

The idea for the reindeer box came about after I made the little small gift bag on yesterday’s post but I wanted the reindeer to be a little narrower.  Then I remembered the 2-4-6-8 Box, an oldie but goodie!  I knew it would be the right size I was looking for, but you could use any size you like.

If you wanted to leave the top open, more like a treat box, then maybe I would tie a bow with some ribbon and adhere the bow at the bottom on the reindeer.

Check out the Year-End Closeout Sale at Stampin’ Up!

Make a Designer Paper Small Gift Bag

Designer Paper Christmas Gift Bag

It’s almost time to be wrapping gifts and preparing everything for Christmas (that is if you have done your shopping already!) so here is a Small Gift Bag you can make with half a sheet of designer paper.  Put a small gift inside, a gift card, or some candy treats!  Easy to make and a good way to use up that designer paper you are hoarding!  It might save a trip to the store to buy more wrapping paper!

Designer Paper Gift Bag Cut

To begin, cut a 12″ x 12″ piece of designer paper or card stock in half at 12″ x 6″. I used the All Is Bright Designer Series Paper.  You can also make the bag out of cardstock and decorate with a piece of designer paper on the front. Score the paper at  1″, 3 3/4″, 6 1/2″ and 9 1/4″.   Then turn lengthwise and score at 2″.  The 2″ area will be the bottom flaps, so pay attention to the pattern on your paper.  If I had scored this paper at the 2″ mark on the other side, the stockings would be upside down.

Crease all the score lines and cut the flaps as shown.  Rather than just cut straight up on the score lines, I cut a little bit of an angle at each score mark.  It just makes it easier to fold, in certain cases, where the bulk of that score line sometimes interferes with a smooth fold and fit.  Use some strong adhesive on that side flap, like Fast Fuse, Tear & Tape, or Multipurpose Liquid Glue.  Fold in the bottom flaps and adhere.  Stick something down inside the bag from the top, like a Bone Folder or ruler to get the flaps to stick together.

Now depending on what you want to make, you can squeeze in on the sides a little bit to bring the top of the bag together, punch holes in the top, and tie shut with ribbon.  Or use a clip on the top.  If you prefer, leave the top open or even make a lid. It’s very versatile!

For this gift bag, I stamped a greeting from the Sincerely Santa Stamp Set, punched a hole in the top and tied it on the bag with the Whisper White Sheer 1/8″ Ribbon.  I could have made it fancier, layered it on some Real Red Cardstock, or adhered it to the front of the bag, but I liked it fine the way it was.  I did add a Red Rhinestone Jewel to the bottom of the tag. (These Red Rhinestones are discounted right now in the Online Store for the Year-End Closeout Sale!)

Try your hand at making this cute little gift bag or treat holder! It’s fun, easy and cute! Once you do it, you will be able to make them over and over again when you need a small gift bag!


SHOP STAMPIN’ UP! ONLINE!

Simple and Easy Labels To Love Christmas Card

Simple and Easy Labels To Love Christmas Card

Time is getting short and maybe you want to make some simple and basic Christmas cards! This Simple and Easy Labels To Love Christmas Card might fit the bill!  Even if you don’t have the exact paper or stamp, you can use the basic idea with what you have.

The card base is Cherry Cobbler, layered with a piece of designer paper from the All Is Bright collection.  Before adhering the designer paper to the card, I wrapped around some Cherry Cobbler 1/4″ Double-Stitched Ribbon.  The greeting is stamped with the Christmas stamp in the Labels to Love Stamp Set. To make it super simple, just stamp in the Cherry Cobbler ink pad.  Since I wanted green trees on it, I colored in all of the stamp with the Cherry Cobbler Stampin’ Write Marker and the trees in Shaded Spruce.  You could also stamp the whole stamp in Cherry Cobbler and then remove the ink from the trees with a Blender Pen. I cut out the stamped image along the lines so I could layer it on a punched piece of Cherry Cobbler, punched with the Everyday Label Punch.

Since the card base is a dark color, you probably will want to add a piece of Whisper White Cardstock layered inside the card for your stamped or written message.  Maybe add a strip of the same designer paper inside.

Now this card is pretty basic, so if you wanted to jazz it up a bit, you might want to try adding some small punched or die cut gold stars, maybe sequins, or maybe some Red RhinestonesMaybe just a couple rhinestones on the greeting would be enough.  Just play around and see what you think!

If you shrunk this card down, in your mind, you could make a cute tag with the same basic design! Sometimes a tag is just a very small card!

Be sure to shop the Stampin’ Up! Year-End Closeout Sale!

Christmas Paper Roll Candy Holder Favors

Christmas Paper Roll Candy Holder Favors

At Christmas time there are lots of opportunities where you might like to make some candy holders or party favors so here are two ideas for Christmas Paper Roll Candy Holder Favors.  These are simple to make, especially the Santa one, and you can just use your imagination and make them however you like, no particular templates or instructions to follow.

These candy holders are made with a paper towel roll cut in half (sort of!). First I made the elf, copying a candy bar wrapper I made several years ago in THIS POST.  I just wrapped the tube in Old Olive Cardstock, wrapped it in a piece of Real Red at the top with a little triangle cut out to look like short pants, and two strips of the red and white striped flocked paper from the Santa’s Workshop Designer Paper (no longer available).j You can make your own striped elf legs with Whisper White Cardstock and a Real Red Stampin’ Write Marker.  The shoes I just cut by hand out of a small piece of Basic Black.  You could just use a rectangle shape if you wanted to. Then there is a little Old Olive belt around his shorts with a black buckle.

Here is the secret of making buckles, as on both of these favors……. cut a square of the color for the belt buckle and adhere.  Then cut a smaller square of the color of the belt to center on top of the belt buckle square. That way you are not cutting slits and sliding the “belt” through the buckle or anything! Sometimes there is a punch that is suitable for the buckle.

The Santa party favor is even easier.  Just wrap the tube with Real Red Cardstock.  Make some “fur” on his coat.  I used the Decorative Ribbon Border Punch to decorate the edges of the Whisper White strip.  Maybe it is too frilly for Santa?  You could also just tear the edges to look a little furry.  The black buttons are punched with the 1/2″ Circle Punch.  Just wrap around a black belt and make a buckle out of Gold Foil Paper or Gold Glimmer Paper. Add that center Basic Black piece to look like a belt.

Then just add some candy or treat in a cello bag or glue on a little bottom piece of cardstock at the bottom of the tube and fill with candy. Easy and fun Christmas Paper Roll Candy Holder Favors for you to make!

SHOP THE STAMPIN’ UP! YEAR-END CLOSEOUT SALE!

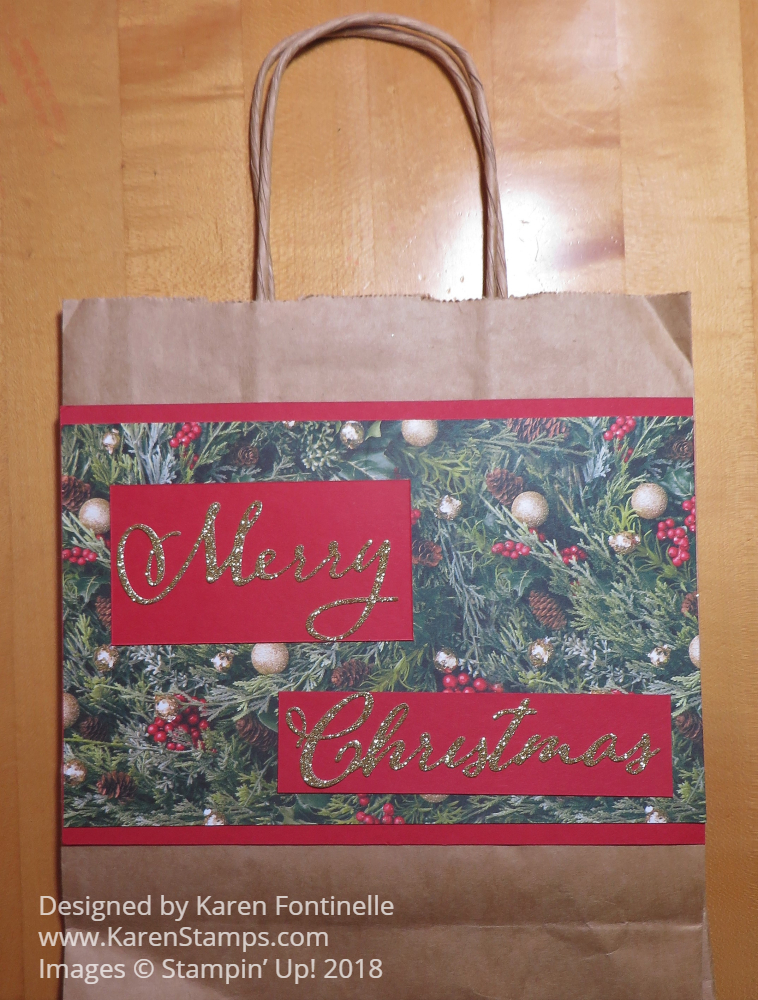
Decorate a Christmas Gift Bag

Decorate a Christmas Gift Bag

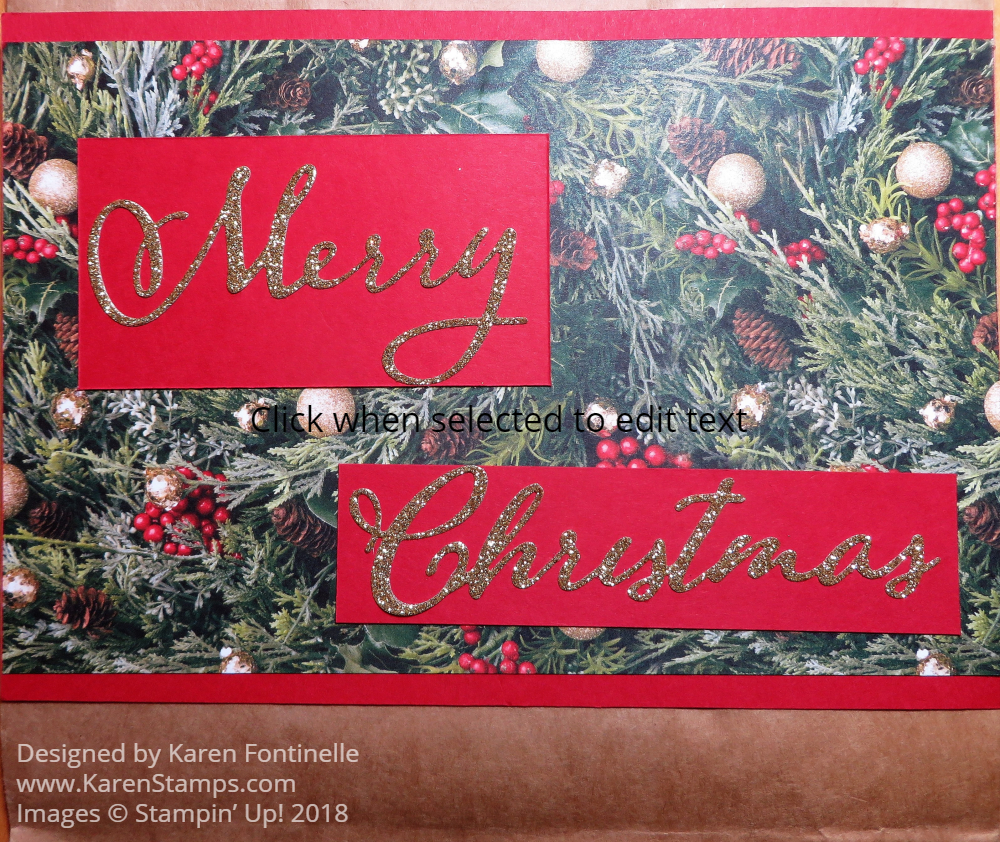
If you have finished your Christmas shopping or at least done a lot of it (I haven’t!), you might be ready to do some Christmas wrapping. (I’m not!) It’s very easy to decorate a Christmas Gift Bag that you just happen to have around the house.  If you don’t have one of the handled kraft gift bags from a store, you can also buy a package of them at a craft store and then you are all set.

It is so simple to decorate and personalize a gift bag for any occasion!  I wonder why stampers just don’t do this all the time for gifts! Often the store bag will have the store logo or name printed on the front.  Don’t let that stop you because you will just cover it up with paper.

For this Christmas gift bag, I chose to use the All Is Bright Designer Series Paper.  Another good choice would be the Dashing Along Designer Series Paper that was brought back by Stampin’ Up! from a previous promotion. Don’t forget, there is also some Christmas paper and stamps in the Annual Catalog such as the Under the Mistletoe Designer Series Paper. I have a layer of Real Red under the designer paper with the greenery.

I die cut the greeting with the Merry Christmas Thinlits Dies using Gold Glimmer Paper.  When I placed the words on the designer paper, they barely showed up with the busy background.  To solve this problem, I layered the words on pieces of Real Red Cardstock and adhered these to the paper.  They don’t take up so much room that you can’t see the designer paper but they do make the words stand out.

That’s all there is to it.  You could also tie a bow around the handle. Make it all as fancy and pretty as you want.

Christmas Gift Bag Closeup

Congratulations if you are farther along with your Christmas shopping than I am and ready to do the gift wrapping!  Take a few minutes to decorate a shopping bag that you have and make your own gift bag!

SHOP STAMPIN’ UP! ONLINE HERE!

SHOP THE STAMPIN’ UP! YEAR-END CLOSEOUT SALE HERE!

All Is Bright Christmas Ornament Card

All Is Bright Christmas Ornament Card

This All Is Bright Christmas Ornament Card actually sends an ornament to the recipient!  Maybe it is just a little paper ornament attached to the front of this card, but you never know!  Someone might be happy to save it and hang it on their tree next year! I remember growing up we knew a couple who were very wealthy and their Christmas card always had something on it that could be saved as an ornament! It was a very expensive card!

My card is not very expensive but I think it does have a rich look to it!  I turned the greeting into an ornament by leaving it unattached from the card and adhering a ribbon to it which is tucked in over the top edge of the card layer. If a person wanted to, they could tear open that top part of the card and remove the ribbon from the back…..or they could simply cut off the ribbon at the top of the card and separate it from the card like that.

The card base is Whisper White cardstock with a layer of Gold Glimmer Paper. If you want to save a bit of the glimmer paper, cut out the center portion, essentially making a frame of gold glimmer to adhere to the Whisper White card base. Just make sure you make it wide enough! Nobody will ever know!  Then I layered on a piece of the All Is Bright Designer Series Paper with the pretty ornaments. On a scrap piece of Whisper White, I stamped the images from the stamp set Making Christmas Bright in Versamark Ink and heat embossed with Gold Embossing Powder using the Heat Tool. This is punched out with the 2″ Circle Punch even though it is a close fit, and then layered on a piece of Gold Glimmer Paper punched out with the 2 1/4″ Circle Punch.  The beautiful ribbon is the Gold 3/8″ Metallic-Edge RibbonThe bow is tied and attached separately and held in place with several Glue Dots.

Take a look at another card I made using this ornament pattern from the All Is Bright DSP.

If you don’t want the “free-swinging” ornament, then just tack it down with some Stampin’ Dimensionals.  See if you can think of another card design that would leave the recipient with an ornament to be saved! It’s time to have fun making these special Christmas cards for friends and loved ones!

SHOP STAMPIN’ UP! ONLINE HERE!


Stampin’ Up! Christmas Decorations: Oldies But Goodies!

Christmas Sampler

As I was decorating our Christmas tree and the house yesterday, I came across several of my past Stampin’ Up! creations from years past. Many of my decorations are handmade ones from all the years before I discovered stamping.

Like many of us who got into stamping, we also did and do lots of other crafts. I have wooden ornaments I painted, glass wine bottles I painted with snowmen, styrofoam ornaments covered with sequins, macrame, counted cross-stitch ornaments and small wall-hangings, Santa dolls, fabric wall-hangings, tons of stuff! Not to mention the ornaments and things my kids made through the years including a nativity made from a paper bag and stickers on popsicle sticks from pre-school!

Above you see my first Christmas sampler (that should be framed but isn’t!). Perhaps one from another holiday is framed and I intended to just change out the samplers for each holiday. People are still making samplers like this, even better, for every holiday and occasion for home decor and gifts.

Glitter Ornament

These decorated ornaments were popular when I became a demonstrator.  It’s just a clear glass ornament with several drops of reinker rolled around inside until the entire inside of the ornament was covered. For an added touch, I dropped some Dazzling Diamonds Glitter inside.  The snowflakes on the outside I believe are rub-ons that we sold at some point.

Frosty Ornament

This was once another very popular way to make an ornament! And it is FROSTY inside!  Anyone who has been around Stampin’ Up! for a while recognizes Frosty!  We could not believe it when they retired the Frosty Stamp Set! It was probably one of the first stamp sets I purchased from Stampin’ Up! For this ornament, we cut a window sheet in a circle with a little tab on top to fit into the ornament hole to hold it in place, stamped on it, then rolled it up small enough to put inside the ornament hole.  Once inside it would open up and relatively stay in place. I added some “snow” and some gold paper strips for decoration.

Paper Star Boxes Kit

These star boxes were from a Stampin’ Up! kit a few years ago, the Many Merry Stars Kit.  The kit made a TON of star boxes.  Some of them open with lids, others are just 3D.  There are several that are VERY large.  These are just three of the boxes. They could be used as gift boxes or as decorations. This post shows some of the boxes.

Stampin' Up! Ornaments Past Kits

These ornaments were made from two different kits.  The blue ornament on the left is made from the Stampin’ Up! Festive Flurry Ornament Kit. Here is a post with a video about the kit.  The ornament on the right is from the Ornamental Elegance Kit.  It graced the cover of the Holiday catalog a few years ago. Here is a post about that kit.

Emellished Christmas Box

Out of many of my Christmas decorations, this box is one of my favorites!  I remember seeing it on display at one of the Stampin’ Up! conventions I attended. It was called the Christmas Keepsake Project Kit.  Shelli and Sara made a video together (or maybe it was a live event,  I don’t remember, that showed how to embellish the box with all the pieces and decorations.  I think it stands the test of time and is still very beautiful. I think I made extras for gifts.

Think about Christmas decorations and decor items you can stamp to have as keepsakes through the years.  It’s always fun to open the Christmas boxes and be reminded of all the memories our ornaments and decorations provide as we decorate for the Christmas holidays!


Making Little Paper Angels

Paper Angels

Somehow I came across a YouTube video that showed how to make these little paper angels, and I couldn’t resist trying them!

The person in the video uses origami paper, which I can see would make things a little easier since it is thin, so I thought I should try designer paper rather than cardstock.  I pulled out some retired designer paper, not knowing if this attempt was going to be a success on the first try or not! But I think it turned out pretty well!  I was not nearly as perfect and precise as the person in the video and there are no measurements in English.  So I had to wing it!

I started with a piece of designer paper that was 5″ x 5″ and cut it in half because the angel is made with two halves glued together.  My first attempt was the white angel on the right.  I scored the length of that paper every 1/4″ and accordion-folded it.  That’s pretty narrow, but it does make the angel look a little fuller in the end.  The green angel is scored at 1/2″.  After accordion-folding you have to fold down a portion to make the angel wings.  That’s really the hard part because the paper is quite bulky then.  But it can be done.

You could use narrow ribbon for this next part of making the angel hanger and gluing the two halves together, but in following the origami video I just cut a very narrow slice of Whisper White cardstock. You will see in the video, but make a loop for the top and then the ends get adhered between the two halves, forming the angel body.  On the first angel, I also made the bow out of a very narrow strip of paper.  On the second I just used ribbon.

After gluing the two halves together, you also add a dab of glue under those wings to attach them to the body. Then you can “fluff” the accordion folds to make the skirt and the wings.  For this size angels, I just punched 4 “faces” with the 1″ Circle Punch.  That loop that forms the hanger can be flattened out down by the angel so you can glue the angel face onto both the front and the back with the loop in between.

Maybe you have made these angels as a child.  They are easy and fun to make and you can make them as fancy or plain as you like!  Just a little something for the holidays to decorate a package or make as an ornament.  Just have some fun trying the angels!

Here is the video I watched to learn how to make them:

Remember, today is the LAST DAY to purchase the Snowflake Showcase stamps, die, and Snowflake Trinkets!