Tag Archives: snowman

Snowman Magic Christmas Card

Snowman Magic Christmas Card

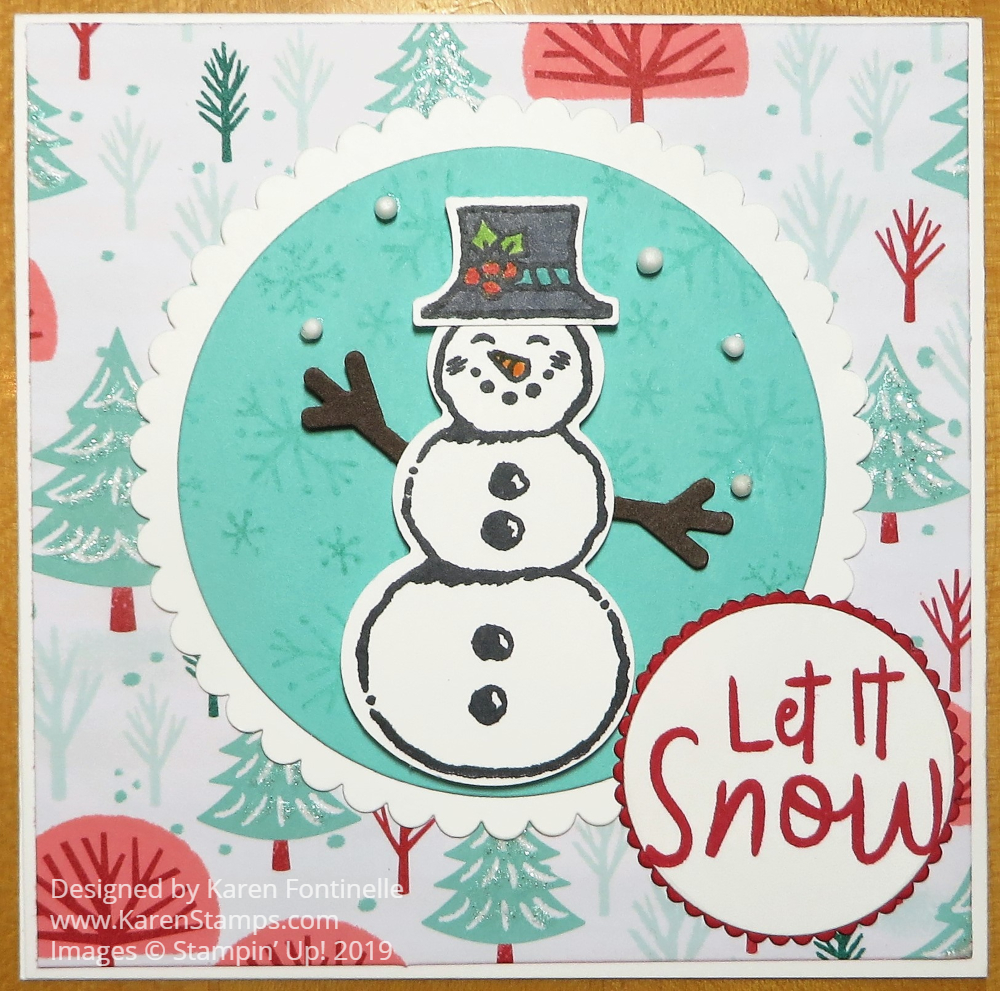
Back in July, I saw a card on the Stampin’ Pretty blog by Mary Fish using the Snowman Magic Bundle and I just loved it! I didn’t even own this Bundle so after a while I order just the Snowman Dies. At any moment, I was going to copy Mary’s card, but it didn’t happen until now! I guess it’s now or never now that it is just a week until Christmas.

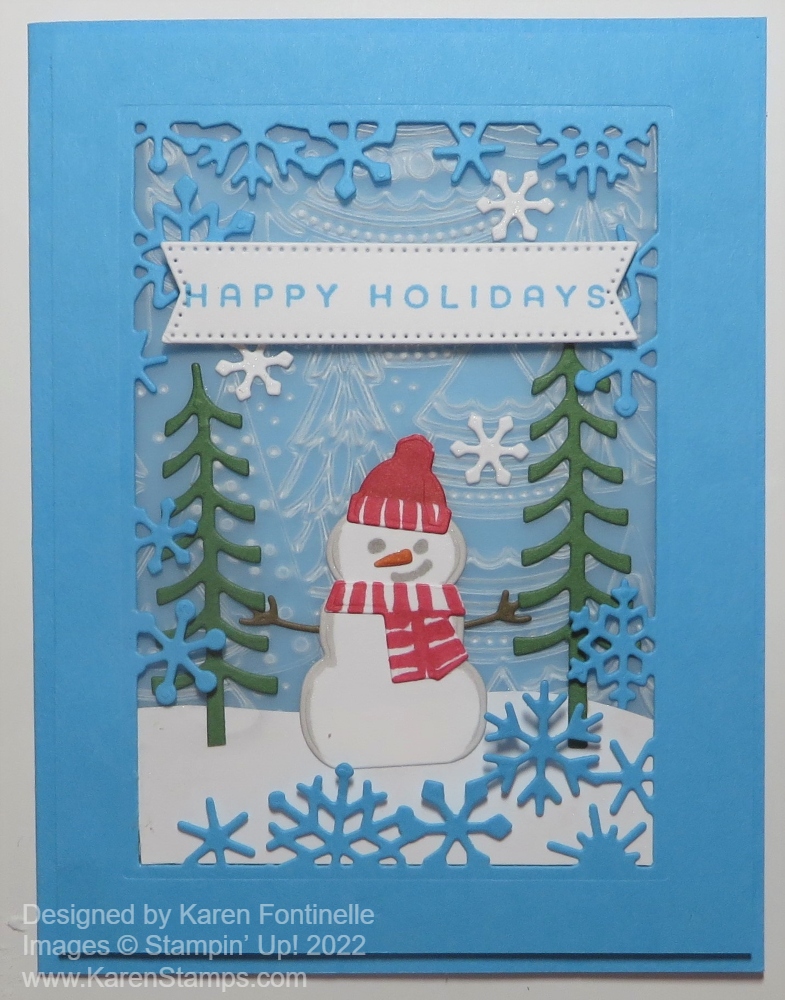
My card isn’t “exactly” like hers because I didn’t buy the stamp set and I used a different background. But it is pretty close! I used Tahitian Tide for this card. It’s one of the “new” In Colors that came out in the Annual Catalog. Such a pretty blue to use with a snow scene!

It has turned cold here in Houston and will get even colder for Christmas so I’m hoping for snow, but I don’t think my wish will come true! It did snow many years ago here on Christmas Eve and we went out and played in the snow a bit on Christmas morning! I even made a tiny snowman that I kept in the freezer for months! It probably wasn’t much bigger than the snowman on this card!

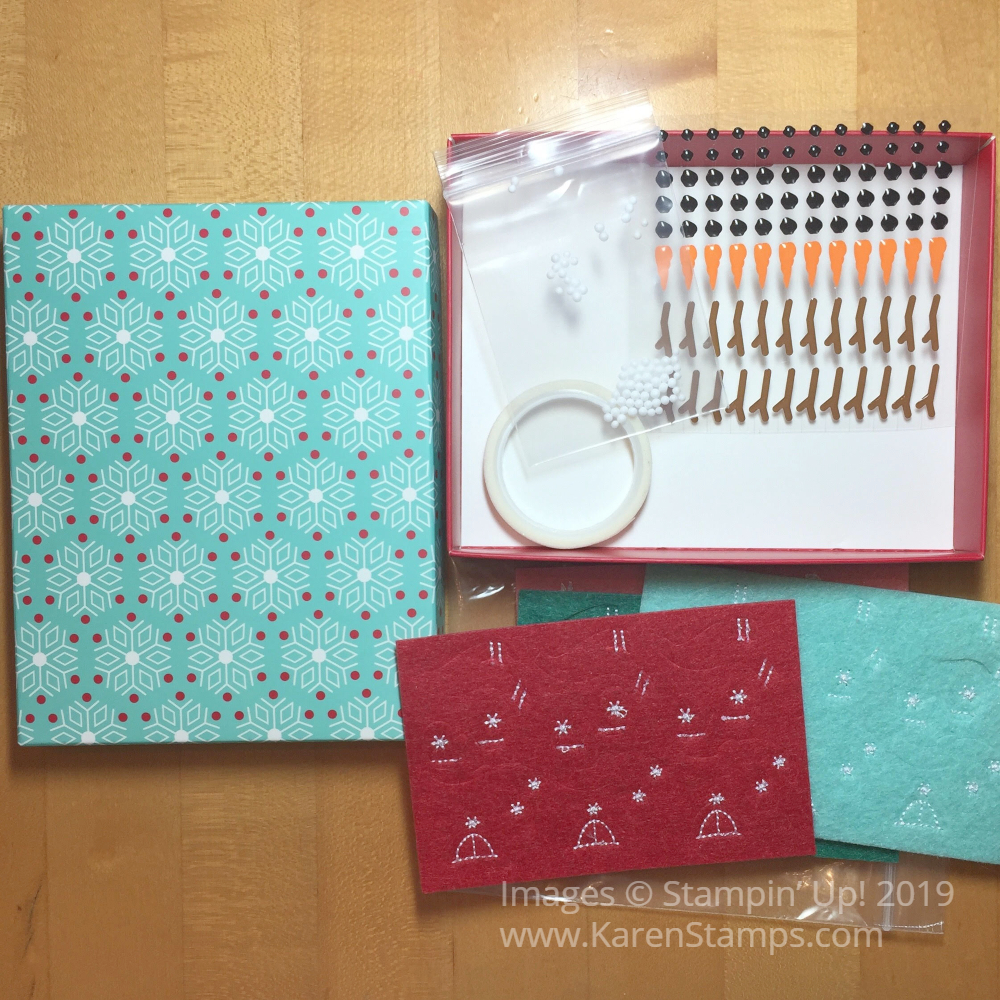
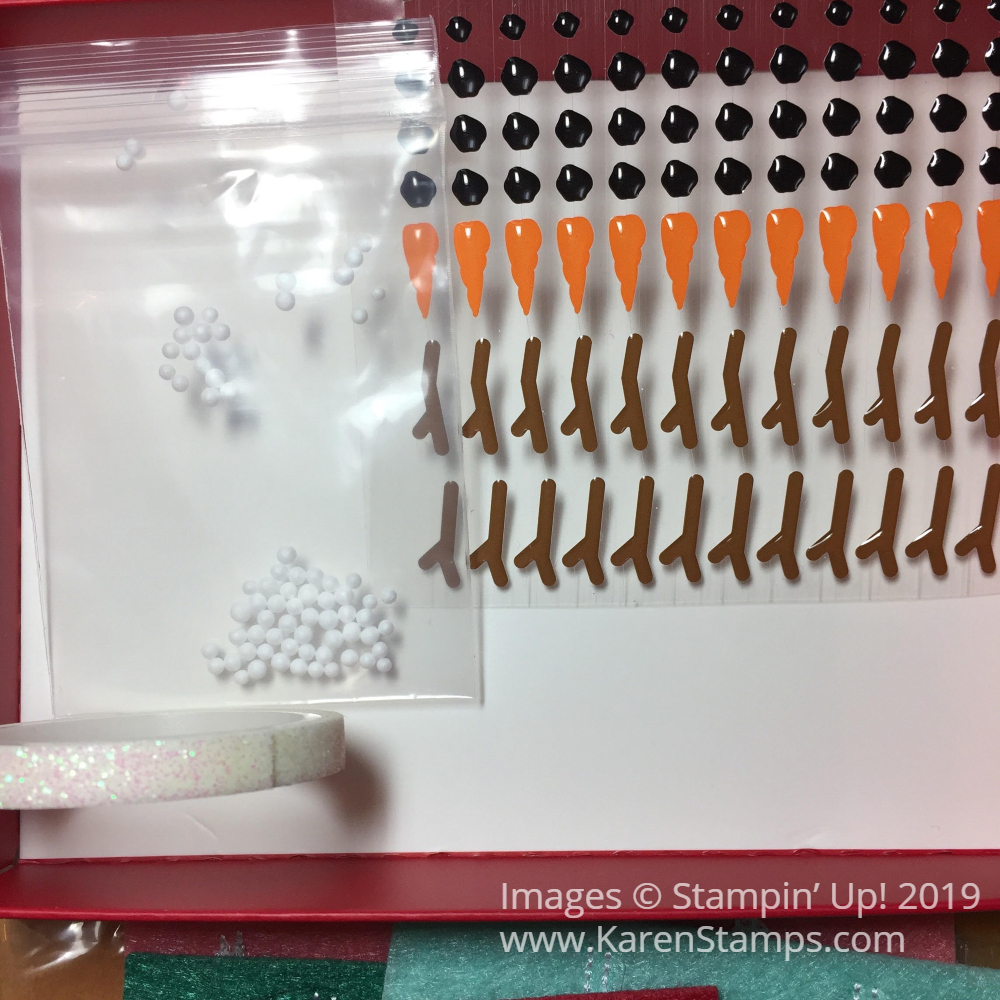
Even without the Snowman Magic Stamp Set, I knew I could use the diecut snowman and make him look okay! I added a bit of the Light Gray Granite Stampin’ Blend on the edges of the snowman plus diecut the scarf and hat and added my own stripes and color with the Dark Real Red Stampin’ Blend. The snowman carrot nose is the smallest thing I have ever seen as a diecut! I just colored it with the Pumpkin Pie Stampin’ Blend and somehow managed to glue it down on the snowman’s face. Then I drew in the eyes and mouth with the Gray Granite marker. The arms are the next smallest things I’ve ever die cut! I had a brown scrap of cardstock handy.

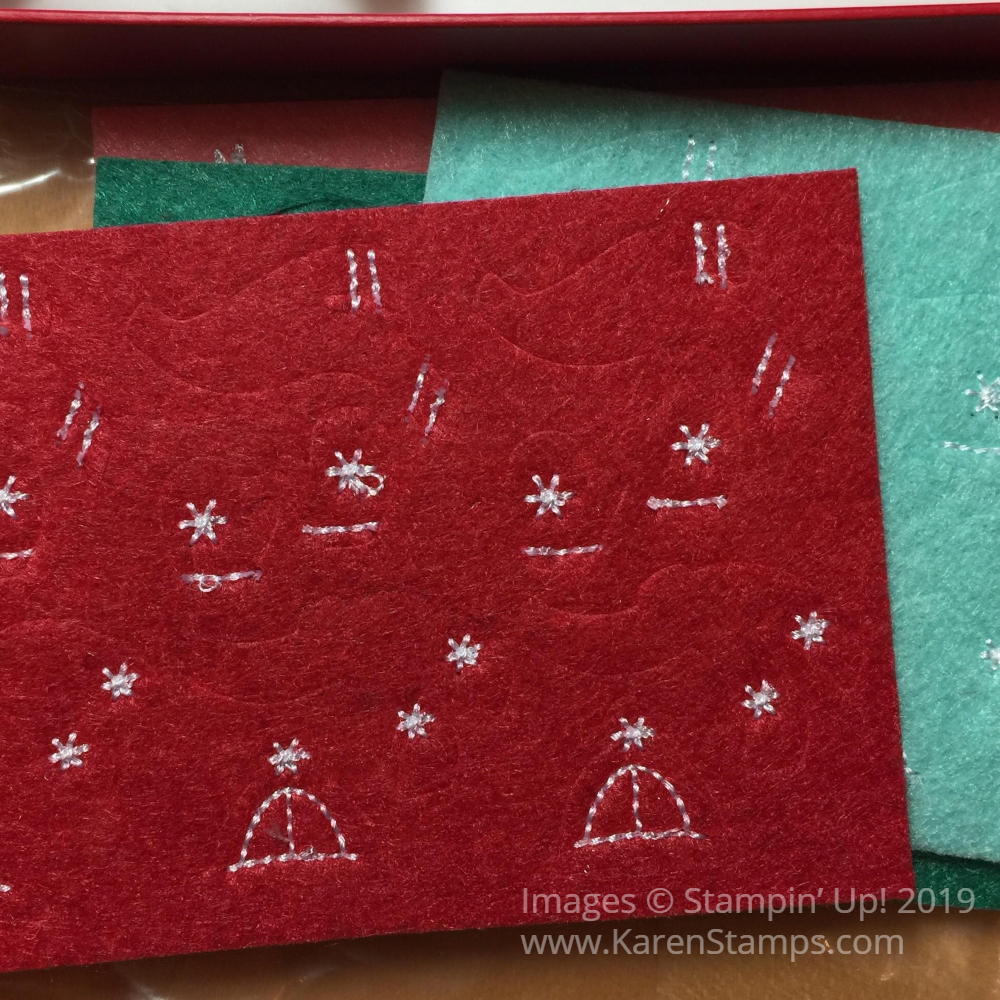
The frame of snowflakes is a diecut that does all that work for you! Before adhering to the card base, I embossed a piece of vellum using the Whimsical Woodland 3D Embossing Folder. You can see the trees in the background. I also diecut the two green trees on each side of the snowman and three white snowflakes that I added.

I adhered the vellum to the back of this frame piece and since the snowflakes aren’t adhered except to the edges, I just cut a piece of snow for the base by hand and slipped it down into the frame. The snowman and trees are adhered flat to the vellum. Just slip them in where you want them. Then adhere the whole thing with Stampin’ Dimensionals to the card base.

The greeting is stamped in Tahitian Tide ink and die cut with a narrow banner shape in the Stylish Shapes Dies. It is popped up on Dimensionals also.

This was a fun card to make, maybe a little too much for multiples, but there are many things you can do creatively with this set of dies!

Snowman Stamped Christmas Card

Snowman Stamped Christmas Card

On this Snowman Stamped Christmas Card, I made my own snowman designer paper! This stamp set is so fun to play with and will make many wonderful Christmas cards for you to send to family and friends.

I love that I am finally using Real Red again on Christmas cards after Real Red got demoted to the Regals color family! I liked it better in the Brights family where it had always been. LOL! But nobody asked me! Anyway, the card base is Real Red Cardstock and instead of designer paper layered on the card, I made my own designer paper! I simply stamped the snowman throwing snowballs up in the air from the Snowman Season Stamp Set in black ink randomly on a layer of Whisper White Cardstock. I think it gives the card a subtle fun feeling!

Next, another snowman is stamped with Memento Ink and then die-cut with one of the Layering Circles Dies and layered on a larger scalloped circle die in the same set. That snowman piece I colored in with Stampin’ Blends Markers. For some embellishment, I used the Multipurpose Liquid Glue and sprinkled on some Ice Stampin’ Glitter. You could also use the Dazzling Diamonds Glitter. This snowman centerpiece is popped up on Stampin’ Dimensionals.

The greeting is stamped on a Real Red banner with a “Merry Christmas” from the Snowman Season Stamp Set also. This card is one that just makes me happy! Sometimes you make a card that gives you that feeling. And, I have to say, it is always a good feeling to repeatedly stamp an image randomly on cardstock. There is something about holding that block and stamp in your hand and stamping over and over! I always like it when I do it!

You CAN stamp a greeting on the inside of the card in black ink and have it show up on the Real Red, but you might want to consider adding a Whisper White inside layer with a greeting stamped and maybe another little coordinating image. For this card, I stamped the other greeting in the Snowman Season set, “Hoping this season builds heartwarming memories” and then stamped the same snowman tossing snowballs in the air down in the corner. I just colored in the orange carrot nose and added a tiny bit of blue as shading on the snowman. The inside of the card looks almost as creative as the outside of the card! You can also stamp the envelope before you send the card with one of the snowmen. How cute would that be?!

Remember to try this technique of stamping an image randomly on a piece of cardstock to make your own designer paper as I did on this Snowman Stamped Christmas Card.

SHOP STAMPIN’ UP! ONLINE!

Snowman Season Punched Snowman Square Christmas Card

Snowman Season Punched Snowman Square Christmas Card

This Snowman Season Punched Snowman Square Christmas Card was made out of a 4″ x 4″ Whisper White card base that I already had. Sometimes it is fun to make a different size card and that’s how this card came about! The main thing was trying out the new Snowman Builder Punch in the Holiday Catalog along with the Snowman Season Stamp Set.

For the background layer on this card, I chose this pattern with trees in the Let It Snow Specialty Designer Series Paper. Some of the colors in this designer paper are Coastal Cabana and Real Red. Real Red has always been one of my favorite colors, probably THE favorite color, but after the recent color rearrangement with Real Red moving to the Regals family instead of Brights, it seemed that it didn’t get much use. So I am very happy to be using Real Red again when using this Let It Snow Paper!

The cute snowman is stamped on Whisper White from the Snowman Season Stamp Set and then punched out with the Snowman Builder Punch. You can use the Whisper White punched out arms and color them brown or black with a marker or you can use scrap cardstock in whatever color you like. I used Early Espresso. The hat was stamped and then punched out. I colored in the hatband, holly leaves, and berries with a marker. I also colored in the snowman nose with Pumpkin Pie. I glued on the hat and arms.

The snowman is adhered to a die-cut circle of Coastal Cabana with Stampin’ Dimensionals® which was first stamped with the snowflakes in the Snowman Season Stamp Set. I inked up the snowflakes, then stamped off once before stamping on the Coastal Cabana so they would be a light background. The Coastal Cabana circle was layered on a Whisper White scalloped circle. All circles are die-cut with the Layering Circles Dies.

There wasn’t much room for a greeting so I did it a little differently by placing it kind of in the corner, layered a little bit over the focal point with the snowman. I think it works okay!

Then for a little fun, I got into the Let It Snow Embellishment Kit, which I discussed in my blog post yesterday. It’s a really cute kit in an adorable box you can reuse that comes with lots of pieces you can use to dress up your snowmen! You’ll find it on page 19 in the Holiday Catalog. I took out five of the teeny tiny snowballs and adhered them to the card with teeny tiny drops of Multipurpose Liquid Glue. So far they are still stuck on! The Take Your Pick Tool is pretty handy to use with these tiny things! the snowman is having fun juggling some snowballs!

Even though this card is sized at 4″ x 4″, I will still mail it in a regular size envelope. Square envelopes cost extra postage and I don’t know if you would find the correct size envelope anyway. It will be fine in one of our beautiful Whisper White Medium Envelopes. These are the best envelopes! You can actually identify a Stampin’ Up! envelope in a batch of mail by feel if someone sends you a card in a Stampin’ Up! envelope!

There are lots of things to make with the Let It Snow Suite, Snowman Season Stamp Set, and Let It Snow Specialty DSP! It’s time to start thinking about Christmas cards like making something like this Snowman Season Punched Snowman Square Christmas Card.

Let It Snow Embellishment Kit

Let It Snow Embellishment Kit Contents Box

If you like cute things, you have to put the Let It Snow Embellishment Kit on your Holiday Catalog order! The catalog goes live September 4, 2019 which is right around the corner!

The box itself is cute, in Coastal Cabana, Real Red, and Whisper White colors. Presentation is everything, as they say! You can reuse the box after you use the contents!

And inside the box, you will ooh and aah when you open the lid!

Let It Snow Embellishment Kit Contents

Just look!!! Darling little enamel pieces every snowman needs – stick arms, a carrot nose, and pieces of coal for buttons and eyes! Just your typical snowman!

Along with the enamel pieces are teeny tiny snowballs!! They are really tiny! I made a card with the snowballs and I used the tiniest drop of Multipurpose Liquid Glue (or if you aren’t sure you are going to get a tiny drop out of the bottle, put a drop or two on scrap paper and then pick up a tiny drop with a toothpick or something to place the glue on your paper where you want the snowball to stick) and then used my Take Your Pick Tool with the sticky putty end to pick up and place the snowball. I will say that they are so tiny they are a little difficult to handle.

There is also a roll of 1/4″ glimmery washi tape. You can use this in many ways. Washi tape is so much fun!

Let It Snow Embellishment Kit Contents Felt

Then there are these die-cut stitched felt pieces that you can use for snowman caps, scarves, and mittens! Use these pieces on your snowmen just by pressing out of the felt piece and using a bit of glue on the back to adhere to your snowmen!

Stamp a snowman with the Snowman Season Stamp Set and add these pieces to dress him up or make your own snowman and decorate with these pieces. No matter what it will be fun to use these pieces in the Let It Snow Embellishment Kit!

It’s only four months until Christmas Day (yikes!) so jump on the Holiday Catalog when it goes live! Check out the Let It Snow Embellishment Kit and see if it is something you want to put on your Wish List so you don’t miss out!

SHOP STAMPIN’ UP!