Category Archives: Cards

A Walk in the Forest Christmas Card

A Walk in the Forest Christmas Card

It’s the first Christmas card of the season! It’s the A Walk in the Forest Christmas Card! One of the perks of being a Stampin’ Up! Demonstrator is getting to preorder new products coming up in the next catalog so that we can become acquainted with the new things and make samples to show our customers. I’m not usually into animals, but there are brown bears and polar bears in this upcoming Holiday Mini Catalog. For some reason, this time I had to have them! The designer paper, anyway!

For this card, I used the new A Walk in the Forest Designer Series Paper (162377), which you will find at the top of page 5. You might miss it even though there are many samples across the two-page spread, but this paper stands alone. It is not part of a suite or bundle or anything. It’s just paper.

However, if you read the Stampin’ Up! Making a Difference box on page 5, you will find that with each purchase of this designer paper, Stampin’ Up! will donate $3 to support organizations dedicated to spreading cheer and providing support to those in need. So with your fun purchase, you will be helping others during this holiday season.

This A Walk in the Forest Designer Series Paper has bears, trees, snowflakes, stripes, evergreen branches and red berries. Some of the images work with the Merriest Trees Dies and some of the bears can be punched with the Beary Cute Punch.

For this card, I decided to use Pecan Pie cardstock although I was tempted to use Real Red or Cherry Cobbler. I decided Pecan Pie would go better with the outdoor, rustic theme of the card. The “other side” of this paper with the trees and the bears, is this Garden Green with tiny little triangle trees all over it. I chose that side of the paper for the layer on the Pecan Pie card base.

The top layer with the tree in the forest was strategically cut out of the designer paper so that I would have that big tree but not part of a bear along the edge. It worked out to cut it a little smaller than a normal layer which was fine because then a larger margin of the green paper would show. The tree layer is 3 1/2″ x 4. Out of another section of the paper, I cut out the brown bear. You can purchase the Beary Cute Punch, on page 67. It is actually part of a Bundle with the Beary Cute Stamp Set. But for this card, I just used my Paper Snips to cut out the bear by hand. I used a LOT of Stampin’ Dimensionals on the back of the bear because I wanted him popped up but sturdy! It was easy enough with my mostly used-up Dimensionals because I cut along the edges and cut itty bitty pieces for on his legs.

The greeting is in the Merriest Trees Stamp Set on page 12 of the Holiday Mini. I stamped it with Garden Green ink on Pecan Pie cardstock. I wasn’t sure if it would show up well enough but it does. It was diecut with a banner in the Stylish Shapes Dies. It just barely fit but I like it. I popped it up on Stampin’ Dimensionals also.

I have to be honest and say it took everything in me to NOT put any rhinestones or jewels or bling of any kind on this card! I really wanted to add some sparkle to the tree, but I also liked the rustic look of the trees and the bear and didn’t want to spoil that.

The Holiday Mini (officially known as the September – December 2023 Mini Catalog) goes live on September 6 for you to order from. It ends on January 3 (which right now we can’t imagine!). Be sure to order your very favorite things as soon as you can so you don’t have to wait for a backorder situation.

If you liked this A Walk in the Forest Christmas Card just know that it is an easy card to make although you couldn’t make a ton of the same card because you need to work with the trees and the bears on the paper. But otherwise, you just have to glue the layers to the card, punch or cut out the bear and add a greeting. That’s it!

Shop the Holiday Mini Sept. 6th!

Embossed Countryside Inn Thank You Card

Embossed Countryside Inn Thank You Card

This Embossed Countryside Inn Thank You Card is an easy one to make! Just let the beautiful pattern of the designer series paper do all the work! Just add a greeting and maybe a bit of ribbon. But there was something extra-special that I don’t think I knew before! The embossing folder matches the paper so you can easily emboss the whole card front!

The card base is Balmy Blue and then there is a layer of this pattern in the Countryside Inn Designer Series Paper. I didn’t know I would like this paper as much as I do! I have used it a lot! If you have the Countryside Blossoms Embossing Folder, which embosses a beautiful design on any cardstock, use this one designer paper in the embossing folder because it matches up!! I had the paper upside down at first and nearly had it matched up but not quite! But I finally got it when I realized I had to turn it the other way! You have to kind of play around with cutting out the piece of designer paper that you want to emboss so that you get the piece that matches and that fit in the folder. But it’s not too difficult. If you look closely at the photo below you may be able to see the embossing of the flowers and little leaves.

Embossed Countryside Inn Thank You Card Closeup

The Countryside Blossoms folder adds a nice texture to the front of the card when you use it with this designer paper. The paper is pretty enough on its own, of course, but if you want a little extra something, emboss it!

Before adhering the paper to the card base, tie a piece of ribbon around it in a bow, if you want. My best choice was this retired 1/4″ Whisper White Crinkled Seam Binding Ribbon because I wanted something to embellish the card but not be really conspicuous.

For the greeting, I stamped this one from the Sending Smiles Stamp Set in Balmy Blue ink. I wanted something small and narrow to fit at the bottom of the card front so using this stamp set and greeting was perfect. Overall, I wanted the designer paper to be the whole focus of the card.

Here is another card using this same pattern of the Countryside Inn Designer Series Paper. You can make so many lovely cards with this pretty paper!

SHOP STAMPIN’ UP! ONLINE HERE!

The Ribbon Mystery: Does Your Ribbon Do This??

Messy Ribbon

Here’s a rather silly post for a Saturday as I recover from celebrating one of those “big” birthdays yesterday. Not that I was celebrating hard, just reading texts, cards, opening a gift, answering a few phone calls, plus two long ones with my boys and one more coming today from my daughter. That was a lot for a person of “this age”!! When you’re young you never really think you will ever be “this old” and actually, I still don’t think I am “this old”! I guess that’s good!

My friend sent me a funny card with two ladies having tea and the card says, “Isn’t it weird being the same age as old people?” It certainly is! And to think of friends and family who are just a few years older than me…..wow, they are REALLY getting old! How has this happened?!

Does your ribbon do this? When I discovered this the other day, I wondered if my ribbon was playing around during the night or something! What has been going on here?! It’s kind of like when you wonder what your socks have been doing, disappearing one at a time, for no reason. My long-time acrylic ribbon holder finally completely fell apart recently and I haven’t found a replacement yet, so my few rolls of current ribbon are just laying on the desk, under all kinds of stuff. A good hiding place I suppose! Even though this white ribbon is retired, it was the best choice for the card I was making so I started pulling it out of the heap of ribbons. Why was so much white and red all unwound? Obviously, some mischief had been going on.

I tried just pulling out the loose ends of the white ribbon to lead me to the actual roll, but I couldn’t get it separated from the red. Finally, I had to just pick up both the red and white rolls of ribbon and take them to my kitchen table. But there still was no easy separating of them! Maybe I had tossed some rolls of ribbon onto my desk and the loose ends had gotten kind of intertwined a bit, but these two ribbons had “tied the knot”!

Messy Ribbon Knot

I can understand that maybe, somehow the ribbons had gotten unwound on the desk, hiding under the Paper Trimmer, Paper Pumpkin boxes, envelopes, and cards I’d already made, but how did the two ribbons get almost tied together into a knot?

It took a minute but I finally got them untied and untangled and rewound. I probably better check and see that the other ribbons are up to under there! Maybe you should check and see what your ribbon is up to in the dark of night! And maybe I need to do some cleaning up and organizing!

Inked Botanicals Easy Scrap Cards

Bet you can’t make just one card using this technique! These Inked Botanicals Easy Scrap Cards are so easy and a great way to use up the strips you probably have cut off from 6″ x 6″ designer paper. I used the Inked Botanicals 6″ x 6″ Designer Series Paper, but certainly, you can use any designer paper you like. When you make a card layer, you primarily use a 4″ wide piece of designer paper, leaving 2″ for scrap. Now you can trim those scraps and use them to make interesting cards with different patterns!

To make these easy cards, cut four pieces of designer paper to layer on the card base. Cut the pieces of designer paper at 1 7/8″ x 2 1/2″. On this card, I used two patterns, placed on diagonally opposite corners of the card base. On the right of the card in the photo above is a leftover 2″ strip of designer paper after cutting a 4″ x 5 1/4″ piece for another card. So it is easy to trim this paper down to the size that fits on the card!

This card has a Lost Lagoon cardstock card base. After adhering the pieces of designer paper, I stamped a greeting from the Irresistible Blooms Stamp Set in Lost Lagoon ink on Very Vanilla cardstock. Then I diecut the greeting and the Calypso Coral layer using the Stylish Shapes Dies. I thought about turning the Calypso Coral layer on a diagonal to make it more interesting, so that’s another fun option. I added some gems from the Tinsel Gems Three-Pack to the greeting.

As I said at the beginning, I bet you can’t make just one of these cards using these little scraps! Think of the number of designer paper scraps we all have and we each could make hundreds of cards! This card also uses the Inked Botanicals Designer Paper, but this time I selected four different patterns. I stamped a greeting again from the Irresistible Blooms Stamp Set on Very Vanilla cardstock using Calypso Coral ink. This was layered on a piece of Calypso Coral, both circles diecut with the Stylish Shapes Dies, the stitched circles. This time I adhered the greeting flat on the card and added some gold Festive Pearls to the card.

Get out your 6″ x 6″ designer series paper packages and see what scraps you have that would make easy work of cards like these! Just have fun!

SHOP STAMPIN’ UP! ONLINE HERE!

Timeless Arrangements Watercolor Birthday Card

Timeless Arrangements Watercolor Birthday Card

This Timeless Arrangements Watercolor Birthday Card is a card you can make for almost any occasion. You can also change up the colors for the season or the occasion. It does require some die-cutting! It’s probably a good idea to cut out extra pieces of the foliage, as long as you are die-cutting, so you have plenty for your project and maybe pieces you can save for another card. You could even save up scraps of cardstock and then do a bunch of die-cutting all at one time in lots of different colors.

This card even has something extra about it! The card base is Petal Pink, but the layer is Fluid 100 Watercolor Paper. You may already have some from previous Stampin’ Up! years. Watercolor paper really holds up better, even to a small amount of water, than Basic White cardstock. If you have the now-retired Shimmery White cardstock, that holds up pretty well to water. To add some color, I just used my Water Painters and some ink. Water Painters are like a small paint brush filled with water. Either put a few drops of reinker on something else, like a clear block or in the lid of the ink pad. Then just pick up some of the ink with as much water as you like from your brush and just “paint” across the watercolor paper, preferably pretty lightly. Use whatever color combinations you like. Let the paper dry or use your Heat Tool to help it along.

Place your diecut stems and foliage on the backside of the greeting. You can use Stampin’ Seal to hold it all in place, then if you want to pop up the greeting you can use Dimensionals. I tied a little bow to adhere to the greeting and added a few Iridescent Rhinestones.

If you didn’t want to do the watercoloring, you could select some designer paper that had more of a solid color background, some even have watercolored looks, so as not to distract from the foliage. Just have fun with it and see what you come up with!

SHOP STAMPIN’ UP! ONLINE! (Use your coupons!)

Zany Zoo Brights Z-Fold Birthday Card

Zany Zoo Brights Z-Fold Birthday Card

Sometimes you have an idea for a card but it doesn’t work out. Instead, something else “calls to you” and you come up with a completely different card than you imagined you would make. In this case, this Brights 6″ x 6″ Designer Series Paper caught my eye and I couldn’t resist! I already had some Poppy Parade cardstock out for my original idea, and I found a Z-Fold card base ready to be used in that package! Poppy Parade is one of the many colors in that designer paper pack so I had my card idea in my head! At least, the basics.

To make a Z-Fold card, you will fold the right half of the front of the card back toward the fold on the left. You’re folding the card front back on itself. Start with a piece of cardstock 5 1/2″ x 8 1/2″. Score at 2 1/8″ and 4 1/4″. Fold and crease in half, then fold at the 2 1/8″ score line so when you view the card from the top it looks like a “Z”.

To decorate the card, I cut a Poppy Parade diagonally striped piece of designer paper at 2″ x 5 3/8″ or you can make the measurements 1/8″ smaller at the width and length if you want more of the cardstock to show in the margins. On the inside, I cut a piece of the heart pattern at 4 1/8″ x 5 3/8″. It’s optional to add designer paper to the inside panel on the left of the card. It would be the same measurements as the striped pattern on the front panel.

For the card’s focal point, I thought it would be fun to use the Zany Zoo Stamp Set to go with the bright colors! I picked this cute little guy holding the balloons for a birthday! He is stamped with Memento Ink on a piece of Basic White that is diecut with one of the Countryside Corners Dies. I hadn’t done any coloring in a little while, so I got out my Stampin’ Blends alcohol markers and colored him in with Light and Dark Pecan Pie Stampin’ Blends and a little gray on his front. The balloons are colored with Poppy Parade, Tahitian Tide, and Parakeet Party Blends. The greeting is in the Zany Zoo Stamp Set and I got it to just fit on the piece!

I thought I would like layers of the colors I used for the balloons so I diecut a piece of Parakeet Party, Tahitian Tide, and Poppy Parade. But I didn’t want to make it all TOO big. I cheated a little and used my Paper Trimmer to try to, as evenly as possible, trim off a little of the Poppy Parade layer so I could use the regular-size die for the Tahitian Tide layer. Otherwise, the Poppy Parade would have been the same size as the Tahitian Tide and then the Tahitian Tide layer would have had to be the next largest die up (which might have been the largest one) and that was going to take up a lot of room on the card front.

When whatever your focal point is on the front of the card, you only want to glue half of it to that folded-back front section. So carefully figure out which side the glue will go on and try to center that part as best you can.

If you want a panel on the inside of the card, over a print as I have on this card, cut a shape the same size as the largest layer on the front so it doesn’t stick out and show when the card is closed. Then lay it face down on the back side of the focal piece, apply glue, and make sure it stays in place lined up with the front of the card, then close the back of the card over to the inside panel gets adhere to the inside of the card but stays hidden behind the front piece. You’ll understand when you do it!

For the inside of my card, I stamped a birthday greeting from the Cheerful Daisies Stamp Set and also some confetti with the stamp in the Zany Zoo Stamp Set in the same colors of ink I had already used on the front of the card – Poppy Parade, Parakeet Party, and Tahitian Tide. On the front of the card, I added some Iridescent Rhinestone Jewels for some sparkle.

Z-Fold cards are easy to make and for sure should be in everyone’s repertoire!

Unfortunately, this Brights 6″ x 6″ paper is backordered until the week of September 25 at this time, but many of you may already own it and of course, you can use whatever designer paper you have for the card that you want to make!

Here is a view of the card when opened.

Zany Zoo Brights Z-Fold Birthday Card open

I hope you will be inspired to try a Z-Fold card. Make it as simple or fancy as you like! Keep checking, maybe this Brights DSP will come back in stock sooner! Don’t forget to use your Bonus Coupons if you earned some in July. Use your Bonus Coupons by August 31.

SHOP STAMPIN’ UP! ONLINE HERE!

Kits Collection Festive Tags Kit!

It’s the new Festive Tags Kit in the Stampin’ Up! Kits Collection that was just added this week! I just love these holiday tag-making kits because we always need more tags when we are wrapping packages! It is good to stock up and have lots of tags on hand! Or, if you prefer, make the tag without the string and add it to the front of a card! Tie a bow on the top with ribbon or twine. What a cute decoration to make an easy card!

In this kit, you get a cute snowman, wreath, holly, ornament, and Christmas tree. The pieces are diecut and you get all the embellishments and twine. There is no stamping! Just put them together, according to the directions and video, or change them up a little bit however you like. You also get sentiment stickers in several languages (English, French, German, and Dutch) so if by chance you want to use something other than English, you will have that choice.

Kit includes:

  • Predesigned projects
  • Step-by-step instructions
  • Precut pieces (No prep work! Get right to crafting)
  • Makes 15 tags: 3 each of 5 designs
  • Size range: 1-1/2″ x 2″–2-1/2″ x 3″ (3.8 x 5.1 cm–2.5 x 7.6 cm)
  • Enough adhesive to complete projects
  • Die cut stickers and accents
  • Peel-and-stick gold dots
  • Baker’s twine
    *A 9-7/8″ x 6-1/2″ x 2-3/4″ (25.1 x 16.5 x 7 cm) printed designer box for storage or crafting on the go

Product colors: Basic Black, Flirty Flamingo, Garden Green, Lost Lagoon, Pool Party, Real Red

Kits by Stampin’ Up! are perfect for new crafters, busy crafters, or crafters who want quick and easy projects. All-inclusive project kits have everything you need in one box! Give as a gift or try them yourself. Kits are while supplies last. Order today! Personally, I ordered TWO kits!

Kits Collection Festive Tags Kit

BUY THIS KIT HERE!

(And it’s on sale!)

Textured Floral Petal Pink Thinking of You Card

Textured Floral Petal Pink Thinking of You Card

After making a project for my Stamping With Karen newsletter I sent out today (are you on my Mailing List? If not, sign up in the red box!), I got the idea to make this Textured Floral Petal Pink Thinking of You Card. Specifically, I got the idea to stamp the little flower randomly to make a background layer for a card! The rest followed.

I was in a Petal Pink mood and didn’t know if this would turn out to be a monochromatic card or not, but it didn’t. It is all Petal Pink, though, except for the leaves. I even used a new product I just got.

The card base is Petal Pink with a Basic White layer stamped with the smallest flower in the Textured Floral Stamp Set. These stamps in this set have that “Distinktive” texture to them that produces various shades in the image just by stamping one time. I like the look, especially on these little flowers for some reason!

After stamping that background, randomly, I stamped the large flower in Petal Pink and diecut with the Textured Floral Dies. You can purchase both the stamp set and dies in the Textured Floral Bundle and save 10%. The leaves were stamped in Granny Apple Green ink and diecut.

As I played around with placing the flower and leaves and thinking about a greeting, I thought the flower needed something to help it stand out better as the focal point of the card. I cut a strip of Petal Pink cardstock 1 1/2″ wide by 5 1/4″ long to go across the card behind the flower. I felt it still needed something and I thought of the Vellum Basics Specialty Designer Series Paper which has three different patterns, two sheets each. Vellum always adds a softness to the look when it is used. The one I chose has polka dots and I diecut a stitched circle, the largest one, in the Stylish Shapes Dies. Once I put that behind the flower and leaves, I was satisfied.

After the Petal Pink strip was adhered across the card, I adhered the vellum circle, only putting Stampin’ Seal in the center of the vellum where I knew it would be covered by the flower. We usually try to hide adhesive when we use it on vellum because it shows through the vellum. The flower is poped up with Stampin’ Dimensionals and the leaves are adhered with Multipurpose Liquid Glue flat on the vellum. Then I stuck in a couple of leafy sprigs that were diecut out of two green colors of cardstock behind the flower.

For the greeting, I stamped one in the Layering Leaves Stamp Set with Petal Pink ink on Basic White cardstock and then diecut it using a label in the Timeless Arrangements Dies. Luckily it fit on the card, just barely, because I didn’t plan the greeting before I finished making the rest of the card! For a finishing touch, I spotted a diecut flower on the table, so I popped it up right below the greeting and I really liked that!

As I’ve said before, I am really liking this Textured Floral Bundle for making pretty floral cards! Check out this card I posted on my blog the other day. These stamps are also great for making quick and easy stamped notecards as I posted in my newsletter today. If you order the Bundle, order the Note Cards & Envelopes, in Basic White or Very Vanilla, also because you never know when you might want to write a quick note.

SHOP STAMPIN’ UP! ONLINE HERE!

Check out the Kits Collection Sale, too!

Hello Ladybug Thank You Card

Hello Ladybug Thank You Card

This Hello Ladybug Thank You Card is a little of the old mixed with the new! For some reason, this Hello, Ladybug Stamp Set caught my eye! Sometimes when you think you have no ideas or no inspiration, something will jump out at you. I hadn’t used this set in so long that I forgot that it coordinates with the Ladybug Punch! I was looking for the dies!

The card base is Granny Apple Green to match the Brights 6″ x 6″ Designer Series Paper I chose to use. At this time, that designer paper is unavailable until the week of September 25! Sorry!

Since there was black on the ladybug, I thought maybe a layer of Basic Black cardstock would look good. The black is cut at the usual layer size of 4″ x 5 1/4″. Then I thought maybe some Daffodil Delight would look good so I used the largest scalloped rectangle in the Scalloped Contours Dies. To fit the designer paper inside, I just measured the inside area and used the Paper Trimmer to cut a rectangle of designer paper.

The ladybug in the Hello, Ladybug Stamp Set is stamped with a black body and Real Red for the wings. You can either stamp the dots or simply color them in with a marker. Then use the Ladybug Builder Punch to punch out those pieces. The big leaf is also in the stamp set. It is stamped in Granny Apple Green ink and I just cut it out by hand with Paper Snips. No dies!

When this set came out last year, we often paired it with the Daisy Punch (retired). So for something new, I used the Cheerful Daisies Bundle. The daisy is stamped and then die cut, plus there are some little green leaves. The daisy and the ladybug are both popped up on Stampin’ Dimensionals, but the large leaf is glued down flat.

I wasn’t sure what greeting I wanted to use. I found this “Thank You” in the Circle Sayings Stamp Set and cut it out with the oval die in the All That Dies.

Sometimes it’s good to look through ALL your current stamp sets and find one you haven’t used in a while before it retires! This Hello Ladybug Bundle is a great one to use for summertime cards and to make this Hello Ladybug Thank You Card.

Today is the LAST DAY to earn a Bonus Coupon with every $50 purchase at Stampin’ Up! (before tax and shipping, of course!). You will get an email with your coupon code and you can spend your $5 coupon (and hopefully more coupons!) in August!

SHOP STAMPIN’ UP! AND DON’T MISS OUT!

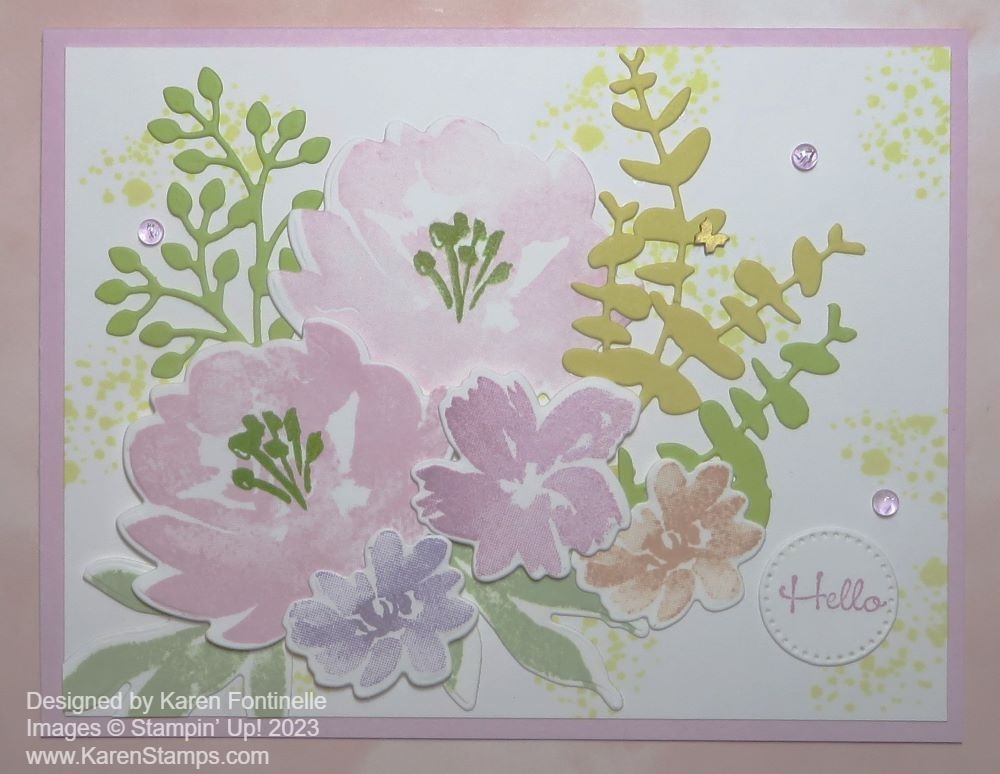
Textured Floral Happy Birthday Card

Textured Floral Happy Birthday Card

I just got this Textured Floral Bundle the other day, and wow, am I happy with this first card I just made! This Textured Floral Happy Birthday Card came together really easily! It reminded me a lot of a stamp set that just retired from the previous annual catalog, but then I saw samples online and couldn’t resist any longer! No matter how many floral stamp sets we have, we still need more!

These stamps have that “Distinktive” style which gives you some texture and makes the image look very artistic. They look good stamped right on the card or you can use the dies to cut them out.

I wanted this card to look bright and summery so I started with a card base of Lemon Lime Twist and a layer of Daffodil Delight cardstock. I stamped the three flowers in Flirty Flamingo, Daffodil Delight, and Highland Heather on a separate piece of Basic White cardstock and then die-cut them with the Textured Floral Dies. One set of leaves was stamped with Garden Green ink on Basic White and the other was stamped on Lemon Lime Twist cardstock with Lemon Lime Twist ink. The stem with the tiny leaves was die-cut from Lemon Lime Twist. I thought it was so pretty I had to use it on this card!

When I first stamped one of the smallest flowers with Highland Heather ink, I thought the flower was so beautiful that I got the idea to stamp those flowers directly on the card and the others would be fine to be diecut and popped up on the card. I think the beautiful Highland Heather flowers really make a pretty backdrop for the other flowers.

After stamping the Highland Heather flowers around where I planned to place the other flowers, I could fill in some empty spaces so it turned out I stamped more purple flowers than I first thought. But I really like them! Then I adhered the Flirty Flamingo large flower with a couple of Stampin’ Dimensionals and then the Daffodil Delight flower off to the side, and finally had to add a diecut purple flower, also popped up. When you know you are going to slip some leaves underneath, be sure not to have too much adhesive right on the edges of the flowers. I used Multipurpose Liquid Glue to adhere all the different leaves and the stem.

The greetings in the Textured Floral Stamp Set were too large for the space I had left, so I used a small “Happy Birthday” stamp in the Go To Greetings Stamp Set. I was going to stamp it on some small label, but took a chance and stamped it directly on the card. If I had messed it up, I still could have covered it with a large stamped greeting label. It’s pretty risky to stamp directly on a card that you have just spent time making!

For a little sparkle, I splattered some Wink of Stella around the front of the card. I could have used Iridescent Rhinestones or sequins instead for a little bling.

On the inside of the card, I did stamp a greeting from the Textured Floral Stamp Set and adhered an extra Highland Heather diecut flower to the corner. Now the card is all set to mail to a friend for her birthday!

Remember, tomorrow is the last day for the Bonus Days at Stampin’ Up! to earn your $5 coupons with every $50 purchase at Stampin’ Up! Then spend your coupons in August!

SHOP STAMPIN’ UP! TODAY!

Inked Botanicals Thank You Card

Inked Botanicals Thank You Card

This Inked Botanicals Thank You Card is one of those super easy cards to make. And that’s okay to make super easy cards! We like the fancy folds and the multi-layered textured cards a lot of times, but this card design is a basic one and you should keep it in mind because you can still make beautiful cards with a basic design.

I just love the colors on this card! The card base is Calypso Coral. The designer paper is the pretty Inked Botanicals 6″ x 6″ Designer Series Paper. This paper is extra-special because it was hand-crafted by the Stampin’ Up! in-house artists. They inked up these florals and pressed them onto paper to create the design. This gives a textured design of all these botanicals, which results in this beautiful paper! Don’t you just love to hear how the artists come up with all these beautiful products?

This Inked Botanicals Paper is 48 sheets, four sheets each of 12 double-sided designs so you will have lots of designs to choose from for your cards and projects!

This card uses two different patterns of the designer paper. There are so many combinations you could choose, all of which would be pretty together. The top paper is cut at 5 1/4″ x 2 3/4″ and the bottom portion is 5 1/4″ x 1 1/2″. When I use two papers like this, I leave some extra room for them to overlap. In this case, the overlap is about 1/4″. The measurements can be modified according to how wide you want each part to be so you can make them whatever works for you.

I usually like to add a ribbon or at least some piece of cardstock covering the seam of where the two papers meet. I think it adds to the design of the card. On this card, I added the beautiful Gold & Vanilla 3/8″ Satin Edged Ribbon around the seam and then I added a separate bow and adhered with Glue Dots.

The greeting is diecut from Very Vanilla cardstock using the label in the Something Fancy Dies. The greeting is stamped in Calypso Coral ink using the Sentimental Park Stamp Set. I love the font they used on some of the words in this set. For a little more embellishment, I added three gold Festive Pearls.

Here’s another card I made with different patterns of the Inked Botanicals Paper.

Don’t overlook this pretty Inked Botanicals 6″ x 6″ Designer Series Paper! You can purchase the whole Inked Botanicals Suite Collection and get the paper, the stamp set, two punches, and ribbon. You will be all set with perfectly coordinated products. Take advantage of the Bonus Days at Stampin’ Up! and earn a $5 coupon for every $50 you spend in July.

SHOP STAMPIN’ UP! ONLINE DURING BONUS DAYS!

Timeless Arrangements Birthday Card

Timeless Arrangements Birthday Card

It was time to play some more with the Timeless Arrangements Dies and out came this Timeless Arrangements Birthday Card. I wanted to make a card with softer and lighter colors mostly than the card I’d first made with this Bundle.

The Timeless Arrangements Stamp Set is a very nice one! There are lots of sentiments. Some you can use alone and many you will want to combine in many different combinations. If you like having lots of sentiments to choose from for your cards, you will want this stamp set. Not to mention a few images of flowers and foliage to stamp. Then there are the Timeless Arrangements Dies to cut out lots of botanical shapes and labels. To save 10%, buy the Bundle of both the stamp set and dies.

This card base is Petal Pink with a layer of Basic White cardstock. For all the diecuts, I just chose an assortment of colors of cardstock scraps, such as Daffodil Delight, Flirty Flamingo, Soft Sea Foam, Lost Lagoon, Pool Party….whatever you like! The greeting is from the Cheerful Daisies Stamp Set and stamped with Flirty Flamingo ink on one of the labels in the Timeless Arrangements Dies. I just used a lot of Stampin’ Seal adhesive on the back of the label and added the die cuts, adding more adhesive as the back of the label got covered up, just trying to make a pleasing combination. Then I used Stampin’ Dimensionals on the back of the label and foliage to pop it up in the middle of the card front.

For something a little different and festive, I splattered a little Wink of Stella around the front of the card before adhering it to the card base. Just tap the brush on the lid so it will splatter randomly around on the card piece. Of course, one blog had to land on the word “brightest” of the greeting! But it is fairly clear, so it’s okay. Then I also took a Light Calypso Coral Stampin’ Blend marker and flicked the brush tip against the inside of the marker cap. You wouldn’t want to do this a lot and ruin the tip of the marker, though! The marker ink and the Wink of Stella are very splattered in very small splatters around on the card so it’s actually barely noticeable.

For a little more sparkle, I added some Pastel Adhesive-Backed Sequins, in pink, blue, and gold. If you don’t want to splatter anything, you can leave that step out and still have a beautiful card. I was just in the mood! Sequins or rhinestones, though, are always a nice final touch!

Remember, Stampin’ Up! Bonus Coupons are continuing for a little over a week so be sure you shop before it ends. With every $50 you spend, you earn a $5 coupon to spend in August.

SHOP STAMPIN’ UP! ONLINE HERE!

Hello Friend Zoo Crew Card

Hello Friend Zoo Crew Card

This Hello Friend Zoo Crew Card turned out pretty cute, I think! I just recently saw a card made like this one and I’ve had fun making a couple. It is very easy to make.

The card base of Pool Party cardstock is cut at 4 1/4″ x 11″. Instead of scoring it in the middle, score each end at 2 3/4″. Crease on those score lines being careful that the two ends line up as perfectly as possible in the middle.

I added a piece of the Zoo Crew Designer Series Paper to each flap to decorate the card. Each one measures 4″ x 2 1/2″.

For the focal point of the card, I diecut a scalloped rectangle using the Scalloped Contours Dies. in Pool Party cardstock. Then I added a rectangle of Basic White cut to fit inside the rectangle. On this piece, I stamped the “hello friend” greeting using matching stamps in the Biggest Wish Stamp Set. Usually, I use one word in block letters and one in script letters, but for this card, I just used both cursive words. The words are stamped with Memento Ink.

Next, I diecut this cute beaver holding the balloons using the Zany Zoo Dies. I colored him with Pecan Pie Light and Dark Stampin’ Blends with a little Crumb Cake on his face and belly. I love using the Stampin’ Blends to color. I just glued him to the greeting using Multipurpose Liquid Glue being careful that anything that wouldn’t be on the rectangle wouldn’t have glue on the back of it. Then I glued on the greeting rectangle, making sure the glue was only applied on the side that would be on the left flap of the card.

For a finishing touch, I adhered three Pastel Adhesive-Backed Sequins in each color to the greeting for a little glimmer. I will add a layer of Basic White cardstock inside the card on which to stamp a greeting or write a personal message, although I could just use the Pool Party since it is a light enough color.

This is basically an easy card to make. You could cut a circle or just a rectangle or square of any size for the focal point of the card if you didn’t have dies to use or a punch.

SHOP STAMPIN’ UP! HERE!

Hello Friend Zoo Crew Card Open

TODAY ONLY! Stamp Sale at Stampin’ Up!

Stamp Sale Banner w Info July 2023

Would you like to save money while you buy stamps?!!

Today is the day! Look through the Stampin’ Up! Annual Catalog and see what stamp sets you haven’t bought yet that you like! There are so many to choose from! Every time I look through the catalog I see something new. Maybe you need more sentiments! Some are funny, some are traditional, some have different fonts or sizes, and some are mostly for certain occasions, like a new baby!

Only the individual stamp sets are on sale, not Bundles. Do the math. It is likely that the Bundle is still cheaper than buying the stamp set separately and then the dies. If the dies or punches aren’t available right now, maybe you want to go ahead and get just the stamps on the sale.

I do not believe the Online Exclusives are on the sale, only the stamp sets actually IN the Annual Catalog are on sale (except the Host sets, which are on page 172.)

Remember, the Bonus Coupons are available to be earned during the sale. With every $50 you spend (before tax and shipping), you will earn a $5 coupon to spend in August. Keep in mind, it will be the total of the stamp sale prices, not the regular prices, that need to add up to $50. Of course, you can order anything you want tomorrow, along with any stamp sets. No limit to how many coupons you can earn!

SHOP THE STAMP SALE TODAY ONLY!

The sale ends at 11:59 PM MT.

Tomorrow, July 19! 24-Hour Stamp Sale!

Find yourself staring at multiple stamp sets from the 2023–2024 Annual Catalog and can’t decide which ones to get? You won’t have to stare for much longer because, on Wednesday, July 19, 2023, you can get those stamp sets you’ve been wanting at a 15% discount! But you will have to act fast because this lightning deal will only last for one day, so make sure you are ready to shop ‘til you drop! This is a deal you don’t want to miss out on.

This sale does not include host stamp sets.

You can still earn the Bonus Coupons during the 24-hour sale, just keep in mind you need a $50 purchase AFTER the discount. For each $50 increment you spend, you receive one $5 coupon to spend in August. No limits! Watch for an email with your coupon code(s) right after you order.

SALES PERIOD:  July 19, 2023, from 12:00 a.m. (midnight) (MT) to 11:59 p.m. (MT) 

  • The sale will run for 24 hours.
  • There is no limit to how many stamp sets may be purchased.
  • The 15% discount will apply to all stamp sets from the 2023–2024 Annual Catalog (excluding host stamp sets).
  • No discount code is necessary—the 15% off discount will be applied automatically.

There will be a special section in the Online Store for the stamps that are on sale.

SHOP STAMPIN’ UP! 24-HOUR STAMP SALE!