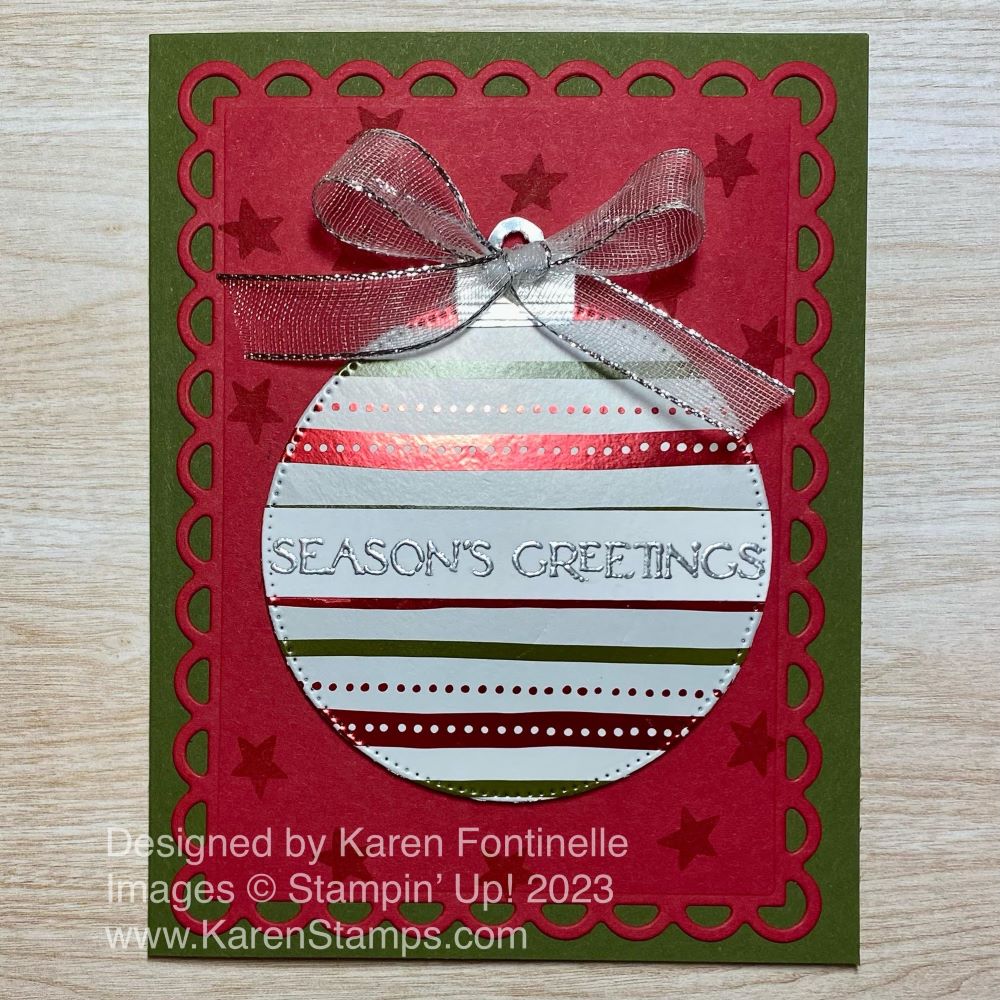
I saw an idea for a card like this online somewhere and thought I would make this Shining Christmas Ornament Card in my own style. The card I saw used some striped paper cut out in a circle to make it look like an ornament on the front of a card.
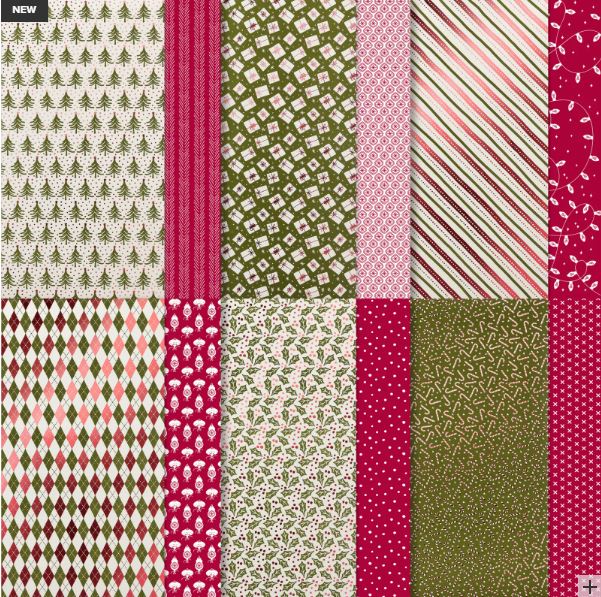
For this Christmas card, I decided to use the Shining Christmas Designer Series Paper, which was on the Online Exclusives in the Stampin’ Up! store. It appears to no longer be available now but there are other papers you can substitute. And if you already purchased it, then you are set to make some shiny cards for the holidays! With any card that we see online, we have the option to copy it exactly or change it up with whatever products we have. Look through your papers (and not just the holiday ones) and see what paper you could substitute for this Shining Christmas paper if you do not have it. Some other striped paper or one with certain prints will work just as well. Maybe you have shiny paper left over from last year.
The coordinating colors for the Shining Christmas DSP are Mossy Meadow and Cherry Cobbler. I pulled out those two cardstock but I thought the card looked too dark. I got out Real Red to see if it would go okay and I liked it just fine. So you don’t have to stick with the coordinating colors of the designer paper!
The card base is Mossy Meadow with a layer of Real Red. I diecut the Real Red with the largest scalloped die in the Scalloped Contours Dies. Even though the ornament would be taking up most of the space, it still needed “something” so I stamped some small stars randomly with the Merry & Bright Stamp Set. I used Real Red ink for that watermark look but you can also use Versamark ink.
For the ornament, I cut out a circle from the Shining Christmas paper using the largest circle in the Stylish Shapes Dies. It has a stitched pattern around the edge but it barely shows on the paper. I liked this striped pattern but there are others I could have chosen. For the top of the ornament, you can diecut a silver foil ornament hanger using the Merry & Bright Dies. Or you can cut one out yourself from foil.
For the greeting, I wondered what would show up best and be the right size. I chose the Season’s Greetings sentiment in the Brightest Glow Stamp Set. I stamped it in Versamark ink on a scrap strip of Basic White and embossed it with silver powder and the Heat Tool. You can find copper, gold, and silver all in the Metallics Embossing Powder package so you are all set with whatever color you need! The greeting seemed to fit perfectly going across the ornament so I just put it through the same stitched circle die in the Stylish Shapes Dies so that the ends would match the ornament. It worked perfectly!
The ornament is popped up with Stampin’ Dimensionals. Then I added a bow made with the Silver & White 1/2″ Sheer Ribbon which I think looks perfect on the card! It embellishes the ornament but doesn’t take away from it because it is sheer and has a silver edge. This ribbon is currently unavailable but is due back in stock next week, the week of November 20.
I hope you are coming along with your Christmas cards and have lots of ideas! But if you need more, just keep in touch!
Remember, tomorrow is the Seasonal Sale at Stampin’ Up! on papers, ribbons, and inks! Check my blog post from the other day for more details or check the Online Store tomorrow, November 14-16th!