Tag Archives: Halloween treat box

Halloween Mini Silver Gable Box

Halloween Mini Silver Gable Box

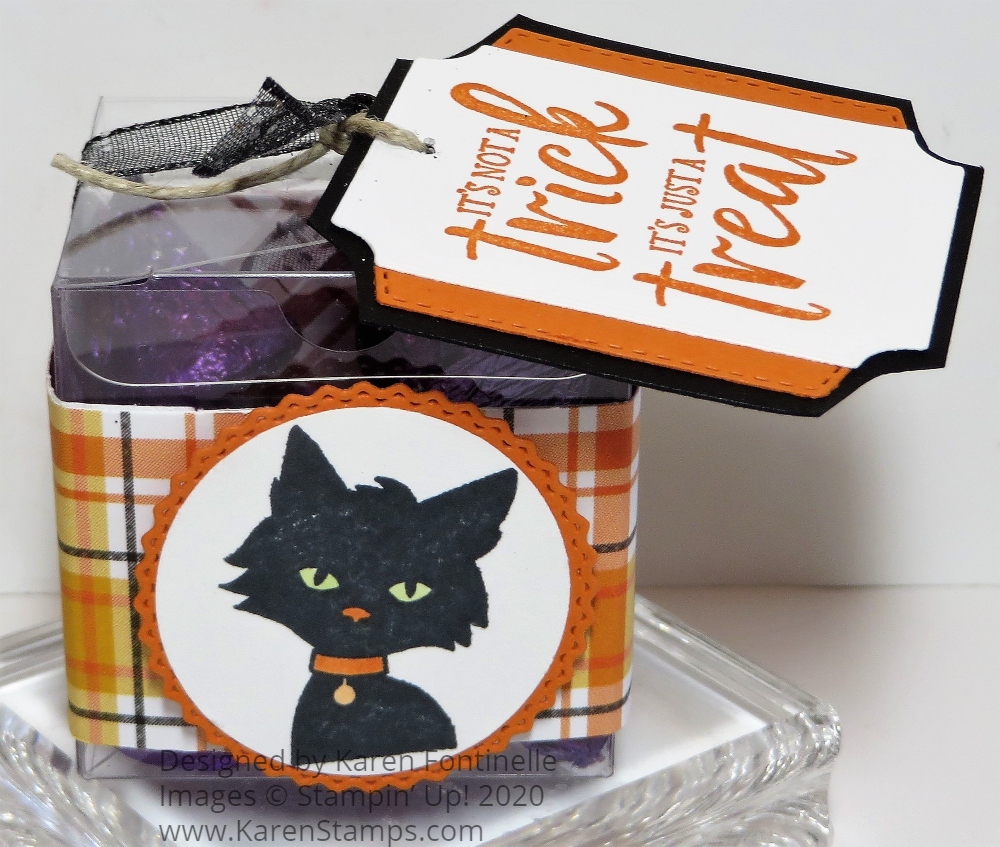
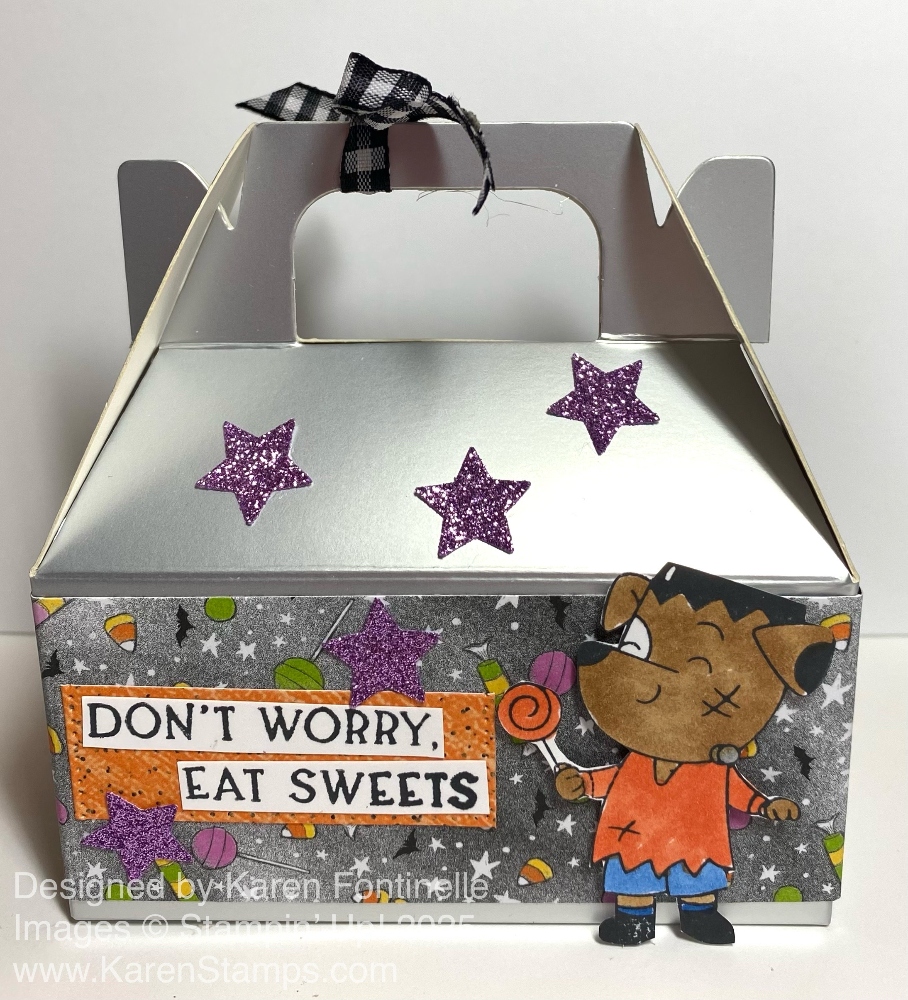
This Halloween Mini Silver Gable Box is a mix of old and new! When you look in your stash, you never know what you might find! I found this package of Mini Silver Gable Boxes and I thought they would make good Halloween treat boxes with the proper decoration. Whether or not you have these exact gable boxes, this shows you how you can transform any small box into a Halloween treat box!

I don’t remember when we had these silver gable boxes. When I first joined Stampin’ Up! there were large gable boxes. My first customer bought some and tried stamping on them, but with the coating on the outside the ink would never dry! It’s better to wrap paper around them!

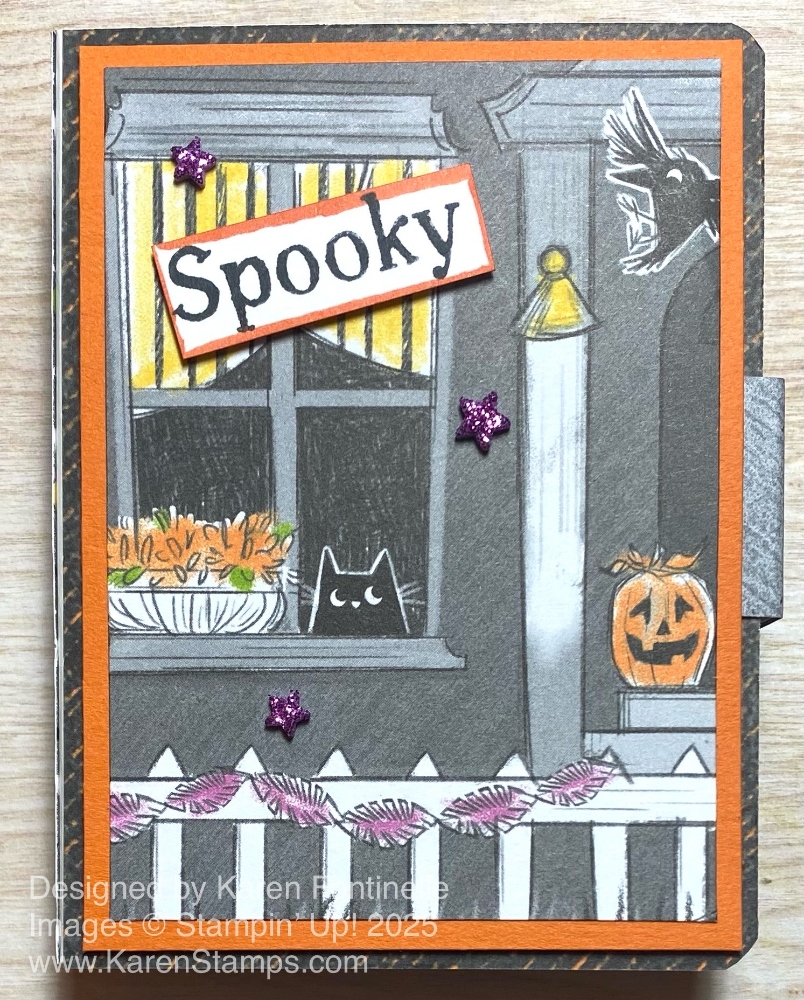
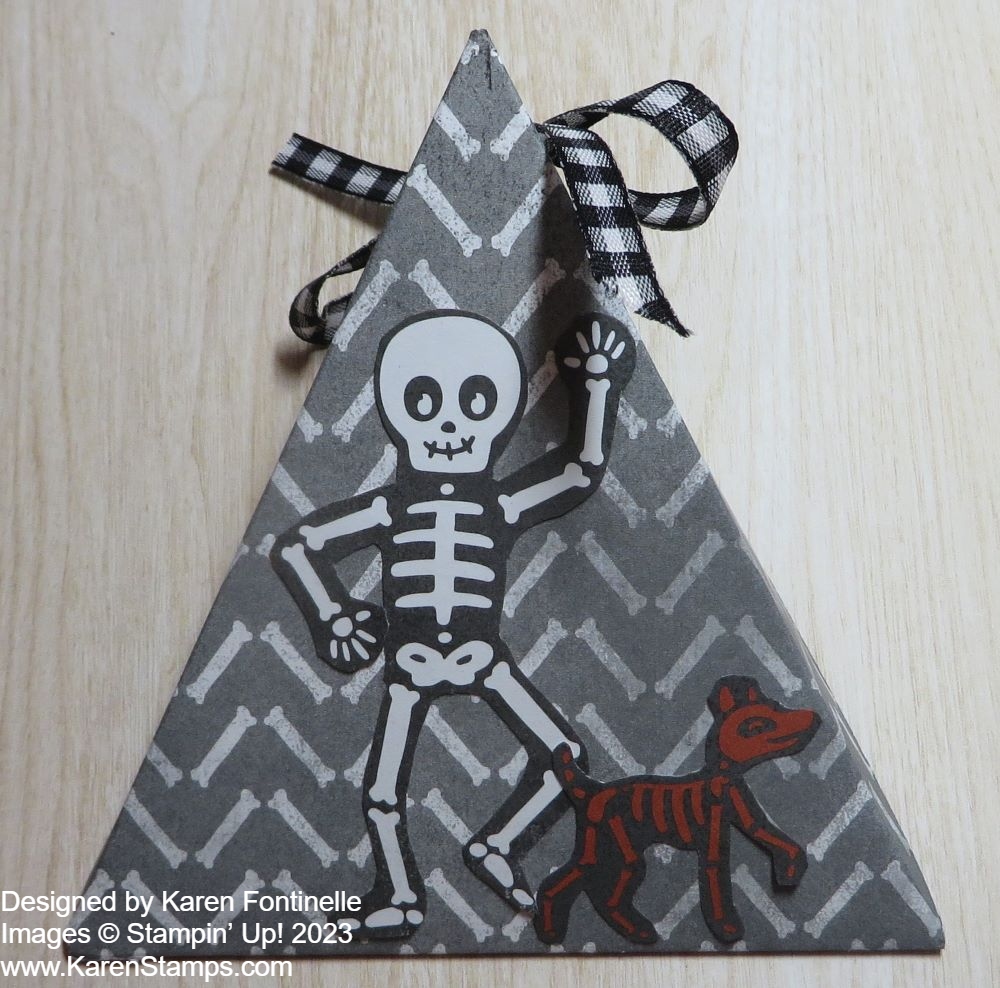
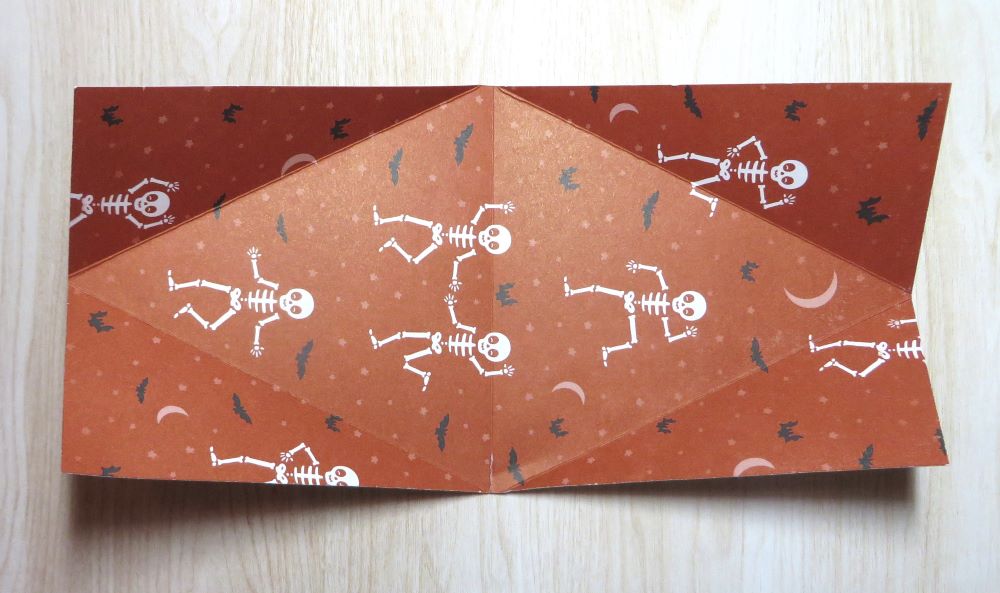
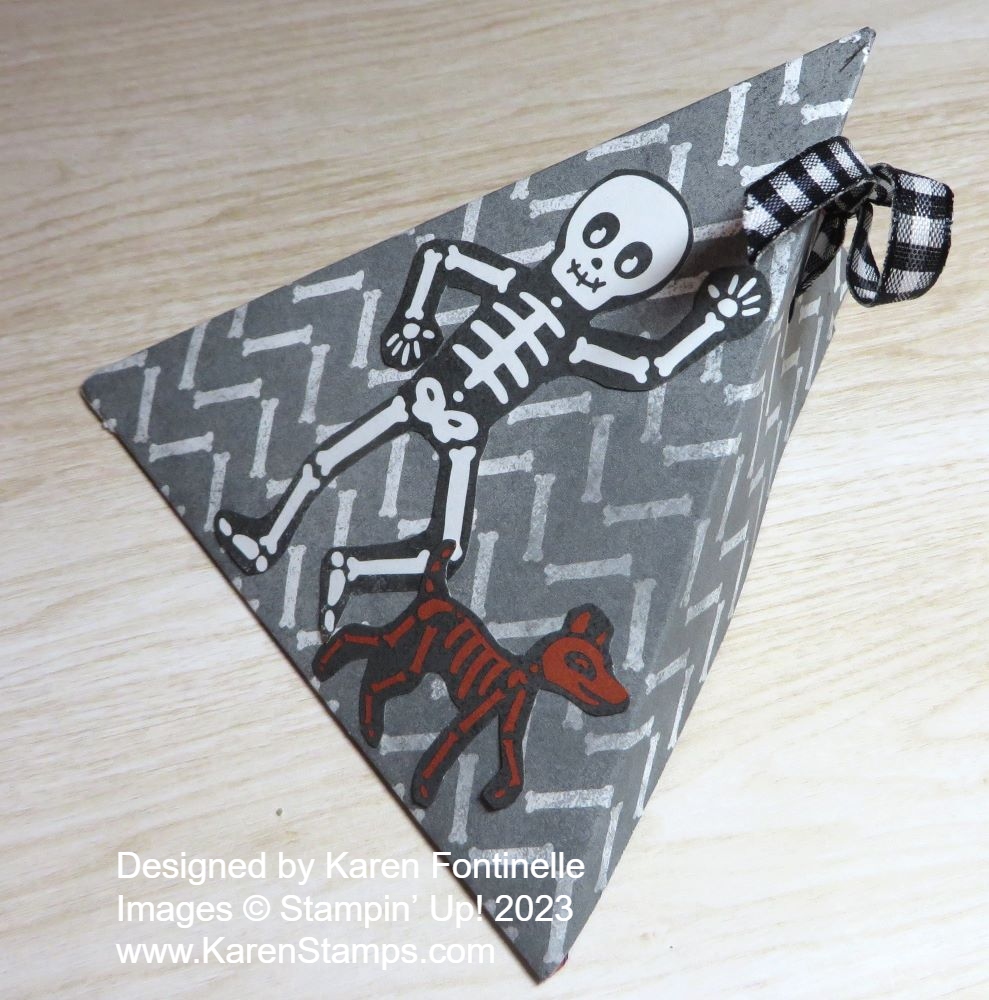
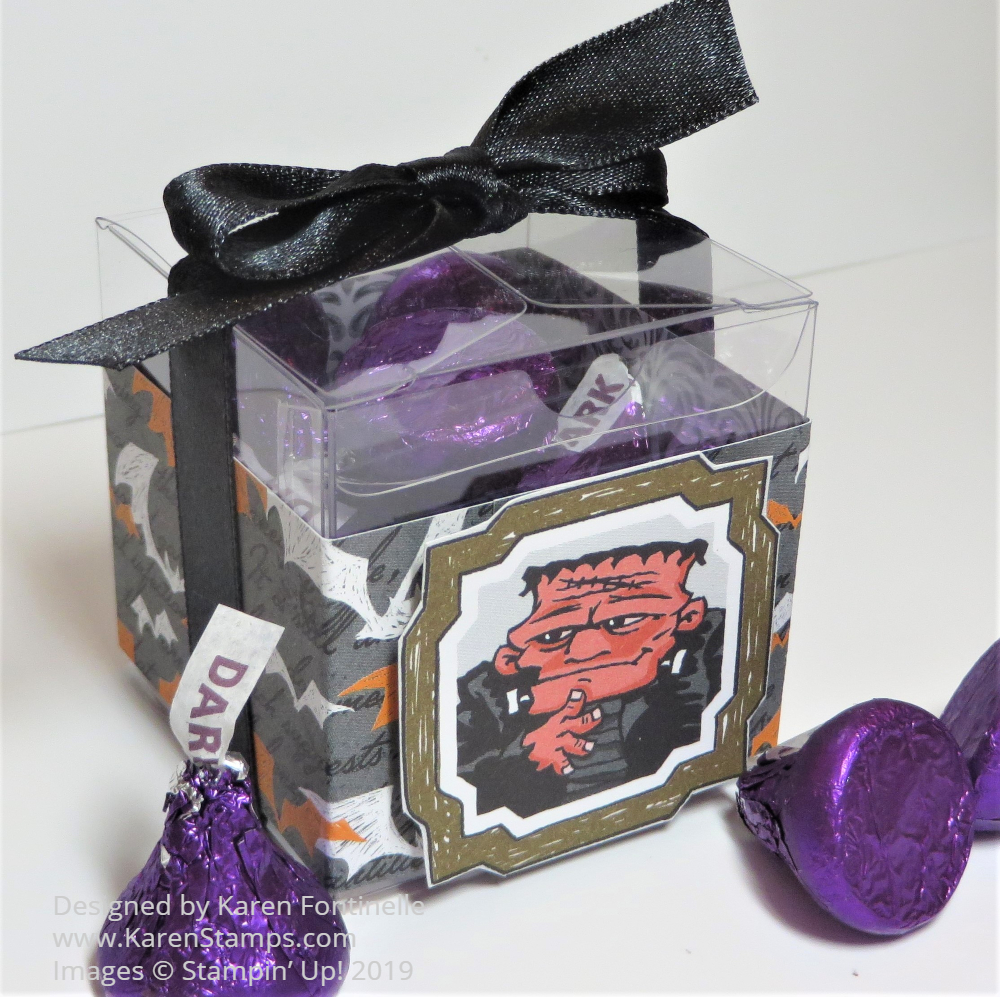
This was super simple to decorate! I looked in my Spooky Sweet Designer Series Paper and saw that this pattern with all the little candies, my favorite pattern in this package, would do with the silver box! I cut two pieces of that paper (out of scraps) to fit around the box and adhered it with Stampin’ Seal. The little Halloween guy is stamped with the Spooky Halloween Stamp Set in Memento ink, colored with Stampin’ Blends alcohol markers, and fussy-cut. He is popped up on Stampin’ Dimensionals on the front of the gable box.

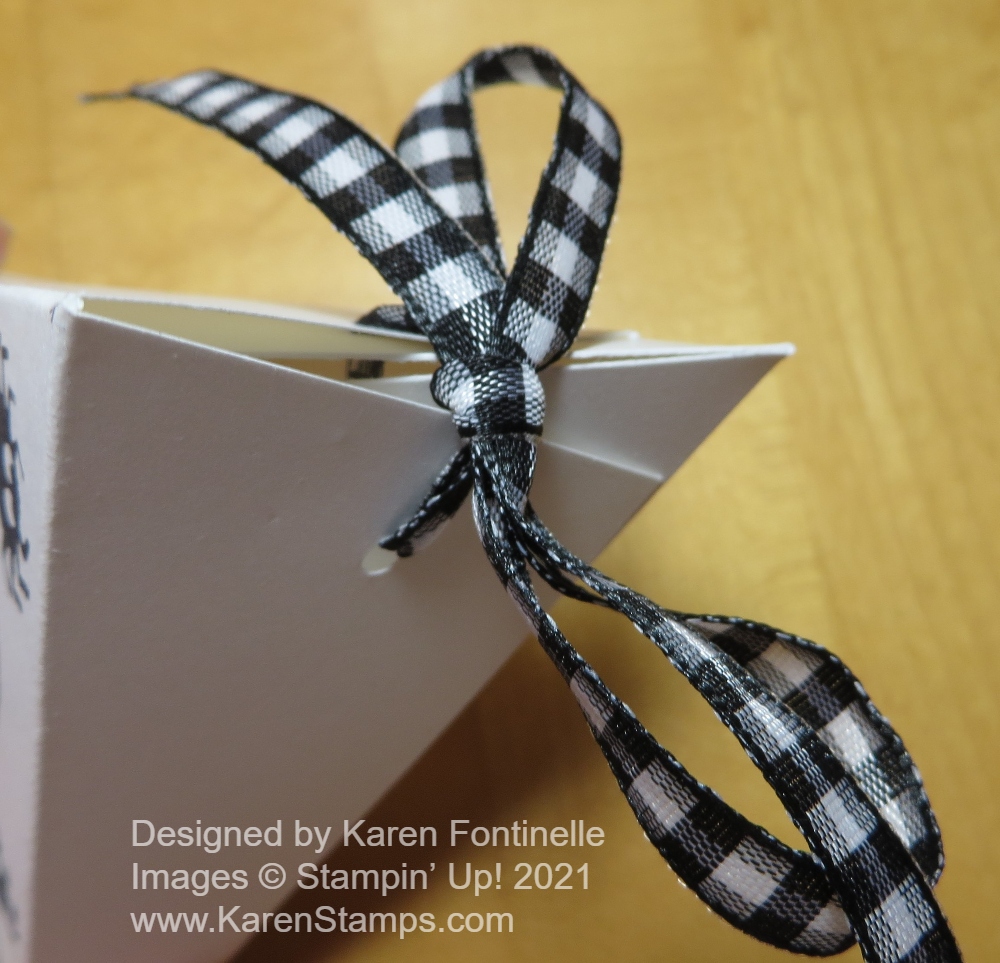
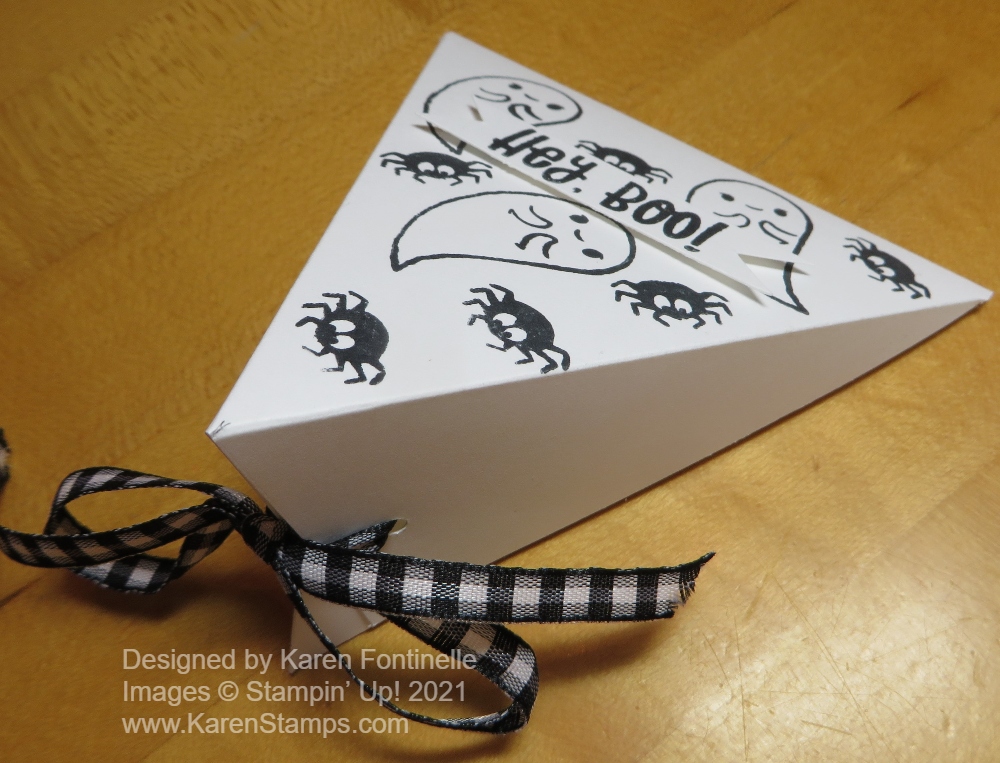
The greeting is stamped from the same Spooky Halloween Stamp Set and cut apart in two strips in order to fit on the box. I used another piece of designer paper in the package for the layer for the greeting. Because I had the small star punch in the A Little Cheer Mini Punch Pack right there on my table, I punched out five stars from the Three Color Glimmer Paper (retired). You could use something else, like gold foil. They are adhered to the box lid and the front panel. With the retired Gingham ribbon, I tied a little bow on the box handle. Cute little box for the trick-or-treaters or just a little Halloween treat for someone in your family, a neighbor, or a friend.

Check your older stash once in a while and see what you have that you can use!

Halloween Spooky Book Treat Box

Halloween Spooky Book Treat Box Inside

I’ve spent a lot of time looking for ideas for Halloween treat box ideas, and at some point I was reminded of the Book Treat Boxes that Stampin’ Up! came out with last year. They weren’t retired and now you will find them in the Stampin’ Up! Online Exclusives. I still had a few left in the package so I decided to try my hand at decorating them for Halloween treat boxes. This Halloween Spooky Book Treat Box is really easy to make! The boxes come already scored so all you have to do is fold and crease. They even come with adhesive on them where you need it to assemble the box inside and the book cover that surrounds the box.

To decorate these boxes, I used the Spooky Sweet Specialty Designer Series Paper. You can just put some simple effort into decorating these boxes or you can do a lot extra, like covering every surface that shows with paper, adding extra embellishments, styling the inside of the box in different ways. It’s all up to you and the occasion.

After folding all the score lines on the two pieces of the Book Treat Box, I adhered pieces of the “generic” sides of a couple of the Halloween papers….for the cover, the book spine, the back side and the three sides that show of the box. The cover and back of the cover is 3″ x 4″. You can trim the little rounded corners with a scissors. The spine of the cover is 1″ x 4″. Don’t adhere the paper to the front of the cover until you think about the closure. The box that goes inside is easy to assemble and has adhesive. You can adhere the designer paper before you assemble it or after or even after you adhere it to the cover. The box is adhered to the back inside cover and adhesive is already provided there. Take your time centering the box exactly how you want it. The sides measure 1″ x about 3 3/8″ and 1″ x 2 3/4″ if you want to cover them.

The only “tricky” part if figuring out how to keep the box closed after you decorate it. I forgot that part on the first box I made for Halloween! There are different ways you can do it. You can wrap a ribbon around, but it might disturb your design on the front. But you can slip the ribbon underneath the paper and tie the closure shut. Or you can pop up the cover with Dimensionals so there is space underneath your cover design to slip the closure tab underneath. Or you can put something popped up on the cover, like a layered circle or something and tuck the tab underneath that.

For this box on the top there is a generic paper covering the cover. Then I trimmed down one of the front porch scenes from the Spooky Halloween paper to layer on a piece of Pumpkin Pie cardstock. This whole piece is popped up on Stampin’ Dimensionals so that I could slide the tab of the closure underneath it. Just mind where you put the Dimensionals so they don’t interfere with the tab fitting underneath and not catching on the sticky Dimensional.

To embellish a little bit, I stamped the word “Spooky” from the Spooky Halloween Stamp Set and trimmed it down. I took my Timid Tiger Stampin’ Blend marker that was on my table and just ran the side of it along the edge of the greeting to make it stand out a little bit. That word is popped up on Dimensionals. I also added three purple Shimmer Star Foam Stickers to the scene.

Inside the box, you can add a piece of designer paper or cardstock if you like. And for Halloween you might even like to add a surprise, once the person takes out or eats the candy! You could draw a ghost, cut it out, and adhere it inside, or for this box, I added the diecut image from the designer paper of the hippo. Just add the Halloween candy to the box, secure the closure, and you have a cute little Halloween treat box to give out!

Them Bones Skeleton Triangle Treat Box For Halloween

Them Bones Skeleton Triangle Treat Box

One of my favorite types of treat boxes is this triangle treat box. You can make them for any occasion such as this Them Bones Skeleton Triangle Treat Box For Halloween. This kind of treat box is really so easy to make! You will be surprised if you haven’t made one yet!

You can vary the size of these triangle boxes. All you have to do is follow the basic pattern. You can use cardstock or designer paper. You can leave the cardstock plain, stamp on it, or add designer paper or embellishments. And these boxes aren’t just for candy or food. They can hold a small gift, or even money or a gift card.

Here is the basic pattern and the size I used for this Halloween Triangle Box. I used a piece of Them Bones Designer Series Paper to make this box. Obviously, cardstock would be a little bit sturdier if you needed that. My paper is cut at 4″ x 8″. If your paper has a pattern you need to pay attention to which way you cut the paper so the pattern won’t be sideways or something.

Triangle Box Drawing

After cutting the paper to the size you want, the rest is scoring. The blue lines on the diagram above are the score lines. Score the length of the paper in half, so if your paper is 4″ x 8″, score at 4″ in the middle. Measure the mid-point on the ends (2″) and lightly mark with a pencil.

The “tricky” part is scoring on the diagonal but it is easy. In that awkward position with your Paper Trimmer, score from that 2″ middle point at one end down to the middle score line which will be on a diagonal. Do that on both sides of one end, then turn the paper and score at the other end in the same way. When you do it, you’ll see how it goes. Here you can see the other side of the paper, which I could have used instead of the bones pattern. You can see what the score lines look like, really from midline to midline. Then you’ll punch holes in each corner, preferably holding the ends together when you do it so they match up.

Triangle Treat Box Scored

After you do the scoring, crease all the score lines and fold the box together to see how it goes. Then hold the ends together on each side and use a hole punch of whatever size you like to punch holes through the two papers on each side. After you decorate your box and put the treat inside, you can tie the box together with ribbon or twine.

This box is simply decorated by cutting out the skeletons from another sheet of paper in the Them Bones DSP and adhering them to the box. You could also add a greeting or some other embellishments. I tied my box closed with the Black & White 1/4″ Gingham Ribbon.

Here is what the box looks like from the side:

Them Bones Skeleton Triangle Treat Box Side

Here’s a triangle box I turned into a Witch’s Hat for Halloween….nine years ago! Wow!

Try one and you will see how easy it is to make a triangle treat box. And you just might need one or more for Halloween night maybe for family treats or for a few special trick-or-treaters!

Happy Halloween in a few days!

Triangle Halloween Treat Box WIth Ghosts

Triangle Halloween Treat Box Front

This may look slightly fancy, but it is really an easy treat box to make! This one was especially easy since it was white cardstock and I just stamped ghosts and spiders on it!

You can vary the size once you know how to make this box, but these are the measurements of the sample I made. I used a piece of Basic White Cardstock that is 4″ x 8″. Actually, there is no reason you couldn’t make it 4 1/4″ x 8 1/2″ so you don’t have to cut off a 1/2″ strip! But you’ll see after you make it.

Score the strip of paper in the center at 4″. Then on each end, make a pencil mark in the center at 2″. This part may seem tricky, but it really is not. Place the paper on your Paper Trimmer so you can score at a diagonal from that 2″ center mark down to the center scoreline.   Just angle the paper on your Stampin’ Trimmer so that both the center score line and the center point on the end are on the track on the Trimmer and then score. See the diagram below.

Triangle Box Drawing

Crease all the score lines and see how your box will go together. Determine which area will be the top of the box and then you can stamp on it or decorate. I used the Cutest Halloween Stamp Set to stamp several ghosts and spiders. The greeting is stamped on a strip of Basic White and then I just flagged the ends with my scissors and adhered it with Mini Stampin’ Dimensionals.

With whatever hole punch you have (or a sharp object!) punch holes in the pointy end so that you can insert ribbon and tie it shut. Be sure to put your candy or gift inside first! I used the Black & White 1/4″ Gingham Ribbon.

Triangle Halloween Treat Box Tied

You can make these triangle boxes smaller or larger. Here is one I made three years ago! I think they are fun to make because they are really so easy and so versatile. You can make them for any occasion!

Triangle Halloween Treat Box WIth Ghosts

Even if you don’t have much time, you can make these pretty easily and quickly! Try one so you will have it in your repertoire!

HAPPY HALLOWEEN!

Witch’s Boot Halloween Treat Holder

Witch's Boot Halloween Treat Holder

One easy and fun treat holder to make for Halloween, or even just for a decoration is this Witch’s Boot Halloween Treat Holder. I have made different ones other years, but this year, with Halloween pumpkins appearing in “trendy” colors other than the usual orange, I thought maybe this year’s witch’s boot could also be in non-traditional colors.

Is it okay to use Christmas paper to make a witch’s boot treat??! Why not? Really, you can use lots of different paper patterns. You don’t have to have “Halloween” paper! Look through your paper and see what appeals to you. I used the Whimsy & Wonder Specialty Designer Series Paper, the striped pattern, for the witch’s sock! Why not have something colorful?! Just measure your toilet paper roll or paper towel roll to see what size to cut your paper to wrap around the tube. Then see how much you need to wrap around the tube adding on about 1/2″ or so overlap to adhesive. My paper was about 4″ wide and about 6 1/2″ around the paper tube.

For the actual “boot”, I used a piece of Black Glitter Paper but you can also just use Basic Black Cardstock. Just cut a strip of black that will be wide enough at the back for the paper roll to fit on and then the front will angle to a point. You can make it as long as you would like. You can use the Paper Trimmer or just cut it by eyeballing. You will need to cut around the edges of the back where the paper roll is so it curves with the paper roll. On the front, you can roll the tip of the boot around a pencil or other stick if you want it to roll up.

Also, cut a strip of Black Glitter Paper as narrow or tall as you would like for the top part of the shoe. This will adhere around the bottom of the paper roll. If you want, you can fold back the ends of the strip in the front for the opening of the shoe. I also tied around a piece of the Metallic Mesh Ribbon and tied it in a bow.

When you have the witch’s boot make how you like it, grab some candy or treats and fill up the boot or put the candy in a small cello bag and insert in the boot, tied at the top with a coordinating ribbon, maybe even a tag. Here is one I made a few years ago, maybe the first one, and here is another one more recently.

It’s Halloween and it’s all fun! Make a Witch’s Boot Halloween Treat Holder for yourself, a gift, or maybe a bunch for the kids when they come trick-or-treating this year!

SHOP STAMPIN’ UP!

Fun Halloween Projects From the Past!

Halloween Night Candy Bars

Halloween Decorated Candy Bars

I think one fun treat project is to cover candy bars with designer paper or cardstock and then decorate. It doesn’t matter if you have Halloween paper or not, you probably have something that will work. If not, stamp some cardstock.

Mini Curvy Keepsake Halloween Boxes

Mini Curvy Keepsake Halloween Character Boxes

It’s so fun to use the Mini Curvy Keepsakes Box Die to make all kinds of treat box characters, like this Jack-o-Lantern and Frankenstein. You’ll find all kinds of examples on the internet for ideas!

Monster Bash Halloween Clear Tiny Treat Box

Monster Bash Halloween Clear Tiny Treat Box

I continue to say having these Clear Tiny Treat Boxes on hand makes it so easy when you want to make a little treat, gift box, or party favor. Just decorate in any number of ways, with designer paper, ribbon, stamping, whatever you like for the occasion.

Easy Halloween Trick or Tweet Candy Treats

Easy Halloween Trick or Tweet Candy Treats

If you want to make a special, but easy, treat wrapper for Halloween, just cut a strip of cardstock and score for the bottom to fit the candy and decorate the front with a funny Halloween character or design!

Black Cat Halloween Cards

Black Cat Halloween Cards

If you want to make Halloween cards but don’t have Halloween paper, make your own “designer paper” by stamping all over. Start with the largest stamp as you stamp randomly around on your paper, then progress through the smaller stamps you are using to fill in the space. It’s really fun! The Cat Punch makes this card so easy!

Triangle Treat Box For Halloween

Triangle Treat Box For Halloween

I’ve always thought these Triangle Treat Boxes were so easy to make and turn into a great treat box. You can vary the size easily. Just follow the directions in this post, linked in the title. Once you make one, you will have it down!

Halloween Card With Ghosts

A Quick and Easy Halloween Card With Ghosts

One of my favorite things of all in stamping is making ghosts out of hearts cut in half! You’ve got to try it!! Here’s an easy card with ghosts and some fun Halloween paper in the background. But you could also just use Basic Black maybe with a few “Boos” written in the background or embossed.

I hope these past Halloween ideas have gotten your creativity going if you are making some last-minute Halloween projects! I hate to see Halloween come to an end because it’s so much fun to make Halloween projects and cards!

Happy Halloween!

Mini Curvy Keepsake Box Halloween Witch

Mini Curvy Keepsake Box Halloween Witch

I think with all the shiny new products, which are great, we have forgotten about products we already have which are perfect for this upcoming holiday season, fall, and Halloween like this Mini Curvy Keepsake Box Halloween Witch. You can make all kinds of little gift boxes and even characters using this Mini Curvy Keepsakes Box Dies. So much opportunity for creativity!

This little Mini Curvy Keepsake Box is so easy to make, no matter what else you are going to do to it! Just die cut the one piece and fold on the score lines. Your box will come together quite well! After scoring and creasing the fold lines, it might be good to kind of press down on the sides to kind of get that curve going a little bit. Then hold the two handles together and slip the two sides with slots right over the handles. Then decorate the box however you like.

For the Halloween witch, I used a piece of Granny Apple Green Cardstock. I assembled the box and then added the witch features. I had a bag of googlie eyes so I opted to use two of those. You could just use circles of black and white cardstock. The witch’s nose is from the 1/2″ Circle Punch (retired, sadly) but if you don’t have the punch you can just cut one by hand or find a punch in your stash that will work. I had some black dots so I put one on her nose for a wart! I just drew in the mouth and freckles with the Basic Black Stampin’ Blend using the tip end, not the brush end.

For the hair, I just grabbed some twine I had, thinking it was Linen Thread but I think it was some natural colored twine I had from something. I just cut a few strands, tied them together in the middle with another piece and adhered them to the witch’s head! You could do cardstock strips, yarn, shredded paper, other ribbon or string you have.

The witch’s hat I sort of copied from one I’d seen on Pinterest or somewhere. You could use the old Tree Punch we used to have but I used the Pine Tree Punch which is current. I punched out two trees. I didn’t want the shaggy edges that make it look like a tree so I just cut along the two sides and cut those edges off so that I had a perfect triangle. I used Black Glimmer Paper because I had some scraps which the punch fit, but not the hat base. For that, I just happened to find this large scalloped circle already cut out and just went with that. Cut a slit in the center of the hat base in which you will insert the triangle top of the hat. I took the two trees and adhered them together with Glue Dots near the top. You want to keep most of the bottom open so you can slide it over the box handles. Then fold the tree trunk up facing the tree, on each side, and use Mini Glue Dots to adhere those trunks to the hat base after inserting through that slit. That way the tree is attached to the hat base but it can still be placed over the box handles.

For a little embellishment, I tied on a Terracotta Tile ribbon and stuck on a little plastic Halloween blackbird sticker I had in my stash. You can just barely see it against the black witch’s hat.

That’s all there is to it! You could make a ghost out of white paper, a scarecrow, Frankenstein, some other monster, or a pumpkin! All with this one die and that’s just for Halloween! Have fun playing with the Mini Curvy Keepsake Die and see what you can make with it!

SHOP STAMPIN’ UP! ONLINE!

Ghoulish Goodies Halloween Clear Tiny Treat Box

Ghoulish Goodies Halloween Clear Tiny Treat Box

For my first, of probably many, Halloween posts for this year, here is a Ghoulish Goodies Halloween Clear Tiny Treat Box. Who knows what Halloween will look like in this pandemic year, but you can still make Halloween treats for your family or even yourself! Thank goodness the grocery stores are still able to deliver craft supplies, such as chocolate candy for treats!

As always, I love and highly recommend keeping a package or two of the Clear Tiny Treat Boxes on hand! They are only 2″ x 2″ x 2″ but food safe and have enough room for a decent treat without being too big. Or add some other small gift inside for any occasion. These boxes come flat, protected by a piece of plastic you remove, then assemble and decorate. Couldn’t be easier!

For this Halloween treat box I wrapped around a piece of the Plaid Tidings 6″ x 6″ Designer Series Paper. Now you may have figured out that a 6″ long strip will not wrap all the way around the box. I cut two strips, then realized I needed the plaid design to march up if I wanted to be picky about it (and of course most of us do!). Actually my strips were only about 1/8″ off so I matched them up, adhered the ends together then trimmed off the excess on each side. It worked fine. Or you can wrap the 6″ strip around from the front to each side and add another piece for the back. Make it longer so you can adhere the ends inside the side pieces to make it look neater.

The tag is stamped in Pumpkin Pie ink on Whisper White with a stamp in the Ghoulish Goodies Stamp Set. What a perfect saying for Halloween treat packages! I die-cut it with a die in the Tasteful Labels set of dies. Then I wanted some kind of layer, so I cut another label which was too small, but I cut it in half lengthwise and added it to each side of the treat tag. This is the Pumpkin Pie piece. To cover up the back, I adhered the whole thing onto a rectangle of Basic Black with just a small margin and simply cut those corner curves by hand. Doesn’t have to be perfect! The tag is already almost too big for the treat box so I couldn’t keep adding larger layers.

To attach the tag and further decorate the box, I used the beautiful Black 3/8″ Glittered Organdy Ribbon. It’s almost too pretty to use on a treat box but it does look great! I punched a small hole in the top of the tag, put a piece of Linen Threat (or whatever twine I had laying around here) through the tag and tied it on to the ribbon, then finished tying the ribbon in a know. You could do a bow instead.

To decorate the front of the box (and to use another new stamp!), I stamped the black cat from Ghoulish Goodies. Then I colored in its eyes with a Granny Apple Green Stampin’ Blend marker and the collar with Pumpkin Pie. I just punched out the cat with my 1 1/2″ Circle Punch and then layered it on a die-cut from the Tasteful Labels Dies again. Love those scalloped circles in that set!!

Put your treat or gift in the box before you tie it up! Luckily I had fresh chocolate kisses wrapped in purple (dark chocolate), perfect for Halloween! These candies are meant for crafting, of course! (Or for after lunch or dinner as a digestive, of course!).

Here’s a super-simple treat I made with the Clear Tiny Treat Boxes recently.

Yes, it’s time to start having fun with Halloween because now that it is August, it is really almost September and you know Halloween isn’t far behind! Check out the Ghoulish Goodies Stamp Set and others in the new holiday mini, August-December 2020 Mini Catalog. If you need a copy, send me your contact information at Karen@Karenstamps.com Then you can start making your own Ghoulish Goodies Halloween Clear Tiny Treat Box or something similar!

Paper Pumpkin September 2019 Kit Halloween Treat Boxes

Paper Pumpkin Sept 2019 Kit Halloween Treat Boxes

I had so much fun making up this Paper Pumpkin September 2019 Kit with Halloween Treat Boxes yesterday while watching the Houston Texans lose another football game that they didn’t need to lose. It was good I had a distraction! I really enjoyed making this kit and not just because it was a Halloween theme!

Paper Pumpkin is a monthly papercrafting kit made by Stampin’ Up! that comes to you in the mail when you subscribe. You may think you do not want to be committed to a “subscription” but there really is no pressure or risk to a Paper Pumpkin subscription. You can go into your account at any time before the 10th of any month and “skip” a month or two if you like. If you want to cancel, just cancel. I consider it a gift to myself each month to receive this special box in my mailbox!

The presentation of the kit is wonderful, too! They don’t just throw all the materials in the box. All the materials are packaged up and wrapped in tissue paper just like a gift. There is also an exclusive stamp set and small ink spot. I think one of my favorite parts about the Paper Pumpkin Kit is opening it up and laying out all the materials provided in the kit! I love to see all the pieces I have been given!

Paper Pumpkin Sept 2019 Kit Contents

In this September Kit you can see the pamphlet with directions (there is also a helpful video online for each kit), the stamp set, the treat boxes, the various tags, the embellishments for the boxes, the bag of little black clothespins, the adhesive dots and even some black mini dimensionals to pop up some of the pieces.

I didn’t close up all my boxes yet, just some to see what they would look like and to show you in this blog post. I don’t want to have to undo all of them when I actually put candy or treats inside closer to Halloween! I got 20 boxes to make in this kit. I made 16 and am deciding if I want to make some alternative projects instead of all the boxes! Obviously it is your kit so you can use the materials however you like in any month! Sometimes I do half and half….make half as designed and make some other projects that I see online for something different!

Paper Pumpkin Halloween Treat Boxes

Here is a closeup of some of the boxes so you can see the decorated Halloween tags that are then clipped onto the handle of the box with a small black clothespin! The skeleton hand is adhered to the front of the clothespin with the glue dots. Such a cute project! Maybe you can see the clothespin clipped to the top of the box in this side view below.

Paper Pumpkin Sept 2019 Halloween Treat Box Closure

If you are interested in trying Paper Pumpkin, it is just the right time because the next two month’s kits will coordinate for the holidays! The October 2019 Kit will be 10 cards and the November Kit will be 24 holiday-themed gift tags of 4 various sizes and designs. Sounds like fun to me! I can guarantee you will be glad to have 10 extra cards, even if you are making some on your own, just in case! I know I always have a few more people I want to send cards to. And we all will need gift tags!

Paper Pumpkin Winter Wonders 2019

The cost of each monthly kit is $22 plus tax but that includes shipping. In your first kit, you will receive an acrylic block made for Paper Pumpkin with which to mount the stamps. In all the kits you will receive an exclusive stamp set, an ink spot, adhesives, and all the materials to make the project, whatever it is! No need to design something yourself or order supplies you don’t have……it’s all in the box! Just open and craft! And of course, you will have the stamp set and ink spot to use in the future. In fact, the ink spots are great to use with the Stamparatus!

October is coming up tomorrow and the important date to remember is October 10th! And then November 10th, if you don’t subscribe in October! But I suggest subscribing by October 10th so you receive both kits and will be ready for Christmas! Do it today so you don’t forget!

JOIN PAPER PUMPKIN HERE!

Monster Bash Halloween Clear Tiny Treat Box

Monster Bash Halloween Clear Tiny Treat Box

Make this Monster Bash Halloween Clear Tiny Treat Box so quickly and easily for all your Halloween ghosts and goblins! It’s practically October and you know that means it’s time to think about fun Halloween treat packaging!

This treat might be something more for family, friends, co-workers or other people, more than random trick-or-treaters since you will be using the Clear Tiny Treat Boxes. I always keep a package of these on hand for small treats or gifts. They are so easy to use and so versatile, not to mention they store flat. Just take off the bit of plastic wrap on them that protects the surface and crease the scored lines to form the treat box.

For this Halloween treat, I simply wrapped a strip, about 1 3/4″ wide, of the Monster Bash Designer Series Paper around the box. It will be longer than you need but just wrap around the box, creasing fairly lightly at each corner. Then take the paper off, trim the end to overlap the front edge just a little bit (since the decoration is going to hide where the paper overlaps) and use a Bone Folder to crease those score lines you created, keeping them straight along the edge of the strip of paper. Now put the paper back around the box and use a little adhesive to join the overlapping ends.

For this box, I wanted to just keep it super simple. I just cut out one of the Halloween character images from the Monster Bash paper with my Paper Snips and adhered him to the front of the box with two Stampin’ Dimensionals. I could have die cut a layer, maybe one of the Ornate Frames, to mount him on, but I was making it quick and easy!

After putting my candy inside (you could add some paper shred if you didn’t want so much room for candy!), I tied a Basic Black Satin Ribbon around the top to make sure the lid stays closed. The recipient can easily untie the bow to get to the candy!

Here’s another example in this post of a Halloween treat box from last year using the Clear Tiny Treat Box.

Another option would be to wrap the designer paper around the box across the top and decorate the top of the box, then wrap the ribbon around the sides of the box. Or just put some decoration on top of the box.

These would be cute party favors at a Halloween party and easy to make! The boxes are clear acetate and food safe so you don’t have to worry! And with the cute Monster Bash Designer Series Paper, you have no limit on decorating options for your treats! Try the Monster Bash Halloween Clear Tiny Treat Box for some Halloween fun!

Shop the Stampin’ Up! Holiday Catalog Here!

Love Halloween? Be Sure to Join Paper Pumpkin For September!

Paper Pumpkin September 2019

Halloween is nearly here, which means that Paper Pumpkin has been busy, busy, busy. Stampin’ Up! thought you might like “a hand” with your frightful festivities, so they designed September’s kit, Bone Appétit, with YOU in mind. I can’t wait for this kit!!!

This kit includes 20 food-safe treat boxes, a unique and exclusive Halloween stamp set, and a spooky, special-edition box. September’s kit also gives new meaning to the word “handmade.” (Cue the scary laughter!)

So don’t be in the dark this Halloween. Subscribe at paperpumpkin.com by September 10 to get in on the fun. Find my name to be on my list:  Karen Fontinelle

OR My personal link! (you don’t have to search for my name!) 

JOIN PAPER PUMPKIN HERE!