
For my first, of probably many, Halloween posts for this year, here is a Ghoulish Goodies Halloween Clear Tiny Treat Box. Who knows what Halloween will look like in this pandemic year, but you can still make Halloween treats for your family or even yourself! Thank goodness the grocery stores are still able to deliver craft supplies, such as chocolate candy for treats!
As always, I love and highly recommend keeping a package or two of the Clear Tiny Treat Boxes on hand! They are only 2″ x 2″ x 2″ but food safe and have enough room for a decent treat without being too big. Or add some other small gift inside for any occasion. These boxes come flat, protected by a piece of plastic you remove, then assemble and decorate. Couldn’t be easier!
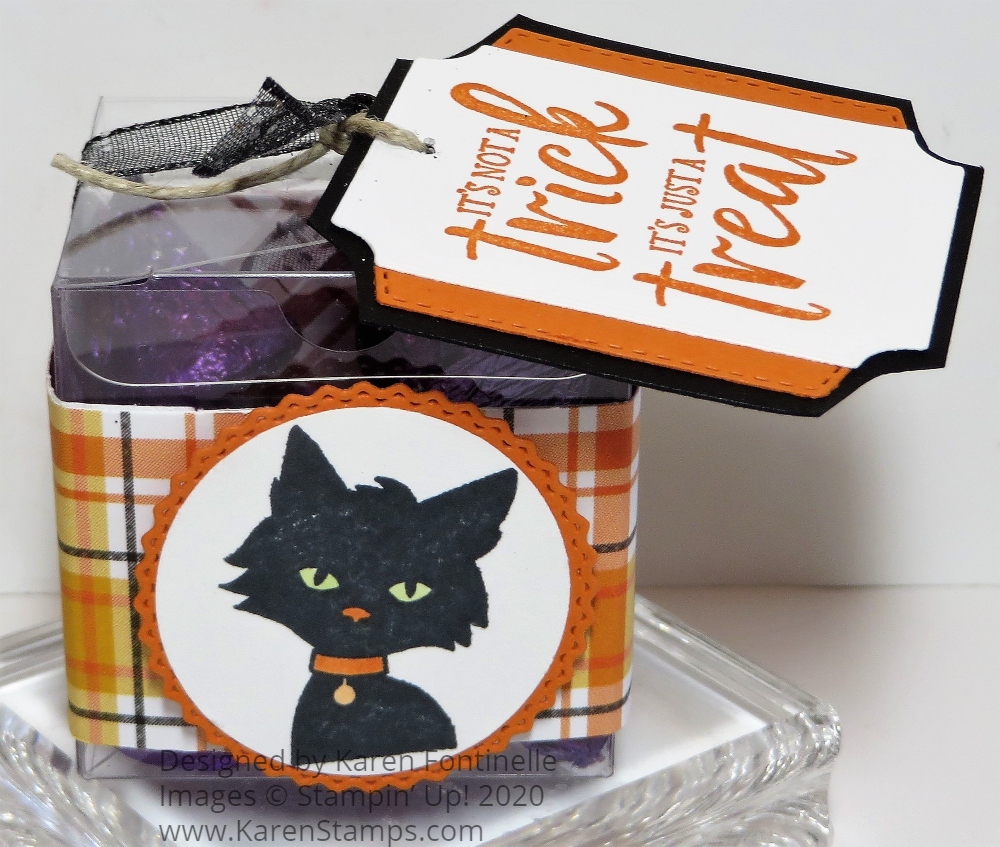
For this Halloween treat box I wrapped around a piece of the Plaid Tidings 6″ x 6″ Designer Series Paper. Now you may have figured out that a 6″ long strip will not wrap all the way around the box. I cut two strips, then realized I needed the plaid design to march up if I wanted to be picky about it (and of course most of us do!). Actually my strips were only about 1/8″ off so I matched them up, adhered the ends together then trimmed off the excess on each side. It worked fine. Or you can wrap the 6″ strip around from the front to each side and add another piece for the back. Make it longer so you can adhere the ends inside the side pieces to make it look neater.
The tag is stamped in Pumpkin Pie ink on Whisper White with a stamp in the Ghoulish Goodies Stamp Set. What a perfect saying for Halloween treat packages! I die-cut it with a die in the Tasteful Labels set of dies. Then I wanted some kind of layer, so I cut another label which was too small, but I cut it in half lengthwise and added it to each side of the treat tag. This is the Pumpkin Pie piece. To cover up the back, I adhered the whole thing onto a rectangle of Basic Black with just a small margin and simply cut those corner curves by hand. Doesn’t have to be perfect! The tag is already almost too big for the treat box so I couldn’t keep adding larger layers.
To attach the tag and further decorate the box, I used the beautiful Black 3/8″ Glittered Organdy Ribbon. It’s almost too pretty to use on a treat box but it does look great! I punched a small hole in the top of the tag, put a piece of Linen Threat (or whatever twine I had laying around here) through the tag and tied it on to the ribbon, then finished tying the ribbon in a know. You could do a bow instead.
To decorate the front of the box (and to use another new stamp!), I stamped the black cat from Ghoulish Goodies. Then I colored in its eyes with a Granny Apple Green Stampin’ Blend marker and the collar with Pumpkin Pie. I just punched out the cat with my 1 1/2″ Circle Punch and then layered it on a die-cut from the Tasteful Labels Dies again. Love those scalloped circles in that set!!
Put your treat or gift in the box before you tie it up! Luckily I had fresh chocolate kisses wrapped in purple (dark chocolate), perfect for Halloween! These candies are meant for crafting, of course! (Or for after lunch or dinner as a digestive, of course!).
Here’s a super-simple treat I made with the Clear Tiny Treat Boxes recently.
Yes, it’s time to start having fun with Halloween because now that it is August, it is really almost September and you know Halloween isn’t far behind! Check out the Ghoulish Goodies Stamp Set and others in the new holiday mini, August-December 2020 Mini Catalog. If you need a copy, send me your contact information at Karen@Karenstamps.com Then you can start making your own Ghoulish Goodies Halloween Clear Tiny Treat Box or something similar!