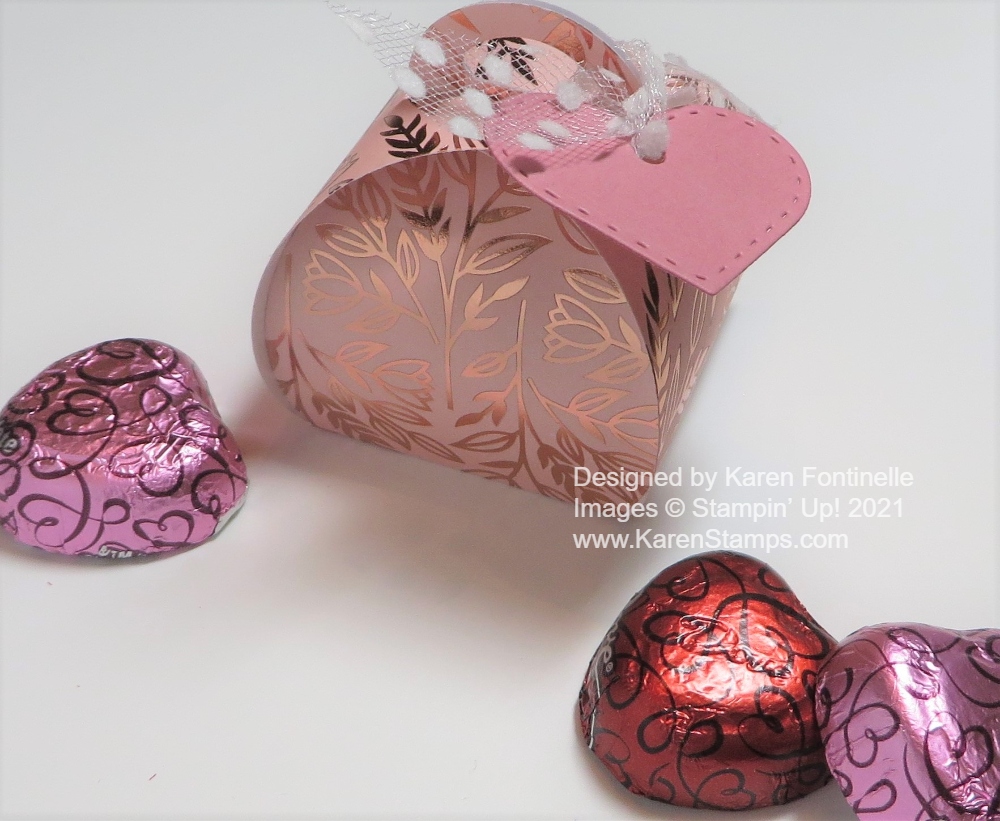
Don’t forget about the cute little boxes you can make easily for some Valentine candy, even at the last minute! Any cardstock or designer paper you have will work, but for Valentine’s Day you might want to use some fancy designer paper!
This cute little box is made with the Mini Curvy Keepsakes Box Dies. You just need a piece of 6″ x 6″ paper for the box. Then you can also die-cut a little heart in the same set to tie onto the box. Just cut the paper, fold on the score lines, then assemble. Push down on the two handle pieces and fold over the two slit pieces to hold the box together. Be sure to put your treat in first!
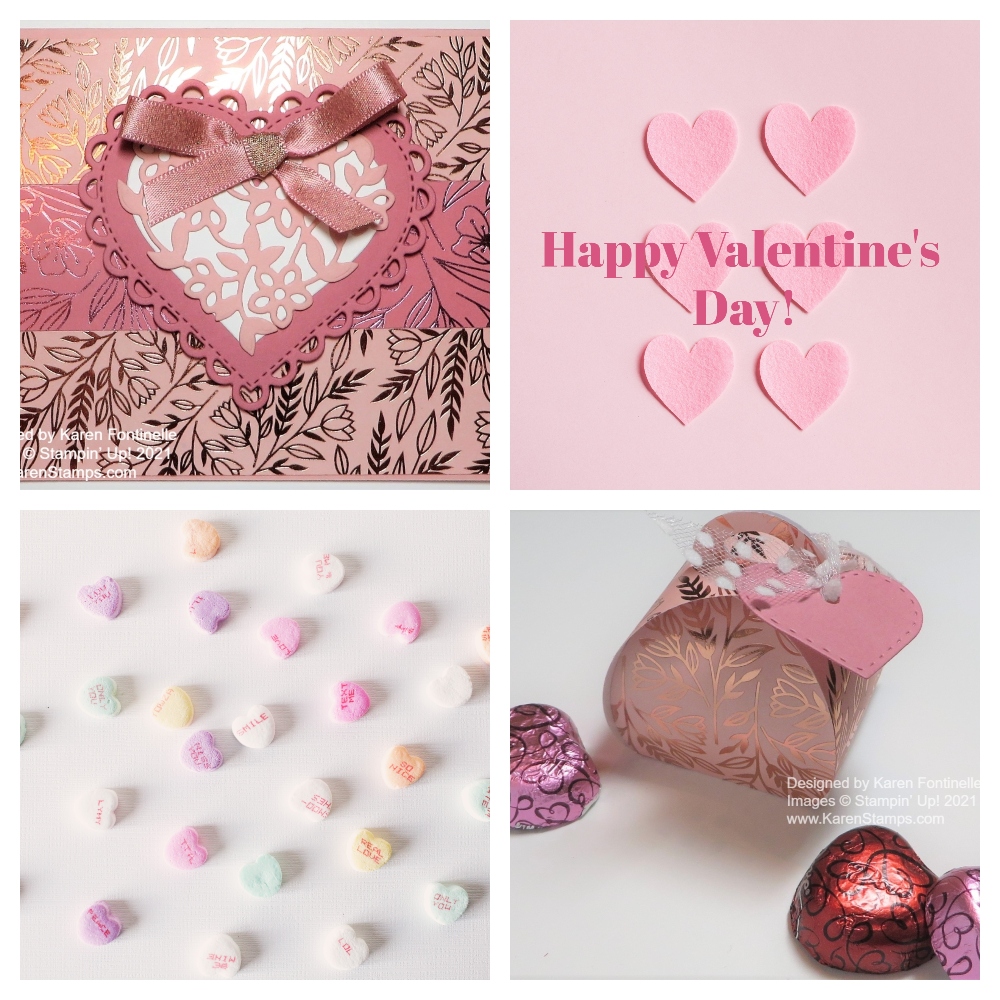
I used the pretty Love You Always Specialty Designer Series Paper with the foil accents. The die-cut heart is Rococo Rose Cardstock. I tied it on with the Whisper White 5/8″ Polka Dot Tulle Ribbon. That’s all there is to it! You could use this little box for Valentine candy or maybe a little table decoration or party favor. You can get very creative with this Mini Curvy Keepsakes Box and make all kinds of creations.
This little Mini Curvy Keepsakes Box For Valentine’s Day matches the card I made with the Love You Always Specialty Paper here in this post! Make a matching set!
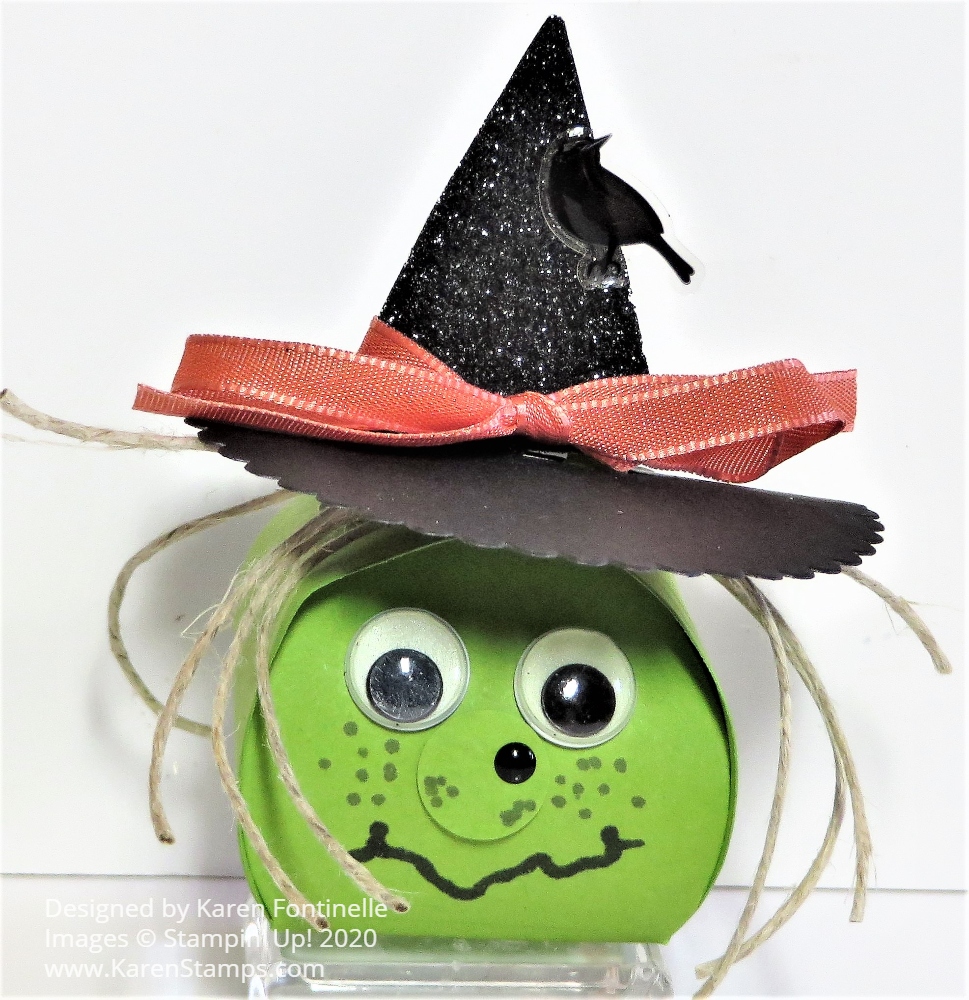
I think with all the shiny new products, which are great, we have forgotten about products we already have which are perfect for this upcoming holiday season, fall, and Halloween like this Mini Curvy Keepsake Box Halloween Witch. You can make all kinds of little gift boxes and even characters using this Mini Curvy Keepsakes Box Dies. So much opportunity for creativity!
This little Mini Curvy Keepsake Box is so easy to make, no matter what else you are going to do to it! Just die cut the one piece and fold on the score lines. Your box will come together quite well! After scoring and creasing the fold lines, it might be good to kind of press down on the sides to kind of get that curve going a little bit. Then hold the two handles together and slip the two sides with slots right over the handles. Then decorate the box however you like.
For the Halloween witch, I used a piece of Granny Apple Green Cardstock. I assembled the box and then added the witch features. I had a bag of googlie eyes so I opted to use two of those. You could just use circles of black and white cardstock. The witch’s nose is from the 1/2″ Circle Punch (retired, sadly) but if you don’t have the punch you can just cut one by hand or find a punch in your stash that will work. I had some black dots so I put one on her nose for a wart! I just drew in the mouth and freckles with the Basic Black Stampin’ Blend using the tip end, not the brush end.
For the hair, I just grabbed some twine I had, thinking it was Linen Thread but I think it was some natural colored twine I had from something. I just cut a few strands, tied them together in the middle with another piece and adhered them to the witch’s head! You could do cardstock strips, yarn, shredded paper, other ribbon or string you have.
The witch’s hat I sort of copied from one I’d seen on Pinterest or somewhere. You could use the old Tree Punch we used to have but I used the Pine Tree Punch which is current. I punched out two trees. I didn’t want the shaggy edges that make it look like a tree so I just cut along the two sides and cut those edges off so that I had a perfect triangle. I used Black Glimmer Paper because I had some scraps which the punch fit, but not the hat base. For that, I just happened to find this large scalloped circle already cut out and just went with that. Cut a slit in the center of the hat base in which you will insert the triangle top of the hat. I took the two trees and adhered them together with Glue Dots near the top. You want to keep most of the bottom open so you can slide it over the box handles. Then fold the tree trunk up facing the tree, on each side, and use Mini Glue Dots to adhere those trunks to the hat base after inserting through that slit. That way the tree is attached to the hat base but it can still be placed over the box handles.
For a little embellishment, I tied on a Terracotta Tile ribbon and stuck on a little plastic Halloween blackbird sticker I had in my stash. You can just barely see it against the black witch’s hat.
That’s all there is to it! You could make a ghost out of white paper, a scarecrow, Frankenstein, some other monster, or a pumpkin! All with this one die and that’s just for Halloween! Have fun playing with the Mini Curvy Keepsake Die and see what you can make with it!