Tag Archives: Toile Tidings Designer Series Paper

Quick and Easy Toile Tidings Christmas Cards

Quick and Easy Toile Tidings Christmas Cards

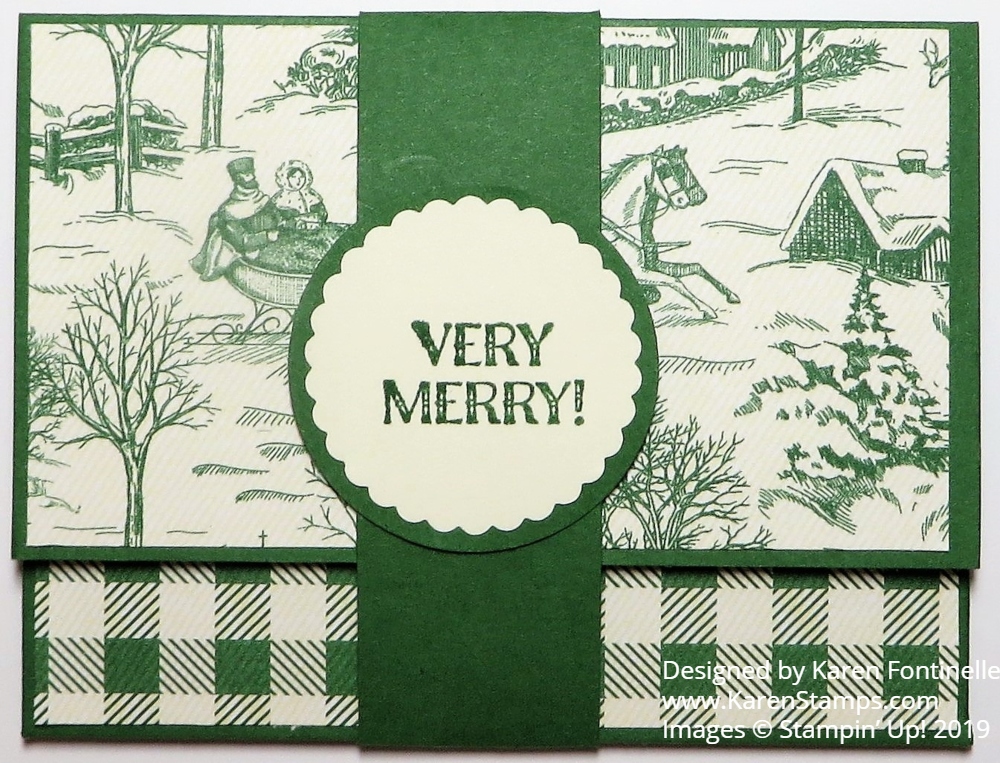
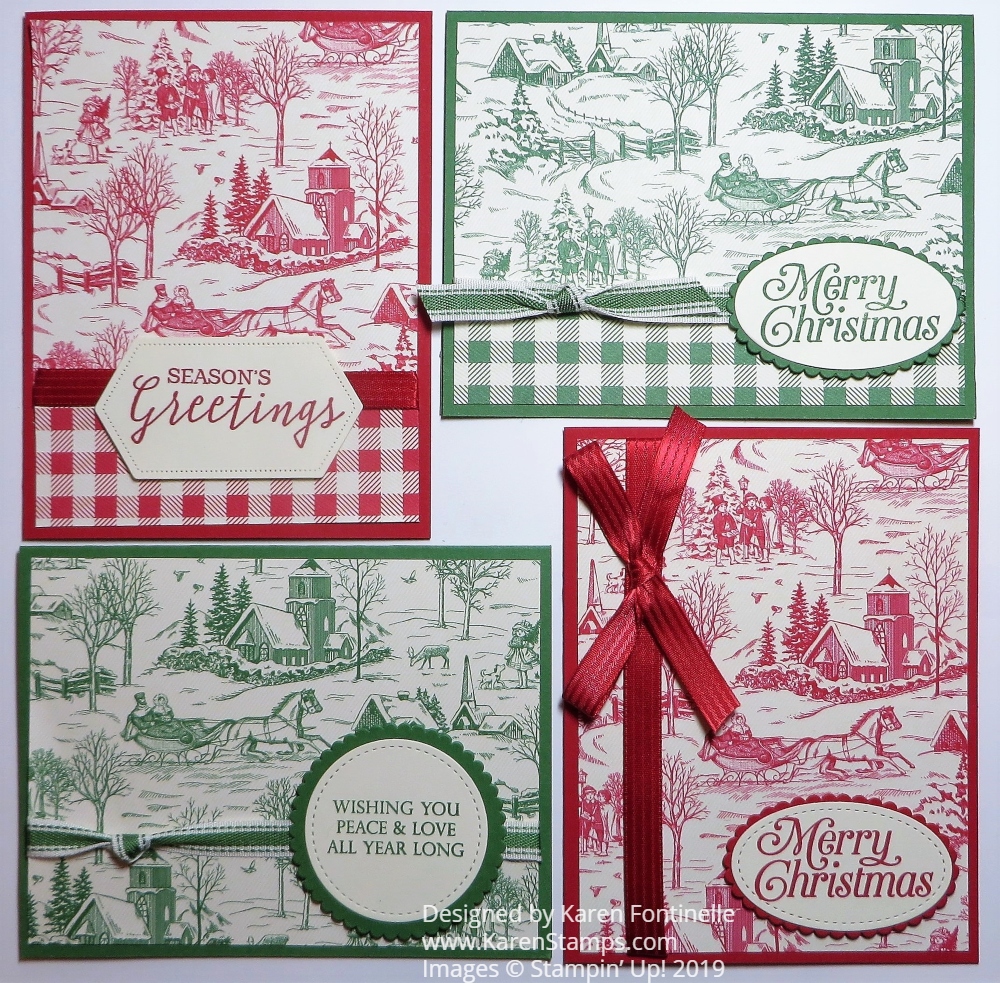
I wanted some quick and easy cards the other day (because who has any time with Christmas racing to get here?!) so I made these Quick and Easy Toile Tidings Christmas Cards. I love this toile paper, probably because I have some toile fabric covering the seats of a couple of chairs.

The card base is Garden Green. I just cut the Toile Tidings Designer Series Paper to fit and adhered some Garden Green 3/8″ Double-Stitched Ribbon around the paper first before adhering to the card. Nice if you can think of this before you adhere the designer paper! Don’t ask me how I know!

Then the card just needed a greeting so I chose this one from the So Many Stars Stamp Set. It is stamped in Garden Green Ink on Very Vanilla Cardstock, which was die cut and then layered on a piece of Garden Green. I made the circle one first but then I changed to the oval die cuts. The greeting is kind of large. The greeting seemed to beg for another little something so I added a couple of Toile Tidings Glitter Enamel Dots.

That’s all there was to it, so if you need some easy cards, just use this Toile Tidings Paper. I love all the little scenes on it! In fact, you could use this paper after Christmas, during the winter for cards or to write thank you notes after the holidays.

SHOP STAMPIN’ UP! ONLINE HERE!

(Did you know you can expedite your Stampin’ Up! order? There is a drop down box when you check out for shipping. It IS extra ($20 for 2nd Day Air and $35 for Next Day Air, on top of regular SU shipping) but if you need it, you need it! Warning: 2nd Day Air CAN be addicting for large orders! (What’s another $20 if I’ll get it in two days?!) You have to place your order by 11:00 am MT (that’s noon Central Time) for it to go out that day.

Make Some Holiday Gift Card Holders

Toile Tidings Christmas Red Gift Card Holder

It’s time to make some gift card holders that you can use at Christmastime for those people that you plan to give a gift card to and for those for whom you buy last-minute gift cards to finish off your shopping! It’s a great way to make the gift card itself something extra-special with your cardmaking touch!

There are all sorts of gift card holders you can make. Basically, you just need a card with a little pocket inside! This one I made is pretty easy. It has a belly band to hold it closed and inside is a pocket to hold the gift card and also a place for a greeting and/or a personal message. You can put it right under the treat or mail it in an envelope.

To begin, start with a piece of cardstock 7 1/2″ x 6″. On the 7 1/2″ side, score the paper at 2 1/4″ and 5 1/4″. Turn and score the 6″ side at 1″ and 5″. Then cut away both 1″ sides down to the last score line as you see in the diagram below. You can cut those bottom tabs at an angle just to fold them in easier. That bottom portion folds up to make the pocket to hold the gift card and then the top folds down. Easy peasy!

Toile Tidings Gift Card Holder Diagram

To decorate the holder, cut the Toile Tidings Designer Paper or whatever you want to use. Cut two pieces at 3 7/8″ x 2 1/8″ and one piece at 3 7/8″ x 2 7/8″. One piece goes on the inside pocket. Adhere and then use some circle punch partially inserted into the pocket to punch out a half-circle at the top, if you wish, just to make it easier to grab the gift card. You can also cut out a plain piece of cardstock on which to stamp a greeting or write a personal message for inside the top of the gift card holder as you see in my sample.

Toile Tidings Red Christmas Gift Card Holder Folded
Toile Tidings Red Gift Card Holder Inside

To make the belly band, if you want one, cut cardtock 7″ x 1″ and designer paper 7″ x 3/4″. Stamp a greeting, punch out, and layer however you like. I used the Itty Bitty Christmas Stamp Set. It’s so handy!

And here’s an example of the same pattern using the Garden Green designer paper, perhaps better for a man than the red and a little plainer.

Toile Tidings Green Christmas Gift Card Holder

Remember, tomorrow, December 11th is FREE SHIPPING for orders $50 or more!! It’s one day only.

Don’t start inputting your order until Dec. 11 or it might not take the free shipping. Just get your list ready today! You can use it on regular orders, Year-End Closeout, Clearance Rack, Paper Pumpkin Prepaid Subscriptions! What fun!

Today is the last day to sign up for Paper Pumpkin and get the December Kit!

JOIN PAPER PUMPKIN HERE!

This will be a kit with an exclusive stamp set with many greetings and supplies to make 12 cards for the New Year!

SHOP STAMPIN’ UP! ONLINE HERE!

Monochromatic Real Red Holly Jolly Santa Christmas Card

Monochromatic Real Red Holly Jolly Santa Christmas Card

If you love this Santa, but don’t want to color him in, monochromatic is the way to go for this card, the Monochromatic Real Red Holly Jolly Santa Christmas Card. After making several other Christmas cards with this Santa and taking time to stamp in black and then color in all the areas with Stampin’ Blends, I would say, even though I LOVE coloring with my Stampin’ Blends, that it can take a fairly long time to color the Santa. So if you want to make a lot of cards in a hurry, just stamp Santa in Real Red Ink and call it a day!

This is a really simple card. The card base is Real Red and the designer paper layered on the base is the red stripe pattern in the Toile Tidings Designer Series Paper in the Holiday Catalog.

The Santa is from the Holly Jolly Christmas Stamp Set. He is just stamped in Real Red on Very Vanilla Cardstock. I have made several cards with this Santa and coloring him in with Stampin’ Blends and as much as I like coloring, it takes a while to do several Santas for several cards! This is super easy, just stamping him in red ink and die-cutting with a Layering Ovals Die. He is layered on a piece of Real Red Cardstock. I was going to stop there but I thought having a layer of Very Vanilla underneath made it stand out just a bit more.

The greeting is stamped in Real Red ink on Very Vanilla from the Itty Bitty Christmas Stamp Set. I keep turning to all these “Itty Bitty” stamp sets for greetings since they have so many choices and don’t take up much room on a card if you don’t have much room for a greeting! The greeting is then die-cut with a small Layering Ovals Die and layered on a scalloped oval die in the same set. You could also have the greeting be just a straight strip of paper too.

I suppose you could even add some rhinestones or sequins to this card, but I liked it just the simple, basic way it turned out. I didn’t even pop anything up on Dimensionals but you could. If you weren’t making a bunch of these cards, you could also stamp the Santa in Memento ink and color in with Stampin’ Blends or whatever color medium you liked. This is just a time-saving method that still delivers a very nice card! Here is a card I previously stamped and colored the Santa. I loved this card, too, and looked forward to making several more to send out, and I did, but it took time.

It’s not too late to get this stamp set or Bundle with the dies and whatever paper you need for Christmas cards! Just go shop at Stampin’ Up! and find what you need!

Four Easy Christmas Cards With Toile Tidings

Four Easy Christmas Cards With Toile Tidings

Surprisingly I hadn’t even played with the Toile Tidings Designer Series Paper in the Stampin’ Up! Holiday Catalog, so I thought I would make an assortment of Four Easy Christmas Cards with Toile Tidings. They are all the basic design of easy cards, put in one orientation or the other, using the Real Red side of the paper or the Garden Green side, full front layer of just one paper pattern or a split layer using two patterns of paper. A greeting is added and a bit of ribbon. That’s all!

The Toile Tidings Designer Paper coordinates with Real Red and Garden Green Cardstock along with Very Vanilla. I made two cards with the Real Red card base and two with the Garden Green. The paper with the toile scene has the same toile scene in the opposite color on the other side so that makes it easy!

On two of the cards, I used a sheet that has the houndstooth check pattern, red on one side and green on the other. I used a small strip of the check pattern underneath the toile pattern, in both orientations, portrait and landscape. This adds a little bit of interest and has a ribbon covering the junction of the two pieces.

On these cards, I used the Garden Green 3/8″ Double-Stitched Ribbon and also a retired Real Red ribbon. If you want the current ribbon, which I don’t have, you can use the Real Red 3/8″ Cotton Ribbon. You might even have something else that would work.

For the greetings, I just chose some from several stamp sets. The “Season’s Greetings” stamp is from the Still Scenes Stamp Set with the globe. I used the pretty “Merry Christmas” stamp on two of the cards. It is from the Perfectly Plaid Stamp Set. And finally, the “Wishing You Peace….” stamp is from the Merry Christmas To All Stamp Set.

You can use any punches or dies to cut out your greetings and layers for them. I’m going to add some designer paper to the inside Very Vanilla layer since the card stock is colored. I may even add some colored rhinestones or dots to some of these cards…maybe. This is a simple card design and depending on your designer paper, you can leave your card as simple or as embellished as you want to. Just have fun with it because Christmastime only comes around once a year!

SHOP STAMPIN’ UP! ONLINE!