Tag Archives: So Many Stars Stamp Set

Quick and Easy Toile Tidings Christmas Cards

Quick and Easy Toile Tidings Christmas Cards

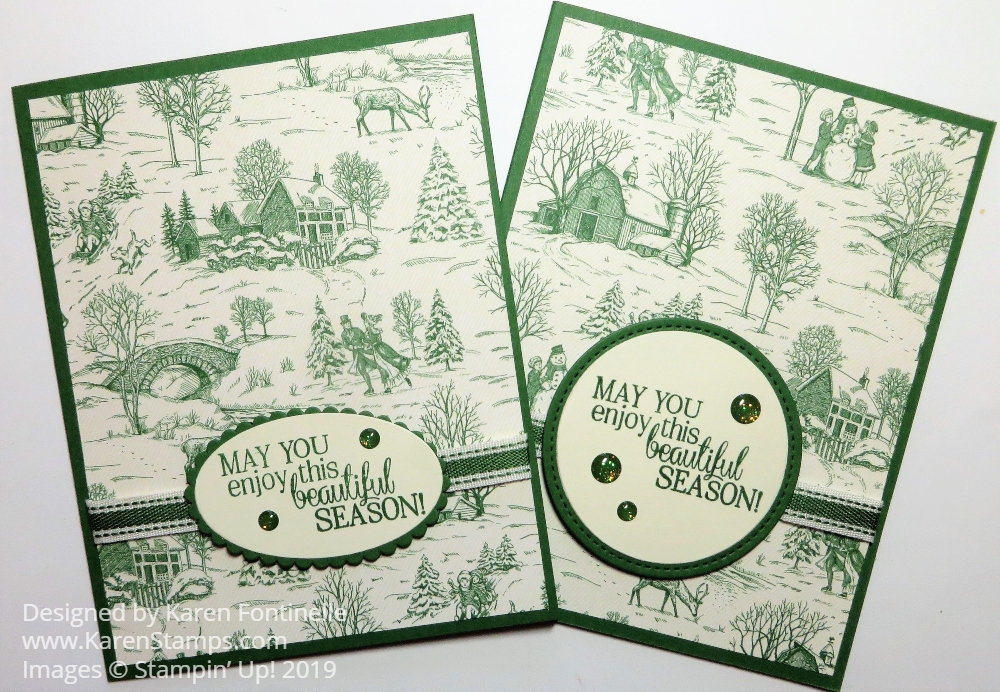
I wanted some quick and easy cards the other day (because who has any time with Christmas racing to get here?!) so I made these Quick and Easy Toile Tidings Christmas Cards. I love this toile paper, probably because I have some toile fabric covering the seats of a couple of chairs.

The card base is Garden Green. I just cut the Toile Tidings Designer Series Paper to fit and adhered some Garden Green 3/8″ Double-Stitched Ribbon around the paper first before adhering to the card. Nice if you can think of this before you adhere the designer paper! Don’t ask me how I know!

Then the card just needed a greeting so I chose this one from the So Many Stars Stamp Set. It is stamped in Garden Green Ink on Very Vanilla Cardstock, which was die cut and then layered on a piece of Garden Green. I made the circle one first but then I changed to the oval die cuts. The greeting is kind of large. The greeting seemed to beg for another little something so I added a couple of Toile Tidings Glitter Enamel Dots.

That’s all there was to it, so if you need some easy cards, just use this Toile Tidings Paper. I love all the little scenes on it! In fact, you could use this paper after Christmas, during the winter for cards or to write thank you notes after the holidays.

SHOP STAMPIN’ UP! ONLINE HERE!

(Did you know you can expedite your Stampin’ Up! order? There is a drop down box when you check out for shipping. It IS extra ($20 for 2nd Day Air and $35 for Next Day Air, on top of regular SU shipping) but if you need it, you need it! Warning: 2nd Day Air CAN be addicting for large orders! (What’s another $20 if I’ll get it in two days?!) You have to place your order by 11:00 am MT (that’s noon Central Time) for it to go out that day.

Brightly Gleaming Stitched Star Christmas Card

Brightly Gleaming Stitched Star Christmas Card

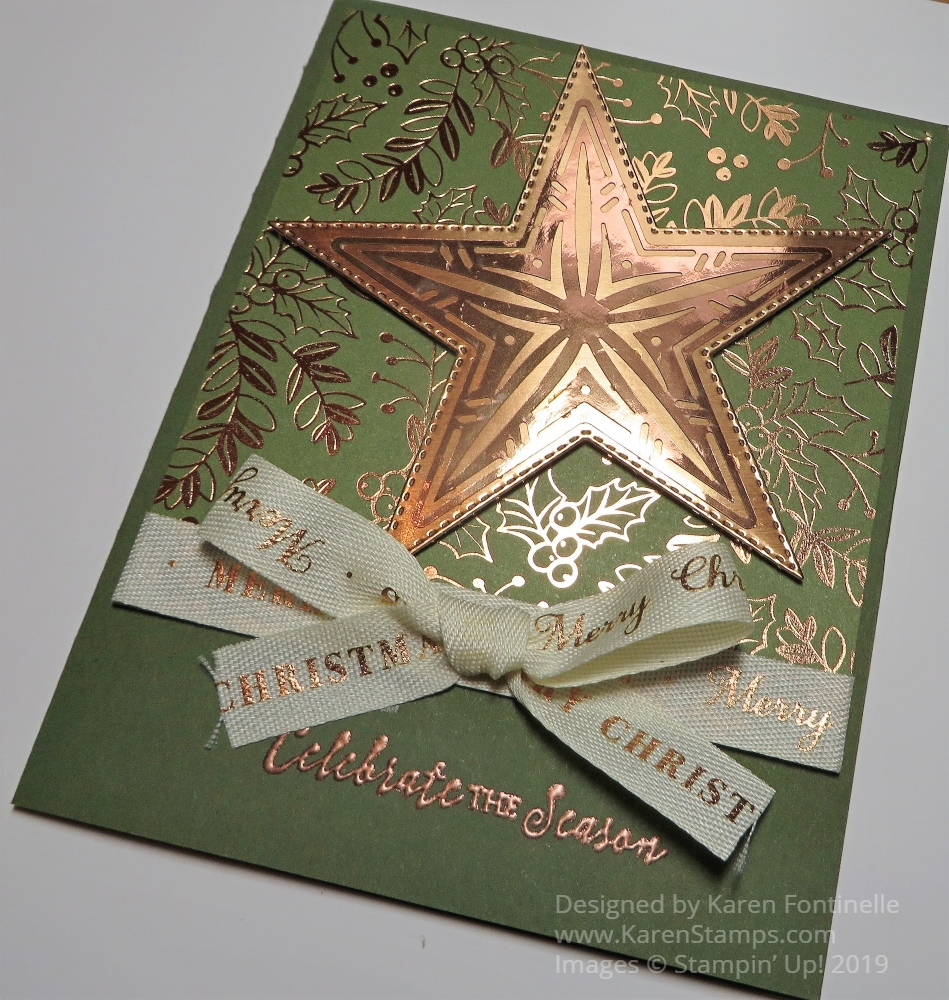
This Brightly Gleaming Stitched Star Christmas Card was very difficult to photograph without a giant glare of the Copper Foil, but I think I got it pretty well now on an angle! I’m feeling like I haven’t had enough time to play with all my Christmas stamp sets and accessories and time is getting short! Panic is setting in! And a sore throat that slowed me down this past week!

However, I did fit in some stamping time and here is one example! It seemed like a lot of samples I was seeing used the Night of Navy designer paper in the Brightly Gleaming Specialty Designer Series Paper. I thought I would change things up a bit and use the Mossy Meadow color.

The card base is Mossy Meadow and the Mossy Meadow patterned designer paper just comes down partway on the card base. Be sure to adhere some of the Very Vanilla/Copper 1/2″ Classic Weave Ribbon around the bottom of the designer paper before adhering the designer paper to the card base! And before you do any of that, if you want to emboss a greeting at the bottom of the card, do it before you have ribbon hanging in the way with the potential to ruin the card! I got lucky and could have covered it up with an embossed greeting on a different paper. But it’s better if you plan your card and space first and stamp or emboss before you get everything adhered to the cad!

The star is die cut with the largest star in the Stitched Stars Dies. I just love that we have star dies again because I think stars are SO useful in designing cards and projects. Just think about how many things you can use stars for besides Christmas! Birthdays, congratulations, babies, retirement, everything! These stars are beautiful dies and certainly not just for the holidays.

The star is cut from Copper Foil. Then that Copper Foil star is overlaid with the large star in the Brightly Gleaming Foil Elements. I used the Multipurpose Liquid Glue in teeny tiny dots on the back of the foil element to adhere to the die-cut star. I got lucky and didn’t make a mess with the glue so it worked fine. On this card, I popped up the foil star with Stampin’ Dimensionals, but you can also adhere it flat on the card.

The ribbon is really beautiful. I need to learn how to tie a bow with the words all going in the same direction if that’s possible! I passed it up on one of my first Holiday Catalog orders, but then added it later because it is something different!

For the greeting on the card front, I chose one from the Itty Bitty Christmas Stamp Set because I knew I needed something small. I stamped it with Versamark and heat embossed with Copper Stampin’ Emboss Powder and my Heat Tool. Heat embossing is magical, if you haven’t tried it yet!

For the inside of the card, I added a Very Vanilla layer of cardstock, stamped with a greeting in Mossy Meadow Ink and with a strip of the same Brightly Gleaming DSP along the inside edge of the Vanilla layer. The greeting used inside the card says “Hoping all your Christmas wishes come true.” in the So Many Stars Stamp Set. Save 10% by purchasing the So Many Stars Stamp Set and Stitched Stars Dies in a Bundle.

Thanksgiving is coming up so make those cards first if you are mailing a few cards to friends and family. But then it’s really time to get serious about Christmas cards!! You’ve probably paged through the Holiday Catalog a bunch of times, but maybe you need another few run-throughs before it gets too close to the holidays!

SHOP STAMPIN’ UP! ONLINE HERE!

Fun Stampin’ Up! Videos After the Houston Floods!

Yesterday was a very wet day in Houston – actually, the third wet day in a row in Houston, which you probably heard about on the news. On Tuesday there was a tropical depression in the Gulf of Mexico which got named Imelda pretty quickly, which I did not take as a good sign that they named a storm! That means it reached certain criteria and that usually isn’t good!

We knew we would get rain, but we needed rain, so at least for the first day it would be good. It all would depend on where you lived and where this storm went how much rain anyone would get. Unfortunately, even the first day coastal towns and towns east of Houston got a lot of rain and flooding. The second day Houston thought the storm had moved on and we dodged a bullet….but then we got big storms late in the day from the heat. Then yesterday, or even the night before for lots of people, the city of Houston itself got plenty of rain, flooding highways and roads and houses. You saw all the pictures on TV. It’s a terrible situation but one we have seen often in all the years we have lived here. We’ve just been lucky, so far, that we haven’t been stranded somewhere on the road or had water get in the house. When Houston gets too much rain, this happens, and often it is difficult to predict or these storms have a mind of their own, no matter how hard the weather people work to get it right.

So for today, let’s just relax and watch some Stampin’ Up! videos for Holiday Catalog products!

You saw the fall birthday box I made for my husband for his birthday instead of a card yesterday in THIS POST.  There are SO MANY ideas for these Mini Curvy Treat Dies Boxes, you won’t believe the cute ideas creative people come up with! I made one Halloween pumpkin one with my daughter but have to make some more here at home.

A great addition to our stamping supplies, I think, are these So Many Stars stamps and dies in the Holiday Catalog.  You can purchase the So Many Stars Bundle and save 10%, which includes the So Many Stars Stamp Set and the Stitched Stars Dies.  Stars are not at all just for Christmas!  You can use them for any celebratory occasion like birthdays, graduations, and many more.  The stars I have had in the past I have used a lot.

Be sure to notice the Mercury Glass Designer Acetate in the Holiday Catalog on page 33 at the bottom.  You could easily overlook it. See in this video how they die cut the acetate and then layer it on a white background. I think this Mercury Glass is very interesting to use for lots of projects!  Certainly something very different that we haven’t had before!

Enjoy your day and set aside some Holiday Catalog reading and browsing time for your pleasure and inspiration!