The plaid paper on this Masculine Plaid Tidings Birthday Card is coming soon in the August-December 2020 Mini Catalog on August 4th. Now when I first saw it in the holiday catalog, I wasn’t too thrilled and might have passed it up. I did notice it could be used for Christmas, fall, or Halloween and probably other things but I wasn’t that excited about it. But I did order it and when I opened the package, I just loved the paper!!
The Plaid Tidings 6″ x 6″ Designer Series Paper package has all kinds of plaids in it. There is a long list of coordinating colors! Although we might think of it as holiday paper, whether for Christmas or the oranges for Halloween, Fall, or Thanksgiving, I decided to use a sheet for a birthday card. While it could be for anyone, the plaid gives it a masculine look in this case and we’re always looking for things that work well for masculine cards for the men in our lives. The red on this paper is Cherry Cobbler and the green might be Shaded Spruce or Mossy Meadow. I wasn’t sure!
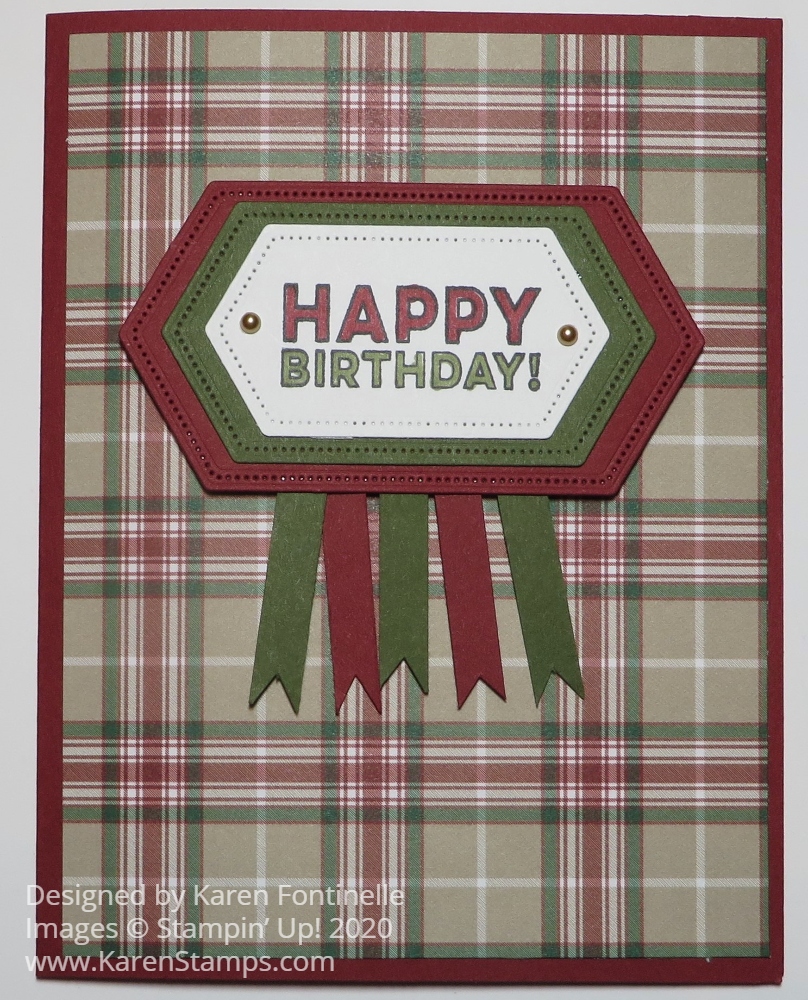
The card base is Cherry Cobbler and the red and green plaid paper is adhered to that. The greeting is from the Many Mates Stamp Set. It is stamped in black Memento Ink. It’s an outline stamp and you can leave it as is or in this case I colored in the letters. I used my Cherry Cobbler and Mossy Meadow Stampin’ Blends markers.
I stamped the greeting on Whisper White and die cut it with the Stitched Nested Labels Dies. Then I made layers with the same dies out of Cherry Cobbler and Mossy Meadow.
Due to not having the right colors of ribbon, I decided to just use some 1/4″ strips of cardstock scraps for tails hanging from the bottom of the greeting panel. I even cut the little bitty flagged ends with my Paper Snips. You could use more or less strips. I started thinking three would be good and ended up with five! After adhering the strips on the back of the layers with our new Stampin’ Seal Adhesive, I popped the whole thing up on Stampin’ Dimensionals®. Even then I wanted another little something, so I used two gold Metallic Pearls.
This is actually a pretty easy card to make! If you didn’t have the particular dies, you could use rectangles or ovals or circles or even just cut rectangle layers. Just stamp a greeting and choose your favorite plaid paper for the occasion!
You’ll find the Plaid Tidings Designer Paper in the Holiday Catalog, now known as the August-December 2020 Mini Catalog on page 57. I think you will be surprised how much you like this paper and how often you can use it for your projects, like this Masculine Plaid Tidings Birthday Card.