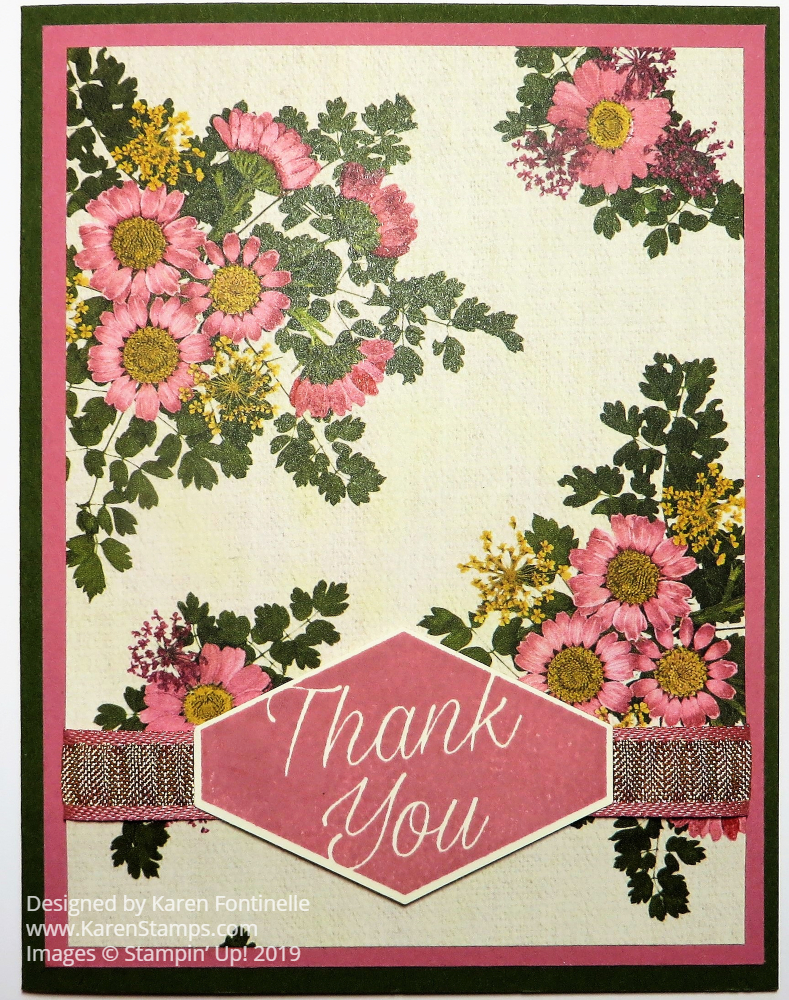
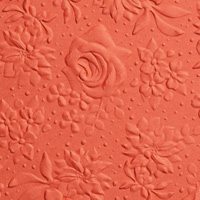
This Pressed Petals Floral Thank You Card is very simple and quick to make! This card design is certainly easy and basic and is also good to use with this beautiful Pressed Petals Specialty Designer Series Paper. The paper itself is so pretty and unusual that you want it to stand on its own. This paper was designed with actual pressed flowers that were photographed by Stampin’ Up! and then printed into paper.
The card base is Mossy Meadow Cardstock with a layer of Rococo Rose, one of the new In Colors. The ribbon adhered around the designer paper is the Rococo Rose 1/2″ Gathered Ribbon. This ribbon is two-toned, with a gold center and Rococo Rose edges.
The greeting is stamped from the Accented Blooms Stamp Set in Rococo Rose Ink. Then it is easily punched out with the Tailored Tag Punch. The greeting is then adhered to the card with Stampin’ Dimensionals at the top and bottom of the center so that it will fit on each side of the ribbon.
Since the Mossy Meadow Cardstock is so dark, I added a Very Vanilla layer inside the card and stamped a little flower in each corner to allow for stamping a sentiment inside or writing a personal note.
Any time you need a quick card, think about this simple design. You could even omit the ribbon if you didn’t have quite the right thing or wanted to make it even simpler. This Pressed Petals Floral Thank You Card is one you can easily make with any cardstock, designer paper, and a greeting! Try it!
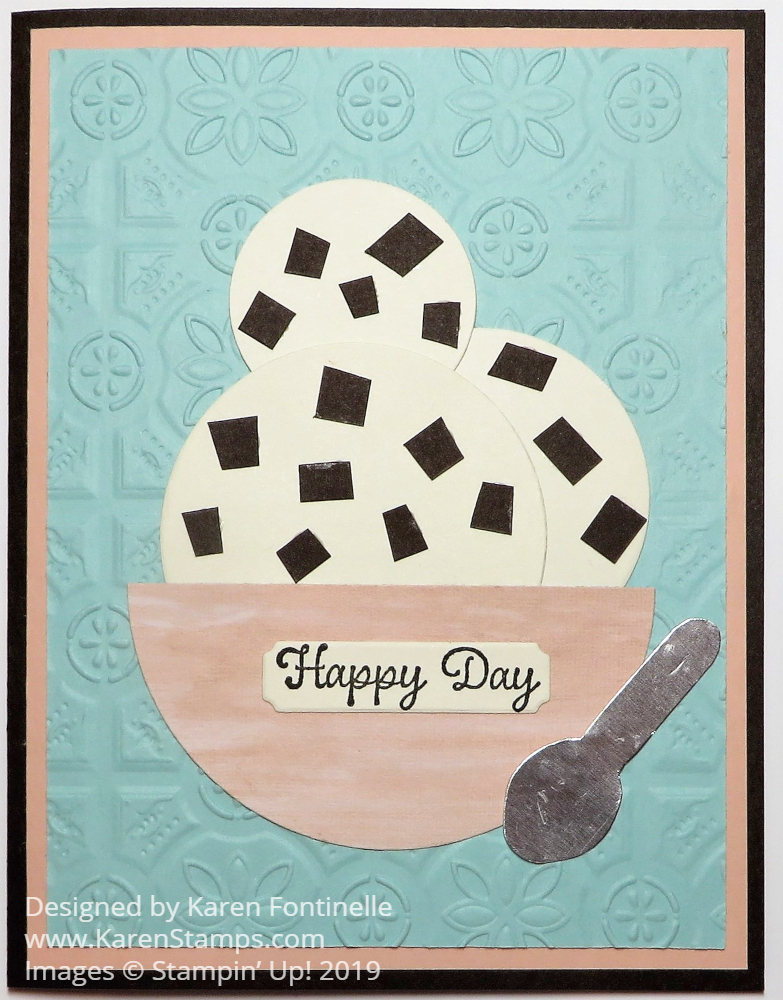
What could be better than A Summer-Themed Card for National Ice Cream Day except for a real bowl of ice cream?! With temperatures as hot as they have been lately around the United States (and always in Houston, Texas!) there’s nothing like a cold bowl of ice cream.
My father loved his dish of ice cream almost every night after dinner. I think what we had growing up was actually something called ice milk. I still remember the translucent plastic container it came in. My mom saved a lot of them and they were perfect for putting cookies in or other things. So I think I got my love of ice cream from my father!
When we lived in Oklahoma when we were first married my favorite was Chocolate Almond ice cream from Braum’s. Little did I know that there would be something better waiting for me when we moved to Houston! Blue Bell Ice Cream!!! There is no other ice cream any better (if you ask us!). When Blue Bell had to shut down production a couple of years ago, we tried many other brands but nothing compared. People even had signs in their yards wanting Blue Bell to come back or that they would rather take a chance on eating it instead of watching cartons being thrown out at the stores! That’s devotion!!
In honor of National Ice Cream Day today, I made a bowl of my favorite flavor, Blue Bell Chocolate Chip! You don’t always have to have an exact stamp set to make a card. Sometimes you can just use punches or dies or parts of punches, dies, or stamps to make what you want. My ice cream scoops are cut from Very Vanilla Cardstock in different sizes of Layering Circle Dies. The bowl is a circle of a piece of pink in the Perennial Essence Designer Series Paper. After cutting the circle, I cut it in half to look like a bowl. The chocolate chips are just little pieces of Early Espresso Cardstock. It looks good enough to eat! I’m always hungry for Chocolate Chip!
Since I knew I would be using Early Espresso for the chocolate chips, I chose it for the card base, with a layer of Petal Pink and then Pool Party. To add some interest, I decided to emboss the Pool Party layer with the Tin Tile 3D Embossing Folder. I thought maybe it looked like a kitchen wall in the background! The spoon is made with Silver Foil Paper and the Perennial Flower Punch! I cut a strip of the Silver Foil wide enough but not too wide, to fit into the punch, fed from the top, to get just the petal portion punched. From that, I trimmed off the rest to round the tip a little and make the spoon handle! Kind of fun to come up with that!
I found the greeting in the Itty Bitty Birthdays Stamp Set. What greeting do you use for National Ice Cream Day? “Happy Day” seemed just right for eating ice cream!
I love some of the other Blue Bell flavors too, like Homemade Vanilla and Moo-llennium Crunch. But Chocolate Chip can’t be beat! Sometimes I like to add pecans on top.
An ice cream treat seems to always be something special, one that cools us off on a hot summer day! If you think about it, you probably have special memories of ice cream! Did you ever walk down to a corner store to buy an ice cream bar? Was there an ice cream truck that drove through your neighborhood ringing a bell or playing a tune for all the kids to run out and want to buy ice cream for a dime or a quarter? Did you have homemade ice cream made in an ice cream freezer with ice and salt?
All of these things make it important to celebrate National Ice Cream Day! It also shows how important our stamping and papercrafting is that we can make almost anything or commemorate almost anything with our crafting supplies!
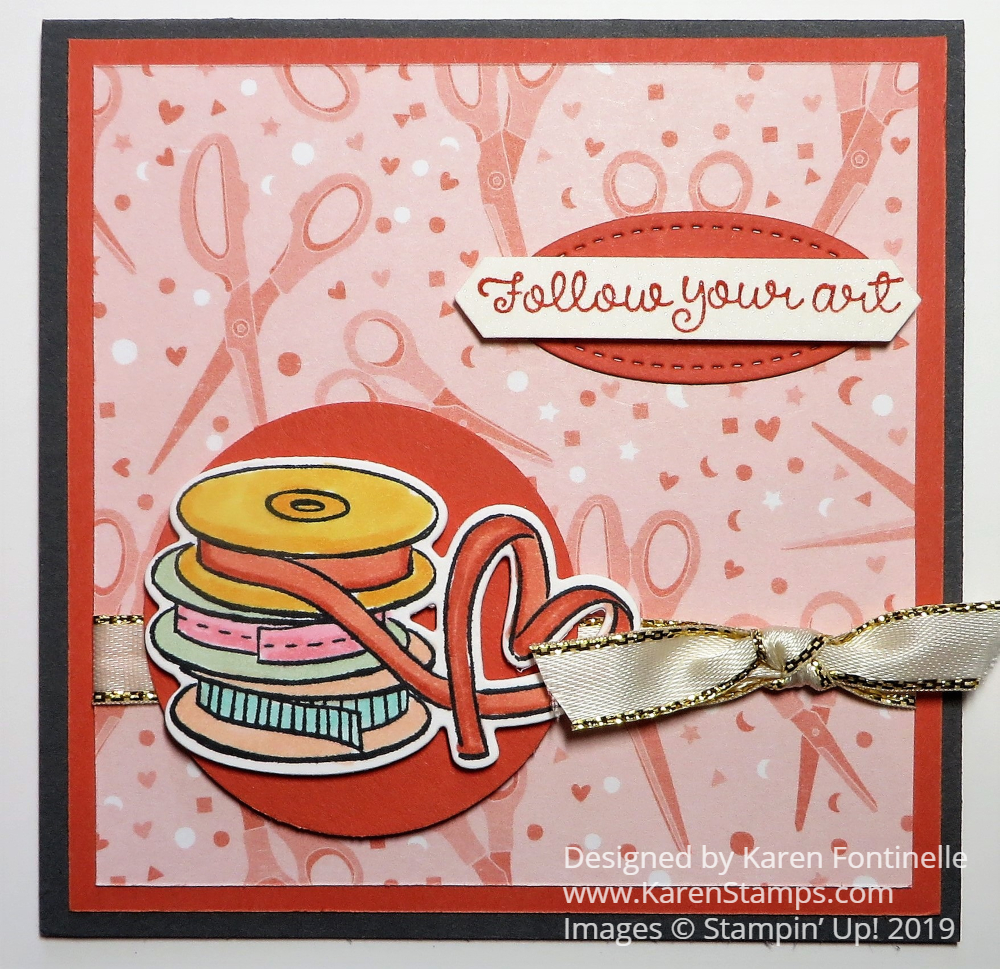
You will find the Follow Your Art Suite in the new Stampin’ Up! Catalog on page 52 with a stamp set, coordinating dies, matching designer series paper, plus accessories. What a perfect suite for all of us crafters of many kinds! You can also use the Crafting Forever Stamp Set from last year’s catalog that will work well with this new suite.
I was on a roll one day playing with this paper stamps, and dies. This is a square card, 4 1/4″ x 4 1/4″. It’s nice to make a card of another size after usually making the normal size. The card base is Basic Gray with a layer of Calypso Coral. The designer paper is a pattern in the Follow Your Art package.
I stamped the stack of ribbons in the It Starts With Art Stamp Set and colored in with Stampin’ Blends markers. Then I was able to die cut these with a die in the Arts & Crafts Dies. To help the ribbon piece stand out a little bit from the paper, I placed it over a large circle of Calypso Coral.
The greeting is in the stamp set and is punched with the Classic Label Punch. Then it is layered on a die-cut oval in the Stitched Shapes Dies. The ribbon adds a little extra embellishment. This Gold 3/8″ Metallic-Edge Ribbon is so useful on many cards. It is worth having in your stash!
If you want another idea for this suite, here is another card I made, A Card For Crafters. Sometimes it is fun to just work with one set of stamps, paper, and maybe dies and just see what all you come up with. Then be sure to mail some cards to your crafty friends!
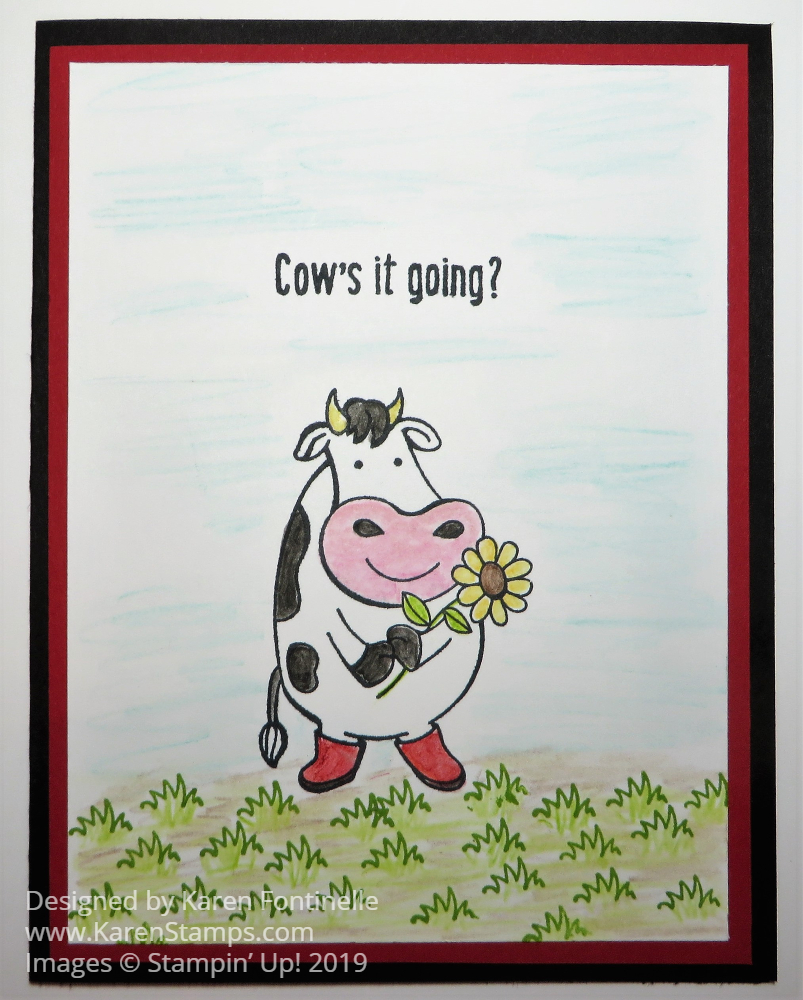
Another stamp set that didn’t jump off the page at me at first until I saw some fun cards made with this stamp set! This Over the Moon Cow Card will just be a silly card to send to someone! There are some other fun cows in this stamp set and funny sayings to go with them. You’ve got to check out the Over The Moon Stamp Set.
I think the boots on the cow made me think of red boots which made me start with a Basic Black card base and a Real Red layer. I used my Stamparatus to stamp the cow and the saying.
I decided to use my Watercolor Pencils and Blender Pen to color the cow instead of my usual Stampin’ Blends markers. I have to say, when I first became a Demonstrator I absolutely loved our (older) watercolor pencils and using the Blender Pen to smooth out the color. Now that I am used to Stampin’ Blends, I don’t care for the Watercolor Pencils as much but then they are not as expensive as the Blends. So it’s nice we have lots of choices! I still think it is kind of magical to use the Blender Pen or Aqua Painter to smooth out the coloring with WC Pencils, so maybe I do still like them! They give a softer look I think.
The little tufts of grass are stamped in Granny Apple Green and then colored with the Granny Apple Green WC Pencil. So there you can actually see the difference between the ink and the pencil. I also scribbled in some Early Espresso to look like dirt and then used the Blender Pen over the whole area. You do have to be light-handed and careful doing this right on Whisper White as it won’t hold up to very much moisture. Shimmery White Cardstock or Watercolor Paper are good choices if you want to get serious with the WC Pencils and Blender Pen or Aqua Painter.
I wondered if the whole plain white background was okay or not, but opted to scribble in some blue to suggest sky and again, used the Blender Pen over this whole area, carefully. I’m not sure Memento Ink was the right thing to use with the WC Pencils but it worked out. If I had thought ahead I might have used Stazon instead.
If you like cows or animals or just want to make some fun cow cards, get the Over the Moon Stamp Set in the new Stampin’ Up! Catalog!
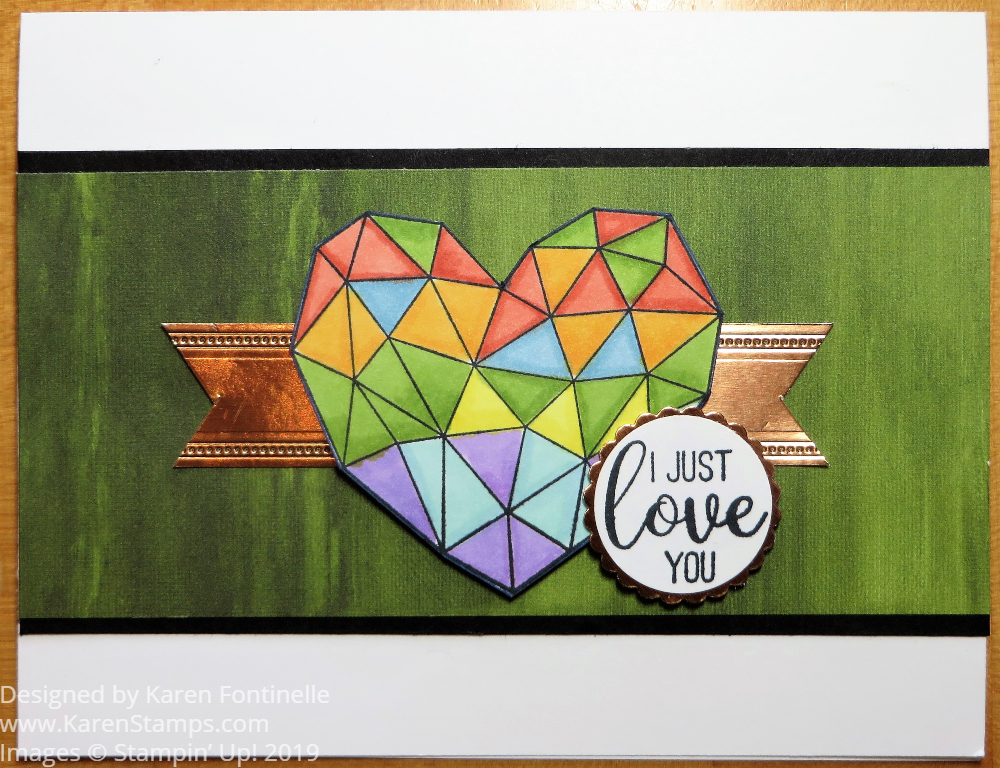
This Modern Heart Stamp Set is one that I skipped over initially and then soon discovered was kind of cute and had really nice sentiments. I love the fonts on the sentiments. You can stamp this heart many ways and make many types of cards with it. I made it a Modern Heart Anniversary Card for my husband.
You can just stamp the heart and color it in, or stamp in a color and leave it as is. You can stamp the “swooshy thing” and then stamp the heart over it. You can emboss the heart if you like some dimension. You can use the new Fluid 100 Watercolor Paperand use the new Pigment Sprinkles. So many opportunities for creativity!
In this case, I wanted to do some coloring using my Stampin’ Blends. I just stamped the heart on Whisper White in Memento Ink and used several shades of markers……Calypso Coral Combo, Mango Melody Combo, Pineapple Punch Combo, Balmy Blue Combo, Granny Apple Green Combo, Pool Party Combo, Highland Heather Combo and Night of Navy Dark just to color around the edge after I cut out the heart.
Take a look at this Modern Heart Stamp Set and see if it is one you want in your collection! Remember, for every $50 you spend in July, you will receive a $5 coupon code to use on your order in August! No limit! It’s Stampin’ Up! Bonus Days! Keep your code(s) in a safe place so you will have them handy to use in August.
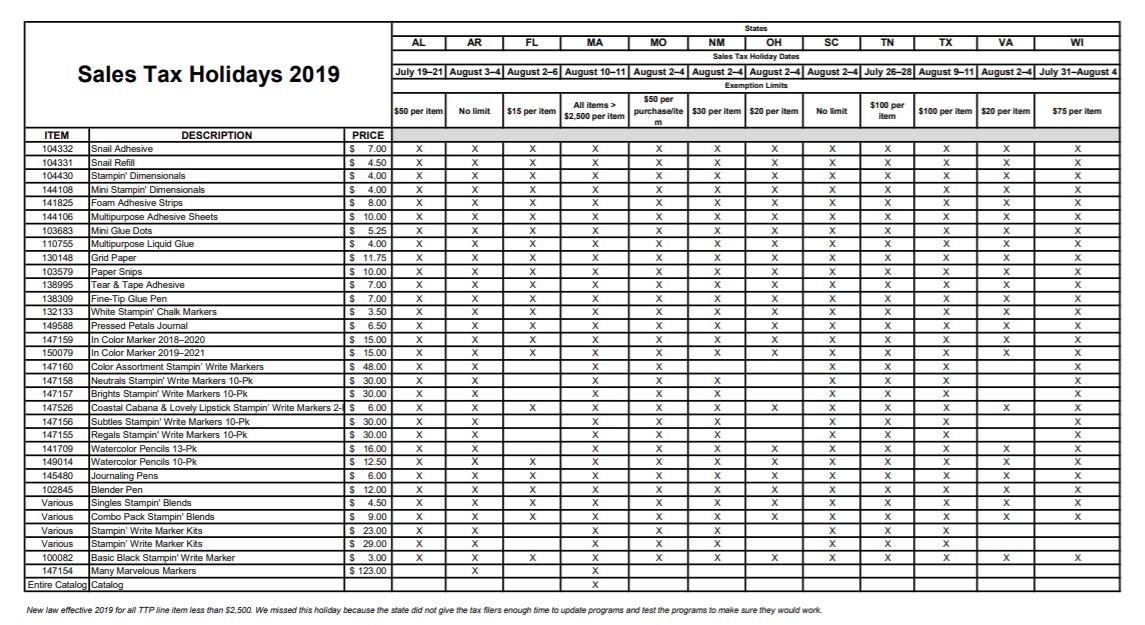
Sales Tax Holidays are coming in at least a few states and some are in July! These sales tax holidays are to help with buying back to school supplies and clothes. Depending on the sales tax in your state it might not be very much, but if you buy a lot it can add up. At a minimum, it saves you a little bit of money. Of course it is not just back-to-school parents and students that get to use this Sales Tax Holiday! Anyone can as long as you buy eligible items.
I suppose since some of the Stampin’ Up! products can be used for school supplies (and how many times have we moms had to share our craft or stamping supplies with family members for school, Scout or other projects?!). Even if you don’t have a child going back to school, if you order during your state’s tax holiday you can take advantage of this savings.
Just some examples of Stampin’ Up! products that “may” qualify (depends on your state) are adhesives, markers, Stampin’ Blends (yea!), In Color Markers, Grid Paper, the new Pressed Petals Journal, Paper Snips, Watercolor Pencils, and more. Zoom in and look over that chart!
To read this Sales Tax Holiday chart, click HERE and even then you may have to zoom in on your computer screen to be able to read it. You will have to check the dates and items for your own state. Note that Alabama starts July 19-21 and Tennesee and Wisconsin are later in July. Several begin almost right away in August. Just sayin’….be ready! You can plan ahead if you are going to order.
However, remember the Bonus Days in July where you get a $5 coupon to spend in August with every $50 purchase of merchandise. Those early July states can double-dip!
I’m still thinking that school just got out for the summer (because once your kids are grown, except for school crossings when you are driving, your life doesn’t revolve around school schedules anymore) but I have already seen Back-to-School supplies out in the store! And even crazier, someone on Instagram said Halloween items are going out in craft stores already!
So it is coming up on Back -to-School time and you may be able to save a little bit of money during the Sales Tax Holidays on “your” school supplies for stamping!
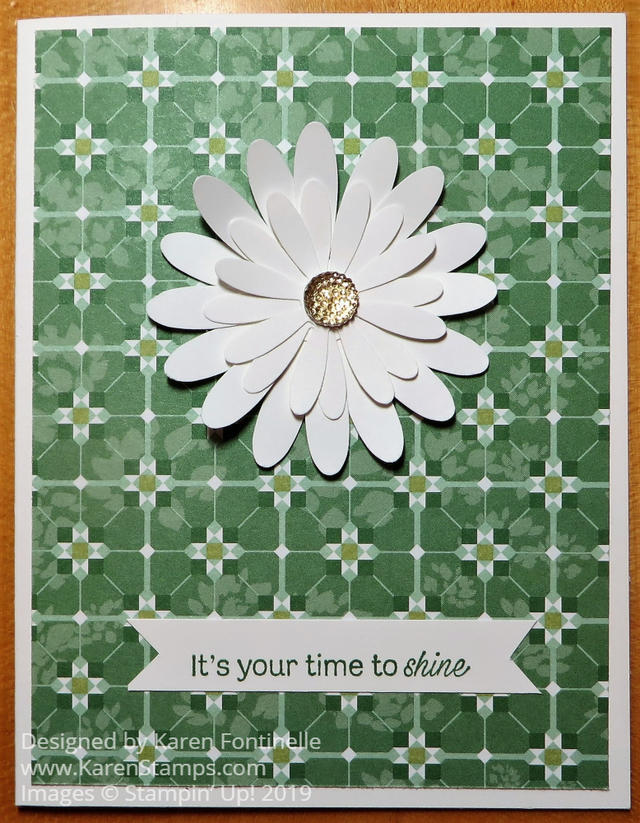
Sometimes all you have to do is look at a package of designer paper and a certain pattern jumps out at you and demands you make a card with it such as this Garden Lane Daisy Card. This is a very easy card to make if you have the two daisy punches and would be a wonderful way to encourage a friend or loved one with this greeting.
You may already have the Daisy Punch from a previous catalog that coordinates with the Daisy Delight Stamp Set. Did you know there is a new, smaller Medium Daisy Punch in the new Stampin’ Up! Catalog? You can use this punch on its own or stack with the larger Daisy Punch. And it has a new stamp set that coordinates with it, Daisy Lane. That gives you two punches and two stamp sets, all involving daisies, with which you can make beautiful cards and projects!
The card base for this card is the Whisper White THICK Cardstock. While not absolutely necessary, if you would like a little more sturdiness to your card, using the Thick cardstock is a little better than the regular Whisper White. As I said, I chose a pattern from the Garden Lane Designer Series Paper. There is something about this paper, to me, that looks so fresh and calming. Maybe it is the greenery look to it. Back to nature!
First I was going to just use the Medium Daisy Punch, with two flowers together on this card, but then I decided to use it with the larger daisy punch in the center of this card. I just punched two daisies of each size and glued them all together with the Multipurpose Liquid Glue. Then the one large flower was adhered to the card front. If you like, you can curl the ends of the petals a little with a Bone Folder to make the flower stand off the card a little bit. In the center, I placed a Gold Faceted Gem.
The greeting is stamped with Garden Green Ink from the Daisy Lane Stamp Set. You can purchase the Medium Daisy Punch with this stamp set in the Daisy Lane Bundle and save 10% if you like!
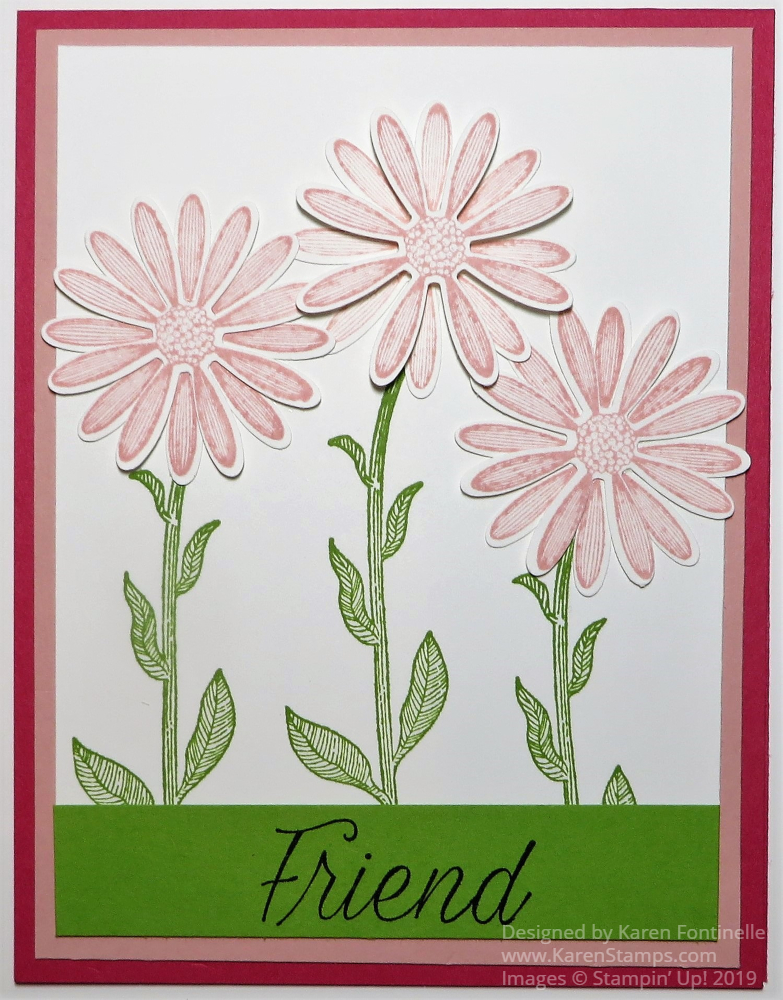
This new Daisy Lane Stamp Set is easy and fun to use to make a card, like this Daisy Lane Floral Friend Card. I kept forgetting to order this new stamp set and smaller Medium Daisy Punch. As you can imagine it pairs with the Daisy Punch we have already had that has been quite popular.
Since this was my first card with this stamp set and punch, I wasn’t too sure what I was going to make. I chose Melon Mambo for the card base since I thought about it but didn’t choose it the other day for a card! For a layer I used Blushing Bride. The top layer is Whisper White.
First I stamped the flower stems with Granny Apple Green Ink. I just stamped them and thought what else I would do. Then I stamped six daisies with Blushing Bride Ink and punched them out so I could have a double layer of daisies to make a fuller flower. It seemed like those three daisies were going to look fine on the card. Two of them I glued together in the center with my Multipurpose Liquid Glue and the center one I popped up the top daisy on a Mini Stampin’ Dimensional. All three daisies are glued to the card with the Multipurpose Liquid Glue.
Now the question was where to put the greeting! I wanted to use one in the Daisy Lane Stamp Set so I just cut a strip of Granny Apple Green Cardstock to match the ink and just stamped the word “Friend” on it and adhered to the bottom of the Whisper White. This covered up my uneven placement of the stems and provided a place for the greeting! At this point, I thought the card looked fine and I stopped! Sometimes you have to know when to stop!
For the inside of the card, I cut a layer of Whisper White and stamped a Blushing Bride daisy in the corner since the Melon Mambo would be a little dark to write on.
You can purchase the stamp set or punch separately or you can save 10% by buying them in the Daisy Lane Bundle.And if you really like daisies, you will also want the Daisy Delight Stamp Set and Daisy Punch that we have had in a catalog before. This Daisy Lane Floral Friend Card is an easy one to make with just stamping and some daisy punching!
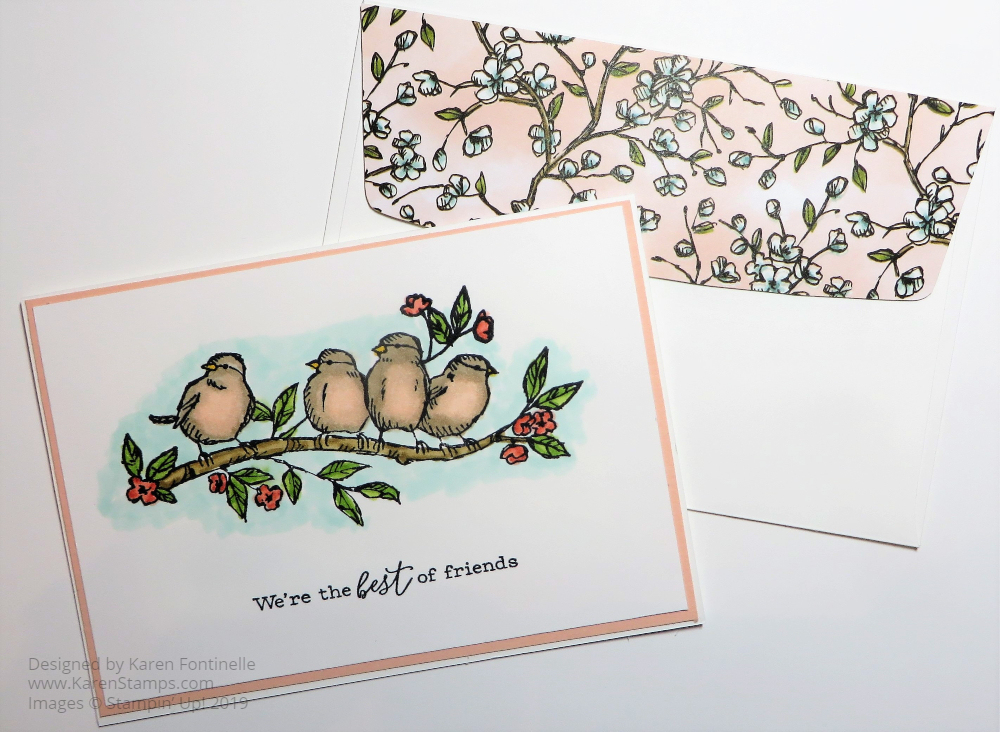
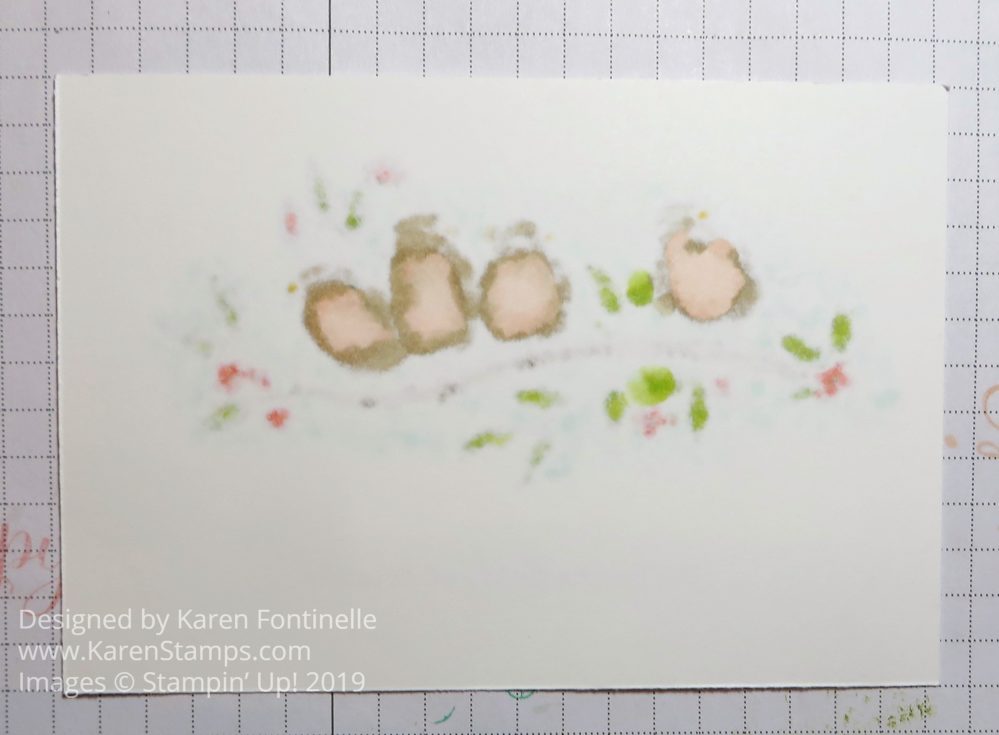
Even though I posted a card with the Bird Ballad Designer Paper yesterday, I think that whole suite is so pretty I had to do something else with it for today, the Free As a Bird Notecard & Envelope. My original idea was to just stamp directly on the front of the Notecard, but since I was going to use my Stampin’ Blends to color in the stamped image, I didn’t want to have the coloring show through to the other side. I’m not positive it would since the notecard paper seems fairly heavy, but no point in taking a chance! I even decided to add a Petal Pink layer with a narrow margin behind the stamped layer.
Back side of Whisper White
I absolutely love coloring with the Stampin’ Blends alcohol markers! Don’t be intimidated to use them, thinking about “blending”. Just color! I usually use the light color first and then maybe color the edges or highlighted areas on the stamped image with the darker color. Then maybe I even go back and color over again with the lighter marker to blend any rough lines. Just play and do whatever you want. I can almost guarantee you will be satisfied with the result with these markers.
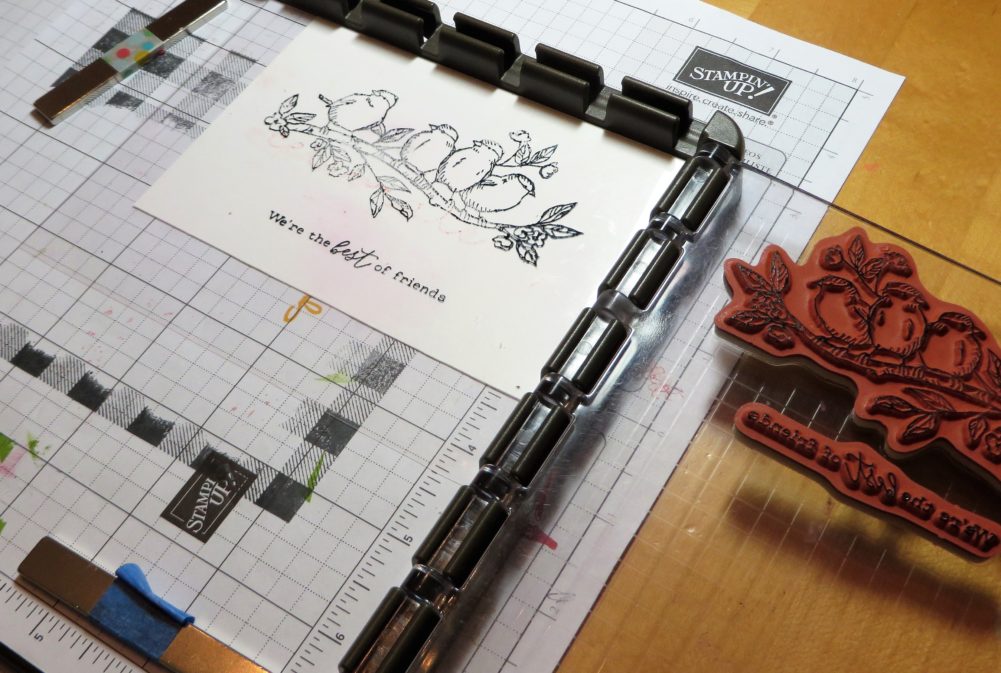
Since I originally thought I was going to stamp the birds directly on the notecard, I knew I just had that one chance to get it right so I pulled out my Stamparatus®! In order to see how everything lined up, I put down a piece of clear Window Sheet on top of the notecard so I could stamp the image on the window sheet and see if anything was crooked (usually the words). Be sure to use the gridlines on the Stamparatus plate to see if you have your stamp or words straight if that is what you want. I could also put two stamps on the Stamparatus at one time and get everything spaced just right!
When you have everything where you want it, remove the window sheet, make sure the cardstock is still in the corner or wherever you stamped it with the window sheet and have your magnets holding down the paper. Then stamp! If the image doesn’t come out fully stamped, just ink up the stamp again without moving anything and stamp again (or again if necessary) until you have a good image. That’s one of the most important benefits of the Stamparatus.
As I have said before, the Note Cards & Envelopes are just handy to have on hand always. When you want to do some quick stamping and write a short note, they are perfect. AND they come with their own mailable envelopes! To fancy up the envelope a little bit, I used a piece of the Bird Ballad Designer Paper on the back flap! You could put the paper inside as a liner if you wanted instead. I put the adhesive on the envelope flap, then glue on a larger than needed piece of paper. Then I trim off the excess with scissors. So easy and so pretty!
Always remember to be careful with the magnets because they really like to jump together and then they are difficult to pull apart. These magnets are very strong, which is good, until they get stuck together! Watch out for your fingers, too! I like to put the magnets on opposite sides of the table if I don’t have then in use so that they are FAR apart!
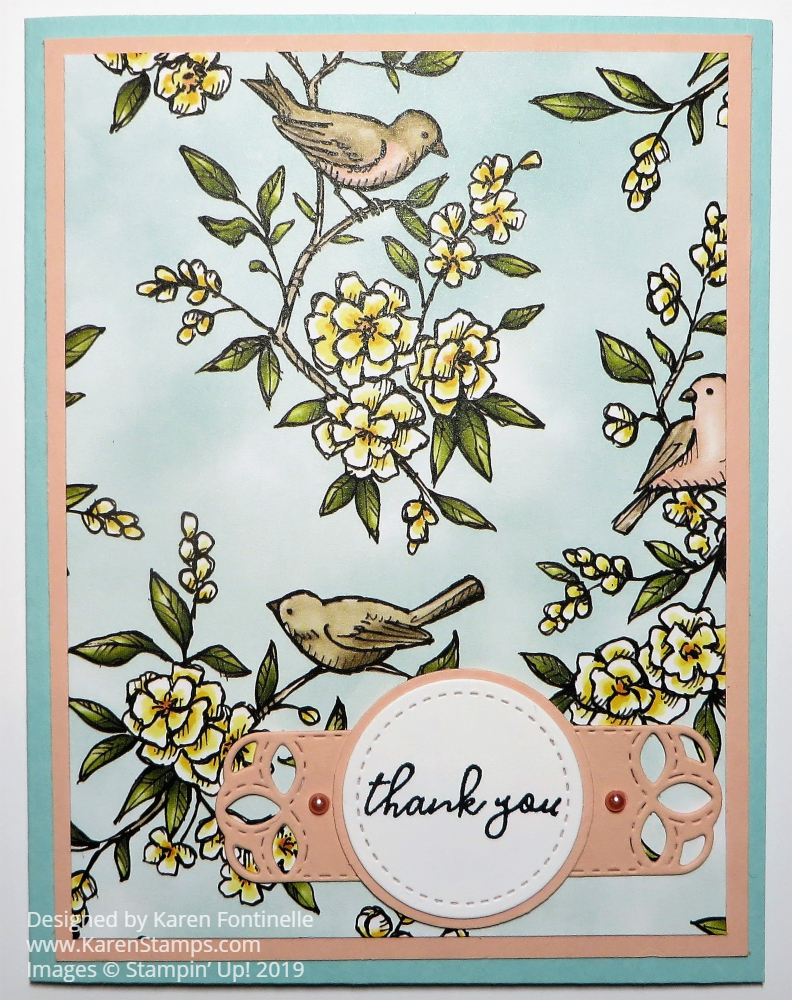
This Easy Bird Ballad Thank You Card is just that – easy! I didn’t even know what I was going to make until I pulled out the Bird Ballad Designer Series Paper. This beautiful pattern appealed to me. It is gorgeous. Such a soft background with a watercolor look and flowers and birds that look like they were colored with Stampin’ Blends markers…..which they were in the creation of this paper by the concept artist at Stampin’ Up! so that WE stampers could then color in stamped images and they would match the paper!
To make this card, I just chose colors listed on the back of the designer paper package. I always write the color names with a marker on the back large enough so I can read them without squinting. Stampin’ Up! must have tiny printing machines!! The card base is Pool Party and a layer of Petal Pink.
The die-cut piece was already in my bag of cardstock so I used it! It is from the Stitched Labels Dies. I also had that Petal Pink circle as a scrap so I die cut a Whisper White circle with the Stitched Shapes Dies. The greeting is from the Free As a Bird Stamp Set. Then I added two Artisan Pearls (retired).
This is an easy card to make with cardstock and designer paper plus a greeting. You could use this card for many occasions. If you don’t already own this Bird Ballad paper, whether you are a fan of birds or not, be sure to put it on your next order!
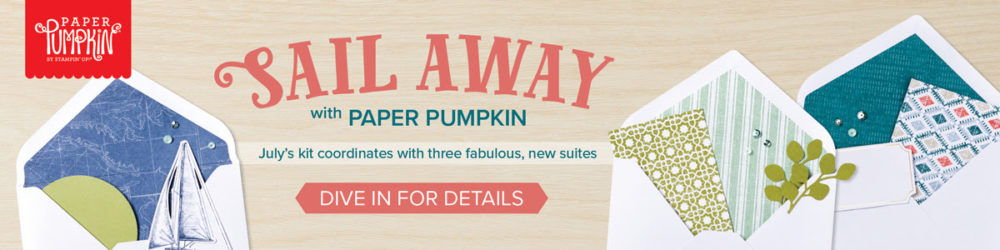
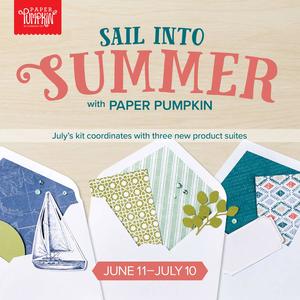
Stampin’ Up! has begun coordinating Paper Pumpkin kits with product suites in the new Stampin’ Up! Catalog. This July Kit coordinates with not one, but THREE product suites that you can mix and match with the kit!
Here is what you will be making (don’t read if you want to be surprised!):
Makes 9 mailable cards with envelopes (3 each of 3 designs)
Coordinating colors: Gold, Kraft, Mossy Meadow, Old Olive, Pear Pizzazz, Pretty Peacock, Sahara Sand, Seaside Spray, and Terracotta Tile
I’m sure you will have fun with your Paper Pumpkin Kit! Just don’t miss out on the original shipment because they often don’t have many extra kits later! The cost is only $22/month and that includes shipping plus everything you need in your kit. With your first kit, you even receive a special acrylic block to use with the stamp set inside.
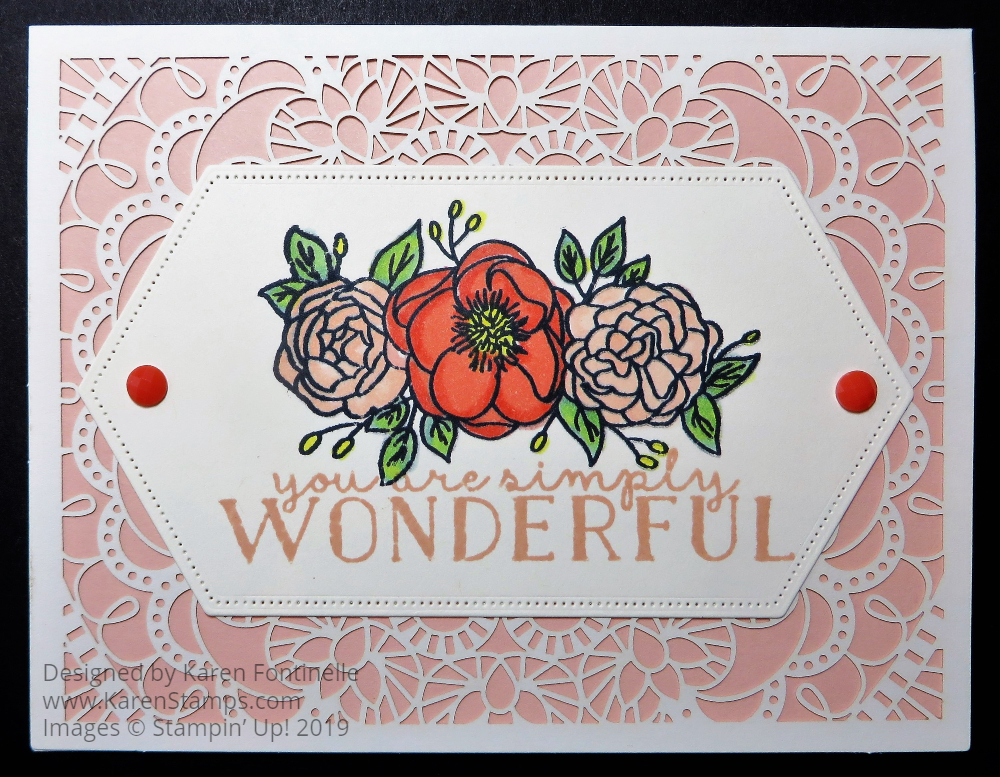
If you want to get an easy start to cardmaking, start with the Bird Ballad Laser-Cut Cards & Tin and add a focal point using the Bloom & Grow Stamp Set. These beautiful laser-cut cards come in a nice tin that you can use for a gift with the cards or separately. You could even just add a simple greeting and let the laser-cut design stand on its own, or you can some other card layers and designs to the front.
I first made THIS CARD with the laser-cut cards, but today’s card is slightly different. On my first card, I adhered the colored cardstock to the inside of the card so the recipient could see the laser design easily when they opened the card. But on today’s card, I carefully adhered the pink cardstock to the back of the laser-cut design carefully, with tiny drops of the Multipurpose Liquid Glue. This has the advantage of covering up the look of the layer placed on the front of the card.
For extra embellishment, I used two of the 2019-2021 In Color Faceted Dots on each end. There are also coordinating dies for the Bloom & Grow Stamp Set, which you might like, and which you can buy in aBundle with the stamp set and save 10%.
Be sure to check out the Bird Ballad Laser-Cut Cards & Tin and the Bloom & Grow Stamp Set (plus dies) because both are beautiful products and will help you make very creative and beautiful cards!
You may or may not have noticed that Stampin’ Up! had introduced new 3D Embossing Folders from a new supplier, but not all of our previous “Dynamic” embossing folders had been changed over. But now, these six 3D Embossing Folders, in the new style (a little bit thinner) are available in the Stampin’ Up! Online Store! More are on the way!
As we talked about before in THIS POST, you may need to use an extra shim, very thin, to make your folders work with your die-cutting machine. Each machine will be different. To remedy this problem, Stampin’ Up! introduced the new 3D Embossing Folder Plate. I have so far forgotten to order one, but I have heard it works well.
Watch this video with George from Stampin’ Up! for tips on using the new style dies, 3D embossing Folders and 3D embossing folder plate. And be sure to listen to his advice at the end!!!
These new 3D Embossing Folders are carryover ones from previous catalogs. The brand new designs in the new catalog were already in this 3D format.
If you have any questions, just ask! If you read the link I posted in this article, you will read about the sandwich that I found that works with my machine, until I remember to order the new 3D Embossing Folder Plate!
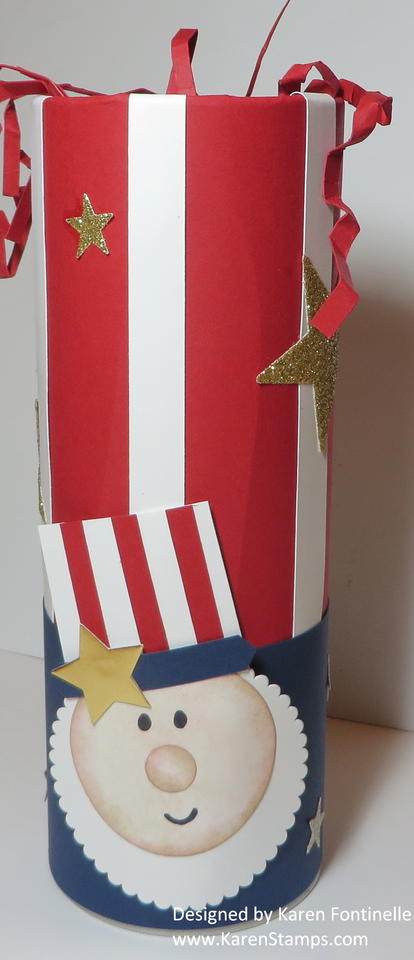
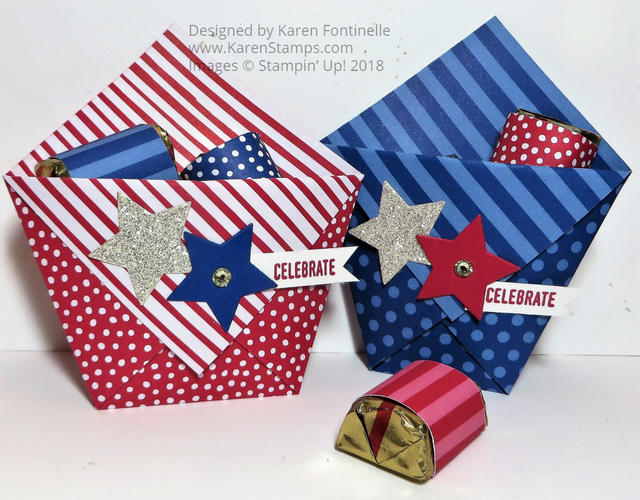
Use a paper towel roll or something similar, maybe a tall round tin, and decorate like Uncle Sam for the 4th of July. Fill it with candies for a party favor or hostess gift!
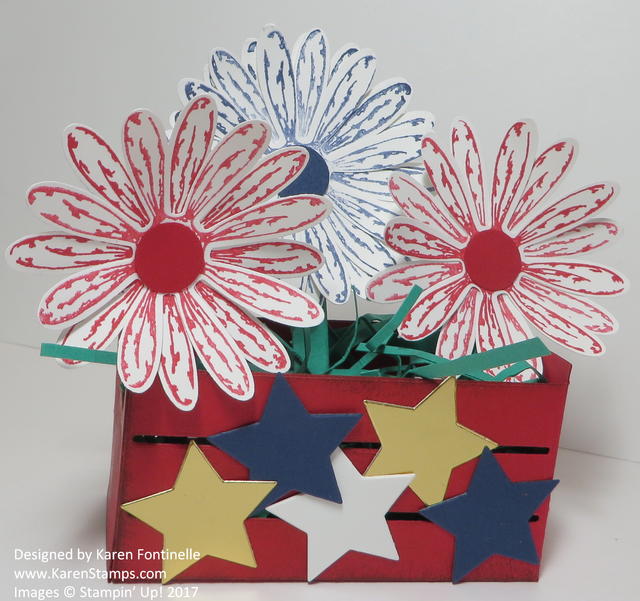
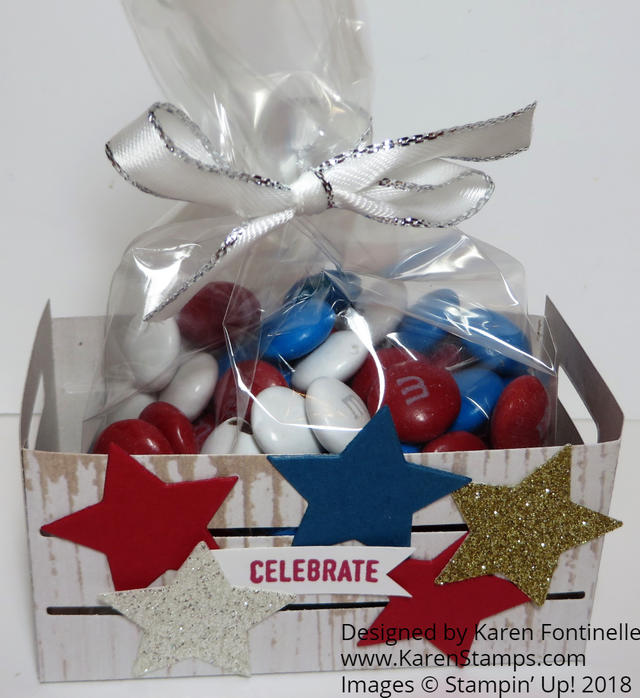
If you have the Wood Crate Dies, you can make this easily and use the Daisy Punch, too! If you don’t own the Wood Crate Dies, just make a little box or use a little box you have. Make some patriotic flowers (and maybe add some candy!) and you are set!
These are really easy to make! You can make a small one with a piece of 6″ x 6″ piece of paper or a larger one with a 9″ square piece of paper. Decorate for a patriotic treat and add candy. You can easily change this up for any occasion!
Another crate but you could also just do a cello bag of candy or some other treat! Fill it with some red, white, and blue candies, tie on a ribbon and maybe add a 4th of July tag!
I hope these past projects give you some ideas for whatever 4th of July projects you would like to make for decorations or treats!
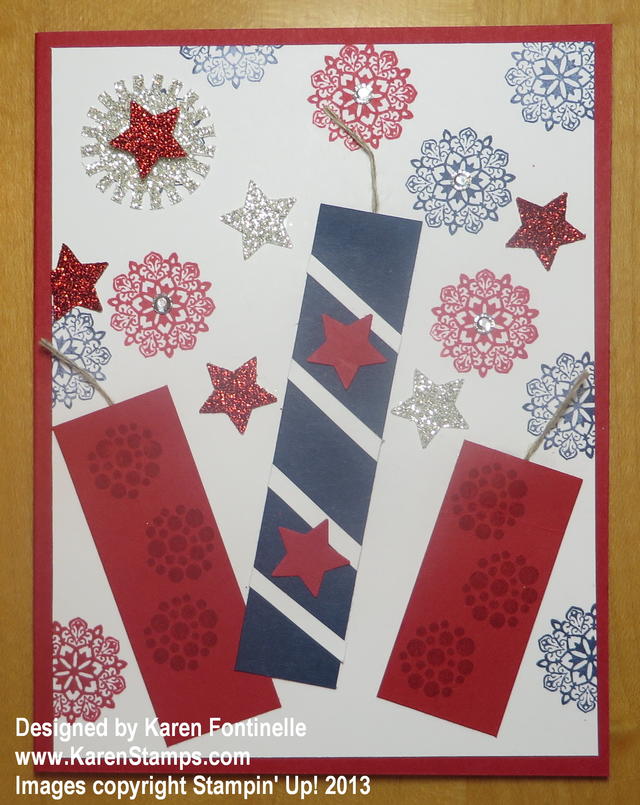
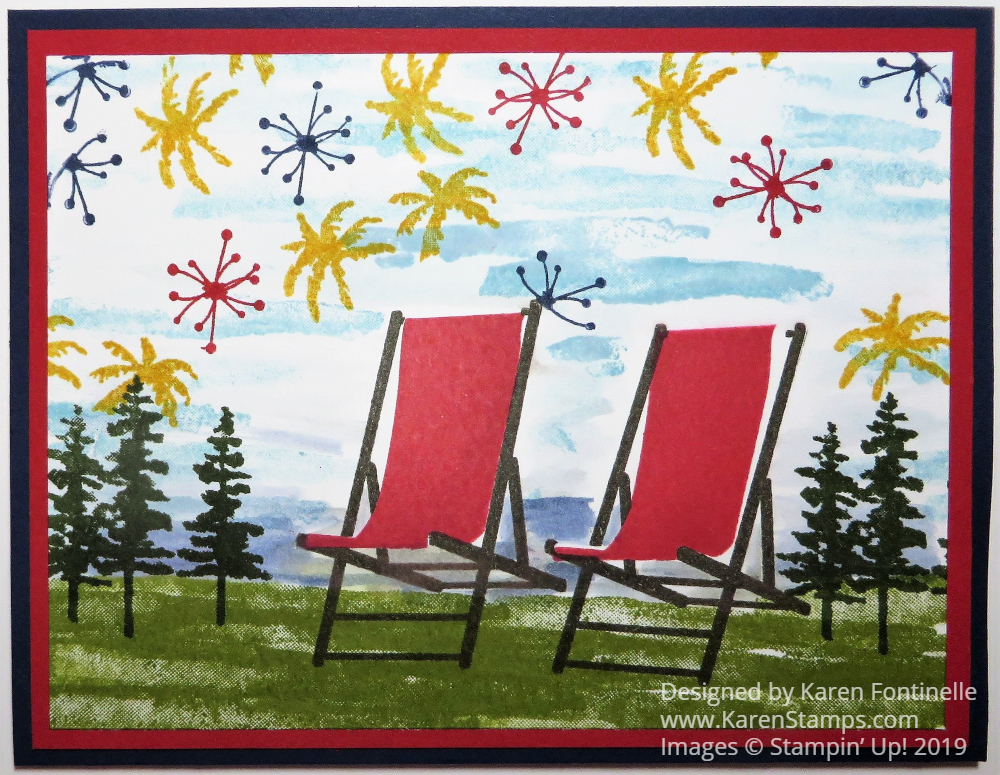
It’s time for fireworks so here is a Colorful Seasons 4th of July Card all ready to inspire you to make some kind of fun card for the 4th of July! Can you believe it is July 1st already?!
I don’t have a “4th of July” stamp set so I had to use what I had. I looked through some stamp sets looking for something I could use for fireworks. I noticed these little stamps in the Colorful Seasons Stamp Set that I stamped in Real Red and Night of Navy Inks. I used the stamp that was half that image but stamped it on both sides to make the firework, but I also see in the stamp set there is one stamp that would have made a full image! Oh well. I think mine came out all right! The Crushed Curry fireworks are actually the tops of palm trees from the Waterfront Stamp Set!
The chairs are stamped from the Colorful Seasons Stamp Set. Originally I was going to die cut the Adirondack style chairs in the set of Seasonal Layers Dies but then I changed my mind and stamped these cloth folding chairs, something more like we will take to watch fireworks Thursday night.
The background on the card is stamped with images from the Waterfront Stamp Set for the grass and some blue sky. I used my Aqua Painter to soften the ink a little bit, although you can’t use much water on Whisper White Cardstock. You could also just sponge on some ink for a background. I do love that Waterfront Stamp Set after ignoring it when it first came out!
I didn’t add a greeting, mainly because there wasn’t any good space to put one! Maybe I will add one later or just stamp something on Whisper White cardstock inside the card.
And Stampin’ Up! has a July special! BONUS DAYS!
For every $50 you spend (before shipping and tax, of course!) you will receive a coupon for $5 to spend on merchandise in August! Your coupon will arrive by email after you place your order. Make sure you hang on to that code! It’s best to print out the email, write down the code somewhere or put it under lock and key in case of a computer crash or natural disaster! No limit to the codes you can earn.
So I think our July is off to a good start! Shop for Stampin’ Up! products in July, spending $50 or more or in increments on one or more orders, and receive a Bonus Coupon to use on an order in August!
Make a card or something for the 4th of July and get in the spirit of the holiday! It’s a short week! Happy 4th!