
One of the things in the new Stampin’ Up! Catalog that I think you could easily overlook (because I did!) is the Bird Ballad Laser-Cut Cards & Tin on page 168. It’s the first item underneath “Cards and Envelopes”.
You get this very pretty tin holding twelve cards with the laser-cut front in Very Vanilla plus envelopes with a pretty scallop edge on the flap! Then just decorate however you like!

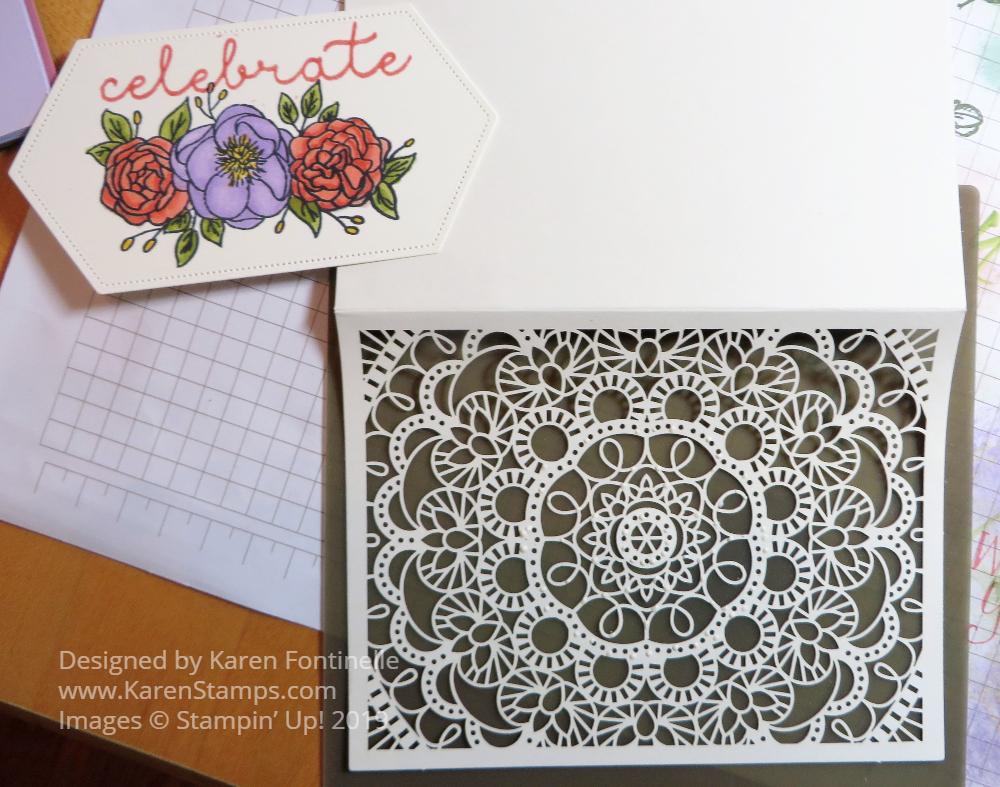
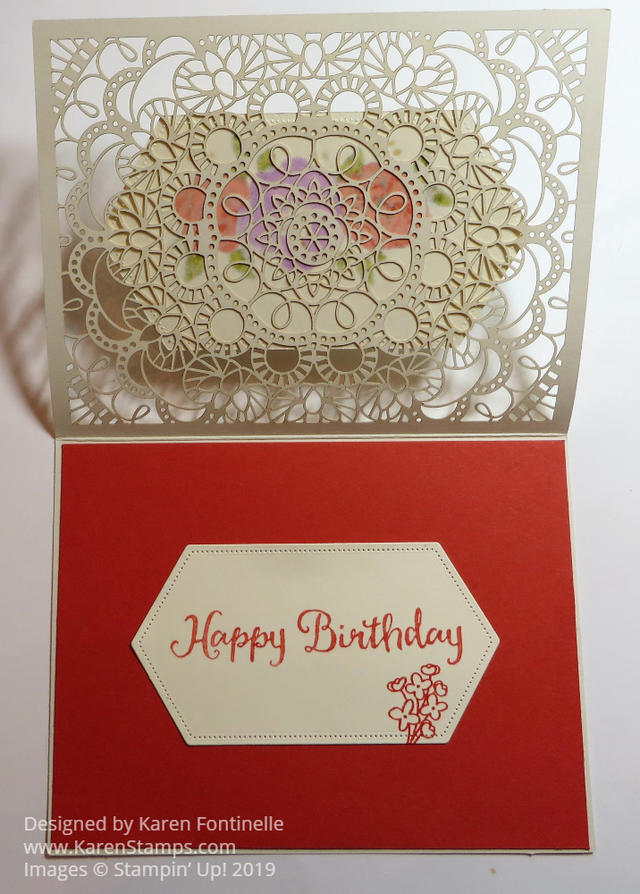
You can work with these cards one of two ways. If you want to add a color underneath the lacy laser-cut card front panel, you can cut a piece of cardstock just slightly smaller than the card and glue it underneath the card front. OR you can do what I did and glue the cardstock to the inside back panel of the card. That way the recipient can lift up just the laser-cut front by itself.
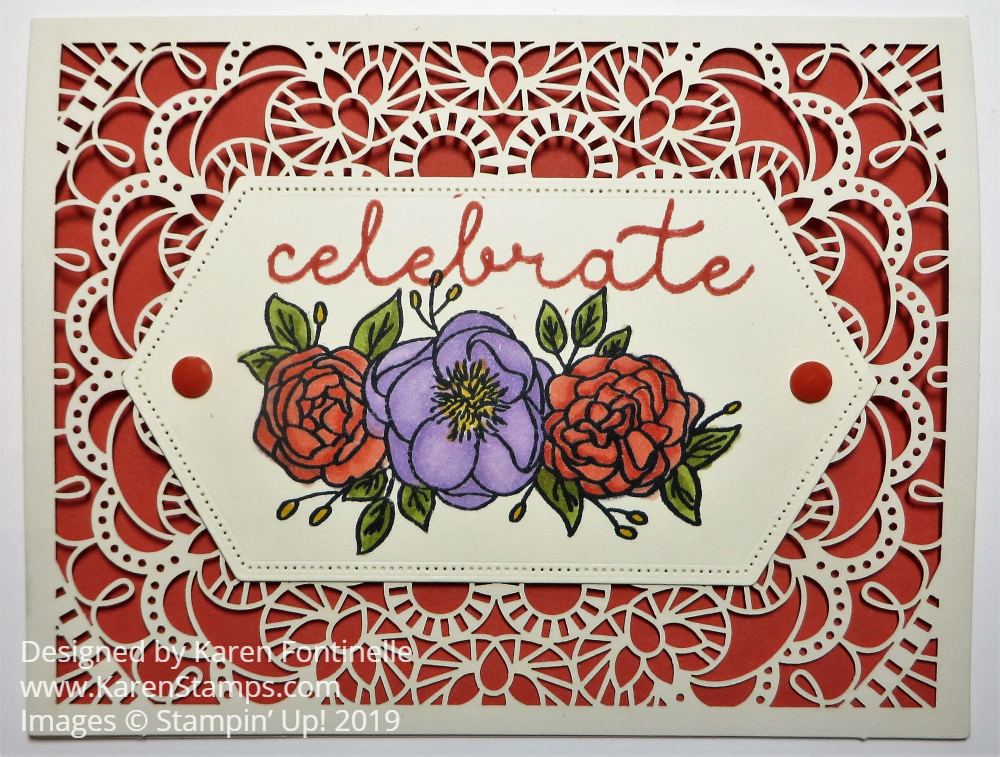
I used one of the new In Colors 2019-2021, Terracotta Tile. I think it is quite striking underneath the laser-cut design! That piece is adhered to the inside of the card.
To decorate the front of the card, since so many samples I’ve seen used the Bird Ballad Suite, I decided to do something different. I stamped a smaller floral image from the Bloom and Grow Stamp Set on Very Vanilla Cardstock in Memento Ink. Then I colored in the flowers with my Stampin’ Blends Markers. I wanted the flowers to match the In Colors somewhat if I could and since we don’t have a Terracotta Tile marker yet, I thought Calypso Coral was pretty close! The other flower is colored with Highland Heather and the leaves with Old Olive and touches of Daffodil Delight yellow.
The greeting is also in this stamp set, but the stamps are larger than they appear on the front of the stamp case. I decided to only stamp the word “Celebrate” from the stamp so I colored it with my Calypso Coral Stampin’ Write Marker. I used the Stamparatus to make sure the word got stamped well and in the correct position. That tool sure comes in handy for making sure something gets stamped right! Next, the greeting was die cut using the Stitched Nested Labels Dies.
The label piece had to be adhered to the card front with tiny dots of glue on the laser-cut front design. I first figured out where the label was going to go on the card front and applied the tiniest dots of Multipurpose Liquid Glue to the laser design. To keep the glue from getting everywhere, I placed the Silicone Craft Sheet underneath the front of the card.
After this label with the flowers was adhered, I die cut the next smaller size of Stitched Nested Label Dies. I stamped a birthday greeting on this from the Beautiful Day Stamp Set, again coloring it with the Calypso Coral Markers. I placed this on the underside of the flower label on the front and put tape on it. When I was sure I had it right, I closed the bottom of the card over it so it would be adhered underneath the flower label and not showing. I stamped a little extra flower on it as well!
And for a little embellishment, I added two In Color Faceted Dots to see how it would look!
This is actually a pretty easy card to make, at least the idea is easy! Try this Bird Ballad Laser-Cut Card With Bloom and Grow Flowers both ways, adhering the colored sheet attached to the back inside of the card or glued right on the back of the card front under the laser-cut design. Just think if you made an assortment of cards, placed them back in the tin, and gave it all for a gift! Check out the Bird Ballad Laser-Cut Card & Tin in the Stampin’ Up! Catalog today in the Stampin’ Up! Online Store!