Tag Archives: stampin up

Pressed Petals Gift Bag and Gift Card

Pressed Petals Gift Bag and Gift Card

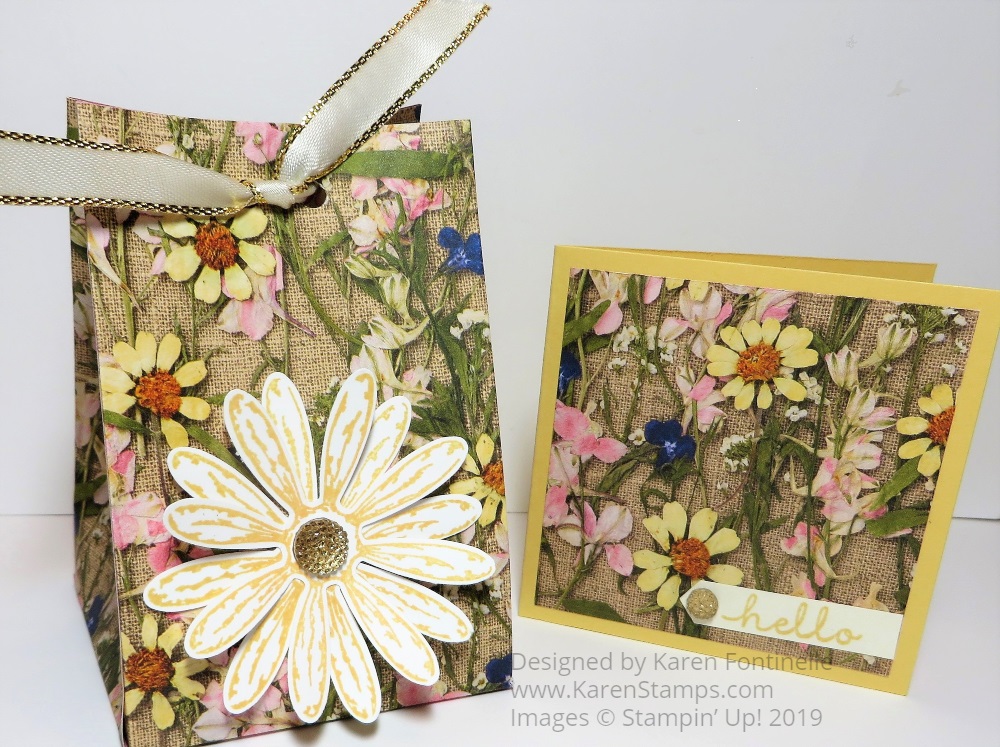
The Pressed Petals Specialty Designer Series Paper is so pretty and I thought I would make something other than a regular card with it. Here is my Pressed Petals Gift Bag and Gift Card that you could also make for just a small gift. The bag is just 6″ high and the paper is very lightweight so you could put some pieces of candy inside, a piece of jewelry, a gift card, or a diamond ring! (Might as well aim high!)

The Pressed Petals Paper is designed with photographic images of real pressed flower petals. One side of the paper has the flower images, the other side has subtle vintage designs like old sheet music, lines of script, wood grain, and vintage plant descriptions. One design has portions you can cut apart and use on cards, much like the Petal Promenade Paper we previously had.

This bag is one of those easy things to make, as I have done many times before. Start with a 12″ x 6″ piece of designer paper (or cardstock). Score at 1″, 3 3/4″, 6 1/2″ and 9 1/4″. Then turn long ways and score at 2″ to make the bottom flaps. Cut off the smallest little section and cut up on the botton flap score lines to the horizontal score line. Then crease and fold to form the bag. Leave it open at the top or punch two holes and tie it closed with ribbon. Here’s a similar example.
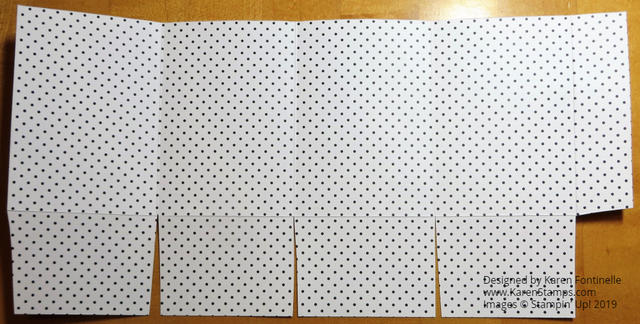
Easy Botanical Butterfly Mini Gift Bag Cutting Diagram

You can see the little bag I made previously HERE with the Botanical Butterfly Paper.

I stamped two daisies with the Daisy Delight Stamp Set and punched out with the Daisy Punch. I like putting one of the Gold Faceted Gems in the daisy center. A new item we have now in the new Stampin’ Up! Catalog is the Perennial Essence Floral Centers, actual fuzzy embellishments to look like the center of real flowers, that you could use.

The ribbon I used is the Gold 3/8″ Metallic Edge Ribbon. Just push the sides of the bag in a little bit and pull the top edges of the bag together to close the top. If you don’t want to get punched holes on all four sides of the bag, punch the front and back holes first before you pull the bag together! You could also hold the top of the bag together with a Mini Library Clip or check the Clearance Rack for two other styles (and bargains!). Don’t forget! Some stamp sets were added to the Clearance Rack the other day you might want to check out!

And while I had the paper out, I decided to make just a cute little matching card, 3″ x 6″ folded in half with a 2 3/4″ x 2 3/4″ piece of designer paper on top. The little “hello” is found in the Bloom & Grown Stamp Set. I thought it was cute for that card and is punched out with the Classic Label Punch to make it easy. Just for a little something, I added the smallest size Gold Faceted Gem on to the greeting to match the bag. I wish it was even smaller but I think it is fine.

Use your Pressed Petals Specialty Designer Series Paper to make simple gift bags like this one plus a gift card to match!
A Card For Crafters

A Card For Crafters

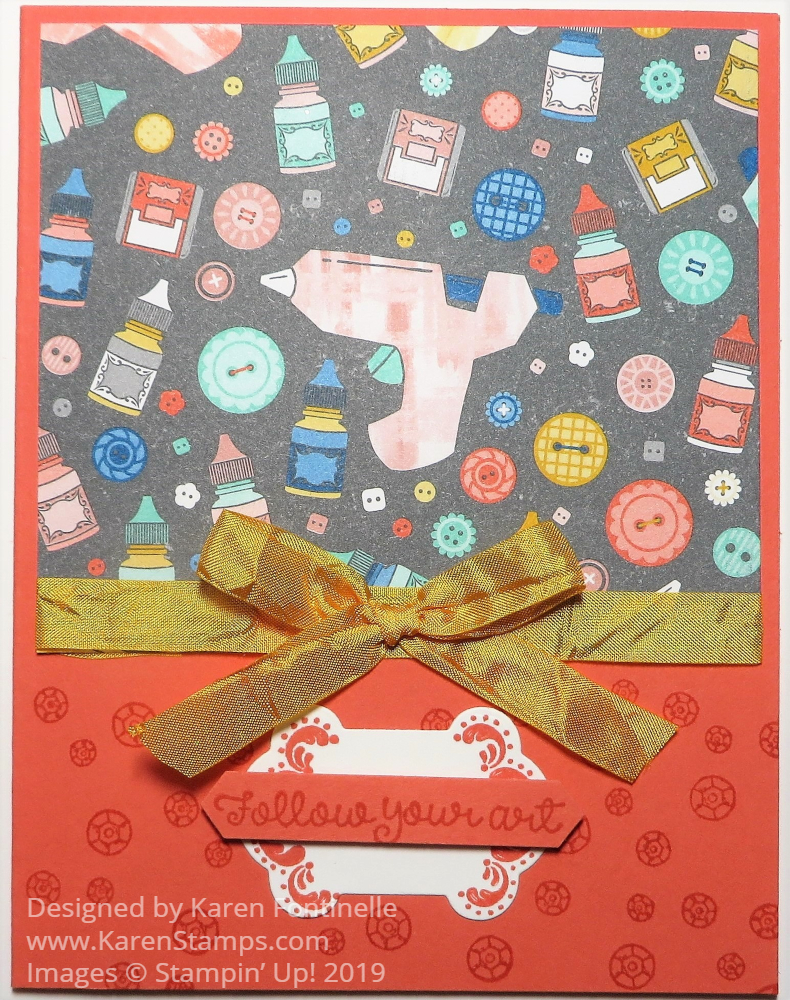
This new stamp set and designer paper will definitely help you make a card for crafters! And not just stampers! You can make a card with these supplies that would suit other crafts besides stamping. Have fun making cards for all your crafty friends!

This card uses items in the Follow Your Art Suite in the new Stampin’ Up! catalog on pages 52-54. The card base is Calypso Coral, but there are many coordinating colors to use with the Follow Your Art Designer Series Paper. I first thought I would use the full sheet of designer paper on the front of this card, then changed my mind and thought I would cut it and flip the paper to the other side for the bottom portion of the card layer. Then I changed my mind and decided to only use a portion of the designer paper on the front of the card! You’re allowed to change your mind in papercrafting!

Since the bottom part of the card then looked plain, I chose to stamp some tiny images at the bottom from the It Starts With Art Stamp Set. I think it coordinates nicely with the designer paper.

The ribbon used on the card is the 3/8″ Crinkled Seam Binding Ribbon in Crushed Curry. It’s a great, fun ribbon to use with this suite. I wrapped the ribbon around the bottom edge of the designer paper, but tied the bow separately and adhered it to the ribbon with a Mini Glue Dot.

The greeting at the bottom is made with the stamped design on Whisper White Cardstock with Calypso Coral Ink and die cut with the Arts & Crafts Dies. Then the greeting was stamped on Calypso Coral Cardstock with Calypso Coral Ink and punched with the Classic Label Punch. The greeting is then popped up with Stampin’ Dimensionals. I tried various things but I liked this combination the best! Sometimes you have to just play until you get what feels right!

If you like this stamp set, there is another similar one from last year’s catalog that carried over called Crafting Forever. This stamp set has some great sayings in it plus other craft supply images. Use both sets together!

REMEMBER……Today is the day to buy an important craft supply if you have the Stampin’ Up! Paper Trimmer…..the Cutting Blades # 126995 will be available at 10:00 am Mountain Time! That is 11:00 am Central Time, Noon Eastern Time, and 9:00 am Pacific Time!. I suggest ordering as close to your time as possible just in case! Maybe the supply will last a few hours or days, but who knows! If you need blades, this is your chance! There is a limit of 3 packages. If they are sold out, you will get an error message that they are discontinued. More will be on the way so don’t despair!

Cutting Blades
Cutting Blades


With the Follow Your Art Suite in the new Stampin’ Up! Catalog you can make lots of fun cards for your crafty friends or anyone!

Shop Stampin’ Up! Online!

Make a Moveable Card With the Cuckoo For You Bundle!

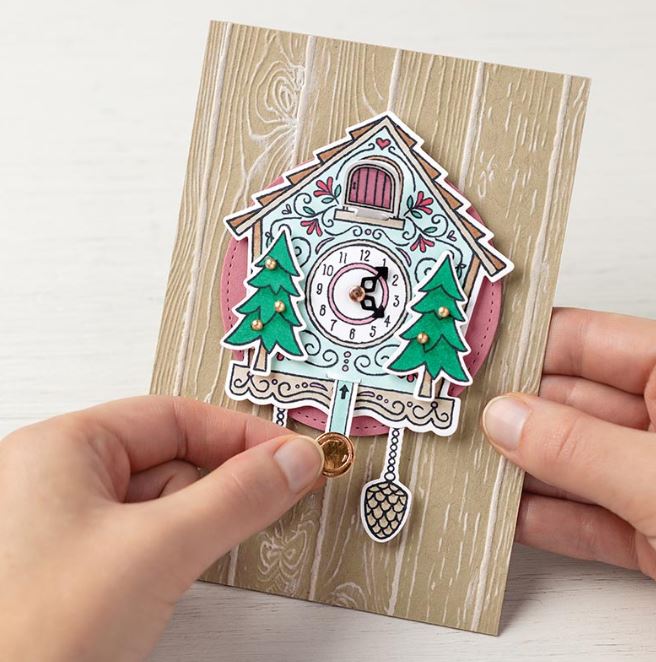
Cuckoo Bundle Card
Image © Stampin’ Up! 2019

Cuckoo clocks always bring back childhood memories for me, and now we can make our own cuckoo clock moveable cards with the Cuckoo For You Bundle by Stampin’ Up!

When my dad was in Germany during World War II, he bought three cuckoo clocks to bring/send home. One was for my parents and one each for their parents. I remember exactly where all those cuckoo clocks hung in my grandparents’ homes and ours and at least for awhile, the cuckoo worked! My brother and I loved pulling those chains to keep the clock running.

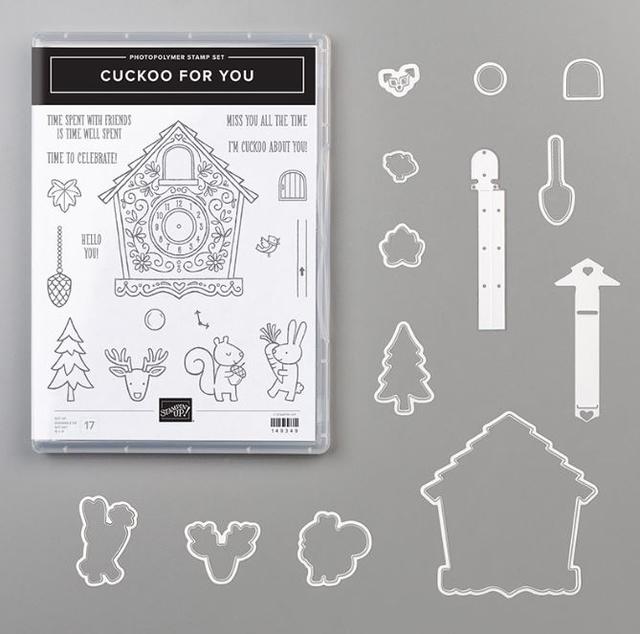
This new Bundle from Stampin’ Up! has the Cuckoo For You Photopolymer Stamp Set and the Cuckoo Clock Dies. While you can make cute cards just with the stamp set, I bet if you are interested in cuckoo clocks you will want the die set as well to make it moveable just like a real cuckoo clock!

Watch this Stampin’ Up! video with Brian Pilling from the Home Office demonstrate how these dies work with the stamp set.

If you like cuckoo clocks, wouldn’t this be a fun card to make and send to someone (although I think you should make at least one to keep for yourself!)?!

Here is the Bundle with the stamp set and dies to make lots of cuckoo clock cards and projects! And of course you can use the bunny, squirrel, reindeer, bird, and tree for other cards unrelated to cuckoo clocks!

Cuckoo For You Bundle

SHOP STAMPIN’ UP! ONLINE!

Daisy Card With the Scripty Embossed Background

Daisy Card With Scripty Embossed Background

Here is a Daisy Card With the Scripty Embossed Background. It is rather simple as is (not that there is anything wrong with simple!) but I was really just making a card to showcase the Scripty 3D Embossing Folder.

As you may have noticed, Stampin’ Up! has come out with some new 3D embossing folders made by a different manufacturer than our previous one. These new 3D Embossing Folders are slightly thinner than our previous ones so you may have trouble running them through your Big Shot or another die-cutting machine.

As I wrote in THIS POST the other day, Stampin’ Up! has come out with a new plate, the 3D Embossing Folder Plate, that will likely make up that thickness difference. It is possible that depending on your machine, you may still need to add an additional shim, such as a thin piece of cardboard. You could use the thin piece that comes in your DSP.

3D Embossing Folder Plate

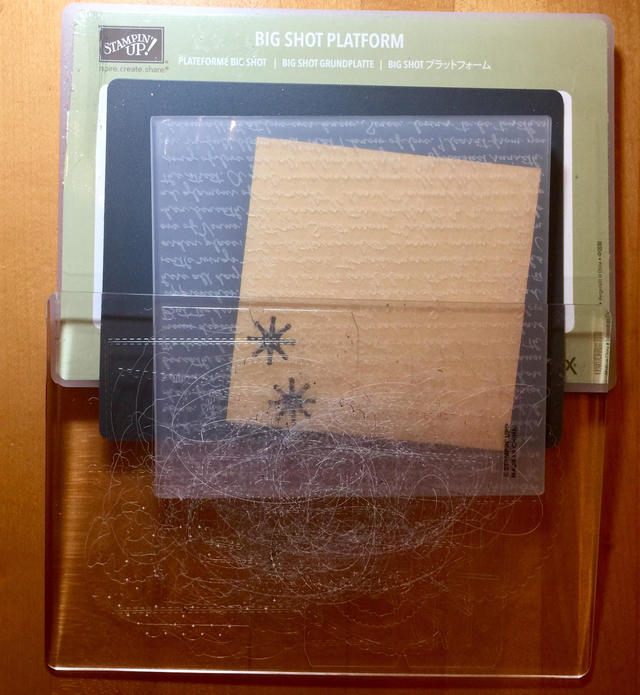
In the meantime, I found that a sandwich of the Big Shot Platform, the squishy Silicone mat, then the embossing folder with the cardstock inside, and a Cutting Pad on top worked with my new Scripty 3D Embossing Folder.

Here is a photo of the pieces of the sandwich I used.

Big Shot Sandwich

If you need a reminder of which mat this is, watch this video:

Remember, Stampin’ Up! is working on a new die-cutting machine for us. In the meantime, try the things you have, different platforms, different shims if you have trouble with your new 3D Embossing Folders. Don’t ever FORCE your machine. If it doesn’t go, don’t do it! Don’t break your machine! You can experiment, or you can add this new 3D Embossing Folder Plate to your next order and hopefully that will simplify using embossing folders for you!

SHOP STAMPIN’ UP! ONLINE!

Some Pieces of Storage by Stampin’ Up! Available!

Stampin' Up! Storage Ad Square

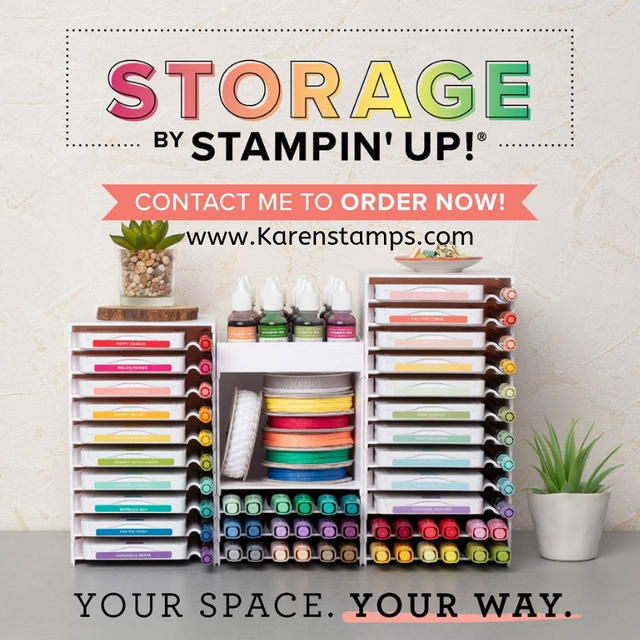
It looks to me like some of the pieces of the Storage by Stampin’ Up! are available now! The Ink Pad & Marker Storage Trays, the Stampin’ Blends Storage Trays and the Open Storage Cube. Maybe it will just be for a short while, so if you were wanting any of these pieces, go check it out in the Online Store HERE and see if it works for you! These really are nice pieces! You can configure them however you like and they work great in small spaces.

Since I stamp at my kitchen table, I bought some of the pieces and just have them at the end of the table against the wall and they work great holding at least some of my frequently used items right there instead of spread around on the end of the table.

Go check it out!

Storage by Stampin’ Up! HERE!

Try the New For the Love of Felt Project Kit by Stampin’ Up!

For the Love of Felt Kit by Stampin' Up!
Image copyright Stampin’ Up! 2019

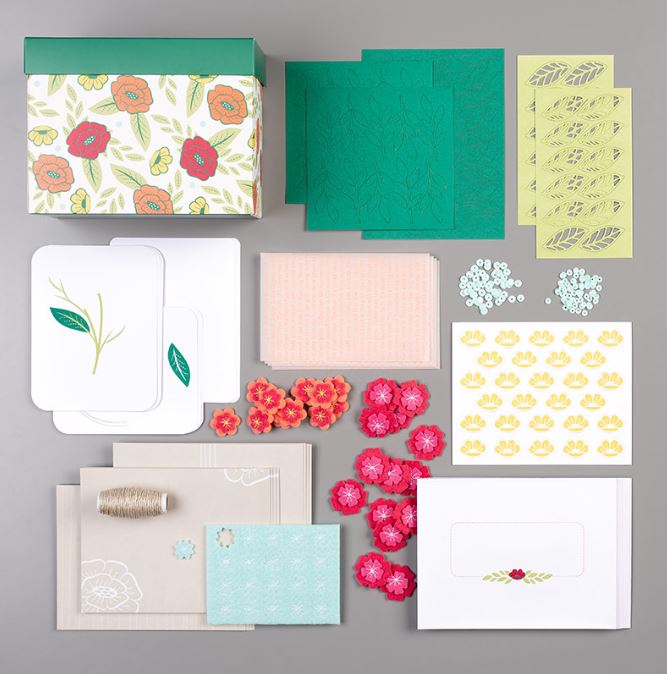
Something I think not getting very much attention in the new Stampin’ Up! Catalog is the For the Love of Felt Project Kit by Stampin’ Up! Kits are great for new stampers and crafters who may not own a lot of materials yet or who find it easiest to have a project all planned for them. Kits are also good for experienced stampers who like to try something new and can enjoy making a project without planning it and designing it themselves first!

All the materials are included in this kit except for the stamp set, ink, and adhesive to make 12 cards, 4 each of 3 designs. Envelopes are included and embellishments. You get cute felt flowers to use on your cards with lots of texture and dimension.

Order the For the Love of Felt Kit HERE in the Stampin’ Up! Online Store!

Watch the fun video below to get an idea of how the kit goes together!

Using the New 3D Embossing Folder Plate

3D Embossing Folder Plate

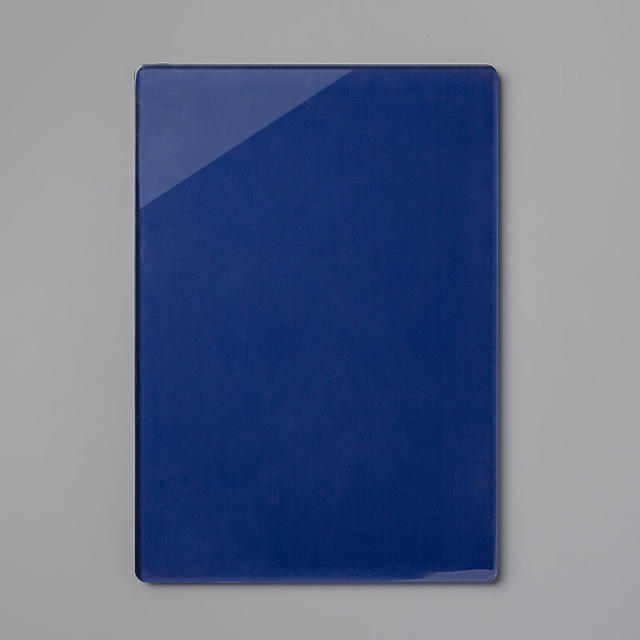
What in the world is this blue thing, you might ask? It’s the new 3D Embossing Folder Plate! Well, what is that??

Because of the surprise change of Stampin’ Up! not carrying the Big Shot die-cutting machine anymore, they have also switched suppliers of dies and embossing folders. The new 3D embossing folders in the new catalog give that deep impression, even without spritzing with water, that our previous 3D Dynamic Embossing Folders did. However, with this new supplier, the folders are slightly thinner than the previous folders and therefore, you may have difficulty using them in your die-cutting machine.

You will probably have to experiment with your machine and see what works best. Do NOT FORCE anything through your machine. Maybe you need a tiny bit of extra pressure to get something to go, but if it doesn’t go, just stop! Try a different sandwich. Stampers are trying different sandwiches, maybe even with their original Big Shot platform with the tabs or with one of the mats or things we have been able to buy in the past.

Yesterday I made a sandwich with the Big Shot Platform, then the thin squishy mat. It’s the silicone mat and when it runs through the machine it squishes out at the end a little bit. Next, I placed my paper inside my Scripty 3D Embossing Folder and put a cutting pad on top of that (only one cutting pad in the whole sandwich). That worked fine! There may be other combinations but I haven’t had enough time to experiment. Some people are using the cardboard from Paper Pumpkin kits or maybe a piece or two of the cardboard in the designer paper packages would work.

OR if you don’t want to fool with all of that, this is what this blue 3D Embossing Folder Plate is for! Use this with the new folders and it should work fine. As another Demonstrator said, “It’s only $10 and it works.” I don’t own it yet so I can’t vouch for it yet.

The sandwich would be (on the bottom) the platform that comes with your machine, the embossing folder with cardstock inside, then the 3D Embossing Folder Plate. Stampin’ Up! says depending on your machine you may still need a shim ( thin piece or two of cardboard works).

Stampin’ Up! is still working on a new die-cutting machine for us, but there is no time frame that has been announced. I don’t know if we will use this blue plate in a new machine or not.

As you start receiving the new embossing folders, just keep these things in mind, that you will have to try and see what works best with your machine. But be careful, don’t force anything and break your machine. If you have it right, it will work and you don’t have to use brutal strength to get it to go!

You will find the new 3D Embossing Folder Plate in the Die-Cutting and Embossing Category of the Online Store and then under Embossing. Let me know if you have questions.

Join the Stamping With Karen Mailing List!

Email Newsletter

Join the Stamping With Karen Mailing List and get free stamping project ideas and instructions every week!

Keep up with the latest Stampin’ Up! news and offers!

Find out about new products, especially this time of year with the new Stampin’ Up! Catalog!

Get a FREE GIFT when you sign up as a thank you!

Get a weekly holiday stamping project when it gets close to Christmas (and you know how fast that comes up!) in a special series of emails called the 12 Weeks of Christmas!

Lots to learn, lots to find out!

JOIN US!

Last Minute Father’s Day Card Ideas!

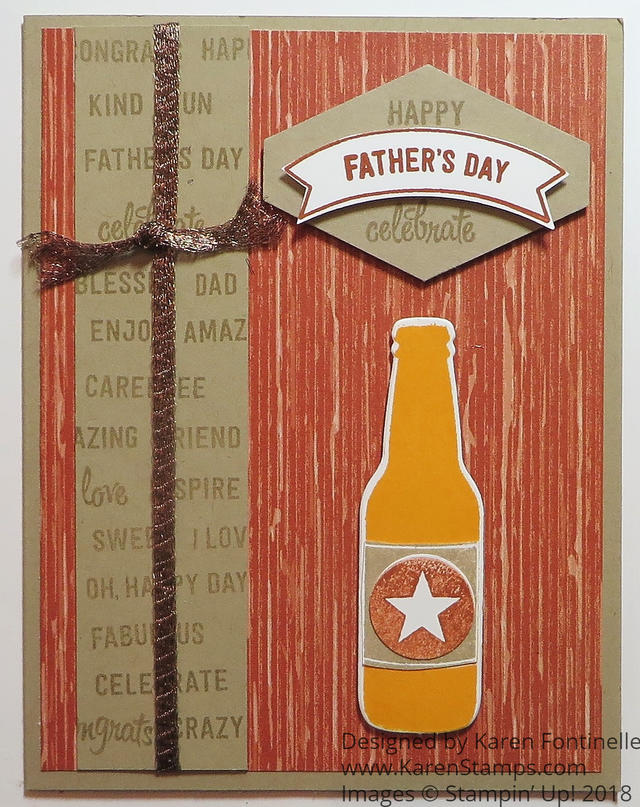
If you have procrastinated, here are some past Father’s Day card ideas made with stamp sets you might already have. Just change them up according to what supplies you have! You know the father in your life will appreciate it! Better than Hallmark!

Tailored Tag Punch Father's Day Wood Tile Card
Click photo to read post!

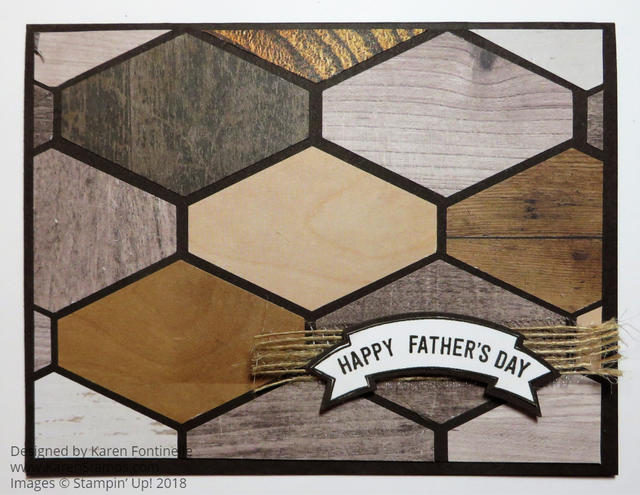
If you have this Tailored Tag Punch in your stash, use whatever paper you have to make something like this card. Or just use strips of designer paper for a background. Add a greeting!

Father's Day Card Oval Window Lovely As a Tree
Click photo to read post!

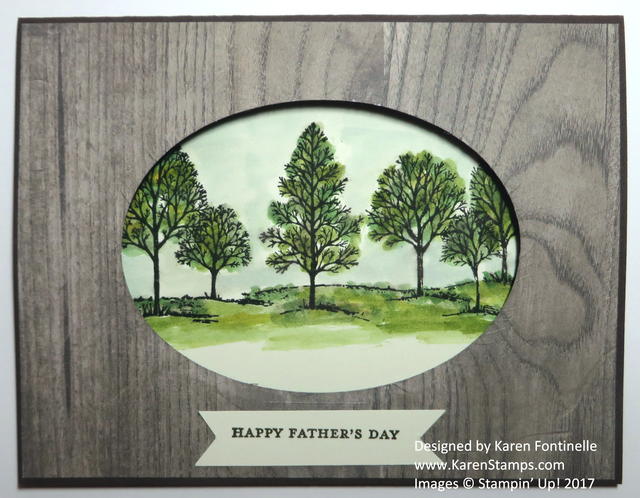
Surely you have the Lovely As A Tree Stamp Set that just retired! It’s very easy to make a card like this one with that stamp set!

Bubble Over Bottle Father's Day Card
Click photo to read this post!

Maybe you have the Bubble Over Stamp Set you could use to make a card like this one for Father’s Day!

Happy Father’s Day to All the Dads!

Magnolia Thinking of You Card

Magnolia Thinking of You Card

This Magnolia Thinking of You Card is easy to make and so fun to do the coloring on the magnolia! The best thing is I found my missing Magnolia Memory Dies finally! Since I was keeping “new stuff” separate from my current, at the time, products the dies didn’t make it into the other room by my Big Shot. Instead, I kept them on a desk and they got covered by a stack of cards! Who would have thought to look under the stack of cards when a couple of loose dies from the set that I had used after getting my preorder were laying uncovered in another spot?! Anyway, I found them and was able to die-cut this gorgeous magnolia after stamping it.

The magnolia is stamped in Memento Ink and then colored with Stampin’ Blends. I used the Petal Pink colors on the flower and Granny Apple Green with a touch of yellow on the leaves. I just love coloring with these alcohol markers!

The greeting is from the Good Morning Magnolia Cling Stamp Set and is stamped in Petal Pink Ink. I also thought about using Early Espresso Ink so either would work! I die cut the greeting with one of the Stitched Nested Labels Dies. I think it looks pretty as is and stands out on the white so doesn’t need any layer.

The card base is Early Espresso and the designer paper is Magnolia Lane DSP. I added a Whisper White layer underneath the designer paper to make it stand out against the Early Espresso. In fact, I die cut the greeting out of the same Whisper White piece because it is hidden underneath the designer paper! I don’t always do this but sometimes I think about it ahead of time!

The beautiful magnolia is popped up with a bunch of Stampin’ Dimensionals® and the greeting is adhered flat on the card front. Since the Early Espresso is so dark for the card base, on the inside of the card I will add a layer of Whisper White Cardstock so I can stamp a sentiment or write a note inside. I can also stamp one of the flowers in the Good Morning Magnolia stamp set on that Whisper White layer or add a piece of the beautiful Magnolia Lane Designer Paper.

Here is the first card I made with the Magnolia Lane Designer Paper and a greeting. In this case, I cut out a flower from the designer paper!

Copy this Magnolia Thinking of You Card when you get your Good Morning Magnolia Bundle. You can change the designer paper and greeting but at least you have an easy design to use!

SHOP STAMPIN’ UP! ONLINE HERE!

Father’s Day Masculine Card With Rooted In Nature

Father's Day Masculine Card With Rooted In Nature

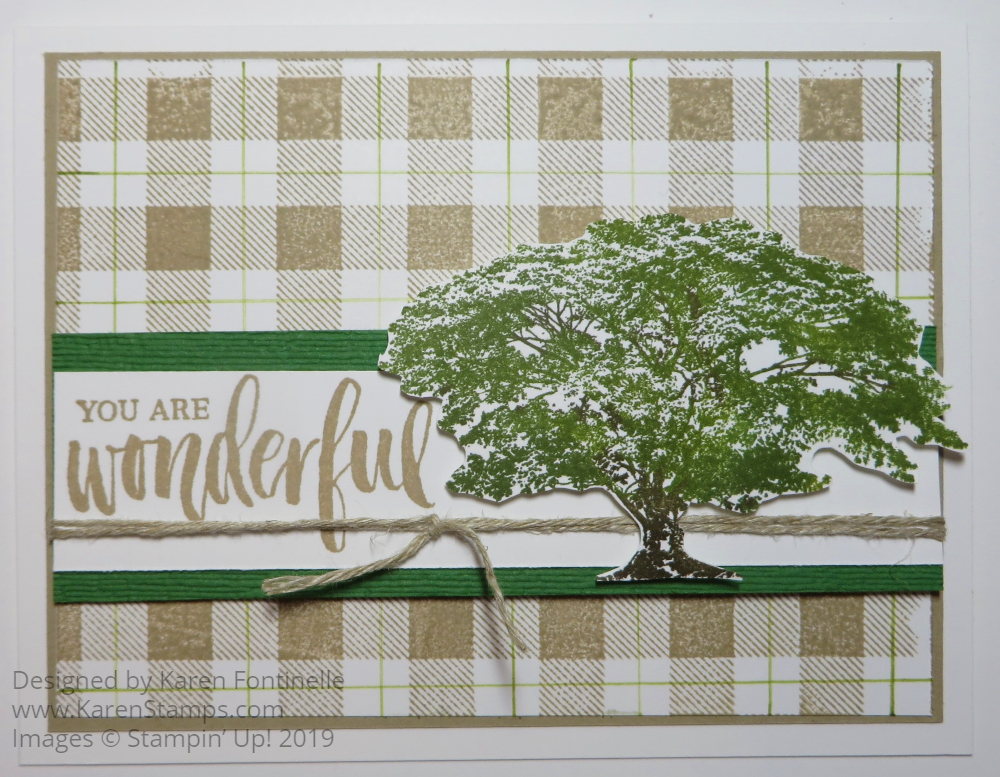
Father’s Day is this Sunday, June 16th, so it is time to make a Father’s Day card for your father or husband or whoever you want to celebrate on this day. This card, Father’s Day Masculine Card With Rooted In Nature, I will probably give my husband, but as you can see, it could be for anyone anytime! You can say it’s a “masculine” card but really it could be for anybody. We just often feel challenged to make a card for men for some reason.

You can barely see in the photo, but the card base is Whisper White with a little extra margin before I added another layer of Whisper White stamped with the Buffalo Check stamp for a checked background. This was then layered on a piece of Crumb Cake with a narrow margin showing.

After I stamped the Buffalo Check design, I used a ruler and an Old Olive Stampin’ Write Marker to draw lines in between the checks for a little extra color and interest.

The greeting and the tree are from the Rooted in Nature Stamp Set. I don’t think I have a “Happy Father’s Day” stamp in my current stamp sets (and I didn’t want to dig in my retired stuff!) so this sentiment will be fine (and truthful!). It is stamped in Crumb Cake ink on a Whisper White strip, then layered on a piece of Garden Green Cardstock that was embossed with the Subtle Embossing Folder. I tied around a piece of Linen Thread (or a scrap of something I found that I think is Linen Thread!) and then popped up the tree on Stampin’ Dimensionals.

About the tree…..I inked up the tree not with ink pads but with a marker and Sponge Daubers! I chose several green ink pads, from light to dark, and used individual Sponge Daubers to tap on the tree leaves. It’s difficult to see where you have “daubed” on the ink and it looks like I mostly covered the lighter ink with the darker. But I like the tree anyway. Then I colored in the trunk with the Early Espresso Stampin’ Write Marker and tried to find a few branches inside the leaves to ink up. I think it turned out fine!

As I said, I have most likely made this card for my husband for Father’s Day on Sunday, unless I make another one I like better. He opens the card, looks at it, then puts it down (and I get a hug and kiss!). Then a few days later, I pick it up off his table and put it with my other sample cards I have made! But I think you can see that while this card will work for Father’s Day or a birthday card for a man in your world, this card could be for anyone anytime. I wanted to use a stamp set from the old catalog in case you don’t have your new stamp sets yet. Maybe you have this one!

And if you need another idea with this Rooted in Nature Stamp Set, here is another “masculine” card I made for a birthday, but again, just put on a Father’s Day greeting (or something similar) and you have a great Father’s Day card! And if you have Lovely As a Tree (retired), that’s another great stamp set for making a Father’s Day card!

Garden Lane Daisy All-Occasion Card

Garden Lane Daisy All-Occasion Card

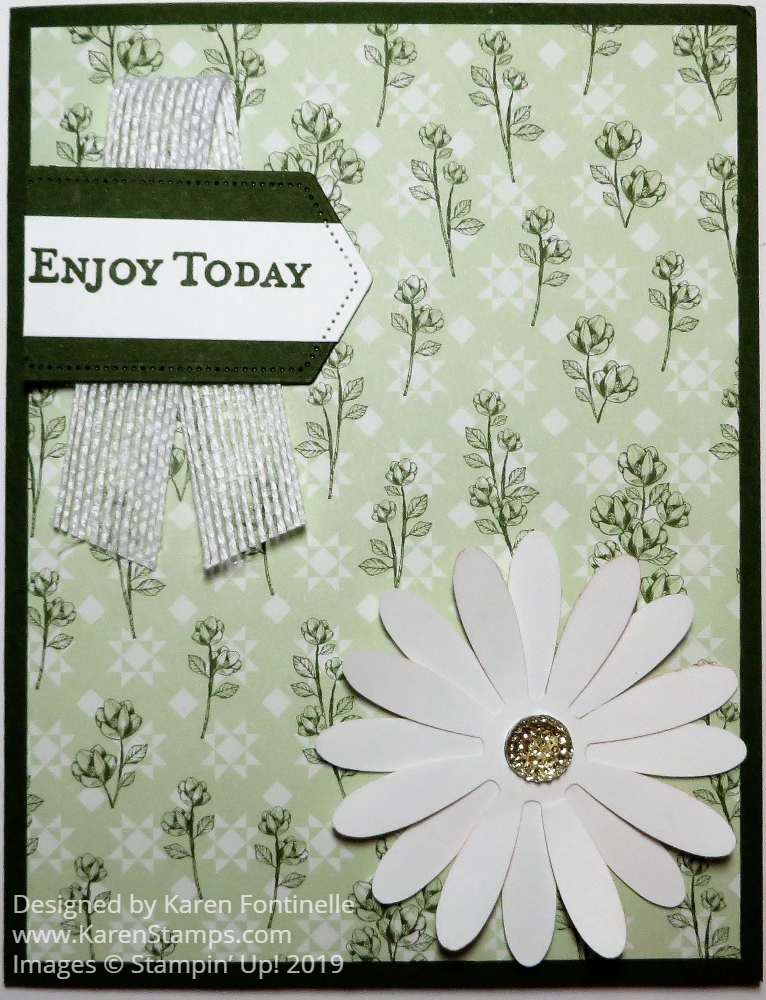
This Garden Lane Daisy All-Occasion Card could be sent to a friend or loved one just to let them know you were thinking about them. It is a fairly easy card to make and you could make it even easier if you wanted to.

The card base is Mossy Meadow, one of the cardstock colors that coordinate with the new Garden Lane Designer Series Paper. I thought this paper was just pretty with all its greenery and small designs and would be good for many projects. Sometimes we don’t need the fanciest paper in the world!

I liked this simple little print paper on the Mossy Meadow cardstock. Since it has some white in the background, I punched a white daisy (two daisies) with the Daisy Punch and adhered it in the corner with a Gold Faceted Gem in the center.

For the greeting, I chose one that could be for an all-occasion card from the Good Morning Magnolia Stamp Set. I already had a Mossy Meadow die cut piece, which I used, and originally thought I would just put a stamped white strip across the middle of it. Then I thought why not die cut the tip of the white strip with the same Stitched Nested Labels Dies. That’s what I did, plus put the die cut piece right up against the edge of the designer paper.

For an extra embellishment, I added a piece of Whisper White 5/8″ Flax Ribbon under the greeting.

If you wanted to make the card even simpler, you could omit the greeting and just tie a simple ribbon around the left side of the card.

Inside the card, since the cardstock is dark, I added a layer of Whisper White cardstock with a strip of the Garden Lane DSP at the bottom.

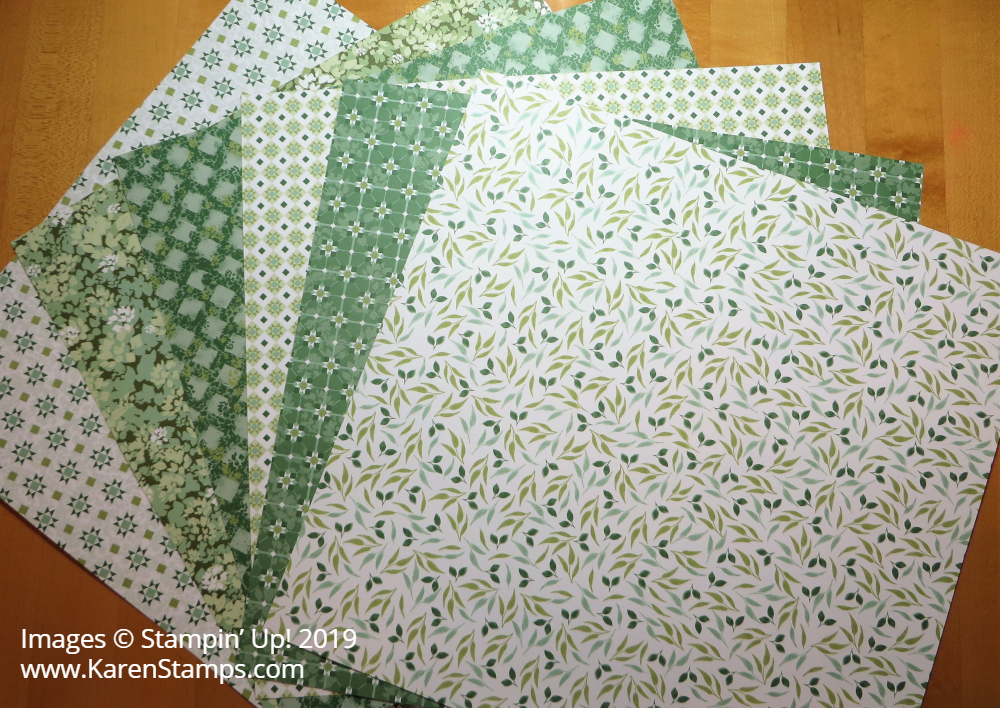
Consider the Garden Lane Designer Paper if you like green, if you like designs with greenery! I think this paper will turn out to be a well-used design in many cards. There is also a matching stamp set, Verdant Garden, that you can purchase with the paper and save 10% in the Garden Lane Suite Bundle.

New Catalog Products Garden Lane DSP2
New Catalog Products Garden Lane DSP

Stampin’ Up! has made a better effort to display the designer paper patterns in this new catalog with larger photos. You can see the products in this Garden Lane Suite on pages 40-41.

If you like this Garden Lane paper, just shop at the Stampin’ Up! Online Store!

Spread Kindness With Paper Pumpkin!

This June Paper Pumpkin Kit from Stampin’ Up! makes it easy to spread a little sunshine this summer! If you would like a project that is beach-themed with a fresh, new look, then this kit is for you. The kit makes 16 fun-sized, beach-themed small cards plus comes with envelopes, of course, and an exclusive carrying case so you will have your cards on hand if you would like to pass them out wherever you go.

The idea is much like “random acts of kindness” except with little cards. Maybe your server at the restaurant was particularly nice, maybe a salesperson was especially helpful, maybe a co-worker could use a little happy card, maybe a neighbor would enjoy a plate of cookies and a little card. Just reach in your carrying case and hand out a little card!

Coordinating colors for this project are Coastal Cabana, Crumb Cake, and Old Olive. I guarantee you that if you do not want to use these cards as designed, other stampers online will be making alternative projects out of the kit! So you will find other ways to use the materials if you would prefer to use them another way.

These cards are too small to be mailable as is. However, you can always put them into a normal size envelope and send the card that way if you want to mail them.

To get this new June Paper Pumpkin Kit, you MUST be subscribed by Monday, June 10th! That is tomorrow! Click the link below to join Paper Pumpkin. (This is my personal link. If you have a Demonstrator you want to sign up under, them go to www.paperpumpkin.com and choose their name.)

CLICK HERE TO JOIN PAPER PUMPKIN!

You are free to cancel at any time or just skip a month and then continue. No risk, no obligation. Paper Pumpkin is worth trying even just for one month! But you will probably find that you enjoy getting your kit in your mailbox each month! It’s a gift you give yourself…..or someone else!

Supplies may be limited toward the end of the subscription period.

Go ahead and treat yourself to a Paper Pumpkin subscription to start the summer off right!

Floral Essence Note Cards

Floral Essence Note Cards

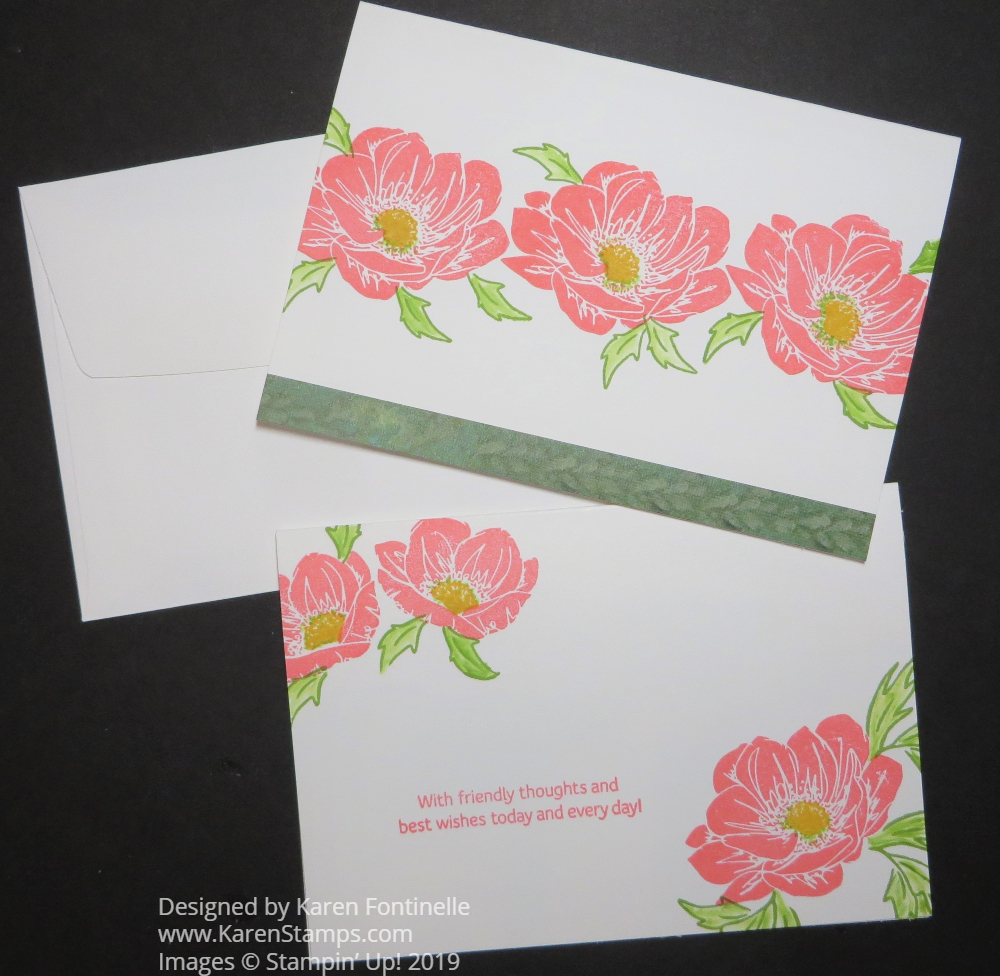
One thing you might overlook in the Stampin’ Up! catalog is the Note Cards & Envelopes on page 168 so I thought I would showcase them by making these Floral Essence Note Cards. These note cards are handy to have on hand for just doing some quick stamping and writing a short note to someone. They are a mailable size so that is not a problem!

I wanted to try out the flowers from the Floral Essence Stamp Set. I stamped the larger flower in Flirty Flamingo Ink first down in the lower right-hand corner on the bottom card and then the smaller flower in the upper left. I wanted to keep these note cards very simple. I took a chance stamping the leaves in Granny Apple Green, not sure how they would look or fit on a small card. I almost left the leaves just with the outline stamped, but then I used my Blender Pen and the lid of the ink pad to very lightly color in the leaves. The flower center is stamped with Crushed Curry. Not leaving well enough alone, I used the tip of the Blender Pen to just dot some green around the flower centers. The greeting comes in the stamp set.

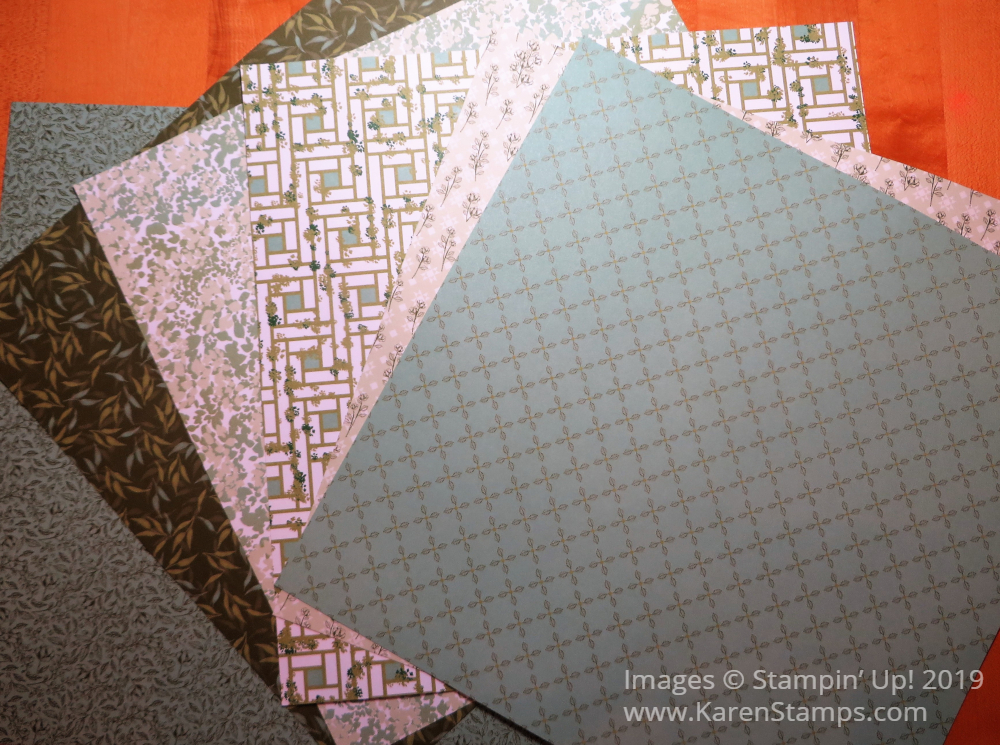
For the second card, I ended up stamping the flower three times across the front of the notecard. Everything was the same as the other card except I wanted to use just a strip of designer paper on the card. The one from the Perennial Essence Designer Series Paper that looked the best was this strip of green, kind of looking like a vine, that I cut rather narrow and just glued to the bottom of the notecard. I thought I would leave the card plain and not put a greeting. This way the notecard can be used any way you like!

The Note Cards & Envelopes are rather inexpensive and come in Whisper White and Very Vanilla for you to choose which color you prefer or use the most. You could cut and make a small card around the same size out of cardstock, but these come with the envelope that is just the right size. These are very handy to have around!

SHOP STAMPIN’ UP! ONLINE HERE!

Easy Floral Thank You Card

Easy Floral Essence Thank You Card

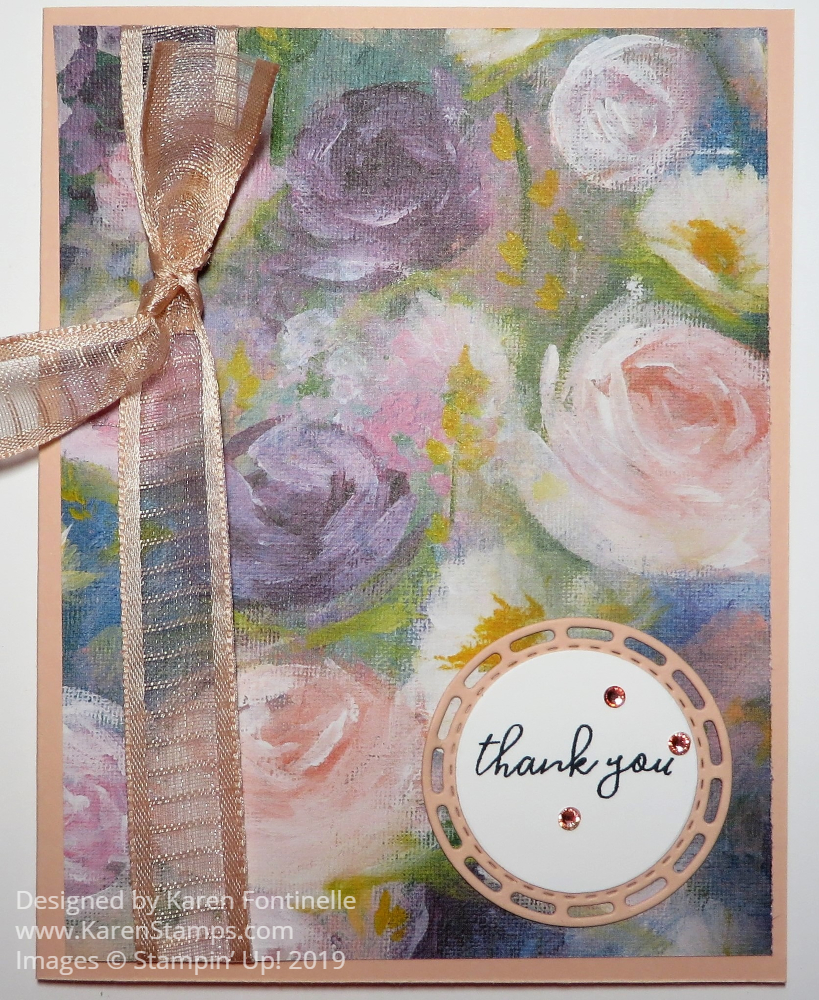
This Easy Floral Thank You Card is made, I think, with one of the most beautiful papers Stampin’ Up! has ever had. The Perennial Essence Designer Series Paper has such pretty prints on every sheet. These papers were designed from handpainted impressionistic images. There will be thousands and thousands of beautiful cards and projects made with this paper!

To make this card I simply choose one of the papers and then chose Petal Pink for the card base. I considered using a purple color as another layer, but for today I liked just the pink card base.

The ribbon around the designer paper is the beautiful Petal Pink 5/8″ Organdy Striped Ribbon. This ribbon is currently on backorder but you can put it on your order anyway and they will mail it separately when it comes in. Or wait and put it on your order as soon as you see it is available. It really is so pretty you will want it in your stash! And with paper this pretty, the sheer ribbon just adds to the design, doesn’t cover up anything.

For the greeting, I got lucky and this Petal Pink circle, die cut from the Stitched Labels Dies, was already cut out and in the bag with the full sheets of cardstock so I thought I would try and use it. It was a good size for this card because I didn’t want much of the paper covered up. Then I stamped a greeting from the Free As a Bird Stamp Set. I needed one that would fit on a fairly small piece. This small circle was die cut with the second smallest circle in the Layering Circles Dies.

And since I usually can’t leave well enough alone, I added some Rhinestone Jewels to the greeting. I wanted them to be pink, though, and I knew I could color the plain rhinestones with Stampin’ Blends markers. The same pink really didn’t show up so I tried Flirty Flamingo. On the rhinestones, it give a pinkish color to them so it was perfect.

As a note, due to the new Big Shot and die situation changing, we don’t use the terms “framelits” and “thinlits” any more, which is fine with me! It is much easier to say “dies”. And since the Big Shot has retired, while we wait for a new machine, we will just refer to any “die-cutting machine” until we get our new one. Stampin’ Up! is working on it and from past experience, they will wait until they have a really good one before putting it on the market.

If you want to hoard your beautiful Perennial Essence Paper, look at THIS CARD and see how you can use just a strip of it to make a lovely card.

After you order this paper, you will be inspired to make lots of cards like my Easy Floral Thank You Card for many different occasions!

SHOP STAMPIN’ UP! ONLINE HERE!