
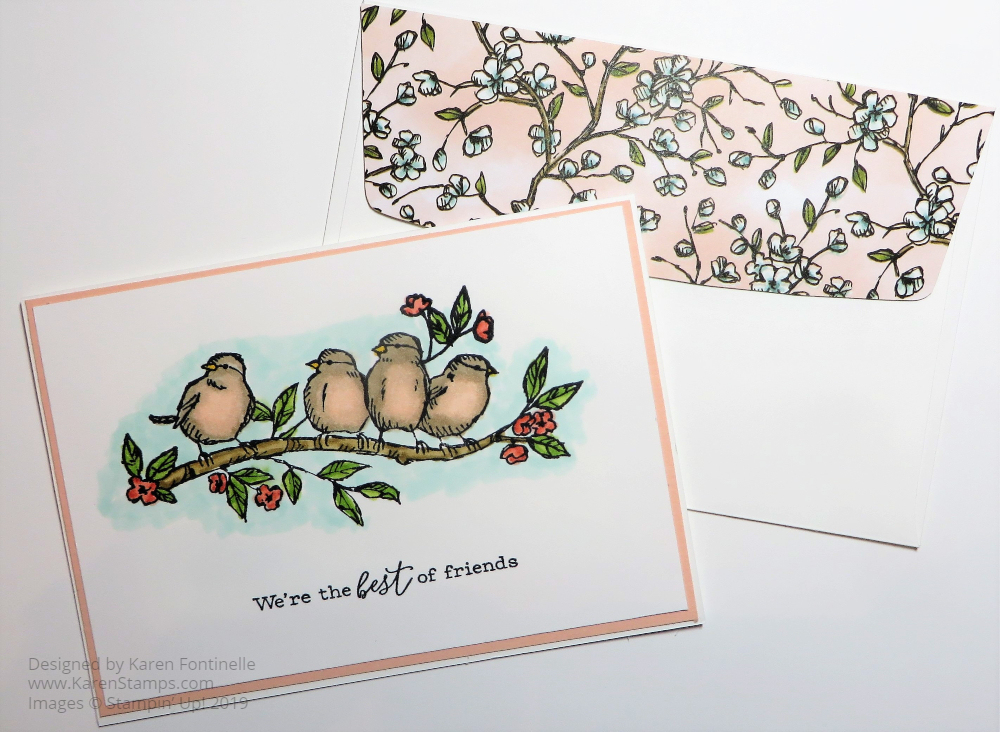
Even though I posted a card with the Bird Ballad Designer Paper yesterday, I think that whole suite is so pretty I had to do something else with it for today, the Free As a Bird Notecard & Envelope. My original idea was to just stamp directly on the front of the Notecard, but since I was going to use my Stampin’ Blends to color in the stamped image, I didn’t want to have the coloring show through to the other side. I’m not positive it would since the notecard paper seems fairly heavy, but no point in taking a chance! I even decided to add a Petal Pink layer with a narrow margin behind the stamped layer.
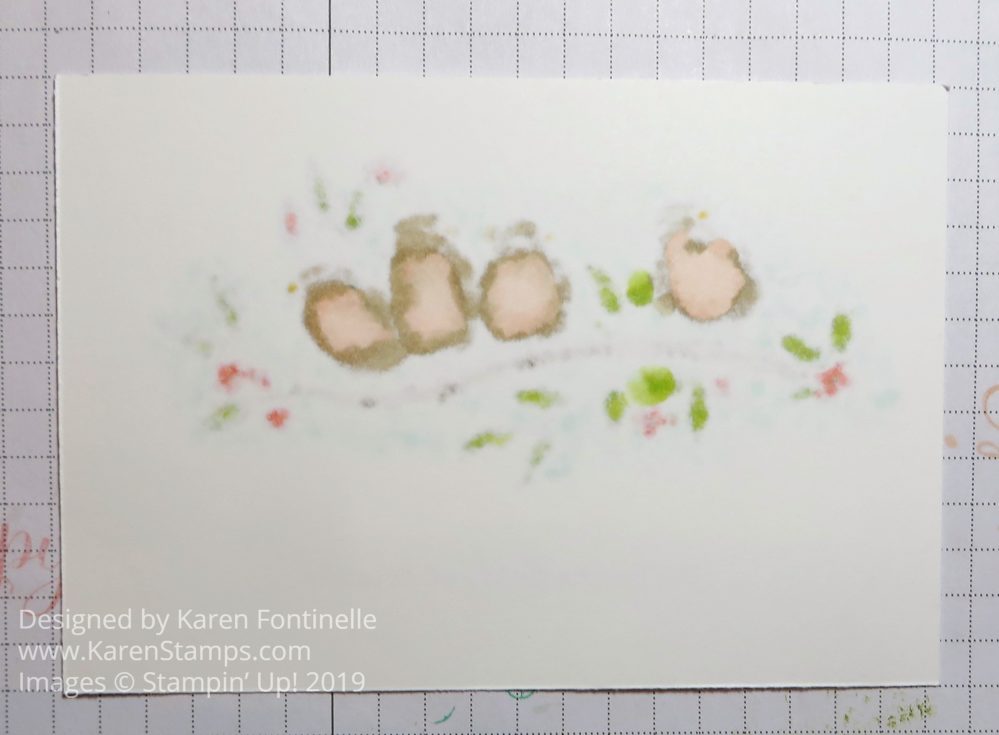
I absolutely love coloring with the Stampin’ Blends alcohol markers! Don’t be intimidated to use them, thinking about “blending”. Just color! I usually use the light color first and then maybe color the edges or highlighted areas on the stamped image with the darker color. Then maybe I even go back and color over again with the lighter marker to blend any rough lines. Just play and do whatever you want. I can almost guarantee you will be satisfied with the result with these markers.
Since I originally thought I was going to stamp the birds directly on the notecard, I knew I just had that one chance to get it right so I pulled out my Stamparatus®! In order to see how everything lined up, I put down a piece of clear Window Sheet on top of the notecard so I could stamp the image on the window sheet and see if anything was crooked (usually the words). Be sure to use the gridlines on the Stamparatus plate to see if you have your stamp or words straight if that is what you want. I could also put two stamps on the Stamparatus at one time and get everything spaced just right!
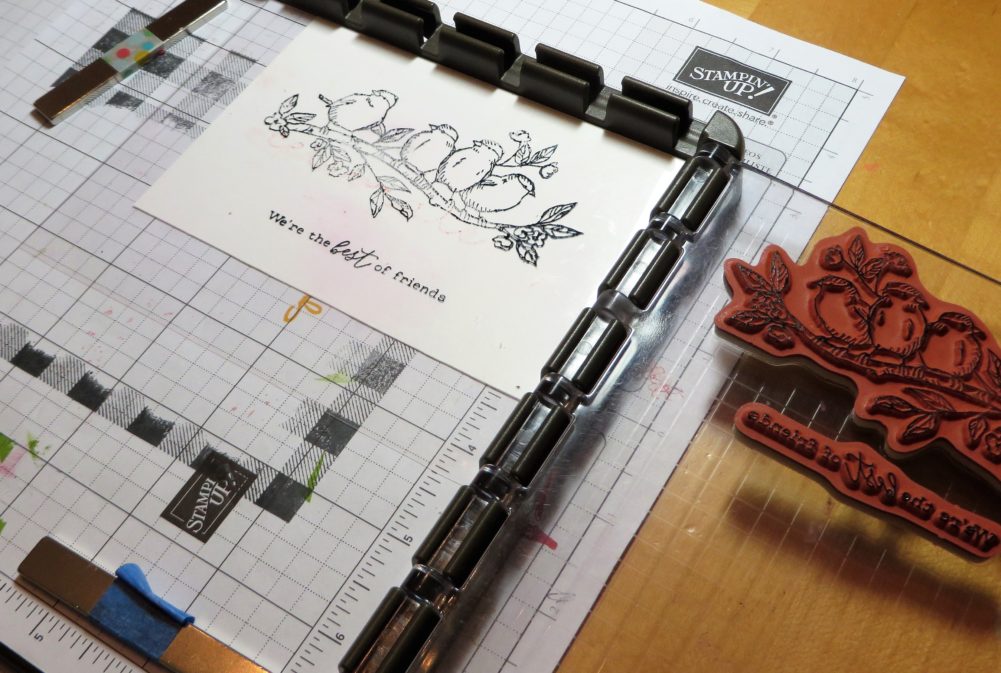
When you have everything where you want it, remove the window sheet, make sure the cardstock is still in the corner or wherever you stamped it with the window sheet and have your magnets holding down the paper. Then stamp! If the image doesn’t come out fully stamped, just ink up the stamp again without moving anything and stamp again (or again if necessary) until you have a good image. That’s one of the most important benefits of the Stamparatus.
As I have said before, the Note Cards & Envelopes are just handy to have on hand always. When you want to do some quick stamping and write a short note, they are perfect. AND they come with their own mailable envelopes! To fancy up the envelope a little bit, I used a piece of the Bird Ballad Designer Paper on the back flap! You could put the paper inside as a liner if you wanted instead. I put the adhesive on the envelope flap, then glue on a larger than needed piece of paper. Then I trim off the excess with scissors. So easy and so pretty!
Always remember to be careful with the magnets because they really like to jump together and then they are difficult to pull apart. These magnets are very strong, which is good, until they get stuck together! Watch out for your fingers, too! I like to put the magnets on opposite sides of the table if I don’t have then in use so that they are FAR apart!
Check out all these great products in the Stampin’ Up! Online Store…..the Bird Ballad Suite, the Note Cards & Envelopes, the Stampin’ Blends Markers, and the Stamparatus. Stampin’ Up! has the best products! Have fun stamping something today!