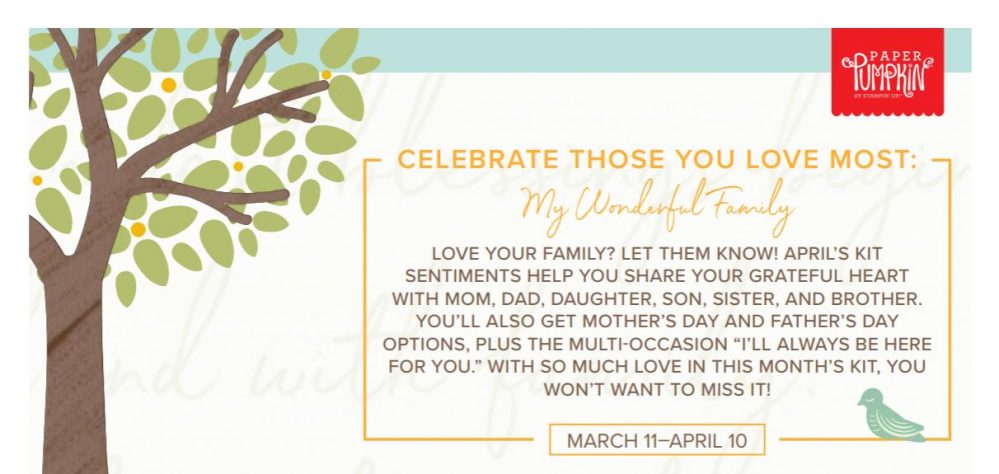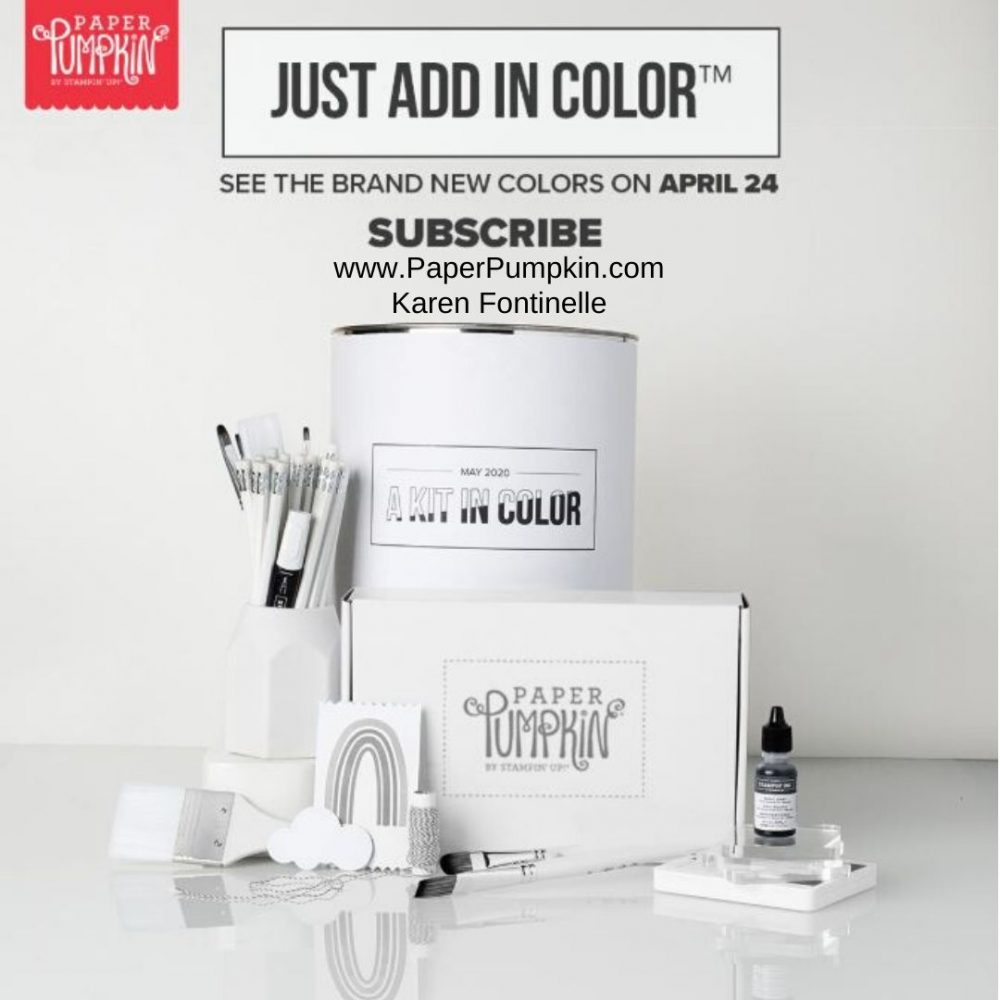
Look What’s Coming in May With Paper Pumpkin! I don’t really know exactly what hints this photo provides for the May Paper Pumpkin Kit except for revealing the new In Colors, coming in the next Stampin’ Up! Annual Catalog, but it sure has my attention! I can’t wait to see the kit!
If you are not familiar, Stampin’ Up! In Colors are the trendiest colors that Stampin’ Up! adds every year to its collection for two years. The oldest In Colors go out and the new ones come in! This ensures that we always have the most current, trending colors to use in our cards and projects. We are always up-to-date!
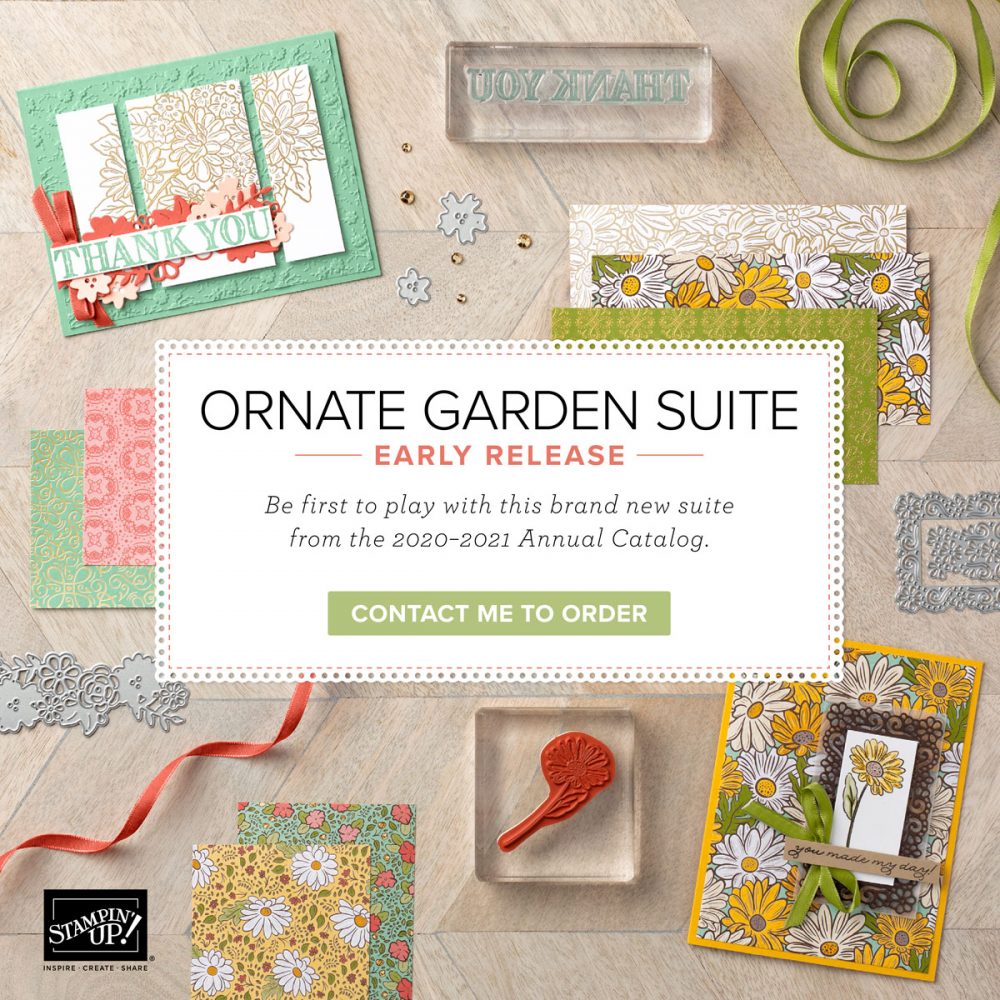
We don’t know yet what the new In Colors will be (except for a hint in the early released Ornate Garden Suite!) so the May Paper Pumpkin Kit will be the big reveal! Paper Pumpkin subscribers will be the first to get to PLAY with the new In Colors even before Demonstrators can begin preordering products from the new Annual Catalog in May!
About the May Kit
A Kit In Color
Kit contains supplies for 12 cards and envelopes
8 cards are traditional size
Card size: 4-1/4″ x 5-1/2″
Envelope size: 4-1/2″ x 5-3/4″
4 cards are notecard size
Notecard size: 5″ x 3-1/2″
Envelope size: 5-1/8″ x 3-5/8″
Coordinating Colors: Four NEW In Colors plus Purple Posy from the 2019–2021 In Color collection. (The new In Colors will be introduced on April 24.)
I think this is one of those kits you don’t want to miss! Even for past subscribers, this might be the time to reactivate your subscription, at least to get this kit! If you are new, this will be an extra-special kit! And with your first kit, you will receive an acrylic Paper Pumpkin block on which to mount the stamps in your kit. Everything you need will be included in your kit, so if you have no craft supplies, no worries!
Although the deadline for subscribing to Paper Pumpkin is May 10, 2020, it would be a good idea to go ahead and subscribe NOW! There is always the possibility the kits could sell out closer to the date and always the possibility that if you don’t subscribe right now, you will forget! Also, once you are a subscriber, you can purchase any Past Kits or Refills that are available in the Stampin’ Up! Online Store. That inventory just depends on what is leftover and how quickly it gets purchased.
Instead of subscribing by the month, if you prefer and are putting in a Stampin’ Up! order, you can add a Prepaid Subscription to your Stampin’ Up! order for whatever time period you like. You will receive an email from Stampin’ Up! right after your order which will have a special code in it and will tell you how to set up your Paper Pumpkin account and how to add that code so you receive your kits. You must do that before the 10th of the month to get that month’s kit. So if you order a Prepaid Kit today, you must set up everything by May 10th to get that kit.
Subscribe to Paper Pumpkin Today! Don’t Miss Out!
Or go to www.PaperPumpkin.com and add my name as your Demonstrator, Karen Fontinelle.