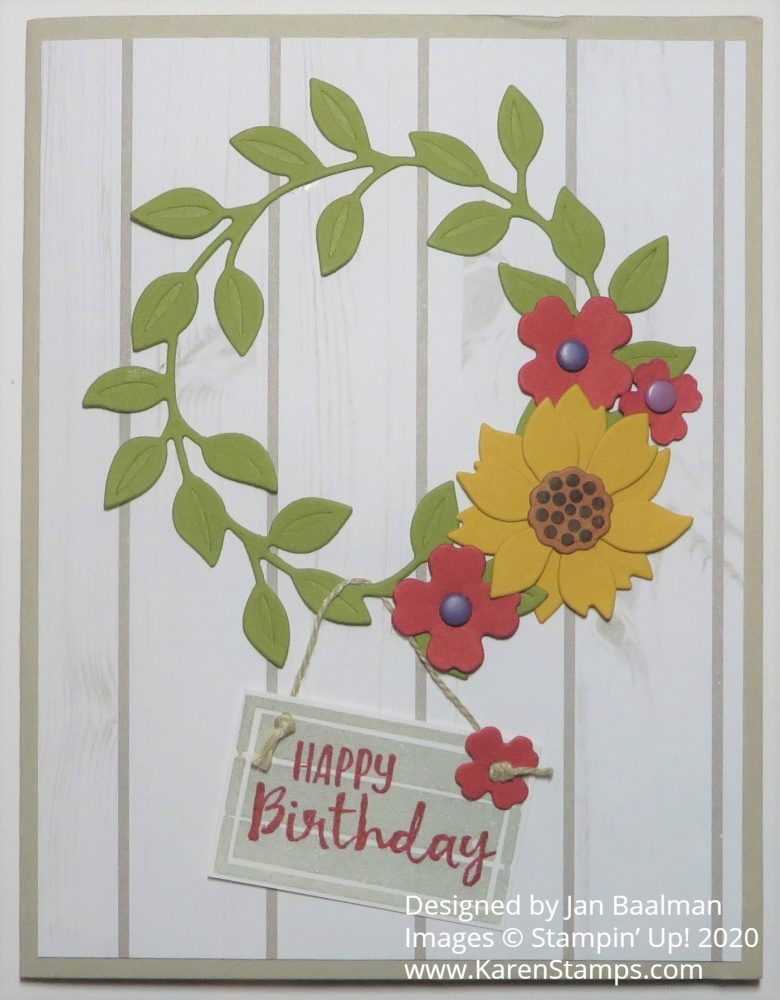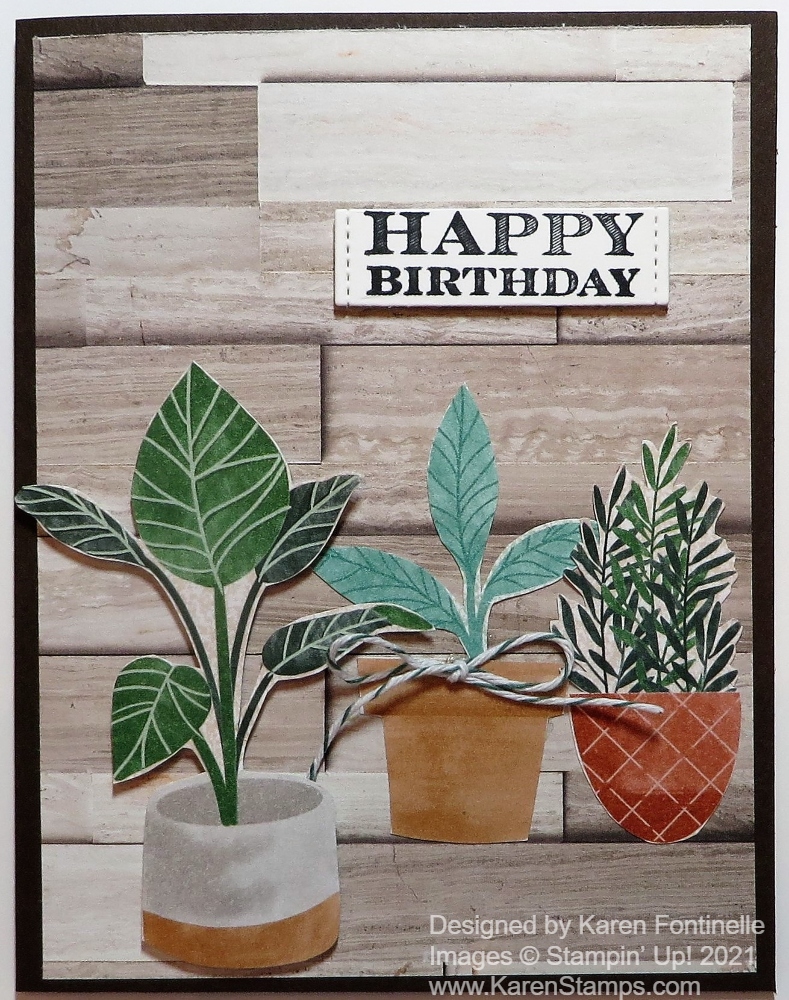
If you would like to make this Bloom Where You’re Planted Happy Birthday Card, you can buy the paper with the plants and the paper with the background both on sale in the Stampin’ Up! Designer Series Paper Sale! There are nine select papers on sale right now through August 2 so you can stock up or try out new ones at a 15% discount!
To make this card, I used two of the papers on sale now – In Good Taste for the background and Bloom Where You’re Planted for the plants! In Good Taste is a giant package of paper, 24 sheets of paper, 2 papers each of 12 different designs. You are sure to find patterns for every creation in this package! Each sheet has photographic images of wood, tile, stone, and other elements to add visual textures to all kinds of projects. These would be great backgrounds for scrapbook pages as well.
For the card base, I used Early Espresso Cardstock. Since this paper is so dark, you will want to add a Basic White or lighter color layer inside the card on which to stamp or write your message. You might even stamp or add a cutout image of one of the plants to this inside layer for a fun surprise.
For the plants, I just went through the Bloom Where You’re Planted Designer Paper and chose some plants I wanted to cut out. This paper has sheets of separate plants and pots, leafy backgrounds as well as various generic backgrounds to look like walls where you might place a plant. If you have the Perfect Plant Dies, you can cut out certain pots and plants on separate papers by running them through the Stampin’ Cut & Emboss Machine. I just used my Paper Snips to cut out one separate pot and separate plant and the other two were the full pot and plant on another sheet.
The largest plant on the left is popped up on Stampin’ Dimensionals® and the other two are adhered right down on the background paper. I found a retired spool of twine and used that to tie a little bow and adhered it to the middle pot with a Mini Glue Dot.
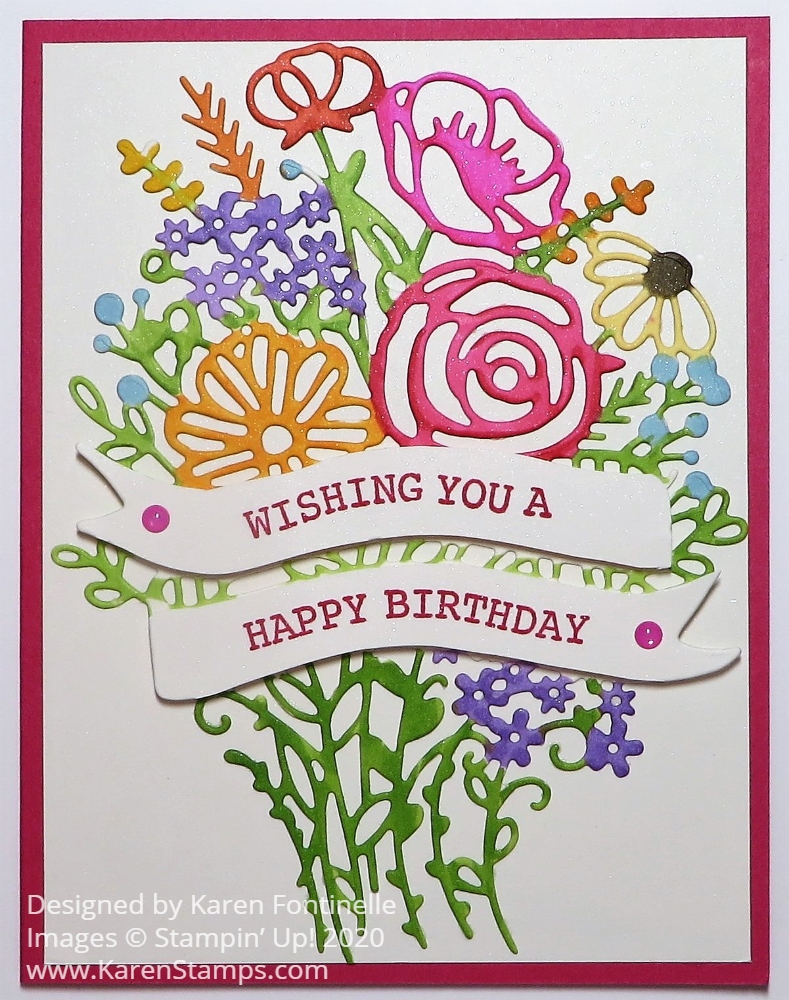
The greeting was already die-cut in a little pile on my table from the Many Messages Stamp Set and Messages Die. This is an amazing concept! It’s like a large background stamp filled with greetings that is best to stamp with the Stamparatus so you make sure every inch is stamped fully. Then die cut with the one large die, making sure it is lined up properly, and it cuts out all the greetings in one fell swoop! You used to be able to buy both the stamp set and die in a Bundle, but that retired now so you have to buy them separately. However, they added a new stamp set, the Many Happenings Stamp Set, for even more greetings to be stamped and die-cut in the same way! If you stamp and cut out these greetings maybe in a couple of colors of ink or on different colors of cardstock, then store them in a little box or bag, you will have a whole bunch of greetings ready to go when you don’t have time to look for a specific stamp set to use!
In this previous post, you can see how I used the Stamparatus to stamp all these greetings!
Check out all the papers on sale, if you haven’t already! Maybe you have purchased one of the patterns already but used a lot of it. Now is the time to stock up on more at a discount! Every little bit helps! My Bloom Where You’re Planted Happy Birthday Card was fun to make!