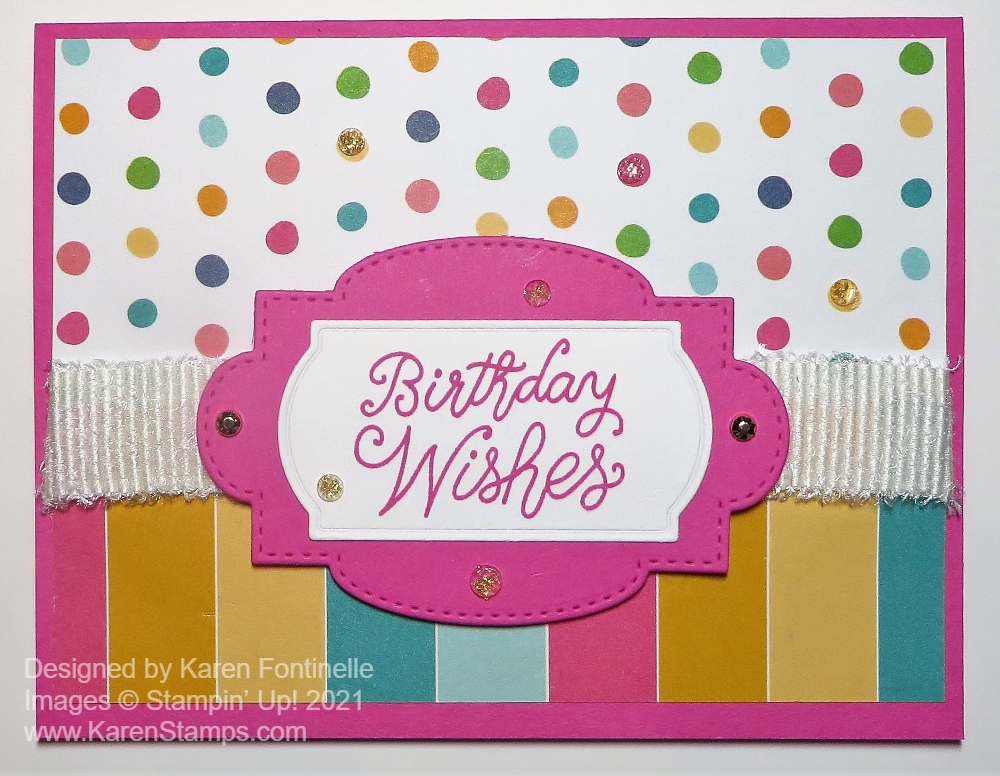
Here’s a bright and happy card to start the New Year, this Sunshine & Rainbows Birthday Wishes Card. With things still disorganized at my house from moving things around for Christmas, I don’t even know what new products I have or where they are! I found one little pile and this paper was in it!
Beginning Tuesday, January 4 (yes, tomorrow!) the new Stampin’ Up! Spring Mini Catalog goes live plus our Sale-A-Bration promotion! Spend $50, get one free Sale-A-Bration product! This is everyone’s favorite promotion because who doesn’t like free product! This paper is used on this card is a Sale-A-Bration product that you can earn for free with a $50 purchase! It’s the Sunshine & Rainbows 6″ x 6″ Designer Series Paper and it coordinates with the Rainbow of Happiness Bundle in the Spring Mini Catalog. Some images coordinate with the dies and the new punch.
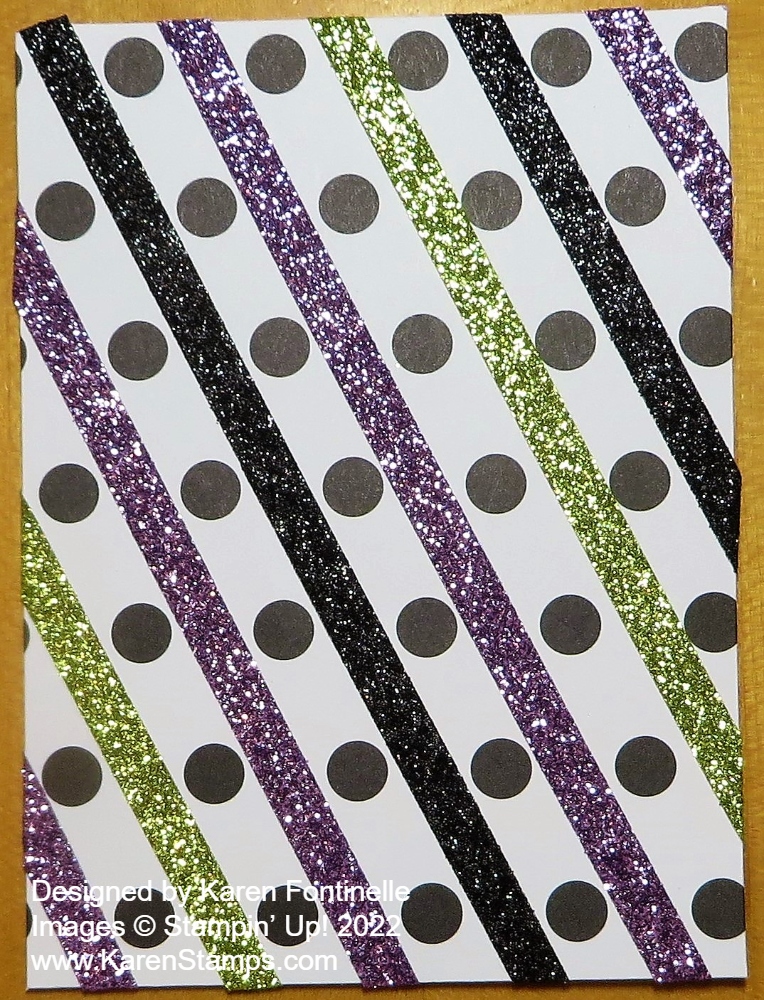
I was surprised to find this polka dot paper in the package, I was thinking it was all going to be rainbows on the “front” side of the paper, but when I saw this colorful polka dot, I had to use it! The bottom striped portion is the opposite side of the polka dots side!
The card base is Magenta Madness. I cut one of the pieces of designer paper a little longer so that they could overlap and not just meet, although that would have worked out okay, I didn’t know which ribbon I was using at first. The striped bottom piece is 5 1/4″ x 1 3/4″ and the polka dot pattern is 5 1/4″ x 2 1/2″ so the two papers can overlap by about 1/4″. The ribbon I used is the White 3/4″ Frayed Ribbon in the Spring Mini.
The greeting is found in the Little Delights Stamp Set, stamped in Magenta Madness ink on Basic White cardstock, and die cut with a die in the Painted Labels Dies. Then the greeting is layered on one of the Stitched So Sweetly Dies in Magenta Madness. It is popped up on Stampin’ Dimensionals over the wide ribbon. This stamp set is retiring from the Holiday Mini so TODAY is the LAST DAY for the great stamp set! Get it while you can!
To finish off this card, since the die cut behind the greeting was rather large, I felt like I should add something. Of course, that something was some jewels! I used the new Iridescent Rhinestone Jewels and a couple of the Gilded Gems from the Annual Catalog on each side of the Magenta Madness die cut. I’m not sure I love the placement of the gems, I didn’t feel like I was getting it right, but it’s right enough, so I decided to leave well enough alone! Sometimes you have to know when to stop!
*** Remember: Today is the last day for the LAST CHANCE PRODUCTS, the products retiring from the July-December 2021 Holiday Mini Catalog! Take a final look at your list and especially check in the Online Store to see what is still available! Check the Clearance Rack, too, as long as you are looking! There are a few things you could even use for making Valentine projects soon, plus punches, embossing folders, great dies, Gold Mini Pizza Boxes (great for treats, little 3″ x 3″ cards, small gift)
One more day until the new January-June 2022 Spring Mini Catalog AND Sale-A-Bration! Sleep well so you are bright-eyed and bushy-tailed tomorrow!! Happy New Year and Shopping!