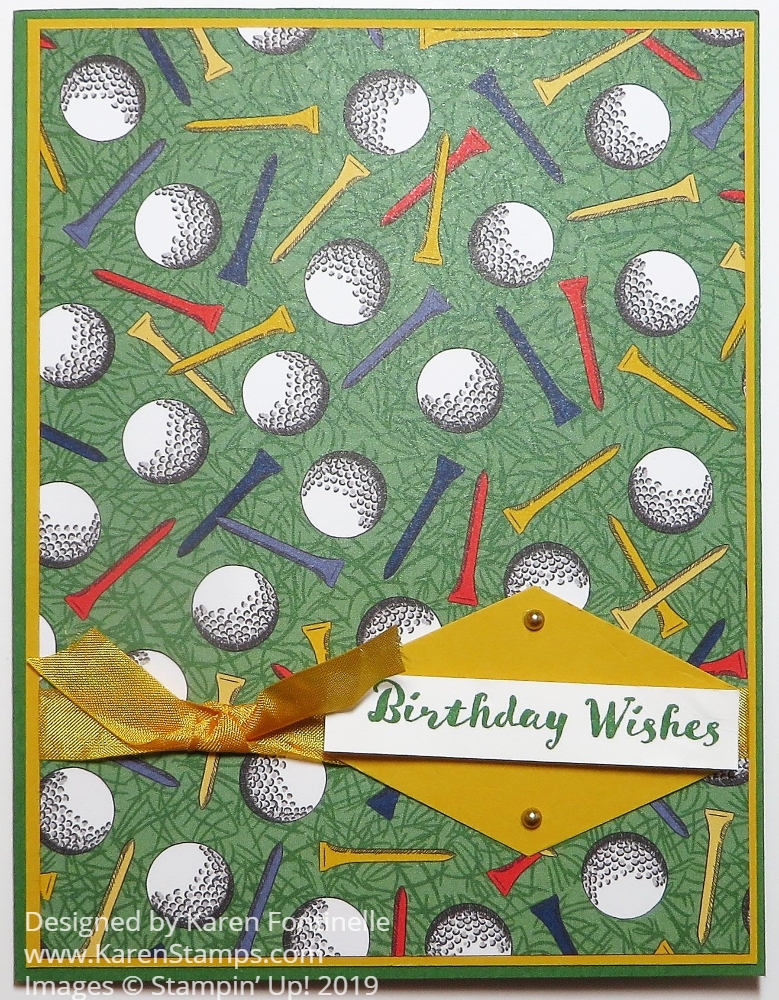
Here is a great birthday card for a golfer, quick and easy to make and you can easily vary the card design. While we are often looking for a masculine card, this one is for any golfer, women golfers, children golfers, anyone who enjoys the game! The golf balls and tees on the green just make for a perfect golfing card with other possibilities for the greeting.
The paper is new in the Occasions Mini Catalog. It’s the Country Club Designer Series Paper. Now not every golfer, probably most, are not Country Club members but this paper is for everyone! Besides golfing images, there are nice plaids you can use on golfing cards or other kinds of cards. So it is a good paper collection to have on hand.
My card has a Garden Green base with a layer of Crushed Curry, both coordinating colors with the designer paper. I just wrapped a piece of the Crushed Curry 3/8″ Crinkled Seam Binding Ribbon around the designer paper before adhering to the card. Then I just added a knot to the left side of the greeting.
The greeting is stamped on a strip of Whisper White and layered on the Tailored Tag Punch. The greeting is popped up on Dimensionals but the tag is adhered flat on the card. Then I added a couple of embellishments to the tag. A quick and easy card for the golfer!
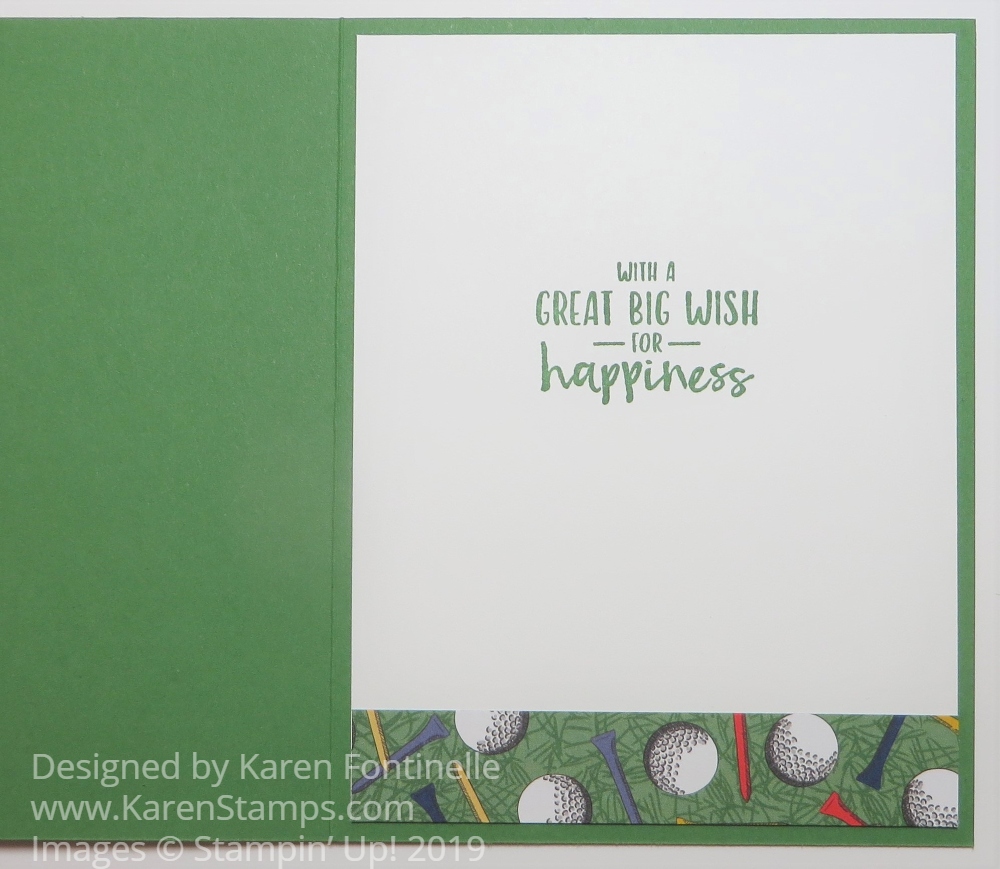
Here is the inside. It is fun to add a strip of designer paper to the inside. I wish I would have used the other side, the plaid design. That would have been cute but I was too fast with the glue!
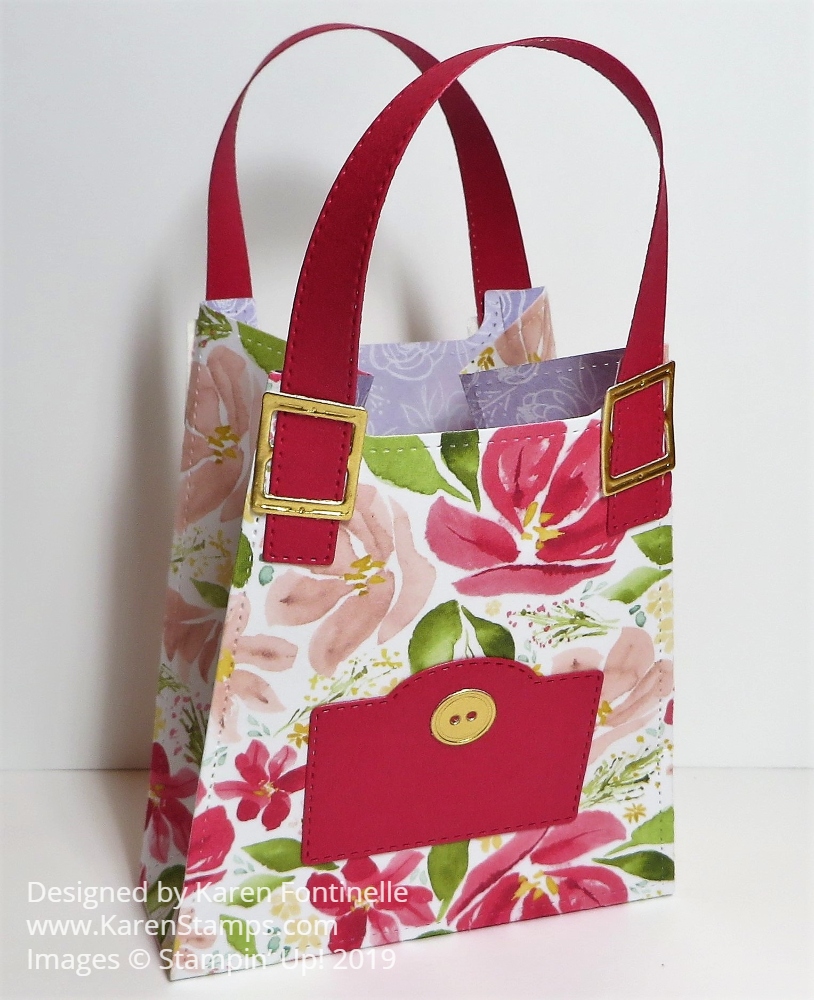
You are going to enjoy, in the Best Dressed Suite in the new Occasions Mini Catalog, making a purse with the All Dressed Up Dies. If you like creating 3D items, little gift bags, party favors, treat holders and more, I think you will have fun with all the possibilities of the Dressed Up Dies!
The Best Dressed Suite is cute enough as it is, with designer paper printed with feminine images….high-heeled shoes, purses, perfume bottles, lipstick…and we will all find so many ideas for making cards and other projects with this Suite. Then add in the All Dressed Up Dies that can die-cut little purses or backpacks or tote bags or whatever you like to call them or design them as.
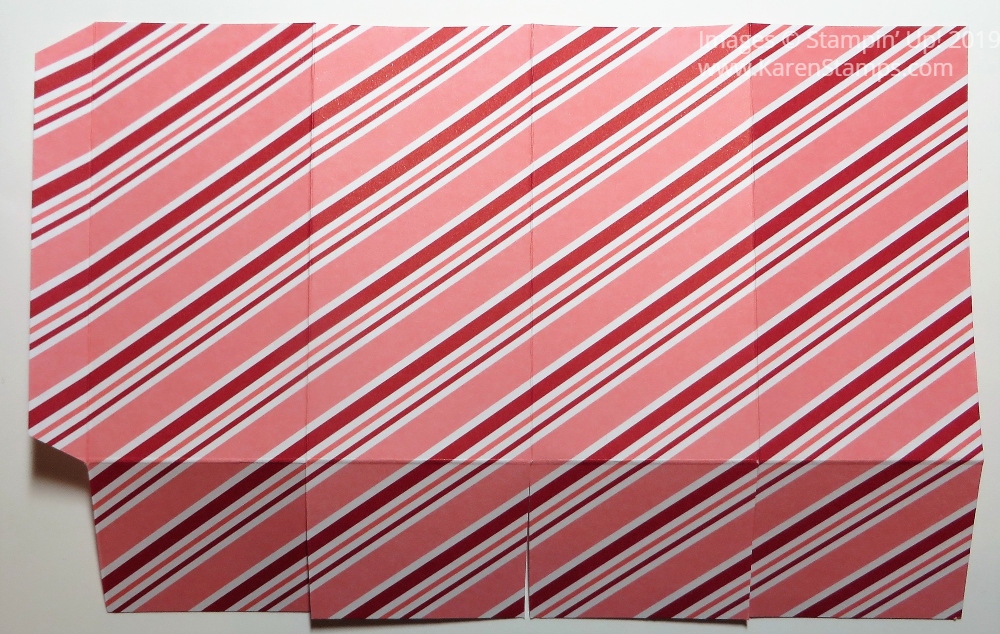
I just got these dies the other day and was excited to try out these dies to make one of the bags… I used a pattern in the Best Dressed 6″ x 6″ Designer Series Paper. You do need to use two sheets of the 6″ x 6″ paper for the two sides of the bag. The die will cut out the bag shape, score the fold lines and even make a decorative stitching line all around.
You do need to be careful when you begin to crease the score lines. They are a little difficult to see compared to the stitch lines. Sometimes the score lines are in between the stitching lines and you are tempted to fold on the stitching line! Put on your reading glasses if you need to and make sure you are creasing the correct lines! You probably won’t have any trouble after you make the first one! You may be able to see some of the stitch lines on the photo above.
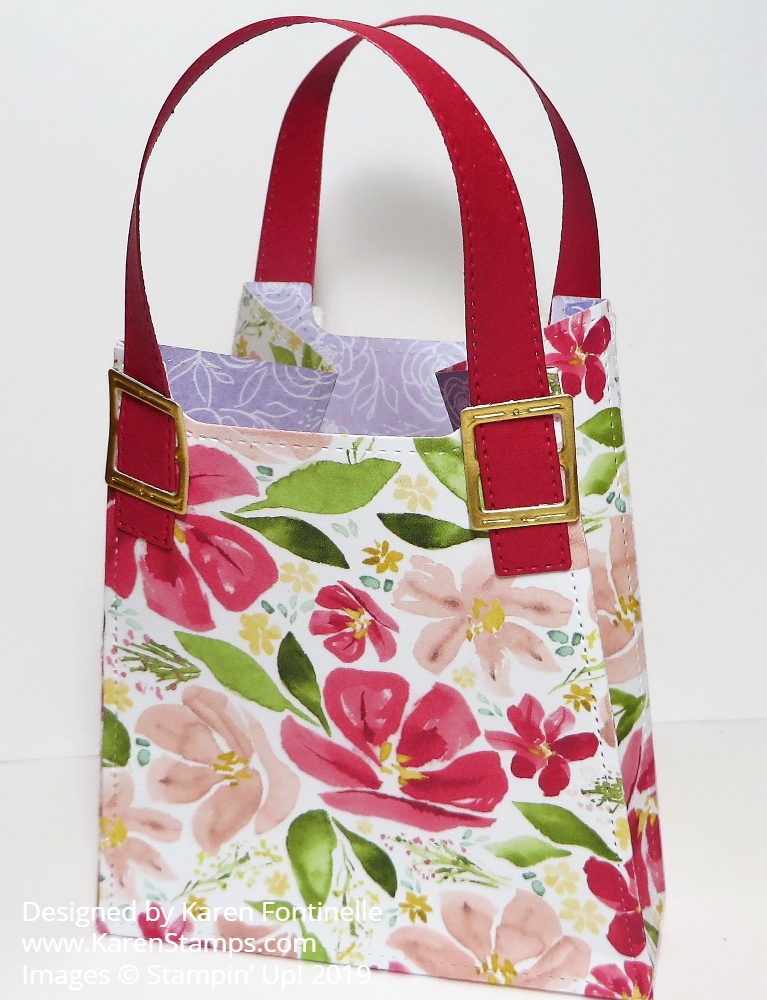
You have options when you make this bag. You can “push in” the sides or let them stick out. You can attach the straps in different ways. You can make it look like a purse or a backpack with longer straps in the back. You can emboss the paper. You can stamp it. You can add different embellishments on the front. The dies come with various pieces to help you customize the bag. Be sure to notice that the dies are on two papers in the package… I missed the die-cut for the straps at first!!
This set even comes with dies to make the little buckles, which I made out of Gold Foil. I also die cut the little button on the front pocket on the front of the bag. There are so many options!
Even though the Best Dressed Suite and designer paper is very girly, you can use these All Dressed Up Dies even for making boyish backpacks, maybe for favors at their birthday party with a little gift inside. Or some of both or something neutral if you are having both boys and girls. If I had known about Stampin’ Up! when my kids were young and having all these parties and activities at school, I would have been in heaven having all kinds of easy ideas to make!
Check out the Best Dressed Suite in the Occasions Mini Catalog! Maybe you want all of it, maybe just some of the products, but give it a second look if you skimmed over it the first time! Think of the fun you can have with the All Dressed Up Dies!
This Stampin’ Up! card is made with the Lily Pad Dies, available during Sale-A-Bration for FREE with a $100 purchase. Just because something says “lily pad” doesn’t mean it has to look like lilies in a pond! If you have an order of $100 or more, you can choose two free $50 items or you can get this higher valued $100 selection.
These dies go with the Lily Impressions Designer Series Paper and the Lovely Lily Pad Stamp Set. These are also Sale-A-Bration choices at the $50 level! So lots to choose from! The Lovely Lily Pad stamps are extra-special because they are reversible! This whole collection of products is really quite interesting. Wait until you hear about the designer paper!
Watch the Stampin’ Up! video below to learn about the Lily Pad products!
Just purchase $50 in Stampin’ Up! products and you can earn one FREE Sale-A-Bration product! No limit to the number of products you can earn so think of your order in $50 increments. You don’t want to get to $48 on your order and miss out on Sale-A-Bration! Sale-A-Bration is going on now through March 31.
Try these Easy to Make Valentine Ghirardelli Candy Holders for Valentine’s Day or any occasion for a little gift or favor. Once you have the measurements and the piece of candy, you are ready to make a special treat!
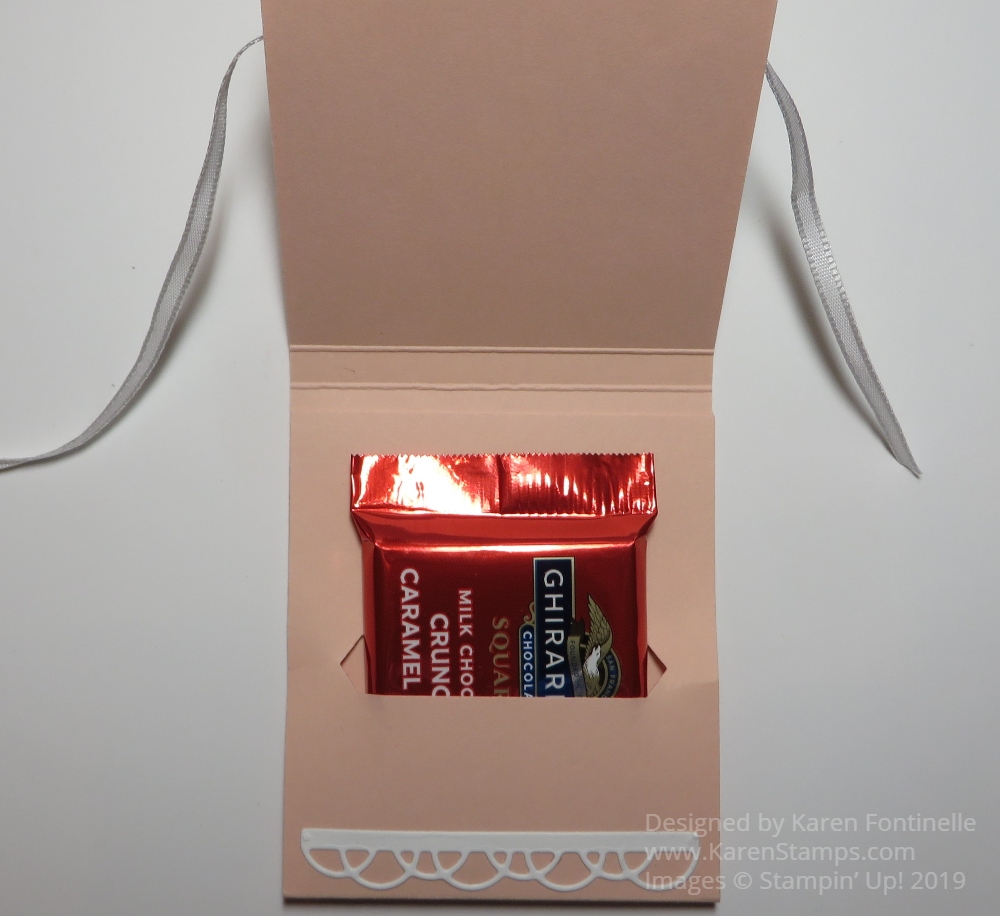
This is basically just a strip of cardstock, scored to that it will fold over a piece of chocolate candy, like a Ghirardelli chocolate (yum!). Then you just decorate the front for whatever occasion you have.
Start with a strip of cardstock cut at 9 5/8″ x 2 3/4″. Score at 2 3/4″ and 3″; 6 1/4″ and 6 1/2″. With these measurements, you could get three strips out of one sheet of cardstock. Fold and crease on the scored lines. Open the strip back up and you will see above and below the score lines, one section is shorter than the other. You want the longer section to be the one that folds up to the inside.
Once you have identified the longer section, use the Classic Label Punch on that flap, inserting as far as you can, centered, to punch the opening for the chocolate. Put a piece of Tear & Tape as you see in the photo so you can fold up that flap and adhere to the inside, not quite up to the score line. You will want to stand the candy holder on the table making sure the bottom is flat as you adhere that flap.
Insert the chocolate candy piece to make sure everything fits right! If you do not have the Classic Label Punch, you can cut hand cut a slit or use the retired Word Window Punch.
Now you can proceed to decorating the front of the candy holder and even that little area at the bottom, where you see I put a die-cut piece.
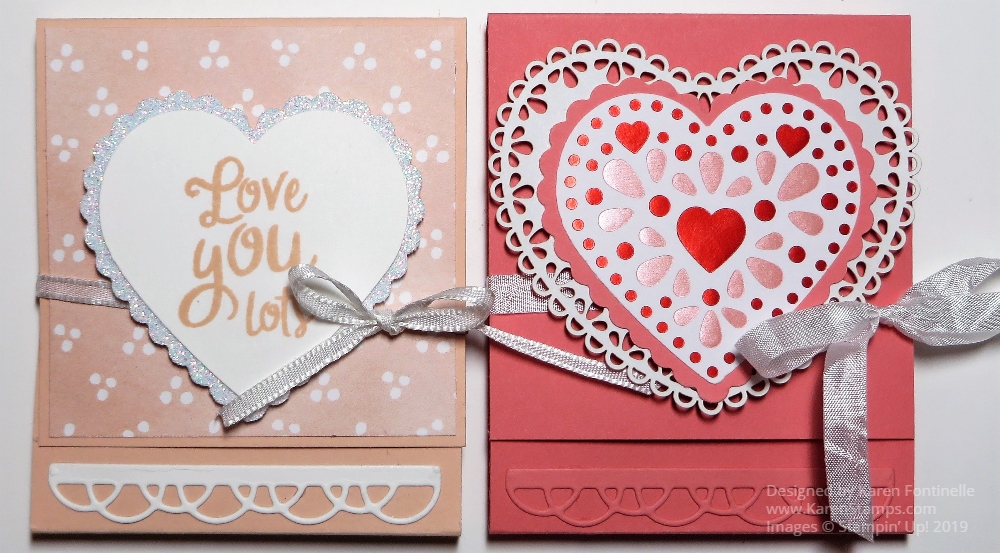
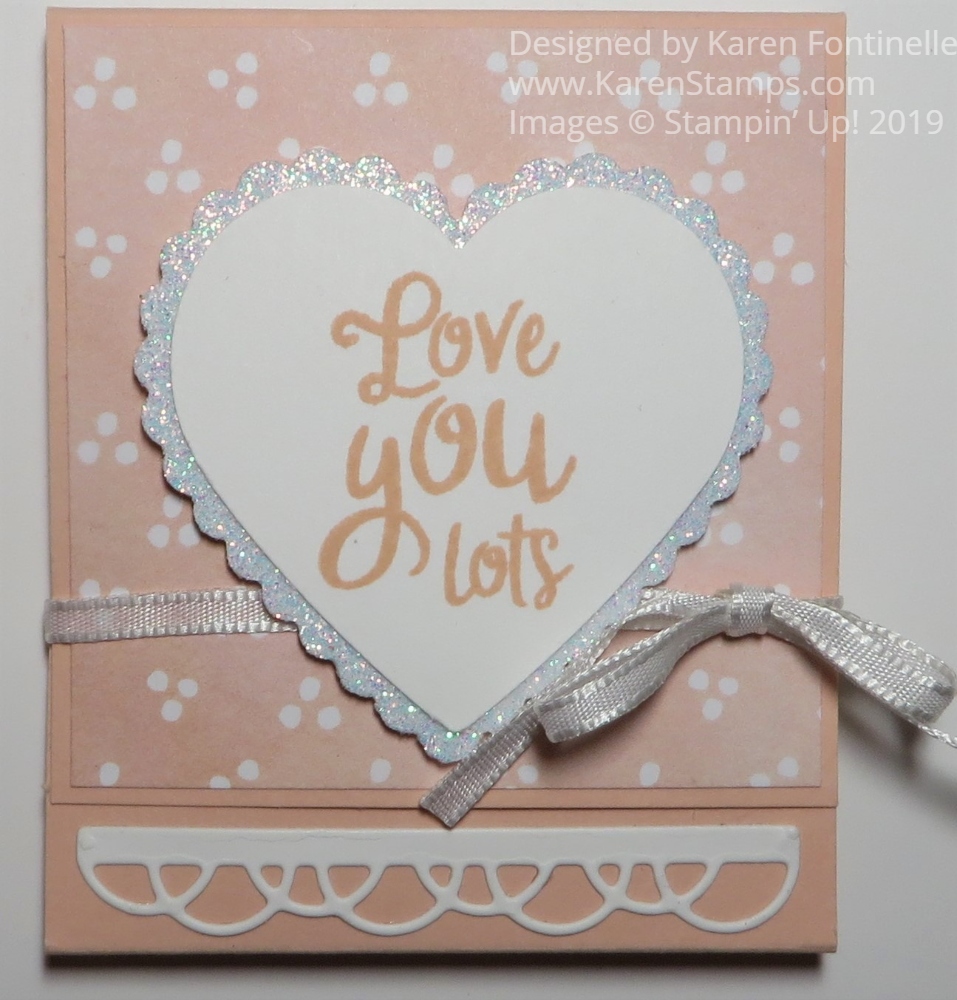
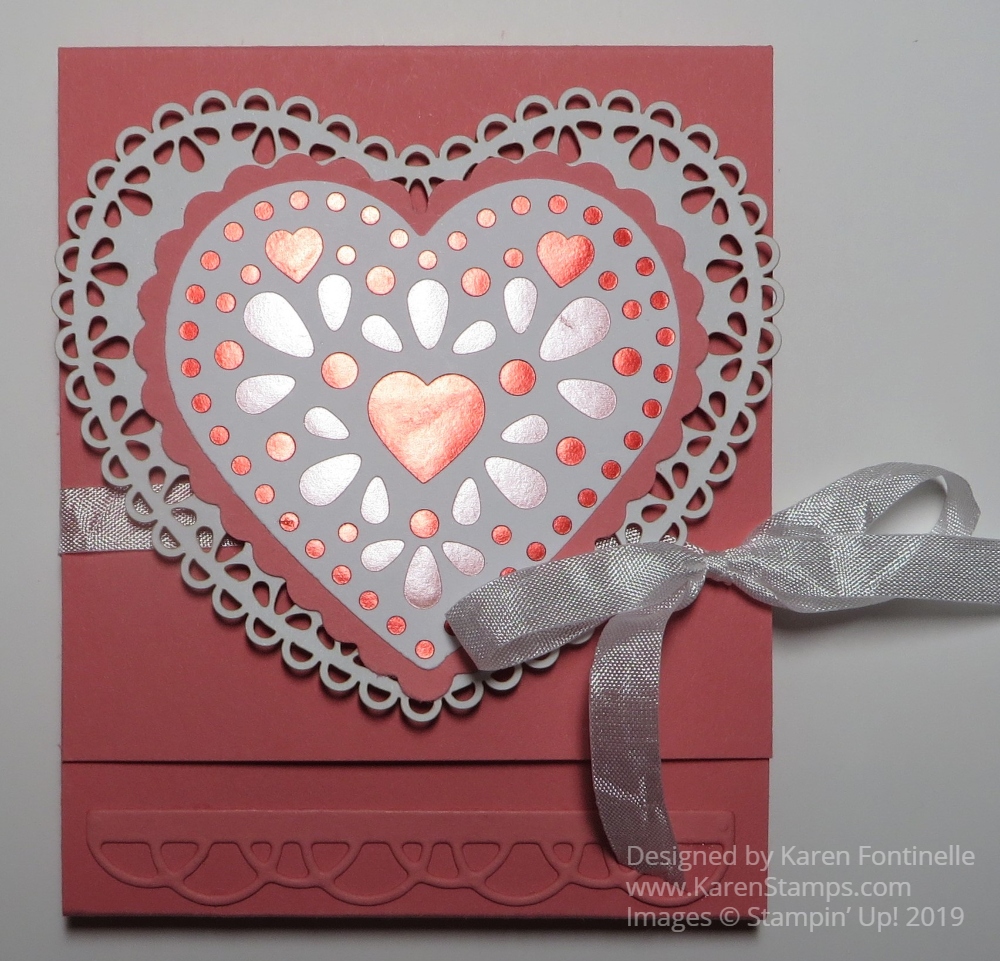
For this candy holder, I used Petal Pink Cardstock for the base. Even though it is for Valentine’s Day, I used a piece of designer paper in the Best Dressed Designer Series Paper! It had this polka dot piece of Petal Pink designer paper so it was perfect for a little background layer. I stamped a heart with the Heartfelt Stamp Set and punched it out with the plain heart in the Heart Punch Pack. You can buy the stamp set and two punches together in a Bundle and save 10% if you wish. The plain heart is layered on a piece of Sparkle Glimmer Paper punched out with the scalloped heart punch in the punch pack. You could also use Silver Glimmer Paper. The little piece at the bottom is a die-cut from the Painted Labels Dies in the Peaceful Poppies Suite.
The hearts are popped up on Dimensionals so that I could run a piece of scrap ribbon underneath just to hold the flap closed on the candy holder.
This Valentine Ghirardelli Candy Treat Holder is made with the Flirty Flamingo Cardstock. The heart with foil accents is punched right out of the From My Heart Specialty Designer Series Paper and layered on a scalloped punched Flirty Flamingo heart. Then these were layered on a Heart Doily. But the doilies come in Real Red and Flirty Flamingo…..so just turn them over and you’ll have white! The ribbon tied around this candy holder is a new one in the Occasions Mini Catalog, the Whisper White 1/4″ Crinkled Seam Binding Ribbon. One of the great things about this white ribbon is you can dye it any color you want with ink or Stampin’ Blends markers.
These Valentine Ghirardelli Candy Holders will be fun to make if you want to take some favors to the people in your office or a little treat for your family or neighbors or friends.
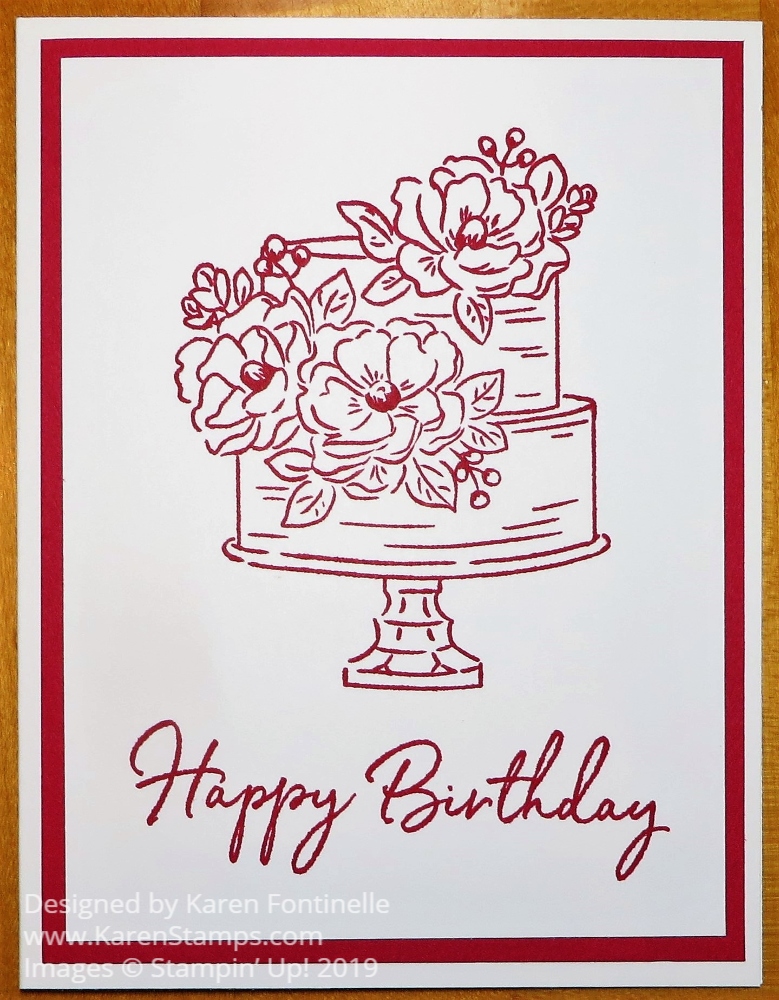
When you want to make a pretty card in a very short time, try monochromatic like this Monochromatic Lovely Lipstick Birthday Card. I thought this stamp set might be a perfect one for a monochromatic card and I think I was right! Talk about quick and easy cardmaking!
I used the Happy Birthday To You Stamp Set, only available FREE during Sale-A-Bration with a $50 purchase. And even more exciting, coming in February, you will be able to purchase a set of dies for this stamp set as an extra! There will be several new coordinating items for you.
The card base is Whisper White and the layer is Lovely Lipstick. I realized I have barely used these In Colors and thought I would give Lovely Lipstick a whirl. Then I stamped the fancy cake with Lovely Lipstick on another layer of Whisper White and the greeting at the bottom. I mean, you can’t make a card any faster than this one!
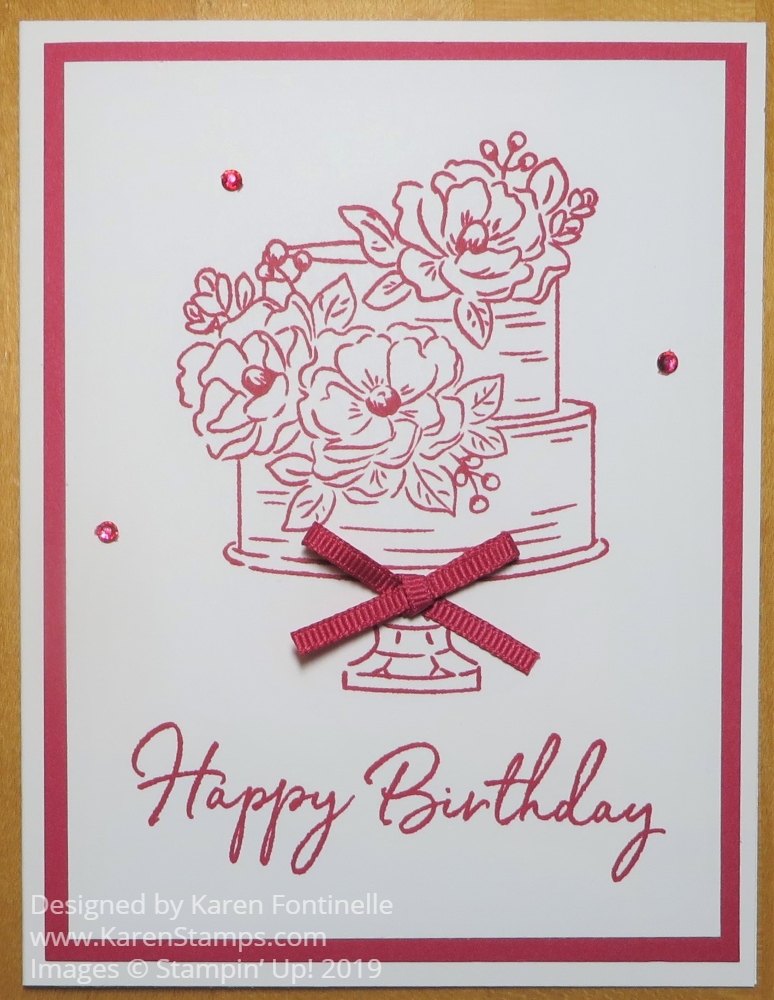
But if you did want to make a quick and easy monochromatic birthday card and you wanted a little bling on it, you could make this card! I had some very narrow Lovely Lipstick 1/8″ Grosgrain Ribbon so I made a very small bow to go on the cake stand. Next, I colored three small rhinestones with the Lovely Lipstick Dark Stampin’ Blend marker and placed them on the card. A monochromatic card with a little extra bling!
Whatever you want to order, be sure to try and do it in $50 increments so you can take advantage of Sale-A-Bration 2020 and earn some free product(s). After you have entered your order, it will prompt you to choose your Sale-A-Bration items.
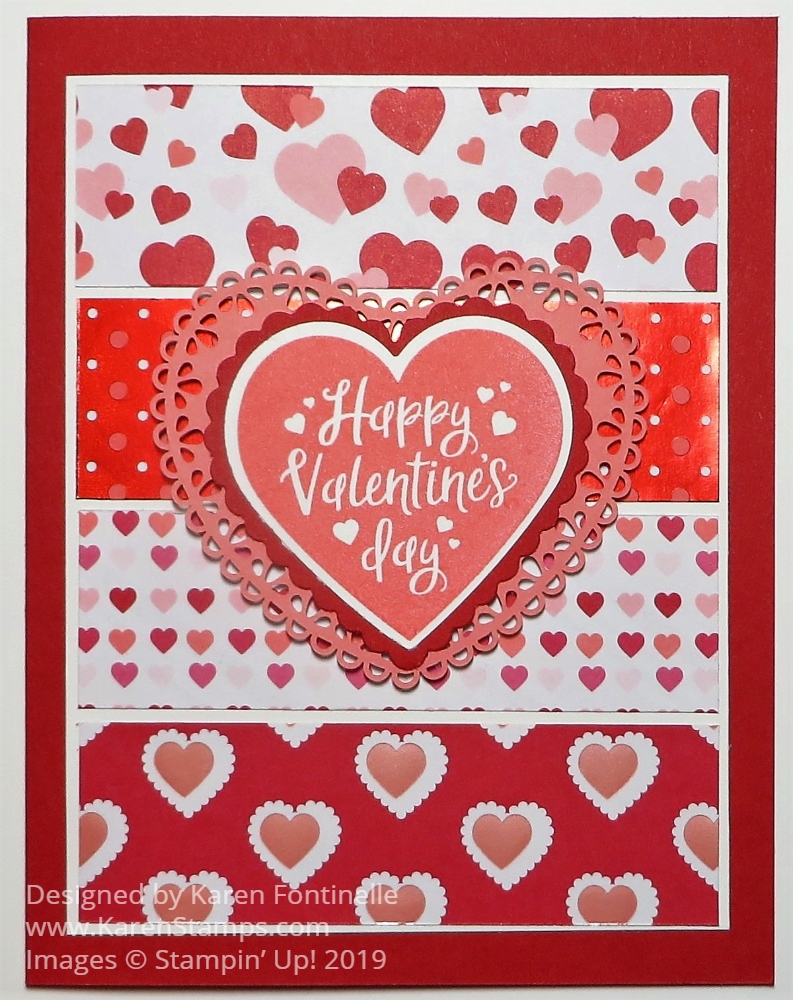
Doesn’t making valentines like this From My Heart Valentine With Paper Strips just take you back to your childhood?! Maybe it’s the doily because who of us did not use that white paste and doilies to make our valentines in elementary school?
I love this new From My Heart Specialty Designer Series Paper in the new Occasions Mini Catalog on page 9. Some of the papers have foil accents which makes them especially pretty! You can’t really tell from my photo above, but the second and fourth strips on my card have the foil accents. As usual, it’s so pretty you hate to cut into the paper, but cut you must in order to make these pretty cards and projects!
This is how this valentine came about! I got out the paper, saw a rectangle scrap in the package and it popped into my head to use several paper strips for the background of the valentine. Often cardmaking ideas just pop into your head or come about after working on your idea and then changing it when something else sparks your creativity.
The card base is Real Red. Real Red has probably always been my favorite Stampin’ Up! color because they have captured such a perfect red. With the switching around of the colors in the Color Families, it seemed like I wasn’t using it as much and that was sad! With Valentine’s Day approaching, how can you not be using Real Red again?
Now I should have gotten out my calculator or pencil and paper and did the math to figure out what size the strips should be and the size paper they are mounted on. But I didn’t! I just made the card, trimmed things down once or twice and when I still had a bigger margin at the bottom of the Whisper White, I simply trimmed that off. The card looks fine to me. If it is not mathematically perfect on the strips and margins, it’s just a valentine….it doesn’t have to be perfect.
If you want some measurements, the Whisper White layer on which I adhered the paper strips is 3 3/4″ wide and 4 7/8″ long. The designer paper strips are each 1 1/8″ wide and 3 5/8″ long with about a 1/16″ space in between the layers. And there is about the same 1/16″ margin around the edge, but you could also not have any margins and totally cover the Whisper White piece. Please don’t go crazy trying to make everything exact and fit perfectly. Just get it as balanced as you can and it will be fine.
The greeting is stamped in Flirty Flamingo Ink with a heart in the Heartfelt Stamp Set in the Suite. Then that stamped heart and the Real Red heart on which it is layered were punched out with the two punches in the Heart Punch Pack. You can purchase the stamp set and punches together in the Heartfelt Bundle and save 10%. These two hearts are then adhered to the Flirty Flamingo doily in the Heart Doilies Package. This large heart is then popped up with Stampin’ Dimensionals®.
If you want EVERYTHING in thisFrom My Heart Suite (as I did, because who wouldn’t?!), just put the number #153931 on your order and you will get the coordinating selection of products on pages 8-10 without having to put in all the individual numbers. This won’t all only be good for Valentine’s Day, you will be able to use hearts on lots of occasions, the punches, the stamp set, etc.
Overall, this From My Heart Valentine With Paper Strips is fairly easy to make so give it a try with the beautiful From My Heart DSP and the Heart Punch Pack!
February’s Paper Pumpkin kit is coming, and love is in the air! The Lovely Day kit is versatile, elegant, and the perfect way to help you celebrate birthdays and other grand occasions.
Coordinating Stampin’ Up! colors: Petal Pink, Pool Party, Pretty Peacock, Rich Razzleberry, Rococo Rose, and Old Olive
Paper Pumpkin is the papercrafting kit from Stampin’ Up! that comes to you in the mail each month. I think it is the treat we all need to give ourselves – the fun of receiving the kit in our mailbox plus the easy opportunity to take the time for some creativity and crafting! Just sit down with your Paper Pumpkin Kit and find a nicely designed project plus all the supplies you need.
Paper Pumpkin is for new crafters, non-crafters, experienced crafters, part-time crafters – anyone! The beauty of Paper Pumpkin is that you don’t need supplies to make the kit! Everything is in the box! So if you don’t want to go down the road of purchasing all kinds of rubber stamping supplies like a lot of us do, you don’t have to! Everything you need is in the kit!
And if you DO like to add on to your kit, this Lovely Day Paper Pumpkin Kit coordinates with the Happy Birthday to You Stamp Setin the Sale-A-Bration brochure! You can get this stamp set FREE with a $50 purchase from Stampin’ Up! during Sale-A-Bration!
If you prefer cards over other projects, the upcoming January Paper Pumpkin Kit being shipped now is some kit of treat project so if you passed on that kit, you can jump back in for February to get the card kit! Let me know if you need help reactivating your subscription. You can join Stampin’ Up! and skip months now and then if you don’t care for the kit or don’t have time that month.
Prepaid subscription HERE! Just add on to your Stampin’ Up! order. With a 3-month prepaid subscription, earn one FREE Sale-A-Bration product. Earn even more with a 6-month or 12-month subscription. Maybe earn Hostess Rewards by adding a prepaid subscription to your order!
Join the gang of Paper Pumpkin subscribers and look forward to a new papercrafting project every month!
Here’s just an Easy Best Dressed Square Celebrate Card that was fun to make and I think will be fun to receive. Sometimes it is fun to make a different shape card and this 4 1/4″ x 4 1/4″ square card is easy enough to make. Just cut across a regular sheet of cardstock at 4 1/4″. Then score that 4 1/4″ x 8 1/2″ piece of cardstock in half at 4 1/4″. Perfect square card for you!
For the card base, I chose Melon Mambo, even though that’s not one of the coordinating colors. But I liked it! Then a piece of the Best Dressed 6″ x 6″ Designer Series Paper was layered on top. The greeting is from the Sale-A-Bration Set,Happy Birthday To You, that you can earn FREE from Stampin’ Up! with a $50 purchase!
I think the Best Dressed DSP is so cute!! Not only do the papers have images of purses, perfume bottles, lipstick, and shoes but also gorgeous floral images plus some other generic designs like stripes or dots. You can use this paper to make very feminine cards and projects or use the other papers for many other things.
The greeting, I knew, couldn’t be too big because it’s a small card and because I didn’t want to cover up too much of the designer paper. Finally I settled on an oval die cut layered on a Stitched Shapes Die.
For a little extra embellishment, I adhered a piece of the Silver 3/8″ Metallic-Edge Ribbon around the designer paper before adhering to the card base. Then I just tied on a smaller piece of the ribbon in a knot. The greeting is adhered with Stampin’ Dimensionals® and has a few Rhinestone Jewels for some bling. This is a fun card!
Check out the Best Dressed Designer Series Paper in the new Occasions Mini Catalog. With an order of $50 or more, you get to choose a FREE Sale-A-Bration product! What a fun time in the Stampin’ Up! year!
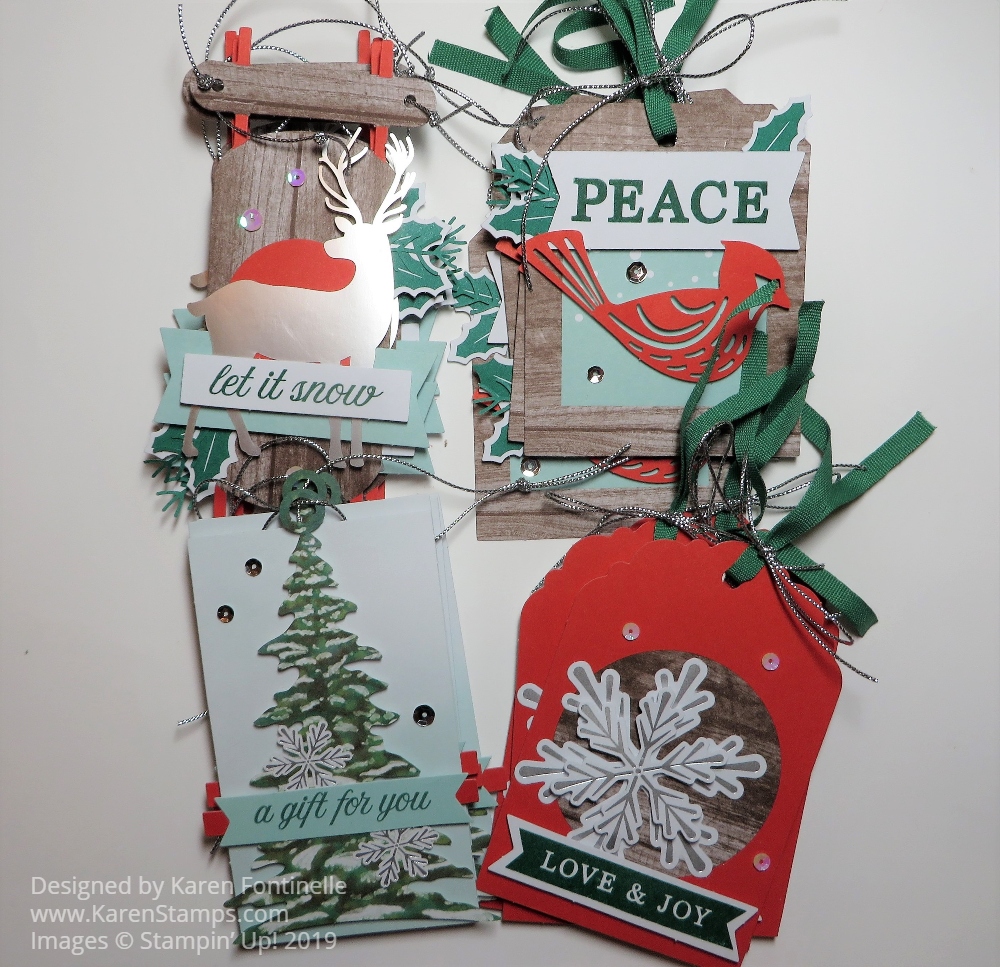
It’s okay to make Paper Pumpkin Christmas Tags AFTER Christmas! These are from the November 2019 Paper Pumpkin Kit and I just didn’t get to them before Christmas.
These are cute Christmas tags, which I could have used during gift-wrapping time! At least I’ll have a head start for next Christmas! These turned out so cute when I got them all put together. There were six of each of four designs of tags in the kit. Some people made cards out of the elements in the kit. Once you get the kit, you can do whatever you like with the supplies!
There are always projects I didn’t get to do before Christmas and when things calm down after Christmas it seems like a good time to go ahead and work on them! In some cases, I might even have “late” Christmas gifts that I put off because I won’t see the people until after the holidays anyway! Yes, I have two friends who usually don’t have time for our gift exchange until after the holidays (or even WAY after the holidays!) but we don’t care. It’s all about the getting together, not the timing! So whatever the reason, perhaps you also do Christmas projects after the holidays!
If you would like to get a head-start on a Paper Pumpkin subscription, today is the first day to subscribe for the February 2020 Paper Pumpkin Kit! The first hints are that it is about birthday cards! And we all like to stock up on birthday cards at the beginning of the year! You can even purchase a Prepaid Paper Pumpkin Subscription in the Online Store along with your regular order, perhaps boosting your order to get more FREE Sale-A-Bration items or bump you up to Hostess Rewards. Or just join by the month.
Are you still playing with Christmas projects you didn’t have time to do earlier? Or even getting a head start on Christmas cards for next year? It’s okay and from experience, I can tell you it’s a good idea to make Christmas tags any time of year!
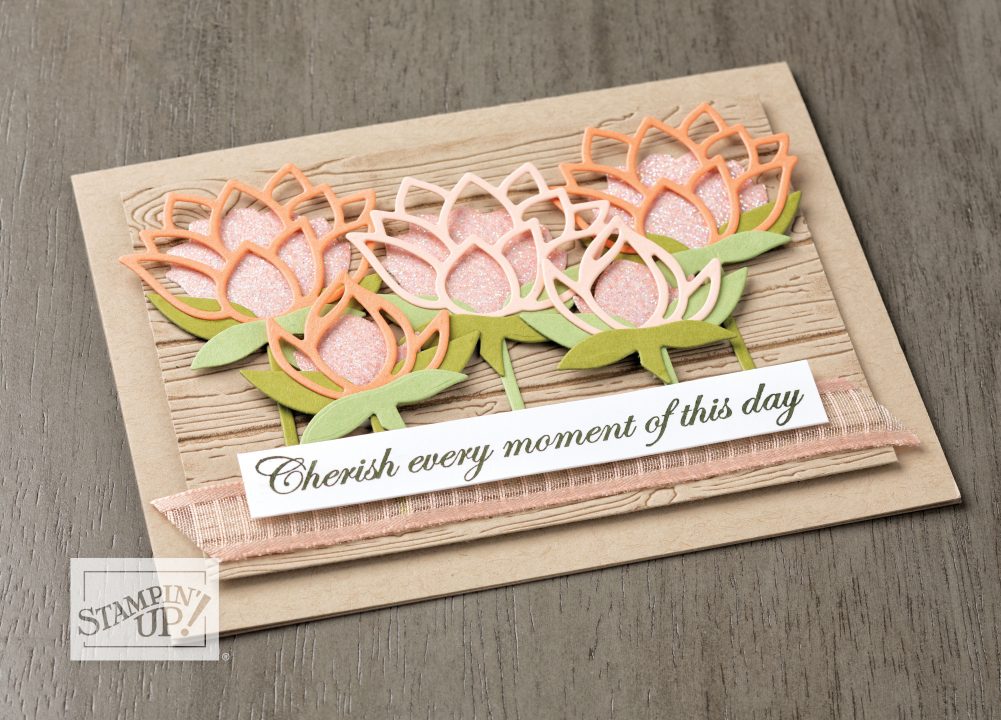
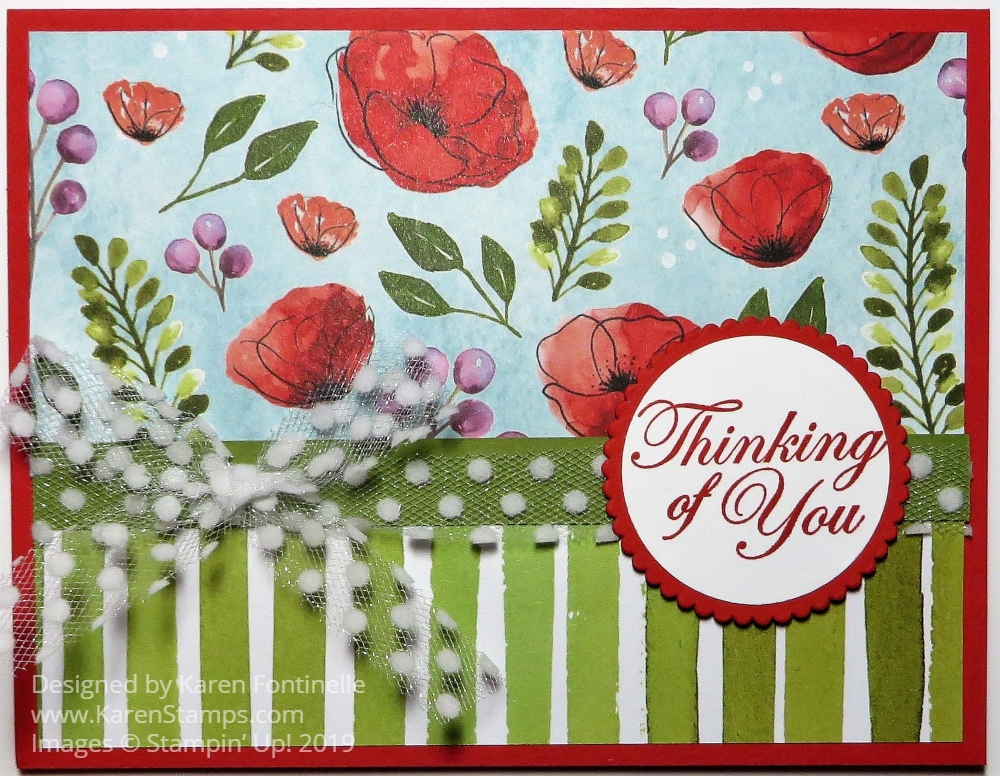
Wouldn’t someone you know just love to receive this Peaceful Poppies Thinking of You Card? I think these two patterns of paper in the Peaceful Poppies Designer Series Paper really make for a springy, happy card! The bright, colorful flowers and the light polka dot tulle ribbon just really catch my eye!
The card base is Poppy Parade, which is one of the many coordinating colors for the Peaceful Poppies DSP. I cut the two pieces of DSP to fit how I wanted them, overlapping about half an inch. Just to cover up the seam, I added a half-inch piece of Old Olive Cardstock across the card.
Before you adhere this designer paper piece to the card base, be sure to wrap the ribbon around the Old Olive strip first! I just love this Whisper White 5/8″ Polka Dot Tulle Ribbonin the Annual Catalog! Just wrap it around and then make a separate bow. Adhere the bow with a couple of Mini Glue Dots. The greeting is stamped fromMagnolia Blooms. I really liked the font and thought it would go with the flowers. I punched it out first with the 1 1/2″ Circle Punch, not yet knowing exactly what I would layer it on, but opted to go with the scalloped circle in Layering Circles Dies. Since I stamped the greeting in Poppy Parade Ink I layered it on a piece of Poppy Parade Cardstock. Then it is popped up on Stampin’ Dimensionals over the ribbon.
The Peaceful Poppies Designer Series Paper has handpainted blooms and watercolor washes. Each paper is beautiful and I think you’ll want to have that package in your collection!
It’s time to subscribe to Paper Pumpkin in order to start the New Year off right and receive the January 2020 Kit in the mail very soon!
Paper Pumpkin’s first kit of 2020 is all about L-O-V-E. Whether you want handmade favors for Valentine’s Day, a bridal shower, or a remarkably romantic wedding, this month’s kit has everything you need to help you celebrate your favorite friendships and love stories. So make it a “LOVE”-ly year with Paper Pumpkin!
About the January Kit
Makes 20 treat bags + 10 mini cards and envelopes
Card size: 3″ x 3″ (7.5 x 7.5 cm)
Envelope size: 3-1/8″ x 3-1/8″ (7.8 x 7.8 cm)
Bag size: 3-1/4″ x 4″ (8.2 x 10 cm)
Coordinating Stampin’ Up! colors: Crushed Curry, Highland Heather, Mint Macaron, and Rococo Rose
You can subscribe to Paper Pumpkin on a monthly basis by clicking the link right below. You can always skip a month or cancel any time.
Add a Prepaid subscription to your Stampin’ Up! order, perhaps getting Sale-A-Bration benefits or even Host Rewards! Choose the 3 months and get one SAB item FREE (although you will pay shipping on it, if by itself) or 6 months for two SAB items (or one $100 choice).
You can get more from the I’ll Bee Yours kit when you buy the Heart Punch Pack (item 151292) from the 2020 January–June Occasions Mini Catalog. Both punches coordinate with the heart stamp in the kit so you can craft for love-filled occasions now . . . and later!
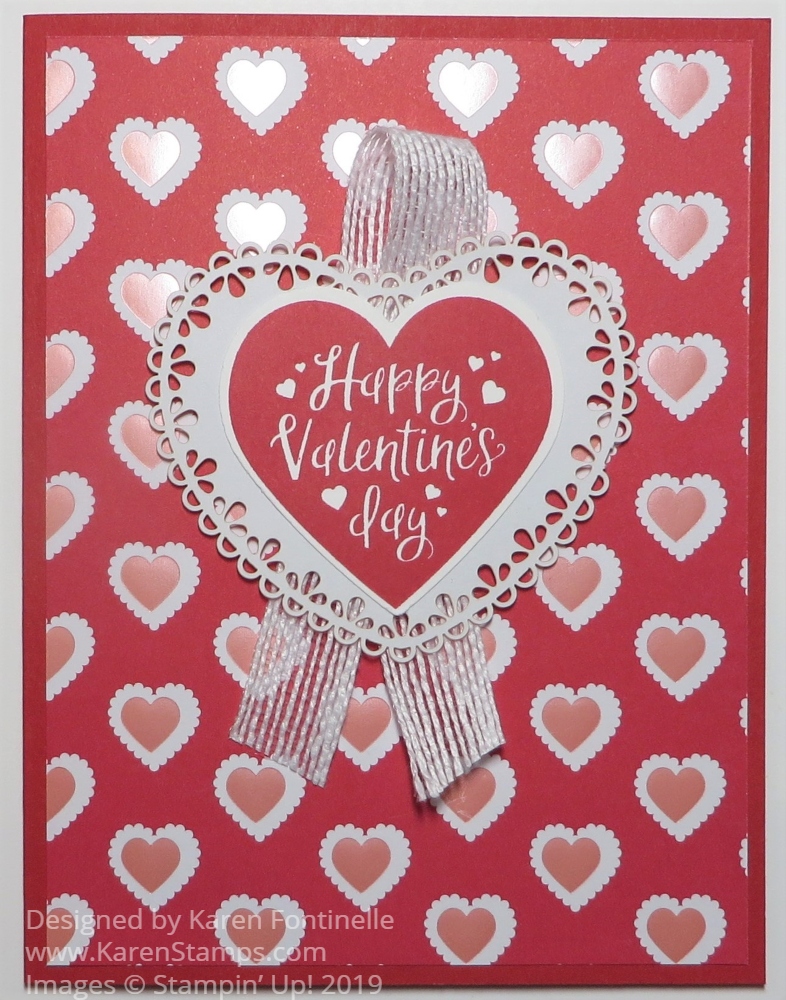
You “might” be able to tell on this From My Heart Valentine’s Day Card that the designer paper has a few pink foil accents. Can you see the shine on the little pink hearts in this photo? There was something about this particular design in the package that really caught my eye!
The doily comes in the package of Heart Doilies. The doilies are Real Red and Flirty Flamingo, but if you flip them over to the back, they are white, which you can also use! So you really get three colors of doilies.
I flipped my doily over to the white side and added the “Happy Valentine’s Day” greeting. That is a stamp in the Heartfelt Stamp Set. It is punched out with one of the heart punches in the Heart Punch Pack. You can buy both the Heart Punch Pack and the Heartfelt Stamp Set in the Heartfelt Bundle and save 10%! The punched heart doesn’t really fit inside the Heart Doily but it looks okay I think.
For an added embellishment, I took a piece of Whisper White 5/8″ Flax Ribbon and just adhered it underneath the doily with a little twist at the top and the tails hanging below the doily. Then I popped up the whole thing with Stampin’ Dimensionals.
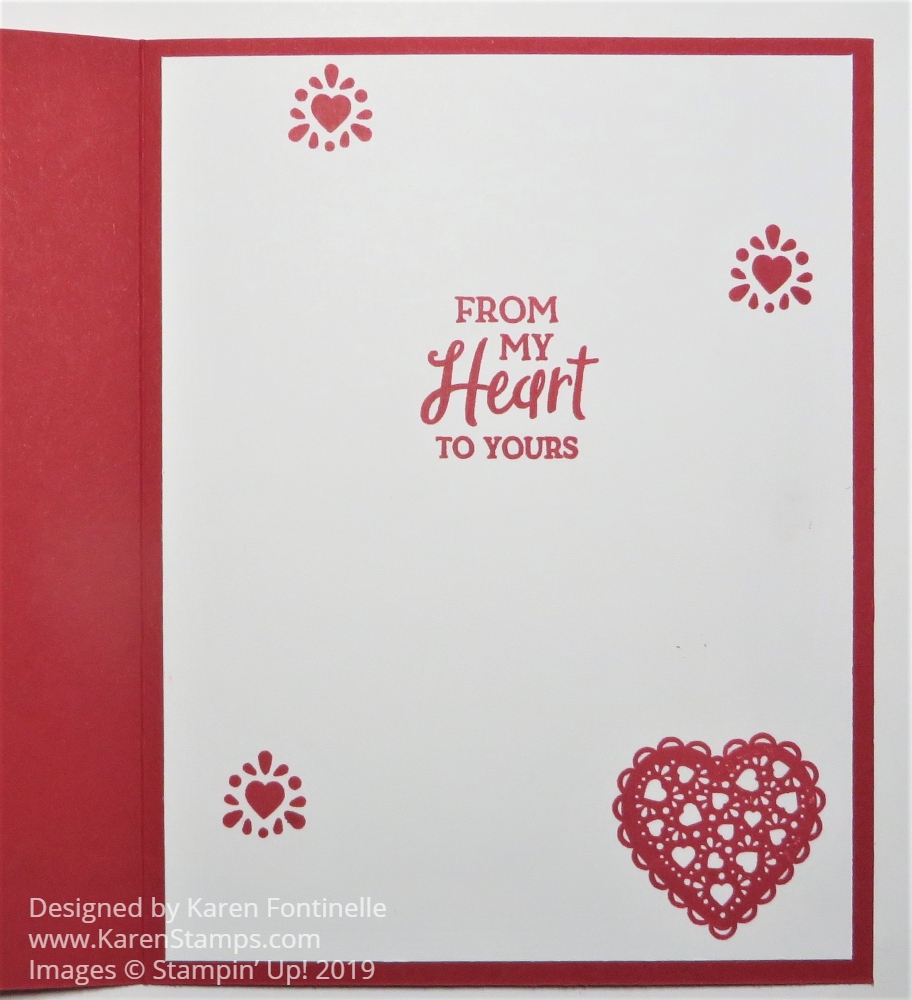
I needed a layer inside the card since the Real Red is rather dark. I stamped a greeting from the same stamp set on a piece of Whisper White and added a heart in the bottom corner. Somewhere along the line, I got a tiny ink smudge on the other side of the card, so I stamped another little heart over it to cover the smudge. But to balance that out, I had to stamp a few more little hearts so you can see the hearts are maybe a bit overdone!
This was really an easy valentine card to make! It’s going to be fun to play with all the hearts and other products in the Suite to make all kinds of valentines! Of course, hearts aren’t just for valentines, so you can use the hearts for other occasions throughout the year!
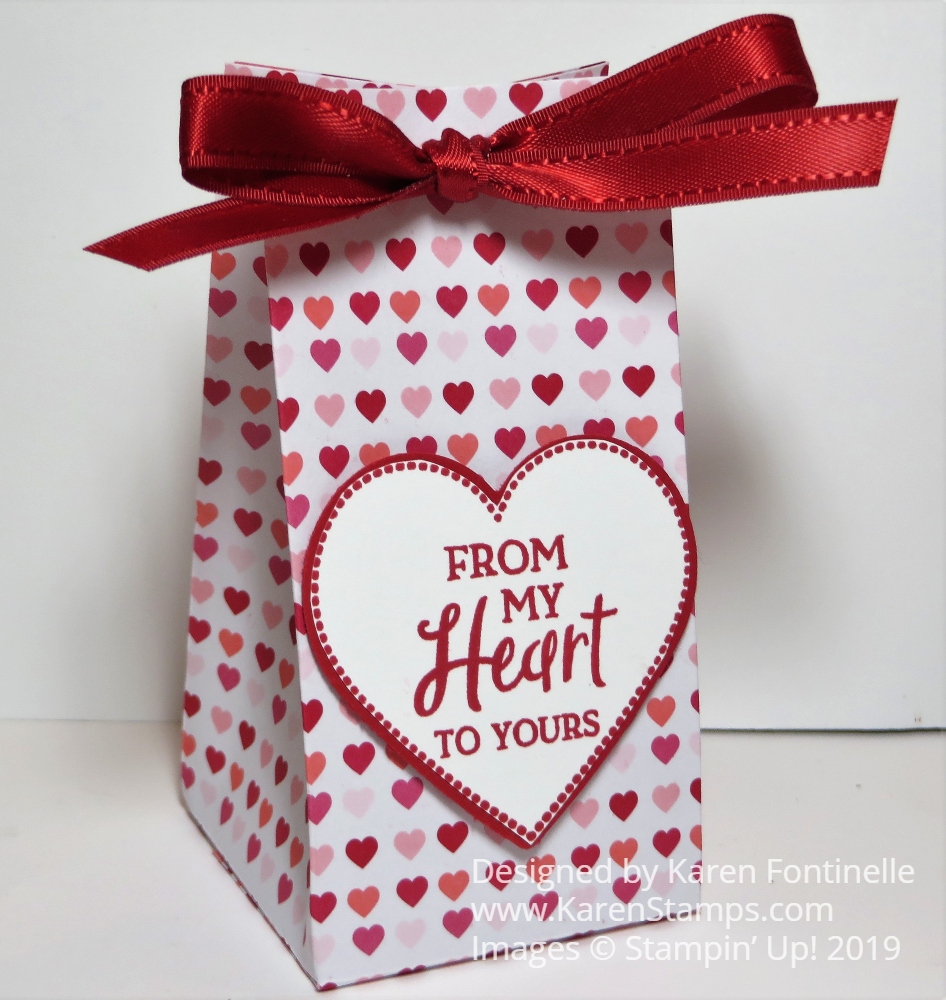
Here’s an easy and cute From My Heart 2-4-6-8 Gift Box you can use for a small gift or treat for someone, maybe for Valentine’s Day or maybe just any time. It’s made with the fun Specialty Designer Series Paper, From My Heart. It’s in the new Occasions Mini Catalog and you know Valentine’s Day is just around the corner, in spite of my Christmas tree not completely taken down yet!
You’ve probably made lots of these 2-4-6-8 boxes of various sizes, but I know I always need a little refresher. For this box, I started with a piece of the designer paper 8 1/2″ x 5 1/2″. Score at 2″, 4″, 6″ and 8″. Turn and score at 1 1/2″ (or 2″). These will be the bottom flaps so pay attention to the pattern on your paper, watching which way it is going so it doesn’t end up upside down.
Here is how my paper looked, although this was the inside of my box. You do cut off the little 1/2″ piece.
Assemble the box, putting adhesive on that 1/2″ piece on the side. Then pay attention to where the seam is and try to have that face the back. Fold in the bottom flaps, trying to make the front of the bag look nice with a flap fold, not the edge.
Decorate the front of the gift box. In some cases you might want to decorate before you assemble. I kept this one simple, but I wanted to try out the new Heart Punch Pack and the Heartfelt Stamp Set. I stamped the greeting and the heart outline in Real Red ink and then punched out the stamped heart plus one Real Red Cardstock heart. Since I wanted to layer them, I trimmed the Whisper White heart right up to the dotted outline. That made it a tiny bit smaller so I could layer it on the Real Red heart. Then I popped up the heart on the front of the box with Stampin’ Dimensionals®.
You could leave the top open or you can punch holes in the top and tie it closed with a ribbon, like this new Real Red 3/8″ Double-Stitched Satin Ribbon. Don’t forget to put your treat or gift inside before you tie it up! This would make a cute party favor bag or treat for a party.
Get the Heartfelt Bundle with the Heartfelt Stamp Set and the Heart Punch Pack and save 10%. You know you want new heart punches!
Remember, shop in $50 increments so you can choose free Sale-A-Bration products!
I think this Peaceful Poppies Suite is one of the most beautiful and has so much creative possibility! While I don’t have the whole suite yet, I have one Bundle and can tell you there are lots of ways to use just that bundle to make wonderful cards and things.
Watch this Stampin’ Up! video and you’ll find out all kinds of things about the Suite, like how they named everything! I watched it twice because there was so much information in it!
You’ll find out how the beautiful Peaceful Poppies Designer Series Paper was designed and that will make you want it even more. Although I have a sample, I can’t wait to get the whole package.
Check out this quick video as they show each paper in the collection:
Check out this post and this post about two cards I have put on my blog if you would like to see a couple of easy cards to make with these poppies!