Tag Archives: Heartfelt Stamp Set

St. Pat’s Day Shamrock Heart Punch Card

St. Pat's Day Shamrock Heart Punch Card

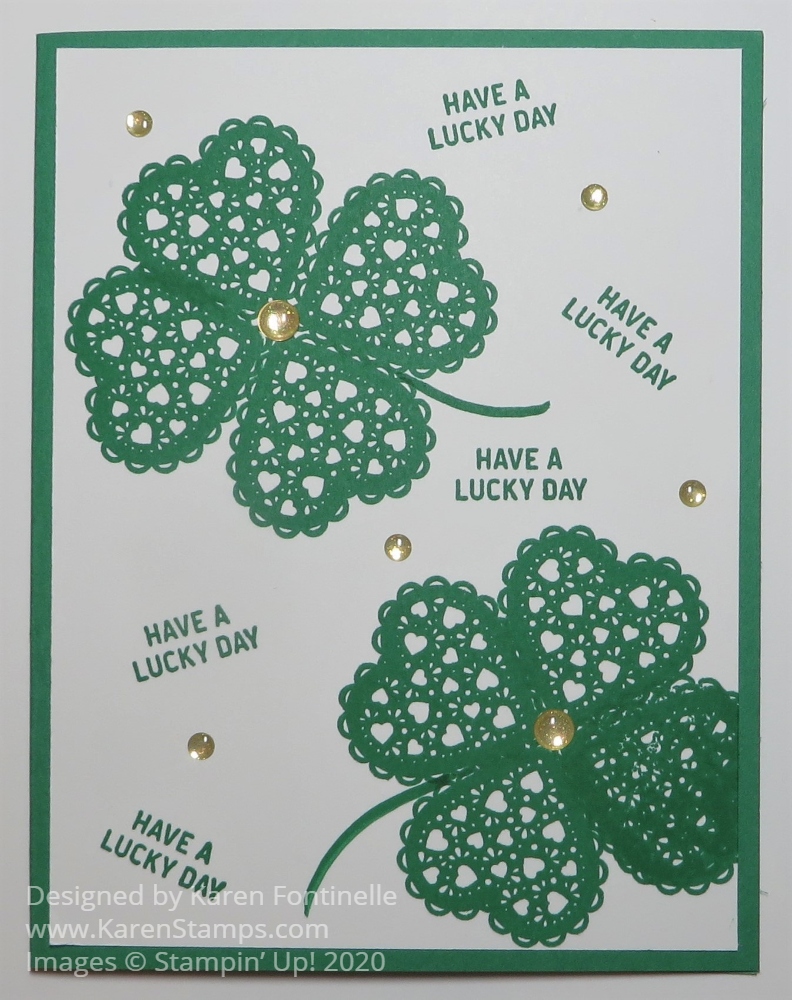
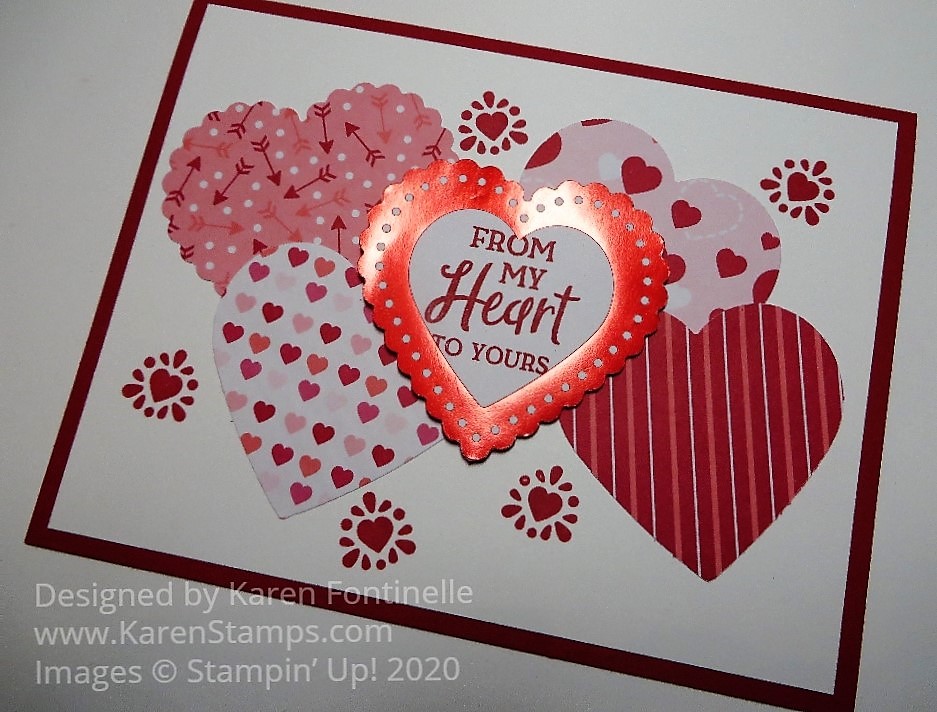
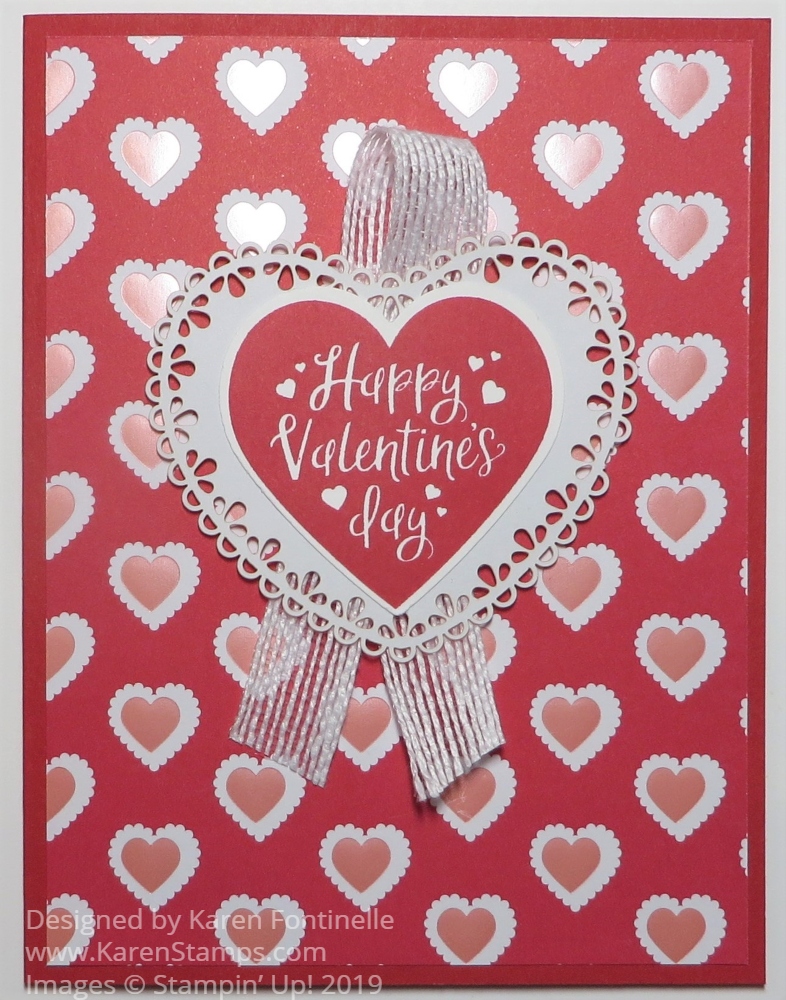
To celebrate St. Patrick’s Day, maybe you want to make card something like this St. Pat’s Day Shamrock Heart Punch Card. You’re probably not going out to celebrate St. Patrick’s Day today so you might as well STAMP! I think this card could even be one to send someone any time because hearts are good at any time whether they are making up shamrocks or just a leafy plant!

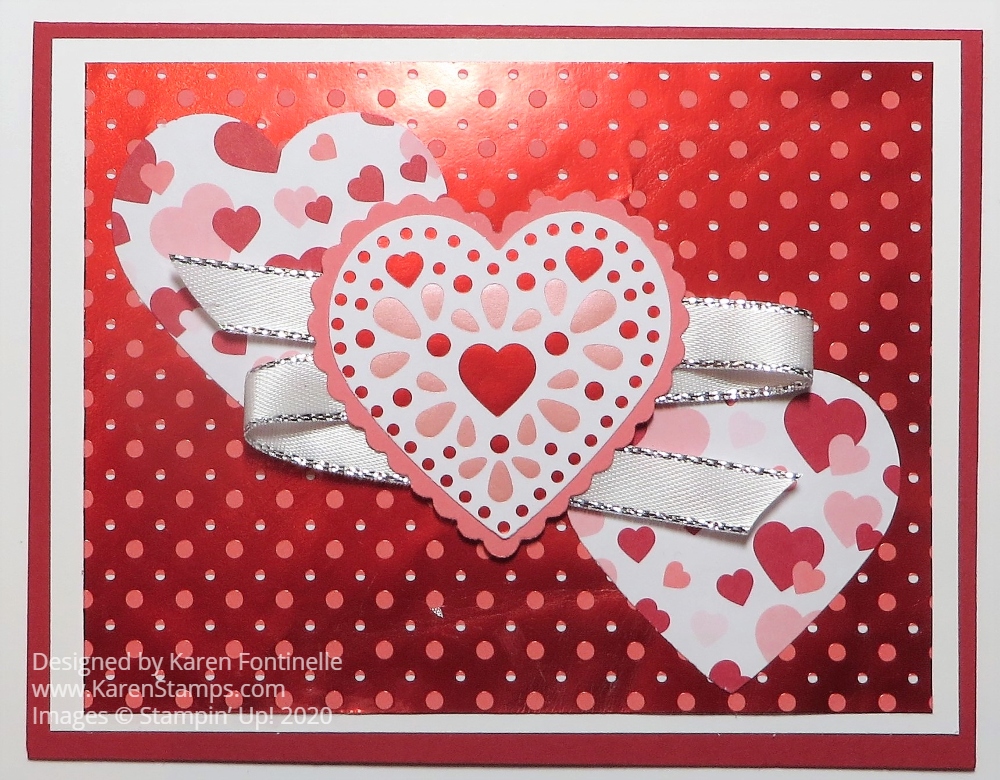
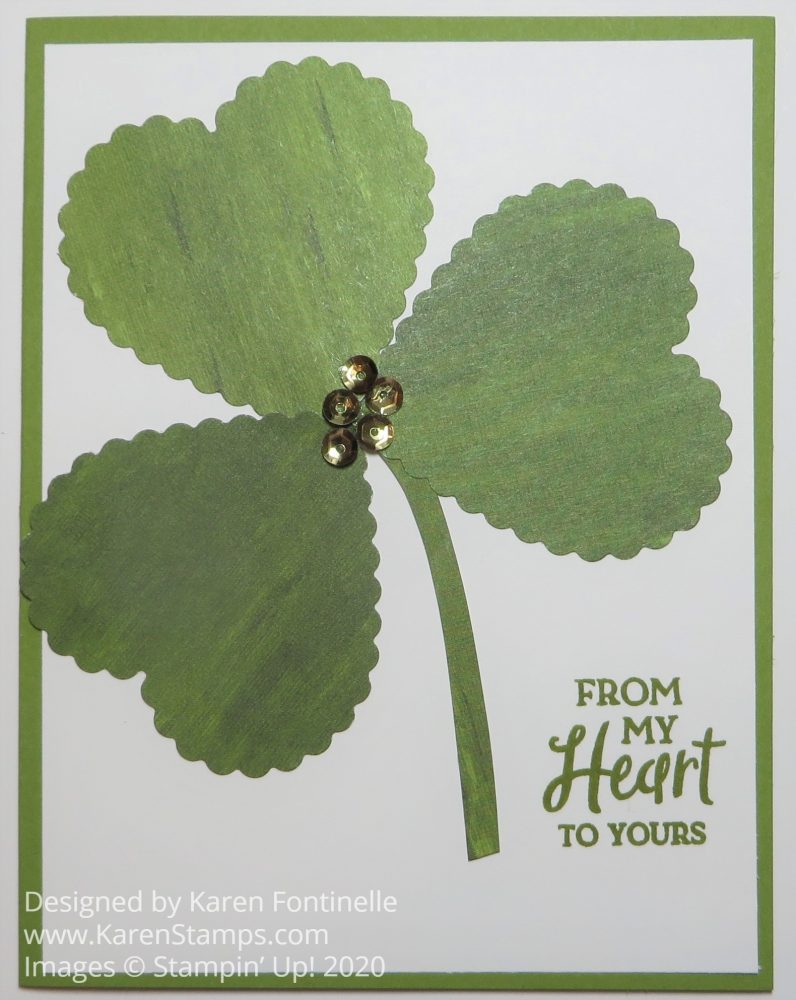
I started with a card base of Old Olive and a layer of Whisper White. I didn’t even know exactly what I was going to make except that it had to be green for St. Pat’s. I settled on using the Heart Punch with the scalloped edge in the Heart Punch Pack. You get two punches in this pack, a plain edge heart and a scalloped edge heart. As a bonus, you can layer the hearts! You can use hearts any time, not just for Valentine’s Day or St. Patrick’s Day! You will find them in the Occasions Mini Catalog.

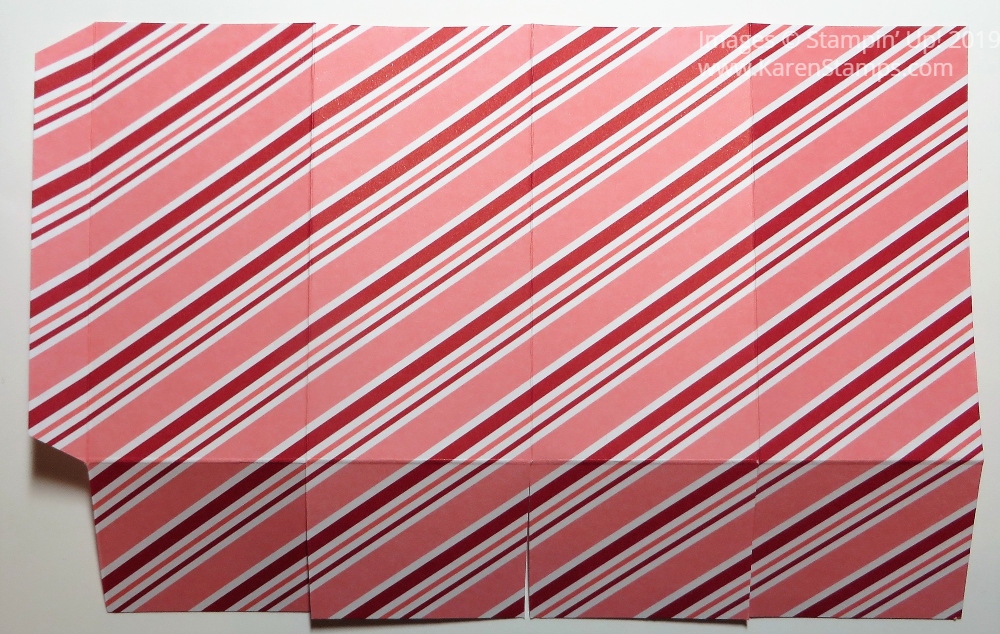
For something more interesting, I looked through my designer paper until I found a “solid” green I could use. I found this green in the Perennial Essence Designer Series Paper. Don’t forget to look at the backsides of the pretty patterned papers! Often there is something very interesting on both sides of the designer paper! I punched three hearts out of this paper and just cut a little curved strip for the stem. Although the paper color is basically a solid green, you can see that there are color variations in it that make it interesting and appealing! I think this greenery can be any kind of leafy plant with heart-shaped leaves!

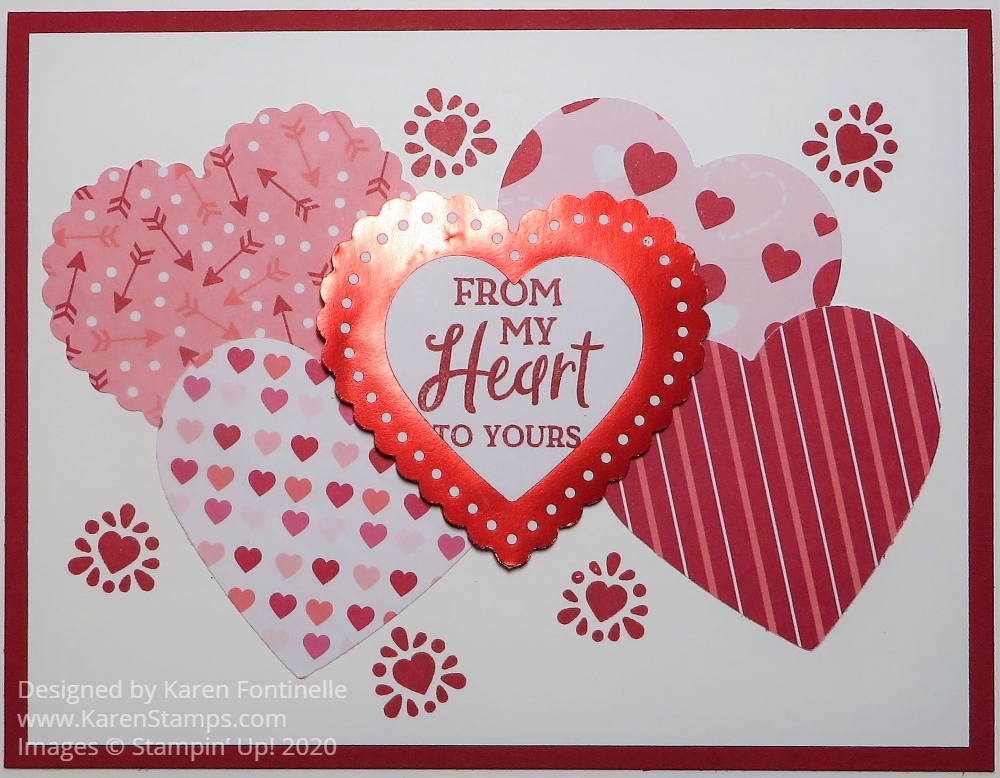
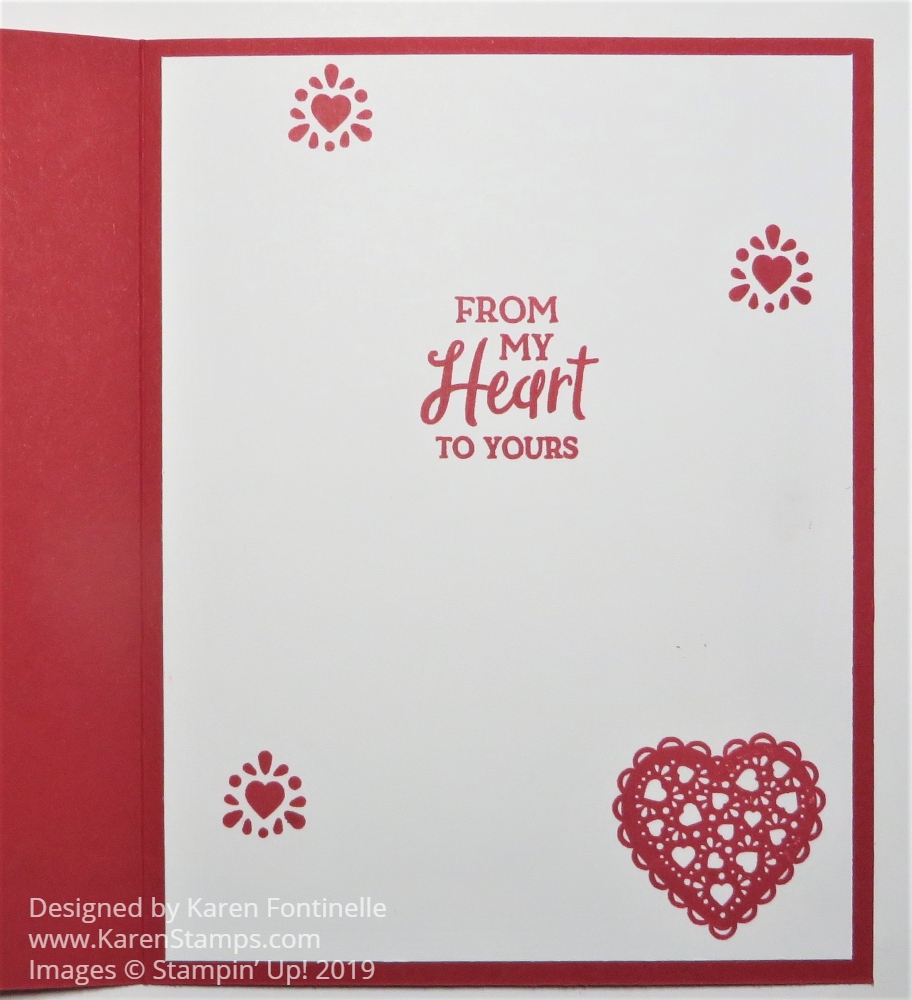
For pizzazz, I dug out some gold sequins and clustered them in the center of the plant rather than placing them around on the card. I liked that look. The greeting is stamped in Old Olive ink from the Heartfelt Stamp Set. This stamp set can also be used for more than Valentine’s Day so you might want to grab it during Sale-A-Bration.

You probably can’t go out to the “pubs” today to celebrate, but if you are staying home you can celebrate by stamping or creating a St. Patrick’s Day project like this St. Pat’s Day Shamrock Heart Punch Card!

Happy St. Patrick’s Day!

St. Patrick’s Day Shamrock Card

St. Patrick's Day Shamrock Card

Get those heart stamps out again and let’s stamp a St. Patrick’s Day Shamrock Card! Heart stamps are good for lots of things besides Valentine’s Day and now you see how you can use them for St. Patrick’s Day. You can use any heart stamps you have for different looking shamrocks.

For this shamrock card, I started with a base of Call Me Clover Cardstock. This cardstock is one of the current In Colors that will be retiring in May before the new In Colors come in. These In Colors have had their two-year run. If you need any of them, refills, ribbons, anything with these In Colors, it would be smart to order them now before people rush to get them at retirement time. And if you order in March, you can take advantage of Sale-A-Bration.

It was fun to basically “just stamp” on this card! I used the Heartfelt Stamp Set in the Occasions Mini Catalog. Just stamp four of the hearts to make a shamrock, or I have seen just 3 heart leaves to make a shamrock also. It’s easier than it used to be now that we have photopolymer stamps that you can see through. For the stem, I simply used a Blender Pen and picked up some of the Call Me Clover ink in the lid of the ink pad and drew on the stem. You could use a marker or just cut a thin stem.

Instead of just stamping a greeting on some kind of layer, I decided to just stamp the sentiment randomly in between the shamrocks on the card front. The “Have a Lucky Day” phrase is from the Itty Bitty Greetings Stamp Set. That’s such a great set to own because you can almost always find a good sentiment to use for your card.

Of course, I wanted to have a little gold on my card for St. Patrick’s Day so I chose the Gold Glitter Enamel Dots. You will find these in the Stampin’ Up! Annual Catalog back in the Embellishments section. First I just put small dots around randomly on the card, but then I also thought the center of each shamrock could use a larger gold one. You could also color a dot with a marker to match the shamrock, but I liked the gold in this case.

This card was very simple to make, quick and easy. Plus a good way to use our heart stamps! Don’t think of your heart stamp sets for just Valentine’s Day, keep them handy for other occasions like this St. Patrick’s Day Shamrock Card with St. Patrick’s Day coming up on March 17th!

Quick and Easy Valentine Card

Quick and Easy Valentine Card

Yes, I know Valentine’s Day is over, but who knows, maybe you need one more valentine for someone today! I didn’t get around to posting this one and it’s one I like because it is a quick and easy valentine! And who doesn’t like quick and easy!

Even if you don’t need another valentine, think of the basic design of this card and think about how you could easily change it into a card for any other occasion.

This valentine has a card base of Real Red (of course!) with a layer of the From My Heart Designer Series Paper. I thought this particular pattern looked really cute on this card! For the focal point, I just have two hearts. The frilly background heart is die-cut with the Be Mine Stitched Dies in the Stampin’ Up! Annual Catalog. The heart on the front is stamped on Whisper White with a stamp in the Heartfelt Stamp Set in Real Red Ink. Then it is punched out with the scallop-edge heart punch in the Heart Punch Pack.

Just for a little something-something, before I adhered the hearts, I used a little Snail Adhesive to hold down a strip of Real Red 3/8″ Double-Stitched Satin Ribbon, just in the center. You can either pop up the hearts with Stampin’ Dimensionals or adhere the hearts flat on the card.

Now if you don’t need a valentine today, all you need to do is change out the hearts to some other focal point whether it be an image or a greeting. You can still use designer paper as a layer and you can still add a strip of ribbon behind the center image. Just keep it simple, whatever you make!

Happy Day-After Valentine’s Day!

Easy Valentine Hearts and Ribbon Card

Valentine Hearts and Ribbon

Valentine’s Day is coming up at the end of this week so if you need more valentine ideas, here is an Easy Valentine Hearts and Ribbon Card you can try!

The card base is Real Red with a layer of Whisper White to help the designer paper stand out a little bit. This dotted foil layer is in the From My Heart Specialty Designer Series Paper. It really caught my eye when I was making this card!

The next step is to simply punch two hearts from another design of the From My Heart DSP. I chose the paper with the scattered hearts. I thought it stood out well against the foil DSP.

The center heart is punched from the sheet of foil hearts and then layered on a punched scallop heart from Flirty Flamingo Cardstock. You can get both these plain-edge heart punch and the scalloped edge heart punch in the Heart Punch Pack. And if you want the Heartfelt Stamp Set, too, you can purchase it with the heart punches and save 10% in the Heartfelt Bundle.

After those two hearts were layered together, I put more adhesive on the back with Snail Adhesive so I could stick the ribbon going back and forth behind the heart. Then it is popped up on Stampin’ Dimensionals® and centered on the card between the other two hearts.

Even though there is no sentiment on the front of the card, I think it is pretty enough on its own so you can just stamp a greeting inside the card on a Whisper White layer.

Don’t forget! Today is the last day to join Paper Pumpkin and get the February Kit in just a few days! You could also purchase a Prepaid Subscription in the Online Store and just add it to your Stampin’ Up! order! That way it might help you earn a free Sale-A-Bration item or reach Hostess Rewards!

Paper Pumpkin Banner Feb 2020

This kit will make nine cards that will help you make cards for birthdays and other special occasions. It also coordinates with the Happy Birthday To You Sale-A-Bration stamp set!

SIGN UP TODAY FOR PAPER PUMPKIN!

From My Heart Valentine With Hearts

From My Heart Valentine With Hearts

You can make this quick and easy From My Heart Valentine With Hearts by just punching out some hearts! And add a little stamping!

The card base is Real Red, although with these hearts you could use any colors, like Flirty Flamingo or a light pink, that go with the designs in the From My Heart Specialty Designer Series Paper. On a layer of Whisper White, just add a grouping of hearts punched with the Heart Punch Pack. You can even punch two hearts out of the same sheet of designer paper and use one side of one and the one side of the other design! Just check the other side of the paper to see if one side goes in a certain direction or not, if you want to use both sides. You can punch some hearts with the scalloped heart punch and some with the plain edge.

I chose one of the foil accented hearts for the focal point on my card. I punched it out with the scalloped punch, which is a perfect fit! Then I stamped a greeting from the Heartfelt Stamp Set in the center of the heart. After all the other hearts were glued down, I popped this foil heart up with Stampin’ Dimensionals® in the center of the card. Then I stamped a few hearts from the same stamp set around the paper hearts.

You could jazz up this same card a little more if you wanted to. I thought about putting a piece of ribbon behind the foil heart that went back and forth behind the heart with the loops sticking out on each side. I could have added some rhinestones or other jewels.

If you want a quick and easy card, just keep it simple and just punch out lots of hearts and see what you come up with!

From My Heart Valentine With Hearts Closeup

Decorated Heart Foil Tins For Valentine’s Day

Decorated Heart Foil Tins

Try these Decorated Heart Foil Tins For Valentine’s Day if you want to make some quick treats! You can really decorate these heart foil tins in just a minute unless you want to add more embellishments! And if you want to really do it up right, you can bake something INSIDE the tin!

I started with the top heart tin in the photo. I just put in four chocolate candy truffles and snapped on the plastic lid. For decoration I just adhered a Flirty Flamingo Heart Doily and then punched a heart with the plain edge heart punch in the Heart Punch Pack from the From My Heart Specialty Designer Series Paper and adhered that. Done! So cute even with just gluing on two hearts! What could be easier!

Next I decorated the heart tin on the bottom right. This one was almost the same except I turned the colored heart doily over to show the white side! Did you know you could do that?! This time I used the scalloped edge heart punch to put a heart out of the same designer paper and stamped a greeting from the Heartfelt Stamp Set. You can buy both this stamp set and the Heart Punch Pack in the Heartfelt Bundle and save 10%. Just stamp a greeting on a heart, layer it on another heart and adhere to the cover of the heart tin! How easy is that?!

For the last heart tin, the bottom left one, I did the same thing with a doily and punched heart from the designer paper, then added a small bow with the Whisper White 1/4″ Crinkled Seam Binding Ribbon. I stamped a greeting from the Itty Bitty Greetings Stamp Set and punched it out with the Classic Label Punch. Then I layered that on a piece of Flirty Flamingo cut wider than the punched piece and cut off the ends to match. It is popped up with the Mini Stampin’ Dimensionals. Then I added two of the From My Heart Faceted Gems. (These are backordered as I write this.)

There you have three ideas for these fun Heart Foil Tins to decorate for Valentine’s Day, but you can really decorate them for any occasion. Think how cute these would be for a birthday party for kids with the Bonanza Buddies Stamp Set characters or lots of other choices! You might want to stock up on these tins to have on hand for other fun occasions!

Heart Foil Tins
Heart Foil Tin With Candy

Get your Heart Foil Tins at Stampin’ Up! Online HERE!

Easy to Make Valentine Ghirardelli Candy Treat Holders

Valentine Ghirardelli Candy Holders

Try these Easy to Make Valentine Ghirardelli Candy Holders for Valentine’s Day or any occasion for a little gift or favor. Once you have the measurements and the piece of candy, you are ready to make a special treat!

This is basically just a strip of cardstock, scored to that it will fold over a piece of chocolate candy, like a Ghirardelli chocolate (yum!). Then you just decorate the front for whatever occasion you have.

Start with a strip of cardstock cut at 9 5/8″ x 2 3/4″. Score at 2 3/4″ and 3″; 6 1/4″ and 6 1/2″. With these measurements, you could get three strips out of one sheet of cardstock. Fold and crease on the scored lines. Open the strip back up and you will see above and below the score lines, one section is shorter than the other.  You want the longer section to be the one that folds up to the inside.

Once you have identified the longer section, use the Classic Label Punch on that flap, inserting as far as you can, centered, to punch the opening for the chocolate. Put a piece of Tear & Tape as you see in the photo so you can fold up that flap and adhere to the inside, not quite up to the score line. You will want to stand the candy holder on the table making sure the bottom is flat as you adhere that flap.

Valentine Ghirardelli Candy Holder Base

Insert the chocolate candy piece to make sure everything fits right! If you do not have the Classic Label Punch, you can cut hand cut a slit or use the retired Word Window Punch.

Valentine Ghirardelli Candy Holder Petal Pink Inside

Now you can proceed to decorating the front of the candy holder and even that little area at the bottom, where you see I put a die-cut piece.

Valentine Ghirardelli Candy Holder Petal Pink

For this candy holder, I used Petal Pink Cardstock for the base. Even though it is for Valentine’s Day, I used a piece of designer paper in the Best Dressed Designer Series Paper! It had this polka dot piece of Petal Pink designer paper so it was perfect for a little background layer. I stamped a heart with the Heartfelt Stamp Set and punched it out with the plain heart in the Heart Punch Pack. You can buy the stamp set and two punches together in a Bundle and save 10% if you wish. The plain heart is layered on a piece of Sparkle Glimmer Paper punched out with the scalloped heart punch in the punch pack. You could also use Silver Glimmer Paper. The little piece at the bottom is a die-cut from the Painted Labels Dies in the Peaceful Poppies Suite.

The hearts are popped up on Dimensionals so that I could run a piece of scrap ribbon underneath just to hold the flap closed on the candy holder.

Valentine Ghirardelli Candy Holder Heart & Doily

This Valentine Ghirardelli Candy Treat Holder is made with the Flirty Flamingo Cardstock. The heart with foil accents is punched right out of the From My Heart Specialty Designer Series Paper and layered on a scalloped punched Flirty Flamingo heart. Then these were layered on a Heart Doily. But the doilies come in Real Red and Flirty Flamingo…..so just turn them over and you’ll have white! The ribbon tied around this candy holder is a new one in the Occasions Mini Catalog, the Whisper White 1/4″ Crinkled Seam Binding Ribbon. One of the great things about this white ribbon is you can dye it any color you want with ink or Stampin’ Blends markers.

These Valentine Ghirardelli Candy Holders will be fun to make if you want to take some favors to the people in your office or a little treat for your family or neighbors or friends.

SHOP THE OCCASIONS MINI CATALOG AT STAMPIN’ UP!

From My Heart Valentine’s Day Card

From My Heart Valentine's Day Card

You “might” be able to tell on this From My Heart Valentine’s Day Card that the designer paper has a few pink foil accents. Can you see the shine on the little pink hearts in this photo? There was something about this particular design in the package that really caught my eye!

The card base is Real Red with a layer from the From My Heart Specialty Designer Series Paper. Next, all you have to do is make the heart focal point!

The doily comes in the package of Heart Doilies. The doilies are Real Red and Flirty Flamingo, but if you flip them over to the back, they are white, which you can also use! So you really get three colors of doilies.

I flipped my doily over to the white side and added the “Happy Valentine’s Day” greeting. That is a stamp in the Heartfelt Stamp Set. It is punched out with one of the heart punches in the Heart Punch Pack. You can buy both the Heart Punch Pack and the Heartfelt Stamp Set in the Heartfelt Bundle and save 10%! The punched heart doesn’t really fit inside the Heart Doily but it looks okay I think.

For an added embellishment, I took a piece of Whisper White 5/8″ Flax Ribbon and just adhered it underneath the doily with a little twist at the top and the tails hanging below the doily. Then I popped up the whole thing with Stampin’ Dimensionals.

I needed a layer inside the card since the Real Red is rather dark. I stamped a greeting from the same stamp set on a piece of Whisper White and added a heart in the bottom corner. Somewhere along the line, I got a tiny ink smudge on the other side of the card, so I stamped another little heart over it to cover the smudge. But to balance that out, I had to stamp a few more little hearts so you can see the hearts are maybe a bit overdone!

From My Heart Valentine's Day Card Inside

This was really an easy valentine card to make! It’s going to be fun to play with all the hearts and other products in the Suite to make all kinds of valentines! Of course, hearts aren’t just for valentines, so you can use the hearts for other occasions throughout the year!

From My Heart Valentine's Day Card Closeup

Shop Stampin’ Up! Online and Remember Sale-A-Bration!

From My Heart 2-4-6-8 Gift Box

From My Heart 2-4-6-8 Gift Box

Here’s an easy and cute From My Heart 2-4-6-8 Gift Box you can use for a small gift or treat for someone, maybe for Valentine’s Day or maybe just any time. It’s made with the fun Specialty Designer Series Paper, From My Heart. It’s in the new Occasions Mini Catalog and you know Valentine’s Day is just around the corner, in spite of my Christmas tree not completely taken down yet!

You’ve probably made lots of these 2-4-6-8 boxes of various sizes, but I know I always need a little refresher. For this box, I started with a piece of the designer paper 8 1/2″ x 5 1/2″. Score at 2″, 4″, 6″ and 8″. Turn and score at 1 1/2″ (or 2″). These will be the bottom flaps so pay attention to the pattern on your paper, watching which way it is going so it doesn’t end up upside down.

Here is how my paper looked, although this was the inside of my box. You do cut off the little 1/2″ piece.

From My Heart 2-4-6-8 Box Diagram

Assemble the box, putting adhesive on that 1/2″ piece on the side. Then pay attention to where the seam is and try to have that face the back. Fold in the bottom flaps, trying to make the front of the bag look nice with a flap fold, not the edge.

Decorate the front of the gift box. In some cases you might want to decorate before you assemble. I kept this one simple, but I wanted to try out the new Heart Punch Pack and the Heartfelt Stamp Set. I stamped the greeting and the heart outline in Real Red ink and then punched out the stamped heart plus one Real Red Cardstock heart. Since I wanted to layer them, I trimmed the Whisper White heart right up to the dotted outline. That made it a tiny bit smaller so I could layer it on the Real Red heart. Then I popped up the heart on the front of the box with Stampin’ Dimensionals®.

You could leave the top open or you can punch holes in the top and tie it closed with a ribbon, like this new Real Red 3/8″ Double-Stitched Satin Ribbon. Don’t forget to put your treat or gift inside before you tie it up! This would make a cute party favor bag or treat for a party.

Get the Heartfelt Bundle with the Heartfelt Stamp Set and the Heart Punch Pack and save 10%. You know you want new heart punches!

Remember, shop in $50 increments so you can choose free Sale-A-Bration products!

SHOP STAMPIN’ UP! ONLINE!