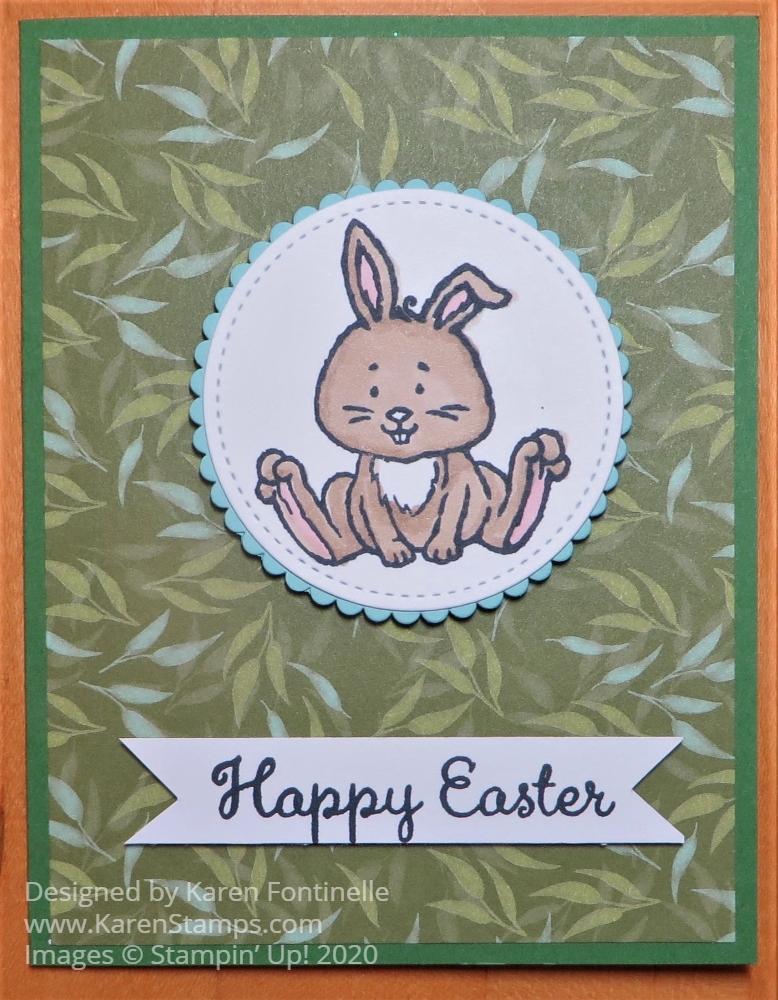
Today I needed to make an Easter card for my son that was a little less frilly than the ones I already made and I had something in mind, but not this Garden Lane Easter Bunny Card. But once I started looking at my designer papers for the one I was going to use, I saw this Garden Lane Designer Series Paper and I thought that leafy pattern would go well with a bunny!
The card base is Garden Green but there are other greens that go with the paper. For the scallopedLayering Circle Die underneath the bunny, I chose Pool Party because it looked like it matched the bluish leaves a little bit.
The Easter greeting is from the same Welcome Easter Stamp Set and is just stamped on a strip of Whisper White. The bunny and the greeting are both popped up on Stampin’ Dimensionals.
That’s all there is to this card! The Garden Lane Easter Bunny Card is an easy and fun card to make!
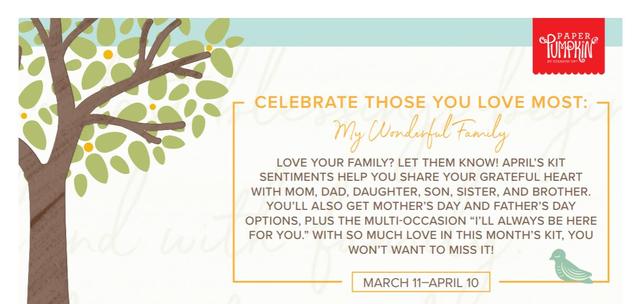
It’s time to sign up for Paper Pumpkin and celebrate your family with April’s kit! What better time than now! Any time is a good time to let family and friends know how much you care about them, but right now with this terrible virus, we certainly are thinking about our families and loved ones. Subscribe to Paper Pumpkin by Friday, April 10 and get your kit in the mail by mid-month. Just choose my name, Karen Fontinelle, as your Demonstrator.
Not only will family members or other close people to you love to receive a card from you, but sitting down to stamp will be good for you! Turn off the news and focus on being creative and relieving your own stress for a little while.
Also, Mother’s Day will be coming up in May followed by Father’s Day in June. This kit will have options for Mother’s Day and Father’s Day. This kit consists of supplies to make 8 regular size cards. The coordinating colors will be Crushed Curry, Early Espresso, Melon Mambo, Mint Macaron, Pear Pizzazz, Shaded Spruce, Soft Sea Foam. A yellow, brown, pink and greens! Those are your clues!
Paper Pumpkin is for everyone! If you’ve never done any crafts before and are looking for something to do while you are home during this time, try Paper Pumpkin because all supplies are included and you will get instructions plus a video to watch to make your cards or project inside. You can even make something different with the materials. And if you are experienced, treat yourself to a project that comes to you in the mail and just sit down and do your thing with the kit! Add some of your own supplies or follow the directions exactly. Whatever you like!
If you are placing a Stampin’ Up! order anyway, just add a Prepaid Subscription to your regular Stampin’ Up! order! This addition to your order may boost your total so that you can receive Stampin’ Rewards. Stampin’ Up! will send you an email telling you how to set up your account and how to add your prepaid code to your account.
Even if you are already subscribed on a monthly basis to Paper Pumpkin, you can still buy a Prepaid Subscription and Paper Pumpkin will use that up first and then resume your monthly subscription.
You must sign up for Paper Pumpkin by April 10th to receive this kit OR if you buy a Prepaid Subscription, you must set up your account with your Prepaid code by April 10th. If you have any questions or problems, just ask or you can call Stampin’ Up! and they will help you with your account.
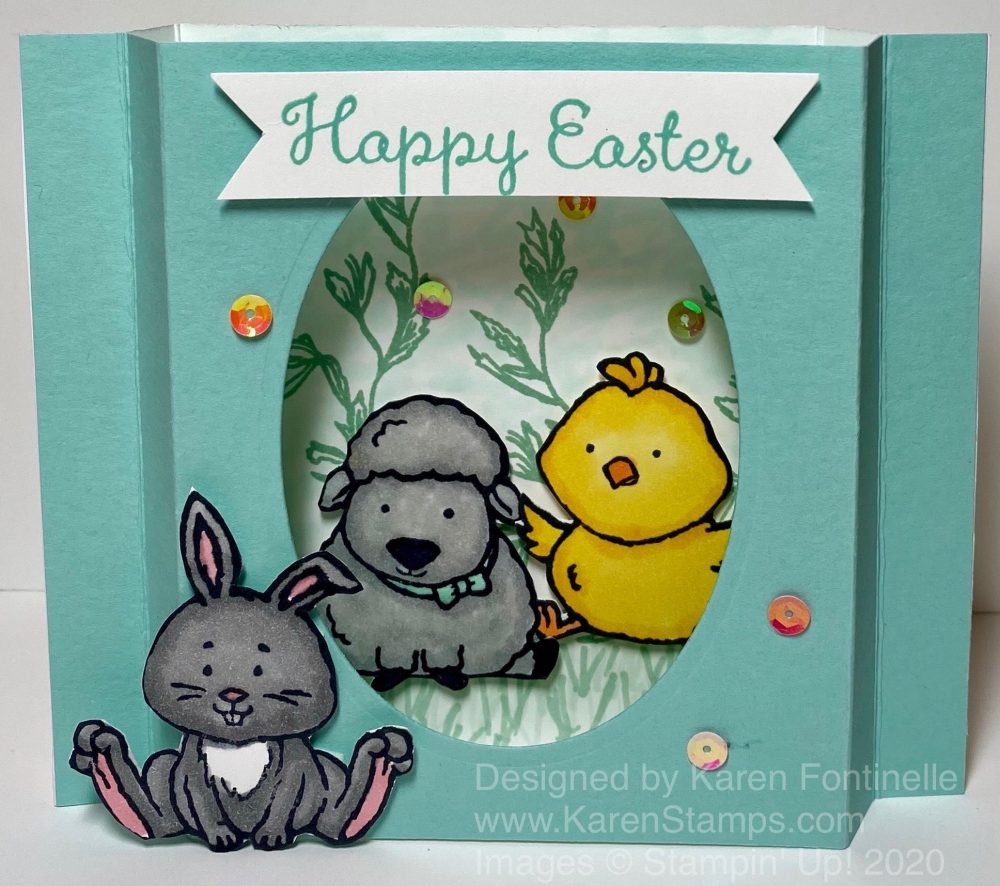
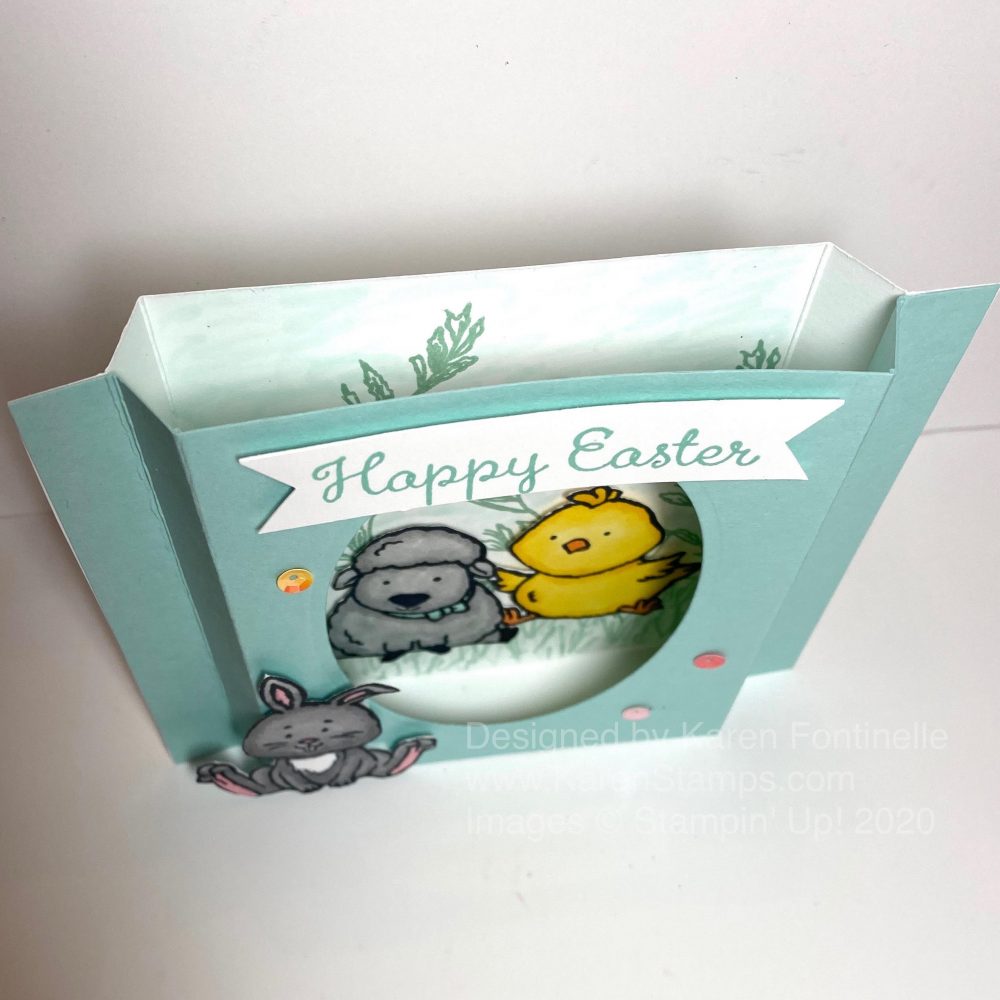
It’s been a long time since I have made a diorama card but it was fun to make this Easter Diorama Card With Welcome Easter. Diorama cards can be made in different ways, even fancier than this one. A diorama card is a 3D card with an opening on the front layer that lets you see a scene of any kind on the inside. Sometimes there is even a middle layer. But let’s start with this one!
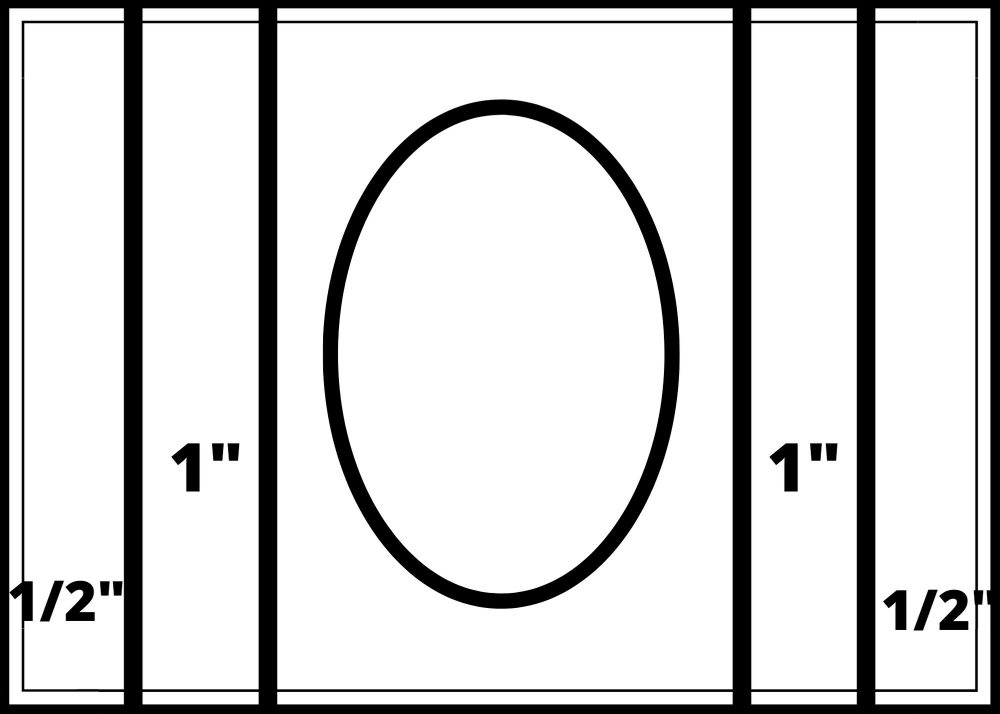
You just need two pieces of cardstock, each piece 4 1/4″ x 5 1/2″. I chose Pool Party for my front piece and Whisper White for the back. On each piece, score 1/2″ and 1″ from each end.
Then you will crease those score lines so that your card front pushes out and the back piece pushes back. You can see which way these score lines go from this top view of the diorama card.
Now you will stamp or decorate that back piece before you assemble the card. But when you are ready to adhere the two pieces of the card together, use something like Tear & Tape Adhesive or Multipurpose Liquid Glue. All you have to do is adhere that end 1/2″ on the front and the back piece together.
For my Easter diorama card, I used the Welcome Easter Stamp Set. I stamped the three little characters, colored them with Stampin’ Blends, and cut them out with my Paper Snips. I also used the Happy Easter greeting stamped in Pool Party from the Welcome Easter Stamp Set.
On the front of the card in the center area, I die cut with a Layering Ovals die. You could use a circle die, punch, square, whatever you like. I played around with the placement of the bunny, chick, and lamb before adhering the two pieces together. You want to make sure that you can see what you want to see well enough.
You want to think about the background. I stamped a few leafy boughs from the Path of Petals Stamp Set. I didn’t want the rest of the background to just be white so I colored in lightly, just with kind of a scribble motion with a Pool Party Stampin’ Blend marker. And I drew in some sprigs of grass at the bottom.
The lamb and the chick are popped up on Stampin’ Dimensionals to give a little dimension inside the card. The bunny is also popped up on a dimensional on the front corner. I still thought the card needed a little something so I used some Iridescent Sequins on the inside and even the outside. Once I added the sequins, I was happy with the card!
Now the amazing part of this card is that you can fold it flat and it is the size of a normal card! It will fit in an envelope and can be mailed!
As I’ve said before, you can use the Welcome Easter Stamp Set to make baby cards with these cute images! You could change the greeting on this Easter card and make it one for a baby, like one that comes in the stamp set.
Easter is coming soon so try your hand at this Easter Diorama Card With Welcome Easter because it is easy enough to make and will the recipient feel like someone special!
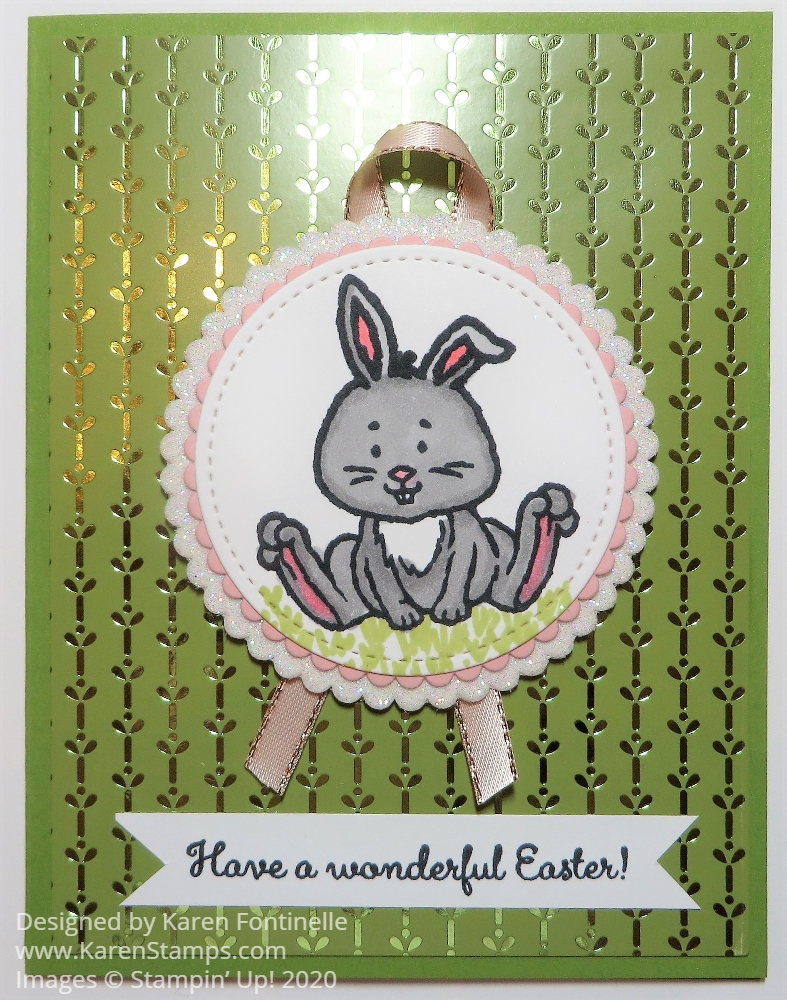
This Welcome Easter Bunny on Peacock Foil Paper is one of those cards for which I didn’t really have a design in mind until I made it but I knew what kind of paper I wanted to use. After it all came together I really loved it! I think I will make some more cards just like this one to send for Easter. And Easter isn’t far off!
I was seeing the Noble Peacock Specialty Designer Series Paperbeing used on some cards and it jogged my memory about having that paper! I have barely used it even though it is beautiful paper! I think products in the Annual Catalog get forgotten sometimes when we are mostly looking at the Mini Catalogs!
One of the coordinating colors with the Noble Peacock paper is Old Olive so I chose that for my card base. Then I just adhered the designer paper on the card base.
The bunny was die cut with one of my favorite dies of all time, the Stitched Shapes Dies. Then in deciding what color and size scalloped circle to use as a layer under the bunny, I die cut one in Petal Pink Cardstock and one in White Glimmer Paper. As I layered them to see what size I wanted, I saw that both layers looked good together! I love the little bit of pink around the edge and the pretty glimmer paper bringing another texture.
Since I had just received some back-ordered ribbon, the Petal Pink 1/4″Metallic Edge Ribbon, I used that underneath the bunny and popped it all up on Stampin’ Dimensionals. The greeting was stamped on a narrow scrap I had of Whisper White and I just cut the flagged ends.
Such a simple card, fun to make, and beautiful! Here is a similar card but with a monochromatic design for Easter. Try your hand at either one of these cards and send them out for Easter or just for spring or to say hello. If you have it, dig in your stash for the fancy-looking Noble Foil Paper to make this Welcome Easter Bunny on Peacock Foil Paper.
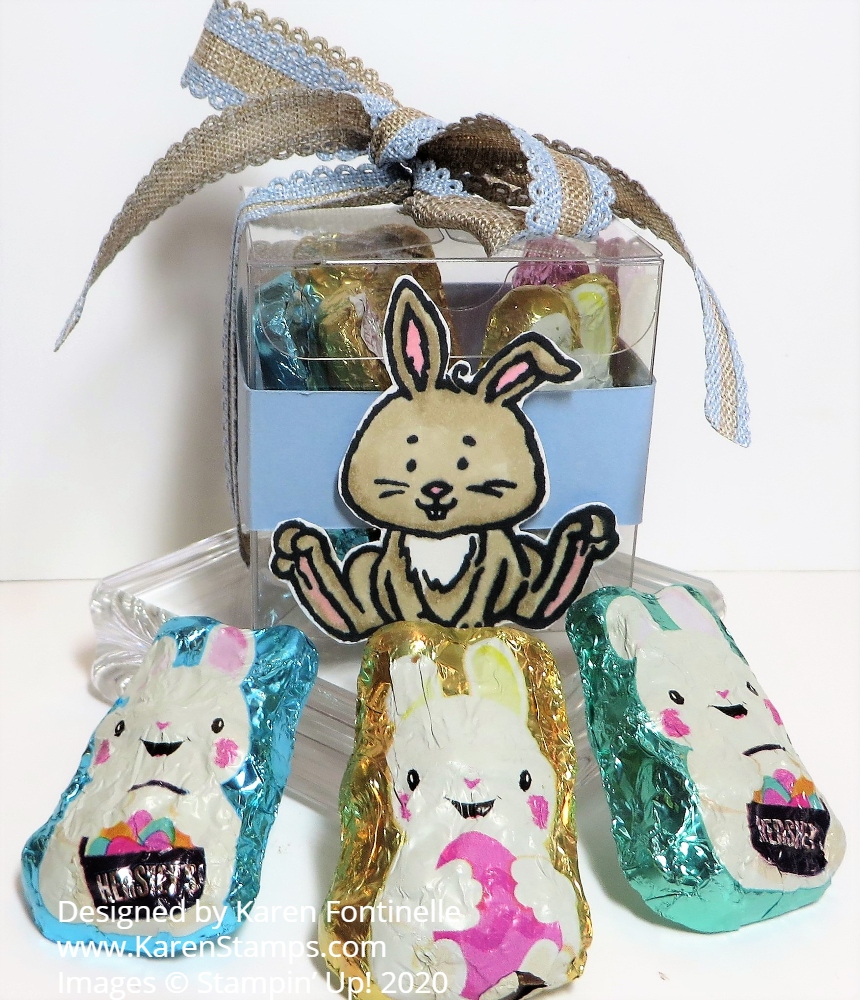
Which do you like better, the Easter Bunny Clear Tiny Treat Box or the chocolate bunnies?! Luckily, they go together so you can like both and not choose! Any time you need a quick and easy treat box, you can turn to the Clear Tiny Treat Boxes in the Stampin’ Up! Annual Catalog!
I intentionally made this Easter treat super simple. You can decorate these Clear Tiny Treat Boxes in many ways, of course. I started with the bunny in the Welcome Easter Stamp Set. It is stamped in Memento Ink and colored in with a Light Crumb Cake Stampin’ Blend marker and a bit of the Dark for shading. For the little bit of pink in his ears and bottom of his feet, I used a Light Flirty Flamingo Stampin’ Blend Marker.
Since the area on the front of the Tiny Treat Box is fairly small, I just cut out the bunny by hand. I wrapped around a 3/4″ strip of Seaside Spray Cardstock, one of the current In Colors, around the box. If you put the ends of the strip on the front of the box, the junction of those paper ends will be covered up by the image you put on the front of the box. You could also use ribbon, but since I was going to tie ribbon around the top of the box, I just used cardstock. You could also use some pretty border dies to die cut a strip going around the box. You can apply a little bit of Snail Adhesive to hold the strip in place. Then the bunny is popped up on Stampin’ Dimensionals on the center of the box front.
Be sure to fill the box first with candy treats or a small gift and then tie with a ribbon. This is decorative plus holds the lid of the box closed for sure. The ribbon I used is the Seaside Spray 1/2″ Scalloped Linen Ribbon. It is very pretty with the linen and the light blue! I just tied it around in a bow. You could also adhere just the ribbon and then tie a bow separately to adhere to the top of the box if you wanted the bow closer to perfect.
Here is a very similar design with a Clear Tiny Treat Box that I made for Halloween using a strip of designer paper around the box and a Halloween image cut out from designer paper with a ribbon tied around the box.
That’s all there is to it! You could also stamp a “Happy Easter” greeting or a “Happy Spring” greeting. Maybe it would be a party favor at a baby shower and that would be cute with the bunny! Keep a stash of these Clear Tiny Treat Boxes on hand to use for quick treats or gifts or order a quantity for a party or event. For a treat or even a little home decoration, try this Easter Bunny Clear Tiny Treat Box for this spring or Easter!
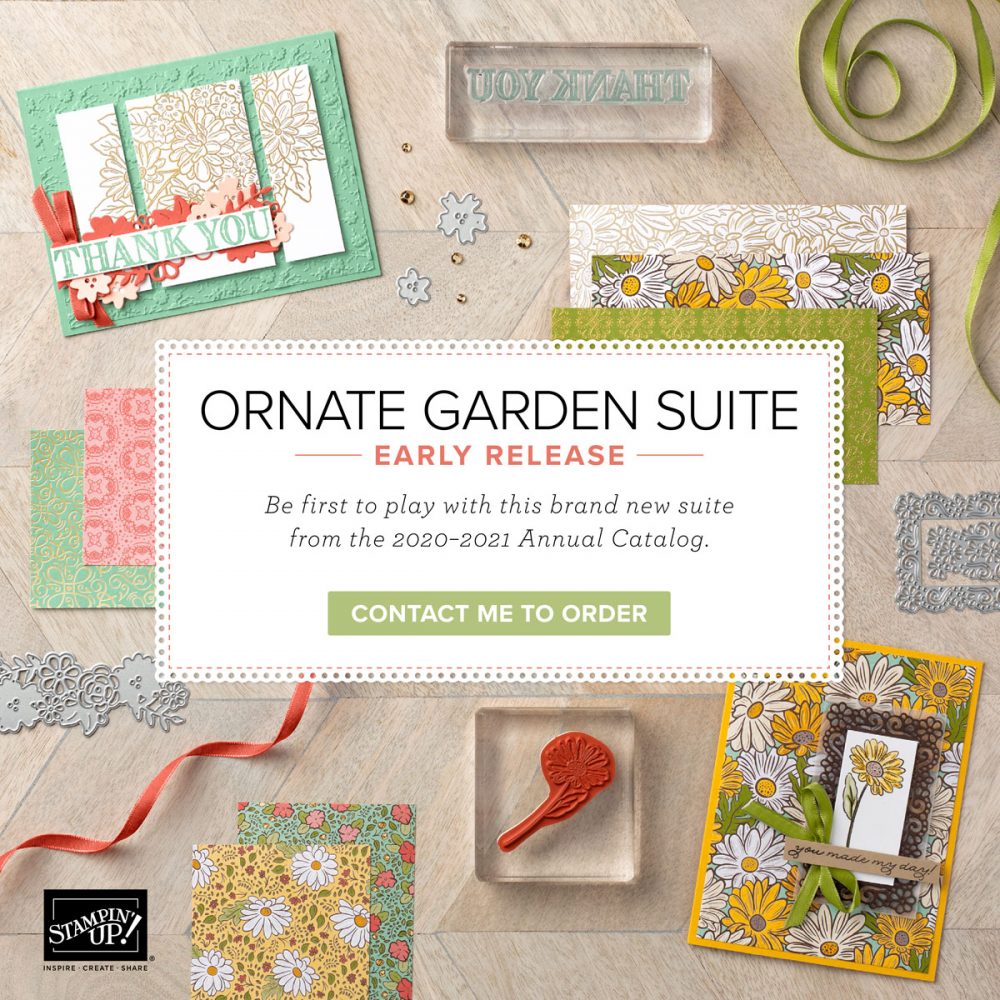
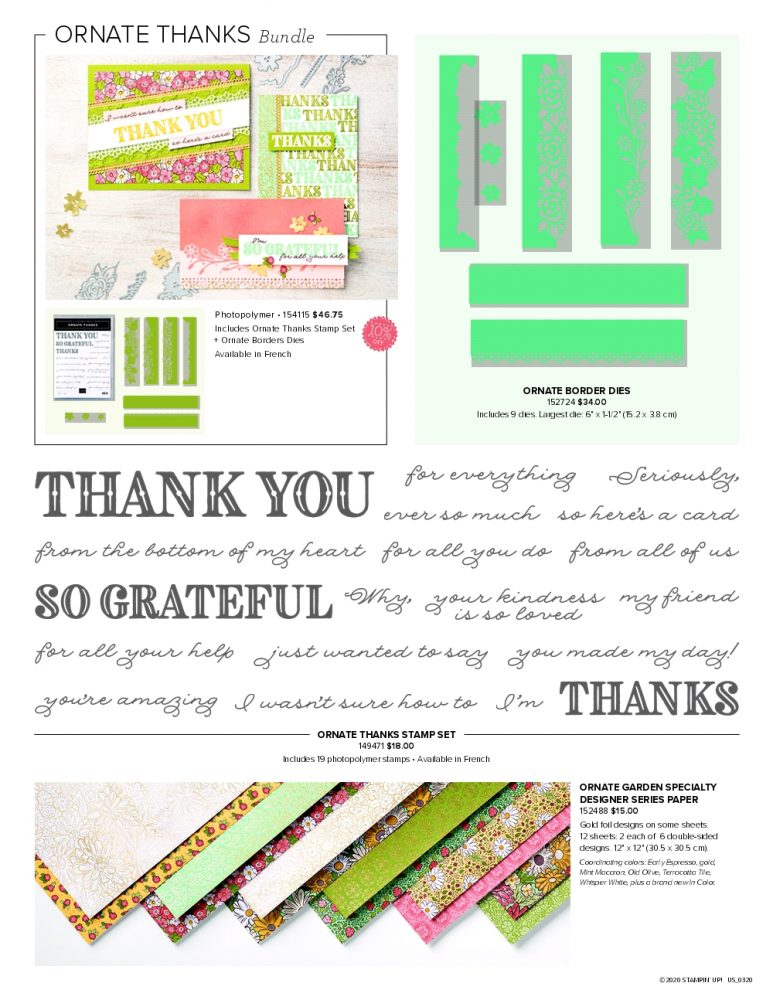
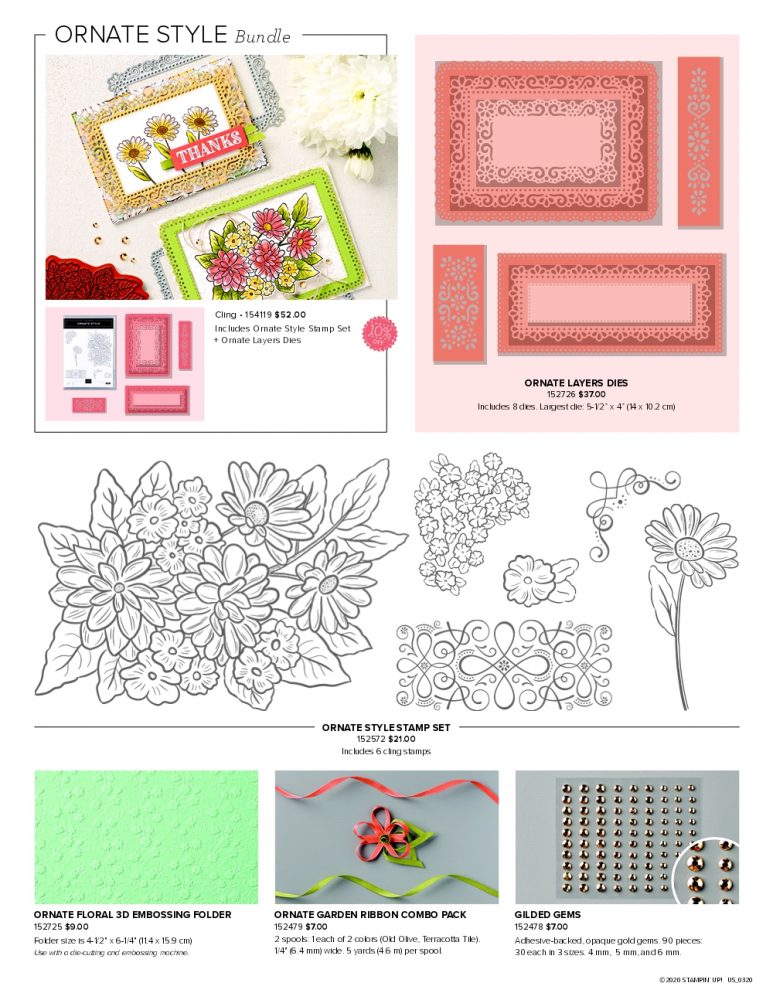
Today is the first day you get a chance to order something from the upcoming Stampin’ Up! Annual Catalog! No need to wait until June! Beginning today, you can order some or all of the products in theOrnate Garden Suite # 154153. If you want it ALL, you can just put in that product number and get everything in the Collection! If you want just certain items, you can order each product that you want.
Click on the photos below or view the individual pieces of this collection.
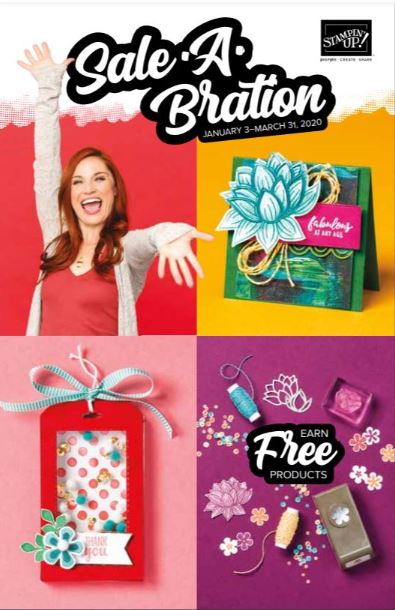
It almost seems like Sale-A-Bration just began, which was back in January, right after the holidays! It was great to see the new Occasions Mini Catalog and have fresh, new products and project ideas after working for months on the fall holidays and Christmas! Sale-A-Bration is a Stampin’ Up! promotion stampers have looked forward to for years and years.
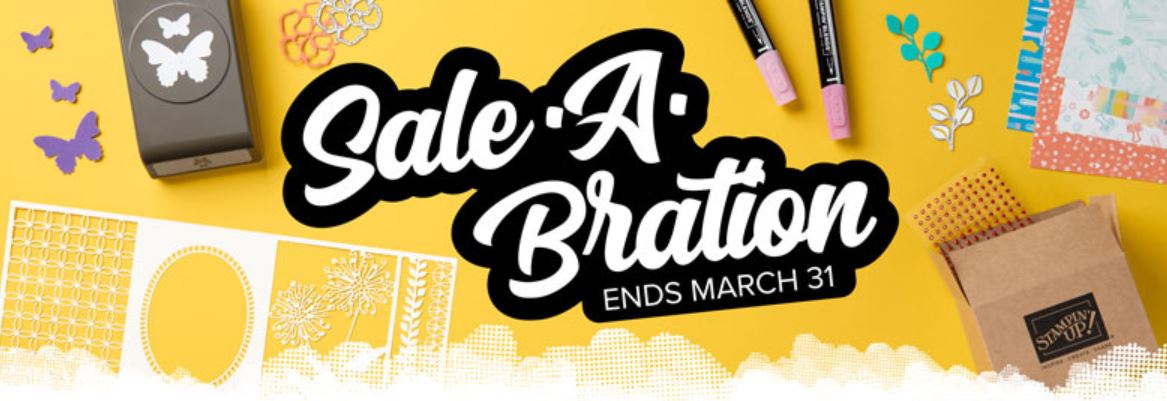
But tonight at 11:50 PM Mountain Time, it all comes to an end! If there was a Sale-A-Bration freebie you were looking forward to earning, but hadn’t yet, today is the day!
See the Sale-A-Bration choices in the Online Store HERE! Place your order totaling $50 or more, or $100 or more, and then select the Sale-A-Bration items you want!
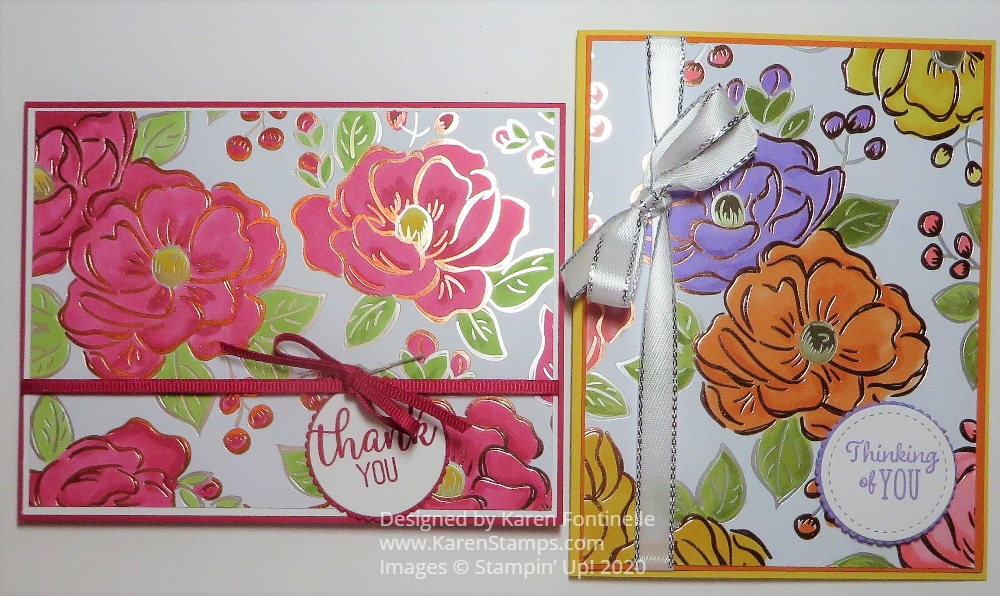
These Flowering Foils Colored Flowers Cards were so easy and fun to make, coloring with my Stampin’ Blends! I think coloring almost anything these days is good therapy to calm us from all the news in the world. And Stampin’ Blends really makes it fun!
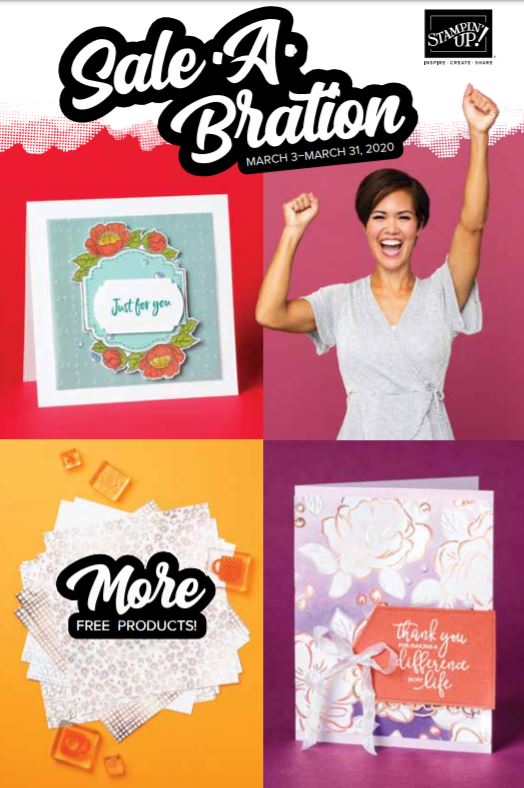
We are at the last TWO days of Sale-A-Bration 2020! Today and tomorrow are the last days to earn FREE Stampin’ Up! products with a qualifying purchase. Spend $50 and choose one free item. Certain items have a $100 qualifying order. With a $150 order, you can choose Sale-A-Bration items PLUS Stampin’ Rewards. And with a $300 order, you can choose the Little Ladybug Stamp Set in addition.
The Flowering Foils Specialty Designer Series Paper is a beautiful choice for Sale-A-Bration with a $50 purchase. These papers are beautiful on their own, as in this card, with Rose Gold and Silver Foil accents. If you like, you can color the papers with various coloring methods. You can use the Aqua Painter and ink, markers, brayer, sponges, Sponge Dauber, and Stampin’ Blends.
For the cards I made today, I simply colored the flowers with Stampin’ Blends markers. You can actually do it rather quickly because you don’t have to be perfect. The Stampin’ Blends do cover the foil outlines a little bit but that’s ok. For a lighter coloring over the whole area, use the Sponge Brayer. Or use Stampin’ Sponges (I cut mine into smaller pieces) or Sponge Daubers to apply ink in more specific areas.
JOIN Stampin’ Up! as a Demonstrator during Sale-A-Bration and get extra perks until March 31! Purchase the Starter Kit for $99 and choose $125 in product PLUS receive a new Mini Paper Cutter, a 6″ x 6″ Designer Series Paper Sampler, and your choice of any stamp set offered in current catalogs (host sets and Sale-A-Bration sets excluded). You will also receive business supplies free in your Starter Kit so you will be ready to start your stamping business! I can help you with any questions you may have to help you decide! Stampin’ Up! has lots of resources to help you start your business plus I’m here for you as well!
Reminder: You have two days left to take advantage of Sale-A-Bration 2020! Tuesday, March 31 is the last day! Use the Flowering Foils Paper, one of the Sale-A-Bration choices, to color in the designs to make cards like these Flowering Foils Colored Flowers Cards.
Isn’t it unbelievable to think that Sale-A-Bration is coming to an end? We look forward to it every year after the holidays and have fun earning free Stampin’ Up! products. What is better than FREE Stampin’ Up! products?! About halfway through we got some new choices to earn and last week we got some Annual Catalog choices. But time is dwindling now!
We are getting close to the end of Sale-A-Bration, March 31, but beginning today we have some new choices of products to choose with each qualifying order! Just click on the photo above or HEREto see the PDF of Stampin’ Up! CATALOG products that you can choose!
Click to View Catalog
This was the Second Release during Sale-A-Bration! View the catalog below.
Click Photo to View
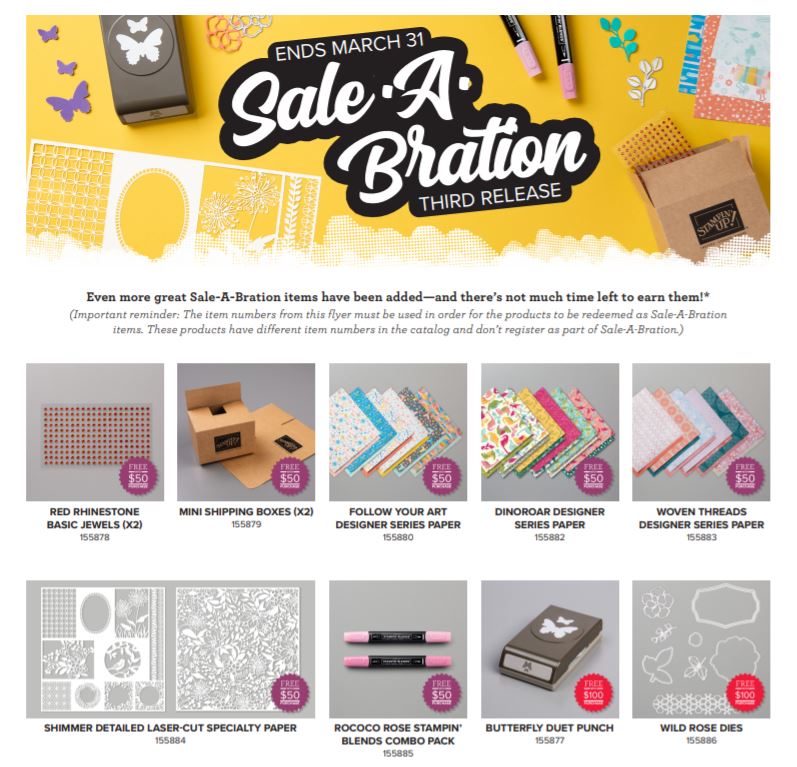
And last week the 3rd Release of Sale-A-Bration choices from the Stampin’ Up! Annual Catalog this time.
Click to View
New Sale-A-Bration Choices! You may choose these catalog products with a $50 purchase:
You can choose from any of the other previously released Sale-A-Bration products that are still available (remember, while supplies last!).
Another good choice during Sale-A-Bration is to purchase Prepaid Paper Pumpkin Subscriptions or add them to your regular Stampin’ Up! order. Even if you are getting a monthly subscription, you can purchase a Prepaid Subscription. You will get an email from Stampin’ Up! with a special code to add to your account. Then the prepaid subscription will be the one used and then it will automatically revert back to your monthly subscription. That way, with a total order of $50 or $100 or more, you will earn Sale-A-Bration products. With a total order of $150 or more, you will earn Sale-A-Bration PLUS Stampin’ Rewards. Click this LINK to go to the Paper Pumpkin page in the Online Store and you can read about Prepaid Subscriptions and you can choose which one suits you best! And once you are a subscriber, you can purchase any past kits or refills that are available any time.
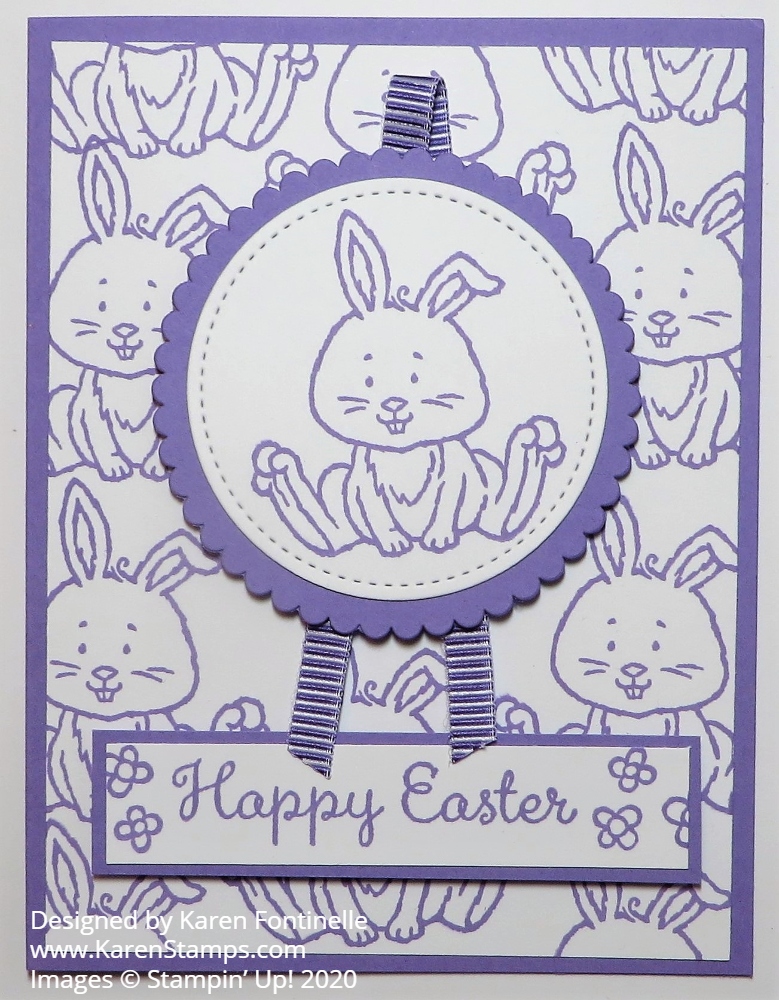
If you want to make a pretty quick and easy Easter card, this Monochromatic Welcome Easter Bunny Card is a good one to make! I really like the way this card turned out!
For this card, I stamped the bunny in the Welcome Easter Stamp Set in the Stampin’ Up! Occasions Mini Catalog. I stamped it in Highland Heather randomly on the Whisper White card front for a background and then on another piece of Whisper White that was die cut with the Stitched Shapes Dies for the focal point of the card. The card base is Highland Heather to match the ink and the scalloped circle layer under the center bunny.
The ribbon underneath the center bunny is the pretty striped Gorgeous Grape 1/4″ Mini Striped Ribbon. Although it is a slightly different purple color, it works just fine and the recipient of your card is still going to love it! I popped up the bunny piece on Stampin’ Dimensionals® and the ribbon’s fold sticks out the top and then tail ends hang out the bottom. Easy and cute!
The greeting is from the same Welcome Easter Stamp Set and layered on a piece of Highland Heather. To add a little something on the greeting I also stamped some of the little flowers in the stamp set at the ends.
A few years ago I made a similar card with a different bunny stamp. You can see it HERE. I stamped the bunny in one color randomly in the background and then colored in just one bunny and added a greeting. That card shows how you can use a bunny stamp to make an Easter card or a Baby card! Bunnies are so versatile!
There are lots of cards you can make simply by using only one color as in my monochromatic Easter card with the Welcome Easter bunny. Try one!
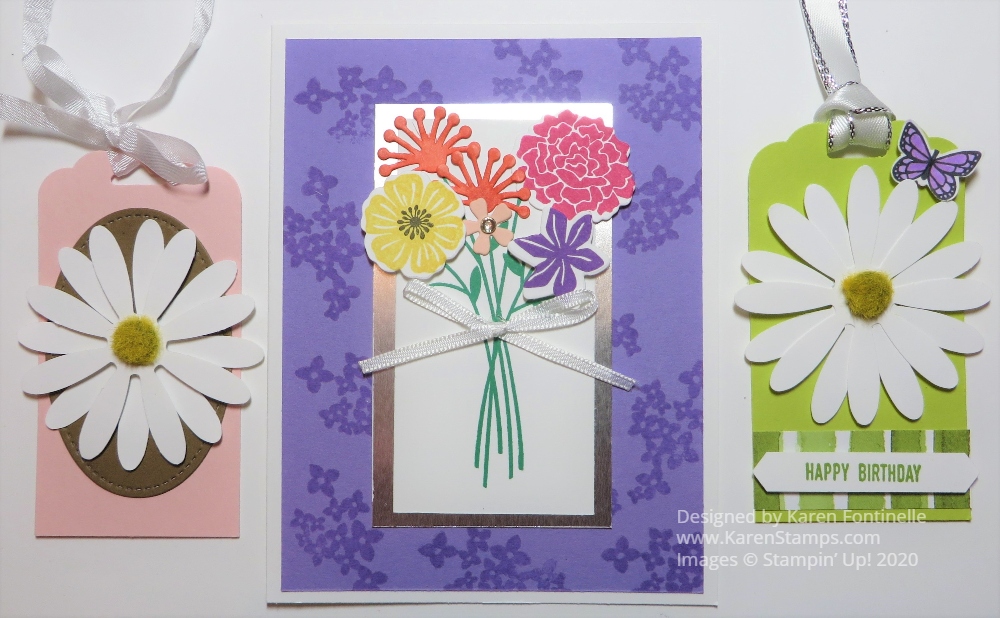
The other day I said I had cleaned off my kitchen table to “sanitize” it and decided to use my little pile of scraps of cardstock, designer paper, die cuts, punched pieces, etc. to make cards and here are some Floral Cards and Tags From Scraps that I made.
Saturday afternoon, Sara Douglass, CEO of Stampin’ Up! did a Facebook Live at her home showing her family having a craft party! I happened to catch it at the beginning so I moved my laptop over to the table and got out my scraps that were on my table plus another baggie full! I sat there and did my own stamping and cardmaking while watching and listening to the Douglass family in the background. It was the most relaxing afternoon for me!
If you are on Facebook, just search for Sara Douglass, Stampin’ Up! CEO. You will find her craft party video plus a new Facebook Live she did yesterday just checking in with everyone. More important than just telling you about her family Facebook Live, is telling you to check out the projects her girls were doing! Such cute things! Sara later posted more details about the projects that you will see in her posts. Near the end, Sara makes her own cards with the Magnolia Memories & More Large Specialty Cards & Envelopes. Even her husband makes a card he saw on the internet! Even if you missed it Saturday, you can still stamp along with the Douglass family!
I found several punched daisies in my scraps so I put two together on each card and added the Perennial Essence Floral Centers. The daisies are punched with the Daisy Punch. These tags were already in my scraps! I can keep them as tags or I can add them to the front of a card.
The center card is made with stamped flowers from the Beautiful Bouquet Stamp Set and die cut with the Bouquet Bunch Dies. I don’t remember what dies the orange flowers came from but they were in my scrap stash. In fact, they were white but I wanted color, so I just colored them with Stampin’ Blends. The little panel with stems was already stamped. I just cut down the length and layered it on a piece of Silver Foil. The background on the card is stamped with Versamark Ink although it still came out darker than I expected.
You can check out some other cards I made with my scraps the other day HERE. It’s fun to sit down with whatever scraps you have, it’s almost like a treasure hunt! You don’t know for sure what you will find if it has been a long time since you looked! Then just let your imagination run and see what cards you can come up with! You can still add other stamping or embellishments and greetings, but try to use as many scraps as you can as I did with this Floral Cards & Tags!
We are getting close to the end of Sale-A-Bration, March 31, but beginning today we have some new choices of products to choose with each qualifying order! Just click on the photo above or HEREto see the PDF of Stampin’ Up! CATALOG products that you can choose!
New Sale-A-Bration Choices! You may choose these catalog products with a $50 purchase:
You can choose from any of the other previously released Sale-A-Bration products that are still available (remember, while supplies last!).
Another good choice during Sale-A-Bration is to purchase Prepaid Paper Pumpkin Subscriptions or add them to your regular Stampin’ Up! order. Even if you are getting a monthly subscription, you can purchase a Prepaid Subscription. You will get an email from Stampin’ Up! with a special code to add to your account. Then the prepaid subscription will be the one used and then it will automatically revert back to your monthly subscription. That way, with a total order of $50 or $100 or more, you will earn Sale-A-Bration products. With a total order of $150 or more, you will earn Sale-A-Bration PLUS Stampin’ Rewards. Click this LINK to go to the Paper Pumpkin page in the Online Store and you can read about Prepaid Subscriptions and you can choose which one suits you best! And once you are a subscriber, you can purchase any past kits or refills that are available any time.
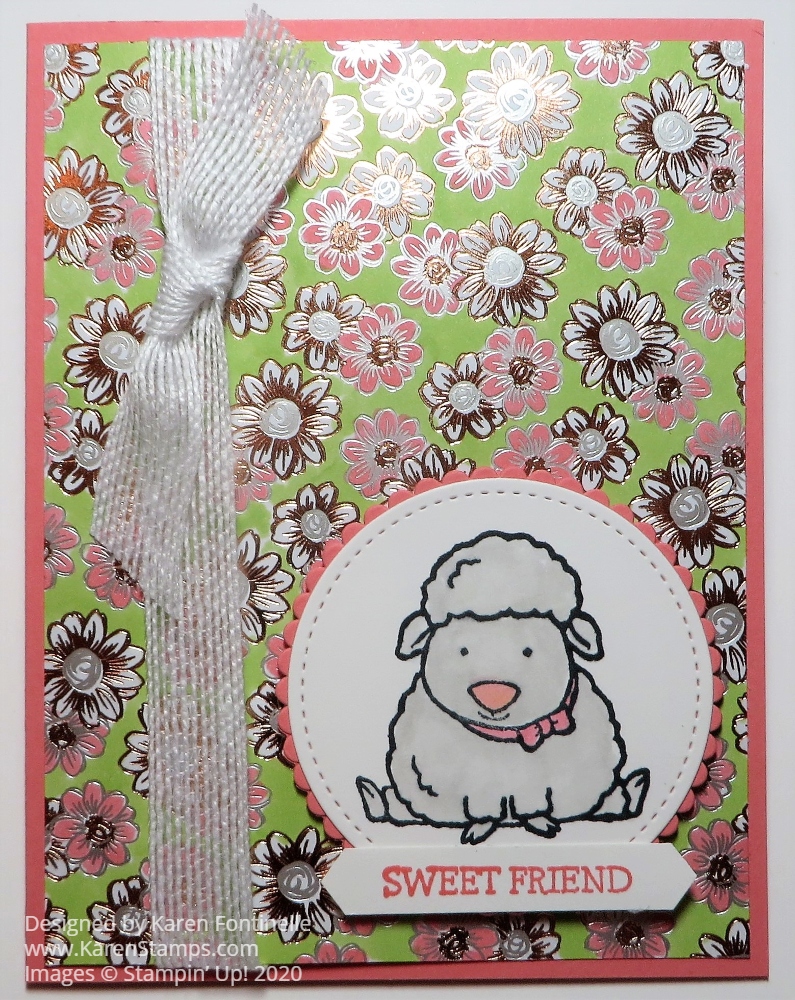
I’ve seen many people coloring this Flowering Foils Specialty Designer Series Paper various ways so I finally tried it on this Welcome Easter Lamb Card For a Sweet Friend. The Flowering Foils paper is one that you can earn FREE during Sale-A-Bration with a $50 Stampin’ Up! purchase until March 31. You can tell from the glare on the photo that this paper has foil accents in Rose Gold and Silver Foil. It’s beautiful but difficult to photograph very well!
I decided to color in the background around all the flowers. You might think (and I thought!) that it would be extremely tedious and ridiculous to color around all those little flowers! Somehow it was not! I got out my Stampin’ Blends, chose Granny Apple Green, and started coloring! It really went pretty fast and I think the Blends marker made it easy. I didn’t feel I had to be absolutely exact and yet it came out just fine! After coloring the background, I decided to color the silver flowers, too! I used Dark Flirty Flamingo.
After the designer paper was colored, I layered it on a card base of Flirty Flamingo Cardstock. I tied around a piece of Whisper White 5/8″ Flax Ribbon with a knot on the side of the card. Then I stamped the lamb from the Welcome Easter Stamp Set and colored him with Stampin’ Blends, particularly with Light Gray Granite. The lamb was die cut with a Stitched Shapes Die and then layered on a scalloped Layering Circles Die in Flirty Flamingo. The greeting is in the same stamp set and is stamped in Flirty Flamingo Ink. It is punched out with the Classic Label Punch.
If you like coloring, just sit down and relax and enjoy coloring this Flowering Foils Paper. And we all need activities that help us relax right now! Here’s a card I made the other day with the Flowering Foils paper without coloring. I even used three different papers on that card! So you can do it either way! The paper is pretty as is, or you can do lots of coloring like I did on my Welcome Easter Lamb Card For a Sweet Friend, but don’t miss out on Sale-A-Bration!
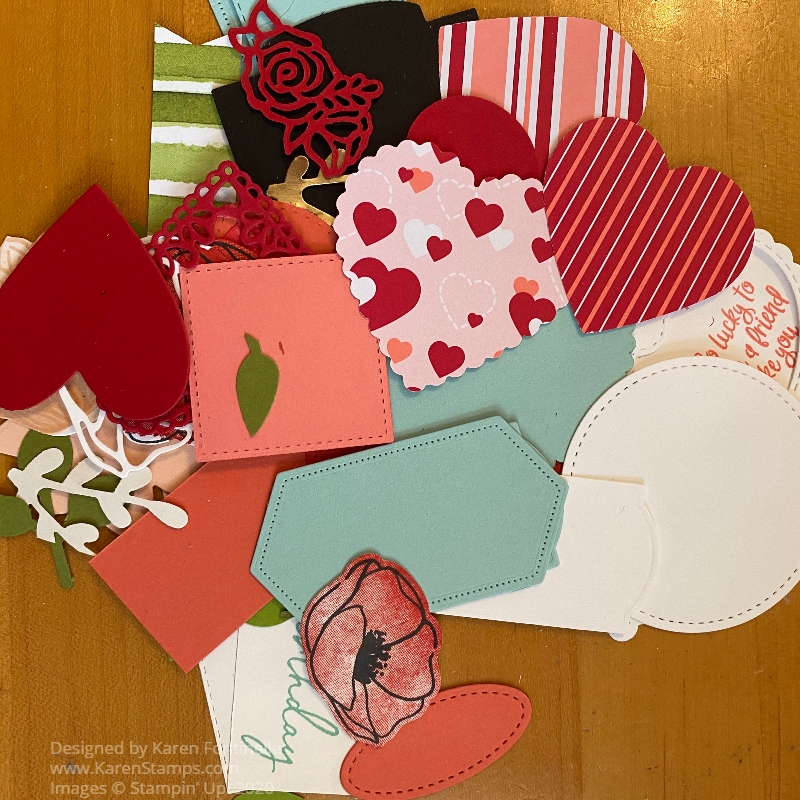
The other day I was taking everything off our kitchen table where I stamp so that I could completely clean it and sanitize it and I had this little pile of scraps! I have more scraps in a ziploc bag and more scraps in the cardstock packages. So I thought why not sit down and try to make cards out of what I have ready to go!
I didn’t get very far before I had to stop and help my husband figure out his teleconferencing with work (who knew you had to “set up” a microphone, not just plug it in?!) and figure out how it works. So I only got two cards made!
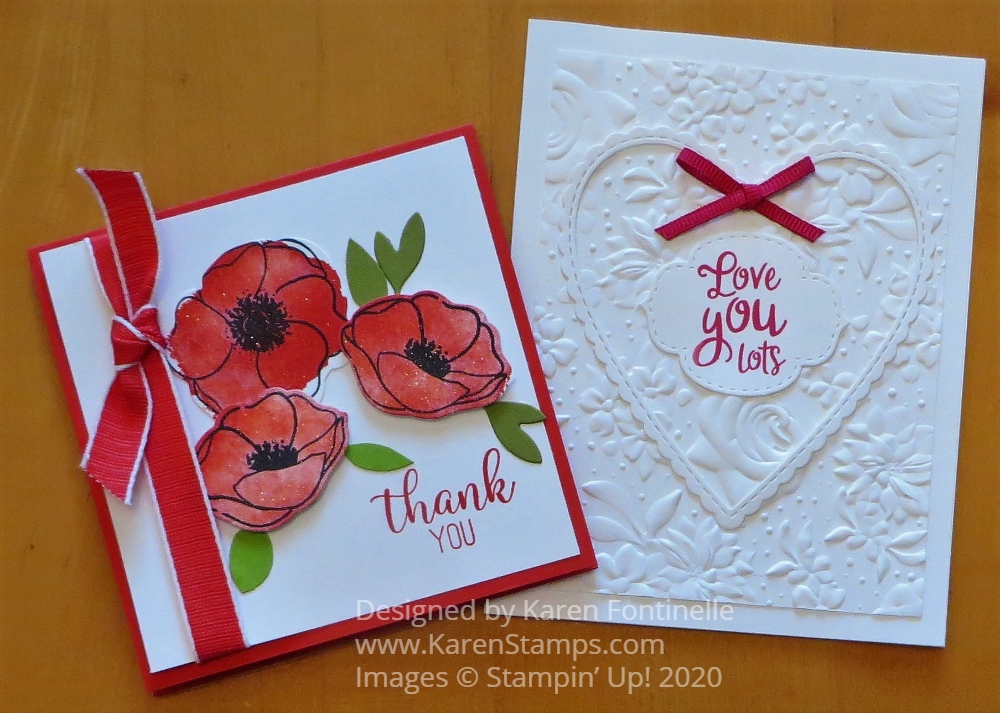
On the poppies card, I already had a Poppy Parade card base cut and folded in my bag of cardstock. I cut it down to 4 1/4″ x 4 1/4″ just for something different. The stamped Painted Poppies were already colored and cut out. Sometimes I stamp or die cut something and then think it doesn’t work or I change my mind. Hence, ready to go scraps! I adhered one flower flat on the card front and popped up the other two on Stampin’ Dimensionals. I even had some leaves already cut out. I tied around a Poppy Parade 1/2″ Textured Weave Ribbon (not a scrap!) and tied on a knot. Finally I used some Clear Wink of Stella to add some glitter to the poppies. On the inside of the card I added a Whisper White layer and another little floral die cut I found.
The second card has a layer embossed with the Country Floral Embossing Folder that I found in my Whisper White package. I added the die cut white heart from the Be Mine Stitched Dies. I don’t remember if the center die cut was already stamped or if I did that, but either way, I think it works! Then I added a bit of Lovely Lipstick 1/8″ Grosgrain Ribbon to the heart.
I plan to make more cards with my scraps as soon as I get some time! I don’t seem to have found all this “free time” that some people have to do all kinds of projects that they never have time to do otherwise. I suppose since I am home every day anyway, my routine isn’t changed during this time.
I hope you are staying on top of the news, only because recommendations and things change so quickly. But you also have to turn off the TV or radio or internet news sites and get some fresh air outside and do something relaxing. It’s a good time to lose yourself in stamping! If you don’t have many supplies, it might be a good time to subscribe to Paper Pumpkin and know you will get a kit in the mail mid-April and mid-May, etc. to give yourself a treat during this difficult time.
Do take care, stay healthy, stay home as much as you can, and STAMP! Use your scraps and see what you can come up with!
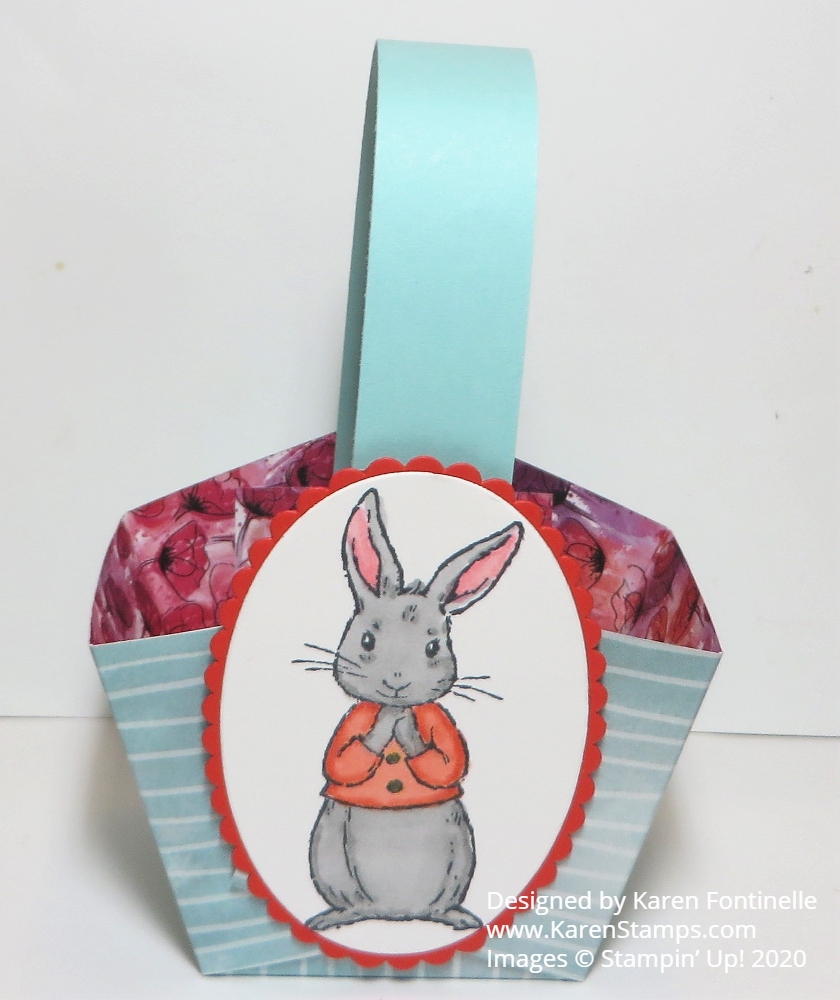
Today is the first day of spring, the earliest first day of spring since 1896, so here is a Fable Friends Easter Basket to celebrate! These are so easy to make you could make a ton now in your “free time”!
This is the Peaceful Poppies Designer Series Paper and I liked the Pool Party stripe paper for the basket. And then you can see the floral pattern on the inside of the basket.
The bunny is stamped from the Fable Friends Stamp Set in the Annual Catalog. I love that bunny! I colored his fur and jacket with Stampin’ Blends and then die cut him with a Layering Oval die, then layered on a scalloped oval die. Don’t think I picked the correct color for the scalloped oval to match the inside of the basket but it’s fine!
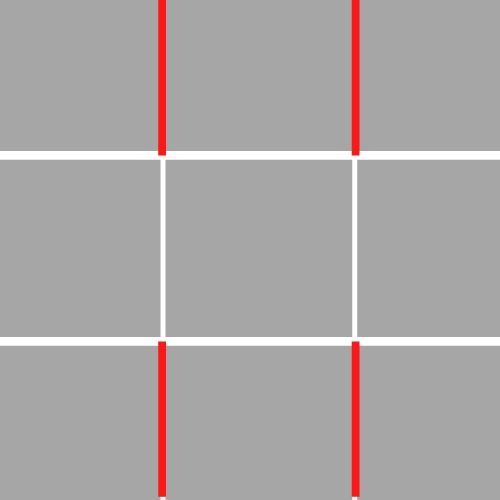
Just use a 6″ x 6″ square of paper and score at 2″ and 4″. Turn the paper and score again at 2″ and 4″. Then on opposite sides, cut up to the scored horizontal line. Round the four corners if you wish with the Detailed Trio Punch. In the rough (?) diagram below, you can see how you score all the lines like a “tic tac toe”, then cut on the red lines up to that horizontal score line. Then crease and fold on all the lines and begin assembling the basket.
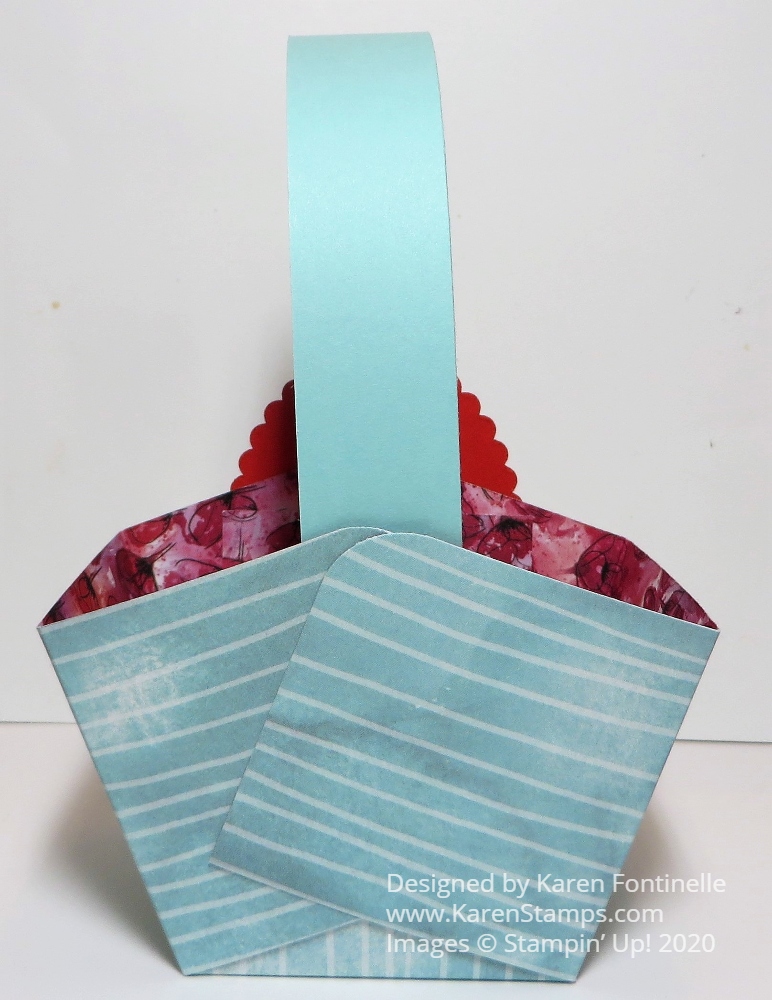
Fold on the score lines and overlap the sides of the basket. You don’t have to be exact on the placement, just try to have both sides pretty much the side. Either adhere with strong glue or use Metallic Brads. Back in the day we were really into brads of all kinds so you probably have some in your stash, but Stampin’ Up! does also carry the Metallic Brads. You can see the sides of my basket in the photo below and I did not put a lot of effort into getting them into some perfect shape!
Last year I made several baskets in one post and you can see those ideas and directions HERE.
I think it just feels better to know that it is spring now! Spring is a happier season, things start growing and blooming, the weather is nicer, we are outdoors more. Look through your designer paper and make a few spring or Easter baskets to brighten up your home. You couldn’t have to put a bunny or anything on the side. You could use cardstock to make the basket and add designer paper on some of the squares. You could just tie on a tag or put a pretty bow on the handle. The handle, by the way, is just a strip of cardstock, probably cut about 1/2″ or 3/4″ wide and however long you would like it. It’s a simple project and would be fun and easy to make if you have kids at home now! Or just make it for yourself! Use larger paper for a larger basket! Maybe I will try that myself! Try your hand at a spring basket like my Fable Friends Bunny Easter Basket!