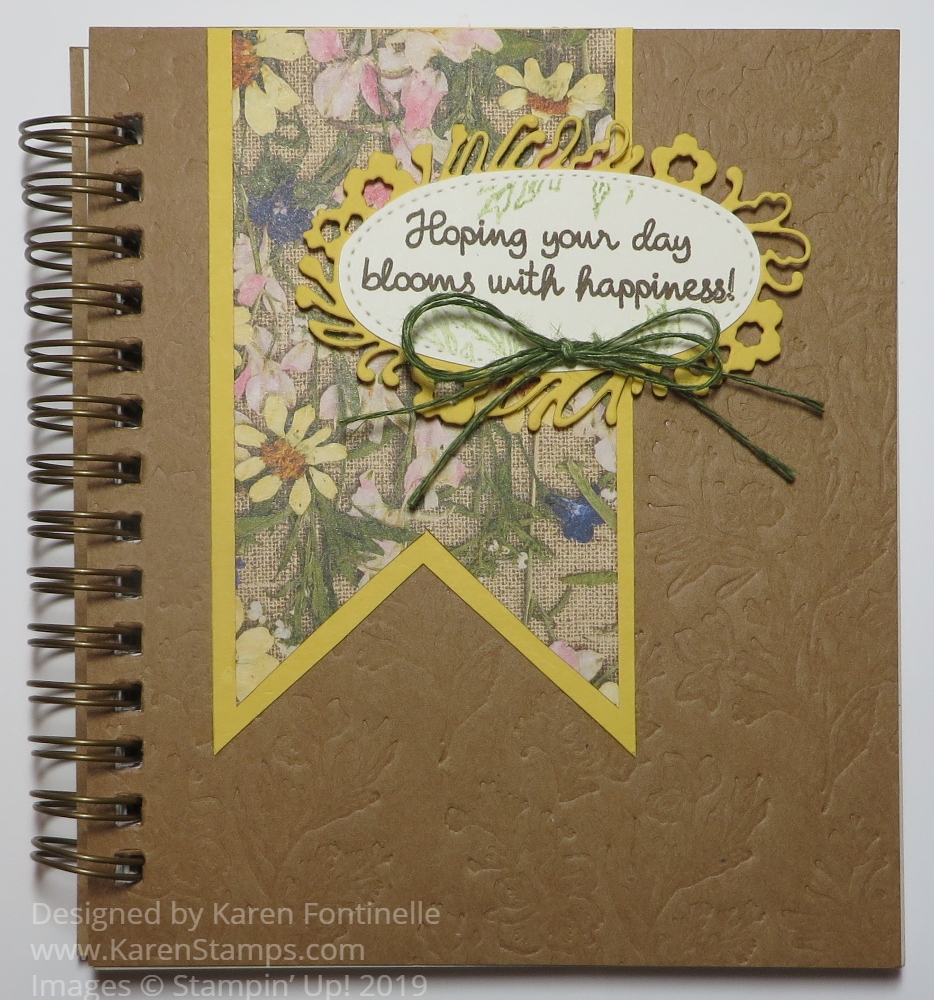
This Pressed Petals Journal With Floral Banner is just one that I have made for Christmas gifts. The Pressed Petals Journal is almost nice enough with its “debossed” cover without any other embellishment on it, but I think if you are giving it as a gift, or even just using it for yourself, it’s nice to decorate it a little bit.
This one is very simple. I just cut a piece of the Pressed Petals Specialty Designer Series Paper and flagged the end to look like a banner. Then I layered this on a piece of Daffodil Delight Cardstock.
I think if you are going to put a sentiment on the front of a journal, it should be something meaningful to the recipient or just something appropriate for the cover of a journal in which the person “might” be writing their personal thoughts or diary. I used the Petal Labels Dies for the layer behind the sentiment. The words are from the Varied Vases Stamp Set. I stamped a little greenery on the die-cut sentiment piece with some leaves in the Path of Petals Stamp Set. I might add it is best to do this before layering!! I just put down a piece of scrap paper over the layer so no ink would get on that piece. Then I added a bow tied with a double piece of green twine in the Magnolia Lane Combo Pack.
Here is a link to the first decorated Pressed Petals Journal I made. You can see in the post that the pages have several different designs and journaling prompts if you want to use them, or of course, you can just use it as any old notebook for keeping track of whatever you like!
I hope you will check out these Pressed Petals Journals in the Stampin’ Up! Annual Catalog on page 170 in the Memories & More section. Order several and you can decorate and give to your friends for gifts!
We often say, “Stamping is therapy” and it certainly is, like with this Path of Petals Thank You Card and many other cards! Sometimes you just need to stop and sit down and stamp.
It’s been such a busy week and everywhere I went traffic, traffic, traffic! I think everybody is in town with all the schools back in session so no one is on vacation anymore. Everybody is home and going to work and on the roads! Not to mention construction everywhere which causes backups and slowdowns! I think I need to allow an hour to get anywhere I go just to keep the drive less stressful! I don’t know when it’s been quite like this in all the years I have lived here.
So what is the best thing to do to alleviate a little stress?? Stamp, of course! This card uses the Pressed Petals Specialty Designer Series Paper and stamping with the Path of Petals Stamp Set. Although I have used the Pressed Petals DSP on lots of cards, I had difficulty stamping the flowers and leaves with this stamp set so this is the first time I actually used the flowers and stems! Here is a card I made with a piece of the Pressed Petals Designer Paper. I love these dark-colored flowers so much!
The card base is Mossy Meadow, one of the coordinating colors of the Pressed Petals Designer Paper. I started with the design with the leaves and ferns (I guess!), although originally I had the top and bottom designs reversed. This is actually the same paper, the leaves on one side and the cloth-looking design on the other.
The die-cut piece going across the front of the card is from the Flourish Dies using Merry Merlot Cardstock. I like to have something, usually ribbon, where I have two different patterns of paper coming together. It just finishes off that edge nicely. But this time I thought of using some kind of border die or something and finally, I found this one. It is a little bit fancy but doesn’t overwhelm the card. The secret is that the piece is not long enough to reach all the way across the card. But since part of the die-cut was going underneath the stamped piece, I was able to cut it, leaving a space underneath the stamping making the ends reach to each side of the card, and no one will be the wiser!
Maybe you won’t have trouble stamping the flowers, but just in case, this is what I found out. I think it was easier to stamp the flower stems and leaves first. I stamped these in Pear Pizzazz Ink. Next, I stamped the flowers in Merry Merlot Ink. I think you will have to move the stamp around until you feel like the flower blossoms are fitting with the stems. Past stamps we have had had a notch on each of the stamps that were to be stamped in the same direction so you could tell how to line them up. These stamps do not, so you just have to line them up as best you can. I could not get the other leafy stamp to line up correctly, so I just stopped with what I had as you see on the card.
For a little pizzazz on the stamping, I used the Clear Wink of Stella Glitter Brush to brush on a little Merry Merlot ink from the ink pad onto each flower, trying to keep it fairly light, which also added a bit of glimmer. Then I did the same with the leaves with the Pear Pizzazz ink. As much trouble as these stamps were to line up, I really liked the stamped image after adding a little bit of color and the glimmer from the Wink of Stella brush!
The greeting is from the same stamp set. It is stamped on Very Vanilla Cardstock in Merry Merlot Ink and then punched out with the Classic Label Punch. However, I snipped off the pointy ends of the punched piece to just make it plain. I could have layered it on a piece of Merry Merlot but I liked it just adhered to the card by itself.
So there you have it! A little stress relief from the demands of the week and a simple card design that you could vary in many different ways!
This Easy Pressed Petals Thank You Card is simple to make and can be for almost any occasion, just change the greeting. Sometimes it is fun to try a more complicated technique or design in our cardmaking or make a card with lots of embellishments, but sometimes just a rather basic design is more than fine!
The Pressed Petals Specialty Designer Series Paper is an easy one to use on cards. This paper was designed by actually photographing real pressed petals for one side of the paper and vintage designs on the other side. One design is a sheet of individual blocks of flowers that can be cut apart to add to cards in different ways. We had something like that last catalog.
This card starts with a base of Pear Pizzazz Cardstock and then a piece of Pressed Petals Designer Paper with these leaves and ferns. So pretty on it’s own so you don’t need to add much to the card. I stamped a greeting and die cut it and some layers with the Layering Ovals Dies, one a Mossy Meadow Cardstock layer and one a Gold Glimmer Paper layer to match the ribbon.
The ribbon is the Gold 3/8″ Metallic-Edge Ribbon. I think this is one ribbon you should have in your stash because it goes well with so many cards and projects. I just tied a knot to keep it easy!
Inside the card, you can stamp something or write a personal note. If you find it difficult to write on the colored cardstock, just cut a layer of Whisper White or Very Vanilla Cardstock and adhere inside. You can first stamp something in the corner or add a strip of the same or coordinating designer paper. It makes for a nice surprise when the recipient opens the card!
The greeting is one in the Path of Petals Photopolymer Stamp Set which is part of the Pressed Petals Suite. I love how Stampin’ Up! has so many coordinating items to use in our projects and has put them together into these Suites. Of course you can always use any stamp set for a greeting or mix and match stamps and paper or whatever, but if you don’t want to think very hard about it, or you just like EVERYTHING that goes together, then it is easy to choose from a Suite….or order the whole Suite.
Enjoy the Stampin’ Up! Annual Catalog while you wait for the Holiday Catalog because once the Holiday Catalog goes live, we will all probably mostly be in holiday mode! I hear Holiday Catalogs are hitting some mailboxes already so be on the lookout!
Use this design that I used for this Easy Pressed Petals Thank You Card to make a batch of cards with different greetings and you will likely have a card ready to go for almost any occasion, especially when you are short on time.