Cutest Paper Pumpkin Kit Cards!

Paper Pumpkin Feb 2023 Kit Cards

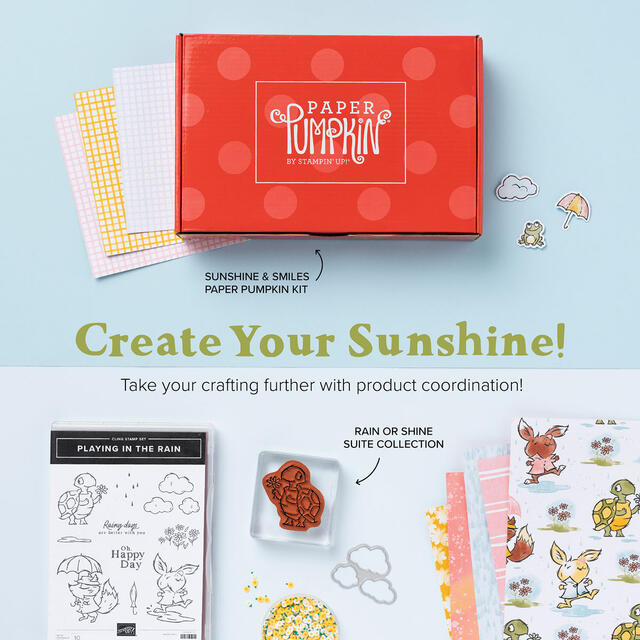
My February Paper Pumpkin, the Sunshine & Smiles Kit, came the other day and I worked on it last night! It coordinates with the Rain Or Shine Suite in the Spring Mini Catalog. Same kind of cute characters and bright colors! The great thing about the Paper Pumpkin Kits is that you get everything you need to make the project and all the directions so you don’t have to come up with the ideas yourself! And this is a kit that makes some really cute cards!

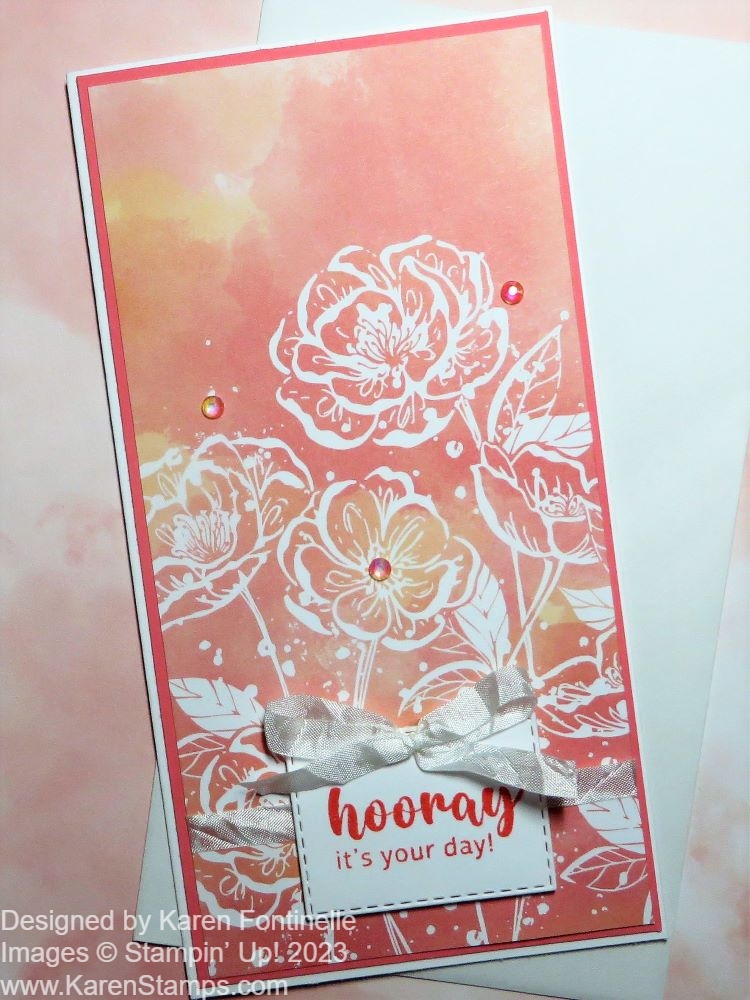
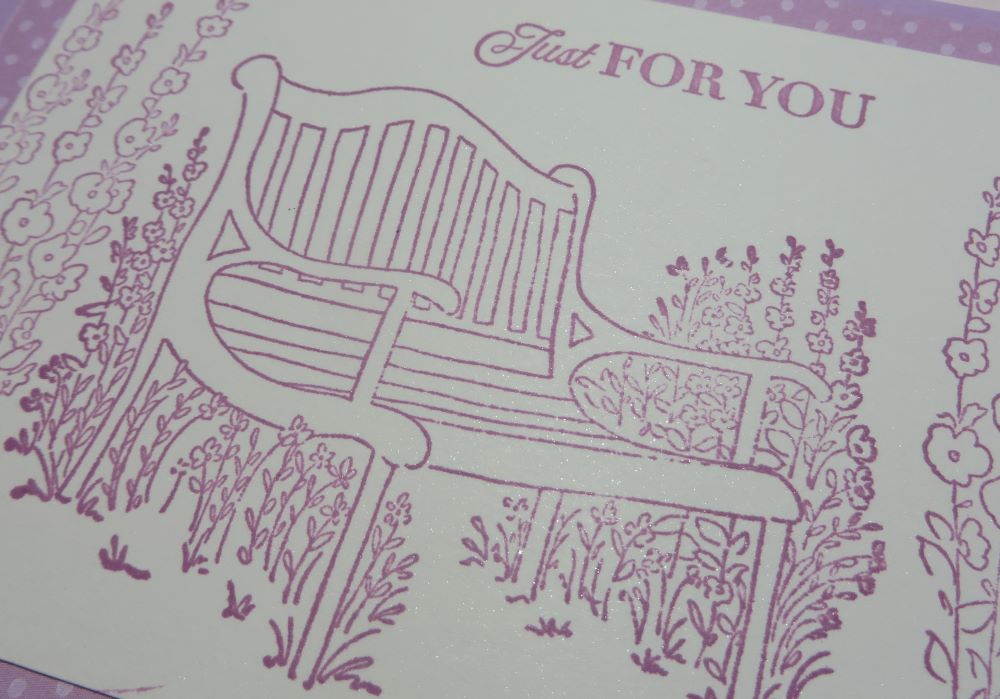
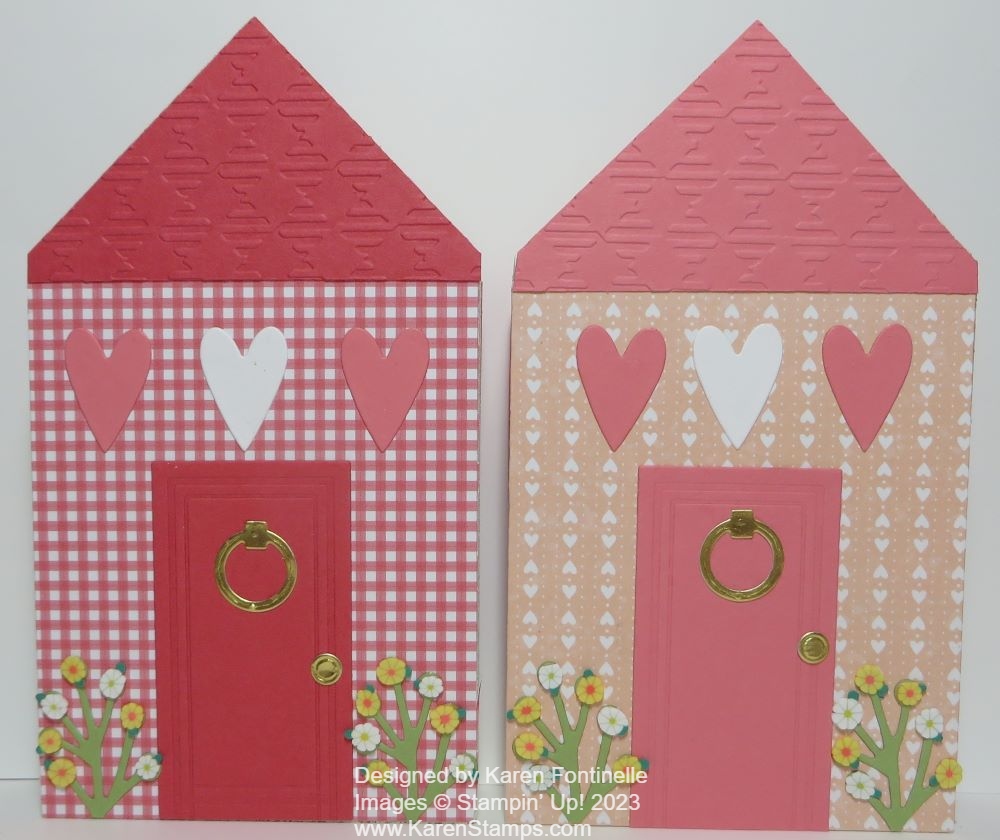
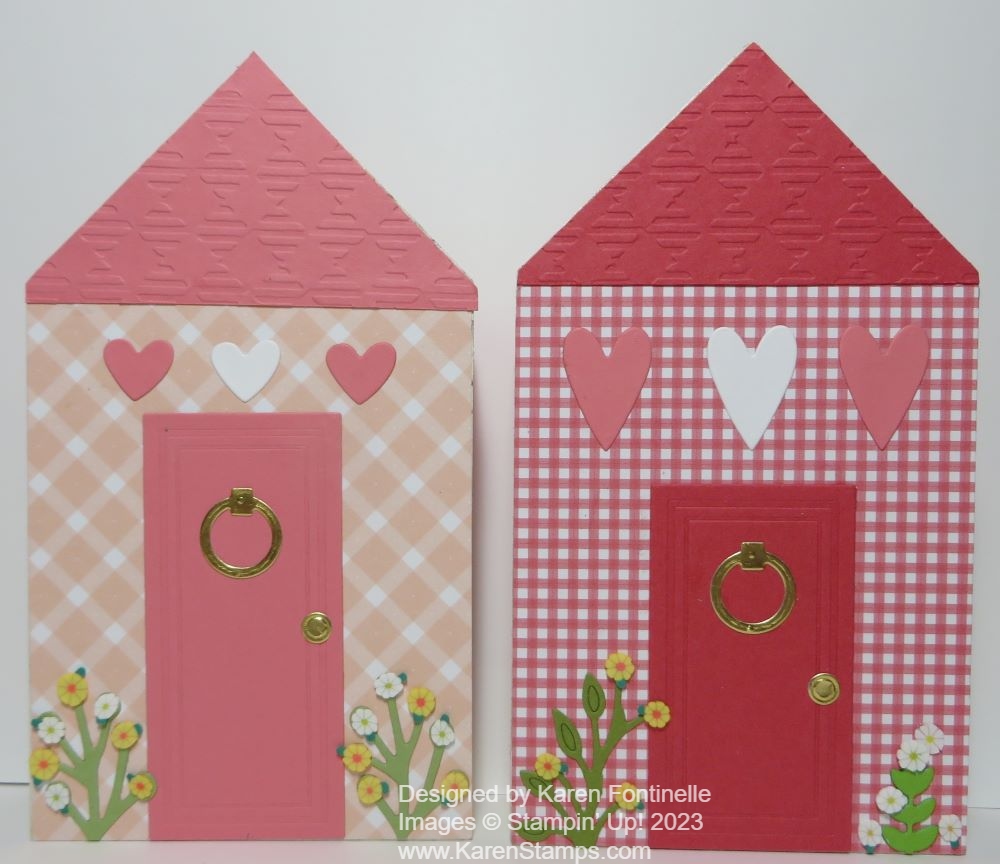
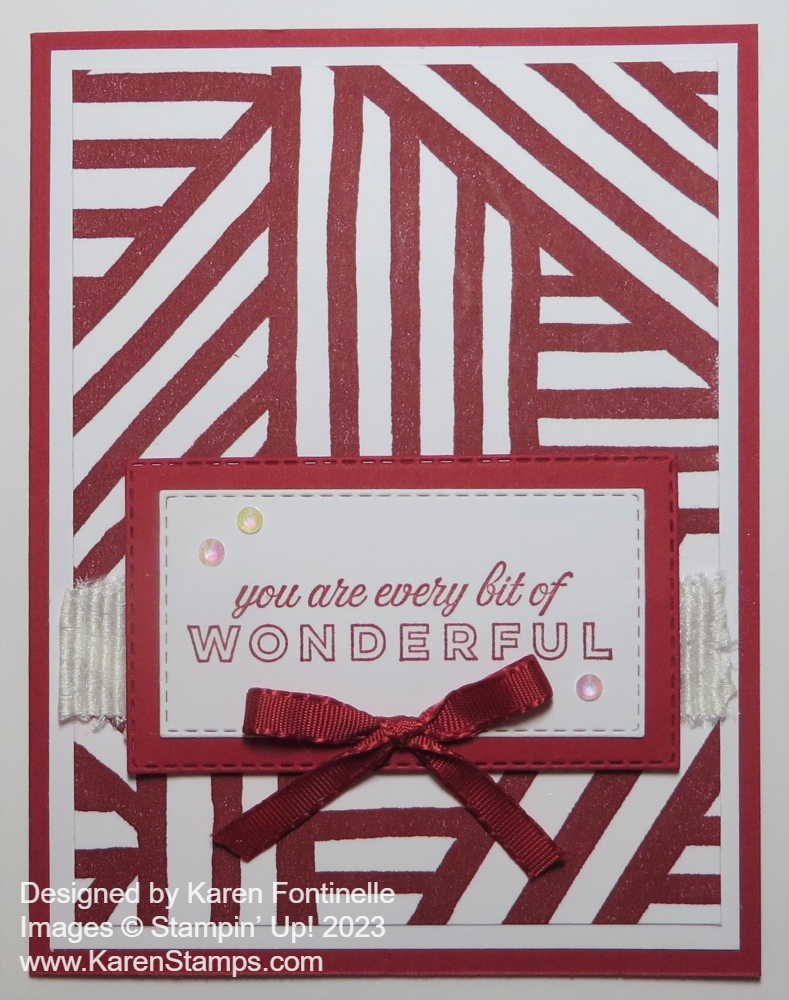
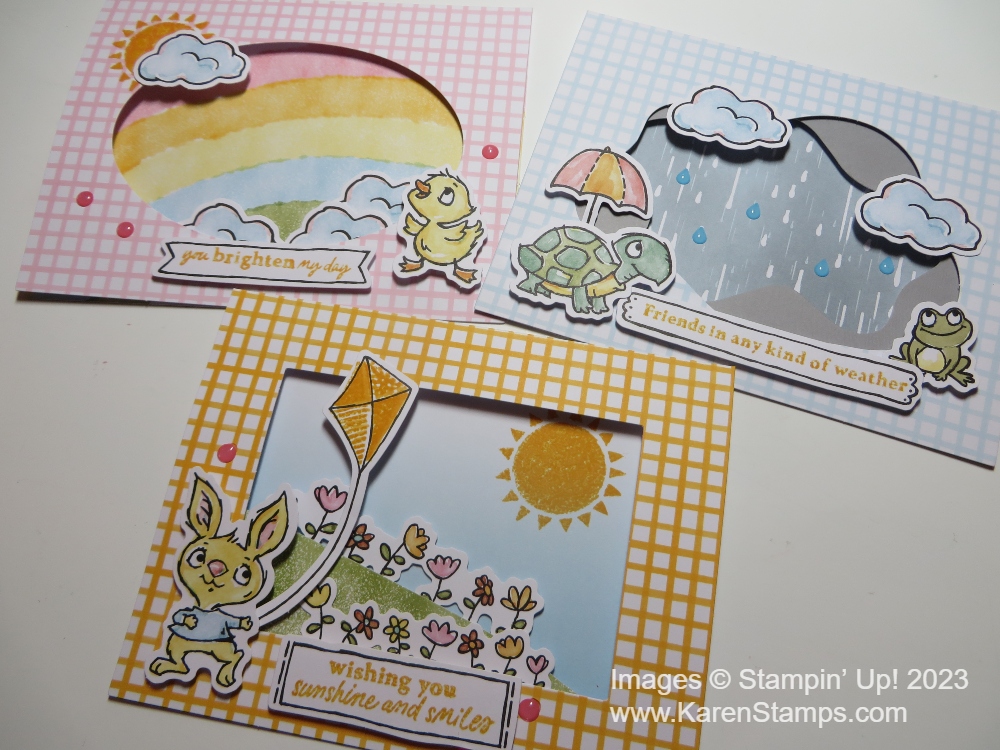
These cards have a peek-through card front, so what you see in the center of the card is actually the inside of the card. If you wanted to write a personal message you would probably write it on the back of the card or simply sign your name and a couple of words on the inside margins of the card. In this photo below you can get a feel for the 3D nature of the design with some elements popped up on dimensionals.

Paper Pumpkin Feb 2023 Kit Cards Closeup

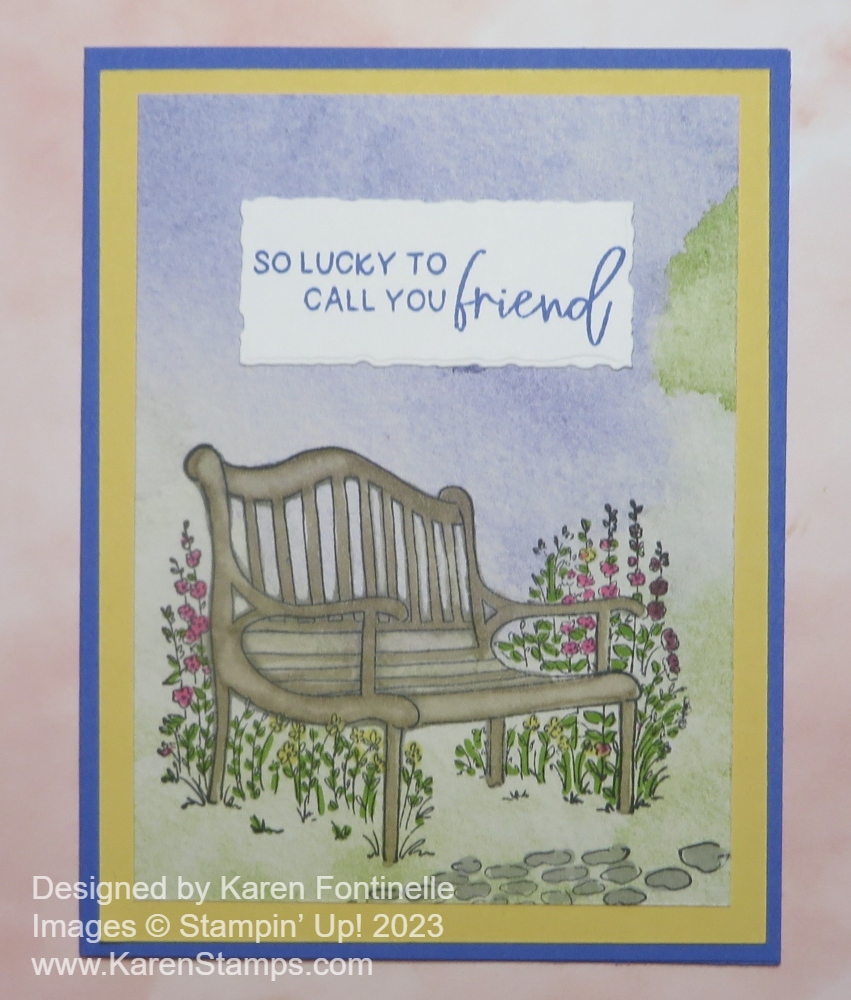
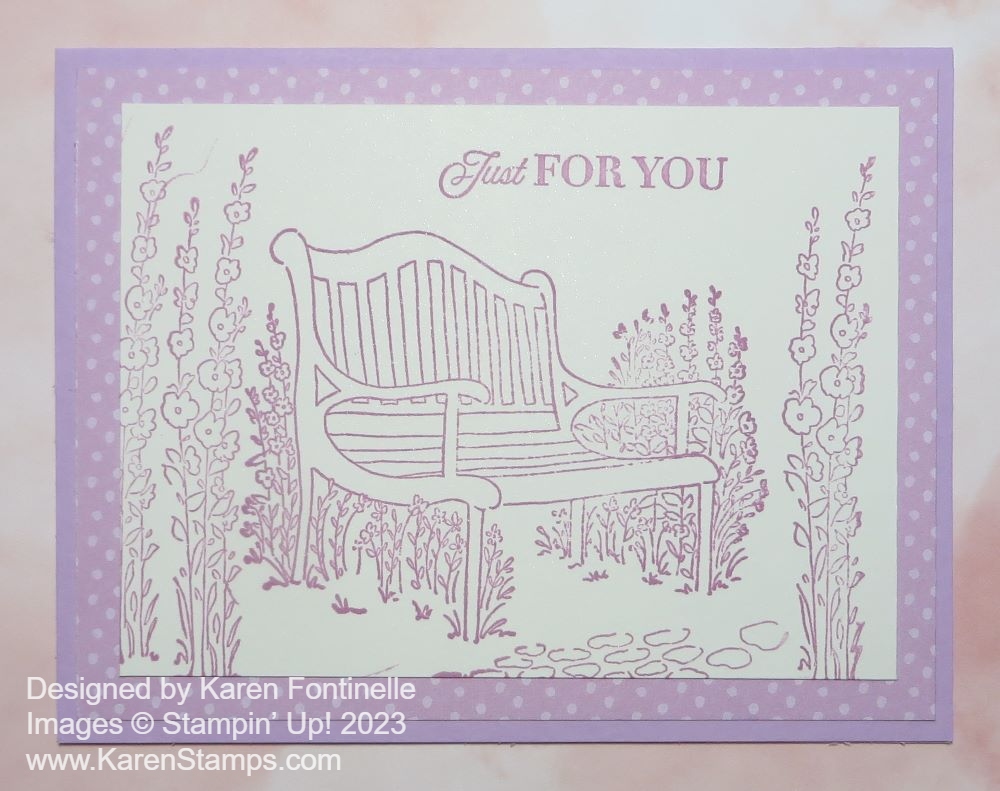
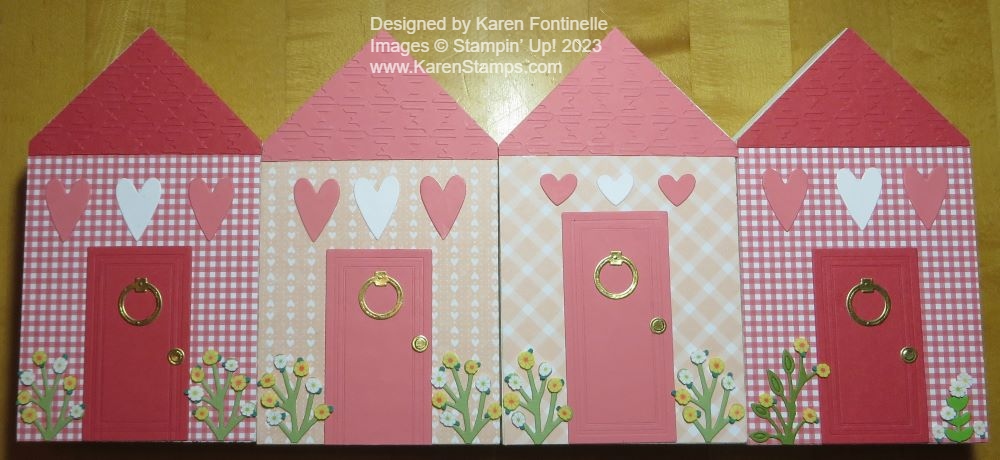
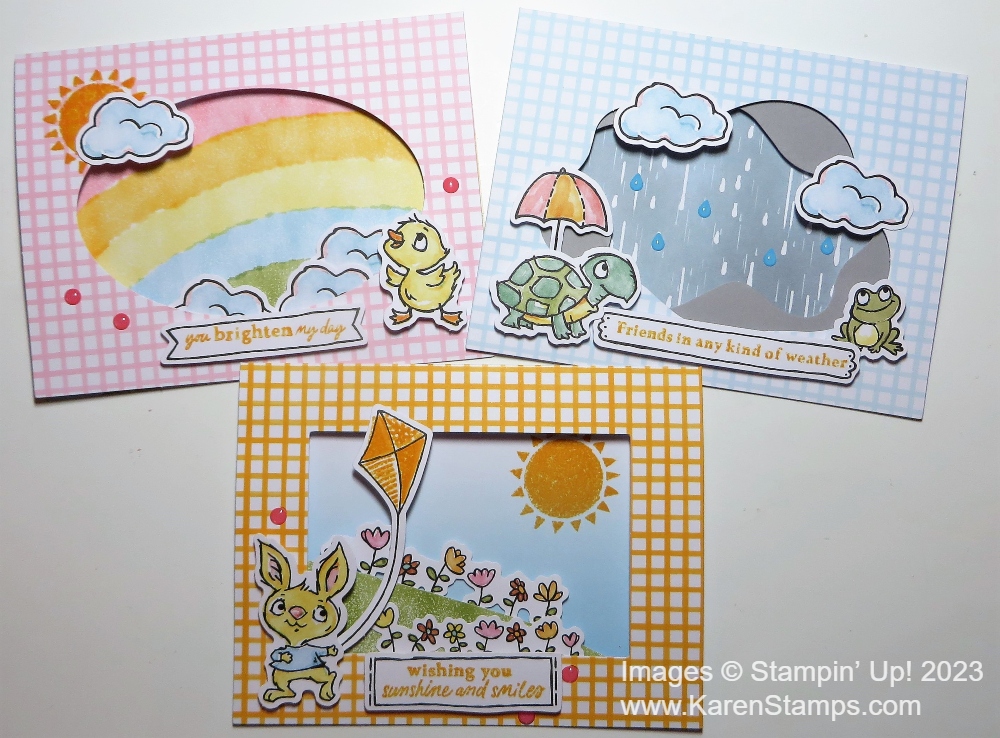
The photo above shows the three different designs that can be made with this kit. I usually like to make the cards as designed and then save some for making alternate ideas.

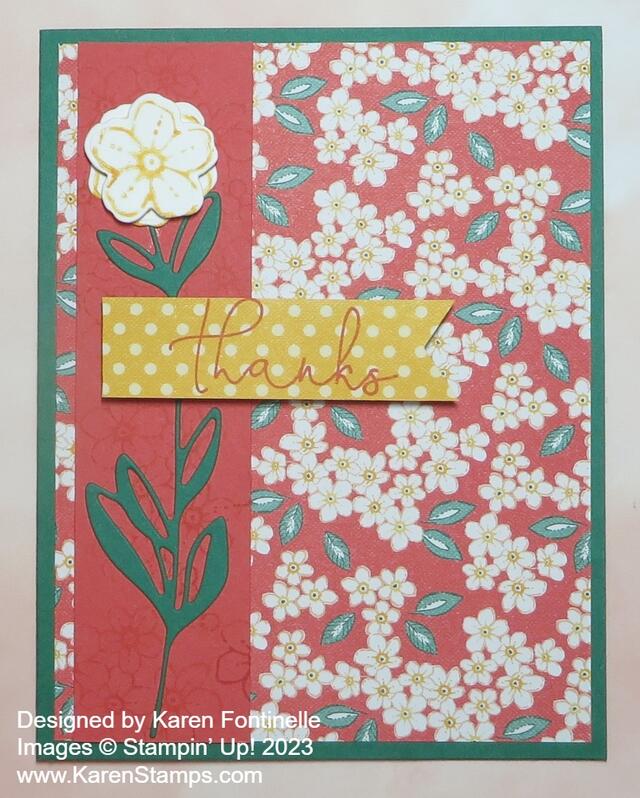
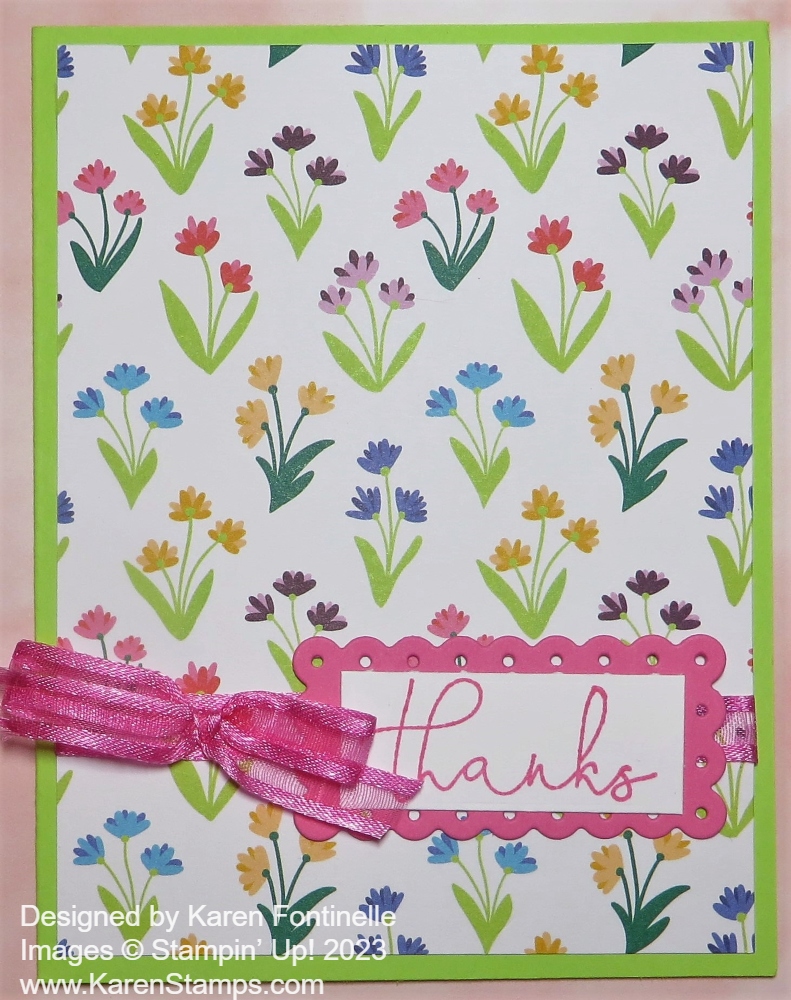
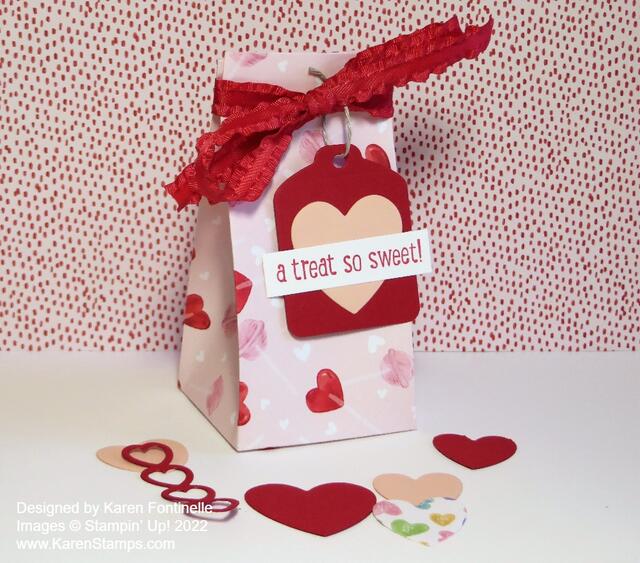
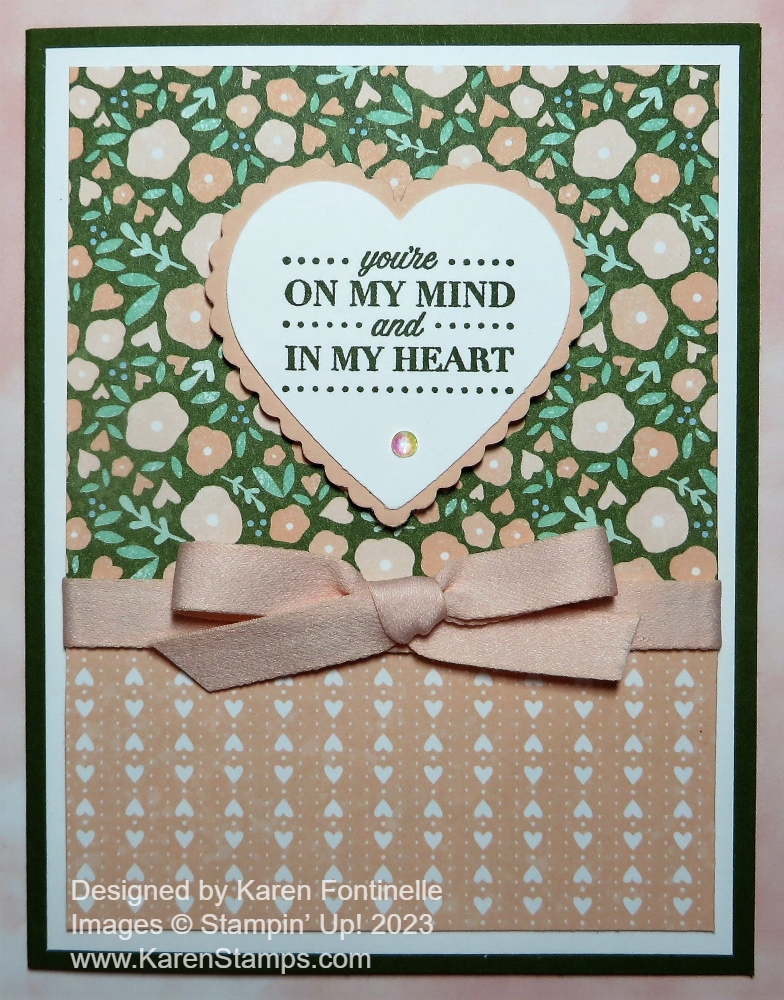
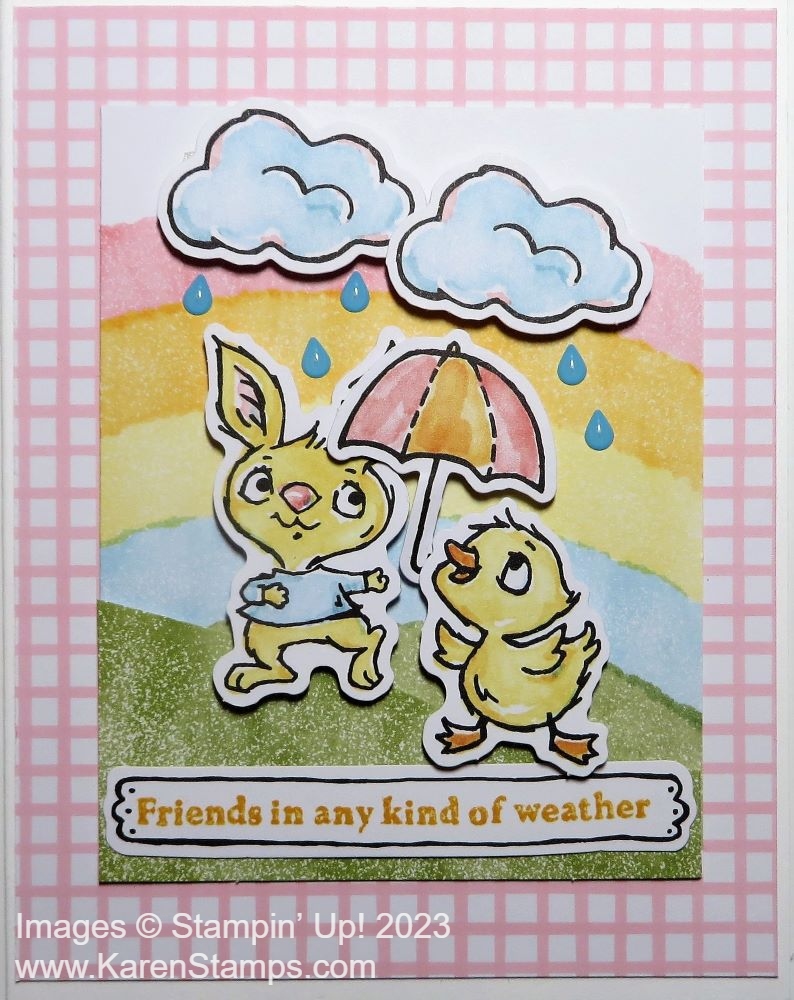
The photo below is an alternate idea suggested in the directions. I didn’t find the instructions until later on the Paper Pumpkin blog but I copied it pretty well from the photo on the instructions. For this alternate, I provided my own Basic White card base and cut the kit card apart so I could use the gingham for the background on the front of the card and then cut down the inside rainbow of the card to fit on the front. I added some grass from the kit, the two characters, an umbrella, clouds, and a greeting. And of course, the fun part, adding some enamel dots on all the cards for a little bling or raindrop bling!

Paper Pumpkin Feb 2023 Alt Card

Of course, you can’t get this kit in the subscription anymore, but if you become a subscriber, while supplies last, you could get the “Refill” for the Kit. You would get all the pieces to make the cards, just not the stamp set and ink spot. So you could make the cards as designed or use your own ideas and use stamps you already own for any greetings you want.

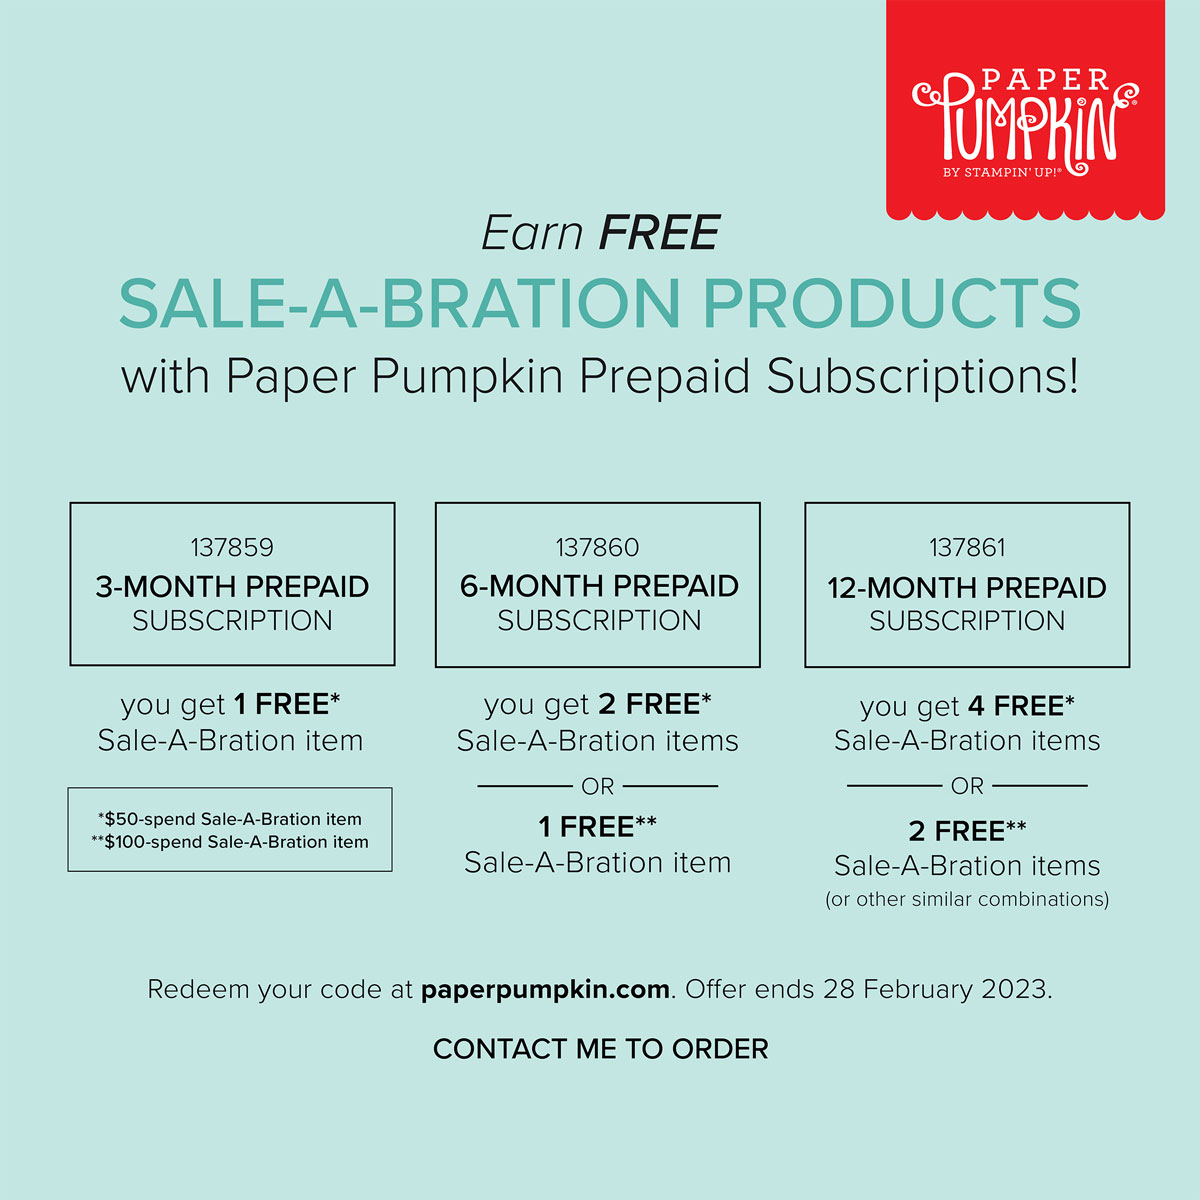
To make sure you don’t miss out on other great Paper Pumpkin Kits, sign up now to get your monthly kit or buy a Prepaid kit in the Stampin’ Up! Online Store!

JOIN PAPER PUMPKIN HERE!

Hello, Irresistible Slimline Floral Card

Hello, Irresistible Slimline Floral Card

Get excited for some new products coming March 1, 2023 from Stampin’ Up! This card is made with new designer paper and a stamp set. These new products (and more!) will be “Online Exclusives” meaning that they will not appear in a catalog but you can view them and order them in the Online Store, while supplies last!

This Hello, Irresistible 6″ x 6″ Designer Series Paper made me think of making a slimline card. It just seemed like the floral pattern would fit nicely on a card made 3 1/4″ x 6 1/4″. I chose that exact size because it would fit in a regular envelope.

The card base is Basic White Cardstock cut at 6 1/2″ x 6 1/4″ and scored in half at 3 1/4″ to make the card. The designer paper is cut at 6″ x 3″. I added a layer of Flirty Flamingo on top of the card base. It is cut just a bit narrower than the card base at 3 1/8″x 6 1/8″. I think it helps to add to the beauty of the designer paper. I love this pattern of paper which looks like the flowers are all stamped or embossed in white.

The greeting is in the Irresistible Blooms Stamp Set. I stamped it in Flirty Flamingo Ink and die cut with one of the Stitched Rectangle Dies. I first thought I would put it up near the top of the card, but then I didn’t like it in that position so I moved it to the bottom over some White 1/4″ Crinkled Seam Binding Ribbon. It is popped up on Stampin’ Dimensionals. Normally I would put the bow at the bottom of the greeting, but in this case, it covered up the greeting and I just kind of liked placing it at the top for a change! I also added a few Iridescent Rhinestone Basic Jewels for a little sparkle to the card.

One interesting thing about this designer series paper is the coordinating colors. Two of them are Lost Lagoon and Pretty Peacock! If you have been around Stampin’ Up! for a while you might remember those colors. Pull them out of your stash if you have the cardstock and ink! Also on March 1st something is going to be announced about colors! So stay tuned!

Stamp Sets on the Clearance Rack!

Clearance Rack Sign

Stampin’ Up! has added some stamp sets on the Clearance Rack! Stampin’ Up! doesn’t usually do this so take advantage of it while you can! Whether you missed out before or now you DO need or want some of these stamp sets, check them out and take advantage of the discounts! They just may help you earn Sale-A-Bration rewards or Host Rewards! Of course, you can add other things on the Clearance Rack, too, when you need just a little more for your order to reach the total you wanted so you can earn free merchandise!

Here are some of the stamp sets (until they sell out)!


AND MORE……!!!

While Supplies Last, of course!

Sale-A-Bration ends Tuesday, February 28!

Have fun shopping!

Enjoy The Journey Mountains

I think this Enjoy The Journey Mountains Card is probably one of the easiest cards I have ever made! The designer paper needs nothing else on the front of the card except a greeting. And you can get this beautiful paper either of two ways!

This pack of paper is the Enjoy The Journey Designer Series Paper in the Spring Mini Catalog. You’ll find it on page 59 of the Spring Mini Catalog in the Enjoy the Journey Suite. It goes nicely with the Greatest Journey Stamp Set and especially the Greatest Journey Dies which are really fun.

This blog post is mostly about the Enjoy The Journey Designer Series Paper. Instead of buying it, you can get it for FREE this last week of Sale-A-Bration. This paper is one of the new products Stampin’ Up! added a couple of weeks ago in addition to the original brochure. You can find ALL of the available Sale-A-Bration products, most free with a $50 purchase and a few free with a $100 purchase, HERE in the Online Store.

If you want to purchase the paper from the Spring Mini Catalog, use #160586. But if you want to choose the paper as a Sale-A-Bration item, use #164425.

To make this card, I used a Garden Green cardstock card base. Then I just used a piece of the greenish paper with the mountains, snow peaks, and evergreen trees. I cut the piece 4″ x 5 1/4″ as usual. For the greeting, I chose one that I thought went with the mountain theme. It is in the Beauty of Friendship Stamp Set. It is stamped in Garden Green ink and die cut with one of the Stylish Shapes Dies. I cut off the one end to place it up against the edge of the designer paper. That’s really all this card needs because I didn’t want to take away from the grandeur of the mountain scenery!

Remember, Sale-A-Bration comes to an end next Tuesday, February 28. Don’t forget to check your basic stamping supplies, like Basic White cardstock, Envelopes, other colors of cardstock, or specialty paper like Shimmery White. Make sure you have plenty of adhesive and Dimensionals. You’ll need those kinds of things eventually so you might as well stock up while you can get free things!

SHOP STAMPIN’ UP! ONLINE RIGHT HERE!

Sentimental Park Thank You Card

Sentimental Park Thank You Card

This Sentimental Park Thank You Card is my first attempt working with the Sentimental Park Bundle in the Regency Park Suite. I didn’t even look around at ideas online although I did look in the Spring Mini Catalog. I just pulled out the Regency Park 6″ x 6″ Designer Series Paper, picked out a paper I liked, and started playing around with it and the stamp set.

I first checked the coordinating colors with the designer paper and wrote the names in marker on the back of the cardboard so they are easier to read! I do this with all my designer paper. For this pattern, I pulled out the Shaded Spruce cardstock, which I haven’t used all that often.

I was curious about some of the dies in the Sentimental Park Dies, especially the LONG flower stem! I cut out the Shaded Spruce cardstock with that die and then stamped two flowers to layer together. The flowers are stamped with the daisy stamp which I inked up using the Mango Melody Stampin’ Write Marker to make two flowers I layered them with the Black Stampin’ Dimensionals.

The card needed something to offset the flower and stem to show up better so I cut a strip of Sweet Sorbet cardstock about 1 1/4″ wide. For a little more interest, I stamped a group of flowers in the stamp set with Sweet Sorbet ink but I stamped off first. You could also use Versamark ink. That gave just a little background on the Sweet Sorbet strip without clashing with the designer paper on the front of the card. I glued the flower stem carefully on the Sweet Sorbet strip with the layered flowers at the top.

For the greeting, I stamped the word “thanks” from the Sentimental Park Stamp Set. I first stamped it on Basic White, but then I got the idea to stamp it on a strip of designer paper, the piece with white dots on the Mango Melody background. I just flagged one side and adhered it, popped up on small pieces of Foam Adhesive Strips.

On the inside, adhere a layer of Basic White or another light color, and consider putting a strip of matching designer paper to decorate the inside of the card I little bit!

Don’t forget, there is only about a week left of Stampin’ Up! Sale-A-Bration, your chance to earn some FREE products!

SHOP STAMPIN’ UP! ONLINE HERE!

Flowers & More Flowers Thank You Card

Flowers & More Flowers Thank You Card

If you begin with pretty paper, it’s easy to make a pretty card without hardly thinking about it! This card is one of those!

Each Stampin’ Up! catalog has some special goodies in the back for party Hosts. Even if you do not have a stamping party with guests who order, you may order these Host specials based on your own personal order total. A single personal order, or even one with a couple of friends together, earns Host Rewards at $150 or more.

If you look in the back of the Spring Mini Catalog on page 90 you will see the Host Rewards and a little chart. Up at the top is a special package of designer paper, Flowers & More 12″ x 12″ Designer Series Paper with 48 sheets of paper!! That’s a lot of paper! You receive four each of 12 double-sided designs. Another Host special is the At The Pond Stamp Set with a couple of frog images and accessory stamps to stamp a little scene. The only way to get these two items is to earn Stampin’ Rewards.

I just recently chose this package of designer paper as my Host Reward for my order. Even though it has a higher value, you can add this paper to your Rewards and it will be valued at $18.00. So instead of choosing $18.00 worth of other merchandise, you can choose this. I think a lot of us forget about these Host special items!

To make this card I chose a Parakeet Party card base and layered this pattern with the little flower bouquets on the front of the card. That’s really all it needs, except for a greeting! The paper makes the card on its own, I think!

For the greeting, I chose the word “thanks” in the Sentimental Park Stamp Set in the Spring Mini. I cut out a rectangle to fit on the Polished Pink die-cut scalloped rectangle in the Scalloped Contours Dies in the Stampin’ Up! Annual Catalog. For a little extra, I tied around a piece of Polished Pink 3/8″ Open Weave Ribbon and adhered a small bow.

That’s all there is to this card! Next time to have an order that qualifies for Host Rewards, be sure to check out the Flowers & More Paper or the special stamp set, At The Pond.

SHOP STAMPIN’ UP! ONLINE HERE!

Scenic Garden Friend Card Two Ways

Scenic Garden Friend Card

If you really stock up on stamping supplies, you may earn this special stamp set for free, Scenic Garden, during Sale-A-Bration! It’s a tranquil stamp set of images – a park bench, a gate, flowers – but it might scare you with all the tiny coloring you think you have to do! But there are ways around that!

For this first card, I did color in the stamped images. But I find that when I use the Stampin’ Blends markers, they just glide so smoothly it is easy to color with them. I love to use them. And you just do not have to be perfect when you are coloring.

You could use other techniques as well, like using Watercolor Pencils, or ink and Water Painters. Soft Pastels would be very pretty, too! To cheat on the background, I used the “backside” of one of the papers in the Dainty Flowers Designer Series Paper, one of the FREE papers you can earn during Sale-A-Bration with a $50 purchase. The “main” side is all florals and greenery, but some of the other sides are pastel backgrounds that look like watercolors. That gave my card what looked like a sky and grass background without even having to color anything.

The card base is Orchid Oasis (I think I used!) with a layer of Soft Saffron. The greeting is from the Framed Florets Stamp Set stamped in the same Orchid Oasis (?) ink on Basic White and then die cut with one of the Deckled Rectangle Dies.

Scenic Garden Monochromatic Card

If coloring is not your thing, just make a monochromatic card, as I have shown many times! For this card I simply stamped the bench, flowers, and stepping stones plus the greeting all in the same color on Shimmery White Cardstock.

The card base is Fresh Freesia cardstock with a layer of the dotted Fresh Freesia pattern in the Dainty Flowers DSP. I made a wider margin with that so you could appreciate the designer paper underneath the card front. The greeting is in the Celebrating You Stamp Set. When you design a card this way, all you have to do is stamp and no coloring is required!

I love the Shimmery White cardstock and don’t think it gets the attention it deserves! I think it has been around forever and is certainly one of my favorites. It is great for stamping and also stands up better to a little water and watercoloring than regular Basic White cardstock. If you look closely, you can see a little shimmer on the paper! It’s difficult to photograph but see if you can notice it in the closeup below.

Scenic Garden Monochromatic Shimmery White

There are only about two weeks or less left of Sale-A-Bration so check your inventory of supplies and see what you need so you can get in on the party and earn some FREE stamping products. Go to the Online Store HERE to see all the Sale-A-Bration choices because extra ones were added besides what is in the Sale-A-Bration Brochure! Happy Shopping!

Last Minute Valentine Ideas!

If you are still looking for Valentine ideas, you will find a lot of ideas here from years past. I’ve picked out some I thought you would like but you can also click on “Valentine” under Categories on the right side of my blog and find a whole lot more!

Just click on the photos below or the title to go to that particular project on my blog!

Sweet Talk 2-4-6-8 Gift Bag

Sweet Talk 2-4-6-8 Valentine Gift Bag

Sweet Little Boxes For Valentine's Day

Sweet Little Boxes For Valentine’s Day

(Get these “Sweet Little Boxes” on the Clearance Rack right now for the future!)

Valentine's Day Chocolate Candy Holders

Valentine’s Day Chocolate Holders

Valentine Treat Bag with Hearts Tag

Valentine Treat Bag with Scraps

Just fill a little cello bag with treats and make a cute little tag!

Mini Mailbox For Valentine's Day Candy

Mini Mailbox For Valentine’s Day Candy

Easy Valentine Candy Jar

Easy Valentine Candy Jar

I hope these ideas help you out! There are PLENTY of Valentine card ideas, too, through the years. Again, just look under Categories and click on Valentine. I think Valentine’s Day is one of the most fun holidays!

Happy Valentine’s Day to you!

Rain Or Shine Valentine Candy Bars

Rain Or Shine Valentine Candy Bars

Last week I made a couple of other decorated candy bars for Valentine’s Day and now today I have these Rain Or Shine Valentine Candy Bars to show you! It is so fun and so easy to make these little treats! Of course, they don’t always have to be for Valentine’s Day. Wouldn’t these be cute for birthday party favors if you just changed the greeting?

These Valentine candy bars were decorated with two of the characters in the Rain Or Shine Suite in the Spring Mini Catalog. You can stamp these characters or you can cut them out of the Rain or Shine Specialty Designer Series Paper. Not only is this paper cute with the charming characters and umbrellas and raindrops, but parts of the images have a glossy coating on them making them a little bit shiny and adding some unique texture. You can cut out these images yourself or there are some dies that line up with the paper.

You can use almost any kind and size of a candy bar for this project. You will just have to modify your design accordingly. I used the regular size of chocolate bar and wrapped a piece of cardstock around it. I didn’t prescore the cardstock because the candy bar is not perfectly flat. I found it better just tightly to press the cardstock around the candy bar and when you have it how you want it, press the creases with a Bone Folder or at least your fingers on the edges of the candy bar to give it a good crease. If you want, you can score it on those lines, but it could still be off a little bit. It’s just as easy to do it by hand. Use a strong adhesive like Tear & Tape to hold the cardstock closed around the candy bar. Try not to get adhesive of any kind on the candy bar.

On the turtle candy bar I used Granny Apple Green cardstock to wrap around the candy bar and then a layer of green striped paper in the Dandy Designs Designer Series Paper. You will find this paper in the Sale-A-Bration 2023 brochure on page 14. It’s actually FREE with a $100 purchase. Remember, Sale-A-Bration comes to an end this month! And it’s the only one for the year. In this paper pack, you get 48 sheets, 4 each of 12 designs. It’s a LOT of paper and certainly the kinds of patterns lend themselves to almost any project, as well as being great for scrapbooking. The turtle is cut out of the Rain Or Shine Designer Paper, as I mentioned and layered on a stitched circle die in the Stylish Shapes Dies. This is a great set of dies that you can use all the time! The greeting is in the Country Bouquet Stamp Set and stamped on just a strip of Basic White with the ends flagged. I also punched a red heart with the Country Bouquet Punch for the turtle to hold.

The foxy candy bar uses Crumb Cake cardstock to wrap around the chocolate bar with another pattern from the Dandy Designs Paper, the Mango Melody with stars to cover the Crumb Cake cardstock. I cut off the umbrella the fox was holding on the designer paper because this isn’t a rainy day theme. Instead I gave him a red heart to hold just like the turtle has and layered him on a stitched square, also in the Stylish Shapes Dies. On this candy bar I did the greeting a little differently. After stamping it on a strip of Basic White cardstock, I cut the words apart and separated them. I think that is a fun look to do for the rare times I think of it!

As for the candy bars themselves, I used the Real Red & Burlap Ribbon Combo Pack to tie a ribbon around the length of the candy bar so the recipient can just pull it out of the wrapping around the bar. On the fox candy bar, I used the Real Red ribbon and tied it at the top with a piece of twine. For the turtle, I used the Burlap ribbon and tied it with the Real Red Ribbon to hold the ribbon in place.

If you want to see the other Valentine candy bars I made, just click HERE. Those used the paper, stamps, and punch in the Country Floral Lane Suite. But it doesn’t matter which suite, it only matters if the candy is chocolate!

SHOP HERE BEFORE THE END OF SALE-A-BRATION!

Valentine Houses

Valentine House 1

From Christmas house to Valentine house! The Christmas house on the left is one of several I bought at Christmas time in one of the big box craft stores. A year or two earlier I had bought something similar, put designer paper on the front, and adhered a little wreath and ribbon. I didn’t get more made this year for Christmas so I got the idea to make a Valentine house out of the wooden blocks I had. Click HERE to see the ones I made previously.

These Valentine houses were fun to make! Bet you can’t make just one! It was easy to measure the bottom portion of the block and cut out a piece of designer series paper to cover it. Then I traced the roof area onto a piece of cardstock, cut it out, and embossed it. I used Multipurpose Liquid Glue for the whole project. The back of each house has a solid piece of cardstock that I just traced from the block and cut out. It’s best to use the Liquid Glue because you have a moment to get the paper perfectly placed. If necessary, you can trim off an overhanging edge with scissors or use a craft knife carefully.

Valentine Houses

These two houses were the first ones I made! The house on the left uses a piece of the Sweet Sorbet gingham paper in the Country Gingham 6″ x 6″ Designer Series Paper on the front. The roof is Sweet Sorbet cardstock embossed with the Gingham Embossing Folder. The door is die cut with the door in the Warm Welcome Dies. The door is rather tall for this project so I made it shorter. I used gold foil to cut out the door knocker and door knob with the same die set. For the plants on each side of the door I just chose some greenery dies. The little flowers are the teeny tiny Loose Daisy Embellishments. I just put a tiny drop of glue where I wanted the flowers and carefully placed them.

The house on the right is decorated with the little hearts page in the Country Floral Lane Designer Series Paper. The roof is a piece of gingham paper in Petal Pink. The door is Petal Pink. On both houses, the hearts are Basic White and Flirty Flamingo, diecut with the heart in the Warm Welcome Dies.

Valentine Houses 2

Here are two more houses decorated in the same way using designer paper, embossing the roof paper, diecutting doors, accessories, hearts, and plants.

Valentine Houses 1

You may notice the door on the house on the left is taller than the door on the right. I had made the other houses the other day and forgot I made the door shorter so I would have room at the top for hearts. But that’s okay (because there are no mistakes in stamping!), I just made smaller hearts! Those smaller hearts are cut out with dies in the Teacup dies.

Four Valentine Houses

Here are four of my houses all lined up! Something different to do with our paper and supplies! Use a house for a Valentine decoration in your house or on your tiered tray. You can probably find something similar at the store. Later, you could decorate one for Easter or another holiday! The important thing is to have fun making something different!

SHOP STAMPIN’ UP! ONLINE!

Don’t Miss the February Paper Pumpkin Kit!

Paper Pumpkin Jan 2023 Kit Sq Ad 1

ONLY A FEW DAYS LEFT TO SIGN UP!

Brighten someone’s day with the new Sunshine & Smiles Paper Pumpkin Kit! Subscribe by February 10th to get this special, brand new kit with some exclusive crafting benefits!

Each kit includes nine cards, three each of three designs, with peek-through windows on the card fronts! The bright colors and furry friends are the perfect way to make someone’s day!

This kit is unique for its suite coordination! It coordinates perfectly with the Rain or Shine Suite Collection (160556) from the January–April 2023 Spring Mini Catalog. It’s the perfect time to get some extra product and get creative with your crafts!

ABOUT THE KIT

Name: Sunshine & Smiles

This kit includes:

  • Everything you need to create 9 radiant cards—3 each of 3 designs—and 9 coordinating envelopes.
  • A sweet springtime photopolymer stamp set.
  • A Mango Melody Stampin’ Spot
  • A fun peek-through window scene on each card!
  • Cute precut critters and labels, fun raindrop embellishments, and more! 

Finished card size: 5-1/2″ x 4-1/4″ (14 x 10.8 cm)

Coordinating Stampin’ Up! colors: Balmy Blue, Cajun Craze, Coastal Cabana, Daffodil Delight, Flirty Flamingo, Mango Melody, Old Olive, Shaded Spruce

The two little die add-ons originally offered unfortunately are no longer available.

Click HERE to sign up for the monthly Paper Pumpkin Kit under my name by February 10th! Don’t delay!

If you want to put a Prepaid Paper Pumpkin subscription Kit on your Stampin’ Up! order to perhaps earn rewards or for Sale-A-Bration, here is a chart explaining Prepaid Kits.

Paper Pumpkin Kit February 2023

Be sure to order and set up your account and put in your code they will email you by February 10 to receive this February Kit. Later, you will receive the next month’s kit.

Let me know if you have any questions! If you already are on a monthly subscription and you want to take advantage of the Prepaid option you can do that! Just put in the code and after you use up your Prepaid subscription, your account will revert to your monthly subscription automatically.

JOIN PAPER PUMPKIN HERE by February 10, 2023!

SHOP PREPAID PAPER PUMPKIN SUBSCRIPTIONS HERE!

Layered Stripes Wonderful Card

Layered Stripes Wonderful Card

Like my card from yesterday, I will ask if this Layered Stripes Wonderful Card is a Valentine or just a “regular” card. What do you think? I think it could be either one! It’s Real Red so it certainly could be for Valentine’s Day! The greeting could be for Valentine’s Day OR just a nice greeting to send to someone any day!

This card is stamped with the large background stamp in the Spring Mini Catalog called Layered Stripes. You’ll find it on page 28. I forget what compelled me to buy this stamp because I think I would normally skip over it. And now I finally got around to playing with it! I used my Stamparatus to stamp it to get a solid image. If I needed to stamp it more than once, I could do that since the Stamparatus holds it in exactly the same place. The stamp is actually larger than a layer you would use on a card. You could have the background stamp stamp-side up, apply ink, and then lay the piece you want stamped on top of it carefully. Or you can stamp the image on a larger piece of paper and then trim it down to the size you want it.

My card base is Real Red and I added a layer of Basic White to help the stamped stripes stand out a little bit more against the white instead of the red card base. The greeting is from the Celebrating You Stamp Set and then diecut with one of the Stitched Rectangle Dies. I also cut out the next larger rectangle in Real Red so have a layer. I still had to play around with it on the card to see how the greeting was going to look the best because obviously the background of the card is pretty bold.

Finally I settled on using the Real Red layer behind the greeting but I adhered it over a piece of White 3/4″ Frayed Ribbon. (You can choose this ribbon (2 spools!) FREE during Sale-A-Bration with a $50 purchase of Stampin’ Up! products.) The greeting is popped up on Stampin’ Dimensionals. I also added a small bow of Real Red Ribbon in the Real Red & Burlap Ribbon Combo Pack. And for a little sparkle, I added three small Iridescent Rhinestone Jewels. I love these things! They go with just about anything and always add a nice touch to your project.

I think there are other fun techniques to use on a stamp like this Layered Stripes background stamp, like applying different colors to the stripes for one. It will be fun to experiment with I’m sure!

Remember, there were some extra products added to the list of Sale-A-Bration products to choose from with $50 or more purchases and a couple special ones with a $100 purchase instead of two $50 Level products. Check out the flyer below! To see ALL the Sale-A-Bration choices, click HERE to see them in the Online Store. Remember Sale-A-Bration ends on February 28, 2023.

New SAB Products Feb 2023

Country Floral Lane Heart Punch Card

Country Floral Lane Heart Punch Card

Is this Country Floral Lane Heart Punch Card a Valentine or an all-occasion card? I think it could be either one! Hearts aren’t just for Valentine’s Day so this could be a “Thinking of You” card…but it could be a Valentine! So make it whatever you like! Of course, you can change the greeting for your specific occasion!

I chose a Mossy Meadow card base since that is one of the coordinating colors of the designer paper. Over that, I added a layer of Basic White cardstock to set off the designer paper a little better.

The paper is the Country Floral Lane Designer Series Paper in the Spring Mini. The papers aren’t strictly for Valentine’s Day so you can use them later in the year, too! For this card, I used the pink floral pattern with a dark green background on the top half of the card and the pink little hearts paper for the bottom portion. These two patterns are actually the two sides of the same sheet of paper! The top portion measures 3 3/4″ x about 3 3/8″. The pink hearts paper is 3 3/4″ x 1 3/4″. The pink paper overlaps the top portion just a tiny bit. Be sure to wrap the ribbon around to the back at the seam to cover the two papers meeting before you glue it down to the Basic White layer. The ribbon is the Petal Pink 3/8″ Soft Polyester Ribbon which is beautiful and really soft.

For the greeting, I found this one in the Celebrating You Stamp Set. It is stamped in Mossy Meadow ink on Basic White. Then punched out with the plain heart in the Heart Punch Pack with a Petal pink scalloped layer with the scalloped heart. These two punches come together in the Stampin’ Up! Annual Catalog in the Heart Punch Pack. If you missed out on the Country Bouquet Punch (it is due back in April!) these heart punches will be fun to use instead.

The heart is popped up on Stampin’ Dimensionals and I added a small Iridescent Rhinestone Basic Jewel on the point of the heart. I think it is the perfect finishing touch!

SHOP STAMPIN’ UP! ONLINE HERE!

Country Floral Lane Valentine Candy Bars

Country Floral Lane Valentine Candy Bars

These Country Floral Lane Valentine Candy Bars are a very old project I have been making all of my stamping years! It is so easy and so fun! You can use any size of candy bars and decorate for any occasion, as simple or as fancy as you like!

I got these “regulation size” chocolate bars in a 6-pack at the grocery store. You could use the very small snack-size bars or you could use the giant-size candy bars. The brand, size, and type doesn’t matter either with a project like this. You only need to be able to wrap some paper around the candy bar or even a bag of candy.

My measurements don’t really matter to you because it all depends on the size of YOUR candy bars. But if you want a starting measurement, for my candy bars I wrapped around a 5 1/2″ x 6″ piece of cardstock, then a piece of designer paper, about 4 1/4″ x 6″ on one and 3 1/2″ x 6″ on the other. Six inches provides a fairly wide overlap for the back so you could make that a little shorter if you needed to save paper.

On the pink candy bar, I first stamped some flowers in the Country Bouquet Stamp Set using Versamark ink on the Petal Pink cardstock just for a little interest on the top and bottom. Then I wrapped around a piece of the Country Floral Lane Designer Paper. I suggest just lightly wrapping it around and not scoring it according to any measurements. Each candy bar and wrapper may be different, there is some thickness to it, and you don’t want the wrap to be too tight that you can’t pull out the candy bar or too loose. After I wrapped the cardstock around the candy bar, I held it in place as tightly as I wanted it and actually ran my Bone Folder along the sides which gave a pretty nice crease.

To decorate the pink candy bar, I used the Country Bouquet Punch to punch out the two hearts and leaves directly from the Country Lane Floral Designer Paper. As I write this, this punch is not available and will not be until April. If you want to use that design on the paper, just cut out the hearts and leaves by hand. I used the Real Red & Burlap Ribbon Combo Pack to wrap around the length of the candy bar with the Burlap Ribbon, then tied at the top with the Real Red Ribbon. This gives the recipient a “handle” to pull out the candy bar.

The Sweet Sorbet candy bar is wrapped with Sweet Sorbet cardstock and then a layer of the Country Gingham 6″ x 6″ Designer Series Paper. This paper is cute and so versatile to use on many projects. At this moment it says, “Low Inventory” so if you want it, order it right away!

To decorate this candy bar, I stamped three hearts with the Country Bouquet Stamp Set and punched out with the Country Bouquet Punch, Again, if you don’t have it, just cut out the hearts by hand. I also added two greetings from the same stamp set plus the little hearts stamped inside one of the hearts. That center heart is popped up on Stampin’ Dimensionals. I used the Black & White Gingham Ribbon to wrap around and pull out the candy bar.

As I said, this is a fun project! Even children can do it! If you want to see the small, Snack Size candy bars decorated, here is a Halloween example.

If you need any supplies for any projects, remember Sale-A-Bration is still going on during February and just the other day Stampin’ Up! added more choices of products that you can earn with a $50 or more purchase. Check out all the choices HERE.

SHOP STAMPIN’ UP! ONLINE HERE!