
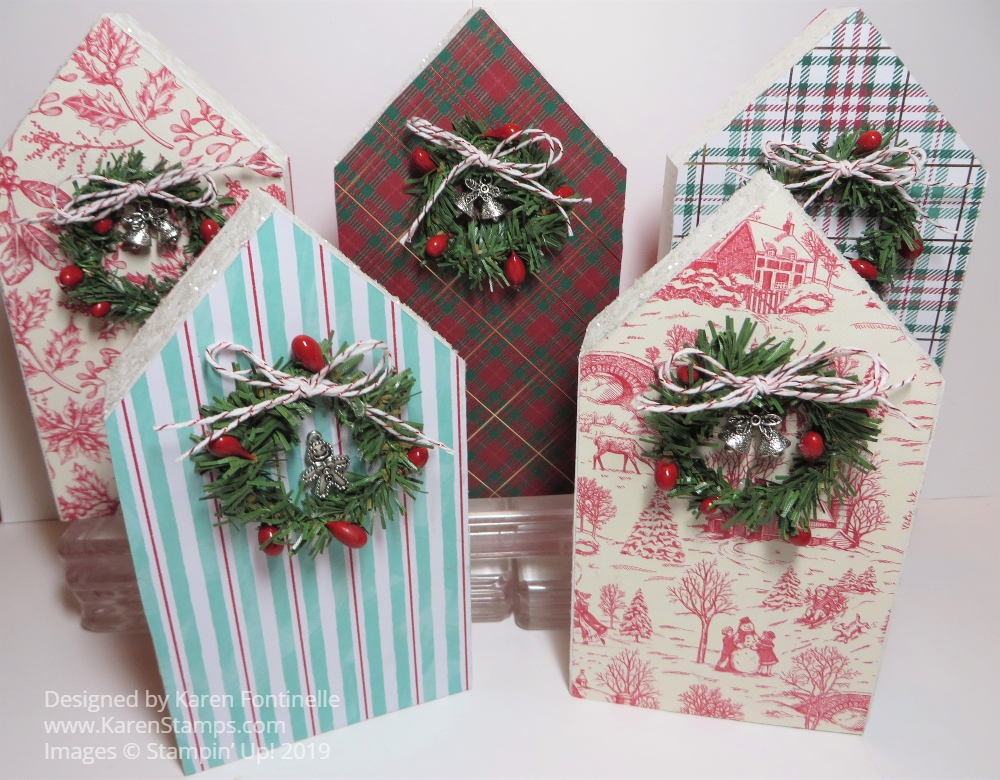
Little houses seem to be trendy this Christmas from what I have seen in the stores and on social media. Mostly the houses are wooden blocks and then painted with one embellishment on the front like a wreath or a heart or something. So here are my Little Wooden Decorated House Blocks that I made one evening and, if I do say so myself, I think they turned out pretty well! At least everything is still stuck on so that is good!
When I was at Hobby Lobby I came across these wooden house blocks although they were painted (printed?) on the front with a word like “Joy” and a painted wreath. I should have taken a “before” photo! When I saw them, I thought why not cover the front with designer paper and then add a wreath or something.
I didn’t know “how” I was supposed to do this project so I started with ModPodge, but I think mine was so old and stinky when I came back to the block the paper was all discolored. I was able to rip it off and wiped off the block and started over. I sanded the fronts of the blocks just a little bit and then just used our Multipurpose Liquid Glue to adhere the paper to the block.
I looked through my designer papers and chose what I thought would work. I used the Toile Tidings Designer Series Paper, the Wrapped in Plaid 6″ x 6″ Specialty Designer Series Paper, and the Let It Snow Specialty Designer Series Paper (sold out). I laid the side of the paper I wanted to show face down on the table. I spread out the glue all over the front of the block (I think a foam brush works well and then you can just throw it away) and then laid the block face down on the paper. Sometimes I lined it up with the edges at the bottom and one side and sometimes I didn’t. After the glue had dried, I used an exacto knife to trim away the excess paper. Just cut off the large excess with scissors first to make trimming easier. If you still have slight edges to trim off, try a sanding block or very fine sandpaper or a nail file to sand the edges. You can even do more sanding for that distressed look along the edges.
You can either buy some tiny wreaths at the craft store or get some greenery that you can twist into a wreath. I also bought a little bag of red berries and twisted those around the greenery. Once I had the wreath made, I adhered each one to a house with hot glue. Then I used some retired twine with a sparkly red thread in it to tie a bow and adhered that with the Multipurpose Liquid Glue. You have to hold it on for a second or you could use hot glue.
On one house I put the bottom blob of hot glue in the wrong place for the bottom of the wreath so that it showed through the center of the wreath. Then I remembered I had these little Christmas trinkets from Stampin’ Up! from a year or two ago, so I held the hot glue gun on the blog of excess glue to soften it and stuck on the gingerbread man! “There are no mistakes in stamping!” It was so cute I added a trinket to each wreath!
I ended up adding just a bit of white acrylic paint on the house sides but you might not need to unless you have the raw wood. For the back, I ended up adding Real Red Cardstock just like I did the designer paper. I guess I could have just painted that area too.
Finally, the roof just begged for some snow, so I used my Shimmery Crystal Effects as the adhesive and sprinkled on some Ice Stampin’ Glitter (not available). I didn’t cover the roof fully but just did some swirls all around.
I think these will be cute for gifts and holiday decorations! You could probably even use some generic design of paper and then have different things to hang on the front of the house for different seasons or occasions so you can change them out.
Don’t forget to shop at the Stampin’ Up! Clearance Rack and Year-End Close-Out for some bargains!