Last week I made a couple of other decorated candy bars for Valentine’s Day and now today I have these Rain Or Shine Valentine Candy Bars to show you! It is so fun and so easy to make these little treats! Of course, they don’t always have to be for Valentine’s Day. Wouldn’t these be cute for birthday party favors if you just changed the greeting?
These Valentine candy bars were decorated with two of the characters in the Rain Or Shine Suite in the Spring Mini Catalog. You can stamp these characters or you can cut them out of the Rain or Shine Specialty Designer Series Paper. Not only is this paper cute with the charming characters and umbrellas and raindrops, but parts of the images have a glossy coating on them making them a little bit shiny and adding some unique texture. You can cut out these images yourself or there are some dies that line up with the paper.
You can use almost any kind and size of a candy bar for this project. You will just have to modify your design accordingly. I used the regular size of chocolate bar and wrapped a piece of cardstock around it. I didn’t prescore the cardstock because the candy bar is not perfectly flat. I found it better just tightly to press the cardstock around the candy bar and when you have it how you want it, press the creases with a Bone Folder or at least your fingers on the edges of the candy bar to give it a good crease. If you want, you can score it on those lines, but it could still be off a little bit. It’s just as easy to do it by hand. Use a strong adhesive like Tear & Tape to hold the cardstock closed around the candy bar. Try not to get adhesive of any kind on the candy bar.
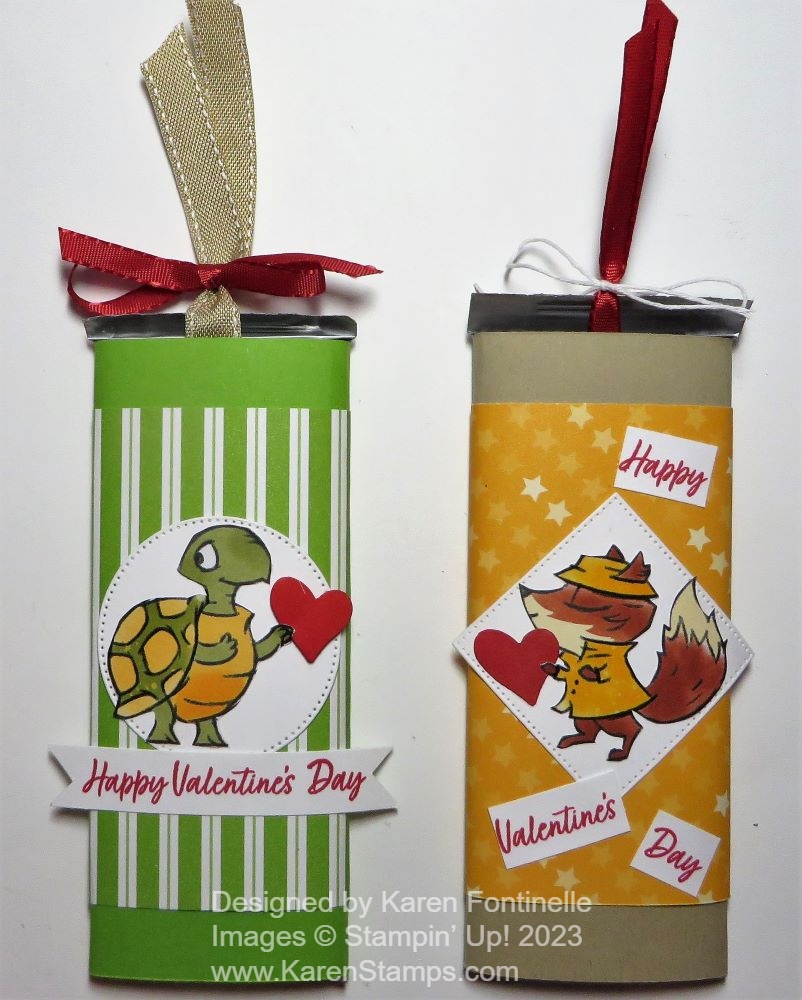
On the turtle candy bar I used Granny Apple Green cardstock to wrap around the candy bar and then a layer of green striped paper in the Dandy Designs Designer Series Paper. You will find this paper in the Sale-A-Bration 2023 brochure on page 14. It’s actually FREE with a $100 purchase. Remember, Sale-A-Bration comes to an end this month! And it’s the only one for the year. In this paper pack, you get 48 sheets, 4 each of 12 designs. It’s a LOT of paper and certainly the kinds of patterns lend themselves to almost any project, as well as being great for scrapbooking. The turtle is cut out of the Rain Or Shine Designer Paper, as I mentioned and layered on a stitched circle die in the Stylish Shapes Dies. This is a great set of dies that you can use all the time! The greeting is in the Country Bouquet Stamp Set and stamped on just a strip of Basic White with the ends flagged. I also punched a red heart with the Country Bouquet Punch for the turtle to hold.
The foxy candy bar uses Crumb Cake cardstock to wrap around the chocolate bar with another pattern from the Dandy Designs Paper, the Mango Melody with stars to cover the Crumb Cake cardstock. I cut off the umbrella the fox was holding on the designer paper because this isn’t a rainy day theme. Instead I gave him a red heart to hold just like the turtle has and layered him on a stitched square, also in the Stylish Shapes Dies. On this candy bar I did the greeting a little differently. After stamping it on a strip of Basic White cardstock, I cut the words apart and separated them. I think that is a fun look to do for the rare times I think of it!
As for the candy bars themselves, I used the Real Red & Burlap Ribbon Combo Pack to tie a ribbon around the length of the candy bar so the recipient can just pull it out of the wrapping around the bar. On the fox candy bar, I used the Real Red ribbon and tied it at the top with a piece of twine. For the turtle, I used the Burlap ribbon and tied it with the Real Red Ribbon to hold the ribbon in place.
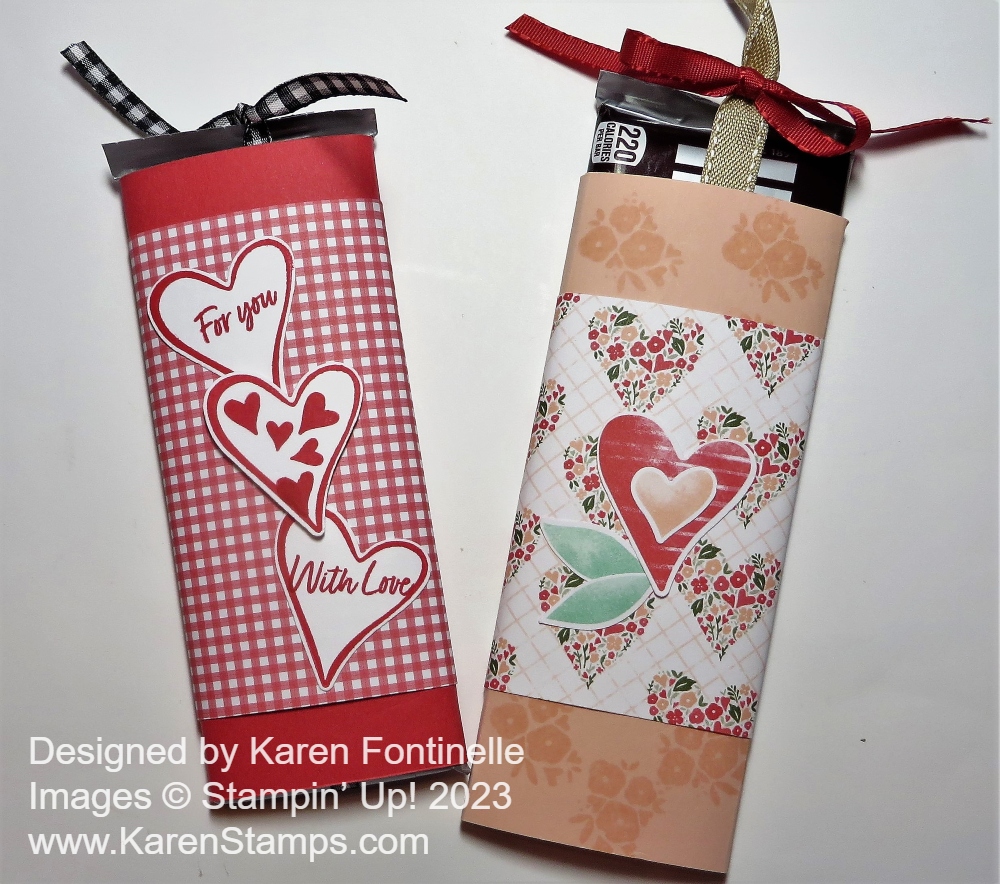
If you want to see the other Valentine candy bars I made, just click HERE. Those used the paper, stamps, and punch in the Country Floral Lane Suite. But it doesn’t matter which suite, it only matters if the candy is chocolate!