
These Country Floral Lane Valentine Candy Bars are a very old project I have been making all of my stamping years! It is so easy and so fun! You can use any size of candy bars and decorate for any occasion, as simple or as fancy as you like!
I got these “regulation size” chocolate bars in a 6-pack at the grocery store. You could use the very small snack-size bars or you could use the giant-size candy bars. The brand, size, and type doesn’t matter either with a project like this. You only need to be able to wrap some paper around the candy bar or even a bag of candy.
My measurements don’t really matter to you because it all depends on the size of YOUR candy bars. But if you want a starting measurement, for my candy bars I wrapped around a 5 1/2″ x 6″ piece of cardstock, then a piece of designer paper, about 4 1/4″ x 6″ on one and 3 1/2″ x 6″ on the other. Six inches provides a fairly wide overlap for the back so you could make that a little shorter if you needed to save paper.
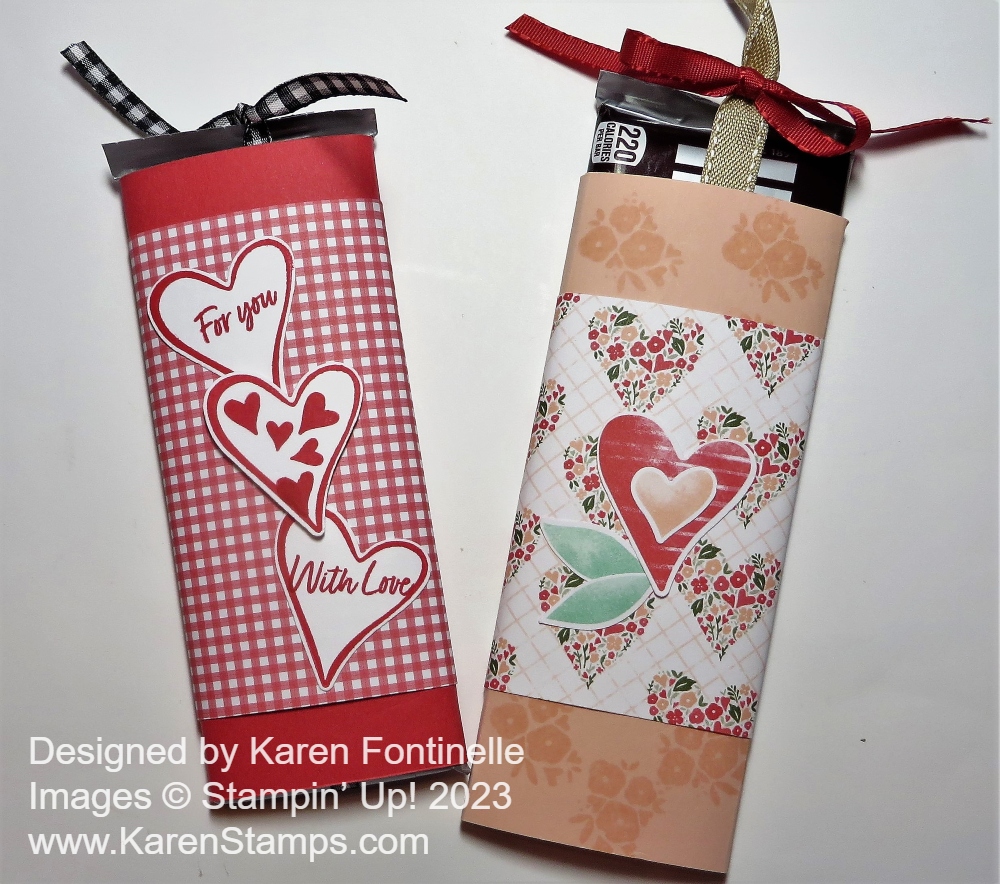
On the pink candy bar, I first stamped some flowers in the Country Bouquet Stamp Set using Versamark ink on the Petal Pink cardstock just for a little interest on the top and bottom. Then I wrapped around a piece of the Country Floral Lane Designer Paper. I suggest just lightly wrapping it around and not scoring it according to any measurements. Each candy bar and wrapper may be different, there is some thickness to it, and you don’t want the wrap to be too tight that you can’t pull out the candy bar or too loose. After I wrapped the cardstock around the candy bar, I held it in place as tightly as I wanted it and actually ran my Bone Folder along the sides which gave a pretty nice crease.
To decorate the pink candy bar, I used the Country Bouquet Punch to punch out the two hearts and leaves directly from the Country Lane Floral Designer Paper. As I write this, this punch is not available and will not be until April. If you want to use that design on the paper, just cut out the hearts and leaves by hand. I used the Real Red & Burlap Ribbon Combo Pack to wrap around the length of the candy bar with the Burlap Ribbon, then tied at the top with the Real Red Ribbon. This gives the recipient a “handle” to pull out the candy bar.
The Sweet Sorbet candy bar is wrapped with Sweet Sorbet cardstock and then a layer of the Country Gingham 6″ x 6″ Designer Series Paper. This paper is cute and so versatile to use on many projects. At this moment it says, “Low Inventory” so if you want it, order it right away!
To decorate this candy bar, I stamped three hearts with the Country Bouquet Stamp Set and punched out with the Country Bouquet Punch, Again, if you don’t have it, just cut out the hearts by hand. I also added two greetings from the same stamp set plus the little hearts stamped inside one of the hearts. That center heart is popped up on Stampin’ Dimensionals. I used the Black & White Gingham Ribbon to wrap around and pull out the candy bar.
As I said, this is a fun project! Even children can do it! If you want to see the small, Snack Size candy bars decorated, here is a Halloween example.
If you need any supplies for any projects, remember Sale-A-Bration is still going on during February and just the other day Stampin’ Up! added more choices of products that you can earn with a $50 or more purchase. Check out all the choices HERE.