Regency Park St. Patrick’s Day Card

Regency Park St. Patrick's Day Card

Happy St. Patrick’s Day!

Today is St. Patrick’s Day for those of you who celebrate! Instead of making an “official” St. Patrick’s Day card, I made this card with lots of green and even a touch of gold! And the greeting could be for someone you are giving the card to on St. Patrick’s Day!

This is about a five-minute card!! The card base is Shaded Spruce cardstock which matches the Regency Park 6″ x 6″ Designer Series Paper in the Spring Mini Catalog. All I had to do was make the card base, cut the designer paper 5 1/4″ x 4″, and glue it on with Stampin’ Seal. The greeting is stamped with a stamp in the Inspired Thoughts Stamp Set in Shaded Spruce ink on Basic White. Then it was diecut with a Deckled Rectangle Die.

For a little embellishment, I decided to use the new Gold & Silver 1/8″ Trim Combo Pack. It is one of the Online Exclusives products in the Stampin’ Up! Online Store. I just got it and I can say the gold is really bright and shiny!

So if I run into somebody today to whom I wanted to give a St. Patrick’s Day card to, I think this one would be somewhat appropriate! Otherwise, I can use it for a birthday or some other occasion!

Celebrate in your green today and enjoy your special day!

St. Patrick’s Day Shamrock Card With Hearts

St. Patrick's Day Shamrock Card With Hearts

If you are looking for a card for St. Patrick’s Day, which is tomorrow, this St. Patrick’s Day Shamrock Card With Hearts card may give you an idea. It certainly wasn’t my first idea, but after several failures of what I thought was going to be an easy idea, I came up with this and I like it a lot! In fact, I believe you could give it to anybody for any occasion where you wanted to wish them some luck!

The card base is Garden Green cardstock, and the front is stamped with the Hand-Drawn Dots background stamp. It’s the first time I’ve used it! It’s in the Spring Mini Catalog on page 28. I must have seen some cute idea that I had to have it for, but who knows now what that was! Anyway, it’s a good background stamp to have just for a little interest and pizzazz! You can make it as bold or as subtle as you like by using different colors or even stamping off for a very light image. I need to play with it more!

I cut the center layers smaller so the dotted background would still show a little bit. The designer paper I used is in the Hues of Happiness package in the Annual Catalog and is on the opposite side of one of the floral patterns. I cut it so that mostly the green area would show. This designer paper is cut at 3 1/4″ x 4 1/4″. Then I used a piece of Daffodil Delight cardstock for a layer under that to help it stand out. It is cut at 3 1/2″ x 4 1/2″.

The shamrock for St. Patrick’s Day is made of three hearts. I originally planned to just punch out three hearts out of Garden Green cardstock, but these look a lot more interesting. I used the Country Bouquet Stamp Set and Garden Green ink on Garden Green cardstock. I punched out the hearts with the Country Bouquet Punch. (This punch is due back in stock around April 17th.) The stem I just cut myself. The hearts are popped up on Stampin’ Dimensionals®.

For a little gold, I embossed the greeting with Gold Embossing Powder and the Heat Tool. The greeting is in the Country Bouquet Stamp Set and as I said, with a simple greeting like this, I think you can use this card on a day other than St. Patrick’s Day. If you want a stamp set that is “officially” for St. Pat’s, the Lucky Clover Stamp Set is perfect for you!

And for just a little more gold, I used my new package of the Gold Faceted Adhesive-Backed Sequins. You get little moon shapes, some large teardrop shapes, and two sizes of circle sequins. You’ll find these on page 43 in the Spring Mini Catalog.

Whether you are Irish or not, have fun making a little something for St. Patrick’s Day with some heart shamrocks!

SHOP STAMPIN’ UP! ONLINE!

Playing in the Rain Z-Fold Card

Playing in the Rain Z-Fold Card

Everything in the Rain Or Shine Suite in the Spring Mini Catalog is so cute that you can’t make just one card! I’ve used this stamp set, dies, and designer paper to make quite a few cards but it’s always fun to make another one, like this Playing in the Rain Z-Fold Card.

I decided to make a Z-Fold card with the cute bunny in the Playing in the Rain Stamp Set. I think Z-Fold cards look like an extra-special design but it’s really ridiculously simple! To make a Z-fold card, make a card base as you normally would. Then score the card front in half, at 2 1/8″, and fold the right front half of the card back on itself. When you look at the card standing up, from the top, it looks like a zigzag or a Z.

This card base is Balmy Blue cardstock. I used layers of the Rain Or Shine Specialty Designer Series Paper, the raindrop pattern for the front panel of the card, and also on the inside. The narrow front panel is 5 3/8″ x 2″. The inside is 5 3/8″ x 4 1/8″.

I diecut two of the scalloped rectangles, the same size, from the Scalloped Contours Dies, in Basic White cardstock. One rectangle is stamped with the bunny using Memento ink and colored in with Stampin’ Blends. For his fur, I used #500 and #600 of the Natural Tones with Pale Papaya in his ears. His jacket is Orchid Oasis. The puddle is colored in with Balmy Blue and I added a little Light Smoky Slate just scribbled in to ground the bunny and the puddle. The raindrops are stamped in Balmy Blue ink. I covered the scalloped edges with a piece of scrap paper so I wouldn’t get raindrops on those edges and I just tried not to get raindrops on the bunny. For a little embellishment, I cut out some flowers from the designer paper and adhered them near the bunny.

When you adhere the front panel onto the Z-fold card, be sure you only put glue on half of the panel so it only adheres to that folded panel, not the inside of the card!

With a Z-Fold card you have to be careful about what you put on the inside. You would like it to not show from the front. So if you write a message all the way across the inside, it will show from the front of the card. I cut another scalloped rectangle die that was the same size as the one on the front (or you could do something smaller) and I stamped the greeting on that plus added some designer paper flowers to the bottom. To adhere it to the inside, I lined it up with the front of the greeting against the back of the front rectangle which is already adhered to the front of the card. Keep that in place while you apply adhesive (I like the Liquid Glue so you have that “wiggle room” in case you need to move it a tiny bit to get it placed perfectly.) and then fold over the back of the card to adhere to the greeting which will then be on the inside of the card and placed perfectly behind the front panel so that you don’t see what is in the inside until you open the card.

Playing in the Rain Z-Fold Card Inside

Writing this out is a lot more complicated than actually making the card! If you don’t put a panel on the inside of the card but you just stamp a greeting, just lightly mark with a pencil where the front panel hits the inside, and then you will know the area where you can safely stamp or write your greeting or message.

Here is another good example of what a z-fold card that I made looks like.

Try your hand at a Z-fold card like my Playing in the Rain Z-Fold Card and it will look extra special for your recipient. With different designer paper and a bunny on the front, this would make a really cute Easter card!

SHOP STAMPIN’ UP! ONLINE HERE!

April Paper Pumpkin Kit: All The Little Things

Paper Pumpkin April 2023 Banner1

Now, this looks like a fascinating Paper Pumpkin Kit to me! I already can’t wait to receive it in mid-April! Paper Pumpkin is a papercrafting kit that comes in your mailbox once a month, usually with all the supplies you need to make specially designed cards, but the project could be anything! I consider it a treat I give myself! No designing my own project (unless I want to!) and no worry if I have the exact supplies! They are all in the box! With your first kit, you receive an acrylic block on which to mount the stamps. An exclusive stamp set, an ink spot, adhesive, and all the materials you need are in the box! You will love the presentation! As I said, it’s a gift you give yourself!

The April Kit is called All the Little Things and if you are not already a subscriber, you can sign up HERE right now! The deadline for the April Kit is April 10th but do it now so you don’t forget!

This kit includes nine cards, three each of three designs, with elegant designs and bright colors. The iridescent foil is the shining detail to bring your crafts together. You can make a card for anyone and for any occasion!

And don’t wait, because anyone who subscribes to this month’s kit will get a FREE box organizer! This organizer fits perfectly inside your Paper Pumpkin box and is great for keeping your supplies from past kits organized, so you know right where everything is!

Paper Pumpkin April 2023 All the Little Things Box Organizer
© Stampin’ Up! 2023

The April Paper Pumpkin kit focuses on optimism and renewal. The sentiments in the kit were designed to focus on just that! The included photopolymer stamp set has four sentiments that celebrate the simple things and encourage growth and healing. It’s a great set to have on hand that can be used for multiple occasions.

The All the Little Things Paper Pumpkin kit has a unique theme that focuses on beautiful cherry blossoms! Cherry blossoms represent positivity, renewal, and a fresh start. The die-cut pieces in this kit are detailed to reflect these exact principles. They are filled with bright colored pinks and dotted with iridescent foil. It’s a detail that won’t go unnoticed!

This kit includes:

  • 9 cards, 3 each of 3 designs, and 9 coordinating envelopes.
  • 1 photopolymer stamp set with celebratory sentiments.
  • 1 Shaded Spruce Stampin’ Spot.
  • Precut cherry blossom paper pieces with iridescent foil.
  • Unique embellishments and twine.
  • Adhesives to complete the projects.
  • Final card size: 5-1/2” x 4-1/4” (14 x 10.8 cm).
  • Coordinating Stampin’ Up! colors: Balmy Blue, Basic Black, Calypso Coral, Granny Apple Green, Petal Pink, Poppy Parade, Shaded Spruce.
  • FREE box organizer

Sign up for Paper Pumpkin TODAY and look forward to the April Kit in your mailbox!

OR add a Prepaid Paper Pumpkin Kit on your Stampin’ Up! Online Order!

JOIN PAPER PUMPKIN AND GET THE APRIL KIT!

Punch Art Bunny Easter Card

Punch Art Bunny Easter Card

If you don’t have the Easter Bunny Punch, there are other ways to make a bunny for an Easter card or treat! This card shows you one way to make a “Punch Art” Bunny with a couple of other punches.

For the face of the bunny, use the one heart in the Heart Punch Pack. I used the plain edge one, but if you want your bunny to look a little furry, the Scallop edge one is good for that! I punched the heart out of Basic White cardstock and turned it upside down for the bunny’s face. If you don’t have a heart punch of a decent size, maybe you have dies. And if you don’t have anything, we all know how to cut out a heart by folding a paper in half!

For the bunny ears, I used the wings on the Ladybug Punch. I glued them behind the tip of the upside-down heart after coloring the inside of the ears pink. I used the Light Petal Pink Stampin’ Blends Combo marker but mine needs to be replaced and was too light. So I used the Dark Petal Pink Blend and that’s how my bunny’s pink cheeks and ears got a little dark! If you don’t have the Ladybug Punch, you can probably find some leaf shapes on another punch or certainly a die that you can use.

The bunny’s nose is punched with a retired 1/2″ Circle Punch but if you don’t have that you may have a circle punch or die that you can use instead. I used a Black Stampin’ Write Marker to draw the bunny’s whiskers and eyes. The little bow is tied with the Pale Papaya Open Weave Ribbon and adhered with a Mini Glue Dot.

To make the card, I used a Soft Sea Foam card base with a layer of Basic White to help the designer paper to stand out better. The designer paper is in the Hello, Irresistible 6″ x 6″ Designer Series Paper package. The bottom portion is the other side of the leafy top portion. Over the seam, I adhered a piece of ribbon, it’s the retired Soft Sea Foam Ribbon.

The greeting is stamped with Soft Sea Foam ink from the Easter Bunny Stamp Set and then die cut with one of the Deckled Rectangles Dies. The bunny and the greeting are popped up with Stampin’ Dimensionals. For a little sparkle, I added three small Loose Frosted Dots in pink with tiny dots of glue.

Some of the products I used are retired or not available at the moment, but all that matters is that you see how to make a bunny using whatever punches or dies you have for your Easter projects!

Petal Pink Easter Bunny Card and Easter Tag

Petal Pink Easter Bunny Card and Easter Tag

I got the idea to make an Easter tag and after I made the tag with no space for Easter eggs, I got the idea to make this Easter card! It turned out that everything was in Petal Pink so they are both monochromatic.

I know the Easter Bunny Punch is currently unavailable, but maybe you already have it or have another bunny punch or die. Hopefully, it will be back in stock, but it will be a while. Or stamp a bunny and cut it out as a pattern.

To make the tag, I needed a large area for the tag as the bunny punch is rather large. I ended up using the large plain Layering Circle Die to cut out the Petal Pink card stock and then punched the Easter Bunny out of it. I wanted to use the negative of the bunny with a piece of designer paper behind it. Since the bunny was pretty large, I just die-cut the next smaller plain circle out of the polka dot pattern in the Regency Park Designer Series Paper to place behind the bunny. I popped up the bunny on Stampin’ Dimensionals, mostly the Black Mini Dimensionals, and then adhered the bunny to the designer paper.

For the backing of the tag, I cut out the largest scalloped circle die in the Layering Circles Dies on which to layer the punched-out bunny in Basic White so the little scalloped edge would just barely show behind the bunny. Then to cover the plain white back, I die-cut another scalloped circle the same size out of the Petal Pink wicker pattern and glued that on.

For a greeting, I stamped “Happy Easter” from the Easter Bunny Stamp Set in Petal Pink ink, cut apart the words, and then even cut around the words for a different look and to have them fit on the tag! For some bling, I added some Iridescent Rhinestone Basic Jewels. I punched a small hole in the top so I could put some ribbon through and tie it with a piece of Linen Thread. This would make a cute tag for a baby gift (without the Easter greeting of course!)

I had wanted to add some of the stamped Easter eggs from the stamp set, but there was no space on the tag. At that point, I got the idea to make a card with a background of the stamped eggs!

The card base is Basic White. I decided to put a stamped center panel across the card. That Basic White piece is 3″ x 5 1/2″ I stamped the Easter eggs randomly on that piece to fill up the space. Then I pulled out a 2″ wide strip of the Regency Park polka dot paper and cut it 5 1/2″ and in half at 1″.

I adhered the two designer paper strips directly to the card base top and bottom and then overlaid the stamped center panel. I punched two bunnies with the Easter Bunny Punch and popped them up with Stampin’ Dimensionals. I added a tiny bow for each bunny and stamped the greeting. It is diecut with a narrow Stitched Rectangle Die. I was hoping the words would fit! The greeting is also popped up on Dimensionals.

That’s all there is to that card so it is actually pretty simple to make. It’s easy to make a monochromatic card with no coloring or choosing multiple colors.

SHOP STAMPIN’ UP! ONLINE HERE!

Regency Park Blue Floral Hooray Card

I thought one time I had seen a card I really liked using this blue floral paper and without even trying to find that card or a similar one again, this Regency Park Blue Floral Hooray Card is what I came up with. I have to say I’m really pleased with how this card turned out! It’s the paper and it’s the tag!

For this card, I used the Regency Park 6″ x 6″ Designer Series Paper which you will find in the Stampin’ Up! Spring Mini Catalog on page 31. I chose this paper with Night of Navy and Balmy Blue colors. One side is the floral side and the other side has stripes so I decided to use both!

The card base is Night of Navy with a layer of Balmy Blue. I think other color combinations would be pretty too and I may try out some of those! The floral paper is cut at 3 1/2″ x 3 3/4″ and the striped portion is 2″ x 3 3/4″. This allows for some overlap of the papers. Often I want to put a ribbon over the “seam” to cover it up and sometimes I do that with just the two papers adhered together. That works, but it is a little flimsy and difficult to handle. On this card, I cut a piece of Basic White Cardstock the same size that I wanted the designer paper layer to be, 3 3/4″ x 5″, and adhered the designer papers to that first, completely covering the white cardstock. I added a narrow strip of Balmy Blue to cover the junction of the two papers and also added a bit of White 1/4″ Crinkled Seam Binding Ribbon over the strip of Balmy Blue. Then I adhered this whole piece to the layer of Balmy Blue on the card.

For the greeting, I chose one from the Sentimental Park Stamp Set in the same Regency Park Suite. I stamped the greeting in Night of Navy ink on Basic White. Then I switched to the Something Fancy Dies and diecut the greeting. These dies are great shapes of tags and labels and versatile with the extra little dies that come with them. I diecut the greeting with the tag die, then used the extra little die with the flower and leaves to diecut the top of the tag and make it really pretty! You can diecut both at the same time or separately. After trying out the tag on my card, I thought it needed a layer and luckily this die set has layering dies! I cut another larger tag out of Balmy blue to layer behind the greeting.

I might have tied a bow at the top of the tag, but with the pretty diecut at the top, I didn’t want to cover that up. So instead, for a little extra embellishment, I used my Paper Snips to cut out some little flowers from the designer paper. I really like how that turned out! I could have also added some rhinestones or other sparkly embellishments.

Since the card base is a dark color, on the inside I added a layer of Basic White and then added a strip of the floral paper to the bottom to decorate it a little bit. That way I can stamp a greeting or write a note on the white cardstock inside.

Check out the whole Regency Park Suite Collection in the Spring Mini. If the whole Suite is not available, then just pick and choose which products you would like. If just one item is not available, the whole Suite is not available, but you can still purchase products individually that are available. Here is another card I made with similarly designed paper but in Sweet Sorbet. Try your hand at a card like my Regency Park Blue Floral Hooray Card and maybe use different color combinations for fun!

SHOP STAMPIN’ UP! ONLINE HERE!

Colorful Kaleidoscope Kit

Colorful Kaleidoscope Kit

If you haven’t heard, there is a new Kit in the Stampin’ Up! Kits Collection called the Colorful Kaleidoscope Kit. The Colorful Kaleidoscope Kit is filled with geometric shapes and unique kaleidoscopic patterns. The diecut peek-through laser cuts allow the very colorful layers to show through. The cards can be made to be for lots of occasions using the included stamp set. Use the materials following the directions in the kit or use your own creative ideas on some of them if you wish.

Colorful Kaleidoscope Kit stamp set

This kit includes:

  • 9 full-size cards, 3 each of 3 designs, measuring 4-1/4″ x 5-1/2″ (10.8 x 14 cm), and 9 coordinating envelopes.
  • One photopolymer stamp set with all-occasion sentiments that go beyond the basics.
  • One Gray Granite Stampin’ Spot.
  • 9 peek-through laser cuts that can easily be layered to create a kaleidoscopic effect.
  • Precut die cuts that are lined with gold foil, perfect for all your stamped sentiments.
  • Mini Stampin’ Dimensionals, Tear & Tape Adhesive, and Foam Adhesive Strips.
  • Gold, pearlized embellishments.
  • The coordinating colors are Bermuda Bay, Calypso Coral, Gray Granite, Night of Navy, and Petal Pink.
  • Each project takes less than 60 minutes to complete.
Colorful Kaleidoscope Kit Contents

Check out this kit in the Kits Collection and others, then place it on your Stampin’ Up! order! Kits are available while supplies last. Just check the Online Store under Kits Collection.

SHOP STAMPIN’ UP! KITS COLLECTION!

Easter Bunny In the Carrot Patch Card

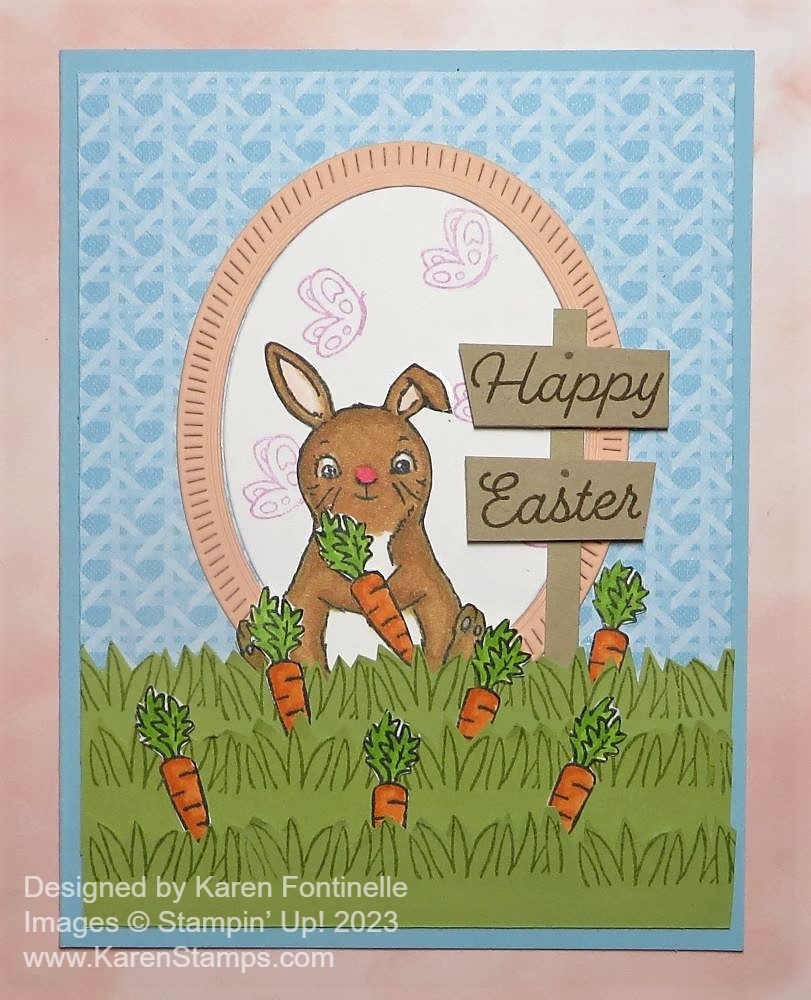
Easter will be here before we know it so it’s time to get going on all things Easter and Spring! This Easter Bunny in the Carrot Patch Card is mostly a copy of a sample in the Spring Mini Catalog on page 52. Sometimes when I’m not quite sure where I want to start with a new stamp set, I look at the samples in the Stampin’ Up! catalog and see if I want to copy something or get some inspiration for my own ideas. My card is mostly the same with a few changes.

Now I will warn you, as cute as this card is, it took some work! It’s like buying the whole Suite of Christmas products to make a spectacular card and then realizing you can’t make 50 of those! Not that I had the intention of making multiples of this card design necessarily, I’m just saying there was a lot of detail work. Which is okay lots of times when you really want to just enjoy a good stamping project!

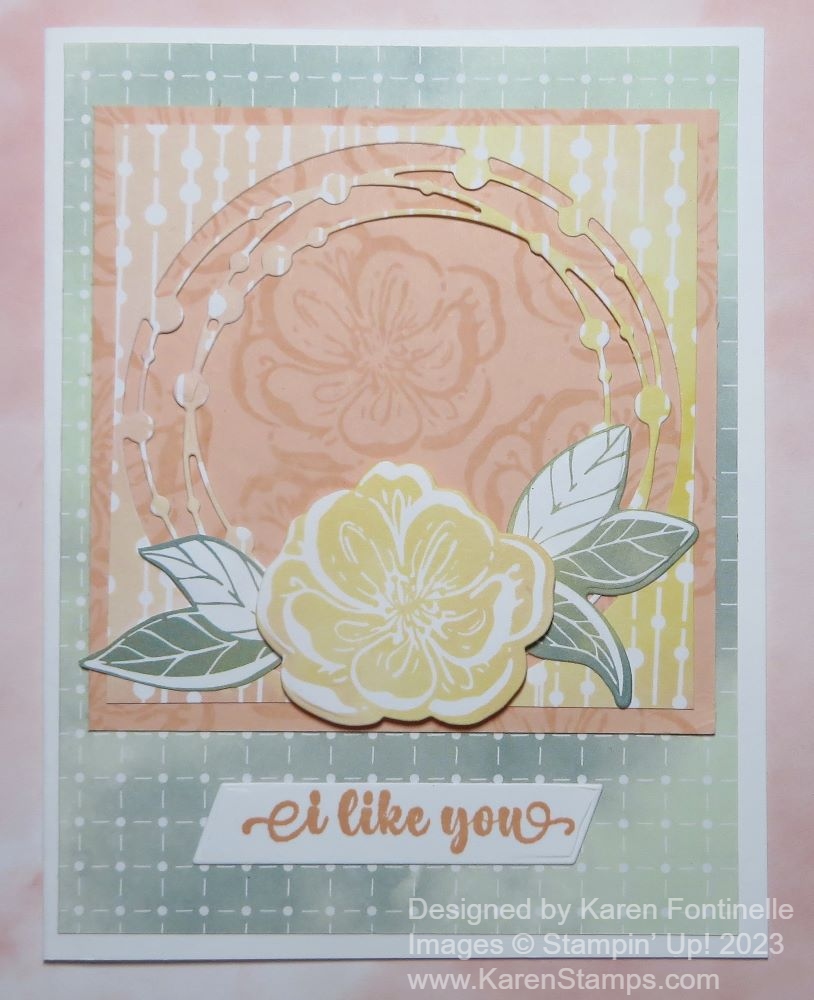
For my card, I changed the colors a little bit. I used Balmy Blue for the card base. Then I found this pattern that looks like wicker in the Regency Park Designer Series Paper, on “the other side” as I like to say, of the floral pattern. I thought a wicker design would go well with an Easter bunny since wicker Easter baskets are what we use!

The Petal Pink frame is diecut with the oval frame in the Framed Florets Dies. (These should be back in stock around March 27.) I had also cut a Basic White oval frame in case I wanted to use white instead but I chose the pink frame and used the white as the insert in the frame. I stamped several butterflies for the background in Fresh Freesia ink.

The Easter Bunny Stamp Set is really a cute one to have for Easter or spring or of course babies! Bunnies are always a cute theme for baby cards and baby projects! The bunny is stamped in Memento ink and colored in with Stampin’ Blends. Don’t forget about the Natural Tones Blends to use for animals. I used #500 for most of the bunny but then added a darker brown (I forget which one!) for the shading. The ears of course have some Petal Pink in them and the nose is a bright Polished Pink! Maybe a little too bright but that’s okay! The designer paper, the frame, the insert, and the bunny are all just glued down flat on the card.

For the grass, I cut strips of Pear Pizzazz Cardstock and stamped them with the grass stamp in the Easter Bunny Stamp Set. There are no dies to cut out the strips of grass but I just zigzagged my scissors to cut imperfectly up and down around the tops of the blades of grass. When I glued these down I only put glue along the bottom edge so the top edge would be open. I needed to stick the carrots down into the grass. I first stamped five carrots and colored them with Pumpkin Pie and Granny Apple Green Blends. I cut these out by hand and glued them down into the grass. But I didn’t like the way I placed them so I made two more carrots and added those. Now I like them! The bunny even gets to hold one in his paws!

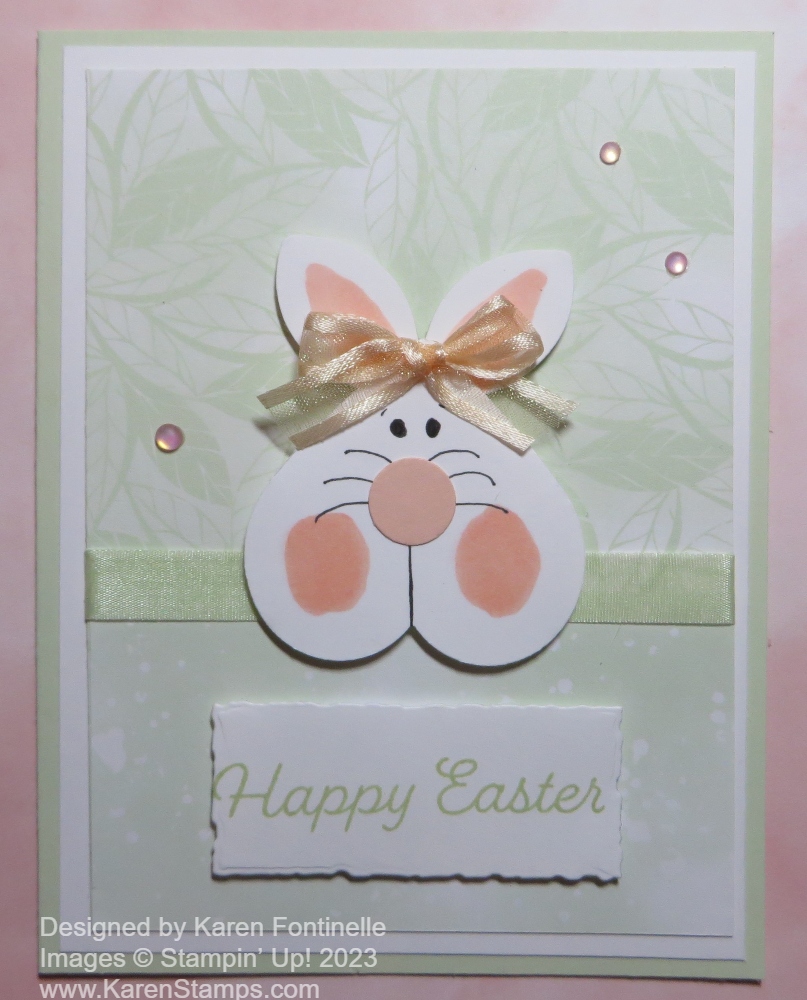
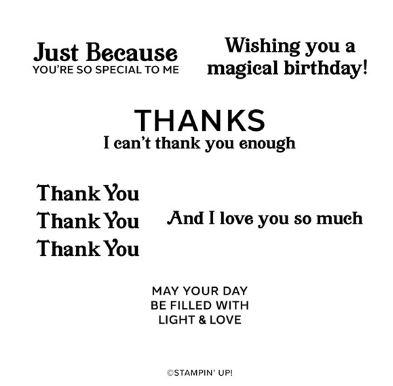
For the greeting, I stamped “Happy Easter” in Soft Suede ink on a little strip of Crumb Cake Cardstock. Since it is rather large, I cut it apart sort of like the greeting on the card in the catalog. But when I looked closely at the catalog sample, I saw that there was a post behind those words! It really is a little wooden sign in the grass! So I cut a very narrow piece of Crumb Cake, glued that down, and then popped up the words on Stampin’ Dimensionals. I even added a dot of Soft Suede marker on the top of each word to look like those boards were nailed onto the post!

As I said, this project did have a lot of steps in it, and if you hate to cut out anything, you might not enjoy this project! But the bunny and the carrots are so cute, I don’t know how you could resist!

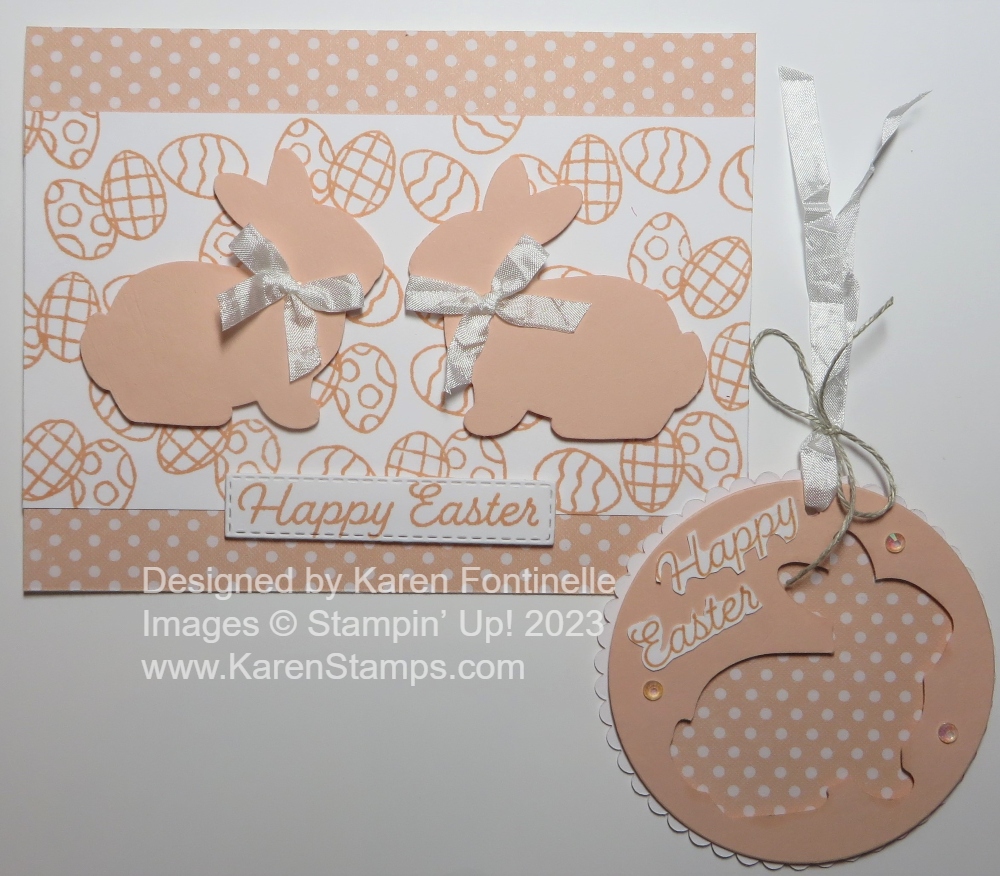
Unfortunately, the Easter Bunny Punch is backordered until May which is sad! However, if you stamp the one bunny that fits the punch, it will be easy enough to cut out by hand.

Start thinking about bunnies, eggs, baskets, and flowers, and let’s get ready for Easter!

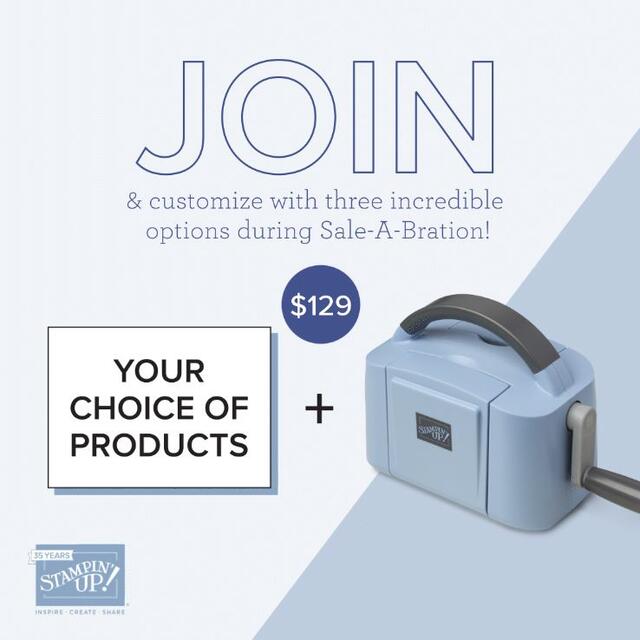
Shop Stampin’ Up! Online HERE!

Sign Up For the March Paper Pumpkin Kit!

It’s Paper Pumpkin’s 10-year anniversary and we want to celebrate how much we’ve grown! This month’s kit is all about happy greetings, organic and botanical designs digitally painted by our in-house artists, along with all-occasion sentiments to celebrate the happy moments in life and recognize the people around you who help you grow!

And as part of our anniversary celebration, the March Paper Pumpkin Kit includes a FREE GIFT featuring a plant and pot builder to make all your projects plant-astic!

It’s also the occasion to root for the people in your life who help you
grow! Let them know you recognize their support at different chapters of your
life by sending them heartfelt cards with happy, fresh, and colorful designs!

ABOUT THE KIT

Name: Ten Years of Growth

This kit includes:

  • All the supplies you need to create 9 cards: 3 each of 3 designs; and coordinating envelopes.
  • An all-occasion stamp set to recognize the people in your life who help you grow with greetings and beautiful botanical images.
  • 1 Polished Pink Classic Stampin’ Spot.
  • Paper pieces and embellishments with digitally-painted designs and images.
  • Mini Stampin’ Dimensionals.
  • 1 FREE additional stamp set, which includes a plant and pot builder to make plant-astic projects!

Completed card size: 5-1/2″ x 4-1/4″

Coordinating Stampin’ Up! colors: Shaded Spruce, Garden Green, Coastal Cabana, Orchid Oasis, Fresh Freesia, Polished Pink, Crumb Cake

Sign Up Deadline: Friday, March 10, 2023!

JOIN PAPER PUMPKIN And Don’t Miss Out!

This is my personal link so if you use it, you don’t have to find my name!

Hello, Irresistible I Like You Card

Hello, Irresistible I Like You Card

Here’s another card using some of the new “Online Exclusives” products Stampin’ Up! introduced on March 1st. I’m happy with the way my Hello, Irresistible I Like You Card turned out! The paper, stamps, and dies are all part of a very nice Suite, the Hello, Irresistible Suite Collection.

These Online Exclusive products are new offerings that Stampin’ Up! will come out with periodically so that we always have some fresh new things with which to create without waiting for the next catalog. It doesn’t mean that your Demonstrator can’t order these things for you if they usually put in your orders, as I do for several of my customers. The products will only be online and not in any catalog.

The Hello, Irresistible Suite Collection includes the Irresistible Blooms Bundle (stamp set and dies), the Hello, Irresistible 6″ x 6″ Designer Series Paper, and the Loose Frosted Dots. As I write this blog post, the Loose Frosted Dots are backordered which means that the Suite Collection cannot be ordered. But you can order everything else separately except the Frosted Dots and then get those when they come back in stock. You can ask me when they are expected as soon as Stampin’ Up! posts a date. The Hello, Irresistible Designer Paper is really pretty and easy to use with some of the dies that will cut out certain flowers and leaves. Besides the flowers and leaves, the dies include a long detailed swirly die and a swirly circle shape die both of which can be used for interesting looks on your projects.

This card has a Basic White card base and is layered with a light green pattern in the Hello, Irresistible Designer Series Paper. After diecutting the swirly circle, which cuts itself as a hole in the paper, not as a separate circle, I evened it up on all four sides to be square (or close to it!) and layered that on a piece of Petal Pink Cardstock. I thought it could use a little more interest, so before adhering, I stamped the Petal Pink cardstock with flowers in the Irresistible Blooms Stamp Set randomly using Petal Pink ink (or you can use Versamark ink for that watermark look). The flowers don’t stand out, but they make the background look slightly better!

I also die-cut a flower out of the designer paper plus some leaves using the Irresistible Blooms Dies. You can use these dies for stamped images or the flowers on the designer paper which is great! The flower is popped up on Stampin’ Dimensionals®. The greeting is from the same stamp set, stamped in Petal Pink ink, and then die cut with the angled die in the Something Fancy Dies.

If you desired, you could add some sparkly embellishments like Iridescent Rhinestone Basic Jewels or some sequins or the Loose Frosted Dots when they come back in stock! You could adhere those Dots on the little circles on this swirly element! The Take Your Pick tool would be handy to use with those Dots since they need to be glued on.

Check out all the new products in the Online Exclusives that Stampin’ Up! just released!

Naturally Gilded Gold Thank You Card

Naturally Gilded Gold Thank You Card

Yesterday Stampin’ Up! released many new products called “Online Exclusives”. These are products that will not appear in a catalog, just in the Online Store. This beautiful designer paper is one of the new products! It wasn’t easy getting a photo with the glare of the shiny foil designs on the paper. The paper is so pretty that I just went with an all-gold theme for this card!

This designer paper is called Naturally Gilded 12″ x 12″ Specialty Designer Series Paper. It has trees and foliage designs in metallics, using gold, silver, and copper foil. You get two sheets of each of the three designs and the paper only has a design on one side. You can use it for a scrapbook page, as a layer on cards, or even as accents on your projects. If you are technique-oriented, you can ink the background of the paper using Blending Brushes or Sponge Daubers for a different, colorful look.

The gold pattern has an ivory background so I used Very Vanilla cardstock for the card base. Then I just added a full layer of the Gilded paper, 5 1/4″ x 4″ with a piece of ribbon with gold trim around the designer paper before adhering to the card base. The ribbon is one that was carried over from the Holiday Mini and is VERY pretty, the Gold & Vanilla 3/8″ Satin Edged Ribbon. It is perfect with this card!

For the greeting, I felt that I needed to emboss the words in gold. The greeting is in the Irresistible Blooms Stamp Set. I stamped it in Versamark ink on Very Vanilla and used Gold Embossing Powder plus the Heat Tool. The greeting and the Gold Foil layer underneath are both diecut with the new dies in the Spring Mini on page 17, the Something Fancy Dies. I adhered the greeting over the ribbon and added a few gold Festive Pearls.

If you like to make easy, elegant-looking cards I think you will like the new Naturally Gilded Designer Series Paper!

SHOP STAMPIN’ UP! ONLINE HERE!

New Stampin’ Up! Products! Irresistible Blooms Hello Card

Stampin’ Up! has added some new products today to keep things fresh and fun! These will be called Online Exclusives and will not be in any catalog. And there’s no end date for the sales period! Some products will be reordered when inventory is low, and others will only be available while supplies last. This way Stampin’ Up! can offer even more new products throughout the year. New products mean new inspiration and new ways to express your creativity!

My Irresistible Blooms Hello Card is made with new things!! Well, and one old thing that apparently is going to be new again! If you have been around Stampin’ Up! for a while, do you recognize the cardstock I used? It is Lost Lagoon, one of the 2014-2016 In Colors! When I saw that was one of the coordinating colors with the new designer paper in the Online Exclusives, I dug around in my stash and found a package! Pretty Peacock is another returning color, apparently, but I haven’t found that yet! Hopefully, I still have the ink pads and reinkers somewhere, but who knows?

Back to this card…it was made with the new Hello, Irresistible Suite Collection. Yes, it is more flowers, but it is a really pretty collection! You can stamp, you can die cut, or you can cut out! Whatever you like! Some of the dies work on some of the designer paper patterns as well as the stamped images and that’s always an advantage when you can die-cut designer paper.

The card has a Lost Lagoon cardstock card base with a layer of the new Hello, Irresistible 6″ x 6″ Designer Series Paper. I like the criss-cross design on this paper and the other side is a watercolor wash. I used “the other side” for a strip across the lower middle of the card because I couldn’t resist using it! The flowers are all die cut from the designer paper as are the leaves. The flowers have the look of “emboss resist” without the work. I die cut several leaves and just stuck them around the flowers. One pink flower and one yellow flower are popped up on Stampin’ Dimensionals and the third is flat on the card.

The greeting is stamped with the Irresistible Blooms Stamp Set. You can purchase the Irresistible Blooms Dies along with the stamp set in the Irresistible Blooms Bundle and save 10% if you want both. For some bling, I added three of the Loose Frosted Dots. These come in three colors and three sizes. They do not have adhesive on the back which is a little inconvenient but you can work around that. On the larger size, you can place the Frosted Dot on a Glue Dot right on the roll. Then take it off and adhere it where you want it. For the smaller sizes, you could put a teeny tiny drop of glue where you want the dot to go on the paper and place the dot on the glue using the Take Your Pick Tool (if I could find mine!). Don’t try to apply the glue to the dot. Or you could try rolling a Glue Dot into a tiny ball and use that for adhesive. Whatever works for you! The Loose Frosted Dots are pretty and will be fun to use.

On the inside of the card, I adhered a piece of Basic White cardstock since the Lost Lagoon cardstock is rather dark for a message or stamped greeting. I added another diecut flower and leaf in the corner. You could also, or instead, use a narrow strip of designer paper to match on the inside. Make the inside fun, too!

Demonstrators were able to preorder some of these Online Exclusive products, but there are even more new products available today! I urge you, for anything you really really want, to order it early. Some products in the Online Exclusives may go on backorder and be re-supplied, some may be gone for good, some may last forever. We won’t know, so when you see something you want, order it!

Have fun checking out the new Stampin’ Up! products!

SHOP STAMPIN’ UP! ONLINE HERE!

Last Day of Sale-A-Bration! Last Chance to Get the Beautifully Happy Stamp Set!

Beautifully Happy Floral Card

Today is the last day of February and therefore the last day of Sale-A-Bration 2023 at Stampin’ Up! Today is your last day to earn FREE products with every $50 purchase, no limits! With a $100 purchase, you may choose two $50 Level products OR you can choose one thing at the $100 Level, such as this Beautifully Happy Stamp Set on page 13 in the Sale-A-Bration Brochure!

I’m not ready for Sale-A-Bration to be over because I haven’t had enough time to use all my stamp sets! Of course, I can still use them any time, but we are always on to the next new things, and some new products are coming tomorrow, March 1st! Also, an announcement about colors is coming in the afternoon at 1:00 PM MT!

This Beautifully Happy Stamp Set is one that is available with a $100 Stampin’ Up! purchase. It is a really pretty floral stamp set with some greetings that you can use over and over. You can use these stamps in two-step stamping or you can stamp and then color in with your favorite technique. These stamps are the Distinktive kind which add some texture just by stamping. For this card, I decided to stamp and color in with my Stampin’ Blends markers.

The card base is Petal Pink, a coordinating color of the large pack of paper available during Sale-A-Bration free with a $100 order, Dandy Designs Designer Series Paper. This is a package of 48 sheets of 12″ x 12″ designer paper with beautiful versatile patterns of polka dots, stripes, plaids, and other designs. You can use this paper on tons of projects! I chose one of the Petal Pink patterns and layered it on a layer of Basic White Cardstock to help it stand out a little. The Basic White is 5 1/4″ x 4″ and the designer paper is 5″ x 3 3/4″ The piece of Basic White focal point is cut narrower so the designer paper will show around the edges. I could have even made it a little smaller, but it is cut at 4 1/2″ x 3 1/4″.

The hollyhock is stamped in Memento ink and colored in with Stampin’ Blends – Petal Pink for the flowers and Granny Apple Green for the leaves. I even added a bit of Flirty Flamingo to the pink flowers. The greeting is stamped in Petal Pink ink at the bottom with a greeting in the Beautifully Happy Stamp Set. For some bling, I added a couple of Brushed Brass Butterflies and some Iridescent Rhinestones.

Don’t forget that some extra products were added in addition to the ones in the Brochure, so you can see all of those in the Sale-A-Bration section of the Online Store.

Don’t be disappointed on Wednesday when you wake up and you forgot to put in your Sale-A-Bration order on Tuesday! Have fun! What’s better than FREE products?!

SHOP STAMPIN’ UP! ONLINE HERE!

Last Two Days of Stampin’ Up! Sale-A-Bration 2023!

Boho Blue Mini Cut & Emboss Machine

If you’ve been thinking about becoming a Stampin’ Up! demonstrator, there’s no better time than now during Sale-A-Bration. Join by Tuesday, February 28, 2023, and choose one of three amazing offers:

•Option 1: The exclusive Boho Blue Mini Machine ($63 value) + your choice of $175* of Stampin’ Up! products for only $129.
•Option 2: The original white Mini Machine ($63 value) + your choice of $175* of Stampin’ Up! products for only $129.
•Option 3: Your choice of $175* of Stampin’ Up! products for only $99.

*That’s $50 more product than the standard Starter Kit offer!

Plus, enjoy free shipping and business supplies to help get you started. And don’t forget those demonstrator benefits like early access to new and exclusive products, discounts, and an opportunity to earn a modest supplemental income.

Become part of the Stampin’ Up! family and run your business however you like, whether you want to work hard and build a big business or whether you’re happy with a few customers and yourself as one of them! Stampin’ Up! welcomes all!

It only takes a few minutes to JOIN and place your Starter Kit order and your Demonstrator number will be emailed to you! At that point, you can look around on the Stampin’ Up! Demonstrator website and get acquainted!

I’m always available to help you get started and answer your questions, even from afar! If you prefer a local Demonstrator to sign up under where you live, then look under the Demo locator and find someone in your community. Contact them and ask if they are working with downline because not everyone does. As I said, you can run your business at the level you prefer. Email me at Karen@Karenstamps.com if you have questions.

Even if you are not interested in joining at this time, you are welcome to join at any time that is right for you! In the meantime, SHOP STAMPIN’ UP! and get your FREE Sale-A-Bration products with every $50 purchase while you can! It all comes to a screeching halt tomorrow night, February 28!

Click the banner below to browse the Sale-A-Bration Brochure. (While supplies last!)

Sale-A-Bration Banner
New SAB Products Feb 2023
Extra Sale-A-Bration options, while supplies last!

Enjoy the LAST 2 DAYS of Sale-A-Bration!