Tag Archives: Valentine Candy

Country Floral Lane Valentine Candy Bars

Country Floral Lane Valentine Candy Bars

These Country Floral Lane Valentine Candy Bars are a very old project I have been making all of my stamping years! It is so easy and so fun! You can use any size of candy bars and decorate for any occasion, as simple or as fancy as you like!

I got these “regulation size” chocolate bars in a 6-pack at the grocery store. You could use the very small snack-size bars or you could use the giant-size candy bars. The brand, size, and type doesn’t matter either with a project like this. You only need to be able to wrap some paper around the candy bar or even a bag of candy.

My measurements don’t really matter to you because it all depends on the size of YOUR candy bars. But if you want a starting measurement, for my candy bars I wrapped around a 5 1/2″ x 6″ piece of cardstock, then a piece of designer paper, about 4 1/4″ x 6″ on one and 3 1/2″ x 6″ on the other. Six inches provides a fairly wide overlap for the back so you could make that a little shorter if you needed to save paper.

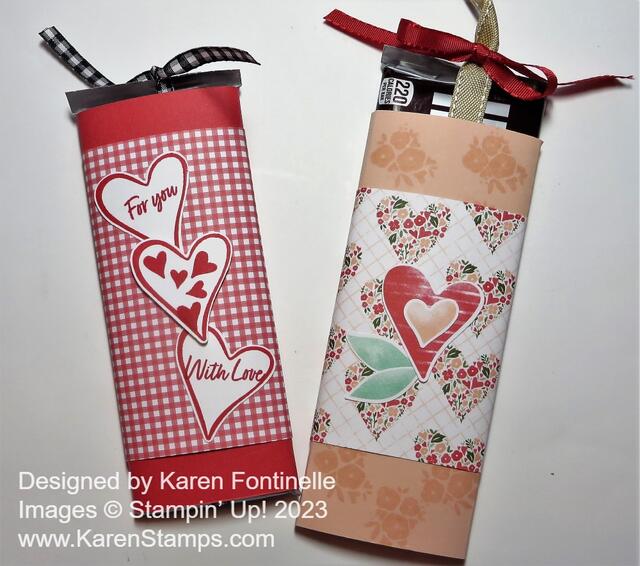
On the pink candy bar, I first stamped some flowers in the Country Bouquet Stamp Set using Versamark ink on the Petal Pink cardstock just for a little interest on the top and bottom. Then I wrapped around a piece of the Country Floral Lane Designer Paper. I suggest just lightly wrapping it around and not scoring it according to any measurements. Each candy bar and wrapper may be different, there is some thickness to it, and you don’t want the wrap to be too tight that you can’t pull out the candy bar or too loose. After I wrapped the cardstock around the candy bar, I held it in place as tightly as I wanted it and actually ran my Bone Folder along the sides which gave a pretty nice crease.

To decorate the pink candy bar, I used the Country Bouquet Punch to punch out the two hearts and leaves directly from the Country Lane Floral Designer Paper. As I write this, this punch is not available and will not be until April. If you want to use that design on the paper, just cut out the hearts and leaves by hand. I used the Real Red & Burlap Ribbon Combo Pack to wrap around the length of the candy bar with the Burlap Ribbon, then tied at the top with the Real Red Ribbon. This gives the recipient a “handle” to pull out the candy bar.

The Sweet Sorbet candy bar is wrapped with Sweet Sorbet cardstock and then a layer of the Country Gingham 6″ x 6″ Designer Series Paper. This paper is cute and so versatile to use on many projects. At this moment it says, “Low Inventory” so if you want it, order it right away!

To decorate this candy bar, I stamped three hearts with the Country Bouquet Stamp Set and punched out with the Country Bouquet Punch, Again, if you don’t have it, just cut out the hearts by hand. I also added two greetings from the same stamp set plus the little hearts stamped inside one of the hearts. That center heart is popped up on Stampin’ Dimensionals. I used the Black & White Gingham Ribbon to wrap around and pull out the candy bar.

As I said, this is a fun project! Even children can do it! If you want to see the small, Snack Size candy bars decorated, here is a Halloween example.

If you need any supplies for any projects, remember Sale-A-Bration is still going on during February and just the other day Stampin’ Up! added more choices of products that you can earn with a $50 or more purchase. Check out all the choices HERE.

SHOP STAMPIN’ UP! ONLINE HERE!

Mini Curvy Keepsakes Box For Valentine’s Day

Mini Curvy Keepsakes Candy Box For Valentine's Day

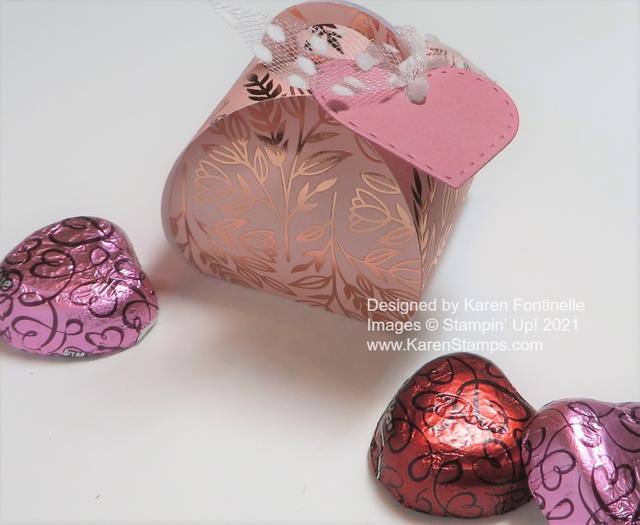
Don’t forget about the cute little boxes you can make easily for some Valentine candy, even at the last minute! Any cardstock or designer paper you have will work, but for Valentine’s Day you might want to use some fancy designer paper!

This cute little box is made with the Mini Curvy Keepsakes Box Dies. You just need a piece of 6″ x 6″ paper for the box. Then you can also die-cut a little heart in the same set to tie onto the box. Just cut the paper, fold on the score lines, then assemble. Push down on the two handle pieces and fold over the two slit pieces to hold the box together. Be sure to put your treat in first!

I used the pretty Love You Always Specialty Designer Series Paper with the foil accents. The die-cut heart is Rococo Rose Cardstock. I tied it on with the Whisper White 5/8″ Polka Dot Tulle Ribbon. That’s all there is to it! You could use this little box for Valentine candy or maybe a little table decoration or party favor. You can get very creative with this Mini Curvy Keepsakes Box and make all kinds of creations.

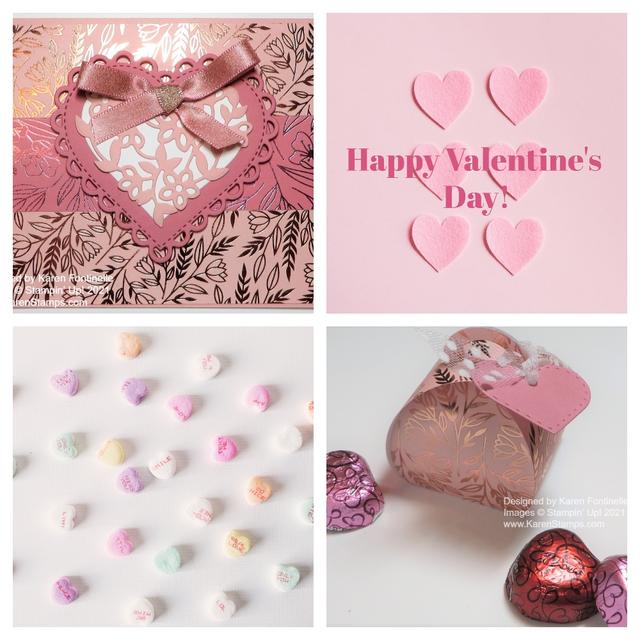
This little Mini Curvy Keepsakes Box For Valentine’s Day matches the card I made with the Love You Always Specialty Paper here in this post! Make a matching set!

Valentine's Day Collage

Valentine’s Day Chocolate Candy Holders

Valentine's Day Chocolate Candy Holders

These Valentine’s Day Chocolate Candy Holders have been around a long time and I probably make them every year! I’ll link to some other ones I have made a little later. Once you have the pattern and the idea, you can run wild with decorating them for any occasion! Maybe party favors, or a little favor at a dinner party (when we can have dinner parties again!), or a stocking stuffer at Christmas, or a treat in an Easter basket! Whatever you want to make!

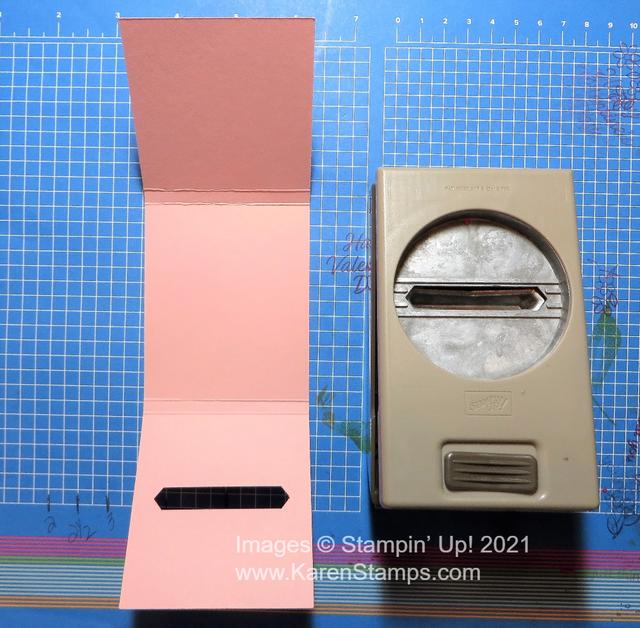
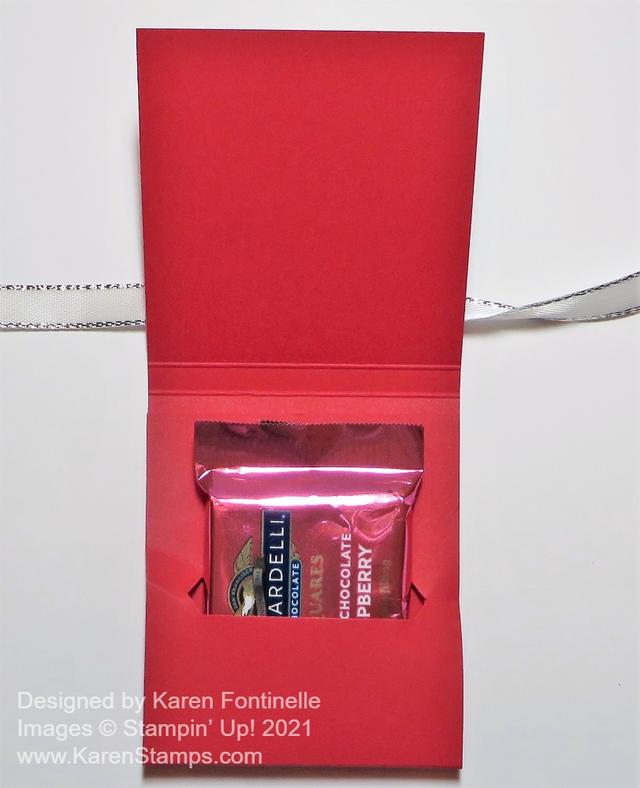
These Valentine’s Day Chocolate Candy Holders are just a strip of cardstock wide enough to hold your candy, with a slit inside to hold the candy if that works or space to place the candy and maybe secure with a tiny bit of adhesive. The cardstock is scored so that it will fold but have space for the chocolate. Put some adhesive on the inside of the bottom of the strip with the punched slit, and adhere. Then decorate the front and tie a ribbon around to secure.

Here are the particulars, if you are interested, for these projects.

Start with a strip of cardstock cut at 9 5/8″ x 2 3/4″. Score at 2 3/4″ and 3″; 6 1/4″ and 6 1/2″. With these measurements, you could get three strips out of one sheet of cardstock. Fold and crease on the scored lines. Open the strip back up and you will see above and below the score lines, one section is shorter than the other. You want the longer section to be the one that folds up to the inside.

Once you have identified the longer section, use the Classic Label Punch on that flap, inserting as far as you can, centered, to punch the opening for the chocolate. Put a piece of Tear & Tape at the bottom of the strip so you can fold up that flap and adhere to the inside, not quite up to the score line. You will want to stand the candy holder on the table making sure the bottom is flat as you adhere that flap.

Valentine's Day Chocolate Candy Holder Inside

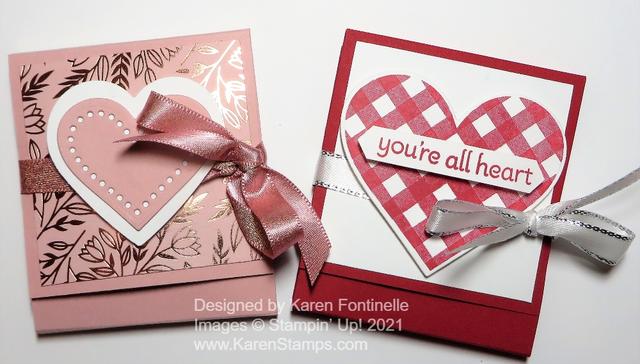
The pink holder on the left is made with Blushing Bride Cardstock with a piece of the Love You Always Specialty Paper (2 1/2″ x 2 1/2″) adhered to the front of the candy holder. Then I simply layered two die-cut hearts popped up on Stampin’ Dimensionals so I could tie a ribbon (the Blushing Bride 3/8″ Metallic Ribbon) around to hold it closed. There are some other patterns more like a matchbook where you just slide the top into the little fold-up pocket at the bottom. But even then, you might like a ribbon to hold it all together.

The red candy holder on the right is made the same way. It has a piece of Basic White Cardstock on top, decorated with a stamped and die-cut heart from the Lots of Heart Stamp Set and Many Hearts Dies. (Get both in the Lots of Heart Bundle and save 10%!). The greeting is also in that stamp set and is punched out with the Classic Label Punch that you used on the inside for the slit to hold the candy. The heart is popped up on Dimensionals, again, to allow room for the ribbon to wrap around the candy holder.

If you would like more ideas, here are a couple of candy holders I made last year. These are so much fun to make, I know you will enjoy this project! They are perfect, of course, for Valentine’s Day, with a nice piece of chocolate on the inside! Try your hand at my Valentine’s Day Chocolate Candy Holders because they are quick and easy to make when the holiday is getting close!