It’s the Last Chance Shopping Day!

Last Chance Products 2023 Sq Ad

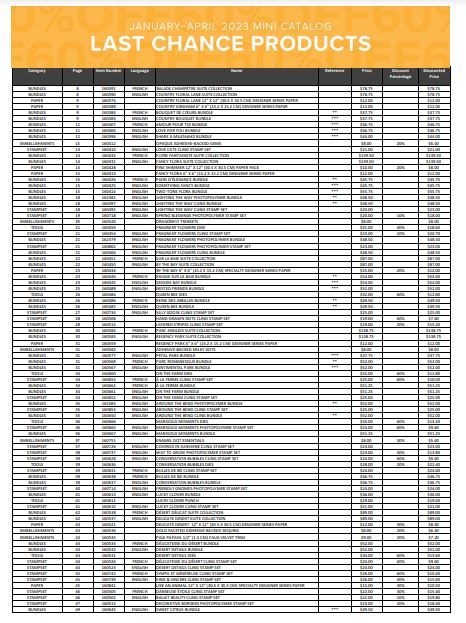
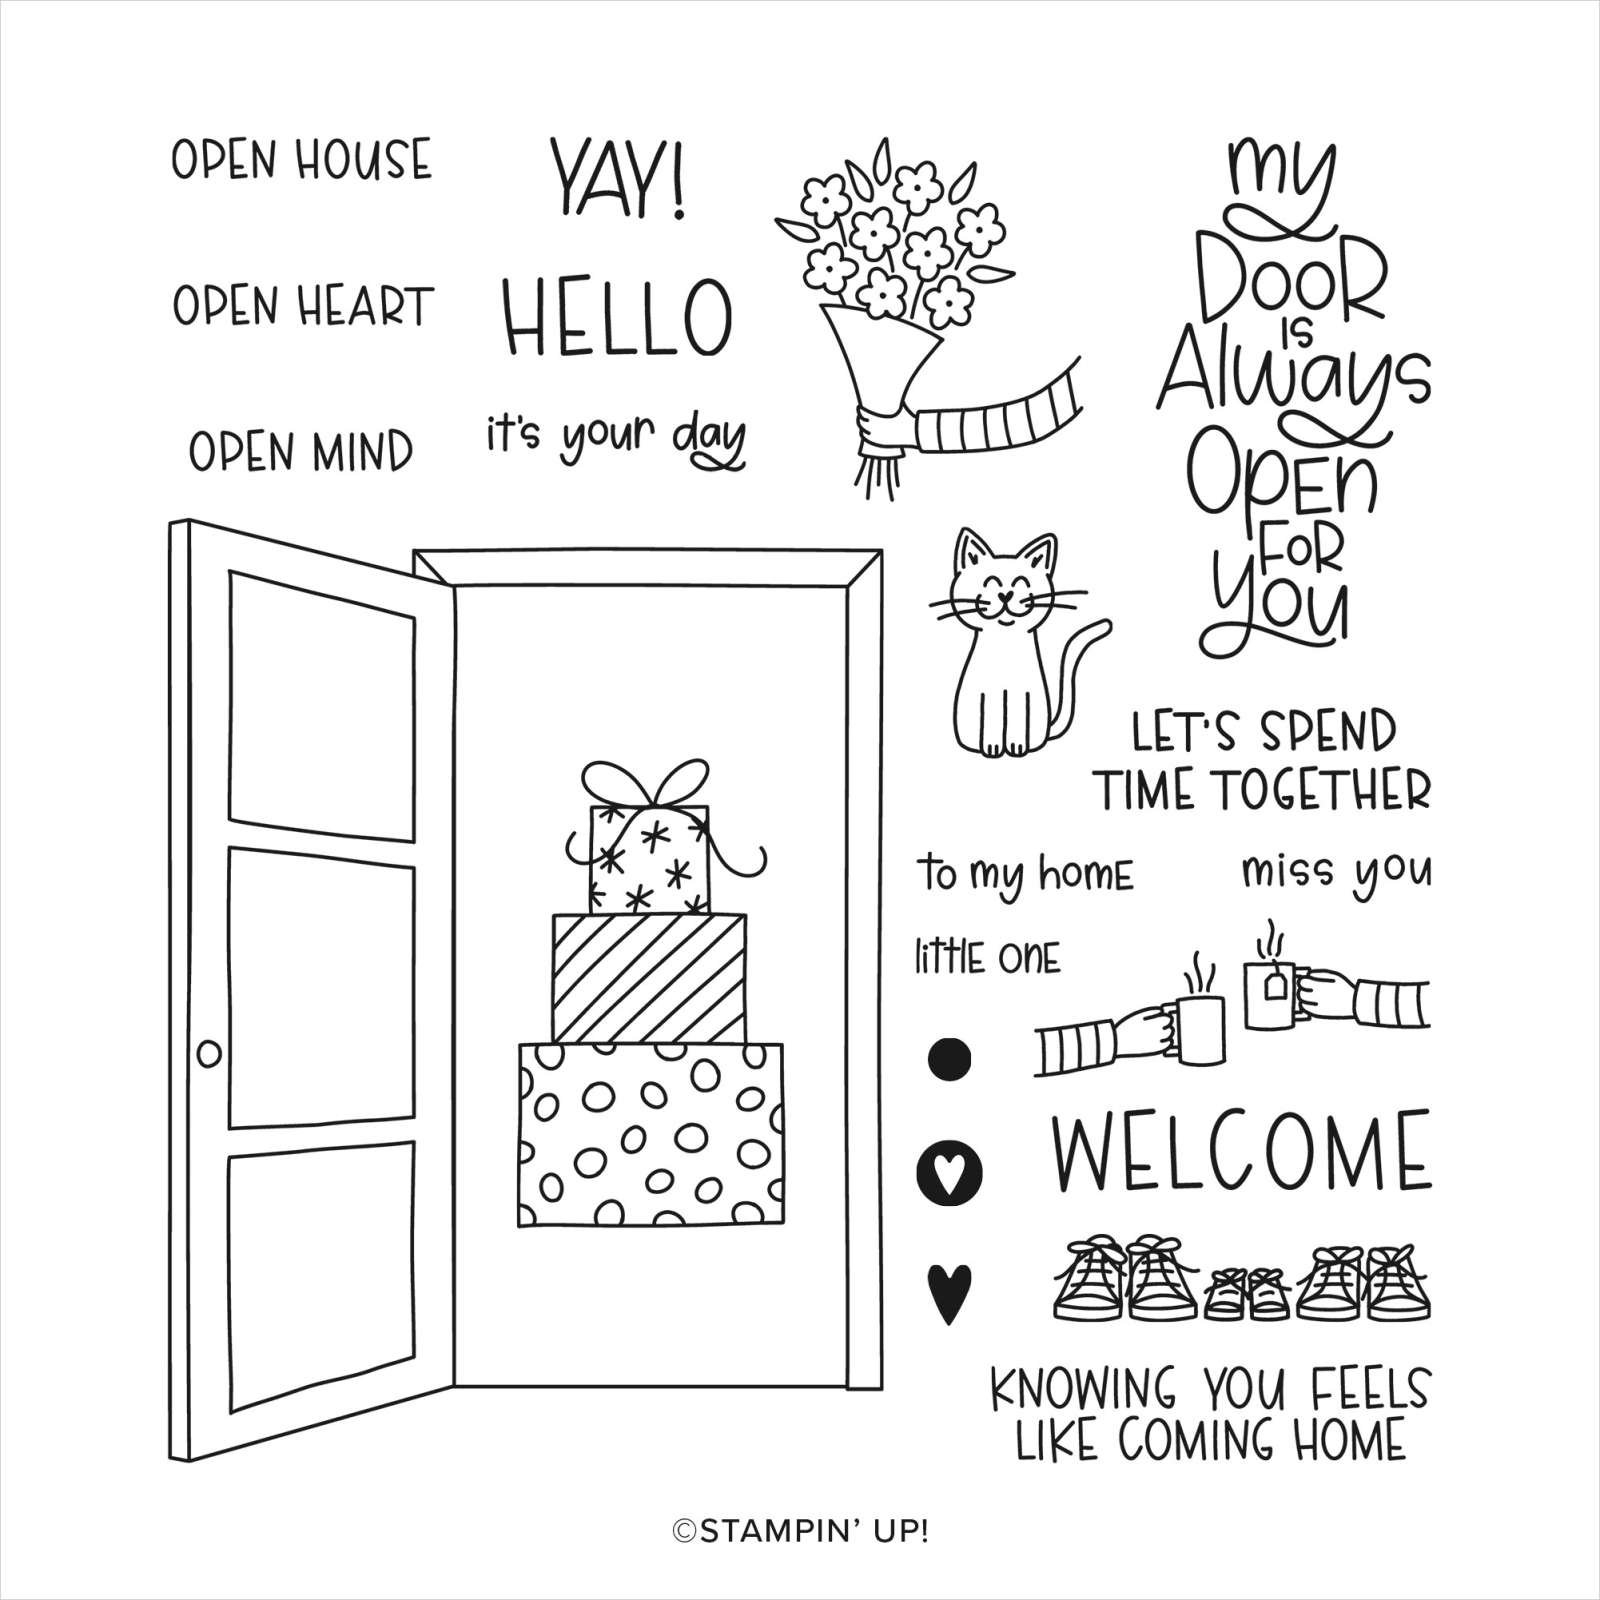
Today is the day the Last Chance List and Sale goes LIVE of products retiring from both the Stampin’ Up! Annual Catalog and the January – April 2023 Mini Catalog (the Spring Mini). Some, but not all, of the products are discounted, some up to 60% off!

All of the Bundles in the catalogs are “retiring” but in some cases, the two products are continuing on, just separately, to make room for the new Bundles. Be sure to check if the two products in the Bundle are discounted because they may be cheaper separately on sale than getting 10% off for the Bundle!

Some retiring products are being “reconfigured”. They are marked retiring but because of the Color Refresh, they just have to be adjusted with the new colors, such as the Stampin’ Write Markers.

Some products are carrying over to the Online Exclusives category, which means they will be available online but not in the catalog. If they sell out, Stampin’ Up! can decide if they can restock those products or not.

Here is the list of those carrying-over Online Exclusives:

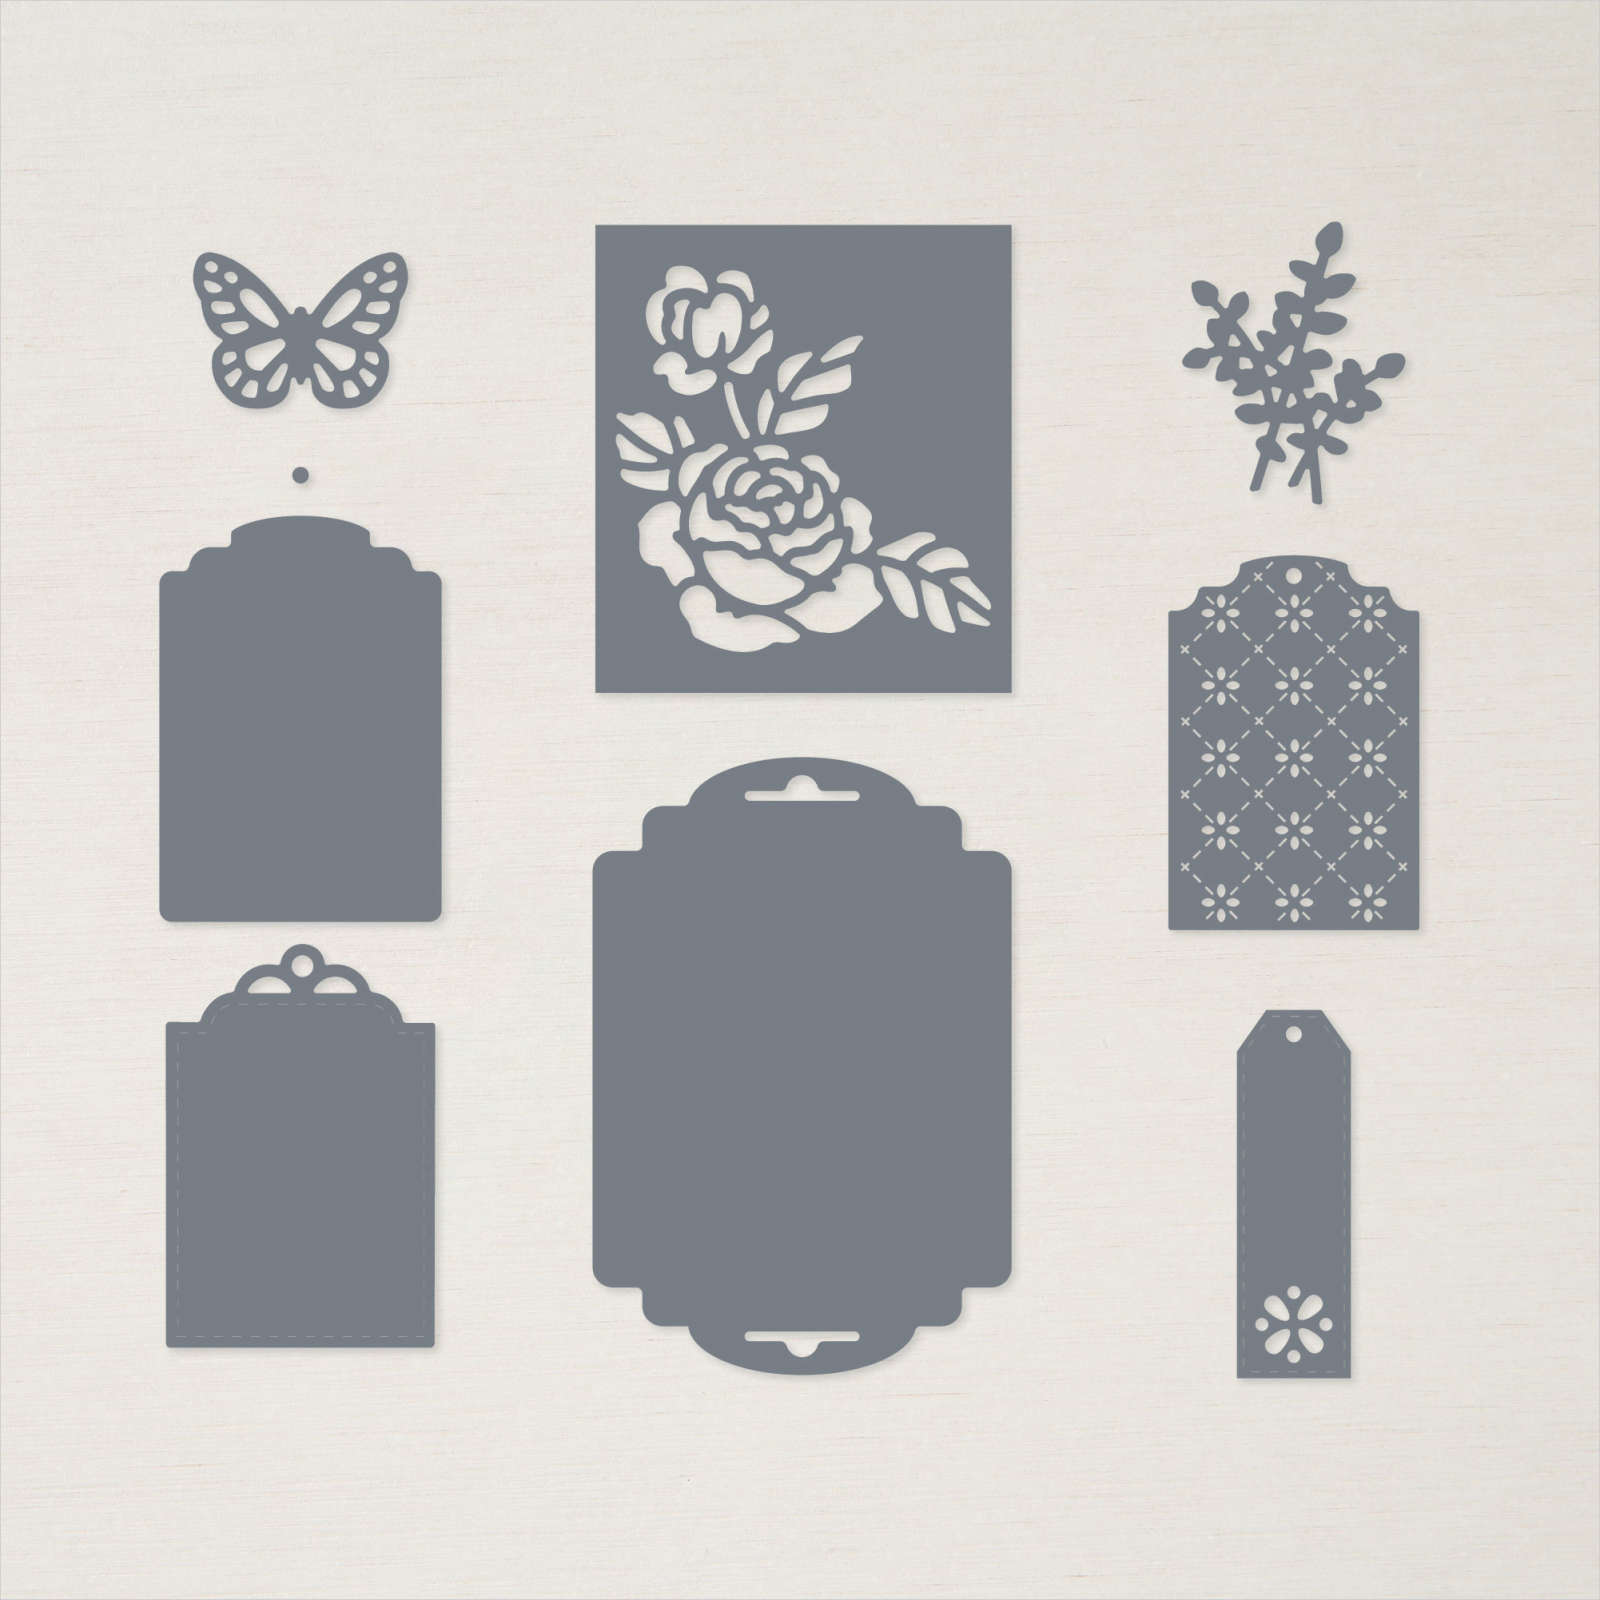
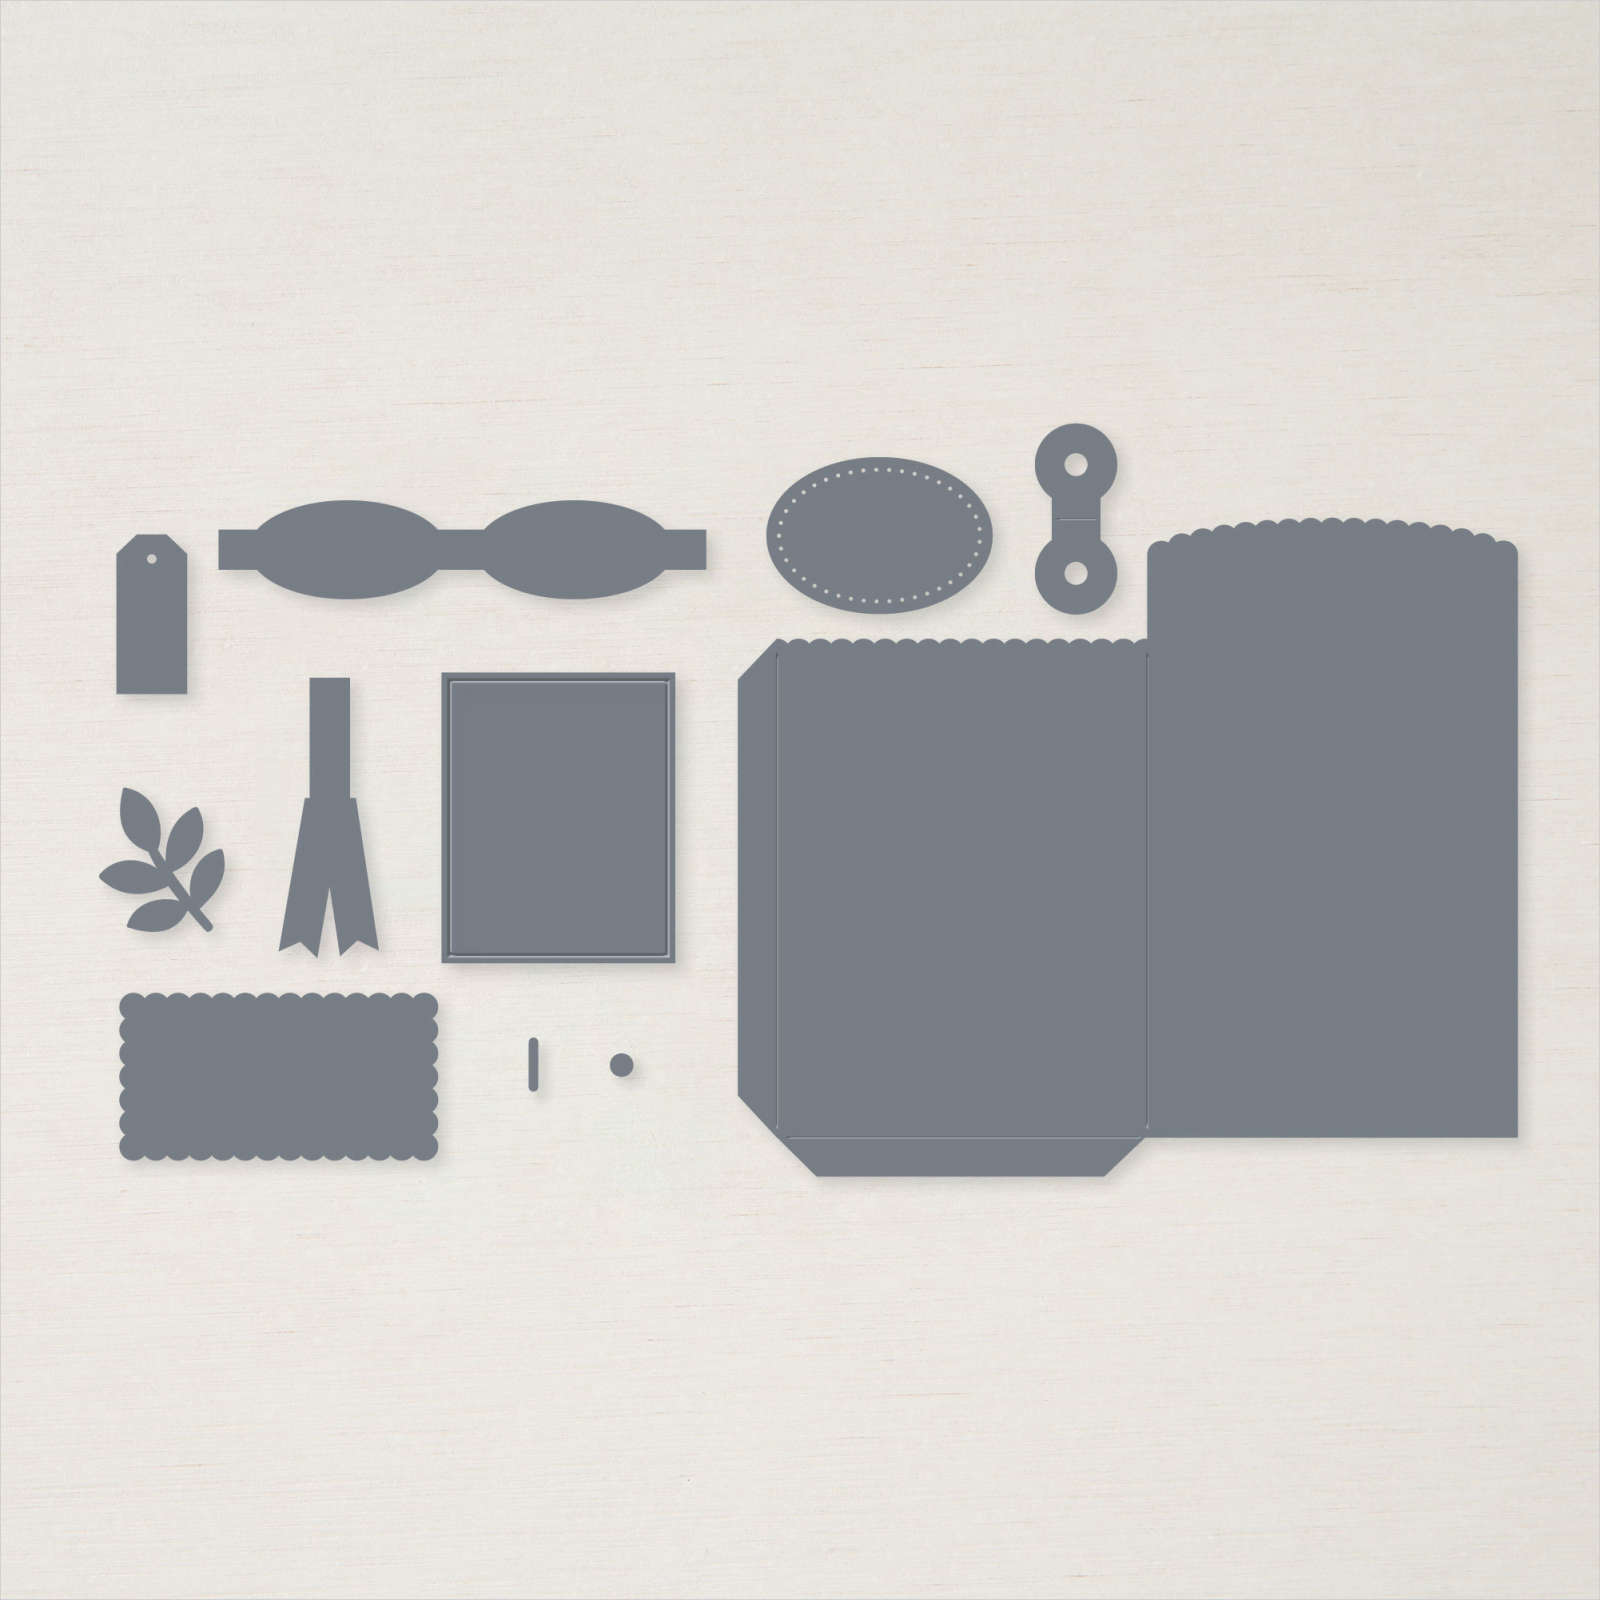
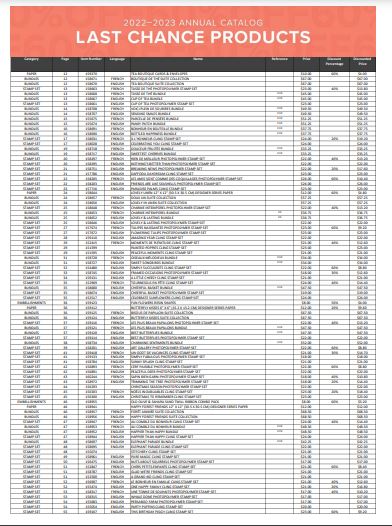
Last Chance Annual Catalog

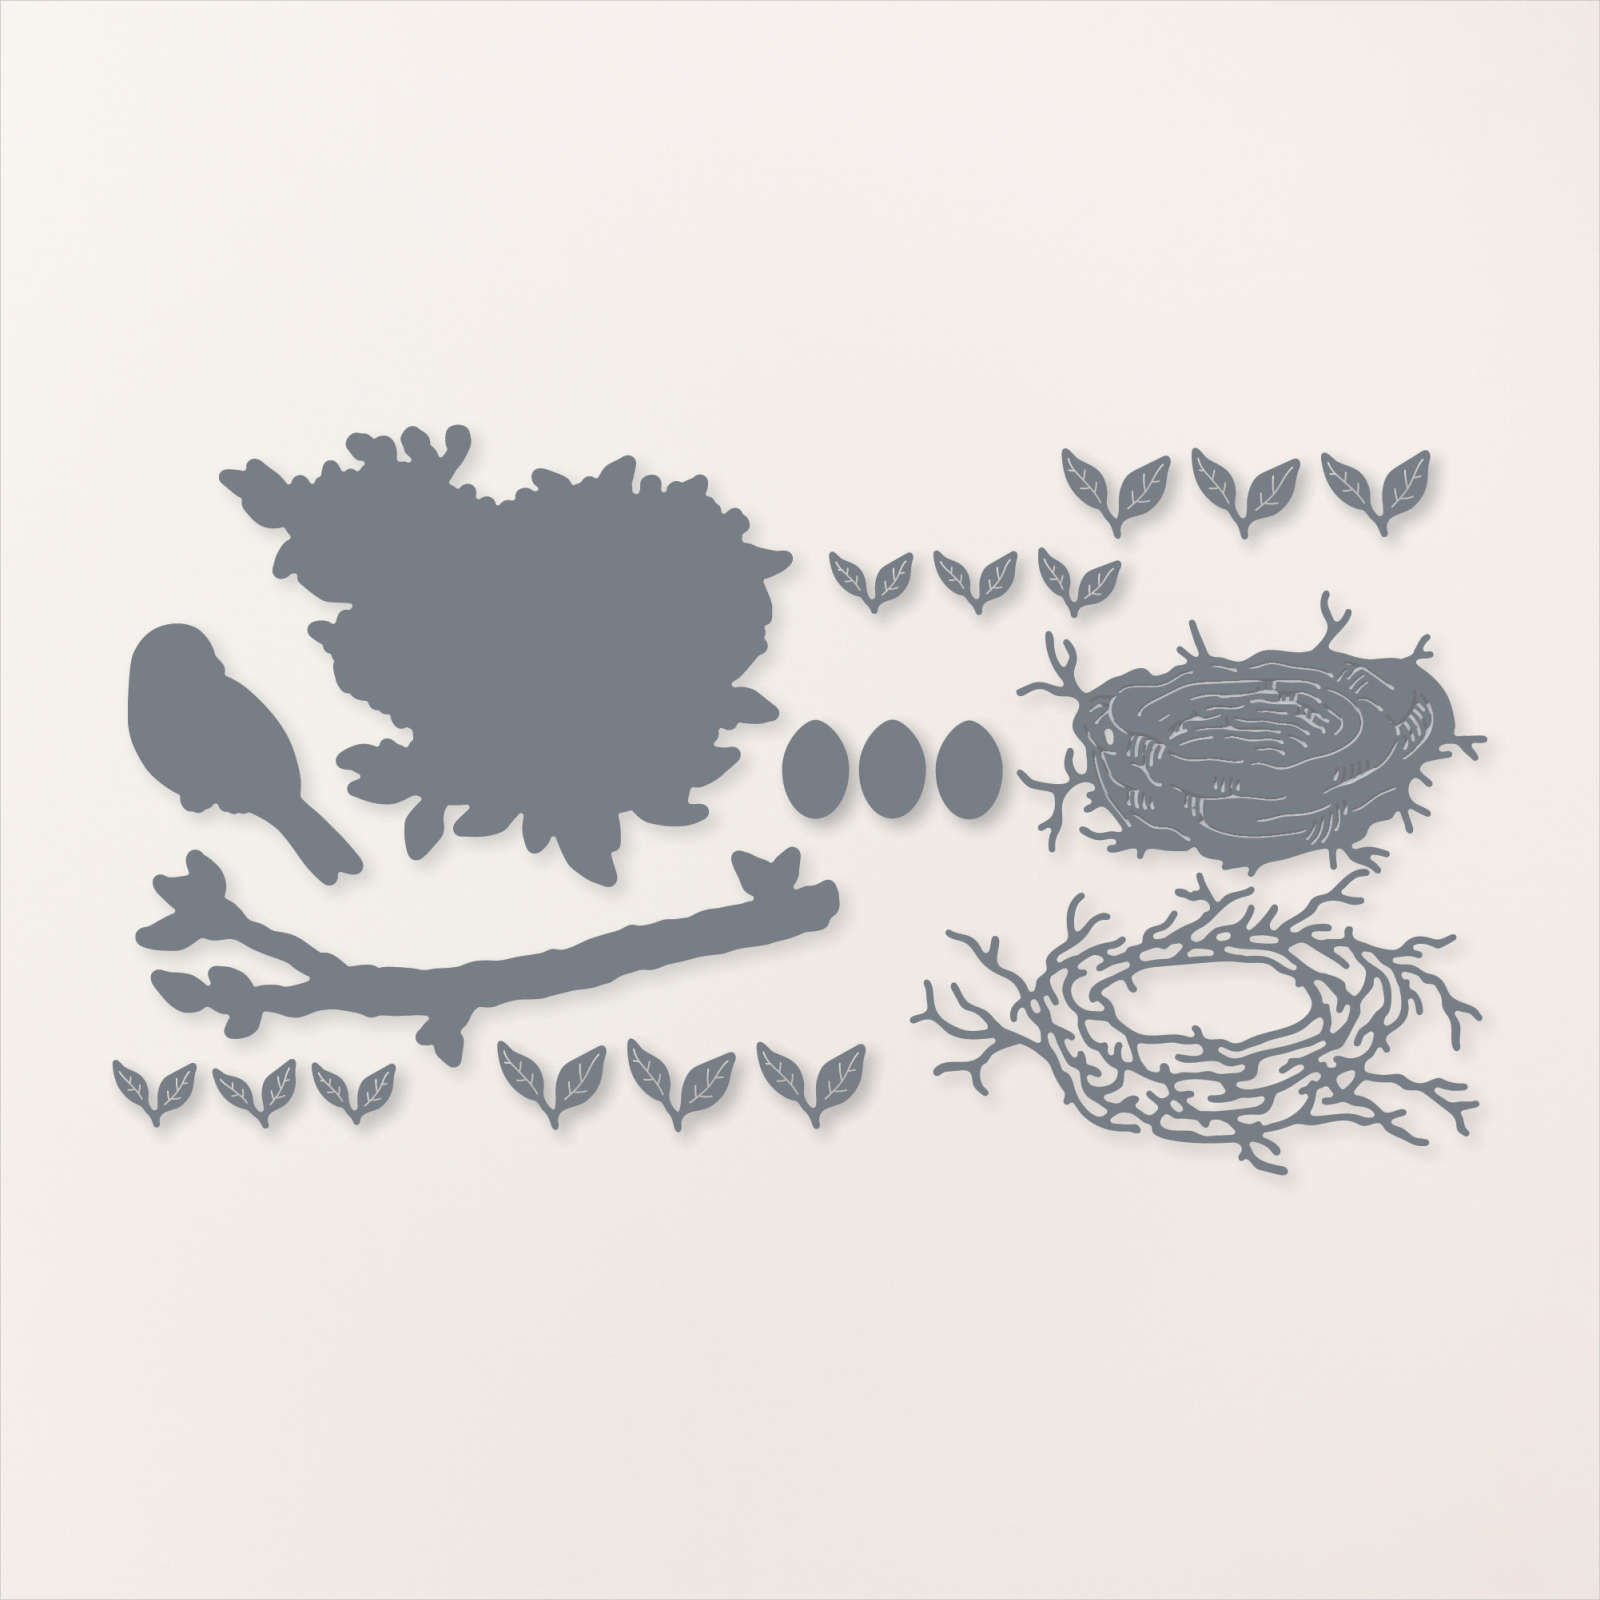
Last Chance Spring Mini Catalog

HAPPY SHOPPING!

Did you know you can SORT the items on any shopping page by different categories, like “Newest”, “Price”, “A-Z” and also change if you want to see 30 products or 90? It’s on the right side under the title “Last Chance Products”. Very helpful sometimes!

Polished Pink Easter Bunny Card

Polished Pink Easter Bunny Card

How about a hot pink Easter card? Well, this Polished Pink Easter Bunny Card probably fits the bill! As long as I already had the Polished Pink cardstock out and as long as this piece of designer paper had already grabbed me, I decided to go ahead and make this card! It’s quick and easy if nothing else!

You still have time to get a few Easter or Spring cards in the mail if you want to and hopefully, they will arrive in time! Easter is Sunday, April 9, 2023.

This card uses the Flowers & More Designer Series Paper that I have really enjoyed from the Spring Mini Catalog. I didn’t even pay attention to it at first, but once I got it as a Host Reward (p. 90) I loved using it. Before adhering the designer paper to the card base of Polished Pink, I wrapped around some ribbon. I pulled out several white ribbons but I liked my first try, the White 3/4″ Frayed Ribbon. Even though it is quite wide, I think it works okay. Instead of trying to tie ribbon all the way around a card layer, just cut it long enough for a small amount to wrap around to the back and adhere those ends. Then you can add a bow or knot or whatever you want separately.

The bunny is stamped in Memento ink from the Easter Bunny Stamp Set. I really have gotten a lot of use out of that stamp set for Easter and it will be good for baby cards, too, with those cute bunnies! I punched out the bunny with the Easter Bunny Punch. As I’ve mentioned before, it is backordered and hopefully will be back in stock around May 15. I popped the bunny up with just two Stampin’ Dimensionals, one to be over the top of the ribbon and one below. It might not be exact but get it as close as you can since the ribbon is a little thick.

For the greeting, I stamped “Happy Easter” in the Celebrating You Stamp Set in Shady Spruce ink. Next, I use the Conversation Bubbles Dies to cut out the greeting. It actually cuts out the two separate pieces, so then I diecut a piece of Polished Pink cardstock to get the border piece I wanted. I first tried Shady Spruce for the border but I liked the pink better!

I did tie a small piece of the Frayed Ribbon around in a knot, which is a little thick, but I liked it fine! If you would like you could add a few rhinestones to the bottom of the greeting.

Remember, the Last Chance Sales for both the Annual Catalog and the Spring Mini begin on Tuesday, April 4th. If you are interested in the Conversation Bubbles Stamp Set and/or Dies which are retiring, do NOT buy the Bundle! The stamp set will be discounted 60% and the Dies 20%. The Bundle itself is still full price! So do the math if there are discounts on the things you want to buy when the sale begins! The Celebrating You Stamp Set is also retiring but not discounted. It is one I have used a lot for greetings! I’m sad to see it go!

SHOP STAMPIN’ UP! ONLINE HERE!

Radiating Stitches Easter Bunny Card

Radiating Stitches Easter Bunny Card

Sometimes when you want an idea for a card, it’s okay to copy yourself! Recently, I made an Easter card like this one and I liked it so much I had to keep it for myself! But then I thought I should just make another one to mail. In the process, I came up with this slightly different design which I also like a lot!

The card base is Polished Pink Cardstock and so is the first layer. Polished Pink is one of the current 2021-2023 In Colors that will be retiring. However, Fresh Freesia, in that group, will be added to the lineup of regular colors!

I used three of the Radiating Stitches Dies for this card to form the layers. Stampin’ Up! made these dies so that they DO layer in the right sizes! They add a different look and some texture to your cards and projects. They are unorderable right now as I write this but hopefully, they will be back in stock soon.

The next layer is Parakeet Party, one of the 2022-2024 In Colors that is staying for another year! The designer paper in the center is one of the patterns in the Flowers & More package, available as a Host Reward in the Spring Mini. Look on page 90. I thought the little lines of colors looked perfect for an Easter card!

The bunny is part of the Easter Bunny Stamp Set. He is stamped in Memento Ink and then has a few colors of Stampin’ Blends markers added to give him a little color and shading. He’s also holding a carrot, one of the cute extras in the Easter Bunny Stamp Set. I just cut the bunny and carrot out by hand with my Paper Snips scissors. It’s really not difficult at all. The bunny and carrot are popped up with Stampin’ Dimensionals, both the regular size and the mini black ones.

The greeting is also from the Easter Bunny Stamp Set and is stamped and diecut with the smallest of the Stitched Rectangle Dies. The “Happy Easter” greeting JUST fits on there! The greeting is also popped up with Stampin’ Dimensionals on the back. For a little bling, I added three Iridescent Rhinestone Basic Jewels.

Whether you like the Orchid Oasis card I made with the Radiating Stitches Dies or this one with the Polished Pink colors and a different Easter Bunny, I think both are cute for Easter. Take off the bunny and add some flowers and foliage or some other image and you can change the card for another occasion!

Country Gingham Happy Easter Bunny Card

Country Gingham Happy Easter Bunny Card

After all the excitement the last couple of days about Last Chance Lists and the Color Refresh at Stampin’ Up!, thought it was time for a relaxing Easter card, like this Country Gingham Happy Easter Bunny Card. This designer paper I used is on the Last Chance List for the Spring Mini Catalog, but I’m happy the Easter Bunny Stamp Set and Punch are staying! After Easter that stamp set and punch will make very cute baby cards!

This card starts with a Petal Pink card base. Petal Pink is staying as one of our colors. I used two different patterns of the Country Gingham 6″ x 6″ Designer Series Paper for the front of the card. I chose a green gingham for the bottom to sort of represent grass that the bunny is sitting in! The top pattern is a Petal Pink and Sweet Sorbet plaid. So soft and pretty!

The Easter Bunny in the Easter Bunny Stamp Set is stamped in Gray Granite ink on Basic White and then punched with the Easter Bunny Punch. (The Easter Bunny Punch is due to be back in stock the week of May 15.) I colored in around the inside edges a little on the bunny with a Gray Granite Stampin’ Blend Marker just to add a little shading.

The flower garland in the Easter Bunny set and Easter eggs were stamped in Memento Ink on Basic White and colored with Stampin’ Blends. Just choose whatever colors you like. I cut out the flowers and the eggs by hand.

The tag is die-cut with one of the Something Fancy Dies out of Basic White. I stamped the greeting from the Celebrating You Stamp Set in Mint Macaron Ink. Mint Macaron is one of the retiring colors. I even adhered a little scrap of the Mint Macaron designer paper with a smaller diagonal plaid at the bottom of the tag.

I adhered two Easter eggs to the tag and tied a bow with the Petal Pink 3/8″ Soft Polyester Ribbon. The bow is adhered with two little Glue Dots to the tag. For a little finishing touch, I added some Heart Pearls above the bunny.

I had almost forgotten, after Valentine’s Day, that I had this Country Gingham Designer Series Paper but it’s really nice for Easter cards and for spring cards and projects. If you don’t have any or don’t have enough left, be sure to stock up before it retires or sells out!

SHOP STAMPIN’ UP! ONLINE!

The Stampin’ Up! Color Refresh Coming May 2!

Wow! Yesterday afternoon was a lot of news! It took me a few hours to take it all in…Last Chance Lists, retiring colors, new colors, colors moved around, the new catalog online for Demonstrators!

Here is a Stampin’ Up! video that explains the Color Refresh!

Here are my notes from watching the video!

Brights Retiring Colors: Mango Melody, Pacific Point, Bermuda Bay

Subtles Retiring Colors: Blushing Bride, Pear Pizzazz, Mint Macaron, So Saffron

Regals: Rich Razzleberry

Neutrals: Soft Suede, Sahara Sand, Merry Merlot

_______________________________

Colors that Moved:

Pumpkin Pie to Brights (where it used to be I think before the last refresh?)

Blackberry Bliss to Neutrals

Gorgeous Grape to Regals

_______________________________

Previous Colors Returning (Look in your Stash, maybe you have some or all of these!)

Blueberry Bushel (Regals)

Fresh Freesia (Subtles) (current outgoing In Color)

Lost Lagoon (Subtles)

Lemon Lime Twist (Brights)

Berry Burst (Brights)

Pretty Peacock (Regals)

Misty Moonlight (Neutrals)

_______________________________

Brand New Colors!!!

Azure Afternoon (Brights)

Bubble Bath (Subtles)

Lemon Lolly (Subtles)

Pecan Pie (Neutrals) (yum!)

Brand New In Colors 2023-2025

I hope you enjoy hearing the Color Refresh News! I’m sure we will be talking about it a lot more in the near future! Check yesterday’s blog post I made in the afternoon with the Last Chance Lists for both the Annual Catalog and the Spring Mini. Some products will be discounted, but remember, the SALE doesn’t start until April 4th! But buy what you want before it sells out!

Last Chance Retiring Lists Are Here!

We will be losing these two catalogs soon, the Annual Stampin’ Up! Catalog and the Spring Mini (January – April 2023) BUT we know there are always lots of exciting new products ahead!

Not all items will be discounted, but some are, up to 60% off!

You can shop today as usual, but any sale prices begin April 4th!

  • The sale begins April 4th at 12:00 am MT! Last Chance Products are “while supplies last”!
  • The sale ends May 1st at 11:59 pm MT.

So you have some time to peruse these lists and see what you “need”! If there are things you REALLY REALLY want, don’t wait until the sale. You can shop anytime but discounted prices don’t begin until April 4th.

Annual Catalog Last Chance Products 2022-23
Click to read!

Click HERE to see the Annual Catalog Last Chance/Retiring List!

It’s 5 pages long due to all the products with the retiring colors so just keep scrolling!

Spring Mini 2023 Last Chance List
Click to read!

Click HERE to see the Spring Mini 2023 Last Chance/Retiring List!

This one is just two pages long!

More about the colors tomorrow! I just got home and have only posted these lists for you! Now to catch up and see what all was announced today while I was gone!

It’s the Big Day at Stampin’ Up!

March 29

The big day at Stampin’ Up! is here, March 29, 2023! There may be many big days at Stampin’ Up! but this one is exciting to see the Color Refresh Reveal! And Demonstrators get a peek at the upcoming Annual Catalog! And I think Last Chance Lists come out for the Annual Catalog and the Spring Mini. It all happens this afternoon! Sounds like more than we can take in in one afternoon, but we’ll see!

Check back later and see what all the news is!

Ten Years of Growth Paper Pumpkin Cards

Ten Years of Growth Paper Pumpkin Cards

When my Paper Pumpkin Kit finally shows up in my mailbox each month, usually the weekend is a good time to sit down and make the project in the kit! These are the three card designs to make with the kit and from there, you can make whatever you want with the supplies!

I usually like to make the project as designed first, and then decide if I want to continue or make some alternates. There are always alternative ideas for each Paper Pumpkin Kit on the internet and even on the directions Stampn’ Up! sends in the box!

This kit was to celebrate ten years of Paper Pumpkin! I think I attended the Convention when the first kit was introduced, or at least I remember I got a free kit at the Convention! I always say it’s a present you give yourself to get a papercrafting kit right in the mail with everything you need inside, but it really does seem like a gift! You open the cute box and inside you’ll find the package of supplies all wrapped up in colored tissue paper, just like a gift! So it IS a gift you give yourself!! And you can gift someone else, too!

The cards in this kit have a pretty design already printed on the front, and then there are diecut pieces of foliage and ferns and pots to add to the card front. There are pieces on which to stamp a greeting and add that to the card. I put the greetings on two cards but I may use another greeting from another stamp set on some of the other cards. So the kits are always easy to make for anyone.

This celebratory kit even came with an extra FREE stamp set to use any time! Paper Pumpkin often has little surprises for us!

Here is a video to see how this kit went together. There is always a video you can watch plus the directions that come in the kit. Some months there are extra full kits or “refills” that are available in the Online Store IF you are a Paper Pumpkin subscriber. If you decided you loved a particular kit and wanted another one, or, for example, at Christmas time maybe you want two kits to make a lot of gift tags or cards. If you subscribe now to receive the April Kit but wish you had the March kit after you subscribe you can shop in the Online Store under Paper Pumpkin -Past Kits, Refills & More and presently, purchase the “Refill” for the March Kit. You won’t get the stamp sets or ink spot but you can stamp greetings from sets you already own….or simply write in your own greeting! All the other supplies are included!

Now if this Paper Pumpkin monthly kit idea appeals to you, be sure to sign up SOON for the April Paper Pumpkin Kit! The deadline will be April 10th and kits are mailed out soon after.

JOIN PAPER PUMPKIN TODAY HERE!

Paper Pumpkin April 2023 Sq Ad2

This kit is coming with a little extra! A box organizer! It will have some narrow strips that you can fit together in an empty Paper Pumpkin Kit box to divide it into sections to hold the ink spots you get in each kit or however you want to use them. To read all the details about the April Kit, just click HERE to read my recent blog post.

Find out MORE about Paper Pumpkin HERE!

Conversation Bubbles Thank You Card

Conversation Bubbles Thank You Card

I simply can’t get enough of this designer paper, especially this pattern, but I finally got a chance to play with the Conversation Bubbles Bundle which I used for the greeting on this Conversation Bubbles Thank You Card. I think it stands out well against this busy paper and makes the whole card look fun!

Years ago Stampin’ Up! had a set with conversation bubbles as I recall, but this one takes it up a level with the diecut bubbles and borders. There are interesting edges, sizes, and textures to the bubbles, plus extra little dies like hearts, flowers, and stars. In the stamp set are fun phrases and expressions in cute fonts to use or use any other sentiments you have. The Bundle is really something you have to play with to see for yourself. Just looking at the catalog doesn’t do it justice.

This package of designer paper, Flowers & More 12″ x 12″ Designer Series Paper, is available as a Host Reward in the Spring Mini Catalog. With an order of $150 or more, you can choose it as your host benefit. It’s not your regular package of 12 sheets of paper. It has 48 sheets of paper, 4 sheets each of 12 designs! Be sure to consider it if you have a large order of $150 or more before the end of Spring Mini on May 1st! Check it out on page 90 on the top edge of the page!

This designer paper has the best coordinating colors! Some In Colors and some regular colors! For the card base, I chose Sweet Sorbet and then added a full layer of the floral pattern in the Flowers & More Designer Paper.

The center focal point is a piece of Parakeet Party Cardstock, cut at 3″ x 3″. The designer paper, this time a stripe in the same Flowers & More paper is cut at 2 3/4″ x 2 3/4″. Underneath the striped paper is a layer of Sweet Sorbet cut at 2 7/8″ x 2 7/8″. That layer is really optional, but I liked it.

The greeting uses the Conversation Bubbles Bundle and is stamped in Sweet Sorbet ink on Basic White. Then I used the die again, this time with Sweet Sorbet cardstock to get the textured border to go around the “thank you”. In the photo, you can see the little diagonal lines for texture on that border piece. I could have used just the white bubble and not used the outer border or layered it just on a small Parakeet Party rectangle or something to give it a layer.

Before I adhered the striped greeting piece to the layer of Parakeet Party, I tied around a piece of the White 1/4″ Crinkled Seam Binding Ribbon just in a knot. What would we do without that ribbon?! I use it all the time and I hope it doesn’t retire! You can even color it easily with markers or ink if you want a colored ribbon.

The center panel is popped up on Stampin’ Dimensionals, but it could be adhered flat on the card. On the inside, I would suggest putting a layer of Basic White with a little strip of designer paper or maybe even one of the other bubble greetings or die cuts. You can stamp another message on that or write your personal note without it being on dark cardstock. It would be fun to use this bright and happy paper on the envelope flap and really make the recipient excited to open your card!

There is only about a month left to shop the Spring Mini Catalog! I think by the end of the week we will have the Last Chance List and any discounts on retiring products. If there are any products in the catalog that you really really want, it might be best to order them BEFORE the Last Chance list comes out just in case things sell out. Some will for sure.

SHOP STAMPIN’ UP! ONLINE HERE!

Easter Triangle Treat Box with Bunny

If you have been around for a while, you know I have made MANY of these triangle boxes for various occasions and made them in multiple sizes! They are so easy yet look so cute! If you want an Easter treat box, try this Easter Triangle Treat Box with Bunny.

Here’s how to make one and then just decorate however you like!

Triangle Box Drawing

For this Easter triangle box, I used a piece of the Country Floral Lane Designer Series Paper. (It’s not just for Valentines!) It is cut at 4″ x 8″ but you can vary the size. Use the diagram above to see how to score, but it is simple! At each end of the paper, put a light pencil mark at the halfway point which in this case would be 2″. Score the paper in half at 4″. Then in that awkward manner, with your Paper Trimmer, score from that 2″ middle point at one end down to the middle score line which will be on a diagonal. Do that on both sides of one end, then turn the paper and score at the other end in the same way.

Now fold and crease all the score lines. You will see how it will fold together to make the triangle box. Determine which side will be the front or top of your box that you will want to decorate and how the flaps will go so that the top view of the box will have the fold of the flaps showing and not the open side. Pay attention to the pattern direction if it matters. Once you see how it folds together how you like, you can use any hole punch to punch holes in the sides near the top. You want the two holes on each side to align. This is how your paper should look creased and with holes punched.

Easter Triangle Treat Box with Bunny diagram

To decorate, I stamped one of the bunnies in the Easter Bunny Stamp Set in Memento Ink and colored with the Soft Suede Combo of Stampin’ Blends markers. I cut out the bunny and popped him up over a Balmy Blue scalloped circle die in the Layering Circles Dies. I already had some extra stamped and colored Easter eggs and a carrot from another project so I just adhered those to the front.

After adding some treats or a small gift inside the triangle box, just close it up and tie a ribbon through the holes you already punched. I used the White 3/8″ Glittered Organdy Ribbon because it’s white and it’s festive and pretty!

You can see what the triangle box will look like from the side.

I’ve made these triangle boxes for Halloween, Christmas, and just for fun! Here’s a Halloween one if you want to see another idea! You really could make an extra-long box, also, just follow the basic scoring directions – score in half and score diagonally from there to the middle point of the end, on each end.

If you want to do something different than an Easter basket, try making something like this Easter Triangle Box with a Bunny on the front!

An Easter Treat Easter Basket

An Easter Treat Easter Basket

These little Easter baskets are fun and easy to make! Make them for a treat to give someone or for table favors on your Easter table at dinner. Decorate as simply or as fancy as you like.

This An Easter Treat Easter Basket is made with both cardstock and designer paper. What I meant to do was make a basket out of cardstock and glue on pieces of designer paper. But I accidentally cut and scored the designer paper first and then realizing my mistake, I just cut a piece of cardstock and glued the designer paper onto it. It worked out fine and made it sturdier than if I had just used designer paper.

This basket is made with Balmy Blue cardstock and a polka dot pattern in Dandy Designs Designer Series Paper. This designer paper was a free product in the Sale-A-Bration Brochure with a $100 purchase and has all this great paper in it. I spotted the polka dot pattern and thought that would be perfect for my basket. Of course, you can use anything you like or even just cardstock.

The way you make a basket like this one is to cut a piece of paper (cardstock or designer paper) at 6″ x 6″. Then score at 2″ and 4″. Turn the paper and score at 2″ and 4″ This will look like a tic tac toe pattern so you know if you have it right! Then cut the two vertical score lines top and bottom to the horizontal score line. Crease all the fold lines. You can see the diagram below.

Fold the sides together at angles as you will see in the photo below. Have the basket handle ready to sandwich in between the layers. I cut my handle at 8 1/2″ x 3/4″. Or if you forget, just adhere it to the inside of the basket.

An Easter Treat Easter Basket back

Decorate the basket however you like! I stamped one of the bunnies in the Easter Bunny Stamp Set on Basic White cardstock and colored him in using Watercolor Pencils in both Assortments and smoothed out the coloring with a Blender Pen. I also stamped and colored one of the carrots for the bunny and cut it out by hand. The bunny was punched out with the Easter Bunny Punch. It was so popular it’s been out of stock for a while but more punches are due back in the week of May 15. I diecut a plain circle and a scalloped circle out of the Layering Circles Dies for the side of the basket. There was not enough room for a little Easter greeting, but I used this one in the stamp set and just cut it apart to fit it on the decoration in a way that it would fit! The bunny and the circles were all popped up on Stampin’ Dimensionals.

Since I hadn’t done anything fancy with the basket handle, I just tied on a bow with the Silver 3/8″ Metallic Edge Cotton Ribbon. Then just put some “shred” or tissue paper in the basket and add your Easter treats!

Here is a blog post from a few years ago showing three different Easter baskets I made!

Have fun trying out these Easter basket ideas for a cute Easter treat!

Flowers & More Floral Print Thank You Card

Flowers & More Floral Print Thank You Card

Here is basically a quick and easy card to make for any occasion. I have been dying to make a card with this particular pattern in the Flowers & More Designer Series Paper, and finally, here is my Flowers & More Floral Print Thank You Card.

This card is so simple to make! The card base is Basic White Cardstock and I just used a square piece of the designer paper for the focal point of the card. The designer paper is cut at 3 1/2″ x 3 1/2″ and is layered on a piece of Sweet Sorbet Cardstock that is cut at 3 3/4″ x 3 3/4″. Even though the card is very simple in design, I played around with it a lot! This is the design I intended to make, but I played around with adding another pattern of designer paper as a regular layer on the card and a smaller square of the floral designer paper. I also played around with the layer under the designer paper square. I tried several different colors and settled on Sweet Sorbet.

Before adhering the designer paper square to the card, I tied around my last little bit of the Polished Pink 3/8″ Open Weave Ribbon. I also added a few Iridescent Rhinestone Basic Jewels in the flower centers.

For the greeting, I stamped a simple “thanks” in Sweet Sorbet ink from the Sentimental Park Stamp Set.

You could use this card design with any paper design and greeting that goes with the occasion, whatever you want it to be!

This Flowers & More Designer Series Paper is available only as a Host Reward that you can choose with an order of $150 or more. You’ll find it in the back of the Spring Mini Catalog at the top of page 90. Since it’s in the Spring Mini, you only have until May 1st to earn this paper. It has beautiful bright patterns in its 48 sheets of paper, 4 each of 12 designs! That’s a lot of paper!!

This card design on my Flowers & More Floral Print Thank You Card is so easy to make, you could make several with different designer papers and then leave the bottom space blank until you need the card for a specific occasion!

SHOP STAMPIN’ UP! ONLINE HERE!

First Day of Spring Hello Spring Card

First Day of Spring Hello Spring Card

Today is the first day of Spring! I decided to celebrate with my First Day of Spring Hello Spring Card! Even though we are having probably one last really cold day in Houston, it is the first day of Spring even if it doesn’t feel like it.

Today is called the Spring Equinox but it doesn’t officially happen until 5:24 PM EDT. The term Equinox comes from Latin words meaning “equal night” with the length of day and night being nearly equal in all parts of the world.

For my card today, I thought I would use my new set of alphabet dies, the Alphabet A La Mode Dies. You will find them on page 61 of the Spring Mini. I loved the skinny look of them and it looked like there would be fun ways to use them! Aren’t we always looking for new and interesting ways to make our cards?!

This is a Slimline card, as we call it. I cut the card base of Bermuda Bay cardstock at 6″ x 6″ and scored it at 3″ to make this style of card. The Basic White layer is just a tiny bit smaller than 3″ x 6″ so 2 7/8″ x 5 7/8″.

I cut out the letters with different colors of the Brights cardstock. I used Melon Mambo, Coastal Cabana, Daffodil Delight, Mango Melody, Granny Apple Green, and Gorgeous Grape. Unbelievably, I remembered to use the Adhesive Sheets so the skinny letters would be like stickers and I wouldn’t have to use teeny tiny drops of glue on the back. I just needed small pieces of the adhesive sheets on the back of each color of cardstock. After they were diecut, I just peeled off the protective layer and stuck the letters onto the Basic White cardstock on the front of the card.

But first, always do your stamping first! I sort of did, and sort of didn’t. I did figure out how the letters would fit on the card and saw that there would be enough space to stamp the “hello” from the Biggest Wish Stamp Set in Memento Black ink. It’s just the right size! After I had that stamped on the white piece, I was ready to adhere the alphabet letters. I figured out where the center of that piece was and started placing the letters off to the sides of the center. Then I saw how they ended up, if they were fairly even with the sides of the card and adjusted them accordingly. It helps to use a ruler along with Grid Paper to have a straight edge to help place the letters evenly at the base. Or make them more whimsical and tip them different ways, then you don’t even have to try to make them straight!

After I had the “hello” stamped and the letters adhered, I knew I wanted to add flowers in the corners. I started off stamping and coloring in some flowers, cutting them out and placing them on the two opposite corners, but I didn’t like that. I ended up using the flower clusters in the Sentimental Park Stamp Set and stamping those with Memento ink. It was dangerous to stamp right on the card with the letters already adhered but I took a chance and it worked out!

I felt like the Stampin’ Blends would be a bit too strong in their colors for this card, so I switched to Watercolor Pencils! I don’t use them often enough but they are fun and satisfying to use just like the Blends! Just add some color with the pencil, it doesn’t have to be perfect, then use a Blender Pen to smooth out the color. The Blender Pens were some of the first things I purchased after I heard about Stampin’ Up! They have just a little bit of moisture which works with the Watercolor Pencils. There are two different assortments of pencils in the Online Store so you can choose which colors you might use the most.

I hope this First Day of Spring Hello Spring Card inspires you to enjoy your first day of spring, and maybe even make a spring season card!

SHOP STAMPIN’ UP ONLINE HERE!

Radiating Stitches Easter Card

Radiating Stitches Easter Card

It’s time to be making Easter cards and here is one with a new design, the Radiating Stitches Easter Card! These new dies, one of the Online Exclusive products Stampin’ Up! recently released, really give a fresh new look to cardmaking!

The card base is Orchid Oasis, one of the current 2022-2024 In Colors, and one that will be staying around. I originally planned the card base to be Basic White with the Orchid Oasis as the layer. But after getting the layer ready, I didn’t care for it against the white so I made the card base out of Orchid Oasis. Color on color! The new die set is called Radiating Stitches. The dies layer pretty well. Three are rectangles and there is also a heart and two circle dies. Lots of creative possibilities!

The Orchid Oasis layer is wider, then the Sweet Sorbet rectangle fits inside the center and the smaller rectangle fits in the center of that one. I used the cute little flower paper in the Flowers & More Designer Series Paper. This is a Host reward you can choose with a $150 order from the Spring Mini Catalog. You’ll find it in the back of the catalog on page 90 up in the top corner!

You really could just add a decent-sized greeting going across the center of the card, but since I wanted an Easter card, I added a bunny! This is one of the bunnies in the Easter Bunny Stamp Set in the Spring Mini. I stamped the bunny on Basic White cardstock with Memento ink. Since I really wanted just a white bunny, I added a little gray fur on his middle with the Light Gray Granite Stampin’ Blend marker and some touches of Petal Pink for the ears and feet.

The greeting is stamped in Orchid Oasis ink on Basic White and diecut with the narrow Stitched Rectangle Die. It barely fits, but it does fit! I popped up the bunny on Stampin’ Dimensionals, so I put Dimensionals on each end of the greeting so it would fit over the bunny. For some sparkle, I added some Iridescent Rhinestones to the card front in the flowers.

These Radiating Stitches Dies are something a little different and you will find them in the Online Exclusives section of the Online Store. They give your cards a little extra texture and design!

SHOP STAMPIN’ UP! ONLINE HERE!

Easter Bunny Treat Sack

Easter Bunny Treat Sack

Here’s a cute Easter treat bag or even an Easter decoration for your home….or both! Make this super easy Easter Bunny Treat Sack in minutes!

Use a lunch sack, either kraft or white. I would have used kraft but I couldn’t find any in my house! But I did have white and there are white bunnies, too!

To begin, fold the lunch sack in half lengthwise and simply draw the bunny ear from the top down a little way or as far as you like it. Then cut with scissors, keeping the bag folded and flat so it will cut both sides the same, just like when you cut a heart for a valentine.

Easter Bunny Treat Sack Pattern
Easter Bunny Treat Sack Cut

If you are giving it as an Easter treat, put the candy or gift inside, maybe adding some shred or tissue paper to fill up the space to shape the bag. If you are just using it as an Easter decoration for your house, stuff the bag with tissue paper or newspaper or whatever you have. Then tie a ribbon around the sack below the ears to make it look like a bunny. Add a cotton ball or pompom to the sack for the bunny’s cottontail. Add a Happy Easter tag if you wish or the name of the person you are giving the treat to.

This style shows the back of the bunny with his cute cottontail, but if you prefer you could draw on the bunny face and have it be the front of the bunny. Either way is cute!

Just a fun little Easter thing to make that is so simple you may as well make one!