Category Archives: Christmas

Stampin’ Up! Holiday Catalog Videos!

Enjoy these videos and get a better view of these new products in the July-December 2021 Mini Catalog, otherwise known as the Holiday Mini!

View the Holiday Mini Catalog HERE!

SHOP THE HOLIDAY MINI CATALOG HERE IN THE ONLINE STORE!

Whimsical Tree Happy Holidays Card

Whimsical Tree Happy Holidays Card

This Whimsical Tree Happy Holidays Card came after I made another card for my weekly newsletter to showcase a card that could be made with this beautiful paper. Actually, that card turned out to be monochromatic! If you didn’t receive my stamping newsletter today, please sign up for my Mailing List in the red box on my blog! Then you won’t miss out!

I am in love with the Whimsy & Wonder Suite in the just-released Holiday Mini Catalog! It’s the Whimsy & Wonder Specialty Designer Series Paper that really caught my eye when I started seeing it in videos, rather than online in the catalog. We can say this about most papers, but they almost all look even better in person and this one does that! If you would like a different, soft color scheme for your Christmas cards or projects, this is the paper for you!

This card base is Mint Macaron, one of the coordinating colors of the designer paper. Then I used a layer of the foil-accented holly leaf pattern of the designer paper. It’s so pretty against that Mint Macaron cardstock! Before adhering it to the card base, I wrapped the Blushing Bride 3/8″ Frayed Grosgrain Ribbon around to the back and added a separate bow. This ribbon is so soft and pliable! You might as well get some on your order! You’ll love it!

The Whimsical Tree is stamped on Basic White with Mint Macaron ink. That piece is die-cut with a Scalloped Contours Die. I could have die cut the next larger size of the Scalloped Contours Dies, but I didn’t want to take up too much room and cover up too much of the holly leaves designer paper, so I just made a layer of Blushing Bride Cardstock slightly larger than the stamped tree piece. That whole piece is popped up on Stampin’ Dimensionals. For some extra embellishment, I added some Champagne Rhinestones on the tree and cut out two gifts from the designer paper. If you do that, feel free to cut down the packages to smaller sizes than are printed on the paper. You can make them a lot smaller if you want!

I wanted just a small greeting so I stamped “Happy Holidays” from the Poinsettia Petals Stamp Set in Mint Macaron and layered it on a small rectangle of Blushing Bride.

This card has a few steps, but nothing too difficult. Did I say how much I love the paper and the ribbon?!! I love this card! I might copy it and make some more and then I’ll have some Christmas cards ready to go in December!

Remember, the Holiday Catalog is LIVE as of yesterday PLUS there is a second Sale-A-Bration going on for two months! Spend $50 and get something free in the Sale-A-Bration Brochure! Look back on yesterday’s post for the links to the PDFs of the catalogs and shopping links. If you purchase some of the Whimsy & Wonder Suite products, you can make your own card like my Whimsical Tree Happy Holidays Card!

SHOP STAMPIN’ UP! ONLINE HERE!

Heartwarming Hugs Christmas Tree Card

Heartwarming Hugs Christmas Tree Card

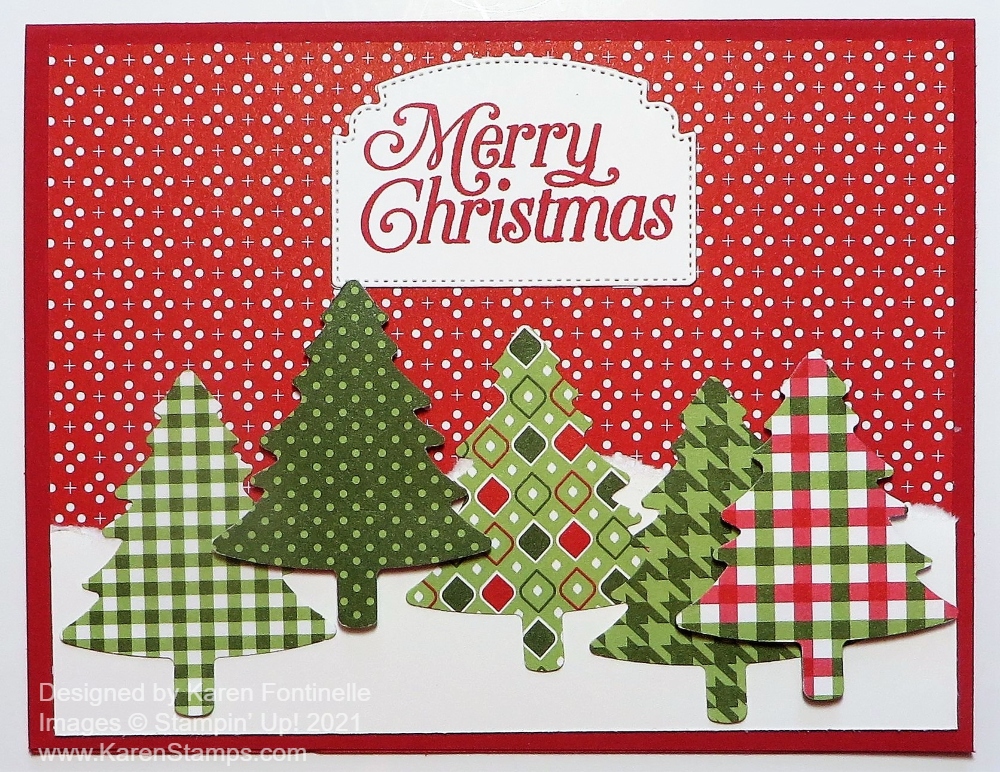
If you are anxious to get started on Christmas in July but you can’t order the new things yet in the Holiday Catalog, see if you still have some Heartwarming Hugs Designer Series Paper from last year’s catalog and make a card like this Heartwarming Hugs Christmas Tree Card! The paper is coming back in this current Holiday Catalog, going live August 3!

I still had some of this Heartwarming Hugs Designer Series Paper and I really like it. Lots of different plaids and stripes in traditional red, green and white! It’s just cute paper without having any special designs. Great for backgrounds on cards or other projects. Cute for making boxes and gift bags with both the inside and outside matching and looking like the holidays! Check your stash and see if you still have some.

The Pine Tree Punch is still current in the new Annual Catalog so get that out too! You can punch out lots of Christmas trees to your heart’s content!

To make this card, I started with a base of Real Red Cardstock (my favorite color!). I chose this red background paper with white dots to see what I could do with it or if it would work with the punched trees. I started with a vertical card, but when that wasn’t quite coming together, I turned it sideways and that worked, of course!

I went back to one of the first techniques I ever learned in stamping – tearing the cardstock! Hold the paper in front of you and pull down with your right hand as evenly or unevenly as you want. You want that torn edge look with kind of the underneath layer of the cardstock showing. That’s the best I can describe it. You don’t necessarily want a very straight, even, perfect edge. I used Basic White to make a snowy base for the trees.

I punched out several trees with the Pine Tree Punch and just placed them along the “snow”, popping up a few with Stampin’ Dimensionals® and some just adhered flat on the card.

The greeting is from the Perfectly Plaid Stamp Set. This is another product carried over into the new Stampin’ Up! Annual Catalog that you may already have. I think it’s been around a couple of years now, which is nice. I stamped it in Real Red Ink and then cut it out with one of the Ornate Frames Dies. It seems to fit perfectly on the card! I love the little stitching around the edge and the shape of the die is already cute.

That’s all there is to this card! I could have added some sparkle to the trees or on the background. Sometimes all I can think of is adding bling to a card, and sometimes I don’t think of it at all – until after I have taken the photo for my blog! Either way, keep it simple or jazz it up, this Heartwarming Hugs Christmas Tree Card is a fun and easy card to make.

SHOP STAMPIN’ UP! ONLINE!

Christmas 2-4-6-8 Treat Bag With Ornament

Christmas 2-4-6-8 Treat Bag With Ornament

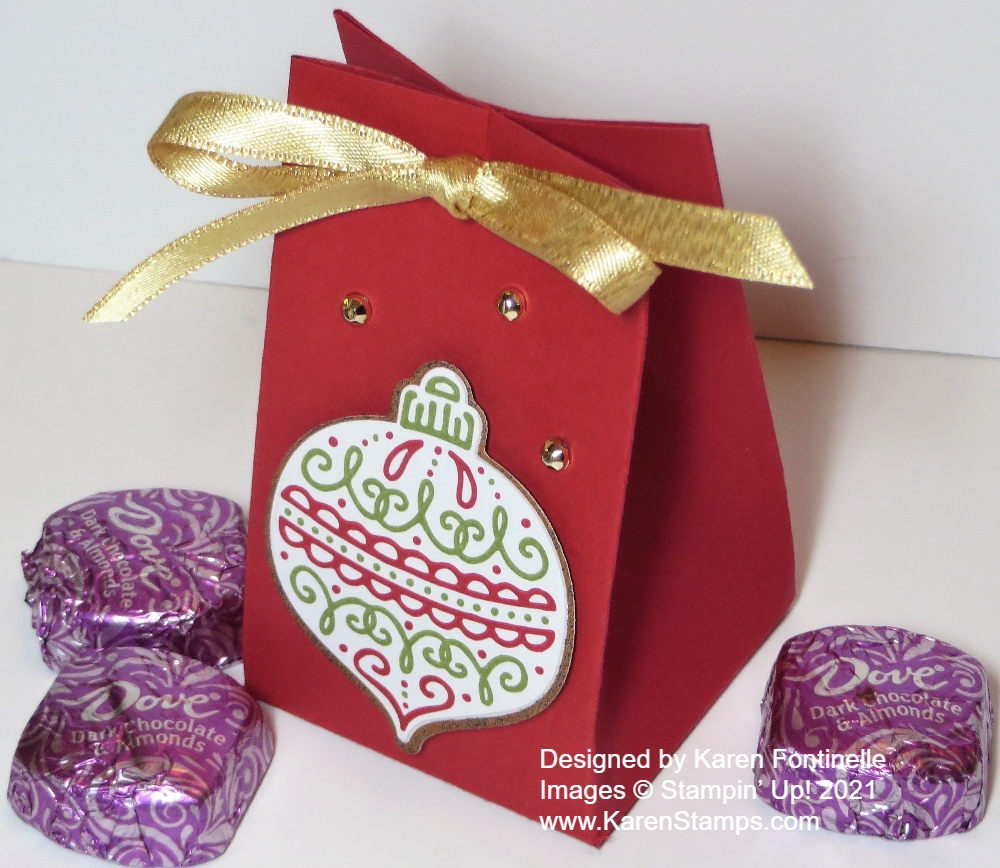
Christmas papercrafting is more than just making cards, as you know! We all will need bags, boxes, treat bags and boxes, gift wrap, party favors, decorations, and all kinds of things like this Christmas 2-4-6-8 Treat Bag With Ornament. This is one of the easiest things you can make! A 2-4-6-8 box or bag!

You can use this little bag for a treat or a small gift. You can put candies inside or a very small gift, like a piece of jewelry. For a little party favor or a little something at each place setting at Christmas dinner, you could make any number of these which would not be too much work! Hopefully this Christmas there can be parties and family gatherings! Keeping my fingers crossed!!

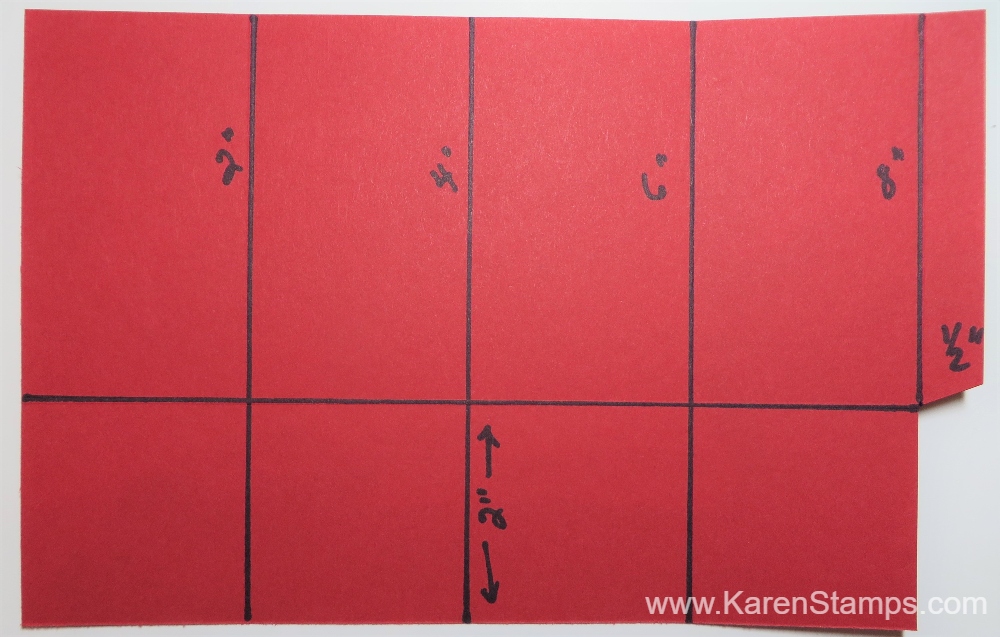
This little box is made with just a half sheet of cardstock, 8 1/2″ x 5 1/2″. Just score it at 2″, 4″, 6″, and 8″ going across.  Turn the paper lengthwise and score at 2″. That short area will be the bottom of the box.  Cut on the score lines just up to the 2″ scoreline going across. Cut off the narrow little tab area. See the photo below. Apply a strong adhesive, like Multipurpose Liquid Glue, Tear & Tape, or Stampin’ Seal+ to the narrow tab on the end, then fold the other side of the box over to adhere.  It’s easier to do this flat than to try to hold the box. Fold in the flaps for the bottom and add a little glue to hold them in place.  Leave the top open or pinch to close, whatever you like.

2-4-6-8 Treat Bag Diagram

You can choose to leave the little bag open at the top or pinch it closed. If you pinch it closed, poke in the sides a little bit to make the top come together easier. You can tie some ribbon through at the top as I did or use some kind of clip. You could even make a lid to fit on top!

Now you are all set to decorate your bag or box! I made this one SUPER simple!! I also happened to have the ornament die cut from the Gingerbread & Peppermint Designer Paper so it was really easy! If you wanted to use another design in the paper, maybe you would want to change the color of the bag. Mine is Real Red. The ornament is popped up with Stampin’ Dimensionals. For some bling, I added some gold Gilded Gems. The ribbon is the Gold 1/4″ Shimmer Ribbon in the Stampin’ Up! Annual Catalog. You could add a little tag tied on with the ribbon if you wanted to. Or decorate with some designer series paper! So many options! Here is a little treat bag I made a few years ago.

It’s time to start making some of these fun things! Christmas comes early for crafters! The July-December 2021 Mini Catalog will be out August 3 along with Sale-A-Bration! After that it is full-steam ahead! Plan to make a few little 2-4-6-8 boxes to have on hand.

SHOP STAMPIN’ UP! ONLINE HERE!

Peaceful Prints Deer and Trees Christmas Card

Peaceful Prints Deer and Trees Christmas Card

My inspiration for this Peaceful Prints Deer and Trees Christmas Card came from a sample in the Sale-A-Bration 2021 Brochure! Sale-A-Bration begins August 3 along with the Holiday Mini Catalog so it will be a great time to shop! With every $50 you spend, you can choose a free product in the Sale-A-Bration Brochure!

This card uses a really new product that we have never had before! In fact, I didn’t know it even existed! Cork Specialty Paper! I knew I was going to use the Peaceful Prints Designer Series Paper which is a product you can choose free in the Sale-A-Bration Brochure with a $50 purchase! I knew I was going to cut out two of the deer, by hand, on the paper and use the deer something like in a sample on that page. In the Holiday Mini, you can purchase a punch that I believe will cut out some of the deer on this designer paper, of course only the deer looking in one direction.

The card base is Real Red. Then I got the idea to use a piece of the Cork Paper for the first time for a background layer and I added a layer of Basic Black behind it to match the plaid on the deer. I cut the two deer out by hand from the Peaceful Prints Paper, leaving a small white margin around them. Someone said to do that at a Stampin’ Up! Convention years ago, I guess it makes cutting easier and you don’t have to be perfect! But when I flipped the paper over to put glue on it, the other side of the paper was the red and black plaid, so I just as easily could have had deer with no white margin around them! So funny! I used Stampin’ Seal to glue down the cork and the black layers onto the card. It seemed to work fine on the Cork Paper. The Cork Paper is surprisingly very thin! It’s amazing!

The trees are stamped from the Whimsical Trees Stamp Set and die cut with one of the dies in the Christmas Trees Dies. I die cut one just plain green and sponged some ink on it for interest. You can buy both the Stamp Set and Dies together in the Whimsical Trees Bundle and save 10%! (see pages 24-25 in the Holiday Catalog). I adhered two tree trees flat on the cork paper and one is popped up on Stampin’ Dimensionals. Then both deer are popped up on Dimensionals, except the one on the left overlaps the tree which is already popped up so I only put a Dimensional under his rear and the front end is glued down to the tree!

The greeting is in the Whimsical Trees Stamp Set. I stamped it in Real Red Ink and die cut with a die in the Stitched So Sweetly Dies. You might not recognize which one because I trimmed off the top and bottom rounded edges so I could layer it on a Real Red piece cut with the exact same die. Really, you can’t recognize either of them the way the top one covers up the bottom layer, but at least I got two colors for the greeting!

On the inside of the card, I added a Basic White layer, adhered a strip of the red and black plaid design at the bottom, and also adhered another die-cut tree! Then I can stamp or write a message on the inside on the white cardstock!

This was a fun card to make as I went along! I started by looking at the sample that looks like a tag in the Sale-A-Bration Brochure and came up with this card! Just play when you are stamping and see what you come up with! Maybe you will choose this Peaceful Prints DSP when you place a $50 order during Sale-A-Bration so you can make something like this Peaceful Prints Deer and Trees Christmas Card.

SHOP STAMPIN’ UP! ONLINE HERE!

Whimsy & Wonder Christmas Trees Holiday Card

There is a new Suite in the Stampin’ Up! Holiday Mini Catalog called the Whimsy & Wonder Suite which I totally passed over the first time I looked through the catalog online. When I saw some videos of the package of the designer paper and the pink color scheme for the holidays I fell in love with it although the first card I made, this Whimsy & Wonder Christmas Trees Holiday Card, doesn’t even have those colors! Go figure! But this is what I came up with at the time!

The Whimsy & Wonderful Designer Series Paper is so stunning! If you don’t mind using some non-traditional colors for Christmas, even for a few cards and projects, I think you will love the designs and colors on this paper! All the sheets have foil accents on one side of the paper. Along with the pinks, blues, light greens, and images it is beautiful! It’s probably my favorite in the Holiday Catalog and I’m usually pretty traditional.

This card starts with a Mossy Meadow Cardstock base. Then I chose the dark green side of one paper with white dots, like snowflakes. I simply turned the paper over and saw the diagonal silver foil stripes on the other side and used that for the bottom portion of the card layer.

Some of the whimsical trees on another sheet of designer paper can be cut out with the dies in the Christmas Trees Dies. Of course, you can’t run the whole 12″ x 12″ sheet of paper through the Stampin’ Cut & Emboss Machine, so you need to cut out portions of the paper to die-cut. You want to leave a generous enough margin around the tree so the die can cut it correctly without ruining too much of the rest of the paper! On my card, the middle tree in the background was actually at the bottom of the page, not the full image, but I was able to die cut what was there and still use it! Some of my trees were glued directly to the card front and some are popped up on Stampin’ Dimensionals®. Most of the trees have foil accents in tiny dots or garlands.

The greeting is in the Frosted Gingerbread Stamp Set. I either didn’t have space for this card or didn’t care for the greetings in the Whimsical Trees Stamp Set. After looking through all my dies and judging the space on my card, I finally had to just stamp the greeting on a narrow strip of Basic White Cardstock and layered it on Mint Macaron Cardstock which matches the ink color. I used the silver pieces in the Silver & Clear Epoxy Essentials on each end of the greeting.

Maybe I should have stopped myself, but I added some Subtle Shimmer Sequins on page 37 in the Holiday Catalog in the upper background of the card. I couldn’t help myself even though with the accents on the trees and the stripes on the bottom paper, there is pretty much sparkle on the card already. But can we really have too much sparkle??!

The Holiday Catalog will come out on August 3rd! The online catalog will go live on that day for you to view. August is not too soon to begin your holiday cardmaking and crafting! Then you’ll be able to start making Christmas and holiday cards like this Whimsy & Wonder Christmas Trees Holiday Card.

Gingerbread & Peppermint Christmas Ornament Card

Gingerbread & Peppermint Christmas Ornament Card

Here is my first Christmas card of the season, the Gingerbread & Peppermint Christmas Ornament Card! It doesn’t seem like it should be time to be thinking about Christmas cards, but the Holiday Catalog will be coming out in August so the fall and holiday craft season is beginning! You can see it already in the craft stores! There is no summer!

One of the sets of products I think a lot of people are going to love in the Holiday Catalog is the Gingerbread & Peppermint Suite. There are a lot of products in this grouping! You can choose stamps, dies, designer paper, ribbon, pillow box dies, Memories & More cards and envelopes, and more! This card doesn’t use all those things!

The card base is Real Red Cardstock with a layer of the Gingerbread & Peppermint 6″ x 6″ Designer Series Paper. This green design with white lines and red dots is actually the reverse side of the ornaments! I wanted a Real Red background for the ornaments I would die-cut, but I also made a layer underneath of Old Olive to help the Real Red stamp out a little more.

I used the Gingerbread Dies to cut out the ornaments, although you could do it with Paper Snips pretty easily. I popped them up with Stampin’ Dimensionals® and tied a little bow with Linen Thread on top of each ornament. You could use whatever twine or narrow ribbon you have. I might have used silver if I had some handy!

The greeting is one in the Frosted Gingerbread Stamp Set. I stamped the entire greeting a couple of times and tried different dies and ideas, but it was just a little too large for the space I had on my card. I thought about only stamping it on the inside of the card and not having any greeting on the front of the card. In the end, I used my Stampin’ Write Real Red Marker to color just the “Merry Christmas” portion of the stamp and used a small die in the Ornate Frames Dies. It just fit!

Then for a little bling, I tried out the new Subtle Shimmer Sequins on page 37 of the Holiday Catalog (when you get one!). They don’t have holes in the center so the glue doesn’t squish out when you adhere them! They come in two sizes and four colors: Matte Silver, Matte White, Metallic Silver, and Pearl White. I just used three Metallic Silver ones. I think it’s perfect!

Once you make a Christmas card design you like, make several more cards exactly the same….five, ten, whatever number depending on how many you think you will send out. That way you can have fun making cards of several different designs. That’s what I like to do. When you have the design figured out, the supplies out, you might as well make a batch of cards! Do it assembly-line style – cut everything, stamp everything, assemble everything, etc.

The July-December Mini Catalog (delayed a month due to shipping issues) will begin August 3 so get ready! It will also be Sale-A-Bration (yes, a second one this year!!) so as you purchase holiday items, you will earn free product with every $50 purchase! Something to look forward to during this hot summer!

SHOP STAMPIN’ UP! ONLINE HERE!

Christmas Designer Paper Gift Tags

Christmas Designer Paper

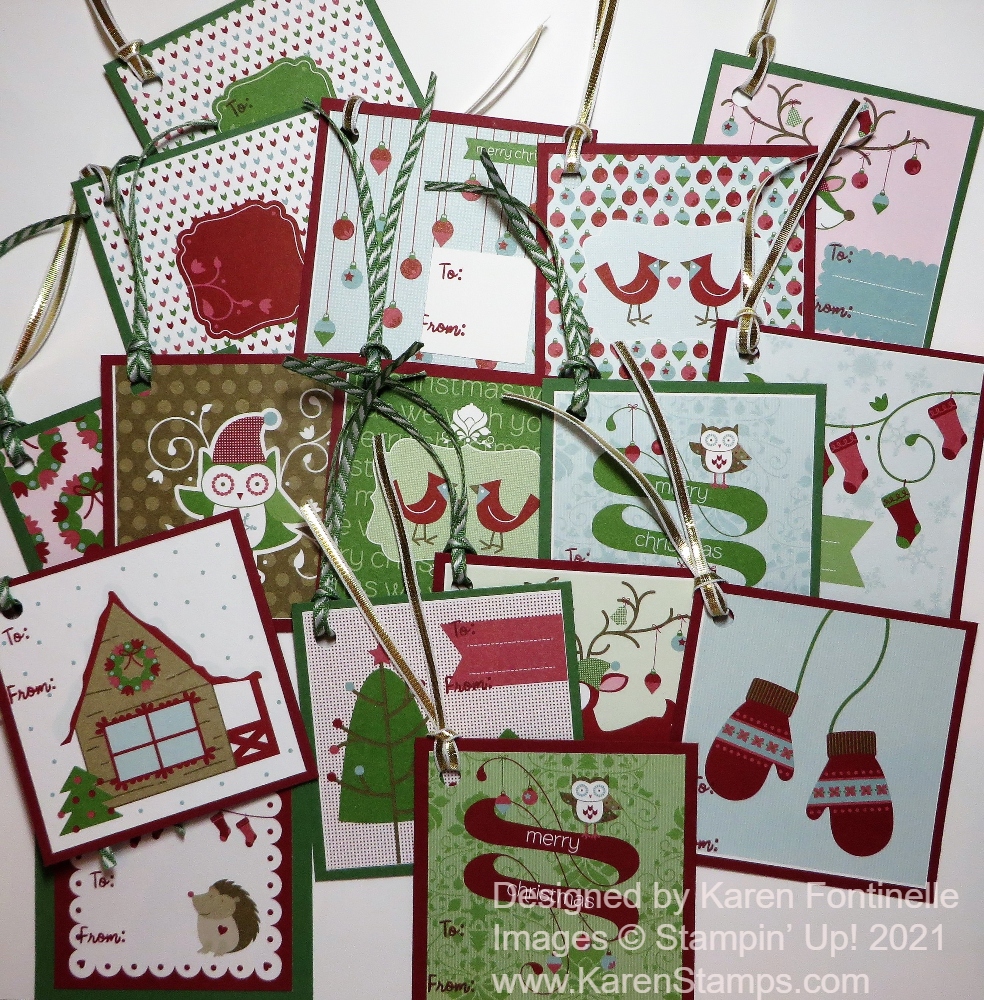
Don’t think you are on the wrong year on my blog! It IS 2021! But this paper is not! I was going through my stash of retired Stampin’ Up! designer series paper recently and came across this single sheet! I’m sure there was another sheet just like this but I don’t know how I used it. I guess I made tags, but I don’t remember. I don’t know the name of this paper or what year it is from. All I know is that when I came across it, instead of sticking it back in the pile, I just thought I should keep it out and actually make some gift tags out of it right away!

Christmas Designer Paper Gift Tags

Of course, all that really had to be done was cut the squares apart! Then I chose the matching colors of Cherry Cobbler and Garden Green and cut those for the back layer of the tags. The tags mostly don’t have a good place to put the “To:” and “From” so they needed to be layered on cardstock. The opposite side of the paper was a diagonal stripe in Christmas colors so no place to write and the paper needed a cardstock layer anyway.

As it turned out, I found a To & From in the Snowman Season Stamp Set so I used that and mostly stamped somewhere right on the front of the tag. For the tags with no good place to stamp it, I used a retired Square Punch and punched out several white squares and stamped on those, then glued to the back of the tag.

With a hole punch, I punched a hole in the corner of the tag and tied on some retired ribbon to match. That’s all there was to it! They will just be tags for our own gifts so they don’t need to be fancy. And having these on hand just might save a last minute trip to the store for more gift tags at Christmas time!

It is so hot here that I figured having a day of making cute, easy Christmas tags would cool me off! You might like looking through your old designer papers and see what you can find to make on a hot summer day!

A Little Christmas in April With the Tag Buffet Project Kit!

Tag Buffet Christmas Gift Tags

How about a little Christmas in April using the Tag Buffet Kit?! While things are kind of quiet holiday-wise, think about getting this Christmas tag kit at a discount and make some tags for Christmas gifts ahead of time! I know I have had to go to the store at the last minute to buy more tags for Christmas gifts. Or you can even make these tags or parts of them and stick them on Christmas cards! Get a head start!

This Tag Buffet Project Kit is on the Stampin’ Up! Clearance Rack right now. The Tag Buffet Stamp Set is no longer available but you can use any stamp set that has Christmas greetings with these tags. There is no stamping involved except for the greeting, so really you could skip any stamping and just use the images. I really think this tag kit is beautiful and I enjoyed making my Christmas tags when the kit came out in the past Holiday Catalog 2020.

The kit comes in a cute holiday box. All you have to do is layer the kit contents to make the tag and thread the string through the top. Or use the pieces to make Christmas cards or any other project!

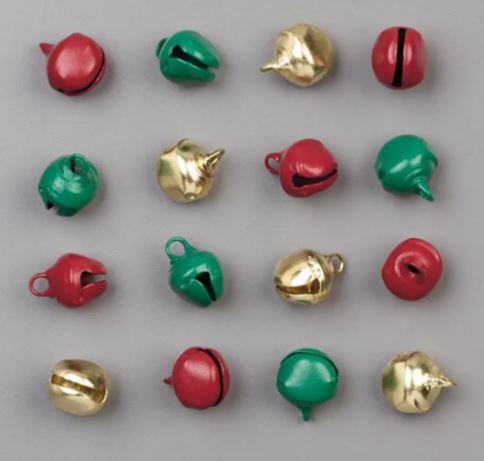
Also on the Clearance Rack are these little Jingle Bells! You can get these for only $3.00 and add them to your Christmas tags! Or add them to any other holiday packaging when the time comes! Order a bunch and make a jingle bracelet for the holidays!

If you want any more details, read my blog post when I made my Tag Buffet Project Kit HERE.

You will also find other Christmas ribbons and even the Plush Poinsettia Specialty Papers on the Clearance Rack right now! Be sure you check it out while you are shopping! I already have my extra Tag Buffet Project Kit! If you don’t use all the designed pieces on each tag, you can probably use some of your own supplies and expand the number of tags you can make! Last year I enclosed a tag in a few Christmas cards that I sent out just for a little surprise gift inside my card. Remember, anything can sell out at any moment, but since now the big rush of the first day is over, I think you have a moment to look around on the Clearance Rack, not to mention the Last Chance Products and pick up some bargains for your stash!

SHOP STAMPIN’ UP! ONLINE HERE!

Mini Coffee Carrier Christmas Gifts

Coffee Carrier Trim the Town

I wished as hard as I could yesterday, but none of the rare Texas snow reached down to my part of the state, or even city! Outside of Houston, to the north and to the west got a few inches of snow which looked beautiful but it just didn’t come my way. Just rain ALL day and cold. Just not cold enough for snow! It’s been three years since we have seen snow, and I can tell you even a few flakes can be quite exciting here!

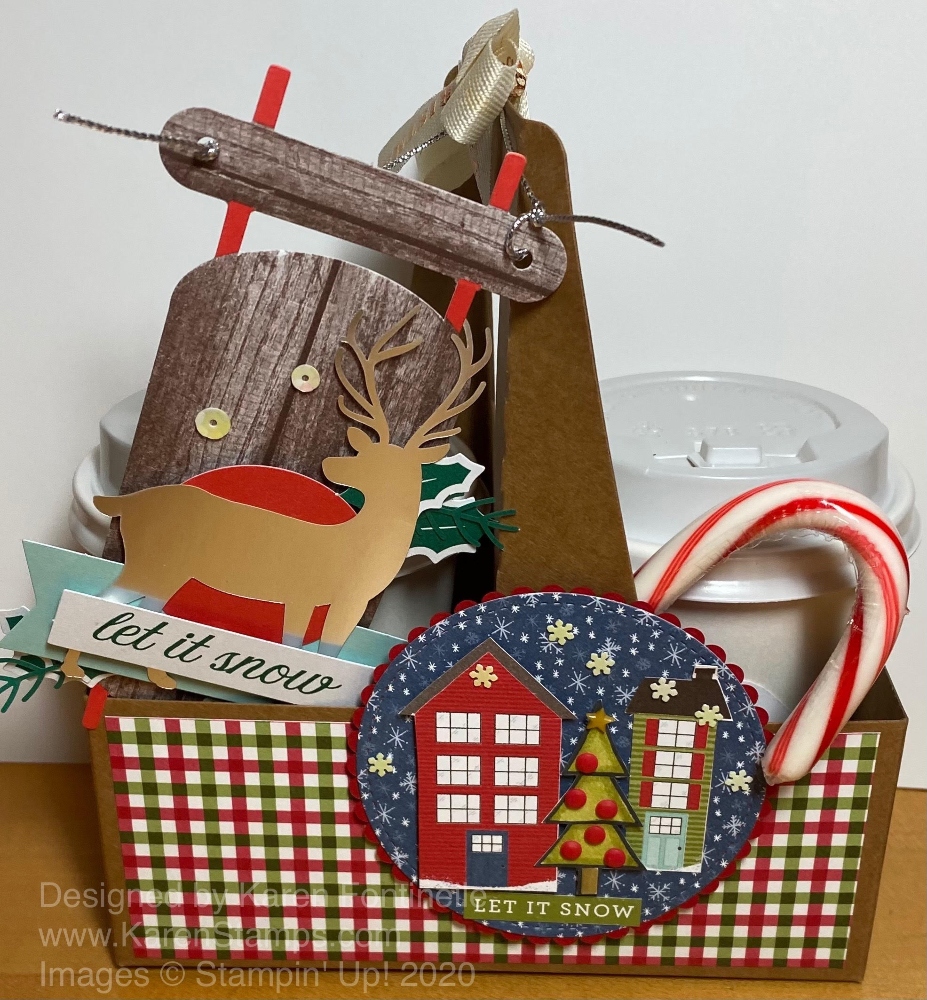
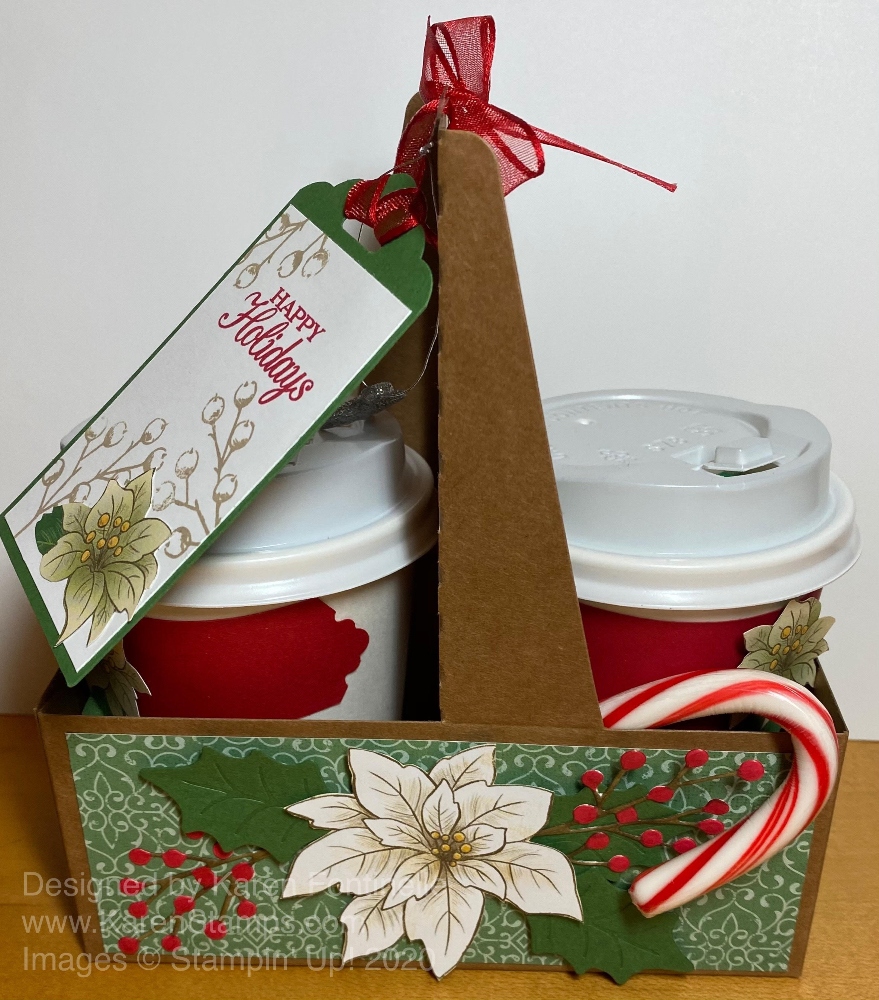
The cold and the snow reminded me of Christmas gifts I made using the Mini Coffee Carrier (retired) and the Mini Coffee Cups. Inside the cups I put a package of hot cocoa mix and plenty of candies (and maybe even a little cello bag of marshmallows). When I ran out of cups, I improvised with some retired bags from last year.

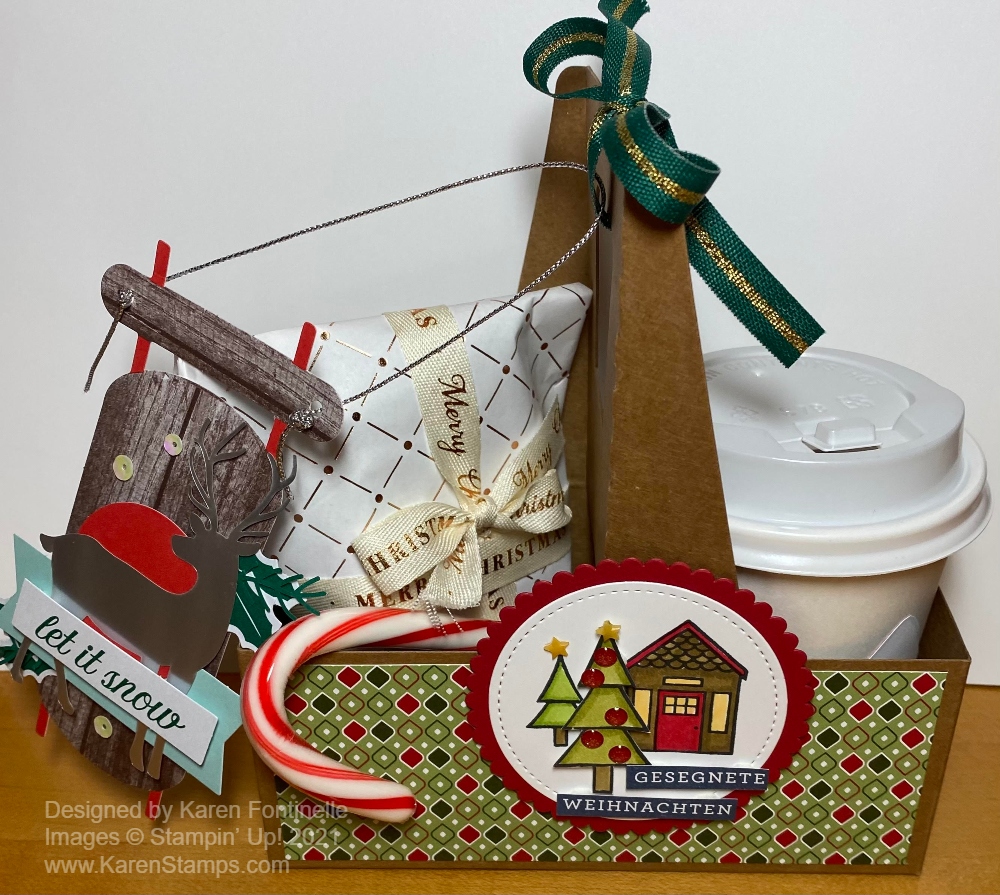
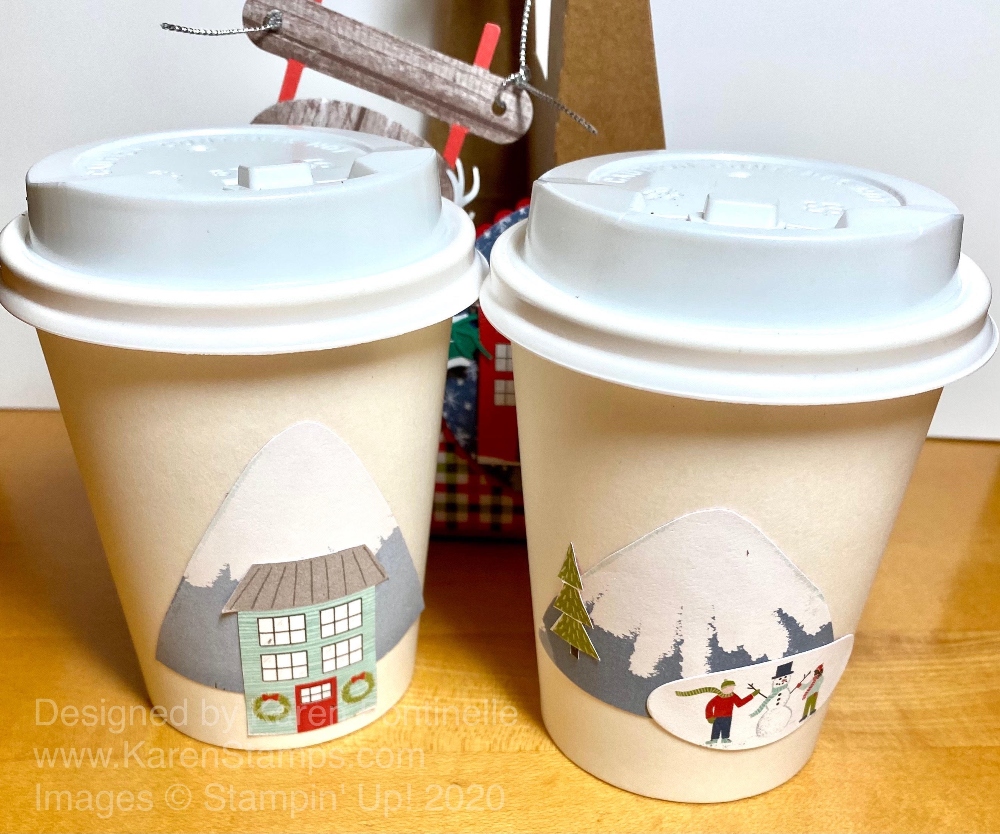
I decorated each Mini Coffee Carrier differently and decorated the cups as well. I didn’t own the dies to wrap paper around the cups so I had to decorate them some other ways because it is next to impossible to just wrap paper around a cup like that!

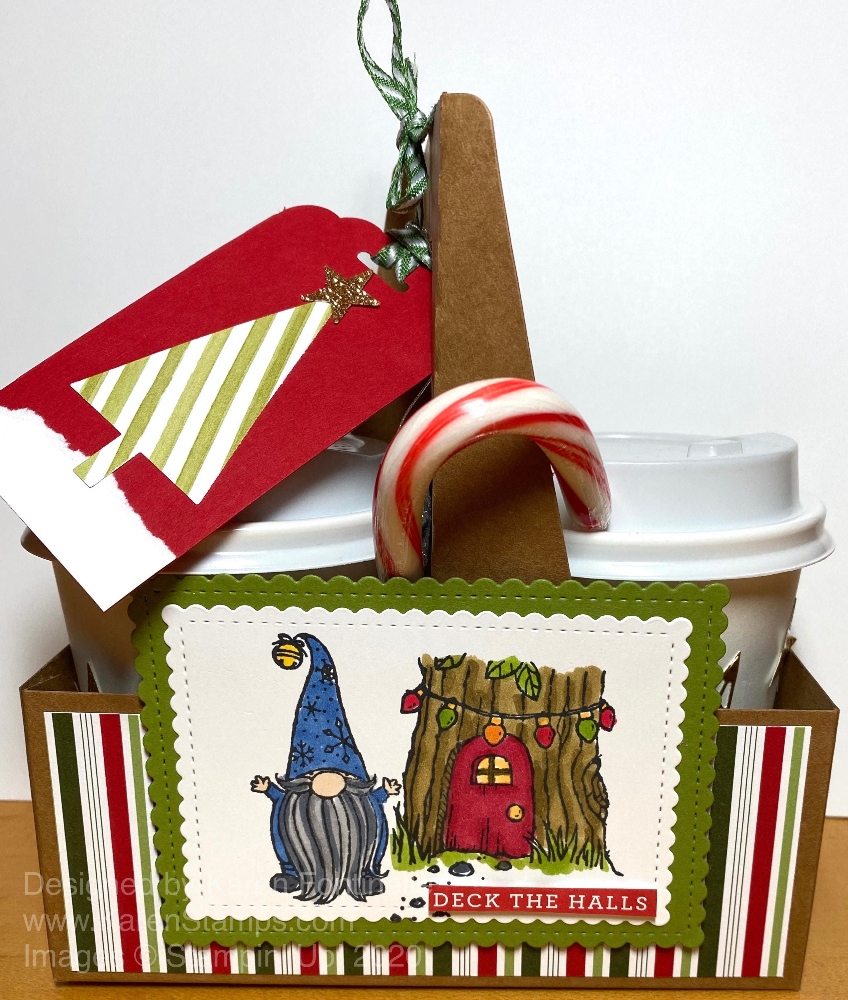
In the top photo, I used some Heartwarming Hugs Designer Series Paper (retired) to decorate the Mini Coffee Carrier and cut out some houses from the Trimming the Town Designer Paper (retired) plus a stamped and colored tree with some red enamel dots for the decoration. In my gift wrap I found tags I made last year from a Stampin’ Up! kit. How great was that to pull out some cute tags I had already made and were ready to use!

Coffee Carrier Gnome Victor

Here’s one made with the cute Gnome For the Holidays Stamp Set (retired) and colored with Stampin’ Blends! You can use lots of different shapes and sizes of die cuts for the focal point on these carriers.

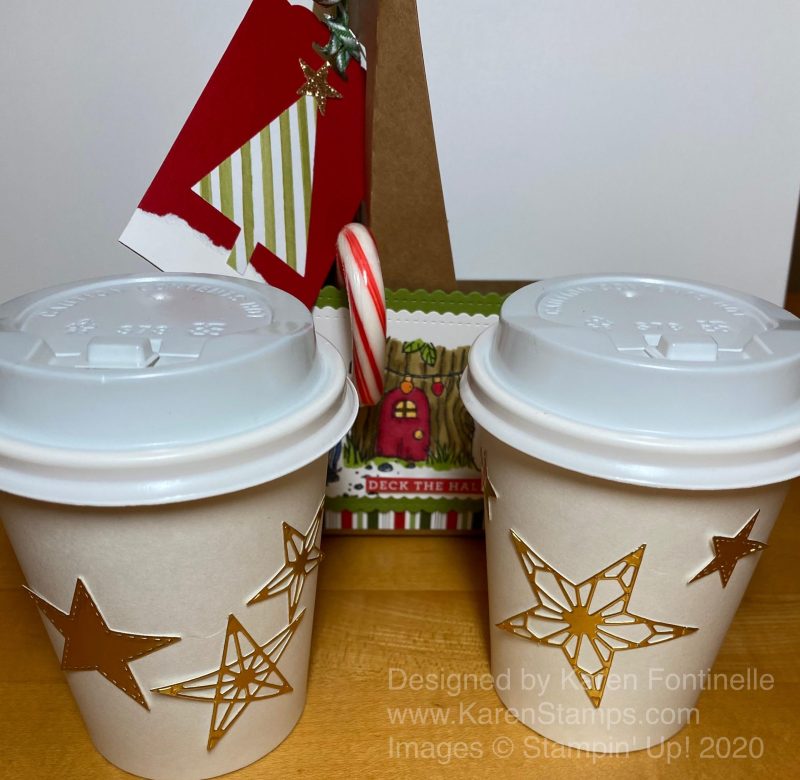
Here’s how I decorated the cups to go with the gnomes. I used the Stitched Stars Dies in Gold Foil.

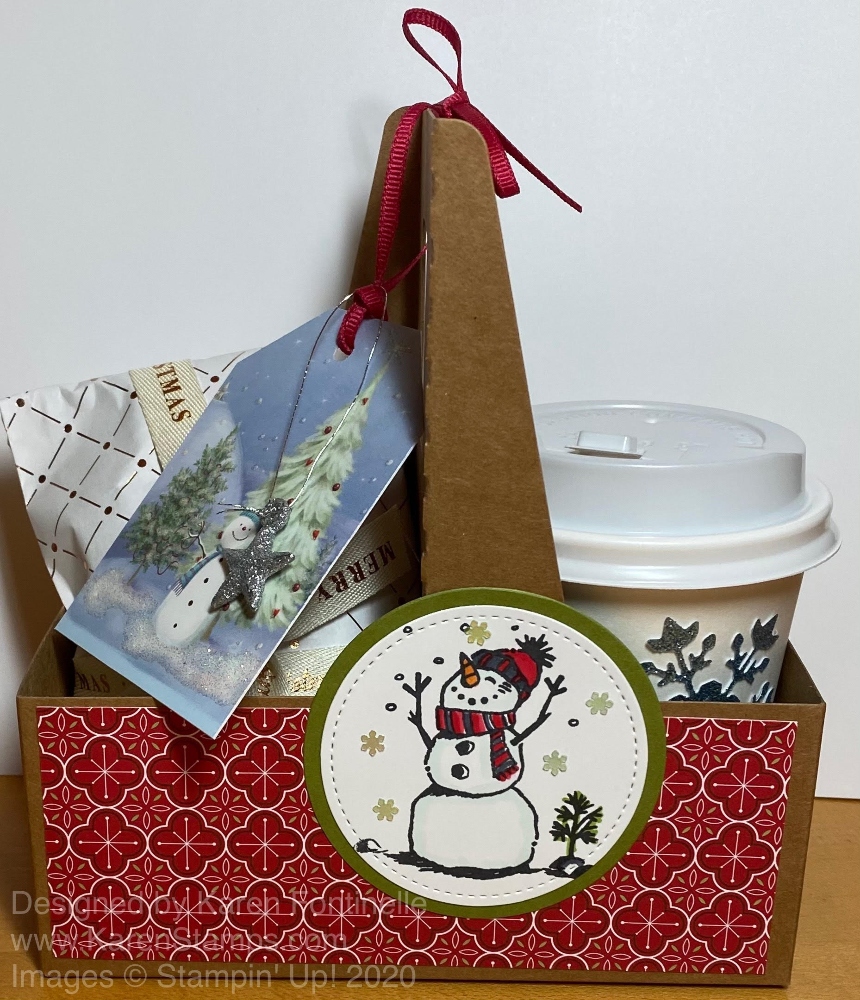
Coffee Carrier Snowman Kelly Full

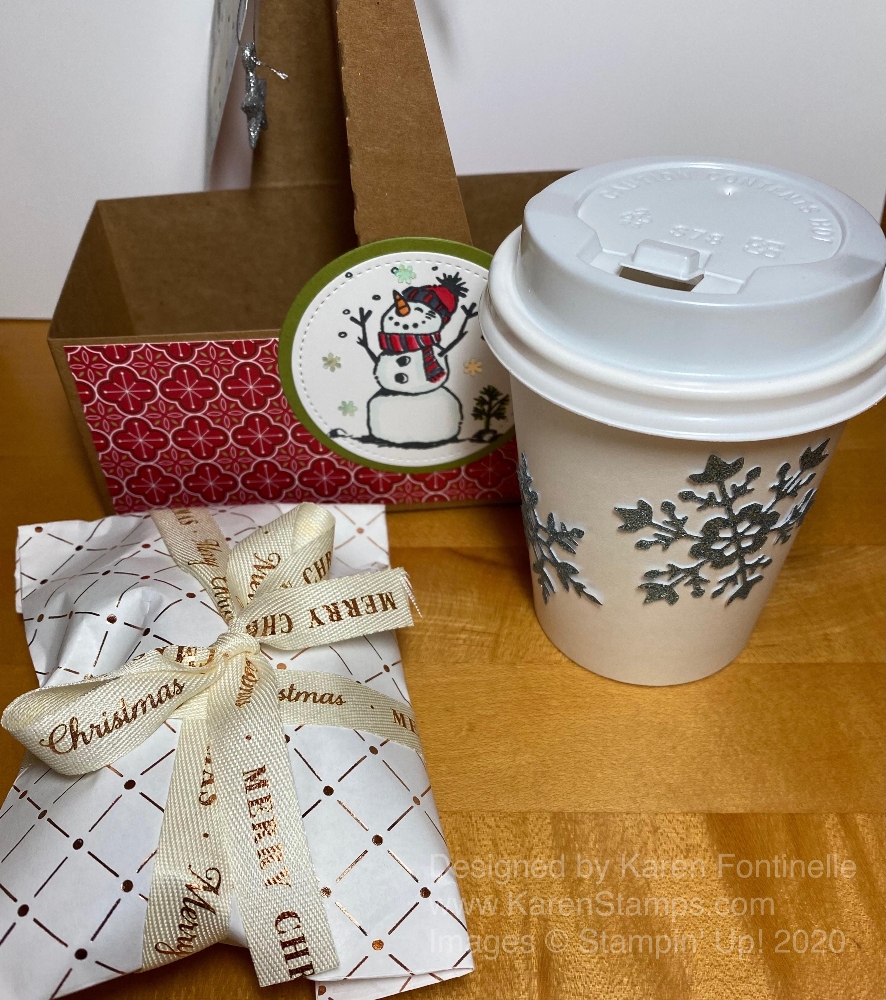
I’ll miss this Snowman Season Stamp Set! I used some adhesive Snowflake Sequins (retired) around him. I also used the Glitter Star Ornaments (retired) on each Mini Coffee Carrier, just tied around the handle. I decorated the cup with a big die-cut snowflake from the So Many Snowflakes Dies. I ran out of cups so I just put the treats in a retired gift bag and tied some retired Christmas ribbon from last year around the package to make it look festive.

Coffee Carrier Snowman Kelly
Coffee Carrier Trim the Town German Eric

You might notice some German words on this one! That’s because it was for my son who took German in high school and went to Austria for his semester abroad back in college. One sheet of the Trimming the Town Designer Paper had all Christmas words in many languages plus English printed in thin strips so I just found a German phrase on there to use and cut out the words! He also got a package wrapped in Merry Christmas ribbon from last year instead of a cup, but I think that was cute as well!

Coffee Carrier Poinsettia Amy

This Mini Coffee Carrier with a poinsettia is one I posted HERE back in November. You can see more details about these Mini Coffee Carriers on that post, if you already purchased some and have some extras to use.

Coffee Carrier Cups Trim the Town cutouts

And here’s how I decorated some cups just by cutting out images from the large paper in the Trimming the Town DSP that had the town scene with the mountains in the background, people ice skating, etc.

If you didn’t get to use your Mini Coffee Carriers and Cups, maybe you can think about ways to decorate them for next Christmas or even during the year with other papers and decorations, maybe for a birthday or other celebration. These were fun to make and easier than I would have thought! Once you get going, the ideas start flowing!

I didn’t get my snow yesterday but I’ll keep hoping!

Heartwarming Hugs Thank You Card

Heartwarming Hugs Thank You Card

Now that the holidays are over, it’s time to write a few thank you notes for gifts you received. At least that is the old-fashioned way of doing things and I think still the best! Which would you rather receive? An email on your computer or a handmade card in the mail with a handwritten note thanking you for a gift you gave or sent to someone?

Christmas may be over but you can still get out any leftover Heartwarming Hugs Designer Series Paper that you have and make a whole assortment of cards! If you look closely at the paper, it has no Christmas or holiday designs, just reds and greens. You can still use this paper for almost anything because it is not specifically designed for Christmas!

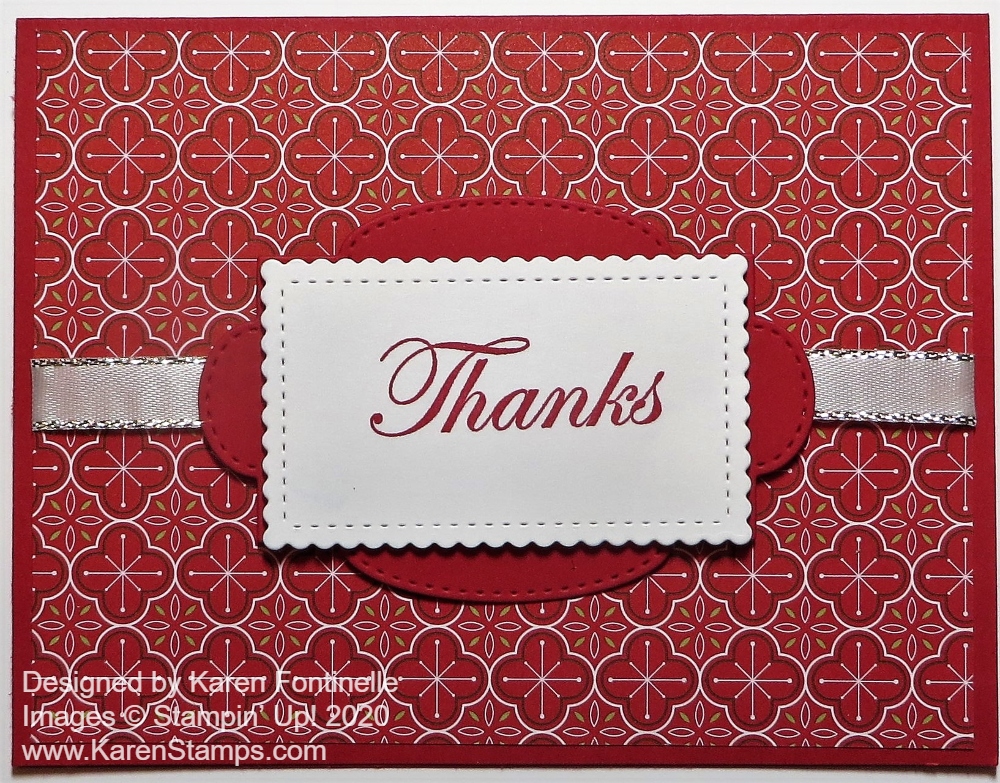
This easy card just starts with a Real Red card base with a layer of one of the patterns in Heartwarming Hugs. This paper is on the Year-End Closeout Sale at Stampin’ Up! but the inventory is running low so if you want it, order it soon! I wrapped a piece of Silver 3/8″ Metallic Edge Ribbon around the middle of the designer paper before adhering it to the card base.

The greeting is stamped in Real Red Ink in the Good Morning Magnolia Stamp Set. I die cut the greeting with a scalloped rectangle in the Stitched So Sweetly Dies. Then this was layered on another die in the set in Real Red. If you wanted to embellish this card further, you could add one kind of jewel or another on the sides of the Real Red die-cut.

Add a Whisper White layer to the inside and write your thank you note for your lovely gift or gathering or whatever you want to write! The recipient is sure to be impressed with your manners and cardmaking skills!

Happy Day-After-Christmas!

After Christmas 2020

Happy Day-After-Christmas! I hope everyone had a wonderful holiday! Probably a different one for most of us, but I have to say, thank goodness for Zoom!! It’s the next best thing to being there! All our kids and spouses and girlfriends gathered on Zoom at 2 pm and opened our gifts! I didn’t know how that would work out but it was great and fun! This photo is of the aftermath!

The box in the middle of the coffee table is where I put my laptop and my husband and I sat on the sofa with our gifts nearby so we could open them. We are slow opening presents on a normal Christmas, taking all afternoon (we aren’t first-thing-in-the-morning people!) and being on Zoom was no different!

I have to say, being “with” our kids on Zoom kind of messed with our heads afterwards! I kept thinking they were around somewhere. My husband was thinking of things he wanted to say or ask them as if they were in the house. This morning when I looked out the kitchen window I wondered if they had seen the neighbor’s Christmas decorations! But really, it was a fun afternoon and now we have some nice and quite unique gifts to figure out and learn to use. USPS was only late with one gift and that has already been delivered in California very early this morning. Amazon and UPS did really well, I think, on almost all the gifts.

So if you didn’t receive everything you wanted from Santa, don’t worry! He is at Stampin’ Up! ready to pack up anything you want to order for yourself to get back at the rest of them who didn’t give you the perfect gift! Or maybe you just deserve to pick out something for yourself after taking care of everyone else! Did you see the skit on Saturday Night Live last weekend with the “family” singing about all the gifts they received and the mom says, “And I got this robe!” Then the kids say “and there are more presents!” and the mom’s face brightens in anticipation of more gifts for her besides the robe, but it’s really gifts for the dog! A rare, pretty funny SNL skit!

Go take a look around at Stampin’ Up! and see what you want for yourself! The store is always open! The Giant Year-End Closeout Sale is going on now with some bargains, plus a few things left on the Clearance Rack!

Hope you had a very happy Christmas!

A Christmas Poem For Stampers!

Christmas cards

Can any of us relate to this poem?? I knew there were some stamping poems out there, from many years ago, and after searching I found this one in a forum from 2005! I don’t think the Demonstrator knew where it came from, it was shared with her from others, so I have no idea who came up with it, but they knew what they were talking about! I can think of one dear stamping friend in particular, but I think it applies to most of us! (Except for those people who had their cards done last summer! But what fun is that?!)

Enjoy! And have a Happy Christmas Eve!

The Week Before Christmas (In a Stamper’s House)

‘Twas the week before Christmas, and the house was a hush
Save the stamping of rubber in a last minute rush.
The cardstock was cut with precision and care
In hopes that a greeting would soon be stamped there.

The children were tucked in their beds around eight,
But now it’s ten-thirty… How’d it get so late?
And I in my PJs with bleary red eyes
Had finally arranged all the stamping supplies.

It started out simple. (It does every year.)
Just make a few cards for friends who are dear.
I pressed ink to paper. (It looked crisp and clean.)
A sprinkle of powder, heat to a sheen.

When what on my green Christmas card should appear?
Why, a tiny gold Santa with sleigh and reindeer.
On pigment! On powder! On heat from a gun!
Now ribbon and glitter! Can I make eighty-one?

“I can do it!” I said with all of my might
And looked at the clock – ’twas well past midnight.
I went straight to stamping out card after card.
“This might take all night, but at least it’s not hard.”

But after I finished, they looked a bit lame.
I didn’t want fancy, but these were too plain.
And then in a twinkling, a thought came to mind.
“I’ll just dress them up, and then they’ll be fine.”

So I went to my craft room and looked all around,
Then back to the table with all that I’d found.
My Fiskars I brandished (I wasn’t a quitter),
And soon I was covered in EP and glitter.

The cap of a marker I held in my teeth.
I’d lay in some color or maybe gold leaf.
My broad little face was all beaded with sweat,
But I wouldn’t give up – well, not at least yet.

There was glue on the table and ink on the floor.
I laughed at the sight though my fingers were sore.
I did not complain, just kept up my work.
When more things went wrong, I did not go berserk.

When finally finished, one card about six,
It looked pretty good after all of my tricks.
I’m keeping this one. My work on it shows.”
So clutching my card, up the stairs I arose.

I crawled into bed at the crack of dawn,
Creativity all spent, motivation all gone.
But make no mistake, I promise one thing:
You’ll all get your cards, but not ’til next spring!

–Author Unknown

Brightly Gleaming Square Christmas Cards

Brightly Gleaming Square Christmas Cards

We’re down to the wire but you may still need some easy Christmas cards to make to put with a gift (or even mail late!) so take a look at these Brightly Gleaming Square Christmas Cards that you can make!

You can make square cards any size you like. I made these 4 1/4″ x 4 1/4″ by just cutting across a full sheet of cardstock horizontally at 4 1/4″. Since the paper is 8 1/2″ wide, when you fold it in half you have 4 1/4″ so that works out perfectly! You could also do 3″ x 3″ for a gift enclosure. Just trim your paper at 3″ x 6″.

You can make it super simple and just add a layer of designer paper, but I added some Copper Foil behind the designer paper on two of the cards. The first card has a base of Mossy Meadow Cardstock, then foil under the Mossy Meadow pattern of the paper, all just regular margins like we make on our cards.

The card on the right has a card base of Pretty Peacock Cardstock. When I went to make the foil layer underneath the Pretty Peacock pattern, all I had were scraps of the Copper Foil so I just cut two strips of foil and put them on two sides of the designer paper. It looks like I designed the card that way, not that I ran out of paper!

For the middle card, I used a card base of Very Vanilla with a layer of Night of Navy underneath the designer paper.

Each card just has a stamped greeting that is die-cut and then layered on another die-cut. You could use punches or simply cut squares or rectangles for the greetings and layers. I won’t even list the dies I used, just use what you have!

These cards I made are difficult to photograph because of the pretty foil accents on the Brightly Gleaming Specialty Designer Series Paper. This paper is, as I write this, on the Giant Year-End Closeout sale, discounted 50%! It’s very pretty so you might want to grab some if it is still available.

Square cards are quite the thing these days. The only thing is that if you mail a square card in a square envelope you are supposed to pay a surcharge. But these square cards will fit in our regular Medium Envelopes so no worries. But if you are just enclosing one with a gift or handing one to someone, you can use or make a square envelope with no issues.

These cards with just a card base, layer, and greeting are simple to make. Change up the designer paper or colors and greetings and you can make a card for a birthday or congratulations or whatever you need. Remember to check out this pretty paper in the Stampin’ Up! Online Store. It is well-worth 50% off for sure! If you need last-minute cards, try these Brightly Gleaming Square Christmas Cards!