Time is flying by and there are only 4 weeks left of my 12 Weeks of Christmas holiday emails! Even though you have missed the first eight weeks, there are still four weeks left to showcase Tags, Bags, and Wraps! Every week for 12 weeks I have sent out a free holiday project idea that you could use to make your holidays brighter! The only people who receive these free projects are those on my Stamping With Karen Mailing List! This is my way of thanking my mailing list subscribers for following me, so if you would like to receive these special holiday emails, please sign up!
Sign up right now, before Wednesday at 1:00 PM, and you will still receive these last four holiday ideas. Maybe one will be just the idea you needed! Here’s how to sign up: If you are on my blog, sign up in the red box in the top right sidebar. You may have to scroll down if you are on your phone. OR go to my sign-up page HERE and sign up in the red Mailing List box! We’d love to have you!
Besides these holiday emails, I also send out a weekly newsletter on Tuesdays with the latest Stampin’ Up! news and new product information, a stamping project or two, or maybe some papercrafting tips! It’s the best way to keep up with what is happening at Stampin’ Up! Go sign up now!
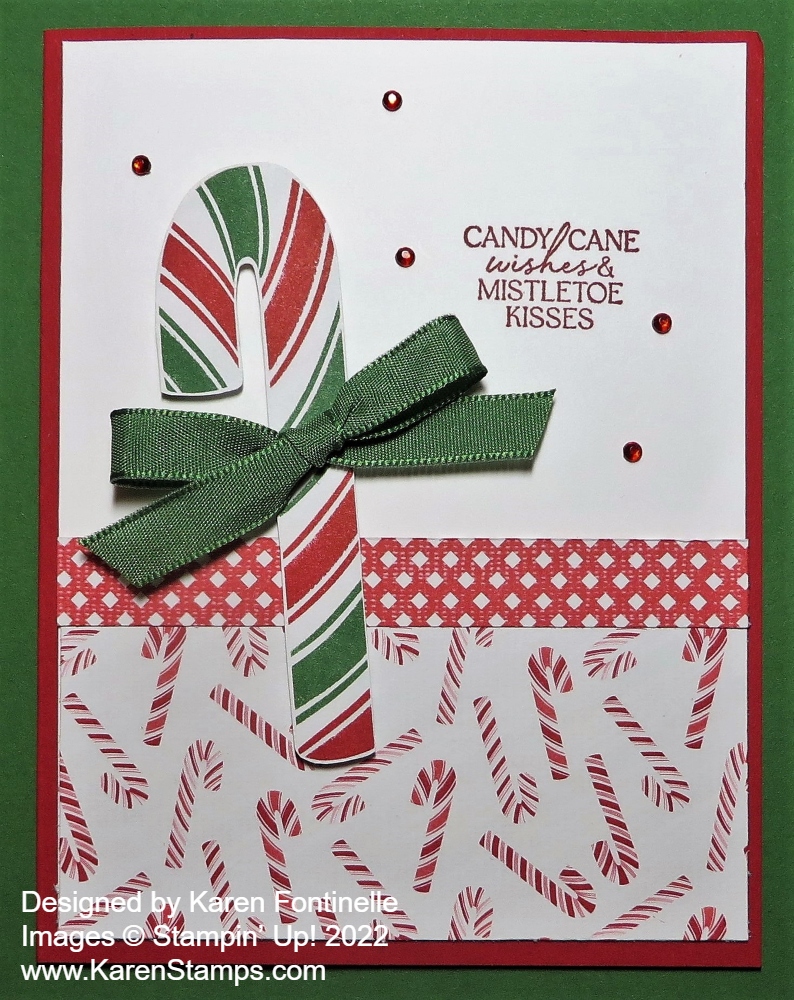
It’s time to have some easy Christmas card ideas such as this Sweetest Christmas Candy Cane Card. It really only took a few minutes to make it and since you already have the idea now, it will take you even less time!
This card starts with a card base of Real Red, my favorite color. The designer paper is the Sweetest Christmas Designer Series Paper, in case you haven’t seen it all over the place by now! I added a layer of Basic White and had planned to put three narrow strips of designer paper across the lower middle of the layer. However, the little candy cane pattern was so cute, had to use a large piece. I cut the candy cane pattern at 2″ x 4″ and then added a 1/2″ strip of the red and white pattern across the top like a ribbon.
The easy way to get a candy cane is to cut one out of the large candy cane patterned paper. You can use one of the candy cane shapes in the Candy Cane Dies or simply take your Paper Snips and cut one out of the designer paper. It’s easy enough to fussy cut those! I popped up my candy cane with Stampin’ Dimensionals, then added a bow. This ribbon is in the Real Red & Garden Green Ribbon Combo Pack. I adhered it with a Mini Glue Dot.
While it’s not a good idea to stamp a greeting on a card when it is almost finished, I think that is what I did, with a greeting in the Sweet Candy Canes Stamp Set. Maybe I didn’t have everything glued down yet but at least I knew the space I had to stamp it. I could have stamped it on another piece of cardstock and layered it, then adhered it to the card front, but I was trying to keep this card easy and simple.
For a finishing touch, I used five Red Rhinestone Basic Jewels. They fill up the white space a little bit without adding more work to the card.
That’s all there is to this card and you would feel good sending it to people on your Christmas card list! It’s time to finish, or start, making your Christmas cards!
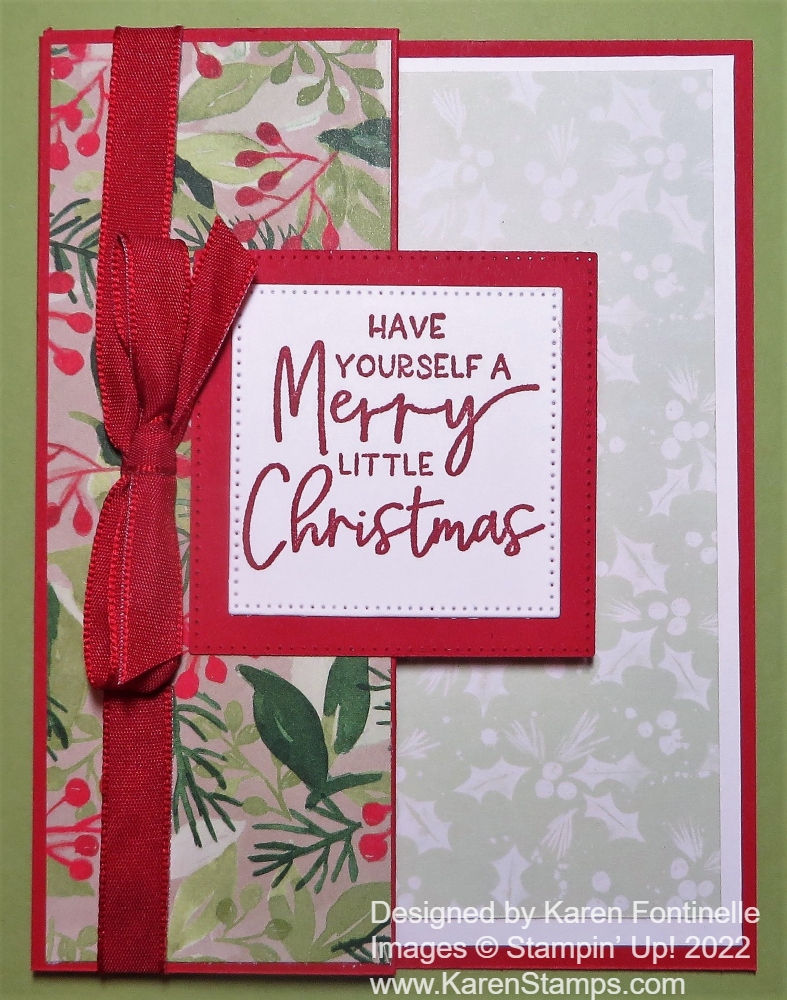
If you are looking for a fairly quick Christmas card to make but still something a little special, this Painted Christmas Z-Fold Card might be the card for you! I have always thought a Z-Fold card, while easy to make, looks a little fancy. The only difference from a regular card is that you fold the front of the card back on itself.
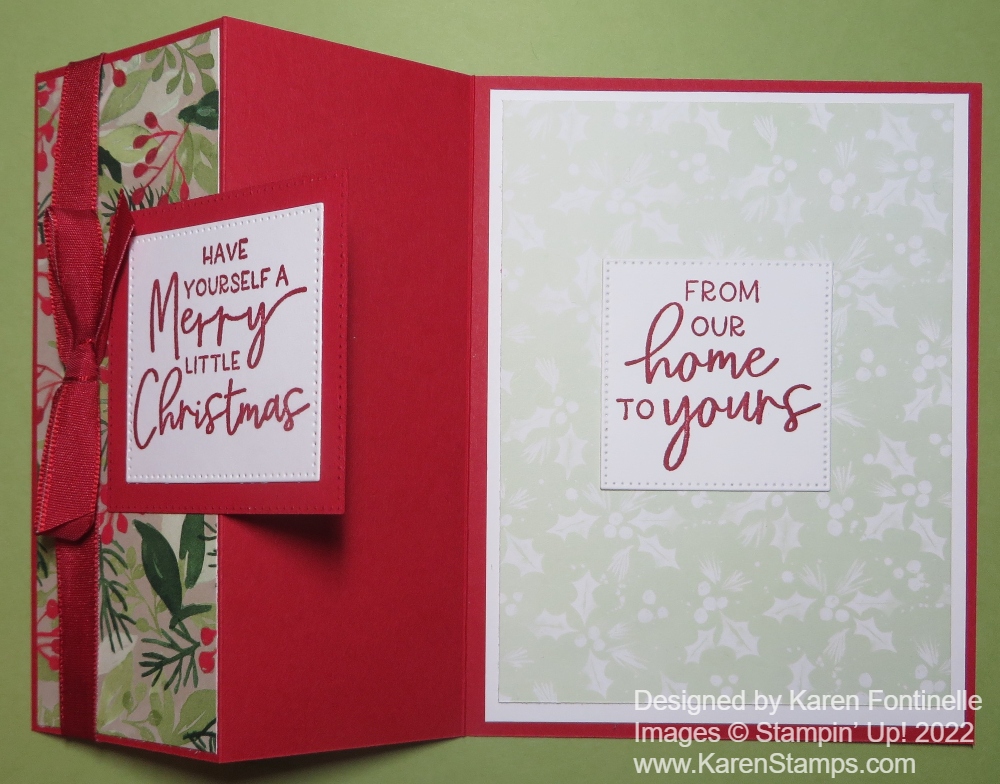
This Christmas card starts with a Real Red card base. After cutting the cardstock at 5 1/2″ x 8 1/2″, score it at 2 1/8″ and 4 1/4″. That gives you a score line on the front of the card. After creasing the card in half as you usually do, fold on the 2 1/8″ score line, which is the center of the card front, back toward the fold. See the photo below.
Depending on where you want to put the designer paper on this card, or stamping, choose which patterns you want to use and where you want to adhere them. On this sample, I cut a piece of the Painted Christmas Designer Series Paper for that narrow front area at 2″ x 5 3/8″. You can make it a bit narrower and shorter if you want. You could also add a piece on the inside of the front fold. I did not on this card.
Since the inside of the card is a somewhat dark color, I added a layer of Basic White. When I saw this light green pattern of designer paper, I decided to add that as another layer that would show from the front and coordinate with the design on the front. Another choice would be to just add a narrow strip of designer paper to the right side of the inside of the card on the Real Red cardstock or on the Basic White layer if that was added.
For the greeting, I chose one from the Framed & Festive Stamp Set, a new offering in the Fitting Florets Suite. It is only available until January 4th or while supplies last. I love the font and the variety of greetings for Christmas cards and projects in this set! I stamped the greeting on Basic White with Real Red ink and diecut with one of the squares in the Stylish Shapes Dies. Then I cut out the next larger square in Real Red to be a layer for the greeting. When you adhere this to the front of the card, make sure you are only putting adhesive on half of the back so it only adheres to that folded front part of the card and not the inside too!
The “tricky” part is adding a greeting to the inside of the card. Ideally, you would like it not to show from the front of the card, so you want the greeting on the inside of the card to be completely behind the greeting on the front of the card. You could mark lightly with a pencil the area where that front greeting covers the inside so you know your boundaries. For this card, I stamped a greeting on Basic White the same size as on the front. I put adhesive on the back of that greeting and layered it face down on the back of the greeting on the front from the inside. When I had it placed properly, I folded the back of the card over so that the greeting would then adhere to the inside of the card in the correct spot. That worked pretty well, but you could use pencil marks or eyeball it!
For a finishing touch, I added some Real Red Ribbon tied around the front fold of the card. I anchored it under the bow and inside the fold with some Mini Glue Dots. You could add a Basic White panel to the back of the card if you wanted to write a note so that it wouldn’t show from the front.
This Painted Christmas Z-Fold Card is an easy one to make and the recipient will think you are a talented cardmaker! Try it today!
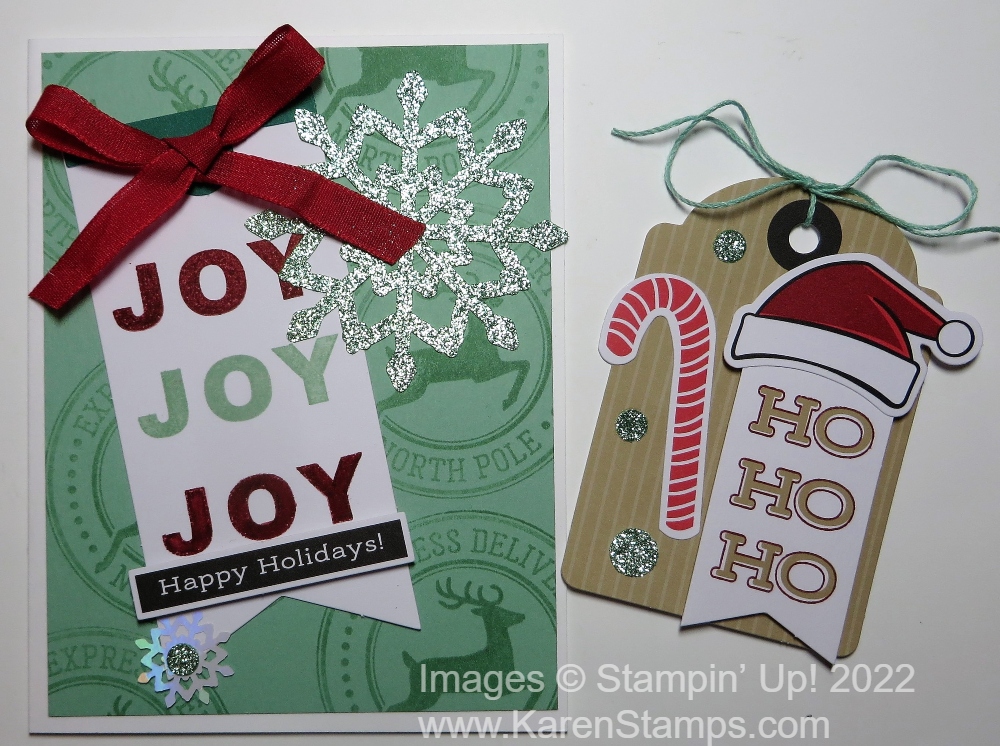
I don’t know what went wrong, but the post office seemed to deliver my November Paper Pumpkin Kit in a normal amount of time! Usually, it seems to sit in one place for a few days or it goes on a little trip to some other city first! But this time, I got it right away! And since Saturday was a very rainy, cold, chilly, dreary day, it was the perfect day to stay inside and work on my November Paper Pumpkin Kit, “From the North Pole”. In this kit were supplies to make three different kinds of Christmas gift tags, four of each design. I always like to start a Paper Pumpkin Kit by making what is designed so I made the three Christmas gift tags in the photo above!
This kit was extra-special because it had Mint Macaron glimmer paper! We’ve never known that to exist before! But there it was, in the Paper Pumpkin kit, sparkling away! It is very pretty.
These three tag designs were all very easy to make. Of course, visual directions are included plus a video you can watch on YouTube. I like to watch the video and see how they suggest making the project.
After I made the tags as designed, I made two things on my own, just to play. You can use the supplies any way you like! They are yours, so if you don’t need tags, just make cards. Or make the tags, but adhere them to cards. Of decorate a notebook and put the tag on the front of the notebook. Whatever you like.
I made these two alternative ideas, as they say:
I really liked how the Mint Macaron card turned out, even though it wasn’t looking too great in the beginning. I stamped the “Joy” in Cherry Cobbler and in Mint Macaron on one of the tags and added the greeting plus snowflakes and ribbon. The background of the card is stamped with the largest stamp in the set, the big round stamp with a reindeer That really made the card come alive.
The other little tag I made was almost the same, but I’d used the big snowflake on that card so I was short one. Instead, I used some Mint Macaron glimmer paper dots from the holes in the banner for one of the other tags to be an embellishment. I ran out of those so I just punched my own with a retired punch.
But in the end, I decided I really did like making those Christmas tags with my Paper Pumpkin Kit so I went back and made the rest. Of course, I was missing a few pieces since I’d made the two extra projects, but I just worked around it.
That’s the fun of Paper Pumpkin Kits that come in the mail each month! It’s so fun opening up the box to see what supplies are inside and think about what you can make with them. Paper Pumpkin projects just keep getting better and better over time!
If you would like to get your own Paper Pumpkin Kit, subscribe now so you don’t forget by December 10th!
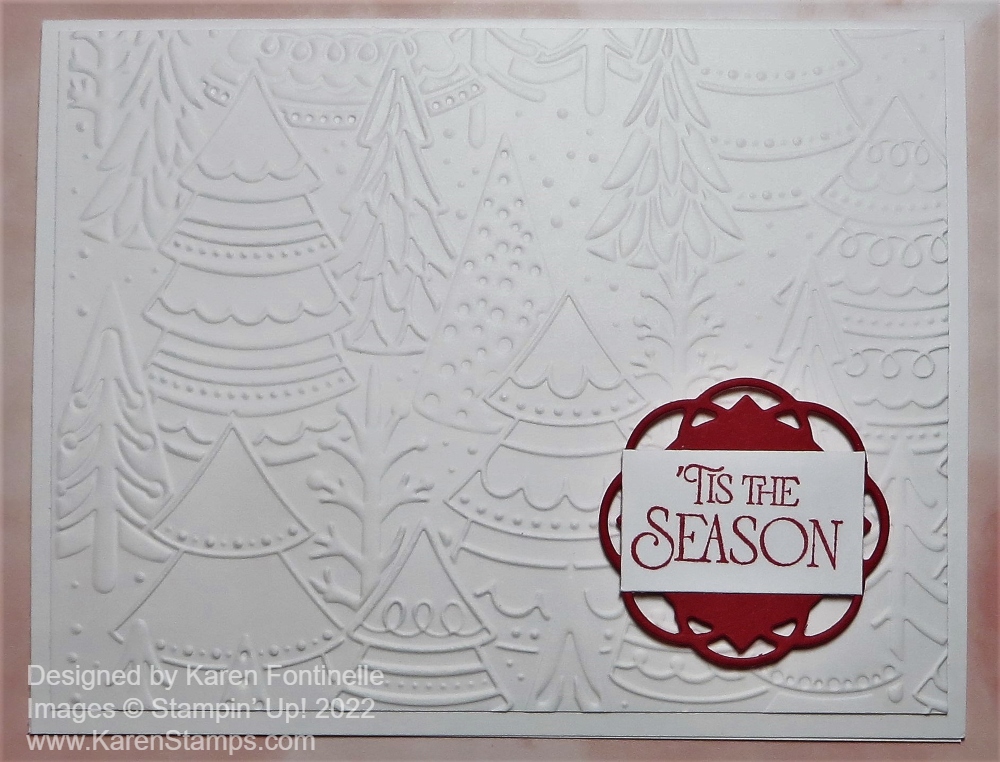
I’ve had this Whimsical Woodland 3D Embossing Folder for a while but have forgotten to use it! This is my first try with it. Actually, I was trying to copy a card I saw I think just yesterday, maybe the day before, but when I wanted to look at it again, of course, I couldn’t find it! Does that happen to you?! It was just this white embossed Whimsical Woodland background and a greeting on red cardstock. But I still wish I could see it again!
In the meantime, I made my own card! I used Basic White for a card base and cut the embossed piece at the regular layer size, 4″ x 5 1/4″. I could have made it as large as the card base, too.
The greeting is in theBrightest Glow Stamp Set. I stamped it with Real Red ink and then just cut it out with my Paper Trimmer. The Real Red layer behind it is a die in the Painted Labels Dies. I popped up the greeting with Stampin’ Dimensionals.
Very easy card to make and you can do different things with the same card design. Instead of a white card base, use colored cardstock. Or use the white card base but put another colored layer under the embossed layer. Just play with different designs and see what you like!
If you like this Whimsical Woodland Embossed Christmas Card, try one of your own and try varying the design and see what you come up with!
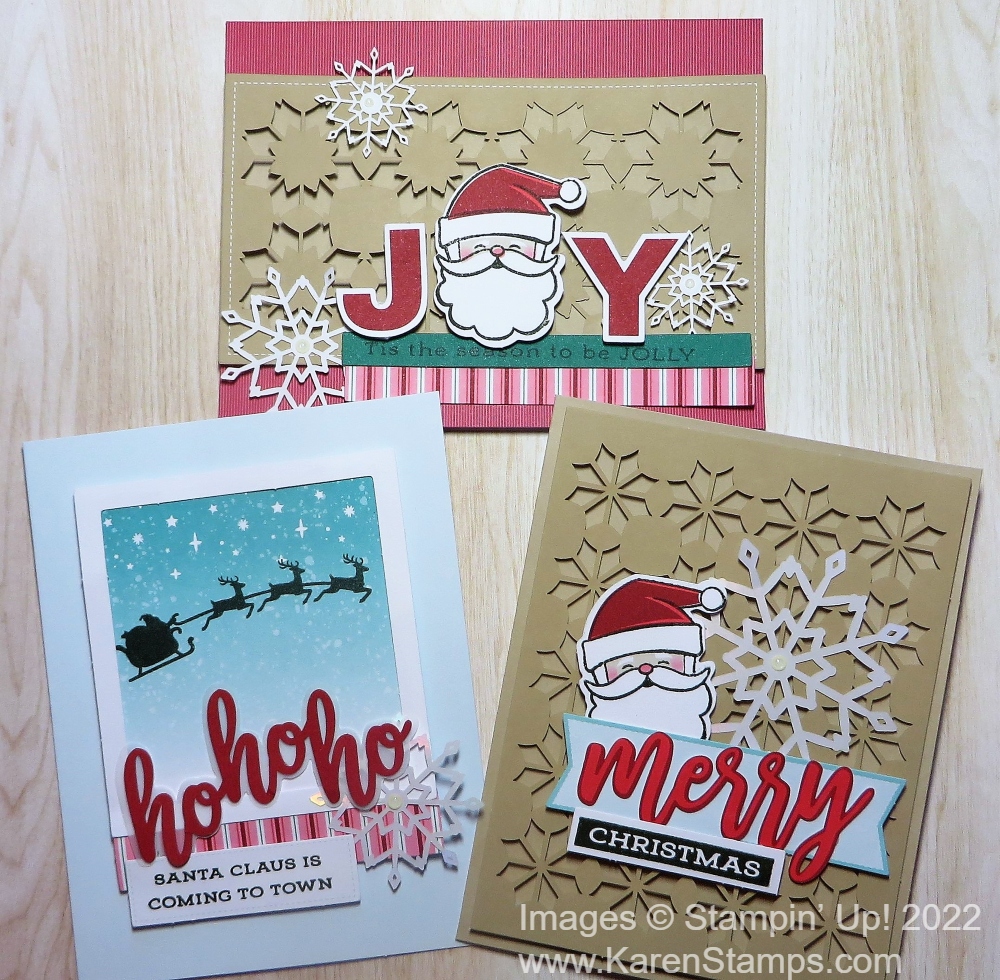
It seems like Saturday afternoons are good times to work on a Paper Pumpkin Kit! These Christmas cards were made with the October 2022 Paper Pumpkin Kit! Very cute! I only made two of each of the designs and then I like to go back and see if I want to make some alternative ideas with the supplies in the kit.
Of course, it is past time to join Paper Pumpkin and have this kit mailed to you, but most of the time, it is possible for you to be a subscriber and then go back in the Online Store and purchase a Past Kit or Refill. The Refill has all the supplies you need except for the stamp set and ink spot, because if you already got the full kit you would have those already and would only need the consumables. Sometimes if the Past Kit isn’t available, the Refill will do and you can use your own stamp sets and ink pad with the kit contents.
The best way not to ever miss out on these super cute kits is to Join Paper Pumpkin and a kit will automatically come in your mailbox about mid-month (unless you live at my house, then it seems that the post office likes to send it to farther away cities first!) (but that’s not Stampin’ Up!’s fault!). You can skip a month if you need to or don’t care for the upcoming kit. And Stampin’ Up! guarantees all Paper Pumpkin Kits.
The November Kit has already been mailed out. If there are extras, they will be in the Online Store a little later, but you must be a Paper Pumpkin subscriber first to order the Past Kits & Refills.
The December Kit is up now! Subscribe by December 10th! You’ll make little boxes that will hold gift cards, and they have designs that you can use all year long. Or use them for other small gifts or treats. You will probably even receive the kit before Christmas if you wanted to make a few for holiday gifts.
Join Paper Pumpkin today so you don’t miss out on any of the fun!
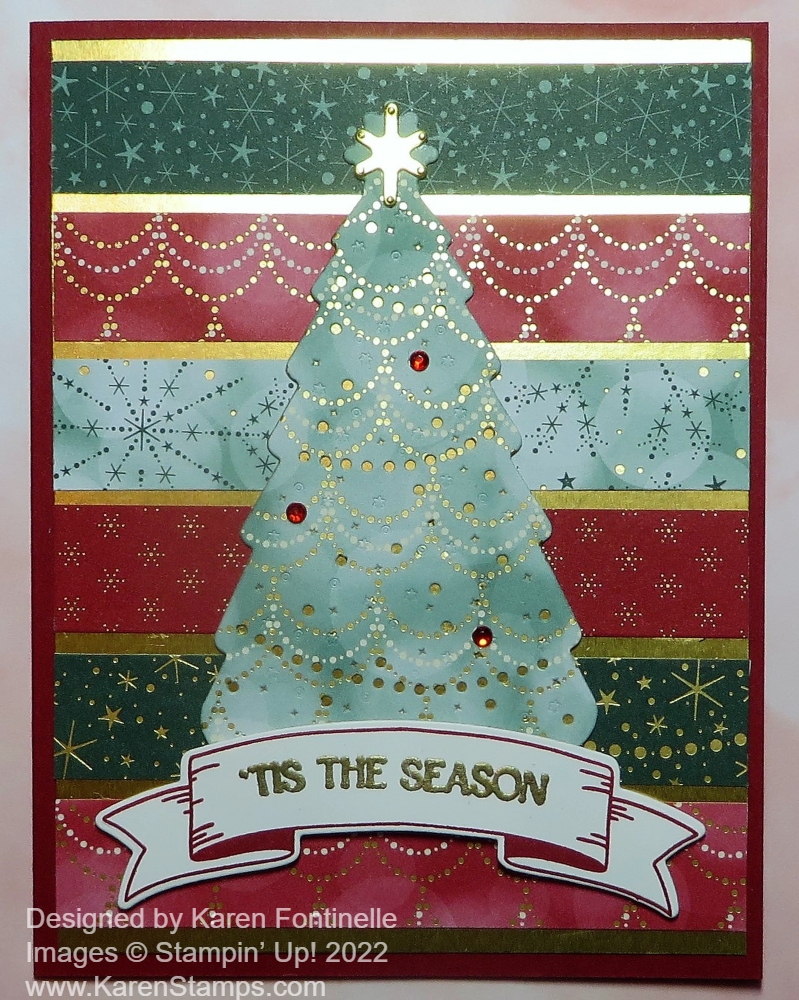
This Lights Aglow Colored Strips Christmas Card came about after seeing a pretty similar card in the Stampin’ Up! Holiday Mini Catalog on page 32. It’s a great way to use up designer paper scraps by using various designer paper strips for the background of the card. It shows off lots of the pretty paper and provides a nice card front. And no waste if you have saved a bunch of scraps!
This card starts with a Cherry Cobbler Cardstock card base. I had a lot of scrap strips from the Lights Aglow 6″ x 6″ Specialty Designer Series Paper. In whatever way I had cut up the paper, I had a lot of 4″ x 3/4″ strips. I began laying out the strips on the card base, just eyeballing it. Then I got the idea that with the paper having gold foil accents, it might look nice if there was gold foil in between the strips. Finally, I decided to cut a piece of Gold Foil for the background of the strips. Fortunately, six strips fit just right on that layer of Gold Foil! If you want to do all the math and figure out the space measurements and all that, go right ahead, but you are very likely to just lay out the strips and have them spaced apart pretty evenly! My Stampin’ Up! Grid Paper was a little bit of help but mostly I just eyeballed it.
I die-cut a Christmas tree out of one of the green Lights Aglow papers using the Twinkling Lights Dies. I also cut out a tree in Gold Foil just with the outline die to adhere behind the tree die so the gold would show through the little holes in the Christmas tree! The tree was then adhered to the card front. You can pop it up if you like, I just glued mine flat. You could instead pop up the background with the strips of paper. If you are going to mail the card, though, you don’t want it
For the greeting, I stamped the banner in Cherry Cobbler ink in the Christmas Banners Stamp Set and cut it out with the Christmas Banner Dies. You can get both in the Christmas Banners Bundle and save 10%. Since I wanted the greeting to be gold to match the card, I stamped the greeting with Versamark Ink and embossed it with Gold Powder using the Heat Tool. The greeting is in the Christmas Banners Stamp Set. I popped up the banner using Stampin’ Dimensionals.
To finish off the Christmas tree, I die-cut the little “star” at the top of the tree with one of the dies out of Gold Foil. I also placed a few Red Rhinestone Basic Jewels on the tree for just a little more sparkle!
I don’t think you would want to mass-produce this card to send, but if you have some scraps, it is easy enough to make one or a few more cards with this design!
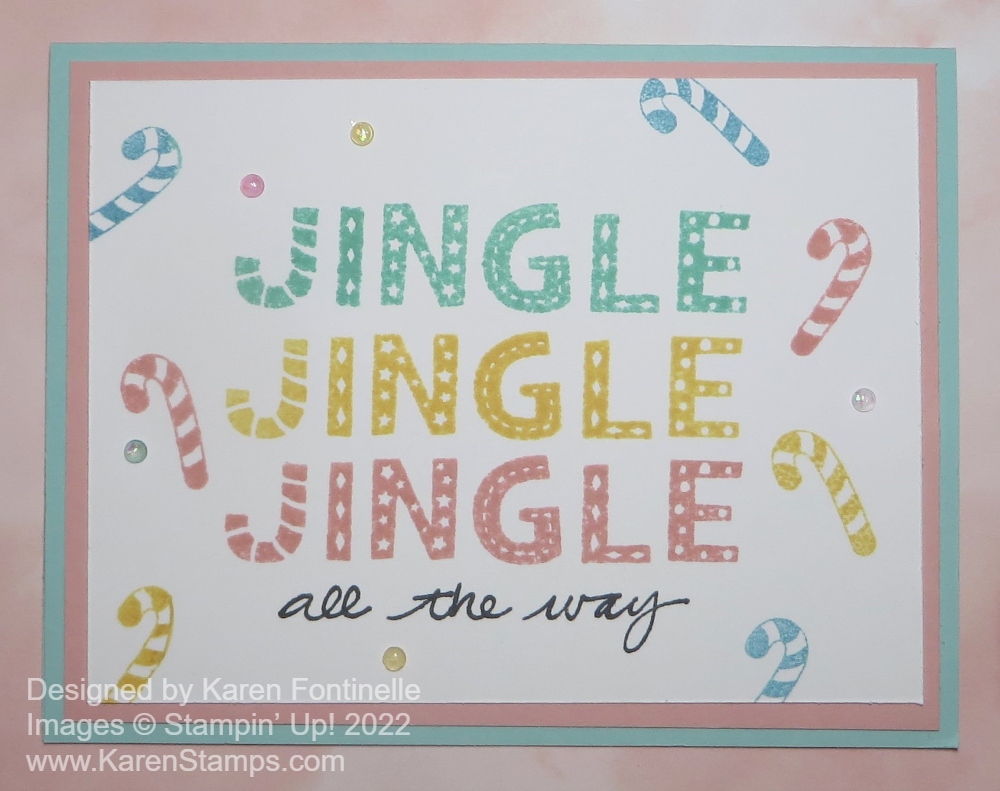
Yesterday when I went into one of my favorite gift shops, I saw a display of Christmas nutcrackers, buildings, decorations, and ornaments all in pastel colors! It was all really pretty and I was a little surprised to see a big display like that of those soft colors. That is what inspired this Jingle Jingle Jingle Pastels Christmas Card!
I sometimes forget I own this Jingle Jingle Jingle Stamp Set but I really do like it! I plan to make lots more cards with this stamp set. There are so many ways to use it and extra images to add more whimsy!
For this card, I simply used a Pool Party cardstock base with a layer of Blushing Bride pink cardstock. The top layer is Basic White. I used three colors of ink – Pool Party, So Saffron, and Blushing Bride, plus Memento black for the “all the way” part of the greeting. Maybe I should have used a pastel color instead of black. Then when I spied the candy canes in the stamp set, I stamped those around randomly in the same colors. And for a finishing touch, I added a few of the 2021-2023 Opal Rounds. These aren’t the exact colors I used on the card, but they are close enough since they are light-colored.
I may try another version of this card using these or similar colors. I have some other ideas! We’ll see!
Get your “Jingle” on and check out this fun stamp set!
Time is flying by and there are only 8 weeks left of my 12 Weeks of Christmas holiday emails! Every week for 12 weeks I send you a free holiday project idea that you can use to make your holidays brighter! The only people who receive these free projects are the people who are on my Stamping With Karen Mailing List! This is my way of thanking my mailing list subscribers for following me, so if you would like to receive these special holiday emails, please sign up!
You have already missed the first four emails but there are eight more to come, starting this afternoon at 1:00 PM Central Time! Sign up right now and here’s how: If you are on my blog, sign up in the red box in the top right sidebar. If you are on your phone, you may have to scroll way down. OR go to my sign-up page HERE and sign up in the red Mailing List box! We’d love to have you!
Besides these holiday emails, I also send out a weekly newsletter on Tuesdays with the latest Stampin’ Up! news and new product information plus a stamping project or two or maybe some papercrafting tips!
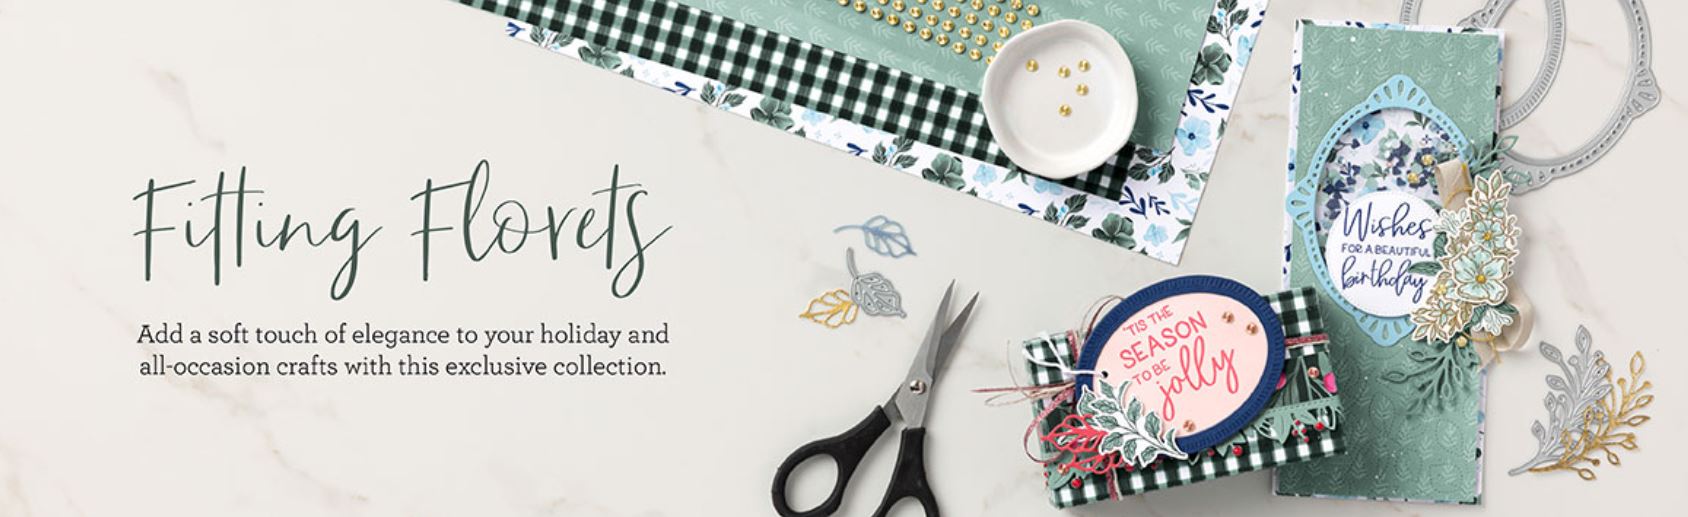
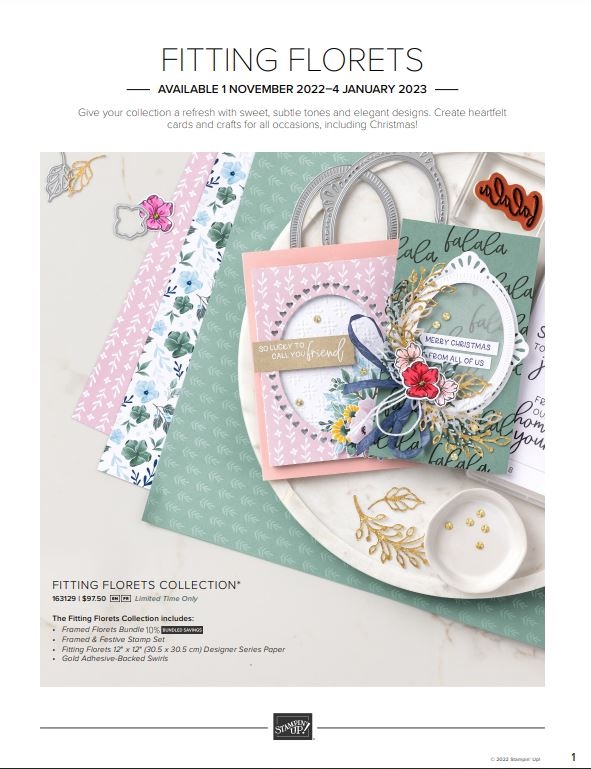
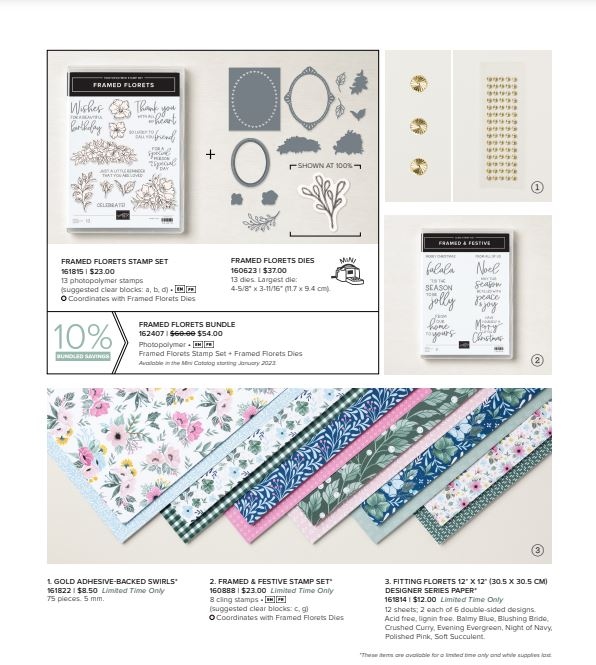
Today is the first day you can purchase the Fitting Florets Collection in the Stampin’ Up! Online Store! “Add just the right touch of elegance to any occasion, including Christmas and seasonal celebrations, with the sweet Fitting Florets Collection. From color schemes to sentiments and embellishments to dies, these unique products blend together so that your cards and crafts fit whatever occasion you might need. Send birthday wishes, express your gratitude, or spread Christmas cheer—with so many options to mix and match you’ll be set no matter the celebration all year!”
This is an interesting Collection because all of it is available now through January 4th (while supplies last), but the Framed Florets Bundle (stamp set and dies, all of the same name!) will continue on and be in the January-June 2023 Spring Mini Catalog! (I know we can’t comprehend a Spring catalog when we just finished Halloween!)
The best way to get an idea about this whole beautiful Collection is to watch this Stampin’ Up! video!
Click the photos below to read the Flyer.
This is a beautiful set of new products! Use them exactly as is or, as the designer did, turn some into a Christmas presentation. The Framed & Festive Stamp Set has really fun greetings to use right now for our Christmas cards and projects.
Check it all out and let me know if you have any questions! The Framed & Festive Stamp Set, the Gold embellishments, and the designer paper will only be available until January 4th or while supplies last before that. The Framed Florets stamps and dies are available now and will be in the Spring Mini Catalog! It’s all pretty! You’ll like it! Get it all in the Collection or pick and choose what you want!
Here’s a Christmas card idea with a pretty diecut Christmas tree, the Twinkling Lights Christmas Tree Card. I felt like I was missing out, not having cards with a Christmas tree on the front! I already purchased this pretty Lights Aglow 6″ x 6″ Designer Series Paper but I found I couldn’t do without a Christmas tree!
This card begins with a Cherry Cobbler card base, one of the coordinating colors of the Lights Aglow paper. Next, I layered a piece of Gold foil (if you want to “cheat”, cut a piece out of the middle of the Gold Foil to use later, it won’t show on the front of the card!) and then a print layer of the Lights Aglow paper.
The Christmas tree is die cut with the tree shape in the Twinkling Lights Dies. Actually, there are two dies to use. One cuts out the tree with the little punched-out dots to look like lights and the other cuts out the same size and shape solid tree. On this card, I die cut the tree out of the Lights Aglow patterned paper with the die that cuts the little holes but I also cut a solid tree out of Gold Foil to show through from the underside of the tree. They are adhered together.
The tree is popped up on Stampin’ Dimensionals with some Gold 1/4″ Shimmer Ribbon that is adhered back and forth on the back of the tree.
The greeting is stamped in Cherry Cobbler Ink from the Brightest Glow Stamp Set. I just cut the banner ends and layered it on a piece of Gold Foil. It is popped up on Stampin’ Dimensionals.
There are so many variations you could make of this same card with different colors and patterns of paper or using cardstock along with the designer paper. Everyone loves a Christmas tree for Christmas cards so if you need one, use the trees in the Twinkling Lights Dies to make a card like this Twinkling Lights Christmas Tree Card.
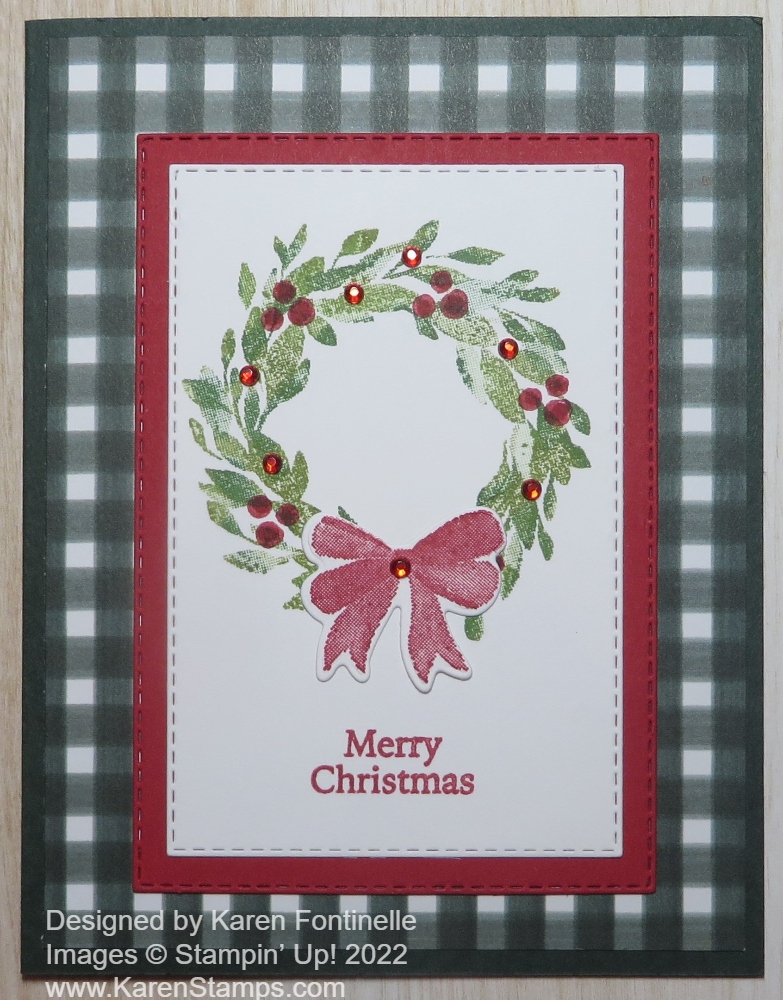
To make this card, I started off with the designer paper in the Fitting Florets Designer Series Paper, a new release coming November 1st. It has lots of flowers so you wouldn’t think you could use it to make a Christmas card. But this Evening Evergreen plaid pattern is perfect for this Cottage Wreaths Christmas Card. I even made it easier than I originally planned on!
The card base is Evening Evergreen to match the designer paper. I thought about putting a layer of Real Red in between the card base and designer paper, but I didn’t. I used the Stitched Rectangle Dies to cut out a piece of Basic White and a layer of Real Red. My Basic White piece is about 2 5/8″ x 4″ and the Real Red layer is 3″ x 4 3/8″. You can just cut out rectangles with your Paper Trimmer if you do not have the dies or you can make yours different sizes.
I simply stamped the wreath and berries in the Cottage Wreaths Stamp Set on the Basic White. I originally thought I would of course die cut it, but then I thought let’s just stamp it. I inked the wreath with Pear Pizzazz ink BUT then I added some other greens with Stampin’ Write Markers. I think I used Garden Green, Old Olive, and Granny Apple Green. I just randomly and lightly added the marker on various leaves of the wreath, trying not to do all of them. This is a Distinktive stamp set so just inking up a stamp and stamping automatically gives that textured look to the image. I thought it worked especially well with this wreath. Then I stamped the groups of three berries around on the wreath in Real Red. They were a little light so I couldn’t resist just adding a dab of Real Red Stampin’ Write Marker to each berry.
The bow in the stamp set was also stamped on a scrap of Basic White and die-cut with the Country Wreaths Dies. I just glued it onto the bottom of the wreath. You could also pop it up on Stampin’ Dimensionals. The greeting is stamped in Real Red and is also in the Cottage Wreaths Stamp Set. The size is perfect for this card design.
To finish it off, I used a few of the Red Rhinestone Basic Jewels. I like a little sparkle but you could easily leave these off or use ones that are not red. You could also color plain rhinestones with a Real Red Stampin’ Blend Marker.
If you want fancier, then use the wreath die cut and leaves and go for it! You can purchase the stamp set and dies in a Bundle, the Cottage Wreaths Bundle.
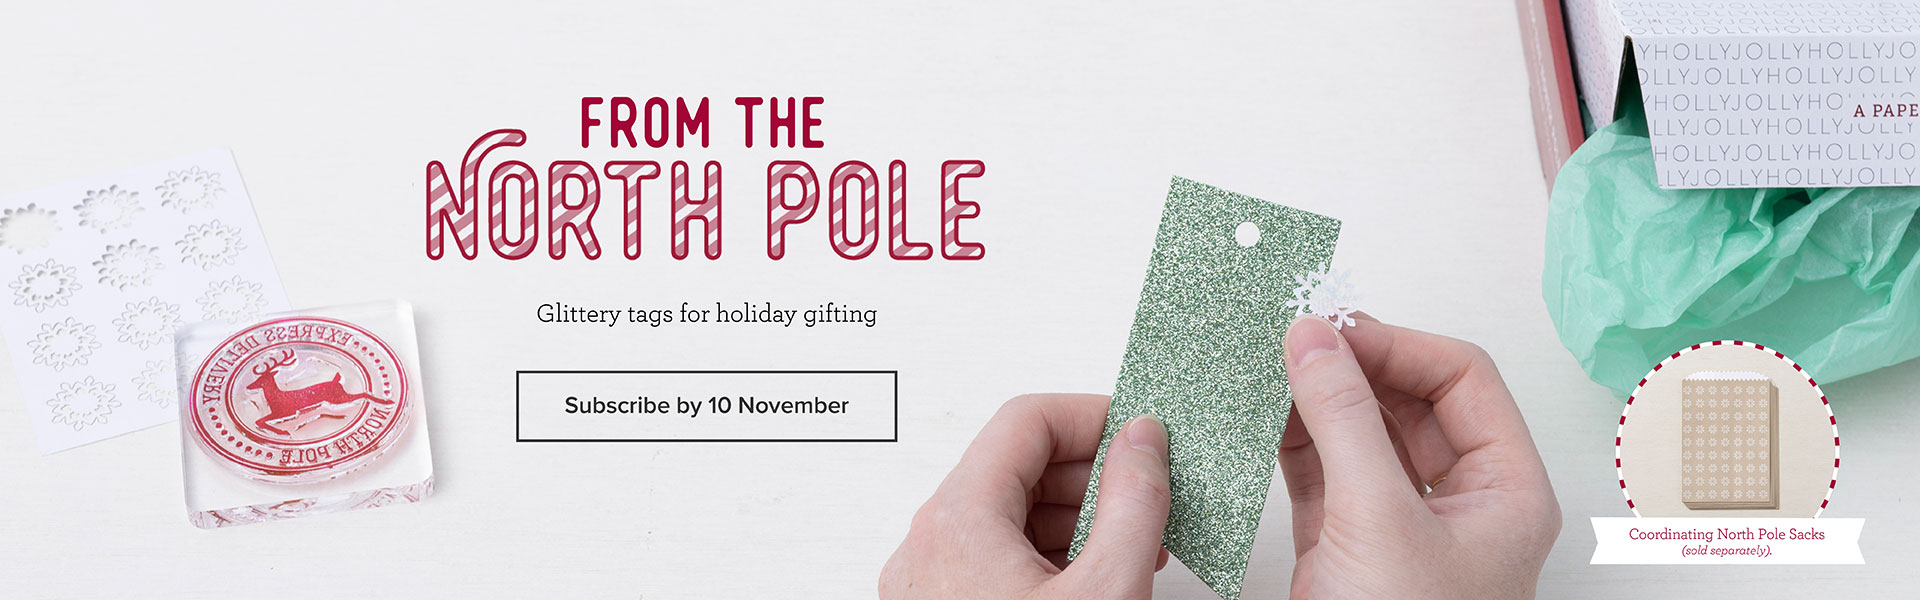
This November, Paper Pumpkin delivers this and more with its one-of-a-kind, holiday-themed crafting experience. This festive kit includes 12 fun, sparkly gift tags and (as always!) an exclusive stamp set—plus everything you need for a successful holiday crafting experience.
This kit includes:
This month’s kit contains enough elements to create 12 tags—4 each of 3 designs. This all-inclusive kit includes printed die-cut paper pieces, twine, adhesive, and more!
Includes a Cherry Cobbler Classic Stampin’ Spot!
You’ll love decorating your gift tags with snowflakes and banner die-cut pieces on our Mint Macaron glitter specialty paper (a Paper Pumpkin exclusive).
Create festive gift tags for all your packaging needs this holiday season with classic Christmas colors and designs.
If you need unique Christmas packaging to round out your gifting, you will be able to purchase these exclusiveNorth Pole Sacks add-ons in the Online Store under Paper Pumpkin Past Kits, for subscribers only. Available now.
Join Paper Pumpkin by November 10th to receive this kit!
Today is the day my 12 Weeks of Christmas holiday emails begin! Hard to believe, I know, to think about Christmas when we have just entered fall! But we crafters know that we must start early on our handmade projects so we can get all the fun things finished on time that we want to make!
It’s just 4 hours until my first 12 Weeks of Christmas email goes out today at 1:00 PM (CT)! The only way you can get these emails is to be on my Stamping With Karen Mailing List! I send out a regular weekly email on Tuesdays and these holiday emails will go out on Wednesdays until Christmas! To get on my email, sign up in the red box on the right side of this blog. If you are on your phone, you may have to scroll to the bottom of your screen.
Every year I send out special holiday emails with a single project for you to make or by inspired by on Wednesdays to my mailing list subscribers. This is a thank you gift to them from me for following me and being on my newsletter list. I really do appreciate those who show an interest in my stamping business either by being a customer or even just following my blog and reading my newsletters.
Please join us and sign up now so you don’t miss the first 12 Weeks of Christmas email this afternoon!
Believe it or not, Christmas is not that far off, just a little over 12 weeks away, so it is time for my 12 Weeks of Christmas Holiday Emails to begin! These special emails will begin next Wednesday, October 5th!
Every week for 12 weeks you will be getting an email from me with a fantastic holiday project for you to make! It is completely FREE, but it is exclusive to people on my mailing list. You can use these ideas to make your holiday preparations easier!
This is a thank you gift for my mailing list subscribers that I like to do every year. Just like in my regular weekly email, I will send a photo of a project, a list of supplies needed, and all the directions to make it.
In the first few weeks, I will send card ideas since it’s likely that is the first thing most of us will work on at this point. Next, come a few weeks of gift ideas, and finally, as we are doing Christmas shopping, some ideas for gift wrap, bags, and gift tags.
These are exclusive projects that I won’t be posting on my blog or anywhere else. I just want my subscribers to know that you are appreciated! If you are already on my mailing list, no need to do anything!
The only way you can get these special 12 Weeks of Christmas emails is to be on my Stamping With Karen Mailing List! If you are not on my Mailing List, you better get on it before Wednesday, October 5th at 1:00 PM, otherwise, you are going to miss out! The first 12 Weeks of Christmas goes out on Wednesday!
Just sign up in the red box on the upper right if you are on my blog or click the link below!